International Conference on Applied Internet and Information Technologies, 2016
DOI:10.20544/AIIT2016.17
Application of 3ds Max for 3D Modelling and Rendering Igor Stojanov1, Blagoj Ristevski2, Zoran Kotevski3 and Snezana Savoska4 Faculty of Information and Communication Technologies, “St. Kliment Ohridski” University – Bitola Partizanska bb, 7000 Bitola, Macedonia
[email protected], 2, 3, 4{blagoj.ristevski, zoran.kotevski, snezhana.savoska}@fikt.edu.mk
Abstract. In this article, the application of 3ds Max for 3D modelling and rendering of a car model is described. The process of creating a 3D car model is explained as well as setting up the references, working with editable poly, details in car interior, using turbosmooth and symmetry modifier. The manner which materials are applied to the model are described as well as lighting the scene and setting up the render. The rendering methods and techniques are described, too. Final render results from several rendering plugins, such as V-ray, Mental Ray, Iray, Scanline, Maxwell, Corona, Octane and LuxRender are presented and compared. Keywords: Computer Graphics, 3ds Max, 3D Modelling, Rendering Techniques.
1.
Introduction
We live in time when visualization and visual effects are widely used. There is no movie that does not use special visual effects and there is no television which not broadcast commercials made with special visual effects. 3ds Max started the revolution in 3D computer graphics and is the longest on the market, compared to the other 3D graphics software packages. This long existence makes 3ds Max to be still at the top of the most popular software for 3D graphics. 3ds Max is a professional 3D computer graphics program for making 3D animations, models, games and images. It is developed and produced by Autodesk Media and Entertainment. It contains many features specifically designed to help artists, architects, engineers and designers in various disciplines in the realization of their projects. In this paper, 3ds Max is used for modelling, texturing and rendering 3D model of a car Mercedes S class coupe 2014. Also rendering methods are explained and renders from V-Ray, Mental Ray, Iray, Scanline, Maxwell, Corona, Octane and Luxrender are shown and compared. The rest of the paper is structured as follows. In the second section creating a 3D car model, basic techniques for creating an exterior and interior of the car model are described. In the following section the rendering is explained as well as the manner how the materials are applied and the scene lighting. In the Section 4 real time and non-real time rendering are explained. In the following section renders from different render plugins are shown and compared. The last section gives the concluding remarks. 133
Igor Stojanov et al.
2.
Creating a 3D car model
Preparation of the 3D car model in 3ds Max is a complex process in which it is necessary to have basic knowledge of polygonal modelling. Polygonal modelling is an approach for modelling objects by representing or approximating the surfaces by using polygons. This type of modelling is the basis of development of the car model. To create polygons as a starting form, 3ds Max offers dozens of classes form such as cube, sphere, plane, cylinder, pyramids, etc. By converting these forms into polygons, then moving, adding or dividing the vertices and polygons and using some modifiers, arbitrary objects can be created [1].
2.1
Setting up the reference image
For making a complex 3D models such as a car, it is necessary to have a technical drawings of at least two views. Also very important is these drawings to be accurately and professionally drawn and to be with the same scale from all views. They are the basis for making the accurate 3D model. Creating a simple material with a reference image from Mercedes S class coupe in a diffuse map is the first step for creating a 3D car model. This material is aligned on a plane and moved to align with the view. This process should be repeated for all views. Furthermore, a cube should be created with dimensions equal to the width of the car and all planes with technical drawing are increased or decreased to match the size of cube. This process makes the car to be in the real scale.
2.2.
Modelling a car
First step for modelling a car is to make a rough plan where the mesh is going to be [4]. Next stage is creating a box or plane from one particular view and convert it to editable poly. A polygon is created by holding Shift key from the keyboard and moving one edge. Another polygons following all reference images are created by using and repeating this technique. It is very important do not forget to check the mesh from all views all the time, because if polygons match from one view it does not mean that they match from another views. The mesh created is not a smooth surface. Turbo smooth is a modifier that creates polygons automatically, and makes the surface to be smoother. This is very important modifier and without it, it is impossible to create a correct smooth surface. Also symmetry modifier is very important because it reduces the modelling time. Only half of the shell of the car should be created by using this symmetry modifier, because the other half is created symmetrically. Particular thickness on the object is made by applying the shell modifier. It is used to make a thickness on the shell of the car. For the remaining parts of the car such as headlights, tail lights, Mercedes logo and rims, similar techniques and modifiers are used. It is very important to have several 134
Application of 3ds Max for 3D Modelling and Rendering
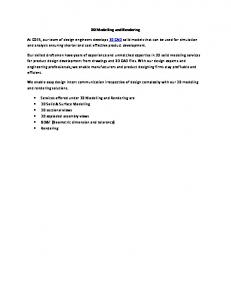
reference images from each element to make more accurate model. The mesh of the car model is shown on Fig. 1.
Fig. 1. Mesh of the car model.
2.3.
Modelling the car interior
The interior of the car is composed of many objects and details modelled as separate elements. There are many buttons with different details and signs on them and all of them should be modelled. This modelling stage highlights the details of the car interior. Most of the objects in the car interior are modelled with the same techniques as objects from the car exterior.
Fig. 2. Interior of the car.
135
Igor Stojanov et al.
One primitives converted in editable poly and with moving and cutting polygons to match the desired object. After that, mostly turbosmooth, symmetry and shell modifiers are used. The interior of the car contains small details such as stitches that makes the render more realistic. Firstly, a small cylinder is modelled and then an animation on spline or path constraints is made. Fig. 2 shows the car interior without applied materials.
3.
Rendering
The final process of converting the 3D scene in a two-dimensional picture is called rendering. It is a process that converts the 3D model, complete scene in 2D image simulating the light rays. The data contained in the file of the scene transmitted to the rendering program are processed to obtain a digital image or raster graphics image. Rendering is one of the main sub-topics of 3D computer graphics. In graphic preparation, it is the last step, which gives the final appearance of the models and animation. The theoretical concept of rendering is presented by Eq. 1, which serves for more formal expression of non-perceptual aspect of rendering [6]. 𝐿𝑜 𝑥, 𝑤 = 𝐿𝑒 𝑥, 𝑤 + Ω 𝑓𝑟 (𝑥, 𝑤, 𝑤) 𝐿𝑖 𝑥, 𝑤 𝑤 ∙ 𝑛 𝑑𝑤 (1) where the output light Lo is a set of emitted light Le and reflected light. Reflected light is a set of incoming light Li from all directions multiplied by the reflectance of the surface and incoming angles, x is the space location, w is the light direction and fr is the bidirectional reflectance distribution function. The complete algorithms can be viewed as a solution to specific formulations of this equation. Fig. 3 shows the vectors defined in the Eq. 1.
Fig. 3. The rendering process.
The car model is rendered by V-Ray render plugin which is one of the most used render plugins in the 3D visualization. Setting up the render is very important part to finalize the image. The first and most important step is to enable the global illumination. Without global illumination the picture will only has light and shadow without surface illuminated by light reflected from other areas. As a primary engine in global illumination, irradiance map is used while for secondary engine light cache is used.
136
Application of 3ds Max for 3D Modelling and Rendering
Medium preset for irradiance map is used and 1200 subdivision for the light cash. Also exterior preset is chosen on V-Ray saving a priceless time for setting up the render. Obtaining a desired render takes a lot of testing, so minimized resolution and image quality to quickly see the changes made in the settings are recommended.
3.1
Materials
The materials describe how an object reflects or transmits the light. They are data that are applied on the surface of an object and they are shown in a particular way when the scene is rendered. Creation of materials can take a long time and for faster results, plugin called V-Ray Material Presets Pro is used for applying materials on the car elements. This plugin contains many types of materials and with a little editing of these materials, the desired results are obtained. Depending on the desired results, it can be often encountered with material that needs to reduce reflection, reflection glossiness, bumpiness and opacity. All these settings and many others can be changed in material editor window. Most of the materials contained in the car do not contain texture and they are only applied on the objects. While those materials containing a texture, when applied applied on very small or big objects do not look realistic. To solve this problem, the UVW Map modifier is used. It is a mathematical technique for coordinating textures. It includes the possibility of adjusting the size of texture in three dimensions to give additional flexibility to get the desired results. The option Multi/Sub-Object is used on the objects that need more than one material. For materials such as a screen on the display of the car, VRayLightMtl is used to illuminate light whereas for particular textures that can not be found online Unwrap UVW modifier is used [2] [3].
3.2.
Lighting the scene and setting up the camera
Lights are objects that simulate real light sources, such as lamps, table lamps, sun etc. Different types of lighting objects lights in different ways to simulate different types of real sources of light. The lights allow adjustment of the distribution, intensity, color temperature and other characteristics of the lights in the real world referenca. One of the easiest and fastest way to light scenes is using High Dynamic Range Imaging (HDRI). This technique make the scene to look like as a picture on the same place in the real life. Because HDRI is pictured in 360 degree, it is easy to adjust the desired angle by rotating the HDRI in the material editor. V-Ray sun is used to get more strong shadows in the scene. For the car interior a lot of V-Ray Plane lights is used with blue color located in each angle illuminating light in the real life interior. For lightening the scene, the camera properties are also very important. The cameras are objects set in the place where the image is going to be. It is used v-ray physical camera with certain f-number, focal length, white balance, shutter speed and ISO. These properties are important to get a correct lightened rendering.
137
Igor Stojanov et al.
Fig.4 shows the final render from the car interior while the final render from exterior of the car with motion blur effect are shown on Fig. 5.
Fig. 4. Final render from interior of the car.
Fig. 5. Final render from exterior of the car with motion blur effect.
4.
Rendering methods
Real time rendering is a rendering of interactive media, such as games and simulations by calculations and displaying in the real time, with rates of about 20-120 frames per second. The purpose of rendering process in the real time is to show as much as possible information the human eye can process in a part of a second. Primary purpose is to achieve the highest possible degree of photo realisms with acceptable minimum speed for rendering, usually 24 frames per second. This speed is the minimum that the human eye can see to successfully create the illusion of movement.
138
Application of 3ds Max for 3D Modelling and Rendering
This is the basic method used for rendering of games and interactive worlds. The rapid growth of computer power provides a higher degree of realism even for rendering in the real time, including techniques such as HDR rendering. No-real time rendering allows expansion of the limited processing power in order to get higher picture quality. Animations for non-interactive media, movies and video, are rendered more slowly. This is the basic method used in digital media and art. More techniques has been developed for simulating other environmental effects such as light interactions with various forms of matter. Examples of such techniques are: particle systems (which can simulate rain, smoke, or fire), volumetric sampling (that can simulate fog, dust and other spatial atmospheric effects), caustics systems (simulates the light that focuses on uneven light surfaces break, such as light that can be seen from the bottom of the pool) and subsurface scattering systems that simulate light reflecting inside the solid objects such as human skin).
4.1 Rendering techniques Ray casting uses ray surface intersection tests to solve various problems in computer graphics and computational geometry. The scene seen from a certain perspective, calculates the observed image based solely on geometry and basic optical laws of reflection, and possibly by using Monte Carlo techniques to reduce artifacts [5]. Ray casting is mostly a base of many computer graphics rendering algorithms. Ray tracing is a technique for generating an image by tracing the path of light through pixels in an image plane, simulating the effects of its encounters with virtual objects. This technique is capable to produce a very high degree of visual realism, usually higher than that of typical scanline rendering methods, with greater computational costs. This makes ray tracing to be best suited for applications where the image can be rendered slowly through the time, such as in still images, movies and TV visual effects. It is more poorly suited for real-time applications, like video games, where the speed is critical and very important. Radiosity is a rendering method based on detail analysis of light reflections of diffuse surfaces. The images obtained from radiosity rendering are characterized by soft gradual shadows. Radiosity is typically used to render images of the buildings’ interior and can achieve extremely photo-realistic results for scenes that are comprised of diffuse reflecting surfaces. The computation of lighting via radiosity is unlike many traditional computer graphics lighting computation because it is view independent. The intensity of surfaces in the model is computed before any view computation to be made. This difference can be considered as the difference between demand-driven and datadriven lighting computation.
5.
Render plugins
Final renders are made by using the V-ray, Mental Ray, Iray, Scanline, Maxwell, Corona, Octane and LuxRender render plugins. Fig. 6 depicts the final render from VRay, while the final render from Mental Ray is presented on Fig. 7. The Fig. 8 shows
139
Igor Stojanov et al.
the final render from Iray, whereas the final renders from Scanline is shown on Fig. 9. The final render from Maxwell, Corona, Octane and LuxRender are shown on Fig. 10, Fig. 11, Fig. 12 and Fig. 13, respectively.
Fig. 6. Final render obtained by V-Ray.
Fig. 7. Final render obtained by Mental Ray.
140
Application of 3ds Max for 3D Modelling and Rendering
Fig. 8. Final render obtained by Iray.
Fig. 9. Final render obtained by Scanline.
141
Igor Stojanov et al.
Fig. 10. Final render obtained by Maxwell.
Fig. 11. Final render obtained by Corona.
142
Application of 3ds Max for 3D Modelling and Rendering
Fig. 12. Final render obtained by Octane.
Fig. 13. Final render obtained by LuxRender.
6.
Conclusion
3ds Max is a powerful computer program that is particularly designed to help 3D artists, architects, engineers and designers in various disciplines in the implementation of their projects. Modelling a car with 3ds Max is a complex task and for this reason, the most important step is to set up reference images from at least two views. Modelling process cannot be imagined without knowledge of working with polygons or editable
143
Igor Stojanov et al.
poly and understanding how turbosmooth modifier works. Adding the more details to the car interior makes the final image to be more realistic. Obtaining desired render takes a lot of testing, and for this purpose it is recommended resolution and image quality to be minimized in order to notice the changes made in the settings. Good starting point for the materials is V-Ray Material Presets Pro. This plugin contains many types of materials, and desired results can be obtain with a simple editing of these materials. One of the easiest and fastest way to light scenes is using High Dynamic Range Imaging shortened HDRI. This technique makes the scene to seem as to be pictured in the same place in real life. The settings in camera are important to get a correct lightened render. There are two types of rendering methods: real time rendering and non-real time rendering. The first one is a rendering of interactive media, such as games and simulations and the second one is used for animations for non-interactive media, movies and video. In this paper, in application of 3ds Max, the following render plugins: V-ray, Mental Ray, Iray, Scanline, Maxwell, Corona, Octane and LuxRender are used for modelling and rendering the car model. It can be noticed that the final result of rendering was the best when V-ray and Corona render plugins were used, while weaker results were achieved when Scanline, Iray and LuxRender render plugins were applied.
References [1] Kelly L. Murdock, Autodesk 3ds Max 2014 Bible, 2014. [2] Hu, Jia Ying., The Application of Computer Software—3D Studio Max, Lightscape and V-Ray in the Environmental Artistic Expression, Advanced Materials Research 631 (2013): 1379-1384. [3] Lin, T. H., Lan, C. C., Wang, C. H., & Chen, C. H., Study on realistic texture mapping for 3D models, International Conference on Information Science, Electronics and Electrical Engineering (ISEEE), Vol. 3, pp. 1567-1571, 2014. [4] Chandler, M., Podwojewski, P., Amin, J., & Herrera, F, 3ds Max Projects: A Detailed Guide to Modeling, Texturing, Rigging, Animation and Lighting, 2014. [5] Woop, Sven; Schmittler, Jörg; Slusallek, Philipp (2005), "RPU: A Programmable Ray Processing Unit for Realtime Ray Tracing", Siggraph 2005. [6] Kajiya, James T: The rendering equation, 1986.
144