Jan 14, 2012 ... AutoIt began during the end of 1998 primarily to automate keystrokes during ...
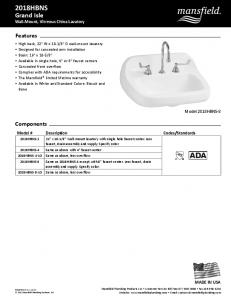
the name from 'New AutoIt v3 Script' to „helloworld‟ but you can ...
AutoIt: Reference for Administrators by Matthew Mansfield Copyright © 2013 Created: January 14, 2012
As Windows administrators, we all have things we need to get done and very little time in which to work with. Our need for automated tasks is immeasurably important to help us with our day-to-day tasks. AutoIt allows you to create scripts and then compile them into a stand-alone executable that can run on systems that do not have an AutoIt interpreter installed. During the course of this guide we will break down the basics of AutoIt so you can create, compile and implement a script today. We will walk through key features that AutoIt can offer from controlling the mouse and keyboard to gaining admin access to install updates. This manual assumes you are already familiar with some programming so we won’t dwell on “Hello World” too long and we can dive into more of what you’re used to. With that in mind we will jump right into examples to show you helpful ways to put together a program.
Contents Section 1 - Origins of AutoIt Section 2 – Getting the Editor & Getting Started • • • •
How to get the AutoIt Script Editor Creating a new script Proper Commenting Programming Hello World
Section 3 – General Scripting • • • • • • • •
• •
Includes List of common includes Function Reference Declaring Variables Scope Arrays Operators Datatypes o Numbers o Strings o Booleans o Binary o Pointer o Datatypes and Ranges Numbers Regular Expressions
Section 4 – Automating Tasks • •
Example 1 – INSTALLING A PROGRAM WITHOUT ADMIN PRIVLEDGES Example 2 – Enable Remote Desktop Connection and NetMeeting
Section 5 – GUI Reference • • • • • •
GUI Concepts GUI Controls GUI Basic Functions GUI Event Modes Message-loop Mode (default) OnEvent Mode
Section 6 – Koda Form Designer • • • • •
How to get Koda Form Designer Creating a Form Adding features to the form Generating the code Why use Koda?
Section 1 – Origins of AutoIt AutoIt began during the end of 1998 primarily to automate keystrokes during software installs. AutoIt Version 1 was released January of 1999 and had limited built in functionality. In August of 1999 AutoIt Version 2 was released which included DLL/COM control and it was the first version that included AutoItX. In May of 2001 the source code for AutoIt was converted from C to C++ which allowed for many additional autocorrecting abilities for the script editor. In 2003 a beta version of AutoIt Version 3 was released and in February of 2004 the AutoIt team released a completed Version 3. One year later Version 3.1.0 broke ground on the first versions of AutoIt which has allowed GUI design. GUI design was only available by manually coding it until February of 2006 when the first build of Koda Form Designer was released. Koda provided programmers to drag and drop forms and its various properties without having to hard code it.
Section 2 – Getting the Editor & Getting Started Section Objective In this section we will cover: How to get the AutoIt Script Editor Creating a new script Proper Commenting Programming Hello World
How to get the Autoit script editor To begin let‟s make sure you have the latest version of Autoit installed on your computer. As of the time of this publication the latest version is 3.3.8.1 Updated: 29th January, 2012. You can obtain a free copy of Autoit from the download page at autoitscript.com/site/autoit/downloads. This install comes with the script to executable, script editor and AutoItX which allows DLL/COM control. Creating a new script First open a folder where you wish to create the script. Right-click in the folder and select New > AutoIt v3 Script.
After your new file is created you may name it something appropriate. For this exercise I will change the name from 'New AutoIt v3 Script' to „helloworld‟ but you can name yours what you would like. Just make sure you keep the correct file extension. The correct file extension for AutoIt is '.au3'. Next, with the script file created we want to edit it. Right-click on helloworld.au3 and select Edit Script.
Proper Commenting Each time a new script is open you will notice that it will come with some commented out sections at the top of the script. This brings us to commenting and how to add them. To add a comment in the code that the editor will not pick up you must begin the line with a semicolon.
Example 2-A ; Your comment goes here.
To have a large section commented out you must begin with #comments-start and conclude with #comments-end. Example 2-B #comments-start ... ... #comments-end
Programming Hello World Now that we have our SciTE Editor properly installed and our first file created let‟s walk through a quick “Hello World” to get you familiar with how the editor works.
We want to tell AutoIt to display a message box - this is done with the MsgBox function. All functions take parameters and the MsgBox has three which are a flag, title and message. Example 2-C MsgBox( [ flag ] [, “title” ] [, “message” ] )
The flag parameter uses a predetermined number which indicates the way your MsgBox displays. The title and message parameters take string input. Whenever you input a string be sure you use “double” or „single‟ quotes. Using the input of Exampe 2-D save your project file and close the editor. To get your program to run simply double-click on your file, in my case the helloworld.au3 file. Another way to run your script is to rightclick and select Run Script. Example 2-D MsgBox(0, "Tutorial", "Hello World!")
Upon running your script you should see the following:
In our example we were using the flag of 0 but to determine which flag you need to use in the future consider the options available to you by reviewing this chart. decimal flag
Button-related Result
hexadecimal flag
0
OK button
0x0
1
OK and Cancel
0x1
2
Abort, Retry, and Ignore
0x2
3
Yes, No, and Cancel
0x3
4
Yes and No
0x4
5
Retry and Cancel
0x5
6 valid on Windows
Cancel, Try Again, Continue
0x6
2000/XP and above decimal flag
Icon-related Result
hexadecimal flag
0
(No icon)
0x0
16
Stop-sign icon
0x10
32
Question-mark icon
0x20
48
Exclamation-point icon
0x30
64
Information-sign icon consisting of an 'i' in a circle
0x40
decimal flag
Default-related Result
hexadecimal flag
0
First button is default button
0x0
256
Second button is default button
0x100
512
Third button is default button
0x200
decimal flag
Modality-related Result
hexadecimal flag
0
Application
0x0
4096
System modal (dialog has an icon)
0x1000
8192
Task modal
0x2000
decimal flag
Miscellaneous-related Result
hexadecimal flag
0
(nothing else special)
0x0
262144
MsgBox has top-most attribute set
0x40000
524288
title and text are right-justified
0x80000
Section 3 – General Scripting Introduction In this section we will cover some of the basics of this scripting language so you have some material to reference to while you are building your codes. Having some of these fundamental tools available to you will enable you to begin building your programs Starting with the code from the top down, we will cover the following in this section:
Includes List of common includes Function Reference Declaring Variables Scope Arrays Operators Datatypes Numbers Strings
Booleans Binary Pointer Datatypes and Ranges Numbers Regular Expressions
Includes Includes are files that contain prewritten functions for AutoIt. Think of them as functions written into your script that you can call to perform actions for you. You can utilize these files by adding them to your script with the following: Example 3-A #include
List of common includes Include
Description
Array.au3
Functions that assist with array management
AVIConstants.au3
AVI Constants
ButtonConstants.au3
Button Constants
Color.au3
Functions that assist with color management
ComboConstants.au3
ComboBox Constants
Constants.au3
Various AutoIt Constants
Date.au3
Functions that assist with dates and times
DateTimeConstants.au3
DateTime Control Constants
EditConstants.au3
Edit Constants
File.au3
Functions that assist with files and directories
GuiCombo.au3
Functions that assist with ComboBox
GUIConstants.au3
Includes all GUI related constants
GUIConstantsEx.au3
Constants to be used in GUI applications
GUIDefaultConstants.au3
GUI default control styles
GuiEdit.au3
Functions that assist with Edit control
GuiIPAddress.au3
Used to create a GUI IP Address Control
GuiList.au3
Functions that assist with Listbox
GuiListView.au3
Functions that assist with ListView
GuiMonthCal.au3
Functions that assist with MonthCal
GuiSlider.au3
Functions that assist with Slider Control “Trackbar”
GuiStatusBar.au3
Functions that assist with the Statusbar control
GuiTab.au3
Functions that assist with the Tab Control
GuiTreeView.au3
Functions that assist with TreeView
IE.au3
Internet Explorer Automation UDF Library for AutoIt3
Inet.au3
Functions that assist with the Internet
ListBoxConstants.au3
ListBox Constants
ListViewConstants.au3
ListView Constants
Math.au3
Functions that assist with mathematical calculations
Memory.au3
Memory management routines
Misc.au3
Functions that assist with Common Dialogs
Process.au3
Functions that assist with process management
ProgressConstants.au3
Progress Constants
SliderConstants.au3
Slider Constants
Sound.au3
Functions that assist with Sound files
SQLite.au3
Functions that assist access to an SQLite database
SQLite.dll.au3
Inline SQLite3.dll
StaticConstants.au3
Static Constants
StatusBarConstants.au3
StatusBar Constants
String.au3
Functions that assist with String manipulation
TabConstants.au3
Tab Constants
TreeViewConstants.au3
TreeView Constants
UpDownConstants.au3
UpDown Constants
Visa.au3
VISA (GPIB & TCP) library
WindowsConstants.au3
Windows Constants
Function Reference A function is a section of code that can be called from the script to provide a given output. There are two different kinds of functions built-in functions and user functions (also referred to as user defined functions or UDF’s). Built-in functions are installed when you setup AutoIt during initial install and are available using the Call keyword: Example 3-B #include ; This calls a function accepting no arguments. Call("Test1")
; This calls a function accepting one argument and passes it an argument. Call("Test2", "Message from Call()!")
A user function is one that you create as you are writing your code: Example 3-C Example1() Example2() ; example1 Func Example1() ; Sample script with three user-defined functions ; Notice the use of variables, ByRef, and Return Local $foo = 2 Local $bar = 5 MsgBox(0, "Today is " & today(), "$foo equals " & $foo) swap($foo, $bar) MsgBox(0, "After swapping $foo and $bar", "$foo now contains " & $foo) MsgBox(0, "Finally", "The larger of 3 and 4 is " & max(3, 4)) EndFunc ;==>Example1 Func swap(ByRef $a, ByRef $b) ;swap the contents of two variables Local $t $t = $a $a = $b $b = $t EndFunc ;==>swap Func today() ;Return the current date in mm/dd/yyyy form Return (@MON & "/" & @MDAY & "/" & @YEAR) EndFunc ;==>today Func max($x, $y) ;Return the larger of two numbers If $x > $y Then Return $x Else Return $y EndIf EndFunc ;==>max ;End of sample script 1 ; example2 Func Example2() ; Sample scriptusing @NumParams macro Test_Numparams(1, 2, 3, 4, 5, 6, 7, EndFunc ;==>Example2
8,
9,
10,
11,
12,
13, 14)
Func Test_Numparams($v1 = 0, $v2 = 0, $v3 = 0, $v4 = 0, $v5 = 0, $v6 = 0, $v7 = 0, $v8 = 0, _ $v9 = 0, $v10 = 0, $v11 = 0, $v12 = 0, $v13 = 0, $v14 = 0, $v15 = 0, $v16 = 0, $v17 = 0, _ $v18 = 0, $v19 = 0) #forceref $v1, $v2, $v3, $v4, $v5, $v6, $v7, $v8, $v9, $v10, $v11, $v12, $v13, $v14, $v15, $v16, $v17, $v18, $v19 Local $val For $i = 1 To @NumParams $val &= Eval("v" & $i) & " "
Next MsgBox(0, "@NumParams example", "@NumParams=" & @NumParams & @CRLF & @CRLF & $val) EndFunc ;==>Test_Numparams ;End of sample script 2
Below is a complete list of the functions available in AutoIt. If you are viewing a digital copy, click on a function name to be taken to the appropriate AutoIt page for a detailed description. Function
Description
Abs
Calculates the absolute value of a number.
ACos
Calculates the arcCosine of a number.
AdlibRegister
Registers an Adlib function.
AdlibUnRegister
Unregisters an adlib function.
Asc
Returns the ASCII code of a character.
AscW
Returns the unicode code of a character.
ASin
Calculates the arcsine of a number.
Assign
Assigns a variable by name with the data.
ATan
Calculates the arctangent of a number.
AutoItSetOption
Changes the operation of various AutoIt functions/parameters.
AutoItWinGetTitle
Retrieves the title of the AutoIt window.
AutoItWinSetTitle
Changes the title of the AutoIt window.
Beep
Plays back a beep to the user.
Binary
Returns the binary representation of an expression.
BinaryLen
Returns the number of bytes in a binary variant.
BinaryMid
Extracts a number of bytes from a binary variant.
BinaryToString
Converts a binary variant into a string.
BitAND
Performs a bitwise AND operation.
BitNOT
Performs a bitwise NOT operation.
BitOR
Performs a bitwise OR operation.
BitRotate
Performs a bit shifting operation, with rotation.
BitShift
Performs a bit shifting operation.
BitXOR
Performs a bitwise exclusive OR (XOR) operation.
BlockInput
Disable/enable the mouse and keyboard.
Break
Enables or disables the users' ability to exit a script from the tray icon menu.
Call
Calls a user-defined function contained in a string parameter.
CDTray
Opens or closes the CD tray.
Ceiling
Returns a number rounded up to the next integer.
Chr
Returns a character corresponding to an ASCII code.
ChrW
Returns a character corresponding to a unicode code.
ClipGet
Retrieves text from the clipboard.
ClipPut
Writes text to the clipboard.
ConsoleRead
Read from the STDIN stream of the AutoIt script process.
ConsoleWrite
Writes data to the STDOUT stream. Some text editors can read this stream as can other programs which may be expecting data on this stream.
ConsoleWriteError
Writes data to the STDERR stream. Some text editors can read this stream as can other programs which may be expecting data on this stream.
ControlClick
Sends a mouse click command to a given control.
ControlCommand
Sends a command to a control.
ControlDisable
Disables or "grays-out" a control.
ControlEnable
Enables a "grayed-out" control.
ControlFocus
Sets input focus to a given control on a window.
ControlGetFocus
Returns the ControlRef# of the control that has keyboard focus within a specified window.
ControlGetHandle
Retrieves the internal handle of a control.
ControlGetPos
Retrieves the position and size of a control relative to its window.
ControlGetText
Retrieves text from a control.
ControlHide
Hides a control.
ControlListView
Sends a command to a ListView32 control.
ControlMove
Moves a control within a window.
ControlSend
Sends a string of characters to a control.
ControlSetText
Sets text of a control.
ControlShow
Shows a control that was hidden.
ControlTreeView
Sends a command to a TreeView32 control.
Cos
Calculates the cosine of a number.
Dec
Returns a numeric representation of a hexadecimal string.
DirCopy
Copies a directory and all sub-directories and files (Similar to xcopy).
DirCreate
Creates a directory/folder.
DirGetSize
Returns the size in bytes of a given directory.
DirMove
Moves a directory and all sub-directories and files.
DirRemove
Deletes a directory/folder.
DllCall
Dynamically calls a function in a DLL.
DllCallAddress
Dynamically calls a function at a specific memory address.
DllCallbackFree
Frees a previously created handle created with DllCallbackRegister.
DllCallbackGetPtr
Returns the pointer to a callback function that can be passed to the Win32 API.
DllCallbackRegister
Creates a user-defined DLL Callback function.
DllClose
Closes a previously opened DLL.
DllOpen
Opens a DLL file for use in DllCall.
DllStructCreate
Creates a C/C++ style structure to be used in DllCall.
DllStructGetData
Returns the data of an element of the struct.
DllStructGetPtr
Returns the pointer to the struct or an element in the struct.
DllStructGetSize
Returns the size of the struct in bytes.
DllStructSetData
Sets the data in of an element in the struct.
DriveGetDrive
Returns an array containing the enumerated drives.
DriveGetFileSystem
Returns File System Type of a drive.
DriveGetLabel
Returns Volume Label of a drive, if it has one.
DriveGetSerial
Returns Serial Number of a drive.
DriveGetType
Returns drive type.
DriveMapAdd
Maps a network drive.
DriveMapDel
Disconnects a network drive.
DriveMapGet
Retrieves the details of a mapped drive.
DriveSetLabel
Sets the Volume Label of a drive.
DriveSpaceFree
Returns the free disk space of a path in Megabytes.
DriveSpaceTotal
Returns the total disk space of a path in Megabytes.
DriveStatus
Returns the status of the drive as a string.
EnvGet
Retrieves an environment variable.
EnvSet
Writes an environment variable.
EnvUpdate
Refreshes the OS environment.
Eval
Return the value of the variable defined by an string.
Execute
Execute an expression.
Exp
Calculates e to the power of a number.
FileChangeDir
Changes the current working directory.
FileClose
Closes a previously opened text file.
FileCopy
Copies one or more files.
FileCreateNTFSLink
Creates an NTFS hardlink to a file or a directory
FileCreateShortcut
Creates a shortcut (.lnk) to a file.
FileDelete
Delete one or more files.
FileExists
Checks if a file or directory exists.
FileFindFirstFile
Returns a search "handle" according to file search string.
FileFindNextFile
Returns a filename according to a previous call to FileFindFirstFile.
FileFlush
Flushes the file's buffer to disk.
FileGetAttrib
Returns a code string representing a file's attributes.
FileGetEncoding
Determines the text encoding used in a file.
FileGetLongName
Returns the long path+name of the path+name passed.
FileGetPos
Retrieves the current file position.
FileGetShortcut
Retrieves details about a shortcut.
FileGetShortName
Returns the 8.3 short path+name of the path+name passed.
FileGetSize
Returns the size of a file in bytes.
FileGetTime
Returns the time and date information for a file.
FileGetVersion
Returns the "File" version information.
FileInstall
Include and install a file with the compiled script.
FileMove
Moves one or more files
FileOpen
Opens a text file for reading or writing.
FileOpenDialog
Initiates a Open File Dialog.
FileRead
Read in a number of characters from a previously opened text file.
FileReadLine
Read in a line of text from a previously opened text file.
FileRecycle
Sends a file or directory to the recycle bin.
FileRecycleEmpty
Empties the recycle bin.
FileSaveDialog
Initiates a Save File Dialog.
FileSelectFolder
Initiates a Browse For Folder dialog.
FileSetAttrib
Sets the attributes of one or more files.
FileSetPos
Sets the current file position.
FileSetTime
Sets the timestamp of one of more files.
FileWrite
Append a text/data to the end of a previously opened file.
FileWriteLine
Append a line of text to the end of a previously opened text file.
Floor
Returns a number rounded down to the closest integer.
FtpSetProxy
Sets the internet proxy to use for ftp access.
GUICreate
Create a GUI window.
GUICtrlCreateAvi
Creates an AVI video control for the GUI.
GUICtrlCreateButton
Creates a Button control for the GUI.
GUICtrlCreateCheckbox
Creates a Checkbox control for the GUI.
GUICtrlCreateCombo
Creates a ComboBox control for the GUI.
GUICtrlCreateContextMenu
Creates a context menu for a control or entire GUI window.
GUICtrlCreateDate
Creates a date control for the GUI.
GUICtrlCreateDummy
Creates a Dummy control for the GUI.
GUICtrlCreateEdit
Creates an Edit control for the GUI.
GUICtrlCreateGraphic
Creates a Graphic control for the GUI.
GUICtrlCreateGroup
Creates a Group control for the GUI.
GUICtrlCreateIcon
Creates an Icon control for the GUI.
GUICtrlCreateInput
Creates an Input control for the GUI.
GUICtrlCreateLabel
Creates a static Label control for the GUI.
GUICtrlCreateList
Creates a List control for the GUI.
GUICtrlCreateListView
Creates a ListView control for the GUI.
GUICtrlCreateListViewItem
Creates a ListView item.
GUICtrlCreateMenu
Creates a Menu control for the GUI.
GUICtrlCreateMenuItem
Creates a MenuItem control for the GUI.
GUICtrlCreateMonthCal
Creates a month calendar control for the GUI.
GUICtrlCreateObj
Creates an ActiveX control in the GUI.
GUICtrlCreatePic
Creates a Picture control for the GUI.
GUICtrlCreateProgress
Creates a Progress control for the GUI.
GUICtrlCreateRadio
Creates a Radio button control for the GUI.
GUICtrlCreateSlider
Creates a Slider control for the GUI.
GUICtrlCreateTab
Creates a Tab control for the GUI.
GUICtrlCreateTabItem
Creates a TabItem control for the GUI.
GUICtrlCreateTreeView
Creates a TreeView control for the GUI.
GUICtrlCreateTreeViewItem Creates a TreeViewItem control for the GUI. GUICtrlCreateUpdown
Creates an UpDown control for the GUI.
GUICtrlDelete
Deletes a control.
GUICtrlGetHandle
Returns the handle for a control and some special (item) handles (Menu, ContextMenu, TreeViewItem).
GUICtrlGetState
Gets the current state of a control
GUICtrlRead
Read state or data of a control.
GUICtrlRecvMsg
Send a message to a control and retrieve information in lParam.
GUICtrlRegisterListViewSort Register a user defined function for an internal listview sorting callback function. GUICtrlSendMsg
Send a message to a control.
GUICtrlSendToDummy
Sends a message to a Dummy control.
GUICtrlSetBkColor
Sets the background color of a control.
GUICtrlSetColor
Sets the text color of a control.
GUICtrlSetCursor
Sets the mouse cursor icon for a particular control.
GUICtrlSetData
Modifies the data for a control.
GUICtrlSetDefBkColor
Sets the default background color of all the controls of the GUI window.
GUICtrlSetDefColor
Sets the default text color of all the controls of the GUI window.
GUICtrlSetFont
Sets the font for a control.
GUICtrlSetGraphic
Modifies the data for a control.
GUICtrlSetImage
Sets the bitmap or icon image to use for a control.
GUICtrlSetLimit
Limits the number of characters/pixels for a control.
GUICtrlSetOnEvent
Defines a user-defined function to be called when a control is clicked.
GUICtrlSetPos
Changes the position of a control within the GUI window.
GUICtrlSetResizing
Defines the resizing method used by a control.
GUICtrlSetState
Changes the state of a control.
GUICtrlSetStyle
Changes the style of a control.
GUICtrlSetTip
Sets the tip text associated with a control.
GUIDelete
Deletes a GUI window and all controls that it contains.
GUIGetCursorInfo
Gets the mouse cursor position relative to GUI window.
GUIGetMsg
Polls the GUI to see if any events have occurred.
GUIGetStyle
Retrieves the styles of a GUI window.
GUIRegisterMsg
Register a user defined function for a known Windows Message ID (WM_MSG).
GUISetAccelerators
Sets the accelerator table to be used in a GUI window.
GUISetBkColor
Sets the background color of the GUI window.
GUISetCoord
Sets absolute coordinates for the next control.
GUISetCursor
Sets the mouse cursor icon for a GUI window.
GUISetFont
Sets the default font for a GUI window.
GUISetHelp
Sets an executable file that will be run when F1 is pressed.
GUISetIcon
Sets the icon used in a GUI window.
GUISetOnEvent
Defines a user function to be called when a system button is clicked.
GUISetState
Changes the state of a GUI window.
GUISetStyle
Changes the styles of a GUI window.
GUIStartGroup
Defines that any subsequent controls that are created will be "grouped" together.
GUISwitch
Switches the current window used for GUI functions.
Hex
Returns a string representation of an integer or of a binary type converted to hexadecimal.
HotKeySet
Sets a hotkey that calls a user function.
HttpSetProxy
Sets the internet proxy to use for http access.
HttpSetUserAgent
Sets the user-agent string sent with InetGet() and InetRead() requests.
HWnd
Converts an expression into an HWND handle.
InetClose
Closes a handle returned from InetGet().
InetGet
Downloads a file from the internet using the HTTP, HTTPS or FTP protocol.
InetGetInfo
Returns detailed data for a handle returned from InetGet().
InetGetSize
Returns the size (in bytes) of a file located on the internet.
InetRead
Downloads a file from the internet using the HTTP, HTTPS or FTP protocol.
IniDelete
Deletes a value from a standard format .ini file.
IniRead
Reads a value from a standard format .ini file.
IniReadSection
Reads all key/value pairs from a section in a standard format .ini file.
IniReadSectionNames
Reads all sections in a standard format .ini file.
IniRenameSection
Renames a section in a standard format .ini file.
IniWrite
Writes a value to a standard format .ini file.
IniWriteSection
Writes a section to a standard format .ini file.
InputBox
Displays an input box to ask the user to enter a string.
Int
Returns the integer (whole number) representation of an expression.
IsAdmin
Checks if the current user has full administrator privileges.
IsArray
Checks if a variable is an array type.
IsBinary
Checks if a variable or expression is a binary type.
IsBool
Checks if a variable's base type is boolean.
IsDeclared
Check if a variable has been declared.
IsDllStruct
Checks if a variable is a DllStruct type.
IsFloat
Checks if a variable or expression is a float-type.
IsHWnd
Checks if a variable's base type is a pointer and window handle.
IsInt
Checks if a variable or expression is an integer type.
IsKeyword
Checks if a variable is a keyword (for example, Default).
IsNumber
Checks if a variable's base type is numeric.
IsObj
Checks if a variable or expression is an object type.
IsPtr
Checks if a variable's base type is a pointer.
IsString
Checks if a variable is a string type.
Log
Calculates the natural logarithm of a number.
MemGetStats
Retrieves memory related information.
Mod
Performs the modulus operation.
MouseClick
Perform a mouse click operation.
MouseClickDrag
Perform a mouse click and drag operation.
MouseDown
Perform a mouse down event at the current mouse position.
MouseGetCursor
Returns the cursor ID Number for the current Mouse Cursor.
MouseGetPos
Retrieves the current position of the mouse cursor.
MouseMove
Moves the mouse pointer.
MouseUp
Perform a mouse up event at the current mouse position.
MouseWheel
Moves the mouse wheel up or down. NT/2000/XP ONLY.
MsgBox
Displays a simple message box with optional timeout.
Number
Returns the numeric representation of an expression.
ObjCreate
Creates a reference to a COM object from the given classname.
ObjCreateInterface
Creates a reference to an object from the given classname/object pointer, interface identifier and description string.
ObjEvent
Handles incoming events from the given Object.
ObjGet
Retrieves a reference to a COM object from an existing process or filename.
ObjName
Returns the name or interface description of an Object
OnAutoItExitRegister
Registers a function to be called when AutoIt exits.
OnAutoItExitUnRegister
UnRegisters a function that was called when AutoIt exits.
Ping
Pings a host and returns the roundtrip-time.
PixelChecksum
Generates a checksum for a region of pixels.
PixelGetColor
Returns a pixel color according to x,y pixel coordinates.
PixelSearch
Searches a rectangle of pixels for the pixel color provided.
PluginClose
Close a plugin file
PluginOpen
Open a plugin file.
ProcessClose
Terminates a named process.
ProcessExists
Checks to see if a specified process exists.
ProcessGetStats
Returns an array about Memory or IO infos of a running process.
ProcessList
Returns an array listing the currently running processes (names and PIDs).
ProcessSetPriority
Changes the priority of a process
ProcessWait
Pauses script execution until a given process exists.
ProcessWaitClose
Pauses script execution until a given process does not exist.
ProgressOff
Turns Progress window off.
ProgressOn
Creates a customizable progress bar window.
ProgressSet
Sets the position and/or text of a previously created Progress bar window.
Ptr
Converts an expression into a pointer variant.
Random
Generates a pseudo-random float-type number.
RegDelete
Deletes a key or value from the registry.
RegEnumKey
Reads the name of a subkey according to its instance.
RegEnumVal
Reads the name of a value according to its instance.
RegRead
Reads a value from the registry.
RegWrite
Creates a key or value in the registry.
Round
Returns a number rounded to a specified number of decimal places.
Run
Runs an external program.
RunAs
Runs an external program under the context of a different user.
RunAsWait
Runs an external program under the context of a different user and pauses script execution until the program finishes.
RunWait
Runs an external program and pauses script execution until the program finishes.
Send
Sends simulated keystrokes to the active window.
SendKeepActive
Attempts to keep a specified window active during Send().
SetError
Manually set the value of the @error macro.
SetExtended
Manually set the value of the @extended macro.
ShellExecute
Runs an external program using the ShellExecute API.
ShellExecuteWait
Runs an external program using the ShellExecute API and pauses script execution until it finishes.
Shutdown
Shuts down the system.
Sin
Calculates the sine of a number.
Sleep
Pause script execution.
SoundPlay
Play a sound file.
SoundSetWaveVolume
Sets the system wave volume by percent.
SplashImageOn
Creates a customizable image popup window.
SplashOff
Turns SplashText or SplashImage off.
SplashTextOn
Creates a customizable text popup window.
Sqrt
Calculates the square-root of a number.
SRandom
Set Seed for random number generation.
StatusbarGetText
Retrieves the text from a standard status bar control.
StderrRead
Reads from the STDERR stream of a previously run child process.
StdinWrite
Writes a number of characters to the STDIN stream of a previously run child process.
StdioClose
Closes all resources associated with a process previously run with STDIO redirection.
StdoutRead
Reads from the STDOUT stream of a previously run child process.
String
Returns the string representation of an expression.
StringAddCR
Takes a string and prefixes all linefeed characters ( Chr(10) ) with a carriage return character ( Chr(13) ).
StringCompare
Compares two strings with options.
StringFormat
Returns a formatted string (similar to the C sprintf() function).
StringFromASCIIArray
Converts an array of ASCII codes to a string.
StringInStr
Checks if a string contains a given substring.
StringIsAlNum
Checks if a string contains only alphanumeric characters.
StringIsAlpha
Checks if a string contains only alphabetic characters.
StringIsASCII
Checks if a string contains only ASCII characters in the range 0x00 - 0x7f (0 - 127).
StringIsDigit
Checks if a string contains only digit (0-9) characters.
StringIsFloat
Checks if a string is a floating point number.
StringIsInt
Checks if a string is an integer.
StringIsLower
Checks if a string contains only lowercase characters.
StringIsSpace
Checks if a string contains only whitespace characters.
StringIsUpper
Checks if a string contains only uppercase characters.
StringIsXDigit
Checks if a string contains only hexadecimal digit (0-9, A-F) characters.
StringLeft
Returns a number of characters from the left-hand side of a string.
StringLen
Returns the number of characters in a string.
StringLower
Converts a string to lowercase.
StringMid
Extracts a number of characters from a string.
StringRegExp
Check if a string fits a given regular expression pattern.
StringRegExpReplace
Replace text in a string based on regular expressions.
StringReplace
Replaces substrings in a string.
StringRight
Returns a number of characters from the right-hand side of a string.
StringSplit
Splits up a string into substrings depending on the given delimiters.
StringStripCR
Removes all carriage return values ( Chr(13) ) from a string.
StringStripWS
Strips the white space in a string.
StringToASCIIArray
Converts a string to an array containing the ASCII code of each character.
StringToBinary
Converts a string into binary data.
StringTrimLeft
Trims a number of characters from the left hand side of a string.
StringTrimRight
Trims a number of characters from the right hand side of a string.
StringUpper
Converts a string to uppercase.
Tan
Calculates the tangent of a number.
TCPAccept
Permits an incoming connection attempt on a socket.
TCPCloseSocket
Closes a TCP socket.
TCPConnect
Create a socket connected to an existing server.
TCPListen
Creates a socket listening for an incoming connection.
TCPNameToIP
Converts an Internet name to IP address.
TCPRecv
Receives data from a connected socket.
TCPSend
Sends data on a connected socket.
TCPShutdown, UDPShutdown
Stops TCP/UDP services.
TCPStartup, UDPStartup
Starts TCP or UDP services.
TimerDiff
Returns the difference in time from a previous call to TimerInit().
TimerInit
Returns a handle that can be passed to TimerDiff() to calculate the difference in milliseconds.
ToolTip
Creates a tooltip anywhere on the screen.
TrayCreateItem
Creates a menuitem control for the tray.
TrayCreateMenu
Creates a menu control for the tray menu.
TrayGetMsg
Polls the tray to see if any events have occurred.
TrayItemDelete
Deletes a menu/item control from the tray menu.
TrayItemGetHandle
Returns the handle for a tray menu(item).
TrayItemGetState
Gets the current state of a control.
TrayItemGetText
Gets the itemtext of a tray menu/item control.
TrayItemSetOnEvent
Defines a user-defined function to be called when a tray item is clicked.
TrayItemSetState
Sets the state of a tray menu/item control.
TrayItemSetText
Sets the itemtext of a tray menu/item control.
TraySetClick
Sets the clickmode of the tray icon - what mouseclicks will display the tray menu.
TraySetIcon
Loads/Sets a specified tray icon.
TraySetOnEvent
Defines a user function to be called when a special tray action happens.
TraySetPauseIcon
Loads/Sets a specified tray pause icon.
TraySetState
Sets the state of the tray icon.
TraySetToolTip
(Re)Sets the tooltip text for the tray icon.
TrayTip
Displays a balloon tip from the AutoIt Icon.
UBound
Returns the size of array dimensions.
UDPBind
Create a socket bound to an incoming connection.
UDPCloseSocket
Close a UDP socket.
UDPOpen
Open a socket connected to an existing server .
UDPRecv
Receives data from an opened socket
UDPSend
Sends data on an opened socket
VarGetType
Returns the internal type representation of a variant.
WinActivate
Activates (gives focus to) a window.
WinActive
Checks to see if a specified window exists and is currently active.
WinClose
Closes a window.
WinExists
Checks to see if a specified window exists.
WinFlash
Flashes a window in the taskbar.
WinGetCaretPos
Returns the coordinates of the caret in the foreground window
WinGetClassList
Retrieves the classes from a window.
WinGetClientSize
Retrieves the size of a given window's client area.
WinGetHandle
Retrieves the internal handle of a window.
WinGetPos
Retrieves the position and size of a given window.
WinGetProcess
Retrieves the Process ID (PID) associated with a window.
WinGetState
Retrieves the state of a given window.
WinGetText
Retrieves the text from a window.
WinGetTitle
Retrieves the full title from a window.
WinKill
Forces a window to close.
WinList
Retrieves a list of windows.
WinMenuSelectItem
Invokes a menu item of a window.
WinMinimizeAll
Minimizes all windows.
WinMinimizeAllUndo
Undoes a previous WinMinimizeAll function.
WinMove
Moves and/or resizes a window.
WinSetOnTop
Change a window's "Always On Top" attribute.
WinSetState
Shows, hides, minimizes, maximizes, or restores a window.
WinSetTitle
Changes the title of a window.
WinSetTrans
Sets the transparency of a window. (Windows 2000/XP or later)
WinWait
Pauses execution of the script until the requested window exists.
WinWaitActive
Pauses execution of the script until the requested window is active.
WinWaitClose
Pauses execution of the script until the requested window does not exist.
WinWaitNotActive
Pauses execution of the script until the requested window is not active.
Declaring Variables Every variable must contain a unique name and the name must start with the $ character and must only contain letters, numbers and the _ character. To declare a variable you can do so using Dim, Local, Global and Const keywords (see example 3c). You can create a variable by assigning a value ($_PI = 3.14159); however, if AutoItSetOption("MustDeclareVars", 1)is active in the code your variables must be declared prior to use. As a rule of thumb, think of your code running top down for example declare the variable before you use it in all cases and it will help you in the long run. The Enum keyword is another variable that can declare and initialize constants.
Scope A variable's scope is controlled by when and how you declare the variable. If you declare a variable at the start of your script and outside any functions it exists in the Global scope and can be read or changed from anywhere in the script. If you declare a variable inside a function it is in Local scope and can only be used within that same function. Variables created inside functions are automatically destroyed when the function ends. By default when variables are declared using Dim or assigned in a function they have Local scope unless there is a global variable of the same name (in which case the global variable is reused). This can be altered by using the Local and Global keywords to declare variables and force the scope you want.
Example 3-D ; Declaring Variables Dim $var1 Dim $var_example2 ; Declaring multiple variables at once Dim $var1, $var_example2 ; Declaring Local and Global variables Local $MonthlyReportSchedule Local $x, $y = 23, $z Global $_PI = 3.14159, $RADIUS, $E = 2.71828 Local $_AccountsReceivable = 5 ; Declaring constant variables Const $x1 = 11, $y1 = 23, $z1 = 55 Global Const $PI = 3.14159, $E = 2.71828 Local Const $daysWorking = 5 ; Must declare variables Opt('MustDeclareVars', 1) ; Declaring constants using Enum Enum $const1 = 1, $const2, $const3 Enum STEP 2 $incr0, $incr2, $incr4 Enum STEP *2 $mult1,$mult2, $mult4
; 1, 2, 3 ; 0, 2, 4 ; 1, 2, 4
If you declare a variable with the same name as a parameter, using Local inside a user function, an error will occur. Global can be used to assign to global variables inside a function, but if a local variable (or parameter) has the same name as a global variable, the local variable will be the only one used. It is recommended that local and global variables have distinct names.
Arrays An Array is a variable containing series of data elements of the same type and size. Each element in this variable can be accessed by an index number. Each array begins with the index of zero and then counts up from there ([0], [1], [2], [3], etc). To access a specific value in an Array, you only have to know the index number (see Example 3-E, Part 3). Arrays can also be multi-dimensional, when you use multiple series of index numbers. You can use up to 64 dimensions in an Array. The total number of entries cannot exceed 2^24 (16,777,216). Before you can start using Arrays in your script, you must define their bounds using the Dim keyword. Example 3-E ; Part 1 - Declaring arrays Dim $weeklyWorkSchedule[$_daysWorking] Global $chessBoard[8][8] Local $mouseCoordinates[2], $windowStats[4] ; Part 2 - Setting up a series of characters for “T”, “E”, “S”, “T” and the number 5 $Array[0]="T"
$Array[1]="E" $Array[2]="S" $Array[3]="T" $Array[4]="5" ; Part 3 - Using the Array above, assign the letter “S” to $MyChar $MyChar=$Array[2] ; Part 4 - Example of multi-dimensional array $Array[0][0]="North-West" $Array[1][0]="South-West" $Array[0][1]="North-East" $Array[1][1]="South-East"
Tip An array which utilizes different datatypes is called a variant array. Currently, AutoIt will not catch it if you create a variant array but it is not advisable. This becomes especially prevalent when arrays are tiered as it will affect the speed of your code.
Usually, an Array contains only one datatype of the same type. But technically speaking, a Variant in AutoIt can contain anything from a number to a Boolean value. So an AutoIt-Array could also contain different types, even other Arrays: Example 3-F $Array[0] $Array[1] $Array[2] $Array[3]
= = = =
1 true ”Text" $NextArray
AutoIt does allow for an array to be copied. For example, $array1 = $array2 would allow $array1 to possess the same dimensions as $array2 without having to declare a Dim previously. Note As mentioned previously in declaring variables, if AutoItSetOption("MustDeclareVars", 1) is previously instantiated then the variable, or $array1 in this case, must be declared first; however, it does not require sizing. If the variable was already assigned a value it would be erase before transferring values.
Because AutoIt works top to bottom (outside in see Example 3-G), sometimes it is necessary to reset a variable (or array) as your code runs. In order to clear a stored value assigned to a variable you can assign a single value to it such as $array1 = 0. This enables the variable to be set to a single value of 0. To erase all values of an array and
reset the dimensions simply declare the variable name again. However, if you declare the same variable within the same scope it will not change the value. Example 3-G
Outside
; Declaring Global presides over the whole program Global $Top_Declaration = 1 ; Think of a Const as unchangeable Const $Const_Throughout = 1 ; To be used during a portion of code Local $Only_Working_Locally ; Instantiating variable Dim $Variable_1 = 12 ; Re-instantiating which would ; clear the previous value and ; assign the new value In Dim $Variable_1 = 6
Top
Bottom
Operators A number is a measurement of distance and programs often have varying distances to quantify. Autoit uses operators which allow us to calculate these shifting vectors. The following chart displays the different operators available. Assignment operators Operator Description
Example
Explanation
=
Assignment
$Var = 6
Assigns 6 to $Var
+=
Addition assignment
$Var += 1
Adds 1 to $Var
-=
Subtraction assignment
$Var += 1
Removes 1 from $Var
*=
Multiplication assignment
$Var *= 1
Multiplies 1 with $Var
/=
Division assignment
$Var /= 5
Divides $Var by 5
&=
Concatenation assignment
$Var = “B” $Var&=4
$Var equals B4
Mathematical operators Operator Description
Example
Explanation
+
Adds two numbers
a+b
a+b=c
-
Subtracts two numbers
c–b
c–b=a
*
Multiplies two numbers
a*b
a*b=c
/
Divides two numbers
c/b
c/b=a
&
Concatenates / joins two strings
“test ”&“one”
Equals test one
^
Power
2^4 = 16
Raises a number to the power
=
Value test
If $var = 5 Then
Tests two values and returns true if $var equals 5
==
Equality test
Inverse equality test
>
Greater than test
>=
Greater than or equal to test
= $var Then
Tests if value1 is greater than or equal to value2. Lexicographic comparison regardless of whether contents of the string are numeric
If $var < $var Then
Tests if value1 is less than value2. Lexicographic comparison regardless of whether contents of the string are numeric
If $var 6 Then
True if $var equals 5 and $var2 is greater than 6
If $var = 5 Or $var2 > 6 Then
True if $var equals 5 or $var2 is greater than 6
If NOT @error Then
Returns a false. The purpose is to test if condition is true or false.
Tip The comparison operators are case insensitive unless you are using the double equals signs “==”. Regardless of format, both sides are converted to strings and then the comparison is conducted. To check if strings are not equal use: Not("string1" == "string2")
AutoIt uses operator precedence to determine which operator comes first. When two operators of the same precedence are used the expression is evaluated from left to right. The order in which these operators are prioritized from highest to lowest are as follows: 1. NOT 2. ^ 3. */
4. 5. 6. 7.
+& < > = = == AND OR Example 3-H
Consider: 8 + 2 * 10 = 28 * has a higher precedence than + the following would be how AutoIt would solve the above equation: 8 + 2 * 10 = 20 8 + 20 = 28 However, use of brackets allows sections to be solved first. For instance: (8 + 2) * 10 = 10 10 * 10 = 100
Datatypes AutoIt has only one datatype and it‟s called a variant. This variant works like a chameleon character because it changes based on the context. If you are using the ampersand to concatenate variants then they will be treated as strings; however, if you are dividing two numbers then they will be treated as numbers. Example 3-I Combining numbers: A.) 10 + 10 = The number 20 B.) 10 + “10” = The number 20 C.) “10” + “10” = The number 20 Combining strings: D.) 10 & 10 = The string 1010 Combining strings: E.) 10 * “asdf” = The number 0 If a string is being used as a number it calls to the number() function. Also, the variant cannot contain a non-valid number or it will always equal 0
String as Boolean: F.) NOT "" = The Boolean true If an empty string is used as a Boolean it will be equal to False
Datatypes – Numbers Example
Explanation
-1, 3.575, 2
Numbers can be standard decimals.
1.5e3 for 1500
Scientific notation is acceptable as well.
0x as in 0x409 or 0x4fff
Hexadecimal notation can represent whole numbers. Only 32-bit numbers are valid.
Datatypes – Strings Example
Explanation
“string”
Enclosing the text in double-quotes is acceptable format
“He said, “”yes”” to that.”
For a string to contain a double-quote you must surround it with two double-quotes
„He said, „‟yes‟‟ to that.‟
For a string to contain a single-quote you must surround it with two single-quotes
„Double “inside” of it.‟
Enclosing the whole string with single-quotes while using the double-quotes inside looks like this Double ‘inside’ of it.
Datatypes – Booleans Computers operate using Boolean logic (also called binary logic) because its values can only be true or false (1 or 0). If any value in an expression has a false value then the result will be false. Value A
Value B
Result
True
True
True
True
False
False
False
True
False
False
False
False
Using logical operators is a wonderful way to apply binary logic and also a good way to assess a condition. For instance, testing to see if a user has administrative privileges or whether a certain file has been installed prior to running a section of code. DID YOU KNOW?
George Boole (1815 – 1864) was an English mathematician and was the author of The Laws of Thought. He focused in the fields of differential equations and algebraic logic and is popularly known as the inventor of Boolean logic. It was this logic that became the basis for the modern digital computer.
Datatypes – Binary The binary type can have any byte value assigned to it. Binary values are converted as hexadecimal notation when stored in a string variable; for instance, „xyz‟ would be stored as „0x78797a‟.
Datatypes – Pointer The pointer value types store the physical memory address. These values will be 32bits or 64bits depending on which version of AutoIt is installed. When stored as a string pointer values are stored in hexadecimal format.
Datatypes – Datatypes and Ranges
The following table shows the internal variant datatypes and their ranges. Data Sub-type Range and Notes Int32
A 32bit signed integer number.
Int64
A 64bit signed integer number
Double
A double-precision floating point number.
String
Can contain strings of up to 2147483647 characters.
Binary
Binary data, can contain up to 2147483647 bytes.
Pointer
A memory address pointer. 32bit or 64bit depending on the version of AutoIt used.
Datatypes – Numbers Numbers can be standard decimal numbers like 2, 4.566, and -7. Scientific notation is also supported; therefore, you could write 1.5e3 instead of 1500. Integers (whole numbers) can also be represented in hexadecimal notation by preceding the integer with 0x as in 0x409 or 0x4fff (when using hex notation only 32-bit numbers are valid). Example 3-H Local Local Local Local
$w $x $y $z
= = = =
Number(1 + 2 + Number("3.14") Number("24/7") Number("tmp3")
10) ;returns 13 ;returns 3.14 ;returns 24 ;returns 0
Regular Expressions RegexBuddy AutoIt does support regular expressions and sometimes using regular expressions can be a bit challenging. For this reason I recommend a helpful program called RegexBuddy. RegexBuddy allows you to type your code into a textbox and it tests each portion of your code and provides plain English explains. This is an invaluable tool for every administrator who plans to parse any bit of code. A copy of the Regex program can be obtained from regexbuddy.com for a nominal fee.
To check if a string fits a given regular expression pattern use StringRegExp() Example 3-I StringRegExp ( "test", "pattern" [, flag [, offset]] )
The test parameter is the string, pattern is the regular expression to compare, flag (optional) is a number used to indicate how the function behaves (default is 0) and
offset (optional) is the string position to start the match (default is 1). Below is a GUI that displays dates in different formats and then I will show you how you can do this yourself.
Example 3-K ;Option 1, using offset Local $nOffset = 1 ; change date format from mm/dd/yyyy to dd.mm.yyyy $out = StringRegExpReplace('12/31/2009', '(\d{2})/(\d{2})/(\d{4})', '$2.$1.$3') $out1 = StringRegExpReplace('12/31/2009', '(\d{2})/(\d{2})/(\d{4})', '$1.$2.$3') $out2 = StringRegExpReplace('12/31/2009', '(\d{2})/(\d{2})/(\d{4})', '$3.$2.$1') MsgBox(0, "RegExp Date Example", _ "This is example: 1" & @CRLF & _ "Format example DD/MM/YYYY" & @CRLF & _ $out & @CRLF & @CRLF & _ "This is example: 2" & @CRLF & _ "Format example MM/DD/YYYY" & @CRLF & _ $out1 & @CRLF & @CRLF & _ "This is example: 3" & @CRLF & _ "Format example YYYY/DD/MM" & @CRLF & _ $out2)
Section 4 – Automating Tasks Introduction Everyone‟s jobs are easier when we can create things to do our work for us faster. This section will help you to create a few fun applications to do just that.
Example 1 – INSTALLING A PROGRAM WITHOUT ADMIN PRIVLEDGES
Example 4-A $PROGRAMNAME = "Admin Client" FileInstall(".\program.msi", @TempDir & "\program.msi", 1) If IsAdmin() Then $ADMINPRIVILEGES = True Else $ADMINPRIVILEGES = False EndIf If $ADMINPRIVILEGES Then $RETURNVALUE = MsgBox(33, "Company Installer", "Installing " _ & $PROGRAMNAME & " as Administrator." & @LF & "Are You Sure?" _ & @LF & "Click 'OK' to continue or 'Cancel' to exit.") If $RETURNVALUE = 2 Then Exit EndIf Else GUICreate("Company Computer Type", 470, 100) Opt("GUICoordMode", 2) GUICtrlCreateLabel("What type of computer is this?", 10, 30) $BUTTON1 = GUICtrlCreateButton("Laptop", -1, 20, 150) $BUTTON2 = GUICtrlCreateButton("Company PC or Laptop", 0, -1) $BUTTON3 = GUICtrlCreateButton("Mobile PC or Laptop", 0, -1) GUISetState() While 1 $GUIGETMSG = GUIGetMsg() Select Case $GUIGETMSG = $BUTTON1 $TYPE = "Laptop" $ADMINPW = "AdminPWhere" ExitLoop Case $GUIGETMSG = $BUTTON2 $TYPE = "StandardPC" $ADMINPW = "AdminPWhere_2" ExitLoop ExitLoop Case $GUIGETMSG = $BUTTON3 $TYPE = "MobilePC" $ADMINPW = "AdminPWhere_3" ExitLoop EndSelect WEnd If $TYPE = "StandardPC" Then $INSTALLINGAS = " will be Installed on this Company PC or Laptop." Else If $TYPE = "AcTICPC" Then $INSTALLINGAS = " will be Installed on this Mobile PC or Laptop." Else $INSTALLINGAS = " will be Installed on this Company Laptop." EndIf EndIf $RETURNVALUE = MsgBox(33, "Company Installer", $PROGRAMNAME _ & $INSTALLINGAS & @LF & "Are You Sure?" & @LF & _ "Click OK to continue or Cancel to exit.") If $RETURNVALUE = 2 Then Exit EndIf EndIf SplashTextOn("Company Installer", "Installing " & $PROGRAMNAME, 300, 50, 10, 10, 16) If $ADMINPRIVILEGES Then $RC = Run(@ComSpec & " /c Start %temp%\program.msi") Else $RC = RunAs("administrator", @ComputerName, $ADMINPW, 4, @ComSpec _
& " /c Start %temp%\program.msi") EndIf Sleep(3000) BlockInput(1) WinWaitActive("Admin Presentation Server Client Setup", _ "Welcome to Admin Presentation Server ") Sleep(3000) ControlClick("Admin Presentation Server Client Setup", "", "[ID:337]") WinWaitActive("Admin Presentation Server Client Setup", _ "Click Finish to exit Setup.") ControlClick("Admin Presentation Server Client Setup", "", _ "[ID:315]") Sleep(3000) BlockInput(0) FileDelete(@TempDir & "\program.msi")
Section 5 – GUI Reference Introduction AutoIt has the ability to create simple Graphical User Interfaces (GUIs) that consist of windows and controls. We will cover: GUI Concepts GUI Controls GUI Basic Functions GUI Event Modes Message-loop Mode (default) OnEvent Mode
GUI Concepts A GUI consists of one or more windows and each window contains one or more controls. GUIs are "event driven" which means you react to events - like a button that is clicked. You spend most of your time idling and waiting for an event to happen this is a little different to a normal script where you are in control of what happens and when! Think of it as waiting by the door for the postman - you sit there until a letter pops through the postbox and then you look at the letters and decide what to do with them - this is exactly how GUIs work - you wait for the postman to come to you. Of course, you may choose to do other tasks while the GUI is active - for example you might use the GUI functions to create an elaborate progress box that you update while your script performs complex actions.
GUI Controls
All users will be familiar with controls - anything you click on or interact with in a window is a type of control. The types of controls that can be created with AutoIt are listed below - you will have used most of them in other Windows programs. A plain piece of text. A simple button. A single line control that you can enter text into. A multi-line control that you can enter text into. A box that can be "checked" or "unchecked". A set of circular buttons - only one can be active at once. A list with a dropdown box. A list. A date picker. A picture. An icon. A progress bar. A group of controls that are contained in tabs. A control that can be added to input controls. Display an AVI format clip. A menu across the top of the window. A menu that appears when you right click inside the ContextMenu window. A control similar to the windows file-explorer. A control similar to the windows sound volume control. A control displaying columns information.
ListViewItem
A control displaying item in a listview control. A control displaying graphics drawn with GUICtrlSetGraphic. A dummy user control.
Here is an example of a single window GUI that contains many of the controls available. As you can see it is possible to create very detailed GUIs!
Controls are created with the GUICtrlCreate... set of functions. When a control is created a Control ID is returned. The most important things to note about a control ID is that: The control ID is a positive number (that is, a number greater than 0) Each control ID is unique - even when there are multiple windows
The control ID is actually the same value as the Control ID that the AutoIt Window Info Tool shows.
GUI Basic Functions These are the main functions that you will need to create a GUI. They are just the basics though, there are many more when you are ready to create some really advanced GUIs. Function
Explanation
GUICreate
Create a window.
GUICtrlCreate... Create various controls in a window. GUISetState
Display or hide the window.
GUIGetMsg
Poll the GUI to see if an event has happened (MessageLoop mode only)
GUICtrlRead
Read the data in a control.
GUICtrlSetData
Set/change the data in a control.
GUICtrlUpdate... Change various options for a control (color, style, etc.)
You will need to #include for basic GUI related constants. There are other filescontaining constants related to the various controls you can create on the GUI. First let's create a window, call it "Hello World" and make it 200 by 100 pixels in size. When a new window is created it is hidden - so we must "show" it. Example 5-A #include GUICreate("GUI Test", 250, 250) GUISetState(@SW_SHOW) Sleep(2000)
If your run the above script you will see a window open and close after 2 seconds. Not very interesting...let's add some text and an OK button. The text will be added at position 30, 10 and the button at 70, 50 and the button will be 60 pixels wide. Example 5-B
#include GUICreate("GUI Test", 200, 90) GUICtrlCreateLabel("GUI Test Message", 25, 10) GUICtrlCreateButton("OK", 70, 50, 60) GUISetState(@SW_SHOW) Sleep(2000)
That's pretty good, but how do we make the GUI react to us clicking the button? Well, this is where we must make a decision as to how we will process events - via a MessageLoop or via OnEvent functions.
GUI Event Modes As mentioned above there are two basic GUI modes:MessageLoop mode and OnEvent mode. The modes are simply two different ways of reacting to GUI events. The mode you choose will depend on personal preference, and to some extent the type of GUI you wish to create. Both modes are equally capable of creating any GUI you wish but sometimes one mode is more suited to a task than the other. The default mode is the MessageLoop mode. To switch to OnEvent mode use Opt("GUIOnEventMode", 1).
Message-loop Mode (default) In the Message-loop mode your script will spend the majority of its time in a tight loop. This loop will simply poll the GUI using the GUIGetMsg function. When an event has occurred the return value of the GUIGetMsg function will show the details (a button is clicked, the GUI has been closed, etc.). In this mode you will only receive events while you are actively polling the GUIGetMsg function so you must ensure that you call it many times a second otherwise your GUI will be unresponsive. This mode is best for GUIs where the GUI is "king" and all you care about is waiting for user events. See this page for a more detailed explanation of theMessageLoop mode.
OnEvent Mode In the OnEvent mode instead of constantly polling the GUI to find out if anything has happened you make the GUI temporarily pause your script and call a pre-defined function to handle the event. For example, if the user clicks Button1 the GUI halts your main script and calls a previously defined user function that deals with Button1. When the function call is completed the main script is resumed. This mode is similar to the Visual Basic forms method.
This mode is best for GUIs where the GUI is of secondary importance and your script has other tasks to perform in addition to looking after the GUI. See this page for a more detailed explanation of theOnEvent mode.
Section 6 – Koda Form Designer Section Objective In this section we will cover: How to get Koda Form Designer Creating a Form Adding features to the form Generating the code Why use Koda?
How to get Koda Form Designer There are a couple options available to you in creating a graphical user interface (or GUI pronounced “gooey”). Using the editor you can hammer out your code manually but if you wanted to think smarter not harder a better way would be to use Koda Form Designer (often just referred to as “Koda”) to assist in your design process. To download Koda go to koda.darkhost Koda will save you time and effort in creating GUIs. Example 6-A Objective
How to
When you open Koda it generates a form Creating a form
automatically for you.
Above the form is the menu bar with various options there for you to select. To add a button, for instance, you would simply click on the button option from the Adding features to the form menu above. Next, click on your form where you would like the button to appear once your program runs.
On the top menu bar go to Tools>Generate Form Code. This will open a Generating the code
window which will contain the code for the form you‟ve designed. In this window you can manually select the code or you can click on the “Copy to clipboard” button below and then you can paste it into your SciTE Editor.
Why use Koda? As you code things manually you have to run the script to confirm that your code is placing things on your form properly. Koda is a fast and simple way to generate code that would otherwise take up your time in scripting. After you use Koda a few times you realize just how much time it saves you. Finally, Koda is absolutely free to download and use.