using the Web System. 1. Sequence for Course Registration using the Web
System. ○ Click "Menu for course guidance week" on the portal login screen,.
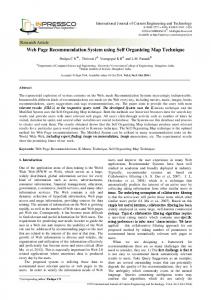
Course Registration using the Web System
* Note
··Main Procedures. Numbers indicate operational sequence
1. Sequence for Course Registration using the Web System Log in to the Menu for course guidance week Registration screen Click "Grades & Course registration" on the MyWaseda login screen, select "Course Registration." Check courses in the Current Schedule. Course Search Click the "Course Search" button and the course search screen will be displayed. Select School, designate Course Category and enter Search Keyword. Click the "Search" button. Courses permitted for registration that match the Search Keyword will be displayed. (Other courses will not be displayed.) Select course Click the Check Box. (Status will be Tentative Selection when you continue the search for the next course or return to the first page) * Repeat this process.
Confirm Course Registration List
Search for desired course
Course Cancellation
Course Registration
"Select" course
Course Registration You must click the "Course Add" button for the tentatively selected courses to register.
Confirm registered course list
[Important] Selecting from Search Results will not complete the registration. Make sure to click the "Course Add" button to register your course. If "Registered" is displayed on the status column, the registration has been completed.
Registered
Error When "Error" appears, check the type of error and make appropriate corrections
Drawing/ Registration Check
Cancellation
Drawing/Registration Check will be done by the University
Click the "Course Drop" button on Course Registration Screen.
Confirm A list will be displayed, showing the courses that you may drop. Select the "Check Box" for the course you wish to cancel then click "Drop."
All courses with registered status have completed the registration process. Confirm registration results for drawing result. For courses where checks are not made at the time of the registration, the result will be shown along with registration results.
Registration results
Confirmed Registration Completed♪ 1
Over enrolled/ Not Accepted To Next Registration
2. Explanation of Course Registration using the Web System All course registration begins from this screen (screen displayed after you log in and select "course registration").
(4)
(1)
(3)
(2)
(1) Registration period Registration deadlines differ by school. Please check the registration period for your school. (2) Schedule Status of courses is displayed according to course title. Courses with a ¥ mark in the Note column require a special enrollment fee. (If the enrollment fee is not paid by the desingated date, registration will be cancelled.) (3) Function Buttons "Course Search," "Course Add," and " Course Drop" are available. "Course Search" Press the "Search" button and the screen will change to the "Course Search Screen." Select School, press OK and select Course Category. Fill in at least one item in the Search Keyword window. When you press the "Search" button, a list of courses you may register for will be displayed. (Any course that you are not able to register for will not appear.) "Course Add" When you press the "Course Add" button, the confirmation screen for registration of tentatively selected courses will be displayed. "Course Drop" When you press the "Course Drop" button, the confirmation screen for course cancellation will be displayed. Courses that you are able to cancel are those whose status is either registered or tentatively selected. (4) Print Screen Button When the PC is connected to a printer, the screen image can be printed out by pressing this button. Please utilize this function to print out a record of your registered courses.
2
3. Procedure for Course Registration using Web System 1
Menu for course guidance week
https://my.waseda.jp/ Access the URL above and select "Grades & Course registration". The menu is displayed on the lower left hand side of the MyWaseda login screen. During the course registration period, use this menu.
2
Login
Enter Waseda ID and Password, and click the "Login" button.
3
Menu for course guidance week
Select "Course Registration" from the "Menu for course guidance week." If you would like to make an inquiry, click the "Inquiry" button, and enter your question and necessary information in the inquiry window. * Inquiries concerning grade reports are not accepted on this inquiry form.
3
4
Course Registration Schedule
Click "Course Registration" and the "Course Registration Schedule Screen" will be displayed. Confirm the schedule and status of registered courses, including automatically registered courses. "Credits" tell you how many required credits for graduation were added. Make sure credits are within the credit limits when registering. (“Credits” will be the total of Full year, Spring semester and Fall semester).
5
Course Search
The function searches for desired courses.
Search methods
1. Select School and click OK. 2. Next, select the desired Course Category. There must be at least one keyword in order to make a search. After entering, press the "Search" button. If unable to find the desired course, reconsider your search keywords. Try deleting some keywords, such as Day and Period.
6
Course title Search to match from the beginning letters. Please do not include course letters and numbers in the keyword. For example if you want to search for "Philosophy IA" enter "Philosophy." Days・Period Term, Day and Period can be specified with pull-down menus.
Select Course
To select a course from the search result, click the Check Box to the left of the course title. You may select more than one course at a time. When you close the page and click "Return to the first page" after placing a check in the Check Box, selected courses will appear as tentative selections.
4
7
Course Add
After making your selection, return to the first page. The selected course will be displayed as a tentative selection. Press the Course Add button to register for the course. Repeat Course Search. You may register for more than one course at a time. When there are tentatively selected courses on the list, the following message will be displayed. Please press "Course Add" to complete the registration process.
8
Confirmation
When you click the "OK" button, a registration check will be executed and a determination will be made as to whether you can or cannot take the course. If there is no error, the status will change from “tentative selection” to “Registration submitted.” If there is an error, the status will change and an error message will be displayed. Delete the course, resolve the problem and press "Course Add" once again.
9
Course Drop
During the registration period, "Tentative Selection" and "Registered" courses can be cancelled. To cancel a course, click the "Course Drop" button. *About "Registered" course Drop After you cancel "Registered" course, you cannot select the course again.
5
10
Confirm Course Drop
A list of courses you may cancel will be displayed. Click the Check Box of the course you want to cancel and press the "Drop" button. You may not cancel courses with a status of "Confirmed" or "Processing" When you press the "Drop" button, a cancellation confirmation message will appear.
11
Print Screen
If the PC you are using is connected to a printer, please print out the course registration screen for your records after you have completed the registration process. Courses with a status of "Registered" have been registered. Courses with a status of "Tentative selection" will be deleted when the screen is closed, so make sure to register with "Course Add" before closing. If a printer is not connected, write out the registered courses for your records.
6
Status of courses on the Registration Screen will be displayed as follows: Status Explanation Status
Explanation
Tentative Selection
Status of Course Search "Tentative Selection." If you close the screen, the tentatively selected course will be invalidated. Possible to cancel.
Not Accepted
Course that was not accepted after "Tentative Selection" or "Registered" status, due to some problem. (Displayed during the announcement period.)
Registration Submitted
Permitted to register by pressing the "Course Add" button. Possible to cancel.
Registration under review
State of processing after registration period. Not possible to cancel. (Display after registration period until announcement.)
Registered
Course that has completed registration. Not possible to cancel. (Displayed after the announcement).
Over Enrolled
Course with more applicants than the capacity, and for which the student was not selected during a random drawing. (Displayed during the announcement period)
* About restrictions on the display. When performing a keyword search for a course, if the research result exceeds 100, an error message will be displayed on the Search Result Display. If this message appears, add more conditions, such as day, period and the first letter of the course you are seeking and redo the search. Registration Methods Order:
Order registration is a method in which multiple registrations are made for courses that are likely to fill beyond capacity and require a drawing. You may list courses in the order of desire in a pull-down menu. When you select an order for the courses, always begin with 01 (first choice). If you select only 02 (second choice), the drawing for this choice will be held after the drawing for the first choice students has been completed, meaning that the possibility for registering for the course will be extremely low.
Category Change: When choices of category are available in a pull-down menu, you may change the Category for your course registration. For example, you may cancel a course that has exceeded the credit limit and change the category to one not included in the credit limit, enabling you to register for the course you desire. Try registering for a different school. Change the School, and click the OK button. Next, specify your choice of Course Category. Make a search in the same manner as you would within your own school. After making your selection, press the "Course Add" button to register.
7
Confirm the registration result. Registration results for the courses you wish to register for will be announced after drawings and registration checks. All courses that you have successfully registered for will be marked "Confirmed." Those not available after drawings will be marked "Over enrolled," and those courses that you failed to register for due to a "registration error" will show "Not accepted" in the status column.
Other Foreign Languages
2
Over enrolled
Introductory Subjects
2
Not accepted:Errors in Sex registration
4. Notes for Course Registration Using the Web System About the check function for registered courses The following checks are done at the time of course registration using the Web System. An error message will be displayed. [Major registration errors] Error Display
Type of Error
Resolution
Duplicate registration error
Trying to add courses already registered for.
Unable to add. Cancel the course.
Duplicate Order error
Same order number is designated for different courses
Delete one of the courses with the same order
Duplicate in a day of the week or period
Days and periods overlap in two or more courses
Delete either course
Prerequisite check error
Not meet the prerequisite for registering the course
Unable to add. Cancel the course.
Traveling time error
Not enough time for traveling from campus to campus between classes
Delete either course
Credit-limitation error
Trying to add more courses than can be registered regarding the credit limitation.
Delete either course, or just ignore the error and register [*].
There are possible errors other than the above. Please refer to the Course Registration booklet to resolve any problems. [*]You can finish the course registration without fixing a credit-limitation error. If you do not fix this error, courses that are randomly chosen will be an error at the time of Registration results.
5. Other functions Links to related websites When "URL" button is displayed in the Note column on the Search Result screen, there are websites available that are related to the course. Click "Check" button and you will be linked to the related website. Special enrollment fees When "Fee" is displayed in the Note column on the Search Result screen, special enrollment fees must be paid for the courses . Course Summary When you click the Course Title on the First Page, you will see a summary of the course.
8
6.
Error Message
When service cannot be provided, If the following message is displayed on the screen, press the "Inquiry form" button, and enter all necessary information.
When an operation is not accepted, Close all browsers, and login again from the "Login page for course registration period."
Waseda ID
9
To optimize the Course Registration System, a time has been set for daily maintenance. The following message will be displayed during maintenance. During Course Registration: 2:00AM to 8:00AM
02:00 – 08:00
If you press the same button more than once, press the "OK" button and wait until the process finishes.
If traffic in the system is excessive, the system will take the following evasive measures. If the system's overall loading is exceeded, a "Retry Message" will be displayed. By clicking the "Try again" button, you can go from the restricted screen back to the regular screen (where you can continue your task). * Please note, however, that in this situation, if you close all browser windows, information on courses in the tentatively selected status will be deleted, and you will need to start again from the search process.
10
7. Recommended Environment Please refer to the URL below for the recommended environment of the course registration system. http://www.waseda.jp/navi/services/system/sys_requirements.html
11