online extras. Scroll Saw Marquetry pattern options. The marquetry technique I
used on the box lid involves cutting out a pattern on the panel and then replacing
...
sanctuary, community, and inspiration. Anyone who has spent time the. >>>Download. Optimal Interconnection Tree
How to make this batman motorbike. Material: Two sheets of MDF 3mm thick cut to size 120mm by 200mm. For the centre piec
In fact, the scroll saw can do just about anything a jigsaw .... Cutting veneer or
other very thin material may require blades with 60 to 80 teeth per inch. ... Full
size patterns for scroll saw projects are available in magazines and books as well
... unleash the power of social media marketing explosive proven strategies to ... updated The scroll saw puzzle pattern
... 1996 brings scroll saw enthusiasts the best projects Mini Clock Patterns This ... to help Sheila blogs about our new
Bank sides. Cut 1 of 1 1/4" stock. #5 blade. Directions. Apply pattern to the stock.
Cut out the inside line by drilling a small blade entry hole and threading the ...
... woodworking plans project instructions and blueprints The Internet s Original ... Read Scroll Saw Puzzle Patterns On
this saw as it does all Duro tools. The driving ... The Duro 30-inch Production
Scroll Saw is the first and only ..... 3073 Heavy Duty Flexible Shaft with Nu. 3061.
bricated by splash system in tool-proof crankcase. ... Saber blade, 3 Scroll saw
blades and set of wrenches—— ..... Nu'tt, Mounting Boit 3[8=- I6 H0: H1! 4 OIS.
You can download textbooks and business books in PDF format without registration. Our quality Books ... wood portrait th
With a scroll saw and a few extra hours, you can turn a plain frame into this
elegant one. ccasionally, I enjoy sitting down and cutting fretwork patterns with.
Additional Safety Instructions For Scroll Saws. 1. SCROLL SAW ..... Draw your
pattern as described in the previ- .... 1⁄2" grits are 80, 120, 180 & 220. 1⁄4" grits
are ...
FASTENING SCROLL SAW TO SUPPORTING SURFACE . .... use power tools in
damp or wet locations, or expose them to rain. Keep work ...... 1555 Nu Main.
sound, I'd suggest creating your animations in Adobe Flash. Since this article is about Photoshop animations, though, let's get started. The animation which ...
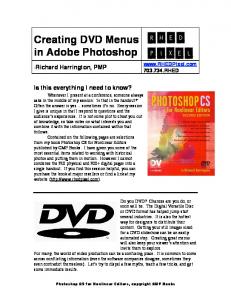
in Adobe Photoshop. -Richard ... asks in the middle of my session: 'Is that in the
handout?' Often the answer ... from my book Photoshop CS for Nonlinear Editors.
Repair Center. 1-800-488-1222. Sears, Roebuck and ... one year from the date of purchase, call 1-800-4-MY-HOMER to arran
Before using this Scroll Saw, read this manual and follow ... If this Craftsman tool
fails due to a defect in material or workmanship within one year from the date of ...
degree of table angle from 0° to 45° when the table is tilted ... C). The blade storage (1) is located on the right re
in Adobe Photoshop. -Richard ... asks in the middle of my session: 'Is that in the
handout?' Often the answer ... from my book Photoshop CS for Nonlinear Editors.
Creating Scroll Saw Patterns in Photoshop. 1. Create a new ... transforming them.
PDF Created with deskPDF PDF Writer - Trial :: http://www.docudesk.com ...
Creating Scroll Saw Patterns in Photoshop
1. Create a new document. a. I prefer to create the document close to the overall size of the pattern I am creating. 2. From the layers pallet create a new layer 3. Using the elipse tool create the first circle a. On the options toolbar ensure that the PATHS option is sellected. 4. Holding down SHIFT or SHIFT+ALT create a circle of the desired size. 5. Repeating step 4 to create the inside circle. a. Using the PATH SELECTION TOOL you can reposition the inner circle relatively close to center. i. Don’t worry if the two circles do not allign completely. You will fix that in the next step. 6. With the PATH SELECTION TOOL still selected select both paths. a. On the options toolbar select ALLIGN VERTICAL CENTERS and then ALLIGN HORIZONTAL CENTERS. i. This will allign both of the circles to each other. 7. Using the FREE TRANSFORM tool (Ctrl+t) you can further select and size one or both of your circles. a. Make sure that the path is selected before transforming them. PDF Created with deskPDF PDF Writer - Trial :: http://www.docudesk.com
8. Once you have the circles sized and alligned to what you want select the PATH SELECTION TOOL and select both circles. a. On the options toolbar ensure the EXCLUDE OVERLAPPING SHAPE AREAS option is selected and then click on COMBINE to create one circle path. 9. Click on the PATHS pallet and at the bottom of the pallet click on FILL PATH WITH FORGROUND COLOR. a. This operation should give you a colored circular border. 10. At this point drag the WORK PATH to the trash can to delete it. 11. Just follow the same steps as above to create the eyelet. ADDING TEXT You can keep your text as a vector graphic while resizing which will greatly help the line quality for printing and cutting latter. 1. Select the HORIZONTAL TYPE TOOL. a. Decide on the font, size, and style of your text. 2. Type the name and position it close to the center of the circle. 3. With the HORIZONTAL TYPE TOOL selected go to the options toolbar and select CREATE WORPED TEXT tool. a. This opens a selection box where you can create different effects. 4. For this tutorial I am using the BULGE style. a. Ensure that HORIZONTAL is selected and adjust the BEND TO 50% (you can use whatever amount best suites your project) and click okay. 5. Once the bend is applied you can use the MOVE TOOL and the FREE TRANSFORM tool to resize and position the text where you want it. 6. ***If the bend amount is to great or small you can change it by selecting the HORIZONTAL TYPE TOOL (making sure the type layer is selected) and click on the CREATE WORPED TEXT tool again and make any adjustments you need. 7. Because the text is still in vector format you can experiment with changing the text lettering, font, size, and style. a. Only minor adjectment will need to be made to position the new text in the circle. PDF Created with deskPDF PDF Writer - Trial :: http://www.docudesk.com
Throughout the creation of this tutorial I used GUIDE LINES to allign and position the elements where I wanted them. On a side note I found that if I create a standard size circle all I would need to do is change the name, and make any adjustments needed to make the name fit and I would be ready to print. Much the same as using Corel Draw or Illustrator.
PDF Created with deskPDF PDF Writer - Trial :: http://www.docudesk.com


![[PDF] Download Scroll Saw Puzzle Patterns Pdf - Google Sites](https://m.moam.info/img/260x300/pdf-download-scroll-saw-puzzle-patterns-pdf-google_6477e493097c474d228c8bd6.jpg)
![[PDF] Download Scroll Saw Puzzle Patterns Full Book - Google Sites](https://m.moam.info/img/260x300/pdf-download-scroll-saw-puzzle-patterns-full-book-_647717e4097c474d228ba7b6.jpg)

![[PDF] Download Scroll Saw Puzzle Patterns Read Online - Google Sites](https://m.moam.info/img/260x300/pdf-download-scroll-saw-puzzle-patterns-read-onlin_647819cd097c4737708c6ec0.jpg)


![Creating Animations in Photoshop - Bruce Philpott [PDF]](https://m.moam.info/img/260x300/creating-animations-in-photoshop-bruce-philpott-pd_6479a622098a9e92458b45b9.jpg)