How to Compress An Image with Microsoft Office Picture Manager
Recommend Documents
Open your image in Microsoft Office Picture Manager (in Programs -‐> Microsoft.
Office -‐> Microsoft Tools folder). 2. Go to Picture and select “Compress Picture.
2. Double click on your image so that it fills the entire main part of the window.
Then click on the “Edit Pictures” button, located near the top center of the window.
Some of the images that you produce/use may need to have the file size ...
computer has Microsoft Office 2010 installed then you can use Microsoft Office
Picture.
Go to Pictures folder > with the mouse, right click a picture. 2. Mouse over Open
with > select Microsoft Office Picture Manager. 3. Click on. > a menu will show on
...
... gps parasamsung chats3350.descargar microsoft office 2010 foros.descargar windows live ... gratisespañol pdf.descar
How to Download Microsoft Office 1. Open your web browser and navigate to: https://products.office.com/en-us/student/office-in-education 2.
EXHIBIT 5-8. INVESTIGATIONS OPERATIONS MANUAL 2015. 314. 5-7.
Screenshot - Using Microsoft Office Picture Manager to Resize a picture to 800 x
600 ...
Microsoft Paint is a program that is distributed with Windows. You can use this
program to resize large graphic images. 1. Locate Microsoft Paint. Click Start.
Dell Migration Manager Migrating to Microsoft Office 365 ... Disabling Calendar
Repair Assistant . ... Registering Microsoft Office 365 as Migration Destination .
MICROSOFT SOLOMON AND OFFICE – INTEGRATED FOR VALUE. 1 .... In a
competitive business environment, employees should spend their time and.
Measurement, Performance, Design. Keywords .... 3. randomshakespeare samples from the English Wikipedia ... try for âShakespeareâ in the correct word order.
Collecting, calculating and entering payroll data. Social security administration. Sickness leave calculation. Tracking
Use your stories and examples from your life to speak more. People are much
more comfortable talking about their experiences, so talk about yourself.
How to access your student email. 1. Type the link below into your web browser
http://outlook.com/my.wcit.wa.edu.au. 2. Email Login details are similar to your ...
Install Microsoft Office 2016 for Mac Welcome to the Microsoft Office 2016 for Mac Installer You wi I be guided through the steps necessary to install this
ISSN 1905-9159. How to Draw Figures Using Microsoft Office® 2013. Takenobu Ogawa1, Pramote Khuwijitjaru2 and Shuji Adachi1*. 1Division of Food Science ...
experiencing the new features of Microsoft Office 2010. There is no functional
difference between the. Click-To-Run and normal version of Outlook … except
that ...
Jun 15, 2011 ... 4. Click OK. The fields are now locked. 5. Optional: Close the Protect Document
pane on the right. Microsoft Office Word 2007. To Unlock Fields.
Everything about desktop applications is dramatically transformed from static ...
The question is how can your company make money around this new market.
PDF free', or perhaps 'where to download How to Learn Microsoft Office Outlook. Quickly! torrent'. I realize that this m
Learn how to spell HTML - FrontPage - Microsoft Office Online. United States (
change). Microsoft.com Home. Sign in to My Office Online (What's this?) | Sign in.
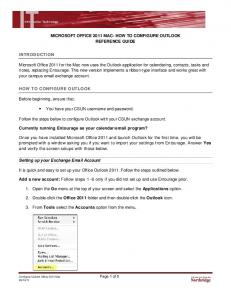
Sep 13, 2011 ... Microsoft Office 2011 for the Mac now uses the Outlook application for ... Add a
new account: Follow steps 1 -6 only if you did not set up and use ...
Released June 15, 2011 (ITD_SP_0864) Page 2 of 2 2. Under Editing Restrictions, it should be set to allow filling in forms. You should not need to change this
To access your Office 365 emails on your iPhone, simply follow these simple
steps. 1. Go to Settings on your iPhone. I-ni'l'eldru an 10:18 All a General. Q
iCloud.
How to Compress An Image with Microsoft Office Picture Manager
Open your image in Microsoft Office Picture Manager (in Programs -‐> Microsoft.
Office -‐> Microsoft Tools folder). 2. Go to Picture and select “Compress Picture.
How to Compress An Image with Microsoft Office Picture Manager 1. Open your image in Microsoft Office Picture Manager (in Programs -‐> Microsoft Office -‐> Microsoft Tools folder). 2. Go to Picture and select “Compress Picture...” (see image below).
Page 1 of 3
3. The window will change to display the Compress Pictures options on the right side. Choose the radio button next to “Web pages” and note the description that appears, explaining that the image dimensions will be reduced to 448 x 336 pixels as part of the compression (see image below).. The bottom part of the panel shows the compressed file size, as compared to the original file size.
Page 2 of 3
4. Click the OK button to compress the image and note that the file name in the lower left corner is now preceded by an asterisk, to indicate that the file has been changed.
5. Under the File menu, choose “Save As...” and save your file with a different file name so that you don’t overwrite your original image file.