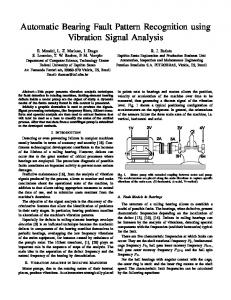
Paper 11.2. INTERNATIONAL TEST CONFERENCE. 1 ... patterns may activate paths which are not required to .... speed, which we call Tmax here. It is very ...
Improving Transition Fault Test Pattern Quality through At-Speed Diagnosis Nandu Tendolkar1, Dawit Belete1, Bill Schwarz1, Bob Podnar1, Akshay Gupta3, Steve Karako1, Wu-Tung Cheng2, Alex Babin2, Kun-Han Tsai2, Nagesh Tamarapalli2, Greg Aldrich2 Freescale Semiconductor1, Mentor Graphics Corporation2, University of Texas, Austin3 Abstract As electronic design feature sizes continue to shrink and clock speeds continue to rise, more and more companies have turned to at-speed test techniques to help ensure high test and product quality. Due to incomplete timing information during Automatic Test Pattern Generation (ATPG), it is possible that some at-speed patterns may activate paths which are not required to meet system speed, and these patterns may fail during production test. It is often difficult and time consuming to identify these paths manually. This paper describes how to use diagnosis techniques to automatically identify these paths. Using this approach, we found most of these paths were false or multicycle paths inside DFT logic. These could be fixed by enhancing the timing exception paths used during ATPG to mask out transition values through these paths. Elimination of these paths resulted in a 300 MHz increase in the speed of the transition fault test pattern. However, occasionally we did find some failing paths were real functional problems and design changes were needed to resolve them.
1. Introduction It is well understood that at-speed testing is a requirement for modern electronic designs. The high clock speeds and small geometry sizes found in the integrated circuit chips of today have led to an increase in speed related defects. The presence of random defects can give rise to circuits with very slow-to-rise or very slow-to-fall switching transitions [1]. Such a defect can cause an increase in the delay of the paths going through circuits. A device fails to operate at rated speed if it contains a delay defect that creates a path delay higher than the maximum allowed path delay [2]. The purpose of a delay test is to verify that a design operates correctly at the specified clock speed. Researchers have proposed two types of fault models for dealing with generating test patterns for delay defect detection. In the transition fault model [3], a gate output has a slow-to-rise and a slow-to-fall fault associated with it. In the other delay fault model, called the path delay fault model [4], a chip contains a path delay fault if it has a path whose delay exceeds a specified value. Fortunately, effective scan-based at-speed test techniques are available in leading ATPG tools [5][6]. The most
common at-speed tests to check for manufacturing defects and process variations include test patterns created for the transition and path delay fault models [7][8][9]. The number of potential paths through the logic circuitry in today’s designs is enormous. It is unrealistic to try to create test patterns that check all possible path combinations. In fact, many of them don’t need to be tested at the system clock cycle because they can be classified as timing exception paths, which include false paths and multicycle paths. A false path in a circuit is a path that is never activated during system operation. Because it is never exercised during system operation, these paths are not required to satisfy timing constraints [10]. Similarly, there are signal paths, e.g. phase shift, which are not required to operate within single clock cycle. These paths are called multicycle paths. ATPG needs to mask out all values activated through timing exception paths; otherwise, it can lead to failing good chips on the tester which reduces the product yield [11][12]. On the other hand, masking out too many values not only reduces test coverage, but also increases test cost due to the negative impact of masking for commonly used test compression techniques [13][14][15][16]. Using information from static timing analysis, the paper in [12] describes how to precisely mask out transition values and glitch values through timing exception paths. It is possible that during ATPG the information about timing exception paths may not be complete. Static timing analysis (STA) [17] can be used to identify timing violations before tape out. However, the accuracy of STA highly depends on the delay model and can be either overly pessimistic or optimistic [18]. In addition, manufacturing process variations further complicate timing verification before silicon. Consequently, the manufactured chips may fail at-speed test patterns. To fix this problem, designers need to inspect all failing paths to ensure they are true timing exception paths, or design optimization may be required. It is time consuming to manually identify the failing paths from failing at-speed test patterns. This paper describes how to use diagnosis techniques to automatically identify the failing paths so that designers can identify the root cause. Sometimes the root cause is incomplete timing exception path information during ATPG. Occasionally, the root cause is a real design issue. The paper is organized as follows. Section 2 explains the process of applying at-speed test patterns on Freescale PowerPC® cores and how to weed
Paper 11.2 INTERNATIONAL TEST CONFERENCE 1-4244-0292-1/06/$20.00 © 2006 IEEE
1
out bad transition patterns semi-manually. Section 3 discusses the diagnosis techniques used to automatically identify failing paths from the collected failing patterns. Section 4 describes some results of using these techniques to expose the root causes of some failing paths. Section 5 concludes the paper.
2. Freescale PowerPC Cores At-Speed Test In this paper we use e600 core, which is an enhanced version of the G4 core used in the high-performance MPC74xx family of host processors containing PowerPC cores [19]. It is designed to run at up to 2 GHz frequencies. Like the MPC74xx microprocessors [7], the at-speed high frequency clocks are generated by the clock controller circuit which is part of the core. It contains two-phase clocks: clock C1 (master) and clock C2 (slave). A variety of clocking sequences are available for testing. For example, the clock sequence can be “C1-C2-C1-C2” or “C2C1-C2-C1” for at-speed testing. As in prior MPC74xx microprocessor designs, the first and last clocks of the clocking sequence are slow clocks. They are not used for at-speed launch or capture. All other clocks are at-speed. The ATPG tool takes this into consideration during test pattern generation. Core e600 has a test mode called Fast Ac Scan. In this test mode all timing exceptional paths should be gated off. In this paper we consider only the test patterns generated in the Fast Ac Scan mode. During testing of Fast Ac Scan test patterns on silicon on known good dice we found that timing exceptional paths were sensitized. We therefore needed a method to identify these paths for further investigation.
2.1
Applying At-Speed ATPG Scan Patterns
We run a set of transition fault test patterns at a given voltage and temperature to find the maximum passing speed, which we call Tmax here. It is very common that, in early stages, Tmax is smaller than the specified device speed, which is called Fmax here. When Tmax is significantly less than Fmax, we need to find out which paths fail and the reason why they fail. For this purpose, the test patterns are run on a small set of chips at a higher speed tmax where Tmax < tmax ≤ Fmax. By definition of Tmax, there will be one or more failing test patterns with tmax clock speed. The purpose of diagnosis is to identify all paths that are failing at speed tmax. With tmax, we log all failing patterns and which scan latches observe the failing values. From the fail log, the diagnosis should find one or more launch latches for each failing latch. Thus we identify a complete set of paths that are running at slower than expected speed. These paths are then reviewed by the designers to determine if they are functional or not. If any such path is non-functional, we can either modify our test pattern so that the path is not tested or update timing exception path information to guide ATPG to avoid sensitizing this path [12]. A
Paper 11.2
functional path that doesn’t pass at-speed test should be fixed by the designer or in the manufacturing process. Once these modifications are made, the transition fault test patterns should pass at a higher speed. The closer Tmax is to Fmax, the better the transition fault test coverage. For example, we do not want to run transition fault test patterns at 1 GHz, when the functional frequency is 2 GHz. This could easily happen if the transition fault test patterns go after a slow non-functional path that runs at 1 GHz. Even with static timing information, the knowledge of the actual speed of each path is incomplete! ATPG sensitizes whatever it can to get the coverage up. It is up to the user to weed out non-functional paths. Ultimately, these slow non-functional paths are included when we run the initial set of transition fault test patterns on the silicon.
2.2
The Challenges
To find the failing paths from the observed failing latches from ATE, we need to consider the following practical issues: 1) When increasing speed from Tmax to tmax, it is possible to activate multiple failing paths. Therefore the search cannot assume only a single failing path. 2) As explained in [12], at-speed failures may be caused by glitches, and there may not be a transition at every node along the failing paths. In Figure 1, there is a timing failure from input A to output Z through gates G1, G2 and G4. The failure at G2 output behaves as a glitch, which can propagate through G4 and reach output Z. If we search for failing paths only through gates with transition values from observed failing points such as Z, the search will go from Z, to G4, to G3 and stop at input C. This search is not sufficient to find the real failing paths. Therefore the search cannot limit itself to paths with transition only. A
B C
G2
01
G1 00
00 10
G3
01
Figure 1
G4
10
Z
10
: Timing Failure due to Glitch
3) As mentioned above, for at-speed testing, the first and last clocks of the clocking sequence used are slow clocks. The generated at-speed scan patterns must follow the same clock sequence. In other words, when the failing value of a failing path is captured, there were some slow clock-pulses are used and therefore the ATE observed failing latches may not be the end points of failing paths. In other words, we have to backward trace several cycles to find the real end points of the failing paths. This makes the search space bigger and harder to trace.
INTERNATIONAL TEST CONFERENCE
2
2.3
Semi-Manually Identifying Timing Failing Paths
Before using an automated tool, we devised a method based on inspecting simulated values and a simple procedure called traceback: the procedure to find the sensitized path associated with a transition fault test pattern. The input to this procedure is a transition fault test pattern and a failing latch. In this case we assume that the clocking sequence is “C1-C2-C1-C2” and that the first C1 and last C2 are not at speed. The first C2 launches a transition and the next C1 captures it. So any transition fault detected by this test pattern has propagated to the failing latch. The following capabilities of the ATPG tool are used. The ATPG tool simulates the test pattern and the simulated values can be displayed in a schematic viewer. It also has traceback capability that we use to trace back on one or more pins. The user can choose the gate that he wants to add to the schematic viewer by using the command "add display instance #n" where "#n" is the number of the specific gate of interest. The ATPG tool then displays the gate and shows the simulated values at the input and output of the gate. Here are the guidelines of which inputs to choose: Case 1: If the output of the gate value has no transition, traceback on the input pin that has the controlling value in the second cycle. Always traceback if the gate is a buffer or inverter. Case 2: If both inputs have transition from a controlling value to a non-controlling value, trace back on both input pins. For example if both inputs of an AND gate have transition from 0 to 1, the output switches. In this case trace back on both inputs. Case 3: If the output of the gate switched, and both inputs switched from a non-controlling value to a controlling value, traceback on both pins. Although, the transition fault on these pins is not detected, we want to find a set of latches that switched and resulted in switching of these pins.
throughput of identifying the sensitized paths and making sure all failing paths were identified.
3. At-speed Diagnosis Automation At-speed failure diagnosis has been studied in the past [19][21][22][23][24][25][26]. To improve diagnosis resolution, timing information is used in [23][24][25][26]. Since our problems are caused by incomplete timing information, we would not use timing information during diagnosis. Although it may have more candidates, it is better than missing any failing paths that may require a respin to fix. Here, we use 3 phases to find failing paths.
3.1
Phase 1: Diagnosis for All Failing Patterns
In the first phase, we use regular non-timing transition fault diagnosis. In this phase, we try to identify any single transition faults to explain as many failing patterns as possible. The algorithm has 3 steps as follows: 1) For each failing pattern, identify all single transition faults which can have all failing values at the observed failing latches. It is allowed to have more failing values than observed from ATE since the real defect may not have as long a delay as the transition fault model assumed. For example, in Figure 2, ATE observed a test pattern fail at latch a and latch b. With this failing pattern, fault f can propagate its failure to latches a, b and c, this fault is considered as a candidate. In diagnosis terminology, the identified transition faults explain the failing pattern or explain all failing latches of this pattern. Based on the definition of transition faults, there are two conditions for detection. First, the fault site must have a transition. Second, if there is a failure after the transition, the failure must be able to propagate to an observable point. This definition also covers failures caused by a glitch as mentioned above. In Figure 1, a slow-to-fall transition fault at G1 output pin can propagate its failure to output Z. To accommodate slow clock cycles used in transition patterns, our transition pattern fault simulator needs to ensure fault effects cannot be triggered during slow clock cycles. However, fault effects triggered at fast clock cycles can still propagate through slow clock cycles.
The traceback continues until we reach a latch. Even this method does not work for some complicated cases, e.g. the case described in Figure 1, in practice; this simple method works for most of cases we encountered. Since this method was time consuming, we could only handle a small number of failing test patterns. The automated method was developed to increase the
Paper 11.2
f1
Figure 2
a
Fail
b
Fail
c
Good
: Transition Fault Candidate
2) After getting the candidates from all failing patterns, find minimal sets of transition faults which can
INTERNATIONAL TEST CONFERENCE
3
explain all failing patterns. For example, in Figure 3, there are four candidates (f1 to f4) that can explain one or more failing patterns from P1 to P4. The failing pattern that can be explained by a fault is marked by ⊗ in Figure 3 in the corresponding row and column. The minimal set covering algorithm which identifies all sets of faults of minimal size that explain all fail data, will choose (f4, f3) to explain these 4 failing patterns. Adding this step reduces the total faults for inspection. P1
P2
P3
Figure 4 : Displaying Failing Paths
P4
f1 f2 f3 f4
Figure 3 : Finding Minimal Sets 3) To aid designers in viewing failing paths, for each transition fault identified, it is very useful to graphically display all failing paths for each failing pattern it can explain. These paths are found by tracing from the fault site backward to the launch latches that caused the transition at the fault site, and then forward to the end points. If there are no slow clock cycles, the end points are the scan cells that observed the failures. If there are slow clock cycles, the end points are sequential elements which captured the failures and propagate them to observed scan cells during the slow clock cycles. An example is shown in Figure 4. It is common that several identified transition faults are on the same path segment. Instead of displaying the same failing paths for each candidate separately, it is useful to have an option to graphically display the failing paths of all candidates of each failing pattern together. And highlight all the locations of all transition fault candidates. In Figure 4, all identified transition faults are on the pins of the first 5 gates that are highlighted. They all have the same timing failing paths. The simulation values of this test pattern are included in the diagram as well. Due to the size of this paper, we cannot display simulation values in Figure 4. To enlarge Figure 4, we break it into 3 parts and display the simulation values in Figure 5 to show how the transition propagates from launch latch to latches that capture failures. In Section 4, we will describe several interesting cases in detail.
Paper 11.2
INTERNATIONAL TEST CONFERENCE
4
3.3
Phase 3: Path Delay Diagnosis
Theoretically, it is possible that Phase 2 may not find a single transition fault to explain a single failing latch, as shown in Figure 7. In this example there are 3 inputs A, B, and C with transition (0->1) and a single output Z (1->1). Even if Z has no transition it may still have a faulty value due to a glitch. Based on the definition of a transition fault, we can see that there is no single transition fault that can explain a faulty value at Z. To find the failing paths of this situation, we have to use path oriented diagnosis as described in [22] to find all possible multiple failing paths for each failing latch separately. Since this approach has to process huge numbers of paths, we will not use it unless the above two phases cannot find any failing paths. Practically, we have not seen the need to use this phase yet.
Figure 5
A 01 B 01 C 01
: Enlarged Diagram of Figure 4
01 01
11
Z
10
3.2
Phase 2: Partition Diagnosis
Step 1 of Phase 1 tries to find a single transition fault to explain each failing pattern. This may not work if the failing pattern activates multiple failing paths. In diagnosis terminology, a failing pattern that cannot find any candidate to match the ATE observed failing behavior is called an unexplained failing pattern. Typically, these failing patterns activate multiple faulty behaviors. As shown in Figure 6, there are failures observed at two latches whose input cones are disjoint. It is impossible to have a single defect propagate failures to these two observing latches. There must be more than one defect. In order to find them, instead of diagnosing one failing pattern at a time as in Phase 1, we diagnosis one failing latch at a time in Phase 2. In other words, we will find one defect at each cone separately. Since typically there are only a few unexplained patterns, we do not use minimal sets in Phase 2. Similarly, we use graphic display capability to display every critical path as described at Step 3 of Phase 1.
f1
f2
Figure 6 : Multiple Fault Partition
Paper 11.2
Figure 7 : Unexplained Failing Latch
4. Application Results Transition patterns are created to cover many paths. We encountered quite a few interesting timing failing paths. Most of them are unexpected. In Freescale's e600 PowerPC Core, a total of 83 slow speed timing exception paths were identified. Elimination of these paths resulted in a 300 MHz increase in the speed of the transition fault test patterns. The following are 3 interesting cases.
4.1
Debug Path
In one early version of e600 core, we had several transition patterns that failed. Before we had an automated tool, the semi-manual method described in Section 2.3 was used to identify a timing failing path as shown in Figure 8. The enlarged diagram with simulation values of the failing pattern is shown in Figure 9. With simulation values, it is quite straightforward for this case to trace back from the failing latches to follow the transition source all the way to the launch latch. This path is not a normal functional path. However, it is used specifically for silicon debug. Therefore it has to run at speed and it should have been timed correctly during timing analysis. Because of human error, the path was not timed at all. Transition fault test patterns caught the path. We also ran the debug test on the silicon and sure enough, the path failed to run at speed. So the path was fixed in the next revision and timing analysis program was also correctly run.
INTERNATIONAL TEST CONFERENCE
5
Figure 8 : Failing Debug Path
Figure 9 : Enlarged Diagram of Figure 8
4.2
Multicycle Path
In this case, there were 120 transition patterns with 13 patterns failing at scan cells of a certain block. Using diagnosis at Phase 1, each failing patterns could be explained by a single transition fault. There were a total of 9 different transition faults identified. When we displayed the failing path, we found all 9 transition faults were on the same path as shown in Figure 10. Actually, this is the same figure as Figure 4. Except, Figure 10 is created for only one transition fault and has only one gate highlighted, while Figure 4 is created for all transition faults and has 5 gates highlighted. The enlarged diagnosis of Figure 10 is shown in Figure 11. This path goes through two highspeed MUXes (implemented with high-speed pass transistors as shown in the last segment of Figure 11). These MUXes are inside the Array BIST (memory BIST) controller to select the address between BIST address and functional address. Furthermore, the launch was from the BIST mode control latch through mux select lines to the address register before memory cells (not included in both figures). Both BIST address and functional address have no transition. This indicates that address logic has no timing problem. The timing problem is that the BIST mode control signal cannot change address at-speed. This
Paper 11.2
INTERNATIONAL TEST CONFERENCE
6
problem was detected by 13 transition patterns. All 13 transition patterns are the same except they have different values at BIST address or functional address. Our Array BIST can run at-speed, but our Array BIST operation does not require changing BIST mode at-speed. Before the BIST operation and after the BIST operation, we allow several cycles to allow BIST mode to change. Therefore, this path is a multicycle path. We changed timing exception path information for ATPG, similar to [12], to fix transition patterns for this case.
Figure 10 : Multicycle path in ABIST controller
Figure 11 : Enlarged Diagram of Figure 10
4.3
Multi-level Latches Across Clock Domain
In this case, all failing transition patterns could not be explained by using the diagnosis approach at Phase 1. With Phase 2 approach, we were able to identify several transition faults for one failing latch at a time. When we displayed the failing path with some transition faults, our designer did not believe the path failed. When we display the composed failing paths, we found the failing path involved 3 latches as shown in Figure 12. It revealed that this path is launched from LA1, through LA2 and reach LA3 in one cycle. LA1 is clocked by C1 and LA2 and LA3 are clocked by C2. For transition faults located between LA2 and LA3, the failing path displayed is from LA2 to LA3 only since the trace stops at a latch. For this case, between LA2 and LA3, there is not much logic and we had other transition patterns exercising that path and they did not fail. Therefore, our designers do not believe this path could fail. However with transition faults located between LA1 and LA2, the failing path is from LA1 to LA3 since the trace is from the fault site backward to a latch, as described at step 3 of Section 3.1. It clearly points out the problem. Our designers identified the path between LA1 and LA2 as a timing exception path. We enhanced the timing exception path information used in ATPG, similar as [12], to fix transition patterns for this case.
Paper 11.2
INTERNATIONAL TEST CONFERENCE
7
architecture,” Proc. IEEE VLSI Test Symposium, 2002, pp. 3-8
d C1 C2 1 C1
LA1 D
Q
0
0
LA2 D EN
EN
LA3 Q
D
Q
?
EN
C2
Figure 12 : Failing Through Multi-level Latches
5. Conclusions This paper describes how to use diagnosis techniques to automatically identify the failing paths of at-speed test pattern failures. Using this approach, we found that most failing paths were timing exception paths inside DFT logic, which could be fixed by updating the timing exception information used during ATPG to mask out transition values through these paths. Elimination of these paths resulted in a 300 MHz increase in the speed of the transition fault test patterns used for Freescale's e600 PowerPC Core. However, occasionally we did find some failing paths were real functional problems and design changes were needed.
References: [1] P. Nigh, D. Vallett, A. Patel, J. Wright, F. Motika, D. Forlenza, R. Kurthlik, W. Chong, “Failure Analysis of Timing and IDDq-only Failures from SEMATECH Test Methods Experiment,” Proc. International Test Conference, 1998, pp.43-52. [2] N. N. Tendolkar, “Analysis of Timing Failures due to Random AC defects in VLSI Modules,” 22nd Design Automation Conference Proceedings, June, 1985, pp. 709714.” [3] J. A. Waicukauski, “Transition Fault Simulation by Parallel Pattern Single Fault Propagation,” Proc. International Test Conference, 1986, pp. 542-549. [4] G. L. Smith, “Model for Delay Based on Paths,” Proc. International Test Conference, 1985, pp. 342-349.
[8] B. Cory, R. Kapur, B. Underwood, “Speed Binning with Path Delay Test in 150-nm Technology,” IEEE Design & Test of Computers, Sept.-Oct. 2003, pp. 41-45. [9] M. Beck, O Barondeau, M. Kaibel, F. Poehl, X. Lin, R. Press, “Logic Design for On-Chip Test Clock Generation – Implementation Details and Impact on Delay Test Quality,” Proc. Design Automation & Test Conference Europe, 2005. [10] H. Higuchi, Y. Matsunaga, “Enhancing the Performance of Multi-Cycle Path Analysis in an Industrial Setting,” Proc. Asia and South Pacific-DAC, 2004. [11] J. Saxena, K. Butler, J. Gatt, R. Raghuraman, S. Kumar, S. Basu, D. Campbell, J. Berech, “Scan-Based Transition Fault Testing – Implementation and Low Cost Test Challenges,” Proc. International Test Conference, 2002. [12] V. Vorisek, B. Swanson, D. Goswami, “Improved Handling of False and Multicycle Paths in ATPG,” to appear IEEE VLSI Test Symposium, 2006. [13] J. Rajski, J. Tyszer, M. Kassab, N. Mukherjee, R. Thompson, H. Tsai, A. Hertwig, N. Tamarapalli, G. Eide, J. Qian, “Embedded Deterministic Test for Low Cost Manufacturing Test,” Proc. International Test Conference, 2002, pp.301-320. [14] C. Barnhart, V. Brunkhorst, F. Distler, O. Farnsworth, A. Ferko, B. Keller, D. Scott, B. Koenenmann, T. Onodera, “Extending OPMISR Beyond 10X Scan Test Efficiency,” IEEE Design and Test of Computers, Vol. 19, Issue 5, pp. 65-73, Sep-Oct. 2002. [15] S. Mitra, K. S. Kim, “X-Compact: An Efficient Response Compaction Technique for Test Cost Reduction,” Proc. International Test Conference, 2002, pp.311-320. [16] P. Wohl, J. Waicukauski, S. Patel, and M. B. Amin, “Xtolerant Compression and Application of Scan-ATPG Patterns in a BIST Architecture,” Proc. International Test Conference, 2003, pp. 727-736. [17] R. B. Hitchcock, “Timing verification and timing analysis program”, Proc. of 19th ACMAEEE DAC, pp. 594-604, 1982. [18] J. Vygen, “Slack in Static Timing Analysis,” IEEE Transactions on Computer-Aided Design of Integrated Circuits and Systems: Accepted for future publication.
[5] X. Lin, R. Press, J. Rajski, P. Reuter, T. Rinderknecht, B. Swanson, N. Tamarapalli, “High-frequency, At-speed Scan Testing,” IEEE Design & Test of Computers, Sept.-Oct. 2003, pp. 17-25.
[19] N. Tendolkar, D. Belete, A. Razdan, H. Reyes, B. Schwarz, and M. Sullivan, “Test Methodology for Freescale’s High Performance e600 Core Based on PowerPC® Instruction Set Architecture,” Proc. International Test Conference 2005, paper 6.2.
[6] M. Beck, O. Barondeau, F. Poehl, X. Lin, R. Press, “Measures to Improve Delay Fault Testing on Low-Cost Testers – A Case Study,” Proc. IEEE VLSI Test Symposium, 2005.
[20] J. G. Dastidar, N. A. Touba, “A Systematic Approach for Diagnosis Multiple Delay Faults,” Proc. IEEE International Symposium on Defect and Fault Tolerance in VLSI Systems, 1998, pp. 211-216.
[7] N. Tendolkar, R. Raina, R. Woltenberg, X. Lin, B. Swanson, G. Aldrich, “Novel techniques for achieving high at-speed transition fault test coverage for Motorola’s microprocessors based on PowerPC instruction set
[21] P. Girard, C. Landrault, S. Pravossoudovitch, “An Alternative to Fault Simulation for Delay-Fault Diagnosis,” Proc. European Conference on Design Automation, 1992, pp. 274-279.
Paper 11.2
INTERNATIONAL TEST CONFERENCE
8
[22] Y. –C. Hsu, S. K. Gupta, “A New Path-Oriented EffectCause Methodology to Diagnose Delay Failures,” Proc. International Test Conference, 1998, pp.758-767. [23] A. Krstic, L. –C Wang, K. –T, Cheng, J. –J. Liou, T. M. Mak, “Enhancing Diagnosis Resolution for Delay Defects Based Upon Statistical Timing and Statistical Fault Models,” Proc. Design Automation Conference, 2003, pp. 668-673. [24] A. Krstic, L. –C Wang, K. –T. Cheng, J. –J. Liou, M. S. Abadir, “Delay Defect Diagnosis Based Upon Statistical Timing Models – The First Step,” Proc. Design Automation and Test in Europe, 2003. [25] Z. Wang, M. Marek-Sadowska, K.-H. Tsai, J. Rajski, “Delay Fault Diagnosis Using Timing Information,” Proc. International Symposium on Quality Electronic Design, 2004. [26] V. Mehta, Z. Wang, M. Marek-Sadowska, K.-H. Tsai, J. Rajski, “Delay Fault Diagnosis for Non-Robust Test”, to appear in Proc. International Symposium on Quality Electronic Design, 2006. The "PowerPC" name is a trademark of IBM Corp. and used under license.
Paper 11.2
INTERNATIONAL TEST CONFERENCE
9