LabVIEW Signal Processing. Course Manual. LabVIEW Signal Processing
Course Manual. Course Software Version 1.0. September 1997 Edition. Part
Number ...
Mr. Com Putist: Do you know what g.c.d. stands for? Ms. Engi Neer shakes ... Now that I understand the algorithm I can start my programming. Here is my front.
programming language G with the LabVIEW environment. ... dialog between a computer science student and an engineering student. Act One ... One of our professors has preached to us that before writing our programs we have to write our .... online tuto
dialog between a computer science student and an engineering student. Act One ... Mr. Com Putist pulls over the laptop,
NI LabVIEW Intermediate I: Successful Development Practices Course. Overview.
While the Basics courses introduce you to the LabVIEW environment and ...
30 Sep 2013 ... Array Functions.vi. Z:\ME204\ Lab Circuits and Components\LabView Exercises\
LabView Assignment. 3\Array Functions.vi. Last modified on ...
May 22, 2017 - platform: a fully automated multisequential flow injection analysis. Lab-on-Valve (MSFIA-LOV) system for radiochemical analysis.
Research Article Labview Based ECG Patient ... - CORE › publication › fulltext › Labview-... › publication › fulltext › Labview-...by OP Singh · 2015 · Cited by 6 · Related articlesinstrumentation amplifier (AD620) followed by signal conditioning
PROFIBUS DP (decentralized peripheral) industrial networks as powerful
masters ... avoid programming the low-level details of the PROFIBUS network.
With the ...
Support. Worldwide Technical Support and Product Information ni.com. National
Instruments Corporate Headquarters. 11500 North Mopac Expressway Austin, ...
Department of Electrical Engineering, Information Technology and Cybernetics
..... The programming language used in LabVIEW, also referred to as G, is a ....
http://zone.ni.com/wv/app/doc/p/id/wv-‐169 ... Windows Mobile and Windows CE.
8 - Debugging. 9 - Project Explorer. 10 - State Machine ..... Use the Project Explorer window to manage projects in LabVIEW. In the Project Explorer window, you ...
Materiały zostały podzielone na kategorie: • Akwizycja danych. • Przetwarzanie
danych. • Techniki programowania. • Modelowanie i symulacja. • Internet. • SQL ...
Physics 3100 Electronics, Fall 2008, Digital Circuits. 1. LabView Exercises: Part
III. The working VIs should be handed in to the TA at the end of the lab. This is a ...
Labview Exercises for Labview 7.0. Installation of Labview: 1. Install the Labview
7.0 software and drivers onto your computer. These files can be found by.
California State University, Fullerton. 4702 11/ ... understanding of coding and documentation best practices ... have s
California State University, Fullerton. 4702 11/ ... understanding of coding and documentation best practices ... have s
Take advantage of the following resources to help you during each phase of
using. LabVIEW – from installation through advanced development. Use the ...
LabView Exercises: Part II. The working VIs should be handed in to the TA at the
end of the lab. Using LabView for Calculations and Sim- ulations. LabView ...
•Become comfortable with the LabVIEW environment ... •Ability to use LabVIEW
to solve problems .... Exercise 2 – Acquiring a Signal with the Sound Card.
2003–2009 National Instruments Corporation. All rights ... National Instruments,
NI, ni.com, and LabVIEW are trademarks of National Instruments Corporation.
This document explains the basic concepts of using LabVIEW MathScript. For
more information ... Processing, Digital Signal Processing, etc. What is MathScript
?
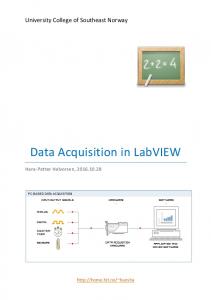
Setting: âPlace front panel terminals as iconsâ (Category: Block Diagram â General). (My Favorite) ... Hans-Petter Halvorsen â Blog: http://home.hit.no/~hansha/.
LabVIEW Project Explorer Example. Description: Projects in LabVIEW consist of
VIs, files necessary for those VIs to run properly, and supplemental files such as ...
2. Exercise 10 – Starting a Project and adding Files. In this exercise you start a
Labview Project containing VIs and Controls which are used to run a Traffic Light
...
Post-Grad LabVIEW Course Exercise 10 G Boorman
Exercise 10 – Starting a Project and adding Files In this exercise you start a Labview Project containing VIs and Controls which are used to run a Traffic Light simulator. This Project will get more complex, and more realistic, as you progress with subsequent exercises.
1. Create a folder in your home directory called Traffic Light Simulator. Add two sub-folder: one named Controls; one named VIs. 2. In Labview, create an Empty Project from the start screen (or do File>>New Project from an existing VI). Highlight Project: Untitled Project 1 and save, using the name Traffic Light Simulator, in the Traffic Light Simulator folder. 3. Drag the folders VIs and Controls from an Explorer window into My Computer in the Project Explorer window. The project should look like the following:
4. Right-click the Controls folder and select New>>Control. Place a Cluster on the control panel and name it Traffic Light Display. Place a Boolean Round LED within the cluster and name it RED. In the Round LED’s Properties>> Appearance panel, make the On colour a Red hue, and the Off colour grey. Close the Properites panel. Expand the size of the LED slightly.
2
5. Make two copies of the ‘RED’ LED within the cluster. Rename the first copy AMBER and the second one GREEN. Change the On colour of each to reflect their names. Right-click each LED in turn and hide its label. Adjust the cluster box and move the LEDs to make it tidy; It should look like the following:
6. Make the control a Strict Type Def by selecting from the menu:
7. Optional: Change the Icon to look like a Traffic Light. 8. Save the Control in the Controls directory as Traffic Light Display.ctl. It will now be displayed in the Project window under the Controls folder. 9. Make another Control in the CTL directory – this time place an Enum on the control panel. Name it Traffic Light States. 10. Right-click and do Edit Items… Type Red as the first item, RedAmber as the second, then Green and finally Amber. Do OK when finished. Use the increment/decrement buttons to check the Enum has the correct states. 11. Optional. Change the Icon to something meaningful. 12. Make this Control a Type Def and save it in the Controls directory with the name Traffic Light States.ctl. 13. Save the Project and then close it. The Project can be re-opened by double-clicking on the Project in Windows Explorer.