Setting up a Linksys EtherFast Cable / DSL router to use - Telestream
Recommend Documents
Apr 9, 2008 ... http://linksys.custhelp.com/cgi-bin/linksys.cfg/php/enduser/std_adp.php? ...
Connect the Broadband modem to the computer using an Ethernet ...
Thank you for choosing the Linksys by Cisco EtherFast ... Reset There are two
ways to reset the Router to ... Administration > Factory Defaults screen of the.
Wireless. Share your broadband Internet connection without running cables. The
Belkin 54g Wireless Cable/DSL Gateway Router lets users share files and a ...
respective proprietors. LIMITED WARRANTY. Linksys guarantees that every
Instant Broadband EtherFast®. Cable Modem with USB and Etherfast
Connection is ...
Linksys is a registered trademark or trademark of Cisco ... This User Guide has
been designed to make understanding networking with the Router easier than ...
D-Link DSL 2640B. Link DSL 2640B ... the DSL socket on the back of the router,
plug the other end into the ... Type your username and password in again.
The first step in the process of installing your Linksys router is to change your
Westell 2200 modem from PPPoE to bridge mode. 1. Open your Web browser
and ...
Item code: 046918. Setting Up Your. Setting Up Your. Thomson TG585v7 Router.
Thomson TG585v7 Router. Read this first. Read this first ...
used in accordance with the instructions, may cause harmful interference to radio
...... Configuring Windows NT4, 2000 or XP for IP Networking . ..... Free technical
support seven days a week, twenty-four hours a day ... Keep the carton, including
Step 4: Configuring your Belkin Wireless Cable/DSL Router. (the Router) for ...
computers to share printers, data and MP3 files, digital photos, and much more.
This Linksys guide provides instructions on how to configure the Linksys
SPA2102 as a ... Linksys is a registered trademark or trademark of Cisco Systems
,.
Setup also saves your setup information as a file to your computer desktop. Network ..... To select a computer to apply
The Linksys Setup Wizard CD-ROM software that came with your Linksys. Router
... your Linksys Router, and the Wizard will provide step-by-step instructions on.
Chapter 3: Advanced Configuration. 4 .... Technical Documents on www .linksys .
com/international . ... While reading through the User Guide you may see.
Setup in few easy steps with Linksys Connect. Create a ... Power adapter. TECHNICAL ... Advanced security features such as WPA2 wireless encryption and.
Transferring and downloading large files. • Streaming multimedia and gaming.
The Cisco Advantage. · Cutting edge technology from the networking leader.
for seamless streaming of your video and media files to an Xbox 360, PS3, or ... Linksys EA-Series. Back view. Ethernet ports. Wi-Fi Protected Setup button. Internet port .... Internet Explorer 8 or higher, Firefox 8 or higher, Google Chrome 10.
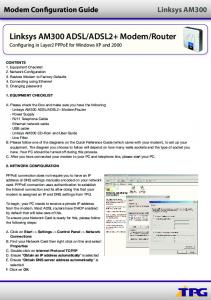
1. Modem Configuration Guide. Linksys AM300 ADSL/ADSL2+ Modem/Router.
Configuring in Layer2 PPPoE for Windows XP and 2000. CONTENTS. 1.
Your guide to the Cable Modem has been designed to make understanding ...
The Linksys Cable Modem is the easiest and most affordable way to get a
blazing ...
Is the carrier detect (CD) light on the front panel of the Cisco DSL Router on or off
?....................6 ..... Cisco DSL Router Configuration and Troubleshooting Guide.
Installing the Linksys Wireless Router with a Westell 6100 Modem. 1. Installing
the Linksys Wireless Router with a Westell 6100 Modem. 1. Open your Web ...
Instant Wireless, Linksys, and the Linksys logo are registered trademarks of. Linksys Group, Inc. ... ucts, software, or
Linksys could void the user's authority to operate the device. FCC Caution: ..... Internet port, transmits data at 10/10
Infineon Technologies MDCA GmbH, Siemensstr. 2, 9500 Villach. 1. Introduction. Broadband access technologies over copper twisted pairs, summarized in the ...
Setting up a Linksys EtherFast Cable / DSL router to use - Telestream
Note: These instructions assume that your Linksys EtherFast Cable / DSL Router
is set to its factory defaults. 1. Connect your DSL Modem's LAN/Ethernet port to ...
Application Note Setting up a Linksys EtherFast Cable / DSL Router to use with ClipMail Pro and ClipMail Express Introduction This Application Note guides the ClipMail user through the Linksys EtherFast Cable / DSL Router configuration process by using a simple dial up connection example. Please refer to the attached network diagram. It is highly recommended that you read the Linksys EtherFast Cable / DSL Router technical literature supplied with the router to become familiar with the features and functions not covered here.
Basic Configuration Procedure (ClipMail send only) Note: These instructions assume that your Linksys EtherFast Cable / DSL Router is set to its factory defaults. 1. Connect your DSL Modem’s LAN/Ethernet port to the port labeled “WAN” on the Linksys router with a standard category-5 ethernet cable. 2. Connect your Clipmail and PC/Mac to any of the hub ports (labeled “1” through “4”) on the Linksys router with standard category-5 ethernet cable. 3. Apply power to the router. 4. Configure your PC or Mac to use DHCP for IP address resolution: For Windows: Click Start/Settings/Control Panel Double-click the Network icon In the Network/Configuration window, double-click TCP/IP -> (Your Ethernet Adapter) In the TCP/IP Properties Window (IP Address tab), click the “Obtain an IP address automatically” radio button Click “OK” to close the TCP/IP Properties window Click “OK” and restart the PC For Mac OS: Click on the Apple menu and select Control Panels, TCP/IP In the “Configure:” drop down list box, select “Using DHCP Server” Close the TCP/IP selection box and restart the Mac 5. Configure your Clipmail to use DHCP for IP address resolution: Click “Setup” Click the Network tab Select “Get IP address from DHCP server” Click “Shut Down” and then “Restart” 6. On your PC or Mac open up a web browser such as Netscape or Internet Explorer and open the following location: http://192.168.1.1
2
Linksys EtherFast Cable/DSL Setup 7. A username/password prompt will appear. Leave the User Name field blank, and type admin (default password) in the Password field. Click “OK.” 8. The Linksys web configuration interface will appear. Use the information provided by your ISP to complete the following fields: Router Name Domain Name LAN IP Address WAN IP Address PPPoE (Only enabled if your ISP requires you to make a “digital call” to bring the Cable / DSL link up.) 9. Click “Apply” then “Continue.” 10. You should now be able to send clips using your ClipMail. If you cannot send a clip try the following: ◆ Turn off both your cable / DSL modem and your Linksys EtherFast Router. ◆ Turn on your cable / DSL modem and wait for the link to come up. ◆ Turn on your Linksys EtherFast Router and wait about 20 seconds for it to boot up. ◆ Try to send your clip again.
Advanced setup (Clipmail can send and receive) 1. Assign a static IP address to your ClipMail: Click Setup Click the Network tab Select “Enter IP Address” Assuming you have not altered the default settings of the Linksys Router’s LAN IP address and DHCP serving addresses, enter the following: IP Address: 192.168.1.2
Note: If this address is already being used by another device on your network you will need to assign a different address to your ClipMail. Keep in mind that the default DHCP scope for the Linksys is 192.168.1.100-150. Do not use an address inside this range. This range can be changed through the Linksys web configuration interface. Enter Subnet Mask: 255.255.255.0 Enter Default Gateway: 192.168.1.1 2. Click Shutdown, then Restart 3. Setup the router to forward Port 21 to your ClipMail. Using a standard web browser such a Netscape or Internet Explorer open address: http://192.168.1.1 The Linksys web configuration interface will appear. Click the Advanced tab.
Linksys EtherFast Cable/DSL Setup Click the Forwarding tab. In any Service Port field enter ‘21’ for Service Port, and in the adjoining field enter ‘2’ for the IP address.
Note: This will be the IP address you entered in Step 1 above so if you assigned your ClipMail a different IP address make sure that is reflected in this step. 4. Click Apply then Continue. 5. Verify that your ClipMail is configured to send clips via Port 21: Under “Setup” click the “Network” tab. Click the button marked “FTP Setup.” The port listed should be 21. 6. You should now be able to receive clips sent to the WAN address of your Linksys Router. This address is listed on the setup page of the Linksys web configuration interface.


![User Guide - Linksys Router EA6300 [PDF]](https://m.moam.info/img/260x300/user-guide-linksys-router-ea6300-pdf_6492f0a6098a9e51548b45c7.jpg)