19 Sep 2006 ... This library reference manual documents Python's standard library, ... Python
Tutorial; the Python Reference Manual remains the highest ...
Python 2.7 Quick Reference Sheet ver 2.01 ... Common Syntax Structures ... min(
s). Minimum value of items in s open(f). Open filename f for input ord(c).
Python is an intergrated, object-orientated development language for use in ... The book also contains sections for Web
Table 1. Python 3.X expression operators and precedence. Operator. Description yield X. Generator function result (retur
floating-point designation in typecode, formally described in. âFormatting method syntaxâ, inserts thousands-separat
Oct 4, 2010 ... of different web servers. wsgiref is a reference implementation of the WSGI
specification that can be used to add WSGI support to a web server ...
... News analysis and research for business technology professionals plus peer to ... Enter your email address to subscr
Mar 12, 2002 ... The Python Imaging Library adds image processing capabilities to ... It should
provide a solid foundation for a general image processing tool.
Feb 20, 2013 ... Describes an image-processing library for the Python programming language.
This publication is available in ... and also as a PDF document. 2.
... Python for Data Science Interactively 182 If you prefer an online interactive environment to learn Python for Data S
... also available for mobile reader span class news dt Feb 08 2016 span nbsp 0183 32 .... reflect the significant new p
May 30, 2013 ... Python 2.7 quick reference. John W. ... A reference guide to most of the common
features of the Python ..... 20.10. dict(): Convert to a dictionary .
... In Your Pocket Pocket Reference O Reilly Mark Lutz FOR IPAD GET LINK NOW ... extensionsCommand-line options and deve
PDF Download Python Pocket Reference: Python In Your Pocket (Pocket ..... Jung the full time eclipse marketing and event
patientstatus = "Admitted". iNTERFACEWARE Python Quick Reference Guide. 1
.... In a dictionary definition, a key and its value are separated by a colon:.
Publisher : O Reilly Media 2014-02-09 q ... InformationWeek com News analysis and research for business technology ... a
CPython is the reference implementation of the Python programming language Written in C CPython is the default and most
Language : English ... Ada Assembly Basic C C C CGI JavaScript Perl Delphi Pascal Haskell Java Lisp PHP You have not yet
7 May 2011 ... Library of Congress Cataloging-in-Publication Data. Hellmann, Doug. The
Python standard library by example / Doug Hellmann. p. cm.
8 The Oxford Essential Dictionary of Foreign Terms in English. 9780199891573
... 23 The Concise Oxford Dictionary of English Etymology. 9780191727153.
MICROFICHE. REFERENCE. LIBRARY ... Reproduction of this microfiche
document in any ...... people confuse a scythe with a broom or a golf club. They
face.
Hot Topic: Resisting 'Scope Creep' Ensured Merchandising Upgrade's Success ... Read the Oracle Commerce Anywhere Blog â
Cochrane Database of Systematic Reviews (Cochrane Reviews). This is the ... The Cochrane Library consists of seven datab
18 Jun 2012 ... Python's standard library is very extensive, offering a wide range of facilities .....
For example, metaclass attributes are not in the result list when.
12 Data Compression and Archiving 12.1 zlib — Compression compatible with gzip 12.2 gzip — Support for gzip files . . . . . . . 12.3 bz2 — Compression compatible with bzip2 12.4 zipfile — Work with ZIP archives . . . . 12.5 tarfile — Read and write tar archive files
B About these documents 1277 B.1 Contributors to the Python Documentation . . . . . . . . . . . . . . . . . . . . . . . . . . . . . . . 1277 C History and License 1279 C.1 History of the software . . . . . . . . . . . . . . . . . . . . . . . . . . . . . . . . . . . . . . . . . . 1279 C.2 Terms and conditions for accessing or otherwise using Python . . . . . . . . . . . . . . . . . . . . . 1280 C.3 Licenses and Acknowledgements for Incorporated Software . . . . . . . . . . . . . . . . . . . . . . 1283
vi
D Copyright
1295
Python Module Index
1297
Index
1301
vii
viii
The Python Library Reference, Release 3.2.3
Release 3.2 Date June 18, 2012 While reference-index describes the exact syntax and semantics of the Python language, this library reference manual describes the standard library that is distributed with Python. It also describes some of the optional components that are commonly included in Python distributions. Python’s standard library is very extensive, offering a wide range of facilities as indicated by the long table of contents listed below. The library contains built-in modules (written in C) that provide access to system functionality such as file I/O that would otherwise be inaccessible to Python programmers, as well as modules written in Python that provide standardized solutions for many problems that occur in everyday programming. Some of these modules are explicitly designed to encourage and enhance the portability of Python programs by abstracting away platform-specifics into platform-neutral APIs. The Python installers for the Windows platform usually includes the entire standard library and often also include many additional components. For Unix-like operating systems Python is normally provided as a collection of packages, so it may be necessary to use the packaging tools provided with the operating system to obtain some or all of the optional components. In addition to the standard library, there is a growing collection of several thousand components (from individual programs and modules to packages and entire application development frameworks), available from the Python Package Index.
CONTENTS
1
The Python Library Reference, Release 3.2.3
2
CONTENTS
CHAPTER
ONE
INTRODUCTION The “Python library” contains several different kinds of components. It contains data types that would normally be considered part of the “core” of a language, such as numbers and lists. For these types, the Python language core defines the form of literals and places some constraints on their semantics, but does not fully define the semantics. (On the other hand, the language core does define syntactic properties like the spelling and priorities of operators.) The library also contains built-in functions and exceptions — objects that can be used by all Python code without the need of an import statement. Some of these are defined by the core language, but many are not essential for the core semantics and are only described here. The bulk of the library, however, consists of a collection of modules. There are many ways to dissect this collection. Some modules are written in C and built in to the Python interpreter; others are written in Python and imported in source form. Some modules provide interfaces that are highly specific to Python, like printing a stack trace; some provide interfaces that are specific to particular operating systems, such as access to specific hardware; others provide interfaces that are specific to a particular application domain, like the World Wide Web. Some modules are available in all versions and ports of Python; others are only available when the underlying system supports or requires them; yet others are available only when a particular configuration option was chosen at the time when Python was compiled and installed. This manual is organized “from the inside out:” it first describes the built-in data types, then the built-in functions and exceptions, and finally the modules, grouped in chapters of related modules. The ordering of the chapters as well as the ordering of the modules within each chapter is roughly from most relevant to least important. This means that if you start reading this manual from the start, and skip to the next chapter when you get bored, you will get a reasonable overview of the available modules and application areas that are supported by the Python library. Of course, you don’t have to read it like a novel — you can also browse the table of contents (in front of the manual), or look for a specific function, module or term in the index (in the back). And finally, if you enjoy learning about random subjects, you choose a random page number (see module random) and read a section or two. Regardless of the order in which you read the sections of this manual, it helps to start with chapter Built-in Functions, as the remainder of the manual assumes familiarity with this material. Let the show begin!
3
The Python Library Reference, Release 3.2.3
4
Chapter 1. Introduction
CHAPTER
TWO
BUILT-IN FUNCTIONS The Python interpreter has a number of functions and types built into it that are always available. They are listed here in alphabetical order. abs() all() any() ascii() bin() bool() bytearray() bytes() callable() chr() classmethod() compile() complex() delattr()
abs(x) Return the absolute value of a number. The argument may be an integer or a floating point number. If the argument is a complex number, its magnitude is returned. all(iterable) Return True if all elements of the iterable are true (or if the iterable is empty). Equivalent to: def all(iterable): for element in iterable: if not element: return False return True any(iterable) Return True if any element of the iterable is true. If the iterable is empty, return False. Equivalent to: def any(iterable): for element in iterable: if element: return True return False
5
The Python Library Reference, Release 3.2.3
ascii(object) As repr(), return a string containing a printable representation of an object, but escape the non-ASCII characters in the string returned by repr() using \x, \u or \U escapes. This generates a string similar to that returned by repr() in Python 2. bin(x) Convert an integer number to a binary string. The result is a valid Python expression. If x is not a Python int object, it has to define an __index__() method that returns an integer. bool([x ]) Convert a value to a Boolean, using the standard truth testing procedure. If x is false or omitted, this returns False; otherwise it returns True. bool is also a class, which is a subclass of int (see Numeric Types — int, float, complex). Class bool cannot be subclassed further. Its only instances are False and True (see Boolean Values). bytearray([source[, encoding[, errors ]]]) Return a new array of bytes. The bytearray type is a mutable sequence of integers in the range 0 import struct >>> dir() # show the names in the module namespace [’__builtins__’, ’__doc__’, ’__name__’, ’struct’] >>> dir(struct) # show the names in the struct module [’Struct’, ’__builtins__’, ’__doc__’, ’__file__’, ’__name__’, ’__package__’, ’_clearcache’, ’calcsize’, ’error’, ’pack’, ’pack_into’, ’unpack’, ’unpack_from’] >>> class Shape(object): def __dir__(self): return [’area’, ’perimeter’, ’location’] >>> s = Shape() >>> dir(s) [’area’, ’perimeter’, ’location’] 8
Chapter 2. Built-in Functions
The Python Library Reference, Release 3.2.3
Note: Because dir() is supplied primarily as a convenience for use at an interactive prompt, it tries to supply an interesting set of names more than it tries to supply a rigorously or consistently defined set of names, and its detailed behavior may change across releases. For example, metaclass attributes are not in the result list when the argument is a class. divmod(a, b) Take two (non complex) numbers as arguments and return a pair of numbers consisting of their quotient and remainder when using integer division. With mixed operand types, the rules for binary arithmetic operators apply. For integers, the result is the same as (a // b, a % b). For floating point numbers the result is (q, a % b), where q is usually math.floor(a / b) but may be 1 less than that. In any case q * b + a % b is very close to a, if a % b is non-zero it has the same sign as b, and 0 >> seasons = [’Spring’, ’Summer’, ’Fall’, ’Winter’] >>> list(enumerate(seasons)) [(0, ’Spring’), (1, ’Summer’), (2, ’Fall’), (3, ’Winter’)] >>> list(enumerate(seasons, start=1)) [(1, ’Spring’), (2, ’Summer’), (3, ’Fall’), (4, ’Winter’)] Equivalent to: def enumerate(sequence, start=0): n = start for elem in sequence: yield n, elem n += 1 eval(expression, globals=None, locals=None) The arguments are a string and optional globals and locals. If provided, globals must be a dictionary. If provided, locals can be any mapping object. The expression argument is parsed and evaluated as a Python expression (technically speaking, a condition list) using the globals and locals dictionaries as global and local namespace. If the globals dictionary is present and lacks ‘__builtins__’, the current globals are copied into globals before expression is parsed. This means that expression normally has full access to the standard builtins module and restricted environments are propagated. If the locals dictionary is omitted it defaults to the globals dictionary. If both dictionaries are omitted, the expression is executed in the environment where eval() is called. The return value is the result of the evaluated expression. Syntax errors are reported as exceptions. Example: >>> x = 1 >>> eval(’x+1’) 2 This function can also be used to execute arbitrary code objects (such as those created by compile()). In this case pass a code object instead of a string. If the code object has been compiled with ’exec’ as the mode argument, eval()‘s return value will be None. Hints: dynamic execution of statements is supported by the exec() function. The globals() and locals() functions returns the current global and local dictionary, respectively, which may be useful to pass around for use by eval() or exec(). 9
The Python Library Reference, Release 3.2.3
See ast.literal_eval() for a function that can safely evaluate strings with expressions containing only literals. exec(object[, globals[, locals ]]) This function supports dynamic execution of Python code. object must be either a string or a code object. If it is a string, the string is parsed as a suite of Python statements which is then executed (unless a syntax error occurs). 1 If it is a code object, it is simply executed. In all cases, the code that’s executed is expected to be valid as file input (see the section “File input” in the Reference Manual). Be aware that the return and yield statements may not be used outside of function definitions even within the context of code passed to the exec() function. The return value is None. In all cases, if the optional parts are omitted, the code is executed in the current scope. If only globals is provided, it must be a dictionary, which will be used for both the global and the local variables. If globals and locals are given, they are used for the global and local variables, respectively. If provided, locals can be any mapping object. If the globals dictionary does not contain a value for the key __builtins__, a reference to the dictionary of the built-in module builtins is inserted under that key. That way you can control what builtins are available to the executed code by inserting your own __builtins__ dictionary into globals before passing it to exec(). Note: The built-in functions globals() and locals() return the current global and local dictionary, respectively, which may be useful to pass around for use as the second and third argument to exec().
Note: The default locals act as described for function locals() below: modifications to the default locals dictionary should not be attempted. Pass an explicit locals dictionary if you need to see effects of the code on locals after function exec() returns. filter(function, iterable) Construct an iterator from those elements of iterable for which function returns true. iterable may be either a sequence, a container which supports iteration, or an iterator. If function is None, the identity function is assumed, that is, all elements of iterable that are false are removed. Note that filter(function, iterable) is equivalent to the generator expression (item for item in iterable if function(item)) if function is not None and (item for item in iterable if item) if function is None. See itertools.filterfalse() for the complementary function that returns elements of iterable for which function returns false. float([x ]) Convert a string or a number to floating point. If the argument is a string, it should contain a decimal number, optionally preceded by a sign, and optionally embedded in whitespace. The optional sign may be ’+’ or ’-’; a ’+’ sign has no effect on the value produced. The argument may also be a string representing a NaN (not-a-number), or a positive or negative infinity. More precisely, the input must conform to the following grammar after leading and trailing whitespace characters are removed: sign infinity nan numeric_value numeric_string
1 Note that the parser only accepts the Unix-style end of line convention. If you are reading the code from a file, make sure to use newline conversion mode to convert Windows or Mac-style newlines.
10
Chapter 2. Built-in Functions
The Python Library Reference, Release 3.2.3
Here floatnumber is the form of a Python floating-point literal, described in floating. Case is not significant, so, for example, “inf”, “Inf”, “INFINITY” and “iNfINity” are all acceptable spellings for positive infinity. Otherwise, if the argument is an integer or a floating point number, a floating point number with the same value (within Python’s floating point precision) is returned. If the argument is outside the range of a Python float, an OverflowError will be raised. For a general Python object x, float(x) delegates to x.__float__(). If no argument is given, 0.0 is returned. Examples: >>> float(’+1.23’) 1.23 >>> float(’ -12345\n’) -12345.0 >>> float(’1e-003’) 0.001 >>> float(’+1E6’) 1000000.0 >>> float(’-Infinity’) -inf The float type is described in Numeric Types — int, float, complex. format(value[, format_spec ]) Convert a value to a “formatted” representation, as controlled by format_spec. The interpretation of format_spec will depend on the type of the value argument, however there is a standard formatting syntax that is used by most built-in types: Format Specification Mini-Language. The default format_spec is an empty string which usually gives the same effect as calling str(value). A call to format(value, format_spec) is translated to type(value).__format__(format_spec) which bypasses the instance dictionary when searching for the value’s __format__() method. A TypeError exception is raised if the method is not found or if either the format_spec or the return value are not strings. frozenset([iterable ]) Return a frozenset object, optionally with elements taken from iterable. The frozenset type is described in Set Types — set, frozenset. For other containers see the built in dict, list, and tuple classes, and the collections module. getattr(object, name[, default ]) Return the value of the named attribute of object. name must be a string. If the string is the name of one of the object’s attributes, the result is the value of that attribute. For example, getattr(x, ’foobar’) is equivalent to x.foobar. If the named attribute does not exist, default is returned if provided, otherwise AttributeError is raised. globals() Return a dictionary representing the current global symbol table. This is always the dictionary of the current module (inside a function or method, this is the module where it is defined, not the module from which it is called). hasattr(object, name) The arguments are an object and a string. The result is True if the string is the name of one of the object’s attributes, False if not. (This is implemented by calling getattr(object, name) and seeing whether it raises an AttributeError or not.)
11
The Python Library Reference, Release 3.2.3
hash(object) Return the hash value of the object (if it has one). Hash values are integers. They are used to quickly compare dictionary keys during a dictionary lookup. Numeric values that compare equal have the same hash value (even if they are of different types, as is the case for 1 and 1.0). help([object ]) Invoke the built-in help system. (This function is intended for interactive use.) If no argument is given, the interactive help system starts on the interpreter console. If the argument is a string, then the string is looked up as the name of a module, function, class, method, keyword, or documentation topic, and a help page is printed on the console. If the argument is any other kind of object, a help page on the object is generated. This function is added to the built-in namespace by the site module. hex(x) Convert an integer number to a hexadecimal string. The result is a valid Python expression. If x is not a Python int object, it has to define an __index__() method that returns an integer. Note: To obtain a hexadecimal string representation for a float, use the float.hex() method. id(object) Return the “identity” of an object. This is an integer which is guaranteed to be unique and constant for this object during its lifetime. Two objects with non-overlapping lifetimes may have the same id() value. CPython implementation detail: This is the address of the object in memory. input([prompt ]) If the prompt argument is present, it is written to standard output without a trailing newline. The function then reads a line from input, converts it to a string (stripping a trailing newline), and returns that. When EOF is read, EOFError is raised. Example: >>> s = input(’--> ’) --> Monty Python’s Flying Circus >>> s "Monty Python’s Flying Circus" If the readline module was loaded, then input() will use it to provide elaborate line editing and history features. int([number | string[, base ]]) Convert a number or string to an integer. If no arguments are given, return 0. If a number is given, return number.__int__(). Conversion of floating point numbers to integers truncates towards zero. A string must be a base-radix integer literal optionally preceded by ‘+’ or ‘-‘ (with no space in between) and optionally surrounded by whitespace. A base-n literal consists of the digits 0 to n-1, with ‘a’ to ‘z’ (or ‘A’ to ‘Z’) having values 10 to 35. The default base is 10. The allowed values are 0 and 2-36. Base-2, -8, and -16 literals can be optionally prefixed with 0b/0B, 0o/0O, or 0x/0X, as with integer literals in code. Base 0 means to interpret exactly as a code literal, so that the actual base is 2, 8, 10, or 16, and so that int(’010’, 0) is not legal, while int(’010’) is, as well as int(’010’, 8). The integer type is described in Numeric Types — int, float, complex. isinstance(object, classinfo) Return true if the object argument is an instance of the classinfo argument, or of a (direct, indirect or virtual) subclass thereof. If object is not an object of the given type, the function always returns false. If classinfo is not a class (type object), it may be a tuple of type objects, or may recursively contain other such tuples (other sequence types are not accepted). If classinfo is not a type or tuple of types and such tuples, a TypeError exception is raised.
12
Chapter 2. Built-in Functions
The Python Library Reference, Release 3.2.3
issubclass(class, classinfo) Return true if class is a subclass (direct, indirect or virtual) of classinfo. A class is considered a subclass of itself. classinfo may be a tuple of class objects, in which case every entry in classinfo will be checked. In any other case, a TypeError exception is raised. iter(object[, sentinel ]) Return an iterator object. The first argument is interpreted very differently depending on the presence of the second argument. Without a second argument, object must be a collection object which supports the iteration protocol (the __iter__() method), or it must support the sequence protocol (the __getitem__() method with integer arguments starting at 0). If it does not support either of those protocols, TypeError is raised. If the second argument, sentinel, is given, then object must be a callable object. The iterator created in this case will call object with no arguments for each call to its __next__() method; if the value returned is equal to sentinel, StopIteration will be raised, otherwise the value will be returned. One useful application of the second form of iter() is to read lines of a file until a certain line is reached. The following example reads a file until the readline() method returns an empty string: with open(’mydata.txt’) as fp: for line in iter(fp.readline, ’’): process_line(line) len(s) Return the length (the number of items) of an object. The argument may be a sequence (string, tuple or list) or a mapping (dictionary). list([iterable ]) Return a list whose items are the same and in the same order as iterable‘s items. iterable may be either a sequence, a container that supports iteration, or an iterator object. If iterable is already a list, a copy is made and returned, similar to iterable[:]. For instance, list(’abc’) returns [’a’, ’b’, ’c’] and list( (1, 2, 3) ) returns [1, 2, 3]. If no argument is given, returns a new empty list, []. list is a mutable sequence type, as documented in Sequence Types — str, bytes, bytearray, list, tuple, range. locals() Update and return a dictionary representing the current local symbol table. Free variables are returned by locals() when it is called in function blocks, but not in class blocks. Note: The contents of this dictionary should not be modified; changes may not affect the values of local and free variables used by the interpreter. map(function, iterable, ...) Return an iterator that applies function to every item of iterable, yielding the results. If additional iterable arguments are passed, function must take that many arguments and is applied to the items from all iterables in parallel. With multiple iterables, the iterator stops when the shortest iterable is exhausted. For cases where the function inputs are already arranged into argument tuples, see itertools.starmap(). max(iterable[, args... ], *[, key ]) With a single argument iterable, return the largest item of a non-empty iterable (such as a string, tuple or list). With more than one argument, return the largest of the arguments. The optional keyword-only key argument specifies a one-argument ordering function like that used for list.sort(). If multiple items are maximal, the function returns the first one encountered. This is consistent with other sort-stability preserving tools such as sorted(iterable, key=keyfunc, reverse=True)[0] and heapq.nlargest(1, iterable, key=keyfunc).
13
The Python Library Reference, Release 3.2.3
memoryview(obj) Return a “memory view” object created from the given argument. See memoryview type for more information. min(iterable[, args... ], *[, key ]) With a single argument iterable, return the smallest item of a non-empty iterable (such as a string, tuple or list). With more than one argument, return the smallest of the arguments. The optional keyword-only key argument specifies a one-argument ordering function like that used for list.sort(). If multiple items are minimal, the function returns the first one encountered. This is consistent with other sort-stability preserving tools such as sorted(iterable, key=keyfunc)[0] and heapq.nsmallest(1, iterable, key=keyfunc). next(iterator[, default ]) Retrieve the next item from the iterator by calling its __next__() method. If default is given, it is returned if the iterator is exhausted, otherwise StopIteration is raised. object() Return a new featureless object. object is a base for all classes. It has the methods that are common to all instances of Python classes. This function does not accept any arguments. Note: object does not have a __dict__, so you can’t assign arbitrary attributes to an instance of the object class. oct(x) Convert an integer number to an octal string. The result is a valid Python expression. If x is not a Python int object, it has to define an __index__() method that returns an integer. open(file, mode=’r’, buffering=-1, encoding=None, errors=None, newline=None, closefd=True) Open file and return a corresponding stream. If the file cannot be opened, an IOError is raised. file is either a string or bytes object giving the pathname (absolute or relative to the current working directory) of the file to be opened or an integer file descriptor of the file to be wrapped. (If a file descriptor is given, it is closed when the returned I/O object is closed, unless closefd is set to False.) mode is an optional string that specifies the mode in which the file is opened. It defaults to ’r’ which means open for reading in text mode. Other common values are ’w’ for writing (truncating the file if it already exists), and ’a’ for appending (which on some Unix systems, means that all writes append to the end of the file regardless of the current seek position). In text mode, if encoding is not specified the encoding used is platform dependent. (For reading and writing raw bytes use binary mode and leave encoding unspecified.) The available modes are: Character ’r’ ’w’ ’a’ ’b’ ’t’ ’+’ ’U’
Meaning open for reading (default) open for writing, truncating the file first open for writing, appending to the end of the file if it exists binary mode text mode (default) open a disk file for updating (reading and writing) universal newline mode (for backwards compatibility; should not be used in new code)
The default mode is ’r’ (open for reading text, synonym of ’rt’). For binary read-write access, the mode ’w+b’ opens and truncates the file to 0 bytes. ’r+b’ opens the file without truncation. As mentioned in the Overview, Python distinguishes between binary and text I/O. Files opened in binary mode (including ’b’ in the mode argument) return contents as bytes objects without any decoding. In text mode (the default, or when ’t’ is included in the mode argument), the contents of the file are returned as str, the bytes having been first decoded using a platform-dependent encoding or using the specified encoding if given.
14
Chapter 2. Built-in Functions
The Python Library Reference, Release 3.2.3
Note: Python doesn’t depend on the underlying operating system’s notion of text files; all the processing is done by Python itself, and is therefore platform-independent. buffering is an optional integer used to set the buffering policy. Pass 0 to switch buffering off (only allowed in binary mode), 1 to select line buffering (only usable in text mode), and an integer > 1 to indicate the size of a fixed-size chunk buffer. When no buffering argument is given, the default buffering policy works as follows: •Binary files are buffered in fixed-size chunks; the size of the buffer is chosen using a heuristic trying to determine the underlying device’s “block size” and falling back on io.DEFAULT_BUFFER_SIZE. On many systems, the buffer will typically be 4096 or 8192 bytes long. •“Interactive” text files (files for which isatty() returns True) use line buffering. Other text files use the policy described above for binary files. encoding is the name of the encoding used to decode or encode the file. This should only be used in text mode. The default encoding is platform dependent (whatever locale.getpreferredencoding() returns), but any encoding supported by Python can be used. See the codecs module for the list of supported encodings. errors is an optional string that specifies how encoding and decoding errors are to be handled–this cannot be used in binary mode. Pass ’strict’ to raise a ValueError exception if there is an encoding error (the default of None has the same effect), or pass ’ignore’ to ignore errors. (Note that ignoring encoding errors can lead to data loss.) ’replace’ causes a replacement marker (such as ’?’) to be inserted where there is malformed data. When writing, ’xmlcharrefreplace’ (replace with the appropriate XML character reference) or ’backslashreplace’ (replace with backslashed escape sequences) can be used. Any other error handling name that has been registered with codecs.register_error() is also valid. newline controls how universal newlines works (it only applies to text mode). It can be None, ”, ’\n’, ’\r’, and ’\r\n’. It works as follows: •On input, if newline is None, universal newlines mode is enabled. Lines in the input can end in ’\n’, ’\r’, or ’\r\n’, and these are translated into ’\n’ before being returned to the caller. If it is ”, universal newline mode is enabled, but line endings are returned to the caller untranslated. If it has any of the other legal values, input lines are only terminated by the given string, and the line ending is returned to the caller untranslated. •On output, if newline is None, any ’\n’ characters written are translated to the system default line separator, os.linesep. If newline is ”, no translation takes place. If newline is any of the other legal values, any ’\n’ characters written are translated to the given string. If closefd is False and a file descriptor rather than a filename was given, the underlying file descriptor will be kept open when the file is closed. If a filename is given closefd has no effect and must be True (the default). The type of file object returned by the open() function depends on the mode. When open() is used to open a file in a text mode (’w’, ’r’, ’wt’, ’rt’, etc.), it returns a subclass of io.TextIOBase (specifically io.TextIOWrapper). When used to open a file in a binary mode with buffering, the returned class is a subclass of io.BufferedIOBase. The exact class varies: in read binary mode, it returns a io.BufferedReader; in write binary and append binary modes, it returns a io.BufferedWriter, and in read/write mode, it returns a io.BufferedRandom. When buffering is disabled, the raw stream, a subclass of io.RawIOBase, io.FileIO, is returned. See also the file handling modules, such as, fileinput, io (where open() is declared), os, os.path, tempfile, and shutil. ord(c) Given a string representing one Unicode character, return an integer representing the Unicode code point of that character. For example, ord(’a’) returns the integer 97 and ord(’\u2020’) returns 8224. This is the inverse of chr().
15
The Python Library Reference, Release 3.2.3
On wide Unicode builds, if the argument length is not one, a TypeError will be raised. On narrow Unicode builds, strings of length two are accepted when they form a UTF-16 surrogate pair. pow(x, y[, z ]) Return x to the power y; if z is present, return x to the power y, modulo z (computed more efficiently than pow(x, y) % z). The two-argument form pow(x, y) is equivalent to using the power operator: x**y. The arguments must have numeric types. With mixed operand types, the coercion rules for binary arithmetic operators apply. For int operands, the result has the same type as the operands (after coercion) unless the second argument is negative; in that case, all arguments are converted to float and a float result is delivered. For example, 10**2 returns 100, but 10**-2 returns 0.01. If the second argument is negative, the third argument must be omitted. If z is present, x and y must be of integer types, and y must be non-negative. print([object, ... ], *, sep=’ ‘, end=’\n’, file=sys.stdout) Print object(s) to the stream file, separated by sep and followed by end. sep, end and file, if present, must be given as keyword arguments. All non-keyword arguments are converted to strings like str() does and written to the stream, separated by sep and followed by end. Both sep and end must be strings; they can also be None, which means to use the default values. If no object is given, print() will just write end. The file argument must be an object with a write(string) method; if it is not present or None, sys.stdout will be used. Output buffering is determined by file. Use file.flush() to ensure, for instance, immediate appearance on a screen. property(fget=None, fset=None, fdel=None, doc=None) Return a property attribute. fget is a function for getting an attribute value, likewise fset is a function for setting, and fdel a function for del’ing, an attribute. Typical use is to define a managed attribute x: class C: def __init__(self): self._x = None def getx(self): return self._x def setx(self, value): self._x = value def delx(self): del self._x x = property(getx, setx, delx, "I’m the ’x’ property.") If then c is an instance of C, c.x will invoke the getter, c.x = value will invoke the setter and del c.x the deleter. If given, doc will be the docstring of the property attribute. Otherwise, the property will copy fget‘s docstring (if it exists). This makes it possible to create read-only properties easily using property() as a decorator: class Parrot: def __init__(self): self._voltage = 100000 @property def voltage(self): """Get the current voltage.""" return self._voltage
16
Chapter 2. Built-in Functions
The Python Library Reference, Release 3.2.3
turns the voltage() method into a “getter” for a read-only attribute with the same name. A property object has getter, setter, and deleter methods usable as decorators that create a copy of the property with the corresponding accessor function set to the decorated function. This is best explained with an example: class C: def __init__(self): self._x = None @property def x(self): """I’m the ’x’ property.""" return self._x @x.setter def x(self, value): self._x = value @x.deleter def x(self): del self._x This code is exactly equivalent to the first example. Be sure to give the additional functions the same name as the original property (x in this case.) The returned property also has the attributes fget, fset, and fdel corresponding to the constructor arguments. range([start ], stop[, step ]) This is a versatile function to create iterables yielding arithmetic progressions. It is most often used in for loops. The arguments must be integers. If the step argument is omitted, it defaults to 1. If the start argument is omitted, it defaults to 0. The full form returns an iterable of integers [start, start + step, start + 2 * step, ...]. If step is positive, the last element is the largest start + i * step less than stop; if step is negative, the last element is the smallest start + i * step greater than stop. step must not be zero (or else ValueError is raised). Example: >>> [0, >>> [1, >>> [0, >>> [0, >>> [0, >>> [] >>> []
Range objects implement the collections.Sequence ABC, and provide features such as containment tests, element index lookup, slicing and support for negative indices (see Sequence Types — str, bytes, bytearray, list, tuple, range):
17
The Python Library Reference, Release 3.2.3
>>> r = range(0, 20, 2) >>> r range(0, 20, 2) >>> 11 in r False >>> 10 in r True >>> r.index(10) 5 >>> r[5] 10 >>> r[:5] range(0, 10, 2) >>> r[-1] 18 Ranges containing absolute values larger than sys.maxsize are permitted but some features (such as len()) will raise OverflowError. Changed in version 3.2: Implement the Sequence ABC. Support slicing and negative indices. Test integers for membership in constant time instead of iterating through all items. repr(object) Return a string containing a printable representation of an object. For many types, this function makes an attempt to return a string that would yield an object with the same value when passed to eval(), otherwise the representation is a string enclosed in angle brackets that contains the name of the type of the object together with additional information often including the name and address of the object. A class can control what this function returns for its instances by defining a __repr__() method. reversed(seq) Return a reverse iterator. seq must be an object which has a __reversed__() method or supports the sequence protocol (the __len__() method and the __getitem__() method with integer arguments starting at 0). round(x[, n ]) Return the floating point value x rounded to n digits after the decimal point. If n is omitted, it defaults to zero. Delegates to x.__round__(n). For the built-in types supporting round(), values are rounded to the closest multiple of 10 to the power minus n; if two multiples are equally close, rounding is done toward the even choice (so, for example, both round(0.5) and round(-0.5) are 0, and round(1.5) is 2). The return value is an integer if called with one argument, otherwise of the same type as x. Note: The behavior of round() for floats can be surprising: for example, round(2.675, 2) gives 2.67 instead of the expected 2.68. This is not a bug: it’s a result of the fact that most decimal fractions can’t be represented exactly as a float. See tut-fp-issues for more information. set([iterable ]) Return a new set, optionally with elements taken from iterable. The set type is described in Set Types — set, frozenset. setattr(object, name, value) This is the counterpart of getattr(). The arguments are an object, a string and an arbitrary value. The string may name an existing attribute or a new attribute. The function assigns the value to the attribute, provided the object allows it. For example, setattr(x, ’foobar’, 123) is equivalent to x.foobar = 123. slice([start ], stop[, step ]) Return a slice object representing the set of indices specified by range(start, stop, step). The start
18
Chapter 2. Built-in Functions
The Python Library Reference, Release 3.2.3
and step arguments default to None. Slice objects have read-only data attributes start, stop and step which merely return the argument values (or their default). They have no other explicit functionality; however they are used by Numerical Python and other third party extensions. Slice objects are also generated when extended indexing syntax is used. For example: a[start:stop:step] or a[start:stop, i]. See itertools.islice() for an alternate version that returns an iterator. sorted(iterable[, key][, reverse]) Return a new sorted list from the items in iterable. Has two optional arguments which must be specified as keyword arguments. key specifies a function of one argument that is used to extract a comparison key from each list element: key=str.lower. The default value is None (compare the elements directly). reverse is a boolean value. If set to True, then the list elements are sorted as if each comparison were reversed. Use functools.cmp_to_key() to convert an old-style cmp function to a key function. For sorting examples and a brief sorting tutorial, see Sorting HowTo. staticmethod(function) Return a static method for function. A static method does not receive an implicit first argument. To declare a static method, use this idiom: class C: @staticmethod def f(arg1, arg2, ...): ... The @staticmethod form is a function decorator – see the description of function definitions in function for details. It can be called either on the class (such as C.f()) or on an instance (such as C().f()). The instance is ignored except for its class. Static methods in Python are similar to those found in Java or C++. Also see classmethod() for a variant that is useful for creating alternate class constructors. For more information on static methods, consult the documentation on the standard type hierarchy in types. str([object[, encoding[, errors ]]]) Return a string version of an object, using one of the following modes: If encoding and/or errors are given, str() will decode the object which can either be a byte string or a character buffer using the codec for encoding. The encoding parameter is a string giving the name of an encoding; if the encoding is not known, LookupError is raised. Error handling is done according to errors; this specifies the treatment of characters which are invalid in the input encoding. If errors is ’strict’ (the default), a ValueError is raised on errors, while a value of ’ignore’ causes errors to be silently ignored, and a value of ’replace’ causes the official Unicode replacement character, U+FFFD, to be used to replace input characters which cannot be decoded. See also the codecs module. When only object is given, this returns its nicely printable representation. For strings, this is the string itself. The difference with repr(object) is that str(object) does not always attempt to return a string that is acceptable to eval(); its goal is to return a printable string. With no arguments, this returns the empty string. Objects can specify what str(object) returns by defining a __str__() special method. For more information on strings see Sequence Types — str, bytes, bytearray, list, tuple, range which describes sequence functionality (strings are sequences), and also the string-specific methods described in the String Methods section. To output formatted strings, see the String Formatting section. In addition see the String Services section.
19
The Python Library Reference, Release 3.2.3
sum(iterable[, start ]) Sums start and the items of an iterable from left to right and returns the total. start defaults to 0. The iterable‘s items are normally numbers, and the start value is not allowed to be a string. For some use cases, there are good alternatives to sum(). The preferred, fast way to concatenate a sequence of strings is by calling ”.join(sequence). To add floating point values with extended precision, see math.fsum(). To concatenate a series of iterables, consider using itertools.chain(). super([type[, object-or-type ]]) Return a proxy object that delegates method calls to a parent or sibling class of type. This is useful for accessing inherited methods that have been overridden in a class. The search order is same as that used by getattr() except that the type itself is skipped. The __mro__ attribute of the type lists the method resolution search order used by both getattr() and super(). The attribute is dynamic and can change whenever the inheritance hierarchy is updated. If the second argument is omitted, the super object returned is unbound. If the second argument is an object, isinstance(obj, type) must be true. If the second argument is a type, issubclass(type2, type) must be true (this is useful for classmethods). There are two typical use cases for super. In a class hierarchy with single inheritance, super can be used to refer to parent classes without naming them explicitly, thus making the code more maintainable. This use closely parallels the use of super in other programming languages. The second use case is to support cooperative multiple inheritance in a dynamic execution environment. This use case is unique to Python and is not found in statically compiled languages or languages that only support single inheritance. This makes it possible to implement “diamond diagrams” where multiple base classes implement the same method. Good design dictates that this method have the same calling signature in every case (because the order of calls is determined at runtime, because that order adapts to changes in the class hierarchy, and because that order can include sibling classes that are unknown prior to runtime). For both use cases, a typical superclass call looks like this: class C(B): def method(self, arg): super().method(arg)
# This does the same thing as: # super(C, self).method(arg)
Note that super() is implemented as part of the binding process for explicit dotted attribute lookups such as super().__getitem__(name). It does so by implementing its own __getattribute__() method for searching classes in a predictable order that supports cooperative multiple inheritance. Accordingly, super() is undefined for implicit lookups using statements or operators such as super()[name]. Also note that super() is not limited to use inside methods. The two argument form specifies the arguments exactly and makes the appropriate references. The zero argument form automatically searches the stack frame for the class (__class__) and the first argument. For practical suggestions on how to design cooperative classes using super(), see guide to using super(). tuple([iterable ]) Return a tuple whose items are the same and in the same order as iterable‘s items. iterable may be a sequence, a container that supports iteration, or an iterator object. If iterable is already a tuple, it is returned unchanged. For instance, tuple(’abc’) returns (’a’, ’b’, ’c’) and tuple([1, 2, 3]) returns (1, 2, 3). If no argument is given, returns a new empty tuple, (). tuple is an immutable sequence type, as documented in Sequence Types — str, bytes, bytearray, list, tuple, range.
20
Chapter 2. Built-in Functions
The Python Library Reference, Release 3.2.3
type(object) Return the type of an object. The return value is a type object and generally the same object as returned by object.__class__. The isinstance() built-in function is recommended for testing the type of an object, because it takes subclasses into account. With three arguments, type() functions as a constructor as detailed below. type(name, bases, dict) Return a new type object. This is essentially a dynamic form of the class statement. The name string is the class name and becomes the __name__ attribute; the bases tuple itemizes the base classes and becomes the __bases__ attribute; and the dict dictionary is the namespace containing definitions for class body and becomes the __dict__ attribute. For example, the following two statements create identical type objects: >>> class X: ... a = 1 ... >>> X = type(’X’, (object,), dict(a=1)) vars([object ]) Without an argument, act like locals(). With a module, class or class instance object as argument (or anything else that has a __dict__ attribute), return that attribute. Note: The returned dictionary should not be modified: the effects on the corresponding symbol table are undefined. 2 zip(*iterables) Make an iterator that aggregates elements from each of the iterables. Returns an iterator of tuples, where the i-th tuple contains the i-th element from each of the argument sequences or iterables. The iterator stops when the shortest input iterable is exhausted. With a single iterable argument, it returns an iterator of 1-tuples. With no arguments, it returns an empty iterator. Equivalent to: def zip(*iterables): # zip(’ABCD’, ’xy’) --> Ax By sentinel = object() iterators = [iter(it) for it in iterables] while iterators: result = [] for it in iterators: elem = next(it, sentinel) if elem is sentinel: return result.append(elem) yield tuple(result) The left-to-right evaluation order of the iterables is guaranteed. This makes possible an idiom for clustering a data series into n-length groups using zip(*[iter(s)]*n). zip() should only be used with unequal length inputs when you don’t care about trailing, unmatched values from the longer iterables. If those values are important, use itertools.zip_longest() instead. 2 In the current implementation, local variable bindings cannot normally be affected this way, but variables retrieved from other scopes (such as modules) can be. This may change.
21
The Python Library Reference, Release 3.2.3
zip() in conjunction with the * operator can be used to unzip a list: >>> x = [1, 2, 3] >>> y = [4, 5, 6] >>> zipped = zip(x, y) >>> list(zipped) [(1, 4), (2, 5), (3, 6)] >>> x2, y2 = zip(*zip(x, y)) >>> x == list(x2) and y == list(y2) True __import__(name, globals={}, locals={}, fromlist=[], level=0)
Note: This is an advanced function that is not needed in everyday Python programming, unlike importlib.import_module(). This function is invoked by the import statement. It can be replaced (by importing the builtins module and assigning to builtins.__import__) in order to change semantics of the import statement, but nowadays it is usually simpler to use import hooks (see PEP 302). Direct use of __import__() is rare, except in cases where you want to import a module whose name is only known at runtime. The function imports the module name, potentially using the given globals and locals to determine how to interpret the name in a package context. The fromlist gives the names of objects or submodules that should be imported from the module given by name. The standard implementation does not use its locals argument at all, and uses its globals only to determine the package context of the import statement. level specifies whether to use absolute or relative imports. 0 (the default) means only perform absolute imports. Positive values for level indicate the number of parent directories to search relative to the directory of the module calling __import__(). When the name variable is of the form package.module, normally, the top-level package (the name up till the first dot) is returned, not the module named by name. However, when a non-empty fromlist argument is given, the module named by name is returned. For example, the statement import spam results in bytecode resembling the following code: spam = __import__(’spam’, globals(), locals(), [], 0) The statement import spam.ham results in this call: spam = __import__(’spam.ham’, globals(), locals(), [], 0) Note how __import__() returns the toplevel module here because this is the object that is bound to a name by the import statement. On the other hand, the statement from spam.ham import eggs, sausage as saus results in _temp = __import__(’spam.ham’, globals(), locals(), [’eggs’, ’sausage’], 0) eggs = _temp.eggs saus = _temp.sausage Here, the spam.ham module is returned from __import__(). From this object, the names to import are retrieved and assigned to their respective names.
22
Chapter 2. Built-in Functions
The Python Library Reference, Release 3.2.3
If you simply want to import importlib.import_module().
a
module
(potentially
within
a
package)
by
name,
use
23
The Python Library Reference, Release 3.2.3
24
Chapter 2. Built-in Functions
CHAPTER
THREE
BUILT-IN CONSTANTS A small number of constants live in the built-in namespace. They are: False The false value of the bool type. Assignments to False are illegal and raise a SyntaxError. True The true value of the bool type. Assignments to True are illegal and raise a SyntaxError. None The sole value of types.NoneType. None is frequently used to represent the absence of a value, as when default arguments are not passed to a function. Assignments to None are illegal and raise a SyntaxError. NotImplemented Special value which can be returned by the “rich comparison” special methods (__eq__(), __lt__(), and friends), to indicate that the comparison is not implemented with respect to the other type. Ellipsis The same as .... Special value used mostly in conjunction with extended slicing syntax for user-defined container data types. __debug__ This constant is true if Python was not started with an -O option. See also the assert statement. Note: The names None, False, True and __debug__ cannot be reassigned (assignments to them, even as an attribute name, raise SyntaxError), so they can be considered “true” constants.
3.1 Constants added by the site module The site module (which is imported automatically during startup, except if the -S command-line option is given) adds several constants to the built-in namespace. They are useful for the interactive interpreter shell and should not be used in programs. quit(code=None) exit(code=None) Objects that when printed, print a message like “Use quit() or Ctrl-D (i.e. EOF) to exit”, and when called, raise SystemExit with the specified exit code. copyright license
25
The Python Library Reference, Release 3.2.3
credits Objects that when printed, print a message like “Type license() to see the full license text”, and when called, display the corresponding text in a pager-like fashion (one screen at a time).
26
Chapter 3. Built-in Constants
CHAPTER
FOUR
BUILT-IN TYPES The following sections describe the standard types that are built into the interpreter. The principal built-in types are numerics, sequences, mappings, classes, instances and exceptions. Some operations are supported by several object types; in particular, practically all objects can be compared, tested for truth value, and converted to a string (with the repr() function or the slightly different str() function). The latter function is implicitly used when an object is written by the print() function.
4.1 Truth Value Testing Any object can be tested for truth value, for use in an if or while condition or as operand of the Boolean operations below. The following values are considered false:
• None • False • zero of any numeric type, for example, 0, 0.0, 0j. • any empty sequence, for example, ”, (), []. • any empty mapping, for example, {}. • instances of user-defined classes, if the class defines a __bool__() or __len__() method, when that method returns the integer zero or bool value False. 1 All other values are considered true — so objects of many types are always true. Operations and built-in functions that have a Boolean result always return 0 or False for false and 1 or True for true, unless otherwise stated. (Important exception: the Boolean operations or and and always return one of their operands.)
4.2 Boolean Operations — and, or, not These are the Boolean operations, ordered by ascending priority: 1
Additional information on these special methods may be found in the Python Reference Manual (customization).
27
The Python Library Reference, Release 3.2.3
Operation x or y x and y not x
Result if x is false, then y, else x if x is false, then x, else y if x is false, then True, else False
Notes (1) (2) (3)
Notes: 1. This is a short-circuit operator, so it only evaluates the second argument if the first one is False. 2. This is a short-circuit operator, so it only evaluates the second argument if the first one is True. 3. not has a lower priority than non-Boolean operators, so not a == b is interpreted as not (a == b), and a == not b is a syntax error.
4.3 Comparisons There are eight comparison operations in Python. They all have the same priority (which is higher than that of the Boolean operations). Comparisons can be chained arbitrarily; for example, x < y n ~x
Result bitwise or of x and y bitwise exclusive or of x and y bitwise and of x and y x shifted left by n bits x shifted right by n bits the bits of x inverted
Notes
(1)(2) (1)(3)
Notes: 1. Negative shift counts are illegal and cause a ValueError to be raised. 2. A left shift by n bits is equivalent to multiplication by pow(2, n) without overflow check. 3. A right shift by n bits is equivalent to division by pow(2, n) without overflow check.
4.4.2 Additional Methods on Integer Types The int type implements the numbers.Integral abstract base class. In addition, it provides one more method: int.bit_length() Return the number of bits necessary to represent an integer in binary, excluding the sign and leading zeros: >>> n = -37 >>> bin(n) ’-0b100101’ >>> n.bit_length() 6 More precisely, if x is nonzero, then x.bit_length() is the unique positive integer k such that 2**(k-1) ’-0b100101’ s = s.lstrip(’-0b’) # remove leading zeros and minus sign return len(s) # len(’100101’) --> 6 New in version 3.1. int.to_bytes(length, byteorder, *, signed=False) Return an array of bytes representing an integer. >>> (1024).to_bytes(2, byteorder=’big’) b’\x04\x00’ >>> (1024).to_bytes(10, byteorder=’big’) b’\x00\x00\x00\x00\x00\x00\x00\x00\x04\x00’ >>> (-1024).to_bytes(10, byteorder=’big’, signed=True) b’\xff\xff\xff\xff\xff\xff\xff\xff\xfc\x00’ >>> x = 1000 >>> x.to_bytes((x.bit_length() // 8) + 1, byteorder=’little’) b’\xe8\x03’ The integer is represented using length bytes. An OverflowError is raised if the integer is not representable with the given number of bytes. The byteorder argument determines the byte order used to represent the integer. If byteorder is "big", the most significant byte is at the beginning of the byte array. If byteorder is "little", the most significant byte is at the end of the byte array. To request the native byte order of the host system, use sys.byteorder as the byte order value. The signed argument determines whether two’s complement is used to represent the integer. If signed is False and a negative integer is given, an OverflowError is raised. The default value for signed is False. New in version 3.2. classmethod int.from_bytes(bytes, byteorder, *, signed=False) Return the integer represented by the given array of bytes. >>> int.from_bytes(b’\x00\x10’, 16 >>> int.from_bytes(b’\x00\x10’, 4096 >>> int.from_bytes(b’\xfc\x00’, -1024 >>> int.from_bytes(b’\xfc\x00’, 64512 >>> int.from_bytes([255, 0, 0], 16711680
The argument bytes must either support the buffer protocol or be an iterable producing bytes. bytes and bytearray are examples of built-in objects that support the buffer protocol. The byteorder argument determines the byte order used to represent the integer. If byteorder is "big", the most significant byte is at the beginning of the byte array. If byteorder is "little", the most significant byte is at the end of the byte array. To request the native byte order of the host system, use sys.byteorder as the byte order value. The signed argument indicates whether two’s complement is used to represent the integer. New in version 3.2.
4.4. Numeric Types — int, float, complex
31
The Python Library Reference, Release 3.2.3
4.4.3 Additional Methods on Float The float type implements the numbers.Real abstract base class. float also has the following additional methods. float.as_integer_ratio() Return a pair of integers whose ratio is exactly equal to the original float and with a positive denominator. Raises OverflowError on infinities and a ValueError on NaNs. float.is_integer() Return True if the float instance is finite with integral value, and False otherwise: >>> (-2.0).is_integer() True >>> (3.2).is_integer() False Two methods support conversion to and from hexadecimal strings. Since Python’s floats are stored internally as binary numbers, converting a float to or from a decimal string usually involves a small rounding error. In contrast, hexadecimal strings allow exact representation and specification of floating-point numbers. This can be useful when debugging, and in numerical work. float.hex() Return a representation of a floating-point number as a hexadecimal string. For finite floating-point numbers, this representation will always include a leading 0x and a trailing p and exponent. classmethod float.fromhex(s) Class method to return the float represented by a hexadecimal string s. The string s may have leading and trailing whitespace. Note that float.hex() is an instance method, while float.fromhex() is a class method. A hexadecimal string takes the form: [sign] [’0x’] integer [’.’ fraction] [’p’ exponent] where the optional sign may by either + or -, integer and fraction are strings of hexadecimal digits, and exponent is a decimal integer with an optional leading sign. Case is not significant, and there must be at least one hexadecimal digit in either the integer or the fraction. This syntax is similar to the syntax specified in section 6.4.4.2 of the C99 standard, and also to the syntax used in Java 1.5 onwards. In particular, the output of float.hex() is usable as a hexadecimal floating-point literal in C or Java code, and hexadecimal strings produced by C’s %a format character or Java’s Double.toHexString are accepted by float.fromhex(). Note that the exponent is written in decimal rather than hexadecimal, and that it gives the power of 2 by which to multiply the coefficient. For example, the hexadecimal string 0x3.a7p10 represents the floating-point number (3 + 10./16 + 7./16**2) * 2.0**10, or 3740.0: >>> float.fromhex(’0x3.a7p10’) 3740.0 Applying the reverse conversion to 3740.0 gives a different hexadecimal string representing the same number: >>> float.hex(3740.0) ’0x1.d380000000000p+11’
4.4.4 Hashing of numeric types For numbers x and y, possibly of different types, it’s a requirement that hash(x) == hash(y) whenever x == y (see the __hash__() method documentation for more details). For ease of implementation and efficiency across a variety of numeric types (including int, float, decimal.Decimal and fractions.Fraction)
32
Chapter 4. Built-in Types
The Python Library Reference, Release 3.2.3
Python’s hash for numeric types is based on a single mathematical function that’s defined for any rational number, and hence applies to all instances of int and fraction.Fraction, and all finite instances of float and decimal.Decimal. Essentially, this function is given by reduction modulo P for a fixed prime P. The value of P is made available to Python as the modulus attribute of sys.hash_info. CPython implementation detail: Currently, the prime used is P = 2**31 - 1 on machines with 32-bit C longs and P = 2**61 - 1 on machines with 64-bit C longs. Here are the rules in detail: • If x = m / n is a nonnegative rational number and n is not divisible by P, define hash(x) as m * invmod(n, P) % P, where invmod(n, P) gives the inverse of n modulo P. • If x = m / n is a nonnegative rational number and n is divisible by P (but m is not) then n has no inverse modulo P and the rule above doesn’t apply; in this case define hash(x) to be the constant value sys.hash_info.inf. • If x = m / n is a negative rational number define hash(x) as -hash(-x). If the resulting hash is -1, replace it with -2. • The particular values sys.hash_info.inf, -sys.hash_info.inf and sys.hash_info.nan are used as hash values for positive infinity, negative infinity, or nans (respectively). (All hashable nans have the same hash value.) • For a complex number z, the hash values of the real and imaginary parts are combined by computing hash(z.real) + sys.hash_info.imag * hash(z.imag), reduced modulo 2**sys.hash_info.width so that it lies in range(-2**(sys.hash_info.width - 1), 2**(sys.hash_info.width - 1)). Again, if the result is -1, it’s replaced with -2. To clarify the above rules, here’s some example Python code, equivalent to the builtin hash, for computing the hash of a rational number, float, or complex: import sys, math def hash_fraction(m, n): """Compute the hash of a rational number m / n. Assumes m and n are integers, with n positive. Equivalent to hash(fractions.Fraction(m, n)). """ P = sys.hash_info.modulus # Remove common factors of P. while m % P == n % P == 0: m, n = m // P, n // P
(Unnecessary if m and n already coprime.)
if n % P == 0: hash_ = sys.hash_info.inf else: # Fermat’s Little Theorem: pow(n, P-1, P) is 1, so # pow(n, P-2, P) gives the inverse of n modulo P. hash_ = (abs(m) % P) * pow(n, P - 2, P) % P if m < 0: hash_ = -hash_ if hash_ == -1: hash_ = -2 return hash_
4.4. Numeric Types — int, float, complex
33
The Python Library Reference, Release 3.2.3
def hash_float(x): """Compute the hash of a float x.""" if math.isnan(x): return sys.hash_info.nan elif math.isinf(x): return sys.hash_info.inf if x > 0 else -sys.hash_info.inf else: return hash_fraction(*x.as_integer_ratio()) def hash_complex(z): """Compute the hash of a complex number z.""" hash_ = hash_float(z.real) + sys.hash_info.imag * hash_float(z.imag) # do a signed reduction modulo 2**sys.hash_info.width M = 2**(sys.hash_info.width - 1) hash_ = (hash_ & (M - 1)) - (hash & M) if hash_ == -1: hash_ == -2 return hash_
4.5 Iterator Types Python supports a concept of iteration over containers. This is implemented using two distinct methods; these are used to allow user-defined classes to support iteration. Sequences, described below in more detail, always support the iteration methods. One method needs to be defined for container objects to provide iteration support: container.__iter__() Return an iterator object. The object is required to support the iterator protocol described below. If a container supports different types of iteration, additional methods can be provided to specifically request iterators for those iteration types. (An example of an object supporting multiple forms of iteration would be a tree structure which supports both breadth-first and depth-first traversal.) This method corresponds to the tp_iter slot of the type structure for Python objects in the Python/C API. The iterator objects themselves are required to support the following two methods, which together form the iterator protocol: iterator.__iter__() Return the iterator object itself. This is required to allow both containers and iterators to be used with the for and in statements. This method corresponds to the tp_iter slot of the type structure for Python objects in the Python/C API. iterator.__next__() Return the next item from the container. If there are no further items, raise the StopIteration exception. This method corresponds to the tp_iternext slot of the type structure for Python objects in the Python/C API. Python defines several iterator objects to support iteration over general and specific sequence types, dictionaries, and other more specialized forms. The specific types are not important beyond their implementation of the iterator protocol. Once an iterator’s __next__() method raises StopIteration, it must continue to do so on subsequent calls. Implementations that do not obey this property are deemed broken.
34
Chapter 4. Built-in Types
The Python Library Reference, Release 3.2.3
4.5.1 Generator Types Python’s generators provide a convenient way to implement the iterator protocol. If a container object’s __iter__() method is implemented as a generator, it will automatically return an iterator object (technically, a generator object) supplying the __iter__() and __next__() methods. More information about generators can be found in the documentation for the yield expression.
4.6 Sequence Types — str, bytes, bytearray, list, tuple, range There are six sequence types: strings, byte sequences (bytes objects), byte arrays (bytearray objects), lists, tuples, and range objects. For other containers see the built in dict and set classes, and the collections module. Strings contain Unicode characters. Their literals are written in single or double quotes: ’xyzzy’, "frobozz". See strings for more about string literals. In addition to the functionality described here, there are also string-specific methods described in the String Methods section. Bytes and bytearray objects contain single bytes – the former is immutable while the latter is a mutable sequence. Bytes objects can be constructed by using the constructor, bytes(), and from literals; use a b prefix with normal string syntax: b’xyzzy’. To construct byte arrays, use the bytearray() function. While string objects are sequences of characters (represented by strings of length 1), bytes and bytearray objects are sequences of integers (between 0 and 255), representing the ASCII value of single bytes. That means that for a bytes or bytearray object b, b[0] will be an integer, while b[0:1] will be a bytes or bytearray object of length 1. The representation of bytes objects uses the literal format (b’...’) since it is generally more useful than e.g. bytes([50, 19, 100]). You can always convert a bytes object into a list of integers using list(b). Also, while in previous Python versions, byte strings and Unicode strings could be exchanged for each other rather freely (barring encoding issues), strings and bytes are now completely separate concepts. There’s no implicit en/decoding if you pass an object of the wrong type. A string always compares unequal to a bytes or bytearray object. Lists are constructed with square brackets, separating items with commas: [a, b, c]. Tuples are constructed by the comma operator (not within square brackets), with or without enclosing parentheses, but an empty tuple must have the enclosing parentheses, such as a, b, c or (). A single item tuple must have a trailing comma, such as (d,). Objects of type range are created using the range() function. They don’t support concatenation or repetition, and using min() or max() on them is inefficient. Most sequence types support the following operations. The in and not in operations have the same priorities as the comparison operations. The + and * operations have the same priority as the corresponding numeric operations. 3 Additional methods are provided for Mutable Sequence Types. This table lists the sequence operations sorted in ascending priority (operations in the same box have the same priority). In the table, s and t are sequences of the same type; n, i, j and k are integers. 3
They must have since the parser can’t tell the type of the operands.
4.6. Sequence Types — str, bytes, bytearray, list, tuple, range
35
The Python Library Reference, Release 3.2.3
Operation x in s x not in s s + t s * n, n * s s[i] s[i:j] s[i:j:k] len(s) min(s) max(s) s.index(i) s.count(i)
Result True if an item of s is equal to x, else False False if an item of s is equal to x, else True the concatenation of s and t n shallow copies of s concatenated ith item of s, origin 0 slice of s from i to j slice of s from i to j with step k length of s smallest item of s largest item of s index of the first occurence of i in s total number of occurences of i in s
Notes (1) (1) (6) (2) (3) (3)(4) (3)(5)
Sequence types also support comparisons. In particular, tuples and lists are compared lexicographically by comparing corresponding elements. This means that to compare equal, every element must compare equal and the two sequences must be of the same type and have the same length. (For full details see comparisons in the language reference.) Notes: 1. When s is a string object, the in and not in operations act like a substring test. 2. Values of n less than 0 are treated as 0 (which yields an empty sequence of the same type as s). Note also that the copies are shallow; nested structures are not copied. This often haunts new Python programmers; consider: >>> lists = [[]] * 3 >>> lists [[], [], []] >>> lists[0].append(3) >>> lists [[3], [3], [3]] What has happened is that [[]] is a one-element list containing an empty list, so all three elements of [[]] * 3 are (pointers to) this single empty list. Modifying any of the elements of lists modifies this single list. You can create a list of different lists this way: >>> lists = [[] for i in range(3)] >>> lists[0].append(3) >>> lists[1].append(5) >>> lists[2].append(7) >>> lists [[3], [5], [7]] 3. If i or j is negative, the index is relative to the end of the string: len(s) + i or len(s) + j is substituted. But note that -0 is still 0. 4. The slice of s from i to j is defined as the sequence of items with index k such that i > ’Py’ in ’Python’ True
str.format(*args, **kwargs) Perform a string formatting operation. The string on which this method is called can contain literal text or
4.6. Sequence Types — str, bytes, bytearray, list, tuple, range
37
The Python Library Reference, Release 3.2.3
replacement fields delimited by braces {}. Each replacement field contains either the numeric index of a positional argument, or the name of a keyword argument. Returns a copy of the string where each replacement field is replaced with the string value of the corresponding argument. >>> "The sum of 1 + 2 is {0}".format(1+2) ’The sum of 1 + 2 is 3’ See Format String Syntax for a description of the various formatting options that can be specified in format strings. str.format_map(mapping) Similar to str.format(**mapping), except that mapping is used directly and not copied to a dict . This is useful if for example mapping is a dict subclass: >>> class Default(dict): ... def __missing__(self, key): ... return key ... >>> ’{name} was born in {country}’.format_map(Default(name=’Guido’)) ’Guido was born in country’ New in version 3.2. str.index(sub[, start[, end ]]) Like find(), but raise ValueError when the substring is not found. str.isalnum() Return true if all characters in the string are alphanumeric and there is at least one character, false otherwise. A character c is alphanumeric if one of the following returns True: c.isalpha(), c.isdecimal(), c.isdigit(), or c.isnumeric(). str.isalpha() Return true if all characters in the string are alphabetic and there is at least one character, false otherwise. Alphabetic characters are those characters defined in the Unicode character database as “Letter”, i.e., those with general category property being one of “Lm”, “Lt”, “Lu”, “Ll”, or “Lo”. Note that this is different from the “Alphabetic” property defined in the Unicode Standard. str.isdecimal() Return true if all characters in the string are decimal characters and there is at least one character, false otherwise. Decimal characters are those from general category “Nd”. This category includes digit characters, and all characters that can be used to form decimal-radix numbers, e.g. U+0660, ARABIC-INDIC DIGIT ZERO. str.isdigit() Return true if all characters in the string are digits and there is at least one character, false otherwise. Digits include decimal characters and digits that need special handling, such as the compatibility superscript digits. Formally, a digit is a character that has the property value Numeric_Type=Digit or Numeric_Type=Decimal. str.isidentifier() Return true if the string is a valid identifier according to the language definition, section identifiers. str.islower() Return true if all cased characters otherwise.
4
in the string are lowercase and there is at least one cased character, false
4 Cased characters are those with general category property being one of “Lu” (Letter, uppercase), “Ll” (Letter, lowercase), or “Lt” (Letter, titlecase).
38
Chapter 4. Built-in Types
The Python Library Reference, Release 3.2.3
str.isnumeric() Return true if all characters in the string are numeric characters, and there is at least one character, false otherwise. Numeric characters include digit characters, and all characters that have the Unicode numeric value property, e.g. U+2155, VULGAR FRACTION ONE FIFTH. Formally, numeric characters are those with the property value Numeric_Type=Digit, Numeric_Type=Decimal or Numeric_Type=Numeric. str.isprintable() Return true if all characters in the string are printable or the string is empty, false otherwise. Nonprintable characters are those characters defined in the Unicode character database as “Other” or “Separator”, excepting the ASCII space (0x20) which is considered printable. (Note that printable characters in this context are those which should not be escaped when repr() is invoked on a string. It has no bearing on the handling of strings written to sys.stdout or sys.stderr.) str.isspace() Return true if there are only whitespace characters in the string and there is at least one character, false otherwise. Whitespace characters are those characters defined in the Unicode character database as “Other” or “Separator” and those with bidirectional property being one of “WS”, “B”, or “S”. str.istitle() Return true if the string is a titlecased string and there is at least one character, for example uppercase characters may only follow uncased characters and lowercase characters only cased ones. Return false otherwise. str.isupper() Return true if all cased characters otherwise.
4
in the string are uppercase and there is at least one cased character, false
str.join(iterable) Return a string which is the concatenation of the strings in the iterable iterable. A TypeError will be raised if there are any non-string values in iterable, including bytes objects. The separator between elements is the string providing this method. str.ljust(width[, fillchar ]) Return the string left justified in a string of length width. Padding is done using the specified fillchar (default is a space). The original string is returned if width is less than or equal to len(s). str.lower() Return a copy of the string with all the cased characters 4 converted to lowercase. str.lstrip([chars ]) Return a copy of the string with leading characters removed. The chars argument is a string specifying the set of characters to be removed. If omitted or None, the chars argument defaults to removing whitespace. The chars argument is not a prefix; rather, all combinations of its values are stripped: >>> ’ spacious ’.lstrip() ’spacious ’ >>> ’www.example.com’.lstrip(’cmowz.’) ’example.com’ static str.maketrans(x[, y[, z ]]) This static method returns a translation table usable for str.translate(). If there is only one argument, it must be a dictionary mapping Unicode ordinals (integers) or characters (strings of length 1) to Unicode ordinals, strings (of arbitrary lengths) or None. Character keys will then be converted to ordinals. If there are two arguments, they must be strings of equal length, and in the resulting dictionary, each character in x will be mapped to the character at the same position in y. If there is a third argument, it must be a string, whose characters will be mapped to None in the result.
4.6. Sequence Types — str, bytes, bytearray, list, tuple, range
39
The Python Library Reference, Release 3.2.3
str.partition(sep) Split the string at the first occurrence of sep, and return a 3-tuple containing the part before the separator, the separator itself, and the part after the separator. If the separator is not found, return a 3-tuple containing the string itself, followed by two empty strings. str.replace(old, new[, count ]) Return a copy of the string with all occurrences of substring old replaced by new. If the optional argument count is given, only the first count occurrences are replaced. str.rfind(sub[, start[, end ]]) Return the highest index in the string where substring sub is found, such that sub is contained within s[start:end]. Optional arguments start and end are interpreted as in slice notation. Return -1 on failure. str.rindex(sub[, start[, end ]]) Like rfind() but raises ValueError when the substring sub is not found. str.rjust(width[, fillchar ]) Return the string right justified in a string of length width. Padding is done using the specified fillchar (default is a space). The original string is returned if width is less than or equal to len(s). str.rpartition(sep) Split the string at the last occurrence of sep, and return a 3-tuple containing the part before the separator, the separator itself, and the part after the separator. If the separator is not found, return a 3-tuple containing two empty strings, followed by the string itself. str.rsplit([sep[, maxsplit ]]) Return a list of the words in the string, using sep as the delimiter string. If maxsplit is given, at most maxsplit splits are done, the rightmost ones. If sep is not specified or None, any whitespace string is a separator. Except for splitting from the right, rsplit() behaves like split() which is described in detail below. str.rstrip([chars ]) Return a copy of the string with trailing characters removed. The chars argument is a string specifying the set of characters to be removed. If omitted or None, the chars argument defaults to removing whitespace. The chars argument is not a suffix; rather, all combinations of its values are stripped: >>> ’ spacious ’.rstrip() ’ spacious’ >>> ’mississippi’.rstrip(’ipz’) ’mississ’ str.split([sep[, maxsplit ]]) Return a list of the words in the string, using sep as the delimiter string. If maxsplit is given, at most maxsplit splits are done (thus, the list will have at most maxsplit+1 elements). If maxsplit is not specified or -1, then there is no limit on the number of splits (all possible splits are made). If sep is given, consecutive delimiters are not grouped together and are deemed to delimit empty strings (for example, ’1„2’.split(’,’) returns [’1’, ”, ’2’]). The sep argument may consist of multiple characters (for example, ’123’.split(’’) returns [’1’, ’2’, ’3’]). Splitting an empty string with a specified separator returns [”]. If sep is not specified or is None, a different splitting algorithm is applied: runs of consecutive whitespace are regarded as a single separator, and the result will contain no empty strings at the start or end if the string has leading or trailing whitespace. Consequently, splitting an empty string or a string consisting of just whitespace with a None separator returns []. For example, ’ 1 2 3 ’.split() returns [’1’, ’2’, ’3’], and ’ 1 2 3 ’.split(None, 1) returns [’1’, ’2 3 ’].
40
Chapter 4. Built-in Types
The Python Library Reference, Release 3.2.3
str.splitlines([keepends ]) Return a list of the lines in the string, breaking at line boundaries. Line breaks are not included in the resulting list unless keepends is given and true. This method uses the universal newlines approach to splitting lines. Unlike split(), if the string ends with line boundary characters the returned list does not have an empty last element. For example, ’ab c\n\nde fg\rkl\r\n’.splitlines() returns [’ab c’, ”, ’de fg’, ’kl’], while the same call with splitlines(True) returns [’ab c\n’, ’\n, ’de fg\r’, ’kl\r\n’]. str.startswith(prefix[, start[, end ]]) Return True if string starts with the prefix, otherwise return False. prefix can also be a tuple of prefixes to look for. With optional start, test string beginning at that position. With optional end, stop comparing string at that position. str.strip([chars ]) Return a copy of the string with the leading and trailing characters removed. The chars argument is a string specifying the set of characters to be removed. If omitted or None, the chars argument defaults to removing whitespace. The chars argument is not a prefix or suffix; rather, all combinations of its values are stripped: >>> ’ spacious ’.strip() ’spacious’ >>> ’www.example.com’.strip(’cmowz.’) ’example’ str.swapcase() Return a copy of the string with uppercase characters converted to lowercase and vice versa. str.title() Return a titlecased version of the string where words start with an uppercase character and the remaining characters are lowercase. The algorithm uses a simple language-independent definition of a word as groups of consecutive letters. The definition works in many contexts but it means that apostrophes in contractions and possessives form word boundaries, which may not be the desired result: >>> "they’re bill’s friends from the UK".title() "They’Re Bill’S Friends From The Uk" A workaround for apostrophes can be constructed using regular expressions: >>> import re >>> def titlecase(s): return re.sub(r"[A-Za-z]+(’[A-Za-z]+)?", lambda mo: mo.group(0)[0].upper() + mo.group(0)[1:].lower(), s) >>> titlecase("they’re bill’s friends.") "They’re Bill’s Friends." str.translate(map) Return a copy of the s where all characters have been mapped through the map which must be a dictionary of Unicode ordinals (integers) to Unicode ordinals, strings or None. Unmapped characters are left untouched. Characters mapped to None are deleted.
4.6. Sequence Types — str, bytes, bytearray, list, tuple, range
41
The Python Library Reference, Release 3.2.3
You can use str.maketrans() to create a translation map from character-to-character mappings in different formats. Note: An even more flexible approach is to create a custom character mapping codec using the codecs module (see encodings.cp1251 for an example). str.upper() Return a copy of the string with all the cased characters 4 converted to uppercase. Note that str.upper().isupper() might be False if s contains uncased characters or if the Unicode category of the resulting character(s) is not “Lu” (Letter, uppercase), but e.g. “Lt” (Letter, titlecase). str.zfill(width) Return the numeric string left filled with zeros in a string of length width. A sign prefix is handled correctly. The original string is returned if width is less than or equal to len(s).
4.6.2 Old String Formatting Operations Note: The formatting operations described here are modelled on C’s printf() syntax. They only support formatting of certain builtin types. The use of a binary operator means that care may be needed in order to format tuples and dictionaries correctly. As the new String Formatting syntax is more flexible and handles tuples and dictionaries naturally, it is recommended for new code. However, there are no current plans to deprecate printf-style formatting. String objects have one unique built-in operation: the % operator (modulo). This is also known as the string formatting or interpolation operator. Given format % values (where format is a string), % conversion specifications in format are replaced with zero or more elements of values. The effect is similar to the using sprintf() in the C language. If format requires a single argument, values may be a single non-tuple object. 5 Otherwise, values must be a tuple with exactly the number of items specified by the format string, or a single mapping object (for example, a dictionary). A conversion specifier contains two or more characters and has the following components, which must occur in this order: 1. The ’%’ character, which marks the start of the specifier. 2. Mapping key (optional), consisting of a parenthesised sequence of characters (for example, (somename)). 3. Conversion flags (optional), which affect the result of some conversion types. 4. Minimum field width (optional). If specified as an ’*’ (asterisk), the actual width is read from the next element of the tuple in values, and the object to convert comes after the minimum field width and optional precision. 5. Precision (optional), given as a ’.’ (dot) followed by the precision. If specified as ’*’ (an asterisk), the actual precision is read from the next element of the tuple in values, and the value to convert comes after the precision. 6. Length modifier (optional). 7. Conversion type. When the right argument is a dictionary (or other mapping type), then the formats in the string must include a parenthesised mapping key into that dictionary inserted immediately after the ’%’ character. The mapping key selects the value to be formatted from the mapping. For example: >>> print(’%(language)s has %(number)03d quote types.’ % ... {’language’: "Python", "number": 2}) Python has 002 quote types. 5
42
To format only a tuple you should therefore provide a singleton tuple whose only element is the tuple to be formatted.
Chapter 4. Built-in Types
The Python Library Reference, Release 3.2.3
In this case no * specifiers may occur in a format (since they require a sequential parameter list). The conversion flag characters are: Flag ’#’ ’0’ ’-’ ’ ’ ’+’
Meaning The value conversion will use the “alternate form” (where defined below). The conversion will be zero padded for numeric values. The converted value is left adjusted (overrides the ’0’ conversion if both are given). (a space) A blank should be left before a positive number (or empty string) produced by a signed conversion. A sign character (’+’ or ’-’) will precede the conversion (overrides a “space” flag).
A length modifier (h, l, or L) may be present, but is ignored as it is not necessary for Python – so e.g. %ld is identical to %d. The conversion types are: Conversion ’d’ ’i’ ’o’ ’u’ ’x’ ’X’ ’e’ ’E’ ’f’ ’F’ ’g’ ’G’ ’c’ ’r’ ’s’ ’a’ ’%’
Meaning Signed integer decimal. Signed integer decimal. Signed octal value. Obsolete type – it is identical to ’d’. Signed hexadecimal (lowercase). Signed hexadecimal (uppercase). Floating point exponential format (lowercase). Floating point exponential format (uppercase). Floating point decimal format. Floating point decimal format. Floating point format. Uses lowercase exponential format if exponent is less than -4 or not less than precision, decimal format otherwise. Floating point format. Uses uppercase exponential format if exponent is less than -4 or not less than precision, decimal format otherwise. Single character (accepts integer or single character string). String (converts any Python object using repr()). String (converts any Python object using str()). String (converts any Python object using ascii()). No argument is converted, results in a ’%’ character in the result.
Notes
(1) (7) (2) (2) (3) (3) (3) (3) (4) (4)
(5) (5) (5)
Notes: 1. The alternate form causes a leading zero (’0’) to be inserted between left-hand padding and the formatting of the number if the leading character of the result is not already a zero. 2. The alternate form causes a leading ’0x’ or ’0X’ (depending on whether the ’x’ or ’X’ format was used) to be inserted between left-hand padding and the formatting of the number if the leading character of the result is not already a zero. 3. The alternate form causes the result to always contain a decimal point, even if no digits follow it. The precision determines the number of digits after the decimal point and defaults to 6. 4. The alternate form causes the result to always contain a decimal point, and trailing zeroes are not removed as they would otherwise be. The precision determines the number of significant digits before and after the decimal point and defaults to 6. 5. If precision is N, the output is truncated to N characters. 7. See PEP 237.
4.6. Sequence Types — str, bytes, bytearray, list, tuple, range
43
The Python Library Reference, Release 3.2.3
Since Python strings have an explicit length, %s conversions do not assume that ’\0’ is the end of the string. Changed in version 3.1: %f conversions for numbers whose absolute value is over 1e50 are no longer replaced by %g conversions. Additional string operations are defined in standard modules string and re.
4.6.3 Range Type The range type is an immutable sequence which is commonly used for looping. The advantage of the range type is that an range object will always take the same amount of memory, no matter the size of the range it represents. Range objects have relatively little behavior: they support indexing, contains, iteration, the len() function, and the following methods: range.count(x) Return the number of i‘s for which s[i] == x. New in version 3.2. range.index(x) Return the smallest i such that s[i] == x. Raises ValueError when x is not in the range. New in version 3.2.
4.6.4 Mutable Sequence Types List and bytearray objects support additional operations that allow in-place modification of the object. Other mutable sequence types (when added to the language) should also support these operations. Strings and tuples are immutable sequence types: such objects cannot be modified once created. The following operations are defined on mutable sequence types (where x is an arbitrary object). Note that while lists allow their items to be of any type, bytearray object “items” are all integers in the range 0 > bytes.fromhex(’f0 f1f2 b’\xf0\xf1\xf2’
’)
The maketrans and translate methods differ in semantics from the versions available on strings: bytes.translate(table[, delete ]) bytearray.translate(table[, delete ]) Return a copy of the bytes or bytearray object where all bytes occurring in the optional argument delete are removed, and the remaining bytes have been mapped through the given translation table, which must be a bytes object of length 256. You can use the bytes.maketrans() method to create a translation table. Set the table argument to None for translations that only delete characters: >>> b’read this short text’.translate(None, b’aeiou’) b’rd ths shrt txt’ static bytes.maketrans(from, to) static bytearray.maketrans(from, to) This static method returns a translation table usable for bytes.translate() that will map each character in from into the character at the same position in to; from and to must be bytes objects and have the same length. New in version 3.1.
4.7 Set Types — set, frozenset A set object is an unordered collection of distinct hashable objects. Common uses include membership testing, removing duplicates from a sequence, and computing mathematical operations such as intersection, union, difference, and symmetric difference. (For other containers see the built in dict, list, and tuple classes, and the collections module.) Like other collections, sets support x in set, len(set), and for x in set. Being an unordered collection, sets do not record element position or order of insertion. Accordingly, sets do not support indexing, slicing, or other sequence-like behavior. There are currently two built-in set types, set and frozenset. The set type is mutable — the contents can be changed using methods like add() and remove(). Since it is mutable, it has no hash value and cannot be used as either a dictionary key or as an element of another set. The frozenset type is immutable and hashable — its contents cannot be altered after it is created; it can therefore be used as a dictionary key or as an element of another set. Non-empty sets (not frozensets) can be created by placing a comma-separated list of elements within braces, for example: {’jack’, ’sjoerd’}, in addition to the set constructor. The constructors for both classes work the same: class set([iterable ]) class frozenset([iterable ]) Return a new set or frozenset object whose elements are taken from iterable. The elements of a set must be hashable. To represent sets of sets, the inner sets must be frozenset objects. If iterable is not specified, a new empty set is returned. Instances of set and frozenset provide the following operations: 46
Chapter 4. Built-in Types
The Python Library Reference, Release 3.2.3
len(s) Return the cardinality of set s. x in s Test x for membership in s. x not in s Test x for non-membership in s. isdisjoint(other) Return True if the set has no elements in common with other. Sets are disjoint if and only if their intersection is the empty set. issubset(other) set other Test whether the set is a true superset of other, that is, set >= other and set != other. union(other, ...) set | other | ... Return a new set with elements from the set and all others. intersection(other, ...) set & other & ... Return a new set with elements common to the set and all others. difference(other, ...) set - other - ... Return a new set with elements in the set that are not in the others. symmetric_difference(other) set ^ other Return a new set with elements in either the set or other but not both. copy() Return a new set with a shallow copy of s. Note, the non-operator versions of union(), intersection(), difference(), and symmetric_difference(), issubset(), and issuperset() methods will accept any iterable as an argument. In contrast, their operator based counterparts require their arguments to be sets. This precludes error-prone constructions like set(’abc’) & ’cbs’ in favor of the more readable set(’abc’).intersection(’cbs’). Both set and frozenset support set to set comparisons. Two sets are equal if and only if every element of each set is contained in the other (each is a subset of the other). A set is less than another set if and only if the first set is a proper subset of the second set (is a subset, but is not equal). A set is greater than another set if and only if the first set is a proper superset of the second set (is a superset, but is not equal). Instances of set are compared to instances of frozenset based on their members. For example, set(’abc’) == frozenset(’abc’) returns True and so does set(’abc’) in set([frozenset(’abc’)]).
4.7. Set Types — set, frozenset
47
The Python Library Reference, Release 3.2.3
The subset and equality comparisons do not generalize to a complete ordering function. For example, any two disjoint sets are not equal and are not subsets of each other, so all of the following return False: ab. Since sets only define partial ordering (subset relationships), the output of the list.sort() method is undefined for lists of sets. Set elements, like dictionary keys, must be hashable. Binary operations that mix set instances with frozenset return the type of the first operand. For example: frozenset(’ab’) | set(’bc’) returns an instance of frozenset. The following table lists operations available for set that do not apply to immutable instances of frozenset: update(other, ...) set |= other | ... Update the set, adding elements from all others. intersection_update(other, ...) set &= other & ... Update the set, keeping only elements found in it and all others. difference_update(other, ...) set -= other | ... Update the set, removing elements found in others. symmetric_difference_update(other) set ^= other Update the set, keeping only elements found in either set, but not in both. add(elem) Add element elem to the set. remove(elem) Remove element elem from the set. Raises KeyError if elem is not contained in the set. discard(elem) Remove element elem from the set if it is present. pop() Remove and return an arbitrary element from the set. Raises KeyError if the set is empty. clear() Remove all elements from the set. Note, the non-operator versions of the update(), intersection_update(), difference_update(), and symmetric_difference_update() methods will accept any iterable as an argument. Note, the elem argument to the __contains__(), remove(), and discard() methods may be a set. To support searching for an equivalent frozenset, the elem set is temporarily mutated during the search and then restored. During the search, the elem set should not be read or mutated since it does not have a meaningful value.
4.8 Mapping Types — dict A mapping object maps hashable values to arbitrary objects. Mappings are mutable objects. There is currently only one standard mapping type, the dictionary. (For other containers see the built in list, set, and tuple classes, and the collections module.)
48
Chapter 4. Built-in Types
The Python Library Reference, Release 3.2.3
A dictionary’s keys are almost arbitrary values. Values that are not hashable, that is, values containing lists, dictionaries or other mutable types (that are compared by value rather than by object identity) may not be used as keys. Numeric types used for keys obey the normal rules for numeric comparison: if two numbers compare equal (such as 1 and 1.0) then they can be used interchangeably to index the same dictionary entry. (Note however, that since computers store floating-point numbers as approximations it is usually unwise to use them as dictionary keys.) Dictionaries can be created by placing a comma-separated list of key: value pairs within braces, for example: {’jack’: 4098, ’sjoerd’: 4127} or {4098: ’jack’, 4127: ’sjoerd’}, or by the dict constructor. class dict([arg ]) Return a new dictionary initialized from an optional positional argument or from a set of keyword arguments. If no arguments are given, return a new empty dictionary. If the positional argument arg is a mapping object, return a dictionary mapping the same keys to the same values as does the mapping object. Otherwise the positional argument must be a sequence, a container that supports iteration, or an iterator object. The elements of the argument must each also be of one of those kinds, and each must in turn contain exactly two objects. The first is used as a key in the new dictionary, and the second as the key’s value. If a given key is seen more than once, the last value associated with it is retained in the new dictionary. If keyword arguments are given, the keywords themselves with their associated values are added as items to the dictionary. If a key is specified both in the positional argument and as a keyword argument, the value associated with the keyword is retained in the dictionary. For example, these all return a dictionary equal to {"one": 1, "two": 2}: •dict(one=1, two=2) •dict({’one’:
1, ’two’:
2})
•dict(zip((’one’, ’two’), (1, 2))) •dict([[’two’, 2], [’one’, 1]]) The first example only works for keys that are valid Python identifiers; the others work with any valid keys. These are the operations that dictionaries support (and therefore, custom mapping types should support too): len(d) Return the number of items in the dictionary d. d[key] Return the item of d with key key. Raises a KeyError if key is not in the map. If a subclass of dict defines a method __missing__(), if the key key is not present, the d[key] operation calls that method with the key key as argument. The d[key] operation then returns or raises whatever is returned or raised by the __missing__(key) call if the key is not present. No other operations or methods invoke __missing__(). If __missing__() is not defined, KeyError is raised. __missing__() must be a method; it cannot be an instance variable: >>> ... ... >>> >>> 0 >>> >>> 1
class Counter(dict): def __missing__(self, key): return 0 c = Counter() c[’red’] c[’red’] += 1 c[’red’]
See collections.Counter for a complete implementation including other methods helpful for accumulating and managing tallies.
4.8. Mapping Types — dict
49
The Python Library Reference, Release 3.2.3
d[key] = value Set d[key] to value. del d[key] Remove d[key] from d. Raises a KeyError if key is not in the map. key in d Return True if d has a key key, else False. key not in d Equivalent to not key in d. iter(d) Return an iterator over the keys of the dictionary. This is a shortcut for iter(d.keys()). clear() Remove all items from the dictionary. copy() Return a shallow copy of the dictionary. classmethod fromkeys(seq[, value ]) Create a new dictionary with keys from seq and values set to value. fromkeys() is a class method that returns a new dictionary. value defaults to None. get(key[, default ]) Return the value for key if key is in the dictionary, else default. If default is not given, it defaults to None, so that this method never raises a KeyError. items() Return a new view of the dictionary’s items ((key, value) pairs). See below for documentation of view objects. keys() Return a new view of the dictionary’s keys. See below for documentation of view objects. pop(key[, default ]) If key is in the dictionary, remove it and return its value, else return default. If default is not given and key is not in the dictionary, a KeyError is raised. popitem() Remove and return an arbitrary (key, value) pair from the dictionary. popitem() is useful to destructively iterate over a dictionary, as often used in set algorithms. If the dictionary is empty, calling popitem() raises a KeyError. setdefault(key[, default ]) If key is in the dictionary, return its value. If not, insert key with a value of default and return default. default defaults to None. update([other ]) Update the dictionary with the key/value pairs from other, overwriting existing keys. Return None. update() accepts either another dictionary object or an iterable of key/value pairs (as tuples or other iterables of length two). If keyword arguments are specified, the dictionary is then updated with those key/value pairs: d.update(red=1, blue=2). values() Return a new view of the dictionary’s values. See below for documentation of view objects.
50
Chapter 4. Built-in Types
The Python Library Reference, Release 3.2.3
4.8.1 Dictionary view objects The objects returned by dict.keys(), dict.values() and dict.items() are view objects. They provide a dynamic view on the dictionary’s entries, which means that when the dictionary changes, the view reflects these changes. Dictionary views can be iterated over to yield their respective data, and support membership tests: len(dictview) Return the number of entries in the dictionary. iter(dictview) Return an iterator over the keys, values or items (represented as tuples of (key, value)) in the dictionary. Keys and values are iterated over in an arbitrary order which is non-random, varies across Python implementations, and depends on the dictionary’s history of insertions and deletions. If keys, values and items views are iterated over with no intervening modifications to the dictionary, the order of items will directly correspond. This allows the creation of (value, key) pairs using zip(): pairs = zip(d.values(), d.keys()). Another way to create the same list is pairs = [(v, k) for (k, v) in d.items()]. Iterating views while adding or deleting entries in the dictionary may raise a RuntimeError or fail to iterate over all entries. x in dictview Return True if x is in the underlying dictionary’s keys, values or items (in the latter case, x should be a (key, value) tuple). Keys views are set-like since their entries are unique and hashable. If all values are hashable, so that (key, value) pairs are unique and hashable, then the items view is also set-like. (Values views are not treated as set-like since the entries are generally not unique.) For set-like views, all of the operations defined for the abstract base class collections.Set are available (for example, ==, >> dishes = {’eggs’: 2, ’sausage’: 1, ’bacon’: 1, ’spam’: 500} >>> keys = dishes.keys() >>> values = dishes.values() >>> >>> >>> ... >>> 504
# iteration n = 0 for val in values: n += val print(n)
>>> # keys and values are iterated over in the same order >>> list(keys) [’eggs’, ’bacon’, ’sausage’, ’spam’] >>> list(values) [2, 1, 1, 500] >>> # view objects are dynamic and reflect dict changes >>> del dishes[’eggs’] >>> del dishes[’sausage’] >>> list(keys) [’spam’, ’bacon’] >>> # set operations
4.9 memoryview type memoryview objects allow Python code to access the internal data of an object that supports the buffer protocol without copying. Memory is generally interpreted as simple bytes. class memoryview(obj) Create a memoryview that references obj. obj must support the buffer protocol. Built-in objects that support the buffer protocol include bytes and bytearray. A memoryview has the notion of an element, which is the atomic memory unit handled by the originating object obj. For many simple types such as bytes and bytearray, an element is a single byte, but other types such as array.array may have bigger elements. len(view) returns the total number of elements in the memoryview, view. The itemsize attribute will give you the number of bytes in a single element. A memoryview supports slicing to expose its data. Taking a single index will return a single element as a bytes object. Full slicing will result in a subview: >>> v = memoryview(b’abcefg’) >>> v[1] b’b’ >>> v[-1] b’g’ >>> v[1:4] >>> bytes(v[1:4]) b’bce’ If the object the memoryview is over supports changing its data, the memoryview supports slice assignment: >>> data = bytearray(b’abcefg’) >>> v = memoryview(data) >>> v.readonly False >>> v[0] = b’z’ >>> data bytearray(b’zbcefg’) >>> v[1:4] = b’123’ >>> data bytearray(b’z123fg’) >>> v[2] = b’spam’ Traceback (most recent call last): File "", line 1, in ValueError: cannot modify size of memoryview object Notice how the size of the memoryview object cannot be changed. memoryview has several methods:
52
Chapter 4. Built-in Types
The Python Library Reference, Release 3.2.3
tobytes() Return the data in the buffer as a bytestring. This is equivalent to calling the bytes constructor on the memoryview. >>> m = memoryview(b"abc") >>> m.tobytes() b’abc’ >>> bytes(m) b’abc’ tolist() Return the data in the buffer as a list of integers. >>> memoryview(b’abc’).tolist() [97, 98, 99] release() Release the underlying buffer exposed by the memoryview object. Many objects take special actions when a view is held on them (for example, a bytearray would temporarily forbid resizing); therefore, calling release() is handy to remove these restrictions (and free any dangling resources) as soon as possible. After this method has been called, any further operation on the view raises a ValueError (except release() itself which can be called multiple times): >>> m = memoryview(b’abc’) >>> m.release() >>> m[0] Traceback (most recent call last): File "", line 1, in ValueError: operation forbidden on released memoryview object The context management protocol can be used for a similar effect, using the with statement: >>> with memoryview(b’abc’) as m: ... m[0] ... b’a’ >>> m[0] Traceback (most recent call last): File "", line 1, in ValueError: operation forbidden on released memoryview object New in version 3.2. There are also several readonly attributes available: format A string containing the format (in struct module style) for each element in the view. This defaults to ’B’, a simple bytestring. itemsize The size in bytes of each element of the memoryview: >>> m = memoryview(array.array(’H’, [1,2,3])) >>> m.itemsize 2
4.9. memoryview type
53
The Python Library Reference, Release 3.2.3
>>> m[0] b’\x01\x00’ >>> len(m[0]) == m.itemsize True shape A tuple of integers the length of ndim giving the shape of the memory as a N-dimensional array. ndim An integer indicating how many dimensions of a multi-dimensional array the memory represents. strides A tuple of integers the length of ndim giving the size in bytes to access each element for each dimension of the array. readonly A bool indicating whether the memory is read only.
4.10 Context Manager Types Python’s with statement supports the concept of a runtime context defined by a context manager. This is implemented using a pair of methods that allow user-defined classes to define a runtime context that is entered before the statement body is executed and exited when the statement ends: contextmanager.__enter__() Enter the runtime context and return either this object or another object related to the runtime context. The value returned by this method is bound to the identifier in the as clause of with statements using this context manager. An example of a context manager that returns itself is a file object. File objects return themselves from __enter__() to allow open() to be used as the context expression in a with statement. An example of a context manager that returns a related object is the one returned by decimal.localcontext(). These managers set the active decimal context to a copy of the original decimal context and then return the copy. This allows changes to be made to the current decimal context in the body of the with statement without affecting code outside the with statement. contextmanager.__exit__(exc_type, exc_val, exc_tb) Exit the runtime context and return a Boolean flag indicating if any exception that occurred should be suppressed. If an exception occurred while executing the body of the with statement, the arguments contain the exception type, value and traceback information. Otherwise, all three arguments are None. Returning a true value from this method will cause the with statement to suppress the exception and continue execution with the statement immediately following the with statement. Otherwise the exception continues propagating after this method has finished executing. Exceptions that occur during execution of this method will replace any exception that occurred in the body of the with statement. The exception passed in should never be reraised explicitly - instead, this method should return a false value to indicate that the method completed successfully and does not want to suppress the raised exception. This allows context management code (such as contextlib.nested) to easily detect whether or not an __exit__() method has actually failed. Python defines several context managers to support easy thread synchronisation, prompt closure of files or other objects, and simpler manipulation of the active decimal arithmetic context. The specific types are not treated specially beyond their implementation of the context management protocol. See the contextlib module for some examples. Python’s generators and the contextlib.contextmanager decorator provide a convenient way to implement these protocols. If a generator function is decorated with the contextlib.contextmanager decorator, it will 54
Chapter 4. Built-in Types
The Python Library Reference, Release 3.2.3
return a context manager implementing the necessary __enter__() and __exit__() methods, rather than the iterator produced by an undecorated generator function. Note that there is no specific slot for any of these methods in the type structure for Python objects in the Python/C API. Extension types wanting to define these methods must provide them as a normal Python accessible method. Compared to the overhead of setting up the runtime context, the overhead of a single class dictionary lookup is negligible.
4.11 Other Built-in Types The interpreter supports several other kinds of objects. Most of these support only one or two operations.
4.11.1 Modules The only special operation on a module is attribute access: m.name, where m is a module and name accesses a name defined in m‘s symbol table. Module attributes can be assigned to. (Note that the import statement is not, strictly speaking, an operation on a module object; import foo does not require a module object named foo to exist, rather it requires an (external) definition for a module named foo somewhere.) A special attribute of every module is __dict__. This is the dictionary containing the module’s symbol table. Modifying this dictionary will actually change the module’s symbol table, but direct assignment to the __dict__ attribute is not possible (you can write m.__dict__[’a’] = 1, which defines m.a to be 1, but you can’t write m.__dict__ = {}). Modifying __dict__ directly is not recommended. Modules built into the interpreter are written like this: . If loaded from a file, they are written as .
4.11.2 Classes and Class Instances See objects and class for these.
4.11.3 Functions Function objects are created by function definitions. func(argument-list).
The only operation on a function object is to call it:
There are really two flavors of function objects: built-in functions and user-defined functions. Both support the same operation (to call the function), but the implementation is different, hence the different object types. See function for more information.
4.11.4 Methods Methods are functions that are called using the attribute notation. There are two flavors: built-in methods (such as append() on lists) and class instance methods. Built-in methods are described with the types that support them. If you access a method (a function defined in a class namespace) through an instance, you get a special object: a bound method (also called instance method) object. When called, it will add the self argument to the argument list. Bound methods have two special read-only attributes: m.__self__ is the object on which the method operates, and m.__func__ is the function implementing the method. Calling m(arg-1, arg-2, ..., arg-n) is completely equivalent to calling m.__func__(m.__self__, arg-1, arg-2, ..., arg-n).
4.11. Other Built-in Types
55
The Python Library Reference, Release 3.2.3
Like function objects, bound method objects support getting arbitrary attributes. However, since method attributes are actually stored on the underlying function object (meth.__func__), setting method attributes on bound methods is disallowed. Attempting to set a method attribute results in a TypeError being raised. In order to set a method attribute, you need to explicitly set it on the underlying function object: class C: def method(self): pass c = C() c.method.__func__.whoami = ’my name is c’ See types for more information.
4.11.5 Code Objects Code objects are used by the implementation to represent “pseudo-compiled” executable Python code such as a function body. They differ from function objects because they don’t contain a reference to their global execution environment. Code objects are returned by the built-in compile() function and can be extracted from function objects through their __code__ attribute. See also the code module. A code object can be executed or evaluated by passing it (instead of a source string) to the exec() or eval() built-in functions. See types for more information.
4.11.6 Type Objects Type objects represent the various object types. An object’s type is accessed by the built-in function type(). There are no special operations on types. The standard module types defines names for all standard built-in types. Types are written like this: .
4.11.7 The Null Object This object is returned by functions that don’t explicitly return a value. It supports no special operations. There is exactly one null object, named None (a built-in name). It is written as None.
4.11.8 The Ellipsis Object This object is commonly used by slicing (see slicings). It supports no special operations. There is exactly one ellipsis object, named Ellipsis (a built-in name). It is written as Ellipsis or ....
4.11.9 The NotImplemented Object This object is returned from comparisons and binary operations when they are asked to operate on types they don’t support. See comparisons for more information. It is written as NotImplemented.
56
Chapter 4. Built-in Types
The Python Library Reference, Release 3.2.3
4.11.10 Boolean Values Boolean values are the two constant objects False and True. They are used to represent truth values (although other values can also be considered false or true). In numeric contexts (for example when used as the argument to an arithmetic operator), they behave like the integers 0 and 1, respectively. The built-in function bool() can be used to convert any value to a Boolean, if the value can be interpreted as a truth value (see section Truth Value Testing above). They are written as False and True, respectively.
4.11.11 Internal Objects See types for this information. It describes stack frame objects, traceback objects, and slice objects.
4.12 Special Attributes The implementation adds a few special read-only attributes to several object types, where they are relevant. Some of these are not reported by the dir() built-in function. object.__dict__ A dictionary or other mapping object used to store an object’s (writable) attributes. instance.__class__ The class to which a class instance belongs. class.__bases__ The tuple of base classes of a class object. class.__name__ The name of the class or type. class.__mro__ This attribute is a tuple of classes that are considered when looking for base classes during method resolution. class.mro() This method can be overridden by a metaclass to customize the method resolution order for its instances. It is called at class instantiation, and its result is stored in __mro__. class.__subclasses__() Each class keeps a list of weak references to its immediate subclasses. This method returns a list of all those references still alive. Example: >>> int.__subclasses__() []
4.12. Special Attributes
57
The Python Library Reference, Release 3.2.3
58
Chapter 4. Built-in Types
CHAPTER
FIVE
BUILT-IN EXCEPTIONS In Python, all exceptions must be instances of a class that derives from BaseException. In a try statement with an except clause that mentions a particular class, that clause also handles any exception classes derived from that class (but not exception classes from which it is derived). Two exception classes that are not related via subclassing are never equivalent, even if they have the same name. The built-in exceptions listed below can be generated by the interpreter or built-in functions. Except where mentioned, they have an “associated value” indicating the detailed cause of the error. This may be a string or a tuple of several items of information (e.g., an error code and a string explaining the code). The associated value is usually passed as arguments to the exception class’s constructor. User code can raise built-in exceptions. This can be used to test an exception handler or to report an error condition “just like” the situation in which the interpreter raises the same exception; but beware that there is nothing to prevent user code from raising an inappropriate error. The built-in exception classes can be sub-classed to define new exceptions; programmers are encouraged to at least derive new exceptions from the Exception class and not BaseException. More information on defining exceptions is available in the Python Tutorial under tut-userexceptions. The following exceptions are used mostly as base classes for other exceptions. exception BaseException The base class for all built-in exceptions. It is not meant to be directly inherited by user-defined classes (for that, use Exception). If str() is called on an instance of this class, the representation of the argument(s) to the instance are returned, or the empty string when there were no arguments. args The tuple of arguments given to the exception constructor. Some built-in exceptions (like IOError) expect a certain number of arguments and assign a special meaning to the elements of this tuple, while others are usually called only with a single string giving an error message. with_traceback(tb) This method sets tb as the new traceback for the exception and returns the exception object. It is usually used in exception handling code like this: try: ... except SomeException: tb = sys.exc_info()[2] raise OtherException(...).with_traceback(tb) exception Exception All built-in, non-system-exiting exceptions are derived from this class. All user-defined exceptions should also be derived from this class.
59
The Python Library Reference, Release 3.2.3
exception ArithmeticError The base class for those built-in exceptions that are raised for various arithmetic errors: OverflowError, ZeroDivisionError, FloatingPointError. exception BufferError Raised when a buffer related operation cannot be performed. exception LookupError The base class for the exceptions that are raised when a key or index used on a mapping or sequence is invalid: IndexError, KeyError. This can be raised directly by codecs.lookup(). exception EnvironmentError The base class for exceptions that can occur outside the Python system: IOError, OSError. When exceptions of this type are created with a 2-tuple, the first item is available on the instance’s errno attribute (it is assumed to be an error number), and the second item is available on the strerror attribute (it is usually the associated error message). The tuple itself is also available on the args attribute. When an EnvironmentError exception is instantiated with a 3-tuple, the first two items are available as above, while the third item is available on the filename attribute. However, for backwards compatibility, the args attribute contains only a 2-tuple of the first two constructor arguments. The filename attribute is None when this exception is created with other than 3 arguments. The errno and strerror attributes are also None when the instance was created with other than 2 or 3 arguments. In this last case, args contains the verbatim constructor arguments as a tuple. The following exceptions are the exceptions that are usually raised. exception AssertionError Raised when an assert statement fails. exception AttributeError Raised when an attribute reference (see attribute-references) or assignment fails. (When an object does not support attribute references or attribute assignments at all, TypeError is raised.) exception EOFError Raised when one of the built-in functions (input() or raw_input()) hits an end-of-file condition (EOF) without reading any data. (N.B.: the file.read() and file.readline() methods return an empty string when they hit EOF.) exception FloatingPointError Raised when a floating point operation fails. This exception is always defined, but can only be raised when Python is configured with the --with-fpectl option, or the WANT_SIGFPE_HANDLER symbol is defined in the pyconfig.h file. exception GeneratorExit Raise when a generator‘s close() method is called. It directly inherits from BaseException instead of Exception since it is technically not an error. exception IOError Raised when an I/O operation (such as the built-in print() or open() functions or a method of a file object) fails for an I/O-related reason, e.g., “file not found” or “disk full”. This class is derived from EnvironmentError. See the discussion above for more information on exception instance attributes. exception ImportError Raised when an import statement fails to find the module definition or when a from ... to find a name that is to be imported.
import fails
exception IndexError Raised when a sequence subscript is out of range. (Slice indices are silently truncated to fall in the allowed
60
Chapter 5. Built-in Exceptions
The Python Library Reference, Release 3.2.3
range; if an index is not an integer, TypeError is raised.) exception KeyError Raised when a mapping (dictionary) key is not found in the set of existing keys. exception KeyboardInterrupt Raised when the user hits the interrupt key (normally Control-C or Delete). During execution, a check for interrupts is made regularly. The exception inherits from BaseException so as to not be accidentally caught by code that catches Exception and thus prevent the interpreter from exiting. exception MemoryError Raised when an operation runs out of memory but the situation may still be rescued (by deleting some objects). The associated value is a string indicating what kind of (internal) operation ran out of memory. Note that because of the underlying memory management architecture (C’s malloc() function), the interpreter may not always be able to completely recover from this situation; it nevertheless raises an exception so that a stack traceback can be printed, in case a run-away program was the cause. exception NameError Raised when a local or global name is not found. This applies only to unqualified names. The associated value is an error message that includes the name that could not be found. exception NotImplementedError This exception is derived from RuntimeError. In user defined base classes, abstract methods should raise this exception when they require derived classes to override the method. exception OSError This exception is derived from EnvironmentError. It is raised when a function returns a system-related error (not for illegal argument types or other incidental errors). The errno attribute is a numeric error code from errno, and the strerror attribute is the corresponding string, as would be printed by the C function perror(). See the module errno, which contains names for the error codes defined by the underlying operating system. For exceptions that involve a file system path (such as chdir() or unlink()), the exception instance will contain a third attribute, filename, which is the file name passed to the function. exception OverflowError Raised when the result of an arithmetic operation is too large to be represented. This cannot occur for integers (which would rather raise MemoryError than give up). Because of the lack of standardization of floating point exception handling in C, most floating point operations also aren’t checked. exception ReferenceError This exception is raised when a weak reference proxy, created by the weakref.proxy() function, is used to access an attribute of the referent after it has been garbage collected. For more information on weak references, see the weakref module. exception RuntimeError Raised when an error is detected that doesn’t fall in any of the other categories. The associated value is a string indicating what precisely went wrong. (This exception is mostly a relic from a previous version of the interpreter; it is not used very much any more.) exception StopIteration Raised by built-in function next() and an iterator‘s __next__() method to signal that there are no further values. exception SyntaxError Raised when the parser encounters a syntax error. This may occur in an import statement, in a call to the built-in functions exec() or eval(), or when reading the initial script or standard input (also interactively). Instances of this class have attributes filename, lineno, offset and text for easier access to the details. str() of the exception instance returns only the message.
61
The Python Library Reference, Release 3.2.3
exception IndentationError Base class for syntax errors related to incorrect indentation. This is a subclass of SyntaxError. exception TabError Raised when indentation contains an inconsistent use of tabs and spaces. IndentationError.
This is a subclass of
exception SystemError Raised when the interpreter finds an internal error, but the situation does not look so serious to cause it to abandon all hope. The associated value is a string indicating what went wrong (in low-level terms). You should report this to the author or maintainer of your Python interpreter. Be sure to report the version of the Python interpreter (sys.version; it is also printed at the start of an interactive Python session), the exact error message (the exception’s associated value) and if possible the source of the program that triggered the error. exception SystemExit This exception is raised by the sys.exit() function. When it is not handled, the Python interpreter exits; no stack traceback is printed. If the associated value is an integer, it specifies the system exit status (passed to C’s exit() function); if it is None, the exit status is zero; if it has another type (such as a string), the object’s value is printed and the exit status is one. Instances have an attribute code which is set to the proposed exit status or error message (defaulting to None). Also, this exception derives directly from BaseException and not Exception, since it is not technically an error. A call to sys.exit() is translated into an exception so that clean-up handlers (finally clauses of try statements) can be executed, and so that a debugger can execute a script without running the risk of losing control. The os._exit() function can be used if it is absolutely positively necessary to exit immediately (for example, in the child process after a call to fork()). The exception inherits from BaseException instead of Exception so that it is not accidentally caught by code that catches Exception. This allows the exception to properly propagate up and cause the interpreter to exit. exception TypeError Raised when an operation or function is applied to an object of inappropriate type. The associated value is a string giving details about the type mismatch. exception UnboundLocalError Raised when a reference is made to a local variable in a function or method, but no value has been bound to that variable. This is a subclass of NameError. exception UnicodeError Raised when a Unicode-related encoding or decoding error occurs. It is a subclass of ValueError. exception UnicodeEncodeError Raised when a Unicode-related error occurs during encoding. It is a subclass of UnicodeError. exception UnicodeDecodeError Raised when a Unicode-related error occurs during decoding. It is a subclass of UnicodeError. exception UnicodeTranslateError Raised when a Unicode-related error occurs during translating. It is a subclass of UnicodeError. exception ValueError Raised when a built-in operation or function receives an argument that has the right type but an inappropriate value, and the situation is not described by a more precise exception such as IndexError. exception VMSError Only available on VMS. Raised when a VMS-specific error occurs.
62
Chapter 5. Built-in Exceptions
The Python Library Reference, Release 3.2.3
exception WindowsError Raised when a Windows-specific error occurs or when the error number does not correspond to an errno value. The winerror and strerror values are created from the return values of the GetLastError() and FormatMessage() functions from the Windows Platform API. The errno value maps the winerror value to corresponding errno.h values. This is a subclass of OSError. exception ZeroDivisionError Raised when the second argument of a division or modulo operation is zero. The associated value is a string indicating the type of the operands and the operation. The following exceptions are used as warning categories; see the warnings module for more information. exception Warning Base class for warning categories. exception UserWarning Base class for warnings generated by user code. exception DeprecationWarning Base class for warnings about deprecated features. exception PendingDeprecationWarning Base class for warnings about features which will be deprecated in the future. exception SyntaxWarning Base class for warnings about dubious syntax exception RuntimeWarning Base class for warnings about dubious runtime behavior. exception FutureWarning Base class for warnings about constructs that will change semantically in the future. exception ImportWarning Base class for warnings about probable mistakes in module imports. exception UnicodeWarning Base class for warnings related to Unicode. exception BytesWarning Base class for warnings related to bytes and buffer. exception ResourceWarning Base class for warnings related to resource usage. New in version 3.2.
5.1 Exception hierarchy The class hierarchy for built-in exceptions is: BaseException +-- SystemExit +-- KeyboardInterrupt +-- GeneratorExit +-- Exception +-- StopIteration +-- ArithmeticError | +-- FloatingPointError | +-- OverflowError | +-- ZeroDivisionError
STRING SERVICES The modules described in this chapter provide a wide range of string manipulation operations. In addition, Python’s built-in string classes support the sequence type methods described in the Sequence Types — str, bytes, bytearray, list, tuple, range section, and also the string-specific methods described in the String Methods section. To output formatted strings, see the String Formatting section. Also, see the re module for string functions based on regular expressions.
6.1 string — Common string operations Source code: Lib/string.py
See Also: Sequence Types — str, bytes, bytearray, list, tuple, range String Methods
6.1.1 String constants The constants defined in this module are: string.ascii_letters The concatenation of the ascii_lowercase and ascii_uppercase constants described below. This value is not locale-dependent. string.ascii_lowercase The lowercase letters ’abcdefghijklmnopqrstuvwxyz’. This value is not locale-dependent and will not change. string.ascii_uppercase The uppercase letters ’ABCDEFGHIJKLMNOPQRSTUVWXYZ’. This value is not locale-dependent and will not change. string.digits The string ’0123456789’. string.hexdigits The string ’0123456789abcdefABCDEF’. string.octdigits The string ’01234567’. 65
The Python Library Reference, Release 3.2.3
string.punctuation String of ASCII characters which are considered punctuation characters in the C locale. string.printable String of ASCII characters which are considered printable. ascii_letters, punctuation, and whitespace.
This is a combination of digits,
string.whitespace A string containing all ASCII characters that are considered whitespace. This includes the characters space, tab, linefeed, return, formfeed, and vertical tab.
6.1.2 String Formatting The built-in string class provides the ability to do complex variable substitutions and value formatting via the format() method described in PEP 3101. The Formatter class in the string module allows you to create and customize your own string formatting behaviors using the same implementation as the built-in format() method. class string.Formatter The Formatter class has the following public methods: format(format_string, *args, **kwargs) format() is the primary API method. It takes a format template string, and an arbitrary set of positional and keyword argument. format() is just a wrapper that calls vformat(). vformat(format_string, args, kwargs) This function does the actual work of formatting. It is exposed as a separate function for cases where you want to pass in a predefined dictionary of arguments, rather than unpacking and repacking the dictionary as individual arguments using the *args and **kwds syntax. vformat() does the work of breaking up the format template string into character data and replacement fields. It calls the various methods described below. In addition, the Formatter defines a number of methods that are intended to be replaced by subclasses: parse(format_string) Loop over the format_string and return an iterable of tuples (literal_text, field_name, format_spec, conversion). This is used by vformat() to break the string into either literal text, or replacement fields. The values in the tuple conceptually represent a span of literal text followed by a single replacement field. If there is no literal text (which can happen if two replacement fields occur consecutively), then literal_text will be a zero-length string. If there is no replacement field, then the values of field_name, format_spec and conversion will be None. get_field(field_name, args, kwargs) Given field_name as returned by parse() (see above), convert it to an object to be formatted. Returns a tuple (obj, used_key). The default version takes strings of the form defined in PEP 3101, such as “0[name]” or “label.title”. args and kwargs are as passed in to vformat(). The return value used_key has the same meaning as the key parameter to get_value(). get_value(key, args, kwargs) Retrieve a given field value. The key argument will be either an integer or a string. If it is an integer, it represents the index of the positional argument in args; if it is a string, then it represents a named argument in kwargs. The args parameter is set to the list of positional arguments to vformat(), and the kwargs parameter is set to the dictionary of keyword arguments. For compound field names, these functions are only called for the first component of the field name; Subsequent components are handled through normal attribute and indexing operations. 66
Chapter 6. String Services
The Python Library Reference, Release 3.2.3
So for example, the field expression ‘0.name’ would cause get_value() to be called with a key argument of 0. The name attribute will be looked up after get_value() returns by calling the built-in getattr() function. If the index or keyword refers to an item that does not exist, then an IndexError or KeyError should be raised. check_unused_args(used_args, args, kwargs) Implement checking for unused arguments if desired. The arguments to this function is the set of all argument keys that were actually referred to in the format string (integers for positional arguments, and strings for named arguments), and a reference to the args and kwargs that was passed to vformat. The set of unused args can be calculated from these parameters. check_unused_args() is assumed to raise an exception if the check fails. format_field(value, format_spec) format_field() simply calls the global format() built-in. The method is provided so that subclasses can override it. convert_field(value, conversion) Converts the value (returned by get_field()) given a conversion type (as in the tuple returned by the parse() method). The default version understands ‘r’ (repr) and ‘s’ (str) conversion types.
6.1.3 Format String Syntax The str.format() method and the Formatter class share the same syntax for format strings (although in the case of Formatter, subclasses can define their own format string syntax). Format strings contain “replacement fields” surrounded by curly braces {}. Anything that is not contained in braces is considered literal text, which is copied unchanged to the output. If you need to include a brace character in the literal text, it can be escaped by doubling: {{ and }}. The grammar for a replacement field is as follows: replacement_field field_name arg_name attribute_name element_index index_string conversion format_spec
In less formal terms, the replacement field can start with a field_name that specifies the object whose value is to be formatted and inserted into the output instead of the replacement field. The field_name is optionally followed by a conversion field, which is preceded by an exclamation point ’!’, and a format_spec, which is preceded by a colon ’:’. These specify a non-default format for the replacement value. See also the Format Specification Mini-Language section. The field_name itself begins with an arg_name that is either a number or a keyword. If it’s a number, it refers to a positional argument, and if it’s a keyword, it refers to a named keyword argument. If the numerical arg_names in a format string are 0, 1, 2, ... in sequence, they can all be omitted (not just some) and the numbers 0, 1, 2, ... will be automatically inserted in that order. Because arg_name is not quote-delimited, it is not possible to specify arbitrary dictionary keys (e.g., the strings ’10’ or ’:-]’) within a format string. The arg_name can be followed by any number of index or attribute expressions. An expression of the form ’.name’ selects the named attribute using getattr(), while an expression of the form ’[index]’ does an index lookup using __getitem__(). Changed
6.1. string — Common string operations
67
The Python Library Reference, Release 3.2.3
in version 3.1: The positional argument specifiers can be omitted, so ’{} {}’ is equivalent to ’{0} {1}’. Some simple format string examples: "First, thou shalt count to {0}" "Bring me a {}" "From {} to {}" "My quest is {name}" "Weight in tons {0.weight}" "Units destroyed: {players[0]}"
# # # # # #
References first positional argument Implicitly references the first positional argument Same as "From {0} to {1}" References keyword argument ’name’ ’weight’ attribute of first positional arg First element of keyword argument ’players’.
The conversion field causes a type coercion before formatting. Normally, the job of formatting a value is done by the __format__() method of the value itself. However, in some cases it is desirable to force a type to be formatted as a string, overriding its own definition of formatting. By converting the value to a string before calling __format__(), the normal formatting logic is bypassed. Three conversion flags are currently supported: ’!s’ which calls str() on the value, ’!r’ which calls repr() and ’!a’ which calls ascii(). Some examples: "Harold’s a clever {0!s}" "Bring out the holy {name!r}" "More {!a}"
# Calls str() on the argument first # Calls repr() on the argument first # Calls ascii() on the argument first
The format_spec field contains a specification of how the value should be presented, including such details as field width, alignment, padding, decimal precision and so on. Each value type can define its own “formatting minilanguage” or interpretation of the format_spec. Most built-in types support a common formatting mini-language, which is described in the next section. A format_spec field can also include nested replacement fields within it. These nested replacement fields can contain only a field name; conversion flags and format specifications are not allowed. The replacement fields within the format_spec are substituted before the format_spec string is interpreted. This allows the formatting of a value to be dynamically specified. See the Format examples section for some examples. Format Specification Mini-Language “Format specifications” are used within replacement fields contained within a format string to define how individual values are presented (see Format String Syntax). They can also be passed directly to the built-in format() function. Each formattable type may define how the format specification is to be interpreted. Most built-in types implement the following options for format specifications, although some of the formatting options are only supported by the numeric types. A general convention is that an empty format string ("") produces the same result as if you had called str() on the value. A non-empty format string typically modifies the result. The general form of a standard format specifier is: format_spec fill align sign width precision type
""" # Record the MIME types of both parts - text/plain and text/html. part1 = MIMEText(text, ’plain’) part2 = MIMEText(html, ’html’) # Attach parts into message container. # According to RFC 2046, the last part of a multipart message, in this case # the HTML message, is best and preferred. msg.attach(part1) 6
Contributed by Martin Matejek.
18.1. email — An email and MIME handling package
729
The Python Library Reference, Release 3.2.3
msg.attach(part2) # Send the message via local SMTP server. s = smtplib.SMTP(’localhost’) # sendmail function takes 3 arguments: sender’s address, recipient’s address # and message to send - here it is sent as one string. s.sendmail(me, you, msg.as_string()) s.quit() See Also: Module smtplib SMTP protocol client Module nntplib NNTP protocol client
18.1.12 Package History This table describes the release history of the email package, corresponding to the version of Python that the package was released with. For purposes of this document, when you see a note about change or added versions, these refer to the Python version the change was made in, not the email package version. This table also describes the Python compatibility of each version of the package. email version 1.x 2.5 3.0 4.0 5.0 5.1
distributed with Python 2.2.0 to Python 2.2.1 Python 2.2.2+ and Python 2.3 Python 2.4 Python 2.5 Python 3.0 and Python 3.1 Python 3.2
compatible with no longer supported Python 2.1 to 2.5 Python 2.3 to 2.5 Python 2.3 to 2.5 Python 3.0 to 3.2 Python 3.0 to 3.2
Here are the major differences between email version 5.1 and version 5.0: • It is once again possible to parse messages containing non-ASCII bytes, and to reproduce such messages if the data containing the non-ASCII bytes is not modified. • New functions message_from_bytes() and message_from_binary_file(), and new classes BytesFeedParser and BytesParser allow binary message data to be parsed into model objects. • Given bytes input to the model, get_payload() will by default decode a message body that has a Content-Transfer-Encoding of 8bit using the charset specified in the MIME headers and return the resulting string. • Given bytes input to the model, Generator will convert message bodies that Content-Transfer-Encoding of 8bit to instead have a 7bit Content-Transfer-Encoding.
have
a
• New class BytesGenerator produces bytes as output, preserving any unchanged non-ASCII data that was present in the input used to build the model, including message bodies with a Content-Transfer-Encoding of 8bit. Here are the major differences between email version 5.0 and version 4: • All operations are on unicode strings. Text inputs must be strings, text outputs are strings. Outputs are limited to the ASCII character set and so can be encoded to ASCII for transmission. Inputs are also limited to ASCII; this is an acknowledged limitation of email 5.0 and means it can only be used to parse email that is 7bit clean. Here are the major differences between email version 4 and version 3: • All modules have been renamed according to PEP 8 standards. email.Message was renamed to email.message in version 4.
730
For example, the version 3 module
Chapter 18. Internet Data Handling
The Python Library Reference, Release 3.2.3
• A new subpackage email.mime was added and all the version 3 email.MIME* modules were renamed and situated into the email.mime subpackage. For example, the version 3 module email.MIMEText was renamed to email.mime.text. Note that the version 3 names will continue to work until Python 2.6. • The email.mime.application module was added, which contains the MIMEApplication class. • Methods that were deprecated in version 3 have been removed. These include Generator.__call__(), Message.get_type(), Message.get_main_type(), Message.get_subtype(). • Fixes have been added for RFC 2231 support which can change some of the return types for Message.get_param() and friends. Under some circumstances, values which used to return a 3-tuple now return simple strings (specifically, if all extended parameter segments were unencoded, there is no language and charset designation expected, so the return type is now a simple string). Also, %-decoding used to be done for both encoded and unencoded segments; this decoding is now done only for encoded segments. Here are the major differences between email version 3 and version 2: • The FeedParser class was introduced, and the Parser class was implemented in terms of the FeedParser. All parsing therefore is non-strict, and parsing will make a best effort never to raise an exception. Problems found while parsing messages are stored in the message’s defect attribute. • All aspects of the API which raised DeprecationWarnings in version 2 have been removed. These include the _encoder argument to the MIMEText constructor, the Message.add_payload() method, the Utils.dump_address_pair() function, and the functions Utils.decode() and Utils.encode(). • New DeprecationWarnings have been added to: Generator.__call__(), Message.get_type(), Message.get_main_type(), Message.get_subtype(), and the strict argument to the Parser class. These are expected to be removed in future versions. • Support for Pythons earlier than 2.3 has been removed. Here are the differences between email version 2 and version 1: • The email.Header and email.Charset modules have been added. • The pickle format for Message instances has changed. Since this was never (and still isn’t) formally defined, this isn’t considered a backward incompatibility. However if your application pickles and unpickles Message instances, be aware that in email version 2, Message instances now have private variables _charset and _default_type. • Several methods in the Message class have been deprecated, or their signatures changed. Also, many new methods have been added. See the documentation for the Message class for details. The changes should be completely backward compatible. • The object structure has changed in the face of message/rfc822 content types. In email version 1, such a type would be represented by a scalar payload, i.e. the container message’s is_multipart() returned false, get_payload() was not a list object, but a single Message instance. This structure was inconsistent with the rest of the package, so the object representation for message/rfc822 content types was changed. In email version 2, the container does return True from is_multipart(), and get_payload() returns a list containing a single Message item. Note that this is one place that backward compatibility could not be completely maintained. However, if you’re already testing the return type of get_payload(), you should be fine. You just need to make sure your code doesn’t do a set_payload() with a Message instance on a container with a content type of message/rfc822.
18.1. email — An email and MIME handling package
731
The Python Library Reference, Release 3.2.3
• The Parser constructor’s strict argument was added, and its parse() and parsestr() methods grew a headersonly argument. The strict flag was also added to functions email.message_from_file() and email.message_from_string(). • Generator.__call__() is deprecated; use Generator.flatten() instead. The Generator class has also grown the clone() method. • The DecodedGenerator class in the email.Generator module was added. • The intermediate base classes MIMENonMultipart and MIMEMultipart have been added, and interposed in the class hierarchy for most of the other MIME-related derived classes. • The _encoder argument to the MIMEText constructor has been deprecated. Encoding now happens implicitly based on the _charset argument. • The following functions in the email.Utils module have been deprecated: dump_address_pairs(), decode(), and encode(). The following functions have been added to the module: make_msgid(), decode_rfc2231(), encode_rfc2231(), and decode_params(). • The non-public function email.Iterators._structure() was added.
18.1.13 Differences from mimelib The email package was originally prototyped as a separate library called mimelib. Changes have been made so that method names are more consistent, and some methods or modules have either been added or removed. The semantics of some of the methods have also changed. For the most part, any functionality available in mimelib is still available in the email package, albeit often in a different way. Backward compatibility between the mimelib package and the email package was not a priority. Here is a brief description of the differences between the mimelib and the email packages, along with hints on how to port your applications. Of course, the most visible difference between the two packages is that the package name has been changed to email. In addition, the top-level package has the following differences: • messageFromString() has been renamed to message_from_string(). • messageFromFile() has been renamed to message_from_file(). The Message class has the following differences: • The method asString() was renamed to as_string(). • The method ismultipart() was renamed to is_multipart(). • The get_payload() method has grown a decode optional argument. • The method getall() was renamed to get_all(). • The method addheader() was renamed to add_header(). • The method gettype() was renamed to get_type(). • The method getmaintype() was renamed to get_main_type(). • The method getsubtype() was renamed to get_subtype(). • The method getparams() was renamed to get_params(). Also, whereas getparams() returned a list of strings, get_params() returns a list of 2-tuples, effectively the key/value pairs of the parameters, split on the ’=’ sign. • The method getparam() was renamed to get_param(). • The method getcharsets() was renamed to get_charsets().
732
Chapter 18. Internet Data Handling
The Python Library Reference, Release 3.2.3
• The method getfilename() was renamed to get_filename(). • The method getboundary() was renamed to get_boundary(). • The method setboundary() was renamed to set_boundary(). • The method getdecodedpayload() was removed. To get similar functionality, pass the value 1 to the decode flag of the get_payload() method. • The method getpayloadastext() was removed. Similar functionality is supported by the DecodedGenerator class in the email.generator module. • The method getbodyastext() was removed. You can get similar functionality by creating an iterator with typed_subpart_iterator() in the email.iterators module. The Parser class has no differences in its public interface. It does have some additional smarts to recognize message/delivery-status type messages, which it represents as a Message instance containing separate Message subparts for each header block in the delivery status notification 7 . The Generator class has no differences in its public interface. There is a new class in the email.generator module though, called DecodedGenerator which provides most of the functionality previously available in the Message.getpayloadastext() method. The following modules and classes have been changed: • The MIMEBase class constructor arguments _major and _minor have changed to _maintype and _subtype respectively. • The Image class/module has been renamed to MIMEImage. The _minor argument has been renamed to _subtype. • The Text class/module has been renamed to MIMEText. The _minor argument has been renamed to _subtype. • The MessageRFC822 class/module has been renamed to MIMEMessage. Note that an earlier version of mimelib called this class/module RFC822, but that clashed with the Python standard library module rfc822 on some case-insensitive file systems. Also, the MIMEMessage class now represents any kind of MIME message with main type message. It takes an optional argument _subtype which is used to set the MIME subtype. _subtype defaults to rfc822. mimelib provided some utility functions in its address and date modules. All of these functions have been moved to the email.utils module. The MsgReader class/module has been removed. Its functionality is most closely supported in the body_line_iterator() function in the email.iterators module.
18.2 json — JSON encoder and decoder JSON (JavaScript Object Notation) is a subset of JavaScript syntax (ECMA-262 3rd edition) used as a lightweight data interchange format. json exposes an API familiar to users of the standard library marshal and pickle modules. Encoding basic Python object hierarchies: >>> import json >>> json.dumps([’foo’, {’bar’: (’baz’, None, 1.0, 2)}]) ’["foo", {"bar": ["baz", null, 1.0, 2]}]’ >>> print(json.dumps("\"foo\bar")) "\"foo\bar" 7
Delivery Status Notifications (DSN) are defined in RFC 1894.
... if isinstance(obj, complex): ... return [obj.real, obj.imag] ... return json.JSONEncoder.default(self, obj) ... >>> json.dumps(2 + 1j, cls=ComplexEncoder) ’[2.0, 1.0]’ >>> ComplexEncoder().encode(2 + 1j) ’[2.0, 1.0]’ >>> list(ComplexEncoder().iterencode(2 + 1j)) [’[2.0’, ’, 1.0’, ’]’] Using json.tool from the shell to validate and pretty-print: $ echo ’{"json":"obj"}’ | python -mjson.tool { "json": "obj" } $ echo ’{1.2:3.4}’ | python -mjson.tool Expecting property name: line 1 column 1 (char 1) Note: The JSON produced by this module’s default settings is a subset of YAML, so it may be used as a serializer for that as well.
18.2.1 Basic Usage json.dump(obj, fp, skipkeys=False, ensure_ascii=True, check_circular=True, allow_nan=True, cls=None, indent=None, separators=None, default=None, **kw) Serialize obj as a JSON formatted stream to fp (a .write()-supporting file-like object). If skipkeys is True (default: False), then dict keys that are not of a basic type (str, int, float, bool, None) will be skipped instead of raising a TypeError. The json module always produces str objects, not bytes objects. Therefore, fp.write() must support str input. If ensure_ascii is True (the default), the output is guaranteed to have all incoming non-ASCII characters escaped. If ensure_ascii is False, these characters will be output as-is. If check_circular is False (default: True), then the circular reference check for container types will be skipped and a circular reference will result in an OverflowError (or worse). If allow_nan is False (default: True), then it will be a ValueError to serialize out of range float values (nan, inf, -inf) in strict compliance of the JSON specification, instead of using the JavaScript equivalents (NaN, Infinity, -Infinity). If indent is a non-negative integer or string, then JSON array elements and object members will be pretty-printed with that indent level. An indent level of 0, negative, or "" will only insert newlines. None (the default) selects the most compact representation. Using a positive integer indent indents that many spaces per level. If indent is a string (such at ‘t’), that string is used to indent each level. If separators is an (item_separator, dict_separator) tuple, then it will be used instead of the default (’, ’, ’: ’) separators. (’,’, ’:’) is the most compact JSON representation. default(obj) is a function that should return a serializable version of obj or raise TypeError. The default simply raises TypeError. To use a custom JSONEncoder subclass (e.g. one that overrides the default() method to serialize additional types), specify it with the cls kwarg; otherwise JSONEncoder is used. 18.2. json — JSON encoder and decoder
735
The Python Library Reference, Release 3.2.3
json.dumps(obj, skipkeys=False, ensure_ascii=True, check_circular=True, allow_nan=True, cls=None, indent=None, separators=None, default=None, **kw) Serialize obj to a JSON formatted str. The arguments have the same meaning as in dump(). Note: Unlike pickle and marshal, JSON is not a framed protocol, so trying to serialize multiple objects with repeated calls to dump() using the same fp will result in an invalid JSON file.
Note: Keys in key/value pairs of JSON are always of the type str. When a dictionary is converted into JSON, all the keys of the dictionary are coerced to strings. As a result of this, if a dictionary is convered into JSON and then back into a dictionary, the dictionary may not equal the original one. That is, loads(dumps(x)) != x if x has non-string keys. json.load(fp, cls=None, object_hook=None, parse_float=None, parse_int=None, parse_constant=None, object_pairs_hook=None, **kw) Deserialize fp (a .read()-supporting file-like object containing a JSON document) to a Python object. object_hook is an optional function that will be called with the result of any object literal decoded (a dict). The return value of object_hook will be used instead of the dict. This feature can be used to implement custom decoders (e.g. JSON-RPC class hinting). object_pairs_hook is an optional function that will be called with the result of any object literal decoded with an ordered list of pairs. The return value of object_pairs_hook will be used instead of the dict. This feature can be used to implement custom decoders that rely on the order that the key and value pairs are decoded (for example, collections.OrderedDict() will remember the order of insertion). If object_hook is also defined, the object_pairs_hook takes priority. Changed in version 3.1: Added support for object_pairs_hook. parse_float, if specified, will be called with the string of every JSON float to be decoded. By default, this is equivalent to float(num_str). This can be used to use another datatype or parser for JSON floats (e.g. decimal.Decimal). parse_int, if specified, will be called with the string of every JSON int to be decoded. By default, this is equivalent to int(num_str). This can be used to use another datatype or parser for JSON integers (e.g. float). parse_constant, if specified, will be called with one of the following strings: ’-Infinity’, ’Infinity’, ’NaN’. This can be used to raise an exception if invalid JSON numbers are encountered. Changed in version 3.1: parse_constant doesn’t get called on ‘null’, ‘true’, ‘false’ anymore. To use a custom JSONDecoder subclass, specify it with the cls kwarg; otherwise JSONDecoder is used. Additional keyword arguments will be passed to the constructor of the class. json.loads(s, encoding=None, cls=None, object_hook=None, parse_float=None, parse_int=None, parse_constant=None, object_pairs_hook=None, **kw) Deserialize s (a str instance containing a JSON document) to a Python object. The other arguments have the same meaning as in load(), except encoding which is ignored and deprecated.
18.2.2 Encoders and decoders class json.JSONDecoder(object_hook=None, parse_float=None, parse_int=None, parse_constant=None, strict=True, object_pairs_hook=None) Simple JSON decoder. Performs the following translations in decoding by default:
736
Chapter 18. Internet Data Handling
The Python Library Reference, Release 3.2.3
JSON object array string number (int) number (real) true false null
Python dict list str int float True False None
It also understands NaN, Infinity, and -Infinity as their corresponding float values, which is outside the JSON spec. object_hook, if specified, will be called with the result of every JSON object decoded and its return value will be used in place of the given dict. This can be used to provide custom deserializations (e.g. to support JSON-RPC class hinting). object_pairs_hook, if specified will be called with the result of every JSON object decoded with an ordered list of pairs. The return value of object_pairs_hook will be used instead of the dict. This feature can be used to implement custom decoders that rely on the order that the key and value pairs are decoded (for example, collections.OrderedDict() will remember the order of insertion). If object_hook is also defined, the object_pairs_hook takes priority. Changed in version 3.1: Added support for object_pairs_hook. parse_float, if specified, will be called with the string of every JSON float to be decoded. By default, this is equivalent to float(num_str). This can be used to use another datatype or parser for JSON floats (e.g. decimal.Decimal). parse_int, if specified, will be called with the string of every JSON int to be decoded. By default, this is equivalent to int(num_str). This can be used to use another datatype or parser for JSON integers (e.g. float). parse_constant, if specified, will be called with one of the following strings: ’-Infinity’, ’Infinity’, ’NaN’, ’null’, ’true’, ’false’. This can be used to raise an exception if invalid JSON numbers are encountered. If strict is False (True is the default), then control characters will be allowed inside strings. Control characters in this context are those with character codes in the 0-31 range, including ’\t’ (tab), ’\n’, ’\r’ and ’\0’. decode(s) Return the Python representation of s (a str instance containing a JSON document) raw_decode(s) Decode a JSON document from s (a str beginning with a JSON document) and return a 2-tuple of the Python representation and the index in s where the document ended. This can be used to decode a JSON document from a string that may have extraneous data at the end. class json.JSONEncoder(skipkeys=False, ensure_ascii=True, check_circular=True, allow_nan=True, sort_keys=False, indent=None, separators=None, default=None) Extensible JSON encoder for Python data structures. Supports the following objects and types by default: Python dict list, tuple str int, float True False None
JSON object array string number true false null
18.2. json — JSON encoder and decoder
737
The Python Library Reference, Release 3.2.3
To extend this to recognize other objects, subclass and implement a default() method with another method that returns a serializable object for o if possible, otherwise it should call the superclass implementation (to raise TypeError). If skipkeys is False (the default), then it is a TypeError to attempt encoding of keys that are not str, int, float or None. If skipkeys is True, such items are simply skipped. If ensure_ascii is True (the default), the output is guaranteed to have all incoming non-ASCII characters escaped. If ensure_ascii is False, these characters will be output as-is. If check_circular is True (the default), then lists, dicts, and custom encoded objects will be checked for circular references during encoding to prevent an infinite recursion (which would cause an OverflowError). Otherwise, no such check takes place. If allow_nan is True (the default), then NaN, Infinity, and -Infinity will be encoded as such. This behavior is not JSON specification compliant, but is consistent with most JavaScript based encoders and decoders. Otherwise, it will be a ValueError to encode such floats. If sort_keys is True (default False), then the output of dictionaries will be sorted by key; this is useful for regression tests to ensure that JSON serializations can be compared on a day-to-day basis. If indent is a non-negative integer (it is None by default), then JSON array elements and object members will be pretty-printed with that indent level. An indent level of 0 will only insert newlines. None is the most compact representation. If specified, separators should be an (item_separator, key_separator) tuple. The default is (’, ’, ’: ’). To get the most compact JSON representation, you should specify (’,’, ’:’) to eliminate whitespace. If specified, default is a function that gets called for objects that can’t otherwise be serialized. It should return a JSON encodable version of the object or raise a TypeError. default(o) Implement this method in a subclass such that it returns a serializable object for o, or calls the base implementation (to raise a TypeError). For example, to support arbitrary iterators, you could implement default like this: def default(self, o): try: iterable = iter(o) except TypeError: pass else: return list(iterable) return json.JSONEncoder.default(self, o) encode(o) Return a JSON string representation of a Python data structure, o. For example: >>> json.JSONEncoder().encode({"foo": ["bar", "baz"]}) ’{"foo": ["bar", "baz"]}’ iterencode(o) Encode the given object, o, and yield each string representation as available. For example: for chunk in json.JSONEncoder().iterencode(bigobject): mysocket.write(chunk)
Mailcap files are used to configure how MIME-aware applications such as mail readers and Web browsers react to files with different MIME types. (The name “mailcap” is derived from the phrase “mail capability”.) For example, a mailcap file might contain a line like video/mpeg; xmpeg %s. Then, if the user encounters an email message or Web document with the MIME type video/mpeg, %s will be replaced by a filename (usually one belonging to a temporary file) and the xmpeg program can be automatically started to view the file. The mailcap format is documented in RFC 1524, “A User Agent Configuration Mechanism For Multimedia Mail Format Information,” but is not an Internet standard. However, mailcap files are supported on most Unix systems. mailcap.findmatch(caps, MIMEtype, key=’view’, filename=’/dev/null’, plist=[]) Return a 2-tuple; the first element is a string containing the command line to be executed (which can be passed to os.system()), and the second element is the mailcap entry for a given MIME type. If no matching MIME type can be found, (None, None) is returned. key is the name of the field desired, which represents the type of activity to be performed; the default value is ‘view’, since in the most common case you simply want to view the body of the MIME-typed data. Other possible values might be ‘compose’ and ‘edit’, if you wanted to create a new body of the given MIME type or alter the existing body data. See RFC 1524 for a complete list of these fields. filename is the filename to be substituted for %s in the command line; the default value is ’/dev/null’ which is almost certainly not what you want, so usually you’ll override it by specifying a filename. plist can be a list containing named parameters; the default value is simply an empty list. Each entry in the list must be a string containing the parameter name, an equals sign (’=’), and the parameter’s value. Mailcap entries can contain named parameters like %{foo}, which will be replaced by the value of the parameter named ‘foo’. For example, if the command line showpartial %{id} %{number} %{total} was in a mailcap file, and plist was set to [’id=1’, ’number=2’, ’total=3’], the resulting command line would be ’showpartial 1 2 3’. In a mailcap file, the “test” field can optionally be specified to test some external condition (such as the machine architecture, or the window system in use) to determine whether or not the mailcap line applies. findmatch() will automatically check such conditions and skip the entry if the check fails. mailcap.getcaps() Returns a dictionary mapping MIME types to a list of mailcap file entries. This dictionary must be passed to the findmatch() function. An entry is stored as a list of dictionaries, but it shouldn’t be necessary to know the details of this representation. The information is derived from all of the mailcap files found on the system. Settings in the user’s mailcap file $HOME/.mailcap will override settings in the system mailcap files /etc/mailcap, /usr/etc/mailcap, and /usr/local/etc/mailcap. An example usage: >>> import mailcap >>> d=mailcap.getcaps() >>> mailcap.findmatch(d, ’video/mpeg’, filename=’/tmp/tmp1223’) (’xmpeg /tmp/tmp1223’, {’view’: ’xmpeg %s’})
18.3. mailcap — Mailcap file handling
739
The Python Library Reference, Release 3.2.3
18.4 mailbox — Manipulate mailboxes in various formats This module defines two classes, Mailbox and Message, for accessing and manipulating on-disk mailboxes and the messages they contain. Mailbox offers a dictionary-like mapping from keys to messages. Message extends the email.Message module’s Message class with format-specific state and behavior. Supported mailbox formats are Maildir, mbox, MH, Babyl, and MMDF. See Also: Module email Represent and manipulate messages.
18.4.1 Mailbox objects class mailbox.Mailbox A mailbox, which may be inspected and modified. The Mailbox class defines an interface and is not intended to be instantiated. Instead, format-specific subclasses should inherit from Mailbox and your code should instantiate a particular subclass. The Mailbox interface is dictionary-like, with small keys corresponding to messages. Keys are issued by the Mailbox instance with which they will be used and are only meaningful to that Mailbox instance. A key continues to identify a message even if the corresponding message is modified, such as by replacing it with another message. Messages may be added to a Mailbox instance using the set-like method add() and removed using a del statement or the set-like methods remove() and discard(). Mailbox interface semantics differ from dictionary semantics in some noteworthy ways. Each time a message is requested, a new representation (typically a Message instance) is generated based upon the current state of the mailbox. Similarly, when a message is added to a Mailbox instance, the provided message representation’s contents are copied. In neither case is a reference to the message representation kept by the Mailbox instance. The default Mailbox iterator iterates over message representations, not keys as the default dictionary iterator does. Moreover, modification of a mailbox during iteration is safe and well-defined. Messages added to the mailbox after an iterator is created will not be seen by the iterator. Messages removed from the mailbox before the iterator yields them will be silently skipped, though using a key from an iterator may result in a KeyError exception if the corresponding message is subsequently removed. Warning: Be very cautious when modifying mailboxes that might be simultaneously changed by some other process. The safest mailbox format to use for such tasks is Maildir; try to avoid using single-file formats such as mbox for concurrent writing. If you’re modifying a mailbox, you must lock it by calling the lock() and unlock() methods before reading any messages in the file or making any changes by adding or deleting a message. Failing to lock the mailbox runs the risk of losing messages or corrupting the entire mailbox. Mailbox instances have the following methods: add(message) Add message to the mailbox and return the key that has been assigned to it. Parameter message may be a Message instance, an email.Message.Message instance, a string, a byte string, or a file-like object (which should be open in binary mode). If message is an instance of the appropriate format-specific Message subclass (e.g., if it’s an mboxMessage instance and this is an mbox instance), its format-specific information is used. Otherwise, reasonable defaults for format-specific information are used. Changed in version 3.2: support for binary input remove(key)
740
Chapter 18. Internet Data Handling
The Python Library Reference, Release 3.2.3
__delitem__(key) discard(key) Delete the message corresponding to key from the mailbox. If no such message exists, a KeyError exception is raised if the method was called as remove() or __delitem__() but no exception is raised if the method was called as discard(). The behavior of discard() may be preferred if the underlying mailbox format supports concurrent modification by other processes. __setitem__(key, message) Replace the message corresponding to key with message. Raise a KeyError exception if no message already corresponds to key. As with add(), parameter message may be a Message instance, an email.Message.Message instance, a string, a byte string, or a file-like object (which should be open in binary mode). If message is an instance of the appropriate format-specific Message subclass (e.g., if it’s an mboxMessage instance and this is an mbox instance), its format-specific information is used. Otherwise, the format-specific information of the message that currently corresponds to key is left unchanged. iterkeys() keys() Return an iterator over all keys if called as iterkeys() or return a list of keys if called as keys(). itervalues() __iter__() values() Return an iterator over representations of all messages if called as itervalues() or __iter__() or return a list of such representations if called as values(). The messages are represented as instances of the appropriate format-specific Message subclass unless a custom message factory was specified when the Mailbox instance was initialized. Note: The behavior of __iter__() is unlike that of dictionaries, which iterate over keys. iteritems() items() Return an iterator over (key, message) pairs, where key is a key and message is a message representation, if called as iteritems() or return a list of such pairs if called as items(). The messages are represented as instances of the appropriate format-specific Message subclass unless a custom message factory was specified when the Mailbox instance was initialized. get(key, default=None) __getitem__(key) Return a representation of the message corresponding to key. If no such message exists, default is returned if the method was called as get() and a KeyError exception is raised if the method was called as __getitem__(). The message is represented as an instance of the appropriate format-specific Message subclass unless a custom message factory was specified when the Mailbox instance was initialized. get_message(key) Return a representation of the message corresponding to key as an instance of the appropriate formatspecific Message subclass, or raise a KeyError exception if no such message exists. get_bytes(key) Return a byte representation of the message corresponding to key, or raise a KeyError exception if no such message exists. New in version 3.2. get_string(key) Return a string representation of the message corresponding to key, or raise a KeyError exception if no 18.4. mailbox — Manipulate mailboxes in various formats
741
The Python Library Reference, Release 3.2.3
such message exists. The message is processed through email.message.Message to convert it to a 7bit clean representation. get_file(key) Return a file-like representation of the message corresponding to key, or raise a KeyError exception if no such message exists. The file-like object behaves as if open in binary mode. This file should be closed once it is no longer needed. Changed in version 3.2: The file object really is a binary file; previously it was incorrectly returned in text mode. Also, the file-like object now supports the context manager protocol: you can use a with statement to automatically close it. Note: Unlike other representations of messages, file-like representations are not necessarily independent of the Mailbox instance that created them or of the underlying mailbox. More specific documentation is provided by each subclass. __contains__(key) Return True if key corresponds to a message, False otherwise. __len__() Return a count of messages in the mailbox. clear() Delete all messages from the mailbox. pop(key, default=None) Return a representation of the message corresponding to key and delete the message. If no such message exists, return default. The message is represented as an instance of the appropriate format-specific Message subclass unless a custom message factory was specified when the Mailbox instance was initialized. popitem() Return an arbitrary (key, message) pair, where key is a key and message is a message representation, and delete the corresponding message. If the mailbox is empty, raise a KeyError exception. The message is represented as an instance of the appropriate format-specific Message subclass unless a custom message factory was specified when the Mailbox instance was initialized. update(arg) Parameter arg should be a key-to-message mapping or an iterable of (key, message) pairs. Updates the mailbox so that, for each given key and message, the message corresponding to key is set to message as if by using __setitem__(). As with __setitem__(), each key must already correspond to a message in the mailbox or else a KeyError exception will be raised, so in general it is incorrect for arg to be a Mailbox instance. Note: Unlike with dictionaries, keyword arguments are not supported. flush() Write any pending changes to the filesystem. For some Mailbox subclasses, changes are always written immediately and flush() does nothing, but you should still make a habit of calling this method. lock() Acquire an exclusive advisory lock on the mailbox so that other processes know not to modify it. An ExternalClashError is raised if the lock is not available. The particular locking mechanisms used depend upon the mailbox format. You should always lock the mailbox before making any modifications to its contents. unlock() Release the lock on the mailbox, if any.
742
Chapter 18. Internet Data Handling
The Python Library Reference, Release 3.2.3
close() Flush the mailbox, unlock it if necessary, and close any open files. For some Mailbox subclasses, this method does nothing. Maildir class mailbox.Maildir(dirname, factory=None, create=True) A subclass of Mailbox for mailboxes in Maildir format. Parameter factory is a callable object that accepts a file-like message representation (which behaves as if opened in binary mode) and returns a custom representation. If factory is None, MaildirMessage is used as the default message representation. If create is True, the mailbox is created if it does not exist. It is for historical reasons that dirname is named as such rather than path. Maildir is a directory-based mailbox format invented for the qmail mail transfer agent and now widely supported by other programs. Messages in a Maildir mailbox are stored in separate files within a common directory structure. This design allows Maildir mailboxes to be accessed and modified by multiple unrelated programs without data corruption, so file locking is unnecessary. Maildir mailboxes contain three subdirectories, namely: tmp, new, and cur. Messages are created momentarily in the tmp subdirectory and then moved to the new subdirectory to finalize delivery. A mail user agent may subsequently move the message to the cur subdirectory and store information about the state of the message in a special “info” section appended to its file name. Folders of the style introduced by the Courier mail transfer agent are also supported. Any subdirectory of the main mailbox is considered a folder if ’.’ is the first character in its name. Folder names are represented by Maildir without the leading ’.’. Each folder is itself a Maildir mailbox but should not contain other folders. Instead, a logical nesting is indicated using ’.’ to delimit levels, e.g., “Archived.2005.07”. Note: The Maildir specification requires the use of a colon (’:’) in certain message file names. However, some operating systems do not permit this character in file names, If you wish to use a Maildir-like format on such an operating system, you should specify another character to use instead. The exclamation point (’!’) is a popular choice. For example: import mailbox mailbox.Maildir.colon = ’!’ The colon attribute may also be set on a per-instance basis. Maildir instances have all of the methods of Mailbox in addition to the following: list_folders() Return a list of the names of all folders. get_folder(folder) Return a Maildir instance representing the folder whose name is folder. A NoSuchMailboxError exception is raised if the folder does not exist. add_folder(folder) Create a folder whose name is folder and return a Maildir instance representing it. remove_folder(folder) Delete the folder whose name is folder. If the folder contains any messages, a NotEmptyError exception will be raised and the folder will not be deleted.
18.4. mailbox — Manipulate mailboxes in various formats
743
The Python Library Reference, Release 3.2.3
clean() Delete temporary files from the mailbox that have not been accessed in the last 36 hours. The Maildir specification says that mail-reading programs should do this occasionally. Some Mailbox methods implemented by Maildir deserve special remarks: add(message) __setitem__(key, message) update(arg) Warning: These methods generate unique file names based upon the current process ID. When using multiple threads, undetected name clashes may occur and cause corruption of the mailbox unless threads are coordinated to avoid using these methods to manipulate the same mailbox simultaneously. flush() All changes to Maildir mailboxes are immediately applied, so this method does nothing. lock() unlock() Maildir mailboxes do not support (or require) locking, so these methods do nothing. close() Maildir instances do not keep any open files and the underlying mailboxes do not support locking, so this method does nothing. get_file(key) Depending upon the host platform, it may not be possible to modify or remove the underlying message while the returned file remains open. See Also: maildir man page from qmail The original specification of the format. Using maildir format Notes on Maildir by its inventor. Includes an updated name-creation scheme and details on “info” semantics. maildir man page from Courier Another specification of the format. Describes a common extension for supporting folders. mbox class mailbox.mbox(path, factory=None, create=True) A subclass of Mailbox for mailboxes in mbox format. Parameter factory is a callable object that accepts a filelike message representation (which behaves as if opened in binary mode) and returns a custom representation. If factory is None, mboxMessage is used as the default message representation. If create is True, the mailbox is created if it does not exist. The mbox format is the classic format for storing mail on Unix systems. All messages in an mbox mailbox are stored in a single file with the beginning of each message indicated by a line whose first five characters are “From ”. Several variations of the mbox format exist to address perceived shortcomings in the original. In the interest of compatibility, mbox implements the original format, which is sometimes referred to as mboxo. This means that the Content-Length header, if present, is ignored and that any occurrences of “From ” at the beginning of a line in a message body are transformed to “>From ” when storing the message, although occurrences of “>From ” are not transformed to “From ” when reading the message. Some Mailbox methods implemented by mbox deserve special remarks:
744
Chapter 18. Internet Data Handling
The Python Library Reference, Release 3.2.3
get_file(key) Using the file after calling flush() or close() on the mbox instance may yield unpredictable results or raise an exception. lock() unlock() Three locking mechanisms are used—dot locking and, if available, the flock() and lockf() system calls. See Also: mbox man page from qmail A specification of the format and its variations. mbox man page from tin Another specification of the format, with details on locking. Configuring Netscape Mail on Unix: Why The Content-Length Format is Bad An argument for using the original mbox format rather than a variation. “mbox” is a family of several mutually incompatible mailbox formats A history of mbox variations. MH class mailbox.MH(path, factory=None, create=True) A subclass of Mailbox for mailboxes in MH format. Parameter factory is a callable object that accepts a filelike message representation (which behaves as if opened in binary mode) and returns a custom representation. If factory is None, MHMessage is used as the default message representation. If create is True, the mailbox is created if it does not exist. MH is a directory-based mailbox format invented for the MH Message Handling System, a mail user agent. Each message in an MH mailbox resides in its own file. An MH mailbox may contain other MH mailboxes (called folders) in addition to messages. Folders may be nested indefinitely. MH mailboxes also support sequences, which are named lists used to logically group messages without moving them to sub-folders. Sequences are defined in a file called .mh_sequences in each folder. The MH class manipulates MH mailboxes, but it does not attempt to emulate all of mh‘s behaviors. In particular, it does not modify and is not affected by the context or .mh_profile files that are used by mh to store its state and configuration. MH instances have all of the methods of Mailbox in addition to the following: list_folders() Return a list of the names of all folders. get_folder(folder) Return an MH instance representing the folder whose name is folder. A NoSuchMailboxError exception is raised if the folder does not exist. add_folder(folder) Create a folder whose name is folder and return an MH instance representing it. remove_folder(folder) Delete the folder whose name is folder. If the folder contains any messages, a NotEmptyError exception will be raised and the folder will not be deleted. get_sequences() Return a dictionary of sequence names mapped to key lists. If there are no sequences, the empty dictionary is returned. set_sequences(sequences) Re-define the sequences that exist in the mailbox based upon sequences, a dictionary of names mapped to key lists, like returned by get_sequences(). 18.4. mailbox — Manipulate mailboxes in various formats
745
The Python Library Reference, Release 3.2.3
pack() Rename messages in the mailbox as necessary to eliminate gaps in numbering. Entries in the sequences list are updated correspondingly. Note: Already-issued keys are invalidated by this operation and should not be subsequently used. Some Mailbox methods implemented by MH deserve special remarks: remove(key) __delitem__(key) discard(key) These methods immediately delete the message. The MH convention of marking a message for deletion by prepending a comma to its name is not used. lock() unlock() Three locking mechanisms are used—dot locking and, if available, the flock() and lockf() system calls. For MH mailboxes, locking the mailbox means locking the .mh_sequences file and, only for the duration of any operations that affect them, locking individual message files. get_file(key) Depending upon the host platform, it may not be possible to remove the underlying message while the returned file remains open. flush() All changes to MH mailboxes are immediately applied, so this method does nothing. close() MH instances do not keep any open files, so this method is equivalent to unlock(). See Also: nmh - Message Handling System Home page of nmh, an updated version of the original mh. MH & nmh: Email for Users & Programmers A GPL-licensed book on mh and nmh, with some information on the mailbox format. Babyl class mailbox.Babyl(path, factory=None, create=True) A subclass of Mailbox for mailboxes in Babyl format. Parameter factory is a callable object that accepts a filelike message representation (which behaves as if opened in binary mode) and returns a custom representation. If factory is None, BabylMessage is used as the default message representation. If create is True, the mailbox is created if it does not exist. Babyl is a single-file mailbox format used by the Rmail mail user agent included with Emacs. The beginning of a message is indicated by a line containing the two characters Control-Underscore (’\037’) and Control-L (’\014’). The end of a message is indicated by the start of the next message or, in the case of the last message, a line containing a Control-Underscore (’\037’) character. Messages in a Babyl mailbox have two sets of headers, original headers and so-called visible headers. Visible headers are typically a subset of the original headers that have been reformatted or abridged to be more attractive. Each message in a Babyl mailbox also has an accompanying list of labels, or short strings that record extra information about the message, and a list of all user-defined labels found in the mailbox is kept in the Babyl options section. Babyl instances have all of the methods of Mailbox in addition to the following:
746
Chapter 18. Internet Data Handling
The Python Library Reference, Release 3.2.3
get_labels() Return a list of the names of all user-defined labels used in the mailbox. Note: The actual messages are inspected to determine which labels exist in the mailbox rather than consulting the list of labels in the Babyl options section, but the Babyl section is updated whenever the mailbox is modified. Some Mailbox methods implemented by Babyl deserve special remarks: get_file(key) In Babyl mailboxes, the headers of a message are not stored contiguously with the body of the message. To generate a file-like representation, the headers and body are copied together into a StringIO instance (from the StringIO module), which has an API identical to that of a file. As a result, the file-like object is truly independent of the underlying mailbox but does not save memory compared to a string representation. lock() unlock() Three locking mechanisms are used—dot locking and, if available, the flock() and lockf() system calls. See Also: Format of Version 5 Babyl Files A specification of the Babyl format. Reading Mail with Rmail The Rmail manual, with some information on Babyl semantics. MMDF class mailbox.MMDF(path, factory=None, create=True) A subclass of Mailbox for mailboxes in MMDF format. Parameter factory is a callable object that accepts a file-like message representation (which behaves as if opened in binary mode) and returns a custom representation. If factory is None, MMDFMessage is used as the default message representation. If create is True, the mailbox is created if it does not exist. MMDF is a single-file mailbox format invented for the Multichannel Memorandum Distribution Facility, a mail transfer agent. Each message is in the same form as an mbox message but is bracketed before and after by lines containing four Control-A (’\001’) characters. As with the mbox format, the beginning of each message is indicated by a line whose first five characters are “From ”, but additional occurrences of “From ” are not transformed to “>From ” when storing messages because the extra message separator lines prevent mistaking such occurrences for the starts of subsequent messages. Some Mailbox methods implemented by MMDF deserve special remarks: get_file(key) Using the file after calling flush() or close() on the MMDF instance may yield unpredictable results or raise an exception. lock() unlock() Three locking mechanisms are used—dot locking and, if available, the flock() and lockf() system calls. See Also: mmdf man page from tin A specification of MMDF format from the documentation of tin, a newsreader. MMDF A Wikipedia article describing the Multichannel Memorandum Distribution Facility.
18.4. mailbox — Manipulate mailboxes in various formats
747
The Python Library Reference, Release 3.2.3
18.4.2 Message objects class mailbox.Message(message=None) A subclass of the email.Message module’s Message. Subclasses of mailbox.Message add mailboxformat-specific state and behavior. If message is omitted, the new instance is created in a default, empty state. If message is an email.Message.Message instance, its contents are copied; furthermore, any format-specific information is converted insofar as possible if message is a Message instance. If message is a string, a byte string, or a file, it should contain an RFC 2822-compliant message, which is read and parsed. Files should be open in binary mode, but text mode files are accepted for backward compatibility. The format-specific state and behaviors offered by subclasses vary, but in general it is only the properties that are not specific to a particular mailbox that are supported (although presumably the properties are specific to a particular mailbox format). For example, file offsets for single-file mailbox formats and file names for directorybased mailbox formats are not retained, because they are only applicable to the original mailbox. But state such as whether a message has been read by the user or marked as important is retained, because it applies to the message itself. There is no requirement that Message instances be used to represent messages retrieved using Mailbox instances. In some situations, the time and memory required to generate Message representations might not be acceptable. For such situations, Mailbox instances also offer string and file-like representations, and a custom message factory may be specified when a Mailbox instance is initialized. MaildirMessage class mailbox.MaildirMessage(message=None) A message with Maildir-specific behaviors. Parameter message has the same meaning as with the Message constructor. Typically, a mail user agent application moves all of the messages in the new subdirectory to the cur subdirectory after the first time the user opens and closes the mailbox, recording that the messages are old whether or not they’ve actually been read. Each message in cur has an “info” section added to its file name to store information about its state. (Some mail readers may also add an “info” section to messages in new.) The “info” section may take one of two forms: it may contain “2,” followed by a list of standardized flags (e.g., “2,FR”) or it may contain “1,” followed by so-called experimental information. Standard flags for Maildir messages are as follows: Flag D F P R S T
Meaning Draft Flagged Passed Replied Seen Trashed
Explanation Under composition Marked as important Forwarded, resent, or bounced Replied to Read Marked for subsequent deletion
MaildirMessage instances offer the following methods: get_subdir() Return either “new” (if the message should be stored in the new subdirectory) or “cur” (if the message should be stored in the cur subdirectory). Note: A message is typically moved from new to cur after its mailbox has been accessed, whether or not the message is has been read. A message msg has been read if "S" in msg.get_flags() is True.
748
Chapter 18. Internet Data Handling
The Python Library Reference, Release 3.2.3
set_subdir(subdir) Set the subdirectory the message should be stored in. Parameter subdir must be either “new” or “cur”. get_flags() Return a string specifying the flags that are currently set. If the message complies with the standard Maildir format, the result is the concatenation in alphabetical order of zero or one occurrence of each of ’D’, ’F’, ’P’, ’R’, ’S’, and ’T’. The empty string is returned if no flags are set or if “info” contains experimental semantics. set_flags(flags) Set the flags specified by flags and unset all others. add_flag(flag) Set the flag(s) specified by flag without changing other flags. To add more than one flag at a time, flag may be a string of more than one character. The current “info” is overwritten whether or not it contains experimental information rather than flags. remove_flag(flag) Unset the flag(s) specified by flag without changing other flags. To remove more than one flag at a time, flag maybe a string of more than one character. If “info” contains experimental information rather than flags, the current “info” is not modified. get_date() Return the delivery date of the message as a floating-point number representing seconds since the epoch. set_date(date) Set the delivery date of the message to date, a floating-point number representing seconds since the epoch. get_info() Return a string containing the “info” for a message. This is useful for accessing and modifying “info” that is experimental (i.e., not a list of flags). set_info(info) Set “info” to info, which should be a string. When a MaildirMessage instance is created based upon an mboxMessage or MMDFMessage instance, the Status and X-Status headers are omitted and the following conversions take place: Resulting state “cur” subdirectory F flag R flag S flag T flag
mboxMessage or MMDFMessage state O flag F flag A flag R flag D flag
When a MaildirMessage instance is created based upon an MHMessage instance, the following conversions take place: Resulting state “cur” subdirectory “cur” subdirectory and S flag F flag R flag
MHMessage state “unseen” sequence no “unseen” sequence “flagged” sequence “replied” sequence
When a MaildirMessage instance is created based upon a BabylMessage instance, the following conversions take place:
18.4. mailbox — Manipulate mailboxes in various formats
749
The Python Library Reference, Release 3.2.3
Resulting state “cur” subdirectory “cur” subdirectory and S flag P flag R flag T flag
BabylMessage state “unseen” label no “unseen” label “forwarded” or “resent” label “answered” label “deleted” label
mboxMessage class mailbox.mboxMessage(message=None) A message with mbox-specific behaviors. Parameter message has the same meaning as with the Message constructor. Messages in an mbox mailbox are stored together in a single file. The sender’s envelope address and the time of delivery are typically stored in a line beginning with “From ” that is used to indicate the start of a message, though there is considerable variation in the exact format of this data among mbox implementations. Flags that indicate the state of the message, such as whether it has been read or marked as important, are typically stored in Status and X-Status headers. Conventional flags for mbox messages are as follows: Flag R O D F A
Meaning Read Old Deleted Flagged Answered
Explanation Read Previously detected by MUA Marked for subsequent deletion Marked as important Replied to
The “R” and “O” flags are stored in the Status header, and the “D”, “F”, and “A” flags are stored in the X-Status header. The flags and headers typically appear in the order mentioned. mboxMessage instances offer the following methods: get_from() Return a string representing the “From ” line that marks the start of the message in an mbox mailbox. The leading “From ” and the trailing newline are excluded. set_from(from_, time_=None) Set the “From ” line to from_, which should be specified without a leading “From ” or trailing newline. For convenience, time_ may be specified and will be formatted appropriately and appended to from_. If time_ is specified, it should be a struct_time instance, a tuple suitable for passing to time.strftime(), or True (to use time.gmtime()). get_flags() Return a string specifying the flags that are currently set. If the message complies with the conventional format, the result is the concatenation in the following order of zero or one occurrence of each of ’R’, ’O’, ’D’, ’F’, and ’A’. set_flags(flags) Set the flags specified by flags and unset all others. Parameter flags should be the concatenation in any order of zero or more occurrences of each of ’R’, ’O’, ’D’, ’F’, and ’A’. add_flag(flag) Set the flag(s) specified by flag without changing other flags. To add more than one flag at a time, flag may be a string of more than one character. remove_flag(flag) Unset the flag(s) specified by flag without changing other flags. To remove more than one flag at a time, flag maybe a string of more than one character. 750
Chapter 18. Internet Data Handling
The Python Library Reference, Release 3.2.3
When an mboxMessage instance is created based upon a MaildirMessage instance, a “From ” line is generated based upon the MaildirMessage instance’s delivery date, and the following conversions take place: Resulting state R flag O flag D flag F flag A flag
MaildirMessage state S flag “cur” subdirectory T flag F flag R flag
When an mboxMessage instance is created based upon an MHMessage instance, the following conversions take place: Resulting state R flag and O flag O flag F flag A flag
MHMessage state no “unseen” sequence “unseen” sequence “flagged” sequence “replied” sequence
When an mboxMessage instance is created based upon a BabylMessage instance, the following conversions take place: Resulting state R flag and O flag O flag D flag A flag
BabylMessage state no “unseen” label “unseen” label “deleted” label “answered” label
When a Message instance is created based upon an MMDFMessage instance, the “From ” line is copied and all flags directly correspond: Resulting state R flag O flag D flag F flag A flag
MMDFMessage state R flag O flag D flag F flag A flag
MHMessage class mailbox.MHMessage(message=None) A message with MH-specific behaviors. Parameter message has the same meaning as with the Message constructor. MH messages do not support marks or flags in the traditional sense, but they do support sequences, which are logical groupings of arbitrary messages. Some mail reading programs (although not the standard mh and nmh) use sequences in much the same way flags are used with other formats, as follows: Sequence unseen replied flagged
Explanation Not read, but previously detected by MUA Replied to Marked as important
MHMessage instances offer the following methods: get_sequences() Return a list of the names of sequences that include this message.
18.4. mailbox — Manipulate mailboxes in various formats
751
The Python Library Reference, Release 3.2.3
set_sequences(sequences) Set the list of sequences that include this message. add_sequence(sequence) Add sequence to the list of sequences that include this message. remove_sequence(sequence) Remove sequence from the list of sequences that include this message. When an MHMessage instance is created based upon a MaildirMessage instance, the following conversions take place: Resulting state “unseen” sequence “replied” sequence “flagged” sequence
MaildirMessage state no S flag R flag F flag
When an MHMessage instance is created based upon an mboxMessage or MMDFMessage instance, the Status and X-Status headers are omitted and the following conversions take place: Resulting state “unseen” sequence “replied” sequence “flagged” sequence
mboxMessage or MMDFMessage state no R flag A flag F flag
When an MHMessage instance is created based upon a BabylMessage instance, the following conversions take place: Resulting state “unseen” sequence “replied” sequence
BabylMessage state “unseen” label “answered” label
BabylMessage class mailbox.BabylMessage(message=None) A message with Babyl-specific behaviors. Parameter message has the same meaning as with the Message constructor. Certain message labels, called attributes, are defined by convention to have special meanings. The attributes are as follows: Label unseen deleted filed answered forwarded edited resent
Explanation Not read, but previously detected by MUA Marked for subsequent deletion Copied to another file or mailbox Replied to Forwarded Modified by the user Resent
By default, Rmail displays only visible headers. The BabylMessage class, though, uses the original headers because they are more complete. Visible headers may be accessed explicitly if desired. BabylMessage instances offer the following methods: get_labels() Return a list of labels on the message. set_labels(labels) Set the list of labels on the message to labels.
752
Chapter 18. Internet Data Handling
The Python Library Reference, Release 3.2.3
add_label(label) Add label to the list of labels on the message. remove_label(label) Remove label from the list of labels on the message. get_visible() Return an Message instance whose headers are the message’s visible headers and whose body is empty. set_visible(visible) Set the message’s visible headers to be the same as the headers in message. Parameter visible should be a Message instance, an email.Message.Message instance, a string, or a file-like object (which should be open in text mode). update_visible() When a BabylMessage instance’s original headers are modified, the visible headers are not automatically modified to correspond. This method updates the visible headers as follows: each visible header with a corresponding original header is set to the value of the original header, each visible header without a corresponding original header is removed, and any of Date, From, Reply-To, To, CC, and Subject that are present in the original headers but not the visible headers are added to the visible headers. When a BabylMessage instance is created based upon a MaildirMessage instance, the following conversions take place: Resulting state “unseen” label “deleted” label “answered” label “forwarded” label
MaildirMessage state no S flag T flag R flag P flag
When a BabylMessage instance is created based upon an mboxMessage or MMDFMessage instance, the Status and X-Status headers are omitted and the following conversions take place: Resulting state “unseen” label “deleted” label “answered” label
mboxMessage or MMDFMessage state no R flag D flag A flag
When a BabylMessage instance is created based upon an MHMessage instance, the following conversions take place: Resulting state “unseen” label “answered” label
MHMessage state “unseen” sequence “replied” sequence
MMDFMessage class mailbox.MMDFMessage(message=None) A message with MMDF-specific behaviors. Parameter message has the same meaning as with the Message constructor. As with message in an mbox mailbox, MMDF messages are stored with the sender’s address and the delivery date in an initial line beginning with “From ”. Likewise, flags that indicate the state of the message are typically stored in Status and X-Status headers. Conventional flags for MMDF messages are identical to those of mbox message and are as follows:
18.4. mailbox — Manipulate mailboxes in various formats
753
The Python Library Reference, Release 3.2.3
Flag R O D F A
Meaning Read Old Deleted Flagged Answered
Explanation Read Previously detected by MUA Marked for subsequent deletion Marked as important Replied to
The “R” and “O” flags are stored in the Status header, and the “D”, “F”, and “A” flags are stored in the X-Status header. The flags and headers typically appear in the order mentioned. MMDFMessage instances offer the following methods, which are identical to those offered by mboxMessage: get_from() Return a string representing the “From ” line that marks the start of the message in an mbox mailbox. The leading “From ” and the trailing newline are excluded. set_from(from_, time_=None) Set the “From ” line to from_, which should be specified without a leading “From ” or trailing newline. For convenience, time_ may be specified and will be formatted appropriately and appended to from_. If time_ is specified, it should be a struct_time instance, a tuple suitable for passing to time.strftime(), or True (to use time.gmtime()). get_flags() Return a string specifying the flags that are currently set. If the message complies with the conventional format, the result is the concatenation in the following order of zero or one occurrence of each of ’R’, ’O’, ’D’, ’F’, and ’A’. set_flags(flags) Set the flags specified by flags and unset all others. Parameter flags should be the concatenation in any order of zero or more occurrences of each of ’R’, ’O’, ’D’, ’F’, and ’A’. add_flag(flag) Set the flag(s) specified by flag without changing other flags. To add more than one flag at a time, flag may be a string of more than one character. remove_flag(flag) Unset the flag(s) specified by flag without changing other flags. To remove more than one flag at a time, flag maybe a string of more than one character. When an MMDFMessage instance is created based upon a MaildirMessage instance, a “From ” line is generated based upon the MaildirMessage instance’s delivery date, and the following conversions take place: Resulting state R flag O flag D flag F flag A flag
MaildirMessage state S flag “cur” subdirectory T flag F flag R flag
When an MMDFMessage instance is created based upon an MHMessage instance, the following conversions take place: Resulting state R flag and O flag O flag F flag A flag
MHMessage state no “unseen” sequence “unseen” sequence “flagged” sequence “replied” sequence
When an MMDFMessage instance is created based upon a BabylMessage instance, the following conversions take place:
754
Chapter 18. Internet Data Handling
The Python Library Reference, Release 3.2.3
Resulting state R flag and O flag O flag D flag A flag
BabylMessage state no “unseen” label “unseen” label “deleted” label “answered” label
When an MMDFMessage instance is created based upon an mboxMessage instance, the “From ” line is copied and all flags directly correspond: Resulting state R flag O flag D flag F flag A flag
mboxMessage state R flag O flag D flag F flag A flag
18.4.3 Exceptions The following exception classes are defined in the mailbox module: exception mailbox.Error The based class for all other module-specific exceptions. exception mailbox.NoSuchMailboxError Raised when a mailbox is expected but is not found, such as when instantiating a Mailbox subclass with a path that does not exist (and with the create parameter set to False), or when opening a folder that does not exist. exception mailbox.NotEmptyError Raised when a mailbox is not empty but is expected to be, such as when deleting a folder that contains messages. exception mailbox.ExternalClashError Raised when some mailbox-related condition beyond the control of the program causes it to be unable to proceed, such as when failing to acquire a lock that another program already holds a lock, or when a uniquelygenerated file name already exists. exception mailbox.FormatError Raised when the data in a file cannot be parsed, such as when an MH instance attempts to read a corrupted .mh_sequences file.
18.4.4 Examples A simple example of printing the subjects of all messages in a mailbox that seem interesting: import mailbox for message in mailbox.mbox(’~/mbox’): subject = message[’subject’] # Could possibly be None. if subject and ’python’ in subject.lower(): print(subject) To copy all mail from a Babyl mailbox to an MH mailbox, converting all of the format-specific information that can be converted: import mailbox destination = mailbox.MH(’~/Mail’) destination.lock() for message in mailbox.Babyl(’~/RMAIL’): destination.add(mailbox.MHMessage(message))
18.4. mailbox — Manipulate mailboxes in various formats
755
The Python Library Reference, Release 3.2.3
destination.flush() destination.unlock() This example sorts mail from several mailing lists into different mailboxes, being careful to avoid mail corruption due to concurrent modification by other programs, mail loss due to interruption of the program, or premature termination due to malformed messages in the mailbox: import mailbox import email.Errors list_names = (’python-list’, ’python-dev’, ’python-bugs’) boxes = {name: mailbox.mbox(’~/email/%s’ % name) for name in list_names} inbox = mailbox.Maildir(’~/Maildir’, factory=None) for key in inbox.iterkeys(): try: message = inbox[key] except email.Errors.MessageParseError: continue # The message is malformed. Just leave it. for name in list_names: list_id = message[’list-id’] if list_id and name in list_id: # Get mailbox to use box = boxes[name] # Write copy to disk before removing original. # If there’s a crash, you might duplicate a message, but # that’s better than losing a message completely. box.lock() box.add(message) box.flush() box.unlock() # Remove original message inbox.lock() inbox.discard(key) inbox.flush() inbox.unlock() break # Found destination, so stop looking. for box in boxes.itervalues(): box.close()
The mimetypes module converts between a filename or URL and the MIME type associated with the filename extension. Conversions are provided from filename to MIME type and from MIME type to filename extension; encodings are not supported for the latter conversion.
756
Chapter 18. Internet Data Handling
The Python Library Reference, Release 3.2.3
The module provides one class and a number of convenience functions. The functions are the normal interface to this module, but some applications may be interested in the class as well. The functions described below provide the primary interface for this module. If the module has not been initialized, they will call init() if they rely on the information init() sets up. mimetypes.guess_type(url, strict=True) Guess the type of a file based on its filename or URL, given by url. The return value is a tuple (type, encoding) where type is None if the type can’t be guessed (missing or unknown suffix) or a string of the form ’type/subtype’, usable for a MIME content-type header. encoding is None for no encoding or the name of the program used to encode (e.g. compress or gzip). The encoding is suitable for use as a Content-Encoding header, not as a Content-Transfer-Encoding header. The mappings are table driven. Encoding suffixes are case sensitive; type suffixes are first tried case sensitively, then case insensitively. The optional strict argument is a flag specifying whether the list of known MIME types is limited to only the official types registered with IANA. When strict is True (the default), only the IANA types are supported; when strict is False, some additional non-standard but commonly used MIME types are also recognized. mimetypes.guess_all_extensions(type, strict=True) Guess the extensions for a file based on its MIME type, given by type. The return value is a list of strings giving all possible filename extensions, including the leading dot (’.’). The extensions are not guaranteed to have been associated with any particular data stream, but would be mapped to the MIME type type by guess_type(). The optional strict argument has the same meaning as with the guess_type() function. mimetypes.guess_extension(type, strict=True) Guess the extension for a file based on its MIME type, given by type. The return value is a string giving a filename extension, including the leading dot (’.’). The extension is not guaranteed to have been associated with any particular data stream, but would be mapped to the MIME type type by guess_type(). If no extension can be guessed for type, None is returned. The optional strict argument has the same meaning as with the guess_type() function. Some additional functions and data items are available for controlling the behavior of the module. mimetypes.init(files=None) Initialize the internal data structures. If given, files must be a sequence of file names which should be used to augment the default type map. If omitted, the file names to use are taken from knownfiles; on Windows, the current registry settings are loaded. Each file named in files or knownfiles takes precedence over those named before it. Calling init() repeatedly is allowed. Changed in version 3.2: Previously, Windows registry settings were ignored. mimetypes.read_mime_types(filename) Load the type map given in the file filename, if it exists. The type map is returned as a dictionary mapping filename extensions, including the leading dot (’.’), to strings of the form ’type/subtype’. If the file filename does not exist or cannot be read, None is returned. mimetypes.add_type(type, ext, strict=True) Add a mapping from the MIME type type to the extension ext. When the extension is already known, the new type will replace the old one. When the type is already known the extension will be added to the list of known extensions. When strict is True (the default), the mapping will added to the official MIME types, otherwise to the nonstandard ones. mimetypes.inited Flag indicating whether or not the global data structures have been initialized. This is set to True by init().
18.5. mimetypes — Map filenames to MIME types
757
The Python Library Reference, Release 3.2.3
mimetypes.knownfiles List of type map file names commonly installed. These files are typically named mime.types and are installed in different locations by different packages. mimetypes.suffix_map Dictionary mapping suffixes to suffixes. This is used to allow recognition of encoded files for which the encoding and the type are indicated by the same extension. For example, the .tgz extension is mapped to .tar.gz to allow the encoding and type to be recognized separately. mimetypes.encodings_map Dictionary mapping filename extensions to encoding types. mimetypes.types_map Dictionary mapping filename extensions to MIME types. mimetypes.common_types Dictionary mapping filename extensions to non-standard, but commonly found MIME types. An example usage of the module: >>> import mimetypes >>> mimetypes.init() >>> mimetypes.knownfiles [’/etc/mime.types’, ’/etc/httpd/mime.types’, ... ] >>> mimetypes.suffix_map[’.tgz’] ’.tar.gz’ >>> mimetypes.encodings_map[’.gz’] ’gzip’ >>> mimetypes.types_map[’.tgz’] ’application/x-tar-gz’
18.5.1 MimeTypes Objects The MimeTypes class may be useful for applications which may want more than one MIME-type database; it provides an interface similar to the one of the mimetypes module. class mimetypes.MimeTypes(filenames=(), strict=True) This class represents a MIME-types database. By default, it provides access to the same database as the rest of this module. The initial database is a copy of that provided by the module, and may be extended by loading additional mime.types-style files into the database using the read() or readfp() methods. The mapping dictionaries may also be cleared before loading additional data if the default data is not desired. The optional filenames parameter can be used to cause additional files to be loaded “on top” of the default database. MimeTypes.suffix_map Dictionary mapping suffixes to suffixes. This is used to allow recognition of encoded files for which the encoding and the type are indicated by the same extension. For example, the .tgz extension is mapped to .tar.gz to allow the encoding and type to be recognized separately. This is initially a copy of the global suffix_map defined in the module. MimeTypes.encodings_map Dictionary mapping filename extensions to encoding types. encodings_map defined in the module.
This is initially a copy of the global
MimeTypes.types_map Tuple containing two dictionaries, mapping filename extensions to MIME types: the first dictionary is for the non-standards types and the second one is for the standard types. They are initialized by common_types and types_map. 758
Chapter 18. Internet Data Handling
The Python Library Reference, Release 3.2.3
MimeTypes.types_map_inv Tuple containing two dictionaries, mapping MIME types to a list of filename extensions: the first dictionary is for the non-standards types and the second one is for the standard types. They are initialized by common_types and types_map. MimeTypes.guess_extension(type, strict=True) Similar to the guess_extension() function, using the tables stored as part of the object. MimeTypes.guess_type(url, strict=True) Similar to the guess_type() function, using the tables stored as part of the object. MimeTypes.guess_all_extensions(type, strict=True) Similar to the guess_all_extensions() function, using the tables stored as part of the object. MimeTypes.read(filename, strict=True) Load MIME information from a file named filename. This uses readfp() to parse the file. If strict is True, information will be added to list of standard types, else to the list of non-standard types. MimeTypes.readfp(fp, strict=True) Load MIME type information from an open file fp. The file must have the format of the standard mime.types files. If strict is True, information will be added to the list of standard types, else to the list of non-standard types. MimeTypes.read_windows_registry(strict=True) Load MIME type information from the Windows registry. Availability: Windows. If strict is True, information will be added to the list of standard types, else to the list of non-standard types. New in version 3.2.
18.6 base64 — RFC 3548: Base16, Base32, Base64 Data Encodings This module provides data encoding and decoding as specified in RFC 3548. This standard defines the Base16, Base32, and Base64 algorithms for encoding and decoding arbitrary binary strings into ASCII-only byte strings that can be safely sent by email, used as parts of URLs, or included as part of an HTTP POST request. The encoding algorithm is not the same as the uuencode program. There are two interfaces provided by this module. The modern interface supports encoding and decoding ASCII byte string objects using all three alphabets. The legacy interface provides for encoding and decoding to and from file-like objects as well as byte strings, but only using the Base64 standard alphabet. The modern interface provides: base64.b64encode(s, altchars=None) Encode a byte string using Base64. s is the string to encode. Optional altchars must be a string of at least length 2 (additional characters are ignored) which specifies an alternative alphabet for the + and / characters. This allows an application to e.g. generate URL or filesystem safe Base64 strings. The default is None, for which the standard Base64 alphabet is used. The encoded byte string is returned. base64.b64decode(s, altchars=None, validate=False) Decode a Base64 encoded byte string. s is the byte string to decode. Optional altchars must be a string of at least length 2 (additional characters are ignored) which specifies the alternative alphabet used instead of the + and / characters. The decoded string is returned. A binascii.Error exception is raised if s is incorrectly padded.
18.6. base64 — RFC 3548: Base16, Base32, Base64 Data Encodings
759
The Python Library Reference, Release 3.2.3
If validate is False (the default), non-base64-alphabet characters are discarded prior to the padding check. If validate is True, non-base64-alphabet characters in the input result in a binascii.Error. base64.standard_b64encode(s) Encode byte string s using the standard Base64 alphabet. base64.standard_b64decode(s) Decode byte string s using the standard Base64 alphabet. base64.urlsafe_b64encode(s) Encode byte string s using a URL-safe alphabet, which substitutes - instead of + and _ instead of / in the standard Base64 alphabet. The result can still contain =. base64.urlsafe_b64decode(s) Decode byte string s using a URL-safe alphabet, which substitutes - instead of + and _ instead of / in the standard Base64 alphabet. base64.b32encode(s) Encode a byte string using Base32. s is the string to encode. The encoded string is returned. base64.b32decode(s, casefold=False, map01=None) Decode a Base32 encoded byte string. s is the byte string to decode. Optional casefold is a flag specifying whether a lowercase alphabet is acceptable as input. For security purposes, the default is False. RFC 3548 allows for optional mapping of the digit 0 (zero) to the letter O (oh), and for optional mapping of the digit 1 (one) to either the letter I (eye) or letter L (el). The optional argument map01 when not None, specifies which letter the digit 1 should be mapped to (when map01 is not None, the digit 0 is always mapped to the letter O). For security purposes the default is None, so that 0 and 1 are not allowed in the input. The decoded byte string is returned. A TypeError is raised if s were incorrectly padded or if there are nonalphabet characters present in the string. base64.b16encode(s) Encode a byte string using Base16. s is the string to encode. The encoded byte string is returned. base64.b16decode(s, casefold=False) Decode a Base16 encoded byte string. s is the string to decode. Optional casefold is a flag specifying whether a lowercase alphabet is acceptable as input. For security purposes, the default is False. The decoded byte string is returned. A TypeError is raised if s were incorrectly padded or if there are nonalphabet characters present in the string. The legacy interface: base64.decode(input, output) Decode the contents of the binary input file and write the resulting binary data to the output file. input and output must be file objects. input will be read until input.read() returns an empty bytes object. base64.decodebytes(s) base64.decodestring(s) Decode the byte string s, which must contain one or more lines of base64 encoded data, and return a byte string containing the resulting binary data. decodestring is a deprecated alias. base64.encode(input, output) Encode the contents of the binary input file and write the resulting base64 encoded data to the output file. input and output must be file objects. input will be read until input.read() returns an empty bytes object. encode() returns the encoded data plus a trailing newline character (b’\n’).
760
Chapter 18. Internet Data Handling
The Python Library Reference, Release 3.2.3
base64.encodebytes(s) base64.encodestring(s) Encode the byte string s, which can contain arbitrary binary data, and return a byte string containing one or more lines of base64-encoded data. encodebytes() returns a string containing one or more lines of base64encoded data always including an extra trailing newline (b’\n’). encodestring is a deprecated alias. An example usage of the module: >>> import base64 >>> encoded = base64.b64encode(b’data to be encoded’) >>> encoded b’ZGF0YSB0byBiZSBlbmNvZGVk’ >>> data = base64.b64decode(encoded) >>> data b’data to be encoded’ See Also: Module binascii Support module containing ASCII-to-binary and binary-to-ASCII conversions. RFC 1521 - MIME (Multipurpose Internet Mail Extensions) Part One: Mechanisms for Specifying and Describing the Format Section 5.2, “Base64 Content-Transfer-Encoding,” provides the definition of the base64 encoding.
18.7 binhex — Encode and decode binhex4 files This module encodes and decodes files in binhex4 format, a format allowing representation of Macintosh files in ASCII. Only the data fork is handled. The binhex module defines the following functions: binhex.binhex(input, output) Convert a binary file with filename input to binhex file output. The output parameter can either be a filename or a file-like object (any object supporting a write() and close() method). binhex.hexbin(input, output) Decode a binhex file input. input may be a filename or a file-like object supporting read() and close() methods. The resulting file is written to a file named output, unless the argument is None in which case the output filename is read from the binhex file. The following exception is also defined: exception binhex.Error Exception raised when something can’t be encoded using the binhex format (for example, a filename is too long to fit in the filename field), or when input is not properly encoded binhex data. See Also: Module binascii Support module containing ASCII-to-binary and binary-to-ASCII conversions.
18.7.1 Notes There is an alternative, more powerful interface to the coder and decoder, see the source for details. If you code or decode textfiles on non-Macintosh platforms they will still use the old Macintosh newline convention (carriage-return as end of line). As of this writing, hexbin() appears to not work in all cases.
18.7. binhex — Encode and decode binhex4 files
761
The Python Library Reference, Release 3.2.3
18.8 binascii — Convert between binary and ASCII The binascii module contains a number of methods to convert between binary and various ASCII-encoded binary representations. Normally, you will not use these functions directly but use wrapper modules like uu, base64, or binhex instead. The binascii module contains low-level functions written in C for greater speed that are used by the higher-level modules. Note: Encoding and decoding functions do not accept Unicode strings. Only bytestring and bytearray objects can be processed. The binascii module defines the following functions: binascii.a2b_uu(string) Convert a single line of uuencoded data back to binary and return the binary data. Lines normally contain 45 (binary) bytes, except for the last line. Line data may be followed by whitespace. binascii.b2a_uu(data) Convert binary data to a line of ASCII characters, the return value is the converted line, including a newline char. The length of data should be at most 45. binascii.a2b_base64(string) Convert a block of base64 data back to binary and return the binary data. More than one line may be passed at a time. binascii.b2a_base64(data) Convert binary data to a line of ASCII characters in base64 coding. The return value is the converted line, including a newline char. The length of data should be at most 57 to adhere to the base64 standard. binascii.a2b_qp(string, header=False) Convert a block of quoted-printable data back to binary and return the binary data. More than one line may be passed at a time. If the optional argument header is present and true, underscores will be decoded as spaces. Changed in version 3.2: Accept only bytestring or bytearray objects as input. binascii.b2a_qp(data, quotetabs=False, istext=True, header=False) Convert binary data to a line(s) of ASCII characters in quoted-printable encoding. The return value is the converted line(s). If the optional argument quotetabs is present and true, all tabs and spaces will be encoded. If the optional argument istext is present and true, newlines are not encoded but trailing whitespace will be encoded. If the optional argument header is present and true, spaces will be encoded as underscores per RFC1522. If the optional argument header is present and false, newline characters will be encoded as well; otherwise linefeed conversion might corrupt the binary data stream. binascii.a2b_hqx(string) Convert binhex4 formatted ASCII data to binary, without doing RLE-decompression. The string should contain a complete number of binary bytes, or (in case of the last portion of the binhex4 data) have the remaining bits zero. binascii.rledecode_hqx(data) Perform RLE-decompression on the data, as per the binhex4 standard. The algorithm uses 0x90 after a byte as a repeat indicator, followed by a count. A count of 0 specifies a byte value of 0x90. The routine returns the decompressed data, unless data input data ends in an orphaned repeat indicator, in which case the Incomplete exception is raised. Changed in version 3.2: Accept only bytestring or bytearray objects as input. binascii.rlecode_hqx(data) Perform binhex4 style RLE-compression on data and return the result. binascii.b2a_hqx(data) Perform hexbin4 binary-to-ASCII translation and return the resulting string. The argument should already be RLE-coded, and have a length divisible by 3 (except possibly the last fragment). 762
Chapter 18. Internet Data Handling
The Python Library Reference, Release 3.2.3
binascii.crc_hqx(data, crc) Compute the binhex4 crc value of data, starting with an initial crc and returning the result. binascii.crc32(data[, crc ]) Compute CRC-32, the 32-bit checksum of data, starting with an initial crc. This is consistent with the ZIP file checksum. Since the algorithm is designed for use as a checksum algorithm, it is not suitable for use as a general hash algorithm. Use as follows: print(binascii.crc32(b"hello world")) # Or, in two pieces: crc = binascii.crc32(b"hello") crc = binascii.crc32(b" world", crc) & 0xffffffff print(’crc32 = {:#010x}’.format(crc))
Note: To generate the same numeric value across all Python versions and platforms use crc32(data) & 0xffffffff. If you are only using the checksum in packed binary format this is not necessary as the return value is the correct 32bit binary representation regardless of sign. binascii.b2a_hex(data) binascii.hexlify(data) Return the hexadecimal representation of the binary data. Every byte of data is converted into the corresponding 2-digit hex representation. The resulting string is therefore twice as long as the length of data. binascii.a2b_hex(hexstr) binascii.unhexlify(hexstr) Return the binary data represented by the hexadecimal string hexstr. This function is the inverse of b2a_hex(). hexstr must contain an even number of hexadecimal digits (which can be upper or lower case), otherwise a TypeError is raised. Changed in version 3.2: Accept only bytestring or bytearray objects as input. exception binascii.Error Exception raised on errors. These are usually programming errors. exception binascii.Incomplete Exception raised on incomplete data. These are usually not programming errors, but may be handled by reading a little more data and trying again. See Also: Module base64 Support for base64 encoding used in MIME email messages. Module binhex Support for the binhex format used on the Macintosh. Module uu Support for UU encoding used on Unix. Module quopri Support for quoted-printable encoding used in MIME email messages.
18.9 quopri — Encode and decode MIME quoted-printable data Source code: Lib/quopri.py
This module performs quoted-printable transport encoding and decoding, as defined in RFC 1521: “MIME (Multipurpose Internet Mail Extensions) Part One: Mechanisms for Specifying and Describing the Format of Internet Message Bodies”. The quoted-printable encoding is designed for data where there are relatively few nonprintable characters; the base64 encoding scheme available via the base64 module is more compact if there are many such characters, as when sending a graphics file. 18.9. quopri — Encode and decode MIME quoted-printable data
763
The Python Library Reference, Release 3.2.3
quopri.decode(input, output, header=False) Decode the contents of the input file and write the resulting decoded binary data to the output file. input and output must be file objects. input will be read until input.readline() returns an empty string. If the optional argument header is present and true, underscore will be decoded as space. This is used to decode “Q”-encoded headers as described in RFC 1522: “MIME (Multipurpose Internet Mail Extensions) Part Two: Message Header Extensions for Non-ASCII Text”. quopri.encode(input, output, quotetabs, header=False) Encode the contents of the input file and write the resulting quoted-printable data to the output file. input and output must be file objects. input will be read until input.readline() returns an empty string. quotetabs is a flag which controls whether to encode embedded spaces and tabs; when true it encodes such embedded whitespace, and when false it leaves them unencoded. Note that spaces and tabs appearing at the end of lines are always encoded, as per RFC 1521. header is a flag which controls if spaces are encoded as underscores as per RFC 1522. quopri.decodestring(s, header=False) Like decode(), except that it accepts a source string and returns the corresponding decoded string. quopri.encodestring(s, quotetabs=False, header=False) Like encode(), except that it accepts a source string and returns the corresponding encoded string. quotetabs and header are optional (defaulting to False), and are passed straight through to encode(). See Also: Module base64 Encode and decode MIME base64 data
This module encodes and decodes files in uuencode format, allowing arbitrary binary data to be transferred over ASCII-only connections. Wherever a file argument is expected, the methods accept a file-like object. For backwards compatibility, a string containing a pathname is also accepted, and the corresponding file will be opened for reading and writing; the pathname ’-’ is understood to mean the standard input or output. However, this interface is deprecated; it’s better for the caller to open the file itself, and be sure that, when required, the mode is ’rb’ or ’wb’ on Windows. This code was contributed by Lance Ellinghouse, and modified by Jack Jansen. The uu module defines the following functions: uu.encode(in_file, out_file, name=None, mode=None) Uuencode file in_file into file out_file. The uuencoded file will have the header specifying name and mode as the defaults for the results of decoding the file. The default defaults are taken from in_file, or ’-’ and 0o666 respectively. uu.decode(in_file, out_file=None, mode=None, quiet=False) This call decodes uuencoded file in_file placing the result on file out_file. If out_file is a pathname, mode is used to set the permission bits if the file must be created. Defaults for out_file and mode are taken from the uuencode header. However, if the file specified in the header already exists, a uu.Error is raised. decode() may print a warning to standard error if the input was produced by an incorrect uuencoder and Python could recover from that error. Setting quiet to a true value silences this warning. exception uu.Error Subclass of Exception, this can be raised by uu.decode() under various situations, such as described above, but also including a badly formatted header, or truncated input file.
764
Chapter 18. Internet Data Handling
The Python Library Reference, Release 3.2.3
See Also: Module binascii Support module containing ASCII-to-binary and binary-to-ASCII conversions.
18.10. uu — Encode and decode uuencode files
765
The Python Library Reference, Release 3.2.3
766
Chapter 18. Internet Data Handling
CHAPTER
NINETEEN
STRUCTURED MARKUP PROCESSING TOOLS Python supports a variety of modules to work with various forms of structured data markup. This includes modules to work with the Standard Generalized Markup Language (SGML) and the Hypertext Markup Language (HTML), and several interfaces for working with the Extensible Markup Language (XML). It is important to note that modules in the xml package require that there be at least one SAX-compliant XML parser available. The Expat parser is included with Python, so the xml.parsers.expat module will always be available. The documentation for the xml.dom and xml.sax packages are the definition of the Python bindings for the DOM and SAX interfaces.
19.1 html — HyperText Markup Language support Source code: Lib/html/__init__.py
This module defines utilities to manipulate HTML. html.escape(s, quote=True) Convert the characters &, < and > in string s to HTML-safe sequences. Use this if you need to display text that might contain such characters in HTML. If the optional flag quote is true, the characters (") and (’) are also translated; this helps for inclusion in an HTML attribute value delimited by quotes, as in . New in version 3.2.
). The tag argument is the name of the tag converted to lower case. HTMLParser.handle_startendtag(tag, attrs) Similar to handle_starttag(), but called when the parser encounters an XHTML-style empty tag (). This method may be overridden by subclasses which require this particular lexical information; the default implementation simply calls handle_starttag() and handle_endtag(). HTMLParser.handle_data(data) This method is called to process arbitrary data (e.g. text nodes and the content of ... and ...). HTMLParser.handle_entityref(name) This method is called to process a named character reference of the form &name; (e.g. >), where name is a general entity reference (e.g. ’gt’). HTMLParser.handle_charref(name) This method is called to process decimal and hexadecimal numeric character references of the form &#NNN; and &#xNNN;. For example, the decimal equivalent for > is >, whereas the hexadecimal is >; in this case the method will receive ’62’ or ’x3E’.
19.2. html.parser — Simple HTML and XHTML parser
769
The Python Library Reference, Release 3.2.3
HTMLParser.handle_comment(data) This method is called when a comment is encountered (e.g. ). For example, the comment will cause this method to be called with the argument ’ comment ’. The content of Internet Explorer conditional comments (condcoms) will also be sent to this method, so, for , this method will receive ’[if IE 9]>IE-specific content StartElementHandler will receive the following strings for each element: http://default-namespace.org/ root http://www.python.org/ns/ elem1 elem2 4 The encoding string included in XML output should conform to the appropriate standards. For example, “UTF-8” is valid, but “UTF8” is not. See http://www.w3.org/TR/2006/REC-xml11-20060816/#NT-EncodingDecl and http://www.iana.org/assignments/character-sets .
19.12. xml.parsers.expat — Fast XML parsing using Expat
807
The Python Library Reference, Release 3.2.3
See Also: The Expat XML Parser Home page of the Expat project.
19.12.1 XMLParser Objects xmlparser objects have the following methods: xmlparser.Parse(data[, isfinal ]) Parses the contents of the string data, calling the appropriate handler functions to process the parsed data. isfinal must be true on the final call to this method. data can be the empty string at any time. xmlparser.ParseFile(file) Parse XML data reading from the object file. file only needs to provide the read(nbytes) method, returning the empty string when there’s no more data. xmlparser.SetBase(base) Sets the base to be used for resolving relative URIs in system identifiers in declarations. Resolving relative identifiers is left to the application: this value will be passed through as the base argument to the ExternalEntityRefHandler(), NotationDeclHandler(), and UnparsedEntityDeclHandler() functions. xmlparser.GetBase() Returns a string containing the base set by a previous call to SetBase(), or None if SetBase() hasn’t been called. xmlparser.GetInputContext() Returns the input data that generated the current event as a string. The data is in the encoding of the entity which contains the text. When called while an event handler is not active, the return value is None. xmlparser.ExternalEntityParserCreate(context[, encoding ]) Create a “child” parser which can be used to parse an external parsed entity referred to by content parsed by the parent parser. The context parameter should be the string passed to the ExternalEntityRefHandler() handler function, described below. The child parser is created with the ordered_attributes and specified_attributes set to the values of this parser. xmlparser.SetParamEntityParsing(flag) Control parsing of parameter entities (including the external DTD subset). Possible flag values are XML_PARAM_ENTITY_PARSING_NEVER, XML_PARAM_ENTITY_PARSING_UNLESS_STANDALONE and XML_PARAM_ENTITY_PARSING_ALWAYS. Return true if setting the flag was successful. xmlparser.UseForeignDTD([flag ]) Calling this with a true value for flag (the default) will cause Expat to call the ExternalEntityRefHandler with None for all arguments to allow an alternate DTD to be loaded. If the document does not contain a document type declaration, the ExternalEntityRefHandler will still be called, but the StartDoctypeDeclHandler and EndDoctypeDeclHandler will not be called. Passing a false value for flag will cancel a previous call that passed a true value, but otherwise has no effect. This method can only be called before the Parse() or ParseFile() methods are called; calling it after either of those have been called causes ExpatError to be raised with the code attribute set to errors.codes[errors.XML_ERROR_CANT_CHANGE_FEATURE_ONCE_PARSING]. xmlparser objects have the following attributes: xmlparser.buffer_size The size of the buffer used when buffer_text is true. A new buffer size can be set by assigning a new integer value to this attribute. When the size is changed, the buffer will be flushed.
808
Chapter 19. Structured Markup Processing Tools
The Python Library Reference, Release 3.2.3
xmlparser.buffer_text Setting this to true causes the xmlparser object to buffer textual content returned by Expat to avoid multiple calls to the CharacterDataHandler() callback whenever possible. This can improve performance substantially since Expat normally breaks character data into chunks at every line ending. This attribute is false by default, and may be changed at any time. xmlparser.buffer_used If buffer_text is enabled, the number of bytes stored in the buffer. These bytes represent UTF-8 encoded text. This attribute has no meaningful interpretation when buffer_text is false. xmlparser.ordered_attributes Setting this attribute to a non-zero integer causes the attributes to be reported as a list rather than a dictionary. The attributes are presented in the order found in the document text. For each attribute, two list entries are presented: the attribute name and the attribute value. (Older versions of this module also used this format.) By default, this attribute is false; it may be changed at any time. xmlparser.specified_attributes If set to a non-zero integer, the parser will report only those attributes which were specified in the document instance and not those which were derived from attribute declarations. Applications which set this need to be especially careful to use what additional information is available from the declarations as needed to comply with the standards for the behavior of XML processors. By default, this attribute is false; it may be changed at any time. The following attributes contain values relating to the most recent error encountered by an xmlparser object, and will only have correct values once a call to Parse() or ParseFile() has raised a xml.parsers.expat.ExpatError exception. xmlparser.ErrorByteIndex Byte index at which an error occurred. xmlparser.ErrorCode Numeric code specifying the problem. This value can be passed to the ErrorString() function, or compared to one of the constants defined in the errors object. xmlparser.ErrorColumnNumber Column number at which an error occurred. xmlparser.ErrorLineNumber Line number at which an error occurred. The following attributes contain values relating to the current parse location in an xmlparser object. During a callback reporting a parse event they indicate the location of the first of the sequence of characters that generated the event. When called outside of a callback, the position indicated will be just past the last parse event (regardless of whether there was an associated callback). xmlparser.CurrentByteIndex Current byte index in the parser input. xmlparser.CurrentColumnNumber Current column number in the parser input. xmlparser.CurrentLineNumber Current line number in the parser input. Here is the list of handlers that can be set. To set a handler on an xmlparser object o, use o.handlername = func. handlername must be taken from the following list, and func must be a callable object accepting the correct number of arguments. The arguments are all strings, unless otherwise stated. xmlparser.XmlDeclHandler(version, encoding, standalone) Called when the XML declaration is parsed. The XML declaration is the (optional) declaration of the applicable
19.12. xml.parsers.expat — Fast XML parsing using Expat
809
The Python Library Reference, Release 3.2.3
version of the XML recommendation, the encoding of the document text, and an optional “standalone” declaration. version and encoding will be strings, and standalone will be 1 if the document is declared standalone, 0 if it is declared not to be standalone, or -1 if the standalone clause was omitted. This is only available with Expat version 1.95.0 or newer. xmlparser.StartDoctypeDeclHandler(doctypeName, systemId, publicId, has_internal_subset) Called when Expat begins parsing the document type declaration (| UnixStreamServer | +-----------+ +------------------+ | v +-----------+ +--------------------+ | UDPServer |------->| UnixDatagramServer | +-----------+ +--------------------+ Note that UnixDatagramServer derives from UDPServer, not from UnixStreamServer — the only difference between an IP and a Unix stream server is the address family, which is simply repeated in both Unix server classes. Forking and threading versions of each type of server can be created using the ForkingMixIn and ThreadingMixIn mix-in classes. For instance, a threading UDP server class is created as follows: class ThreadingUDPServer(ThreadingMixIn, UDPServer): pass The mix-in class must come first, since it overrides a method defined in UDPServer. Setting the various attributes also change the behavior of the underlying server mechanism. To implement a service, you must derive a class from BaseRequestHandler and redefine its handle() method. You can then run various versions of the service by combining one of the server classes with your request handler class. The request handler class must be different for datagram or stream services. This can be hidden by using the handler subclasses StreamRequestHandler or DatagramRequestHandler. Of course, you still have to use your head! For instance, it makes no sense to use a forking server if the service contains state in memory that can be modified by different requests, since the modifications in the child process would never reach the initial state kept in the parent process and passed to each child. In this case, you can use a threading server, but you will probably have to use locks to protect the integrity of the shared data. On the other hand, if you are building an HTTP server where all data is stored externally (for instance, in the file system), a synchronous class will essentially render the service “deaf” while one request is being handled – which may be for a very long time if a client is slow to receive all the data it has requested. Here a threading or forking server is appropriate.
20.19. socketserver — A framework for network servers
895
The Python Library Reference, Release 3.2.3
In some cases, it may be appropriate to process part of a request synchronously, but to finish processing in a forked child depending on the request data. This can be implemented by using a synchronous server and doing an explicit fork in the request handler class handle() method. Another approach to handling multiple simultaneous requests in an environment that supports neither threads nor fork() (or where these are too expensive or inappropriate for the service) is to maintain an explicit table of partially finished requests and to use select() to decide which request to work on next (or whether to handle a new incoming request). This is particularly important for stream services where each client can potentially be connected for a long time (if threads or subprocesses cannot be used). See asyncore for another way to manage this.
20.19.2 Server Objects class socketserver.BaseServer This is the superclass of all Server objects in the module. It defines the interface, given below, but does not implement most of the methods, which is done in subclasses. BaseServer.fileno() Return an integer file descriptor for the socket on which the server is listening. This function is most commonly passed to select.select(), to allow monitoring multiple servers in the same process. BaseServer.handle_request() Process a single request. This function calls the following methods in order: get_request(), verify_request(), and process_request(). If the user-provided handle() method of the handler class raises an exception, the server’s handle_error() method will be called. If no request is received within self.timeout seconds, handle_timeout() will be called and handle_request() will return. BaseServer.serve_forever(poll_interval=0.5) Handle requests until an explicit shutdown() request. Poll for shutdown every poll_interval seconds. Ignores self.timeout. If you need to do periodic tasks, do them in another thread. BaseServer.shutdown() Tell the serve_forever() loop to stop and wait until it does. BaseServer.address_family The family of protocols to which the server’s socket belongs. Common examples are socket.AF_INET and socket.AF_UNIX. BaseServer.RequestHandlerClass The user-provided request handler class; an instance of this class is created for each request. BaseServer.server_address The address on which the server is listening. The format of addresses varies depending on the protocol family; see the documentation for the socket module for details. For Internet protocols, this is a tuple containing a string giving the address, and an integer port number: (’127.0.0.1’, 80), for example. BaseServer.socket The socket object on which the server will listen for incoming requests. The server classes support the following class variables: BaseServer.allow_reuse_address Whether the server will allow the reuse of an address. This defaults to False, and can be set in subclasses to change the policy. BaseServer.request_queue_size The size of the request queue. If it takes a long time to process a single request, any requests that arrive while the server is busy are placed into a queue, up to request_queue_size requests. Once the queue is full,
896
Chapter 20. Internet Protocols and Support
The Python Library Reference, Release 3.2.3
further requests from clients will get a “Connection denied” error. The default value is usually 5, but this can be overridden by subclasses. BaseServer.socket_type The type of socket used by the server; socket.SOCK_STREAM and socket.SOCK_DGRAM are two common values. BaseServer.timeout Timeout duration, measured in seconds, or None if no timeout is desired. If handle_request() receives no incoming requests within the timeout period, the handle_timeout() method is called. There are various server methods that can be overridden by subclasses of base server classes like TCPServer; these methods aren’t useful to external users of the server object. BaseServer.finish_request() Actually processes the request by instantiating RequestHandlerClass and calling its handle() method. BaseServer.get_request() Must accept a request from the socket, and return a 2-tuple containing the new socket object to be used to communicate with the client, and the client’s address. BaseServer.handle_error(request, client_address) This function is called if the RequestHandlerClass‘s handle() method raises an exception. The default action is to print the traceback to standard output and continue handling further requests. BaseServer.handle_timeout() This function is called when the timeout attribute has been set to a value other than None and the timeout period has passed with no requests being received. The default action for forking servers is to collect the status of any child processes that have exited, while in threading servers this method does nothing. BaseServer.process_request(request, client_address) Calls finish_request() to create an instance of the RequestHandlerClass. If desired, this function can create a new process or thread to handle the request; the ForkingMixIn and ThreadingMixIn classes do this. BaseServer.server_activate() Called by the server’s constructor to activate the server. The default behavior just listen()s to the server’s socket. May be overridden. BaseServer.server_bind() Called by the server’s constructor to bind the socket to the desired address. May be overridden. BaseServer.verify_request(request, client_address) Must return a Boolean value; if the value is True, the request will be processed, and if it’s False, the request will be denied. This function can be overridden to implement access controls for a server. The default implementation always returns True.
20.19.3 RequestHandler Objects The request handler class must define a new handle() method, and can override any of the following methods. A new instance is created for each request. RequestHandler.finish() Called after the handle() method to perform any clean-up actions required. The default implementation does nothing. If setup() or handle() raise an exception, this function will not be called. RequestHandler.handle() This function must do all the work required to service a request. The default implementation does nothing. Several instance attributes are available to it; the request is available as self.request; the client address as
20.19. socketserver — A framework for network servers
897
The Python Library Reference, Release 3.2.3
self.client_address; and the server instance as self.server, in case it needs access to per-server information. The type of self.request is different for datagram or stream services. For stream services, self.request is a socket object; for datagram services, self.request is a pair of string and socket. However, this can be hidden by using the request handler subclasses StreamRequestHandler or DatagramRequestHandler, which override the setup() and finish() methods, and provide self.rfile and self.wfile attributes. self.rfile and self.wfile can be read or written, respectively, to get the request data or return data to the client. RequestHandler.setup() Called before the handle() method to perform any initialization actions required. The default implementation does nothing.
20.19.4 Examples socketserver.TCPServer Example This is the server side: import socketserver class MyTCPHandler(socketserver.BaseRequestHandler): """ The RequestHandler class for our server. It is instantiated once per connection to the server, and must override the handle() method to implement communication to the client. """ def handle(self): # self.request is the TCP socket connected to the client self.data = self.request.recv(1024).strip() print("{} wrote:".format(self.client_address[0])) print(self.data) # just send back the same data, but upper-cased self.request.sendall(self.data.upper()) if __name__ == "__main__": HOST, PORT = "localhost", 9999 # Create the server, binding to localhost on port 9999 server = socketserver.TCPServer((HOST, PORT), MyTCPHandler) # Activate the server; this will keep running until you # interrupt the program with Ctrl-C server.serve_forever() An alternative request handler class that makes use of streams (file-like objects that simplify communication by providing the standard file interface): class MyTCPHandler(socketserver.StreamRequestHandler): def handle(self):
898
Chapter 20. Internet Protocols and Support
The Python Library Reference, Release 3.2.3
# self.rfile is a file-like object created by the handler; # we can now use e.g. readline() instead of raw recv() calls self.data = self.rfile.readline().strip() print("{} wrote:".format(self.client_address[0])) print(self.data) # Likewise, self.wfile is a file-like object used to write back # to the client self.wfile.write(self.data.upper()) The difference is that the readline() call in the second handler will call recv() multiple times until it encounters a newline character, while the single recv() call in the first handler will just return what has been sent from the client in one sendall() call. This is the client side: import socket import sys HOST, PORT = "localhost", 9999 data = " ".join(sys.argv[1:]) # Create a socket (SOCK_STREAM means a TCP socket) sock = socket.socket(socket.AF_INET, socket.SOCK_STREAM) try: # Connect to server and send data sock.connect((HOST, PORT)) sock.sendall(bytes(data + "\n", "utf-8")) # Receive data from the server and shut down received = str(sock.recv(1024), "utf-8") finally: sock.close() print("Sent: {}".format(data)) print("Received: {}".format(received)) The output of the example should look something like this: Server: $ python TCPServer.py 127.0.0.1 wrote: b’hello world with TCP’ 127.0.0.1 wrote: b’python is nice’ Client: $ python TCPClient.py hello world with TCP Sent: hello world with TCP Received: HELLO WORLD WITH TCP $ python TCPClient.py python is nice Sent: python is nice Received: PYTHON IS NICE
20.19. socketserver — A framework for network servers
899
The Python Library Reference, Release 3.2.3
socketserver.UDPServer Example This is the server side: import socketserver class MyUDPHandler(socketserver.BaseRequestHandler): """ This class works similar to the TCP handler class, except that self.request consists of a pair of data and client socket, and since there is no connection the client address must be given explicitly when sending data back via sendto(). """ def handle(self): data = self.request[0].strip() socket = self.request[1] print("{} wrote:".format(self.client_address[0])) print(data) socket.sendto(data.upper(), self.client_address) if __name__ == "__main__": HOST, PORT = "localhost", 9999 server = socketserver.UDPServer((HOST, PORT), MyUDPHandler) server.serve_forever() This is the client side: import socket import sys HOST, PORT = "localhost", 9999 data = " ".join(sys.argv[1:]) # SOCK_DGRAM is the socket type to use for UDP sockets sock = socket.socket(socket.AF_INET, socket.SOCK_DGRAM) # As you can see, there is no connect() call; UDP has no connections. # Instead, data is directly sent to the recipient via sendto(). sock.sendto(bytes(data + "\n", "utf-8"), (HOST, PORT)) received = str(sock.recv(1024), "utf-8") print("Sent: {}".format(data)) print("Received: {}".format(received)) The output of the example should look exactly like for the TCP server example. Asynchronous Mixins To build asynchronous handlers, use the ThreadingMixIn and ForkingMixIn classes. An example for the ThreadingMixIn class: import socket import threading import socketserver
900
Chapter 20. Internet Protocols and Support
The Python Library Reference, Release 3.2.3
class ThreadedTCPRequestHandler(socketserver.BaseRequestHandler): def handle(self): data = str(self.request.recv(1024), ’ascii’) cur_thread = threading.current_thread() response = bytes("{}: {}".format(cur_thread.name, data), ’ascii’) self.request.sendall(response) class ThreadedTCPServer(socketserver.ThreadingMixIn, socketserver.TCPServer): pass def client(ip, port, message): sock = socket.socket(socket.AF_INET, socket.SOCK_STREAM) sock.connect((ip, port)) try: sock.sendall(bytes(message, ’ascii’)) response = str(sock.recv(1024), ’ascii’) print("Received: {}".format(response)) finally: sock.close() if __name__ == "__main__": # Port 0 means to select an arbitrary unused port HOST, PORT = "localhost", 0 server = ThreadedTCPServer((HOST, PORT), ThreadedTCPRequestHandler) ip, port = server.server_address # Start a thread with the server -- that thread will then start one # more thread for each request server_thread = threading.Thread(target=server.serve_forever) # Exit the server thread when the main thread terminates server_thread.daemon = True server_thread.start() print("Server loop running in thread:", server_thread.name) client(ip, port, "Hello World 1") client(ip, port, "Hello World 2") client(ip, port, "Hello World 3") server.shutdown() The output of the example should look something like this: $ python ThreadedTCPServer.py Server loop running in thread: Thread-1 Received: Thread-2: Hello World 1 Received: Thread-3: Hello World 2 Received: Thread-4: Hello World 3 The ForkingMixIn class is used in the same way, except that the server will spawn a new process for each request.
20.19. socketserver — A framework for network servers
This module defines classes for implementing HTTP servers (Web servers). One class, HTTPServer, is a socketserver.TCPServer subclass. It creates and listens at the HTTP socket, dispatching the requests to a handler. Code to create and run the server looks like this: def run(server_class=HTTPServer, handler_class=BaseHTTPRequestHandler): server_address = (’’, 8000) httpd = server_class(server_address, handler_class) httpd.serve_forever() class http.server.HTTPServer(server_address, RequestHandlerClass) This class builds on the TCPServer class by storing the server address as instance variables named server_name and server_port. The server is accessible by the handler, typically through the handler’s server instance variable. The HTTPServer must be given a RequestHandlerClass on instantiation, of which this module provides three different variants: class http.server.BaseHTTPRequestHandler(request, client_address, server) This class is used to handle the HTTP requests that arrive at the server. By itself, it cannot respond to any actual HTTP requests; it must be subclassed to handle each request method (e.g. GET or POST). BaseHTTPRequestHandler provides a number of class and instance variables, and methods for use by subclasses. The handler will parse the request and the headers, then call a method specific to the request type. The method name is constructed from the request. For example, for the request method SPAM, the do_SPAM() method will be called with no arguments. All of the relevant information is stored in instance variables of the handler. Subclasses should not need to override or extend the __init__() method. BaseHTTPRequestHandler has the following instance variables: client_address Contains a tuple of the form (host, port) referring to the client’s address. server Contains the server instance. command Contains the command (request type). For example, ’GET’. path Contains the request path. request_version Contains the version string from the request. For example, ’HTTP/1.0’. headers Holds an instance of the class specified by the MessageClass class variable. This instance parses and manages the headers in the HTTP request. rfile Contains an input stream, positioned at the start of the optional input data. wfile Contains the output stream for writing a response back to the client. Proper adherence to the HTTP protocol must be used when writing to this stream. 902
Chapter 20. Internet Protocols and Support
The Python Library Reference, Release 3.2.3
BaseHTTPRequestHandler has the following class variables: server_version Specifies the server software version. You may want to override this. The format is multiple whitespaceseparated strings, where each string is of the form name[/version]. For example, ’BaseHTTP/0.2’. sys_version Contains the Python system version, in a form usable by the version_string method and the server_version class variable. For example, ’Python/1.4’. error_message_format Specifies a format string for building an error response to the client. It uses parenthesized, keyed format specifiers, so the format operand must be a dictionary. The code key should be an integer, specifying the numeric HTTP error code value. message should be a string containing a (detailed) error message of what occurred, and explain should be an explanation of the error code number. Default message and explain values can found in the responses class variable. error_content_type Specifies the Content-Type HTTP header of error responses sent to the client. The default value is ’text/html’. protocol_version This specifies the HTTP protocol version used in responses. If set to ’HTTP/1.1’, the server will permit HTTP persistent connections; however, your server must then include an accurate Content-Length header (using send_header()) in all of its responses to clients. For backwards compatibility, the setting defaults to ’HTTP/1.0’. MessageClass Specifies an email.message.Message-like class to parse HTTP headers. Typically, this is not overridden, and it defaults to http.client.HTTPMessage. responses This variable contains a mapping of error code integers to two-element tuples containing a short and long message. For example, {code: (shortmessage, longmessage)}. The shortmessage is usually used as the message key in an error response, and longmessage as the explain key (see the error_message_format class variable). A BaseHTTPRequestHandler instance has the following methods: handle() Calls handle_one_request() once (or, if persistent connections are enabled, multiple times) to handle incoming HTTP requests. You should never need to override it; instead, implement appropriate do_*() methods. handle_one_request() This method will parse and dispatch the request to the appropriate do_*() method. You should never need to override it. handle_expect_100() When a HTTP/1.1 compliant server receives a Expect: 100-continue request header it responds back with a 100 Continue followed by 200 OK headers. This method can be overridden to raise an error if the server does not want the client to continue. For e.g. server can chose to send 417 Expectation Failed as a response header and return False. New in version 3.2. send_error(code, message=None) Sends and logs a complete error reply to the client. The numeric code specifies the HTTP error code, with message as optional, more specific text. A complete set of headers is sent, followed by text composed using the error_message_format class variable.
20.20. http.server — HTTP servers
903
The Python Library Reference, Release 3.2.3
send_response(code, message=None) Sends a response header and logs the accepted request. The HTTP response line is sent, followed by Server and Date headers. The values for these two headers are picked up from the version_string() and date_time_string() methods, respectively. send_header(keyword, value) Stores the HTTP header to an internal buffer which will be written to the output stream when end_headers() method is invoked. keyword should specify the header keyword, with value specifying its value. Changed in version 3.2: Storing the headers in an internal buffer send_response_only(code, message=None) Sends the reponse header only, used for the purposes when 100 Continue response is sent by the server to the client. The headers not buffered and sent directly the output stream.If the message is not specified, the HTTP message corresponding the response code is sent. New in version 3.2. end_headers() Write the buffered HTTP headers to the output stream and send a blank line, indicating the end of the HTTP headers in the response. Changed in version 3.2: Writing the buffered headers to the output stream. log_request(code=’-‘, size=’-‘) Logs an accepted (successful) request. code should specify the numeric HTTP code associated with the response. If a size of the response is available, then it should be passed as the size parameter. log_error(...) Logs an error when a request cannot be fulfilled. By default, it passes the message to log_message(), so it takes the same arguments (format and additional values). log_message(format, ...) Logs an arbitrary message to sys.stderr. This is typically overridden to create custom error logging mechanisms. The format argument is a standard printf-style format string, where the additional arguments to log_message() are applied as inputs to the formatting. The client ip address and current date and time are prefixed to every message logged. version_string() Returns the server software’s version string. This is a combination of the server_version and sys_version class variables. date_time_string(timestamp=None) Returns the date and time given by timestamp (which must be None or in the format returned by time.time()), formatted for a message header. If timestamp is omitted, it uses the current date and time. The result looks like ’Sun, 06 Nov 1994 08:49:37 GMT’. log_date_time_string() Returns the current date and time, formatted for logging. address_string() Returns the client address, formatted for logging. A name lookup is performed on the client’s IP address. class http.server.SimpleHTTPRequestHandler(request, client_address, server) This class serves files from the current directory and below, directly mapping the directory structure to HTTP requests. A lot of the work, such as parsing the request, is done by the base class BaseHTTPRequestHandler. This class implements the do_GET() and do_HEAD() functions. The following are defined as class-level attributes of SimpleHTTPRequestHandler: server_version This will be "SimpleHTTP/" + __version__, where __version__ is defined at the module
904
Chapter 20. Internet Protocols and Support
The Python Library Reference, Release 3.2.3
level. extensions_map A dictionary mapping suffixes into MIME types. The default is signified by an empty string, and is considered to be application/octet-stream. The mapping is used case-insensitively, and so should contain only lower-cased keys. The SimpleHTTPRequestHandler class defines the following methods: do_HEAD() This method serves the ’HEAD’ request type: it sends the headers it would send for the equivalent GET request. See the do_GET() method for a more complete explanation of the possible headers. do_GET() The request is mapped to a local file by interpreting the request as a path relative to the current working directory. If the request was mapped to a directory, the directory is checked for a file named index.html or index.htm (in that order). If found, the file’s contents are returned; otherwise a directory listing is generated by calling the list_directory() method. This method uses os.listdir() to scan the directory, and returns a 404 error response if the listdir() fails. If the request was mapped to a file, it is opened and the contents are returned. Any IOError exception in opening the requested file is mapped to a 404, ’File not found’ error. Otherwise, the content type is guessed by calling the guess_type() method, which in turn uses the extensions_map variable. A ’Content-type:’ header with the guessed content type is output, followed by a ’Content-Length:’ header with the file’s size and a ’Last-Modified:’ header with the file’s modification time. Then follows a blank line signifying the end of the headers, and then the contents of the file are output. If the file’s MIME type starts with text/ the file is opened in text mode; otherwise binary mode is used. For example usage, see the implementation of the test() function invocation in the http.server module. The SimpleHTTPRequestHandler class can be used in the following manner in order to create a very basic webserver serving files relative to the current directory. import http.server import socketserver PORT = 8000 Handler = http.server.SimpleHTTPRequestHandler httpd = socketserver.TCPServer(("", PORT), Handler) print("serving at port", PORT) httpd.serve_forever() http.server can also be invoked directly using the -m switch of the interpreter with a port number argument. Similar to the previous example, this serves files relative to the current directory. python -m http.server 8000 class http.server.CGIHTTPRequestHandler(request, client_address, server) This class is used to serve either files or output of CGI scripts from the current directory and below. Note that mapping HTTP hierarchic structure to local directory structure is exactly as in SimpleHTTPRequestHandler.
20.20. http.server — HTTP servers
905
The Python Library Reference, Release 3.2.3
Note: CGI scripts run by the CGIHTTPRequestHandler class cannot execute redirects (HTTP code 302), because code 200 (script output follows) is sent prior to execution of the CGI script. This pre-empts the status code. The class will however, run the CGI script, instead of serving it as a file, if it guesses it to be a CGI script. Only directory-based CGI are used — the other common server configuration is to treat special extensions as denoting CGI scripts. The do_GET() and do_HEAD() functions are modified to run CGI scripts and serve the output, instead of serving files, if the request leads to somewhere below the cgi_directories path. The CGIHTTPRequestHandler defines the following data member: cgi_directories This defaults to [’/cgi-bin’, ’/htbin’] and describes directories to treat as containing CGI scripts. The CGIHTTPRequestHandler defines the following method: do_POST() This method serves the ’POST’ request type, only allowed for CGI scripts. Error 501, “Can only POST to CGI scripts”, is output when trying to POST to a non-CGI url. Note that CGI scripts will be run with UID of user nobody, for security reasons. Problems with the CGI script will be translated to error 403.
20.21 http.cookies — HTTP state management Source code: Lib/http/cookies.py
The http.cookies module defines classes for abstracting the concept of cookies, an HTTP state management mechanism. It supports both simple string-only cookies, and provides an abstraction for having any serializable datatype as cookie value. The module formerly strictly applied the parsing rules described in the RFC 2109 and RFC 2068 specifications. It has since been discovered that MSIE 3.0x doesn’t follow the character rules outlined in those specs and also many current day browsers and servers have relaxed parsing rules when comes to Cookie handling. As a result, the parsing rules used are a bit less strict. The character set, string.ascii_letters, string.digits and !#$%&’*+-.^_‘|~ denote the set of valid characters allowed by this module in Cookie name (as key). Note: On encountering an invalid cookie, CookieError is raised, so if your cookie data comes from a browser you should always prepare for invalid data and catch CookieError on parsing. exception http.cookies.CookieError Exception failing because of RFC 2109 invalidity: incorrect attributes, incorrect Set-Cookie header, etc. class http.cookies.BaseCookie([input ]) This class is a dictionary-like object whose keys are strings and whose values are Morsel instances. Note that upon setting a key to a value, the value is first converted to a Morsel containing the key and the value. If input is given, it is passed to the load() method.
906
Chapter 20. Internet Protocols and Support
The Python Library Reference, Release 3.2.3
class http.cookies.SimpleCookie([input ]) This class derives from BaseCookie and overrides value_decode() and value_encode() to be the identity and str() respectively. See Also: Module http.cookiejar HTTP cookie handling for web clients. http.cookies modules do not depend on each other.
The http.cookiejar and
RFC 2109 - HTTP State Management Mechanism This is the state management specification implemented by this module.
20.21.1 Cookie Objects BaseCookie.value_decode(val) Return a decoded value from a string representation. Return value can be any type. This method does nothing in BaseCookie — it exists so it can be overridden. BaseCookie.value_encode(val) Return an encoded value. val can be any type, but return value must be a string. This method does nothing in BaseCookie — it exists so it can be overridden In general, it should be the case that value_encode() and value_decode() are inverses on the range of value_decode. BaseCookie.output(attrs=None, header=’Set-Cookie:’, sep=’\r\n’) Return a string representation suitable to be sent as HTTP headers. attrs and header are sent to each Morsel‘s output() method. sep is used to join the headers together, and is by default the combination ’\r\n’ (CRLF). BaseCookie.js_output(attrs=None) Return an embeddable JavaScript snippet, which, if run on a browser which supports JavaScript, will act the same as if the HTTP headers was sent. The meaning for attrs is the same as in output(). BaseCookie.load(rawdata) If rawdata is a string, parse it as an HTTP_COOKIE and add the values found there as Morsels. If it is a dictionary, it is equivalent to: for k, v in rawdata.items(): cookie[k] = v
20.21.2 Morsel Objects class http.cookies.Morsel Abstract a key/value pair, which has some RFC 2109 attributes. Morsels are dictionary-like objects, whose set of keys is constant — the valid RFC 2109 attributes, which are •expires •path •comment •domain •max-age
20.21. http.cookies — HTTP state management
907
The Python Library Reference, Release 3.2.3
•secure •version •httponly The attribute httponly specifies that the cookie is only transferred in HTTP requests, and is not accessible through JavaScript. This is intended to mitigate some forms of cross-site scripting. The keys are case-insensitive. Morsel.value The value of the cookie. Morsel.coded_value The encoded value of the cookie — this is what should be sent. Morsel.key The name of the cookie. Morsel.set(key, value, coded_value) Set the key, value and coded_value attributes. Morsel.isReservedKey(K) Whether K is a member of the set of keys of a Morsel. Morsel.output(attrs=None, header=’Set-Cookie:’) Return a string representation of the Morsel, suitable to be sent as an HTTP header. By default, all the attributes are included, unless attrs is given, in which case it should be a list of attributes to use. header is by default "Set-Cookie:". Morsel.js_output(attrs=None) Return an embeddable JavaScript snippet, which, if run on a browser which supports JavaScript, will act the same as if the HTTP header was sent. The meaning for attrs is the same as in output(). Morsel.OutputString(attrs=None) Return a string representing the Morsel, without any surrounding HTTP or JavaScript. The meaning for attrs is the same as in output().
20.21.3 Example The following example demonstrates how to use the http.cookies module. >>> from http import cookies >>> C = cookies.SimpleCookie() >>> C["fig"] = "newton" >>> C["sugar"] = "wafer" >>> print(C) # generate HTTP headers Set-Cookie: fig=newton Set-Cookie: sugar=wafer >>> print(C.output()) # same thing Set-Cookie: fig=newton Set-Cookie: sugar=wafer >>> C = cookies.SimpleCookie() >>> C["rocky"] = "road" >>> C["rocky"]["path"] = "/cookie" >>> print(C.output(header="Cookie:")) Cookie: rocky=road; Path=/cookie 908
Chapter 20. Internet Protocols and Support
The Python Library Reference, Release 3.2.3
>>> print(C.output(attrs=[], header="Cookie:")) Cookie: rocky=road >>> C = cookies.SimpleCookie() >>> C.load("chips=ahoy; vienna=finger") # load from a string (HTTP header) >>> print(C) Set-Cookie: chips=ahoy Set-Cookie: vienna=finger >>> C = cookies.SimpleCookie() >>> C.load(’keebler="E=everybody; L=\\"Loves\\"; fudge=\\012;";’) >>> print(C) Set-Cookie: keebler="E=everybody; L=\"Loves\"; fudge=\012;" >>> C = cookies.SimpleCookie() >>> C["oreo"] = "doublestuff" >>> C["oreo"]["path"] = "/" >>> print(C) Set-Cookie: oreo=doublestuff; Path=/ >>> C = cookies.SimpleCookie() >>> C["twix"] = "none for you" >>> C["twix"].value ’none for you’ >>> C = cookies.SimpleCookie() >>> C["number"] = 7 # equivalent to C["number"] = str(7) >>> C["string"] = "seven" >>> C["number"].value ’7’ >>> C["string"].value ’seven’ >>> print(C) Set-Cookie: number=7 Set-Cookie: string=seven
The http.cookiejar module defines classes for automatic handling of HTTP cookies. It is useful for accessing web sites that require small pieces of data – cookies – to be set on the client machine by an HTTP response from a web server, and then returned to the server in later HTTP requests. Both the regular Netscape cookie protocol and the protocol defined by RFC 2965 are handled. RFC 2965 handling is switched off by default. RFC 2109 cookies are parsed as Netscape cookies and subsequently treated either as Netscape or RFC 2965 cookies according to the ‘policy’ in effect. Note that the great majority of cookies on the Internet are Netscape cookies. http.cookiejar attempts to follow the de-facto Netscape cookie protocol (which differs substantially from that set out in the original Netscape specification), including taking note of the max-age and port cookie-attributes introduced with RFC 2965. Note: The various named parameters found in Set-Cookie and Set-Cookie2 headers (eg. domain and expires) are conventionally referred to as attributes. To distinguish them from Python attributes, the documentation for this module uses the term cookie-attribute instead.
20.22. http.cookiejar — Cookie handling for HTTP clients
909
The Python Library Reference, Release 3.2.3
The module defines the following exception: exception http.cookiejar.LoadError Instances of FileCookieJar raise this exception on failure to load cookies from a file. LoadError is a subclass of IOError. The following classes are provided: class http.cookiejar.CookieJar(policy=None) policy is an object implementing the CookiePolicy interface. The CookieJar class stores HTTP cookies. It extracts cookies from HTTP requests, and returns them in HTTP responses. CookieJar instances automatically expire contained cookies when necessary. Subclasses are also responsible for storing and retrieving cookies from a file or database. class http.cookiejar.FileCookieJar(filename, delayload=None, policy=None) policy is an object implementing the CookiePolicy interface. For the other arguments, see the documentation for the corresponding attributes. A CookieJar which can load cookies from, and perhaps save cookies to, a file on disk. Cookies are NOT loaded from the named file until either the load() or revert() method is called. Subclasses of this class are documented in section FileCookieJar subclasses and co-operation with web browsers. class http.cookiejar.CookiePolicy This class is responsible for deciding whether each cookie should be accepted from / returned to the server. class http.cookiejar.DefaultCookiePolicy(blocked_domains=None, allowed_domains=None, netscape=True, rfc2965=False, rfc2109_as_netscape=None, hide_cookie2=False, strict_domain=False, strict_rfc2965_unverifiable=True, strict_ns_unverifiable=False, strict_ns_domain=DefaultCookiePolicy.DomainLiberal, strict_ns_set_initial_dollar=False, strict_ns_set_path=False) Constructor arguments should be passed as keyword arguments only. blocked_domains is a sequence of domain names that we never accept cookies from, nor return cookies to. allowed_domains if not None, this is a sequence of the only domains for which we accept and return cookies. For all other arguments, see the documentation for CookiePolicy and DefaultCookiePolicy objects. DefaultCookiePolicy implements the standard accept / reject rules for Netscape and RFC 2965 cookies. By default, RFC 2109 cookies (ie. cookies received in a Set-Cookie header with a version cookieattribute of 1) are treated according to the RFC 2965 rules. However, if RFC 2965 handling is turned off or rfc2109_as_netscape is True, RFC 2109 cookies are ‘downgraded’ by the CookieJar instance to Netscape cookies, by setting the version attribute of the Cookie instance to 0. DefaultCookiePolicy also provides some parameters to allow some fine-tuning of policy. class http.cookiejar.Cookie This class represents Netscape, RFC 2109 and RFC 2965 cookies. It is not expected that users of http.cookiejar construct their own Cookie instances. Instead, if necessary, call make_cookies() on a CookieJar instance. See Also: Module urllib.request URL opening with automatic cookie handling. Module http.cookies HTTP cookie classes, principally useful for server-side code. The http.cookiejar and http.cookies modules do not depend on each other.
910
Chapter 20. Internet Protocols and Support
The Python Library Reference, Release 3.2.3
http://wp.netscape.com/newsref/std/cookie_spec.html The specification of the original Netscape cookie protocol. Though this is still the dominant protocol, the ‘Netscape cookie protocol’ implemented by all the major browsers (and http.cookiejar) only bears a passing resemblance to the one sketched out in cookie_spec.html. RFC 2109 - HTTP State Management Mechanism Obsoleted by RFC 2965. Uses Set-Cookie with version=1. RFC 2965 - HTTP State Management Mechanism The Netscape protocol with the bugs fixed. Set-Cookie2 in place of Set-Cookie. Not widely used.
Uses
http://kristol.org/cookie/errata.html Unfinished errata to RFC 2965. RFC 2964 - Use of HTTP State Management
20.22.1 CookieJar and FileCookieJar Objects CookieJar objects support the iterator protocol for iterating over contained Cookie objects. CookieJar has the following methods: CookieJar.add_cookie_header(request) Add correct Cookie header to request. If policy allows (ie. the rfc2965 and hide_cookie2 attributes of the CookieJar‘s CookiePolicy instance are true and false respectively), the Cookie2 header is also added when appropriate. The request object (usually a urllib.request..Request instance) must support the methods get_full_url(), get_host(), get_type(), unverifiable(), get_origin_req_host(), has_header(), get_header(), header_items(), and add_unredirected_header(), as documented by urllib.request. CookieJar.extract_cookies(response, request) Extract cookies from HTTP response and store them in the CookieJar, where allowed by policy. The CookieJar will look for allowable Set-Cookie and Set-Cookie2 headers in the response argument, and store cookies as appropriate (subject to the CookiePolicy.set_ok() method’s approval). The response object (usually the result of a call to urllib.request.urlopen(), or similar) should support an info() method, which returns a email.message.Message instance. The request object (usually a urllib.request.Request instance) must support the methods get_full_url(), get_host(), unverifiable(), and get_origin_req_host(), as documented by urllib.request. The request is used to set default values for cookie-attributes as well as for checking that the cookie is allowed to be set. CookieJar.set_policy(policy) Set the CookiePolicy instance to be used. CookieJar.make_cookies(response, request) Return sequence of Cookie objects extracted from response object. See the documentation for extract_cookies() for the interfaces required of the response and request arguments. CookieJar.set_cookie_if_ok(cookie, request) Set a Cookie if policy says it’s OK to do so. CookieJar.set_cookie(cookie) Set a Cookie, without checking with policy to see whether or not it should be set. CookieJar.clear([domain[, path[, name ]]]) Clear some cookies.
20.22. http.cookiejar — Cookie handling for HTTP clients
911
The Python Library Reference, Release 3.2.3
If invoked without arguments, clear all cookies. If given a single argument, only cookies belonging to that domain will be removed. If given two arguments, cookies belonging to the specified domain and URL path are removed. If given three arguments, then the cookie with the specified domain, path and name is removed. Raises KeyError if no matching cookie exists. CookieJar.clear_session_cookies() Discard all session cookies. Discards all contained cookies that have a true discard attribute (usually because they had either no max-age or expires cookie-attribute, or an explicit discard cookie-attribute). For interactive browsers, the end of a session usually corresponds to closing the browser window. Note that the save() method won’t save session cookies anyway, unless you ask otherwise by passing a true ignore_discard argument. FileCookieJar implements the following additional methods: FileCookieJar.save(filename=None, ignore_discard=False, ignore_expires=False) Save cookies to a file. This base class raises NotImplementedError. Subclasses may leave this method unimplemented. filename is the name of file in which to save cookies. If filename is not specified, self.filename is used (whose default is the value passed to the constructor, if any); if self.filename is None, ValueError is raised. ignore_discard: save even cookies set to be discarded. ignore_expires: save even cookies that have expired The file is overwritten if it already exists, thus wiping all the cookies it contains. Saved cookies can be restored later using the load() or revert() methods. FileCookieJar.load(filename=None, ignore_discard=False, ignore_expires=False) Load cookies from a file. Old cookies are kept unless overwritten by newly loaded ones. Arguments are as for save(). The named file must be in the format understood by the class, or LoadError will be raised. Also, IOError may be raised, for example if the file does not exist. FileCookieJar.revert(filename=None, ignore_discard=False, ignore_expires=False) Clear all cookies and reload cookies from a saved file. revert() can raise the same exceptions as load(). If there is a failure, the object’s state will not be altered. FileCookieJar instances have the following public attributes: FileCookieJar.filename Filename of default file in which to keep cookies. This attribute may be assigned to. FileCookieJar.delayload If true, load cookies lazily from disk. This attribute should not be assigned to. This is only a hint, since this only affects performance, not behaviour (unless the cookies on disk are changing). A CookieJar object may ignore it. None of the FileCookieJar classes included in the standard library lazily loads cookies.
20.22.2 FileCookieJar subclasses and co-operation with web browsers The following CookieJar subclasses are provided for reading and writing .
912
Chapter 20. Internet Protocols and Support
The Python Library Reference, Release 3.2.3
class http.cookiejar.MozillaCookieJar(filename, delayload=None, policy=None) A FileCookieJar that can load from and save cookies to disk in the Mozilla cookies.txt file format (which is also used by the Lynx and Netscape browsers). Note: This loses information about RFC 2965 cookies, and also about newer or non-standard cookie-attributes such as port. Warning: Back up your cookies before saving if you have cookies whose loss / corruption would be inconvenient (there are some subtleties which may lead to slight changes in the file over a load / save roundtrip). Also note that cookies saved while Mozilla is running will get clobbered by Mozilla. class http.cookiejar.LWPCookieJar(filename, delayload=None, policy=None) A FileCookieJar that can load from and save cookies to disk in format compatible with the libwww-perl library’s Set-Cookie3 file format. This is convenient if you want to store cookies in a human-readable file.
20.22.3 CookiePolicy Objects Objects implementing the CookiePolicy interface have the following methods: CookiePolicy.set_ok(cookie, request) Return boolean value indicating whether cookie should be accepted from server. cookie is a Cookie instance. request is an object implementing the interface defined by the documentation for CookieJar.extract_cookies(). CookiePolicy.return_ok(cookie, request) Return boolean value indicating whether cookie should be returned to server. cookie is a Cookie instance. request is an object implementing the interface defined by the documentation for CookieJar.add_cookie_header(). CookiePolicy.domain_return_ok(domain, request) Return false if cookies should not be returned, given cookie domain. This method is an optimization. It removes the need for checking every cookie with a particular domain (which might involve reading many files). Returning true from domain_return_ok() and path_return_ok() leaves all the work to return_ok(). If domain_return_ok() returns true for the cookie domain, path_return_ok() is called for the cookie path. Otherwise, path_return_ok() and return_ok() are never called for that cookie domain. If path_return_ok() returns true, return_ok() is called with the Cookie object itself for a full check. Otherwise, return_ok() is never called for that cookie path. Note that domain_return_ok() is called for every cookie domain, not just for the request domain. For example, the function might be called with both ".example.com" and "www.example.com" if the request domain is "www.example.com". The same goes for path_return_ok(). The request argument is as documented for return_ok(). CookiePolicy.path_return_ok(path, request) Return false if cookies should not be returned, given cookie path. See the documentation for domain_return_ok().
20.22. http.cookiejar — Cookie handling for HTTP clients
913
The Python Library Reference, Release 3.2.3
In addition to implementing the methods above, implementations of the CookiePolicy interface must also supply the following attributes, indicating which protocols should be used, and how. All of these attributes may be assigned to. CookiePolicy.netscape Implement Netscape protocol. CookiePolicy.rfc2965 Implement RFC 2965 protocol. CookiePolicy.hide_cookie2 Don’t add Cookie2 header to requests (the presence of this header indicates to the server that we understand RFC 2965 cookies). The most useful way to define a CookiePolicy class is by subclassing from DefaultCookiePolicy and overriding some or all of the methods above. CookiePolicy itself may be used as a ‘null policy’ to allow setting and receiving any and all cookies (this is unlikely to be useful).
20.22.4 DefaultCookiePolicy Objects Implements the standard rules for accepting and returning cookies. Both RFC 2965 and Netscape cookies are covered. RFC 2965 handling is switched off by default. The easiest way to provide your own policy is to override this class and call its methods in your overridden implementations before adding your own additional checks: import http.cookiejar class MyCookiePolicy(http.cookiejar.DefaultCookiePolicy): def set_ok(self, cookie, request): if not http.cookiejar.DefaultCookiePolicy.set_ok(self, cookie, request): return False if i_dont_want_to_store_this_cookie(cookie): return False return True In addition to the features required to implement the CookiePolicy interface, this class allows you to block and allow domains from setting and receiving cookies. There are also some strictness switches that allow you to tighten up the rather loose Netscape protocol rules a little bit (at the cost of blocking some benign cookies). A domain blacklist and whitelist is provided (both off by default). Only domains not in the blacklist and present in the whitelist (if the whitelist is active) participate in cookie setting and returning. Use the blocked_domains constructor argument, and blocked_domains() and set_blocked_domains() methods (and the corresponding argument and methods for allowed_domains). If you set a whitelist, you can turn it off again by setting it to None. Domains in block or allow lists that do not start with a dot must equal the cookie domain to be matched. For example, "example.com" matches a blacklist entry of "example.com", but "www.example.com" does not. Domains that do start with a dot are matched by more specific domains too. For example, both "www.example.com" and "www.coyote.example.com" match ".example.com" (but "example.com" itself does not). IP addresses are an exception, and must match exactly. For example, if blocked_domains contains "192.168.1.2" and ".168.1.2", 192.168.1.2 is blocked, but 193.168.1.2 is not. DefaultCookiePolicy implements the following additional methods: DefaultCookiePolicy.blocked_domains() Return the sequence of blocked domains (as a tuple). DefaultCookiePolicy.set_blocked_domains(blocked_domains) Set the sequence of blocked domains.
914
Chapter 20. Internet Protocols and Support
The Python Library Reference, Release 3.2.3
DefaultCookiePolicy.is_blocked(domain) Return whether domain is on the blacklist for setting or receiving cookies. DefaultCookiePolicy.allowed_domains() Return None, or the sequence of allowed domains (as a tuple). DefaultCookiePolicy.set_allowed_domains(allowed_domains) Set the sequence of allowed domains, or None. DefaultCookiePolicy.is_not_allowed(domain) Return whether domain is not on the whitelist for setting or receiving cookies. DefaultCookiePolicy instances have the following attributes, which are all initialised from the constructor arguments of the same name, and which may all be assigned to. DefaultCookiePolicy.rfc2109_as_netscape If true, request that the CookieJar instance downgrade RFC 2109 cookies (ie. cookies received in a Set-Cookie header with a version cookie-attribute of 1) to Netscape cookies by setting the version attribute of the Cookie instance to 0. The default value is None, in which case RFC 2109 cookies are downgraded if and only if RFC 2965 handling is turned off. Therefore, RFC 2109 cookies are downgraded by default. General strictness switches: DefaultCookiePolicy.strict_domain Don’t allow sites to set two-component domains with country-code top-level domains like .co.uk, .gov.uk, .co.nz.etc. This is far from perfect and isn’t guaranteed to work! RFC 2965 protocol strictness switches: DefaultCookiePolicy.strict_rfc2965_unverifiable Follow RFC 2965 rules on unverifiable transactions (usually, an unverifiable transaction is one resulting from a redirect or a request for an image hosted on another site). If this is false, cookies are never blocked on the basis of verifiability Netscape protocol strictness switches: DefaultCookiePolicy.strict_ns_unverifiable apply RFC 2965 rules on unverifiable transactions even to Netscape cookies DefaultCookiePolicy.strict_ns_domain Flags indicating how strict to be with domain-matching rules for Netscape cookies. See below for acceptable values. DefaultCookiePolicy.strict_ns_set_initial_dollar Ignore cookies in Set-Cookie: headers that have names starting with ’$’. DefaultCookiePolicy.strict_ns_set_path Don’t allow setting cookies whose path doesn’t path-match request URI. strict_ns_domain is a collection of flags. Its value is constructed by or-ing together (for example, DomainStrictNoDots|DomainStrictNonDomain means both flags are set). DefaultCookiePolicy.DomainStrictNoDots When setting cookies, the ‘host prefix’ must not contain a dot (eg. www.foo.bar.com can’t set a cookie for .bar.com, because www.foo contains a dot). DefaultCookiePolicy.DomainStrictNonDomain Cookies that did not explicitly specify a domain cookie-attribute can only be returned to a domain equal to the domain that set the cookie (eg. spam.example.com won’t be returned cookies from example.com that had no domain cookie-attribute). DefaultCookiePolicy.DomainRFC2965Match When setting cookies, require a full RFC 2965 domain-match.
20.22. http.cookiejar — Cookie handling for HTTP clients
915
The Python Library Reference, Release 3.2.3
The following attributes are provided for convenience, and are the most useful combinations of the above flags: DefaultCookiePolicy.DomainLiberal Equivalent to 0 (ie. all of the above Netscape domain strictness flags switched off). DefaultCookiePolicy.DomainStrict Equivalent to DomainStrictNoDots|DomainStrictNonDomain.
20.22.5 Cookie Objects Cookie instances have Python attributes roughly corresponding to the standard cookie-attributes specified in the various cookie standards. The correspondence is not one-to-one, because there are complicated rules for assigning default values, because the max-age and expires cookie-attributes contain equivalent information, and because RFC 2109 cookies may be ‘downgraded’ by http.cookiejar from version 1 to version 0 (Netscape) cookies. Assignment to these attributes should not be necessary other than in rare circumstances in a CookiePolicy method. The class does not enforce internal consistency, so you should know what you’re doing if you do that. Cookie.version Integer or None. Netscape cookies have version 0. RFC 2965 and RFC 2109 cookies have a version cookie-attribute of 1. However, note that http.cookiejar may ‘downgrade’ RFC 2109 cookies to Netscape cookies, in which case version is 0. Cookie.name Cookie name (a string). Cookie.value Cookie value (a string), or None. Cookie.port String representing a port or a set of ports (eg. ‘80’, or ‘80,8080’), or None. Cookie.path Cookie path (a string, eg. ’/acme/rocket_launchers’). Cookie.secure True if cookie should only be returned over a secure connection. Cookie.expires Integer expiry date in seconds since epoch, or None. See also the is_expired() method. Cookie.discard True if this is a session cookie. Cookie.comment String comment from the server explaining the function of this cookie, or None. Cookie.comment_url URL linking to a comment from the server explaining the function of this cookie, or None. Cookie.rfc2109 True if this cookie was received as an RFC 2109 cookie (ie. the cookie arrived in a Set-Cookie header, and the value of the Version cookie-attribute in that header was 1). This attribute is provided because http.cookiejar may ‘downgrade’ RFC 2109 cookies to Netscape cookies, in which case version is 0. Cookie.port_specified True if a port or set of ports was explicitly specified by the server (in the Set-Cookie / Set-Cookie2 header).
916
Chapter 20. Internet Protocols and Support
The Python Library Reference, Release 3.2.3
Cookie.domain_specified True if a domain was explicitly specified by the server. Cookie.domain_initial_dot True if the domain explicitly specified by the server began with a dot (’.’). Cookies may have additional non-standard cookie-attributes. These may be accessed using the following methods: Cookie.has_nonstandard_attr(name) Return true if cookie has the named cookie-attribute. Cookie.get_nonstandard_attr(name, default=None) If cookie has the named cookie-attribute, return its value. Otherwise, return default. Cookie.set_nonstandard_attr(name, value) Set the value of the named cookie-attribute. The Cookie class also defines the following method: Cookie.is_expired(now=None) True if cookie has passed the time at which the server requested it should expire. If now is given (in seconds since the epoch), return whether the cookie has expired at the specified time.
20.22.6 Examples The first example shows the most common usage of http.cookiejar: import http.cookiejar, urllib.request cj = http.cookiejar.CookieJar() opener = urllib.request.build_opener(urllib.request.HTTPCookieProcessor(cj)) r = opener.open("http://example.com/") This example illustrates how to open a URL using your Netscape, Mozilla, or Lynx cookies (assumes Unix/Netscape convention for location of the cookies file): import os, http.cookiejar, urllib.request cj = http.cookiejar.MozillaCookieJar() cj.load(os.path.join(os.path.expanduser("~"), ".netscape", "cookies.txt")) opener = urllib.request.build_opener(urllib.request.HTTPCookieProcessor(cj)) r = opener.open("http://example.com/") The next example illustrates the use of DefaultCookiePolicy. Turn on RFC 2965 cookies, be more strict about domains when setting and returning Netscape cookies, and block some domains from setting cookies or having them returned: import urllib.request from http.cookiejar import CookieJar, DefaultCookiePolicy policy = DefaultCookiePolicy( rfc2965=True, strict_ns_domain=Policy.DomainStrict, blocked_domains=["ads.net", ".ads.net"]) cj = CookieJar(policy) opener = urllib.request.build_opener(urllib.request.HTTPCookieProcessor(cj)) r = opener.open("http://example.com/")
XML-RPC is a Remote Procedure Call method that uses XML passed via HTTP as a transport. With it, a client can call methods with parameters on a remote server (the server is named by a URI) and get back structured data. This module supports writing XML-RPC client code; it handles all the details of translating between conformable Python objects and XML on the wire. class xmlrpc.client.ServerProxy(uri, transport=None, encoding=None, verbose=False, allow_none=False, use_datetime=False) A ServerProxy instance is an object that manages communication with a remote XML-RPC server. The required first argument is a URI (Uniform Resource Indicator), and will normally be the URL of the server. The optional second argument is a transport factory instance; by default it is an internal SafeTransport instance for https: URLs and an internal HTTP Transport instance otherwise. The optional third argument is an encoding, by default UTF-8. The optional fourth argument is a debugging flag. If allow_none is true, the Python constant None will be translated into XML; the default behaviour is for None to raise a TypeError. This is a commonly-used extension to the XML-RPC specification, but isn’t supported by all clients and servers; see http://ontosys.com/xml-rpc/extensions.php for a description. The use_datetime flag can be used to cause date/time values to be presented as datetime.datetime objects; this is false by default. datetime.datetime objects may be passed to calls. Both the HTTP and HTTPS transports support the URL syntax extension for HTTP Basic Authentication: http://user:pass@host:port/path. The user:pass portion will be base64-encoded as an HTTP ‘Authorization’ header, and sent to the remote server as part of the connection process when invoking an XMLRPC method. You only need to use this if the remote server requires a Basic Authentication user and password. The returned instance is a proxy object with methods that can be used to invoke corresponding RPC calls on the remote server. If the remote server supports the introspection API, the proxy can also be used to query the remote server for the methods it supports (service discovery) and fetch other server-associated metadata. ServerProxy instance methods take Python basic types and objects as arguments and return Python basic types and classes. Types that are conformable (e.g. that can be marshalled through XML), include the following (and except where noted, they are unmarshalled as the same Python type): Name Meaning boolean The True and False constants integers Pass in directly floating-pointPass in directly numbers strings Pass in directly arrays Any Python sequence type containing conformable elements. Arrays are returned as lists structures A Python dictionary. Keys must be strings, values may be any conformable type. Objects of user-defined classes can be passed in; only their __dict__ attribute is transmitted. dates in seconds since the epoch (pass in an instance of the DateTime class) or a datetime.datetime instance. binary data pass in an instance of the Binary wrapper class This is the full set of data types supported by XML-RPC. Method calls may also raise a special Fault instance, used to signal XML-RPC server errors, or ProtocolError used to signal an error in the HTTP/HTTPS transport layer. Both Fault and ProtocolError derive from a base class called Error. Note that the xmlrpc client module currently does not marshal instances of subclasses of built-in types. When passing strings, characters special to XML such as , and & will be automatically escaped. However, it’s the caller’s responsibility to ensure that the string is free of characters that aren’t allowed in XML, such as the control characters with ASCII values between 0 and 31 (except, of course, tab, newline and carriage return); failing to do this will result in an XML-RPC request that isn’t well-formed XML. If you have to pass arbitrary strings via XML-RPC, use the Binary wrapper class described below. 918
Chapter 20. Internet Protocols and Support
The Python Library Reference, Release 3.2.3
Server is retained as an alias for ServerProxy for backwards compatibility. New code should use ServerProxy. See Also: XML-RPC HOWTO A good description of XML-RPC operation and client software in several languages. Contains pretty much everything an XML-RPC client developer needs to know. XML-RPC Introspection Describes the XML-RPC protocol extension for introspection. XML-RPC Specification The official specification. Unofficial XML-RPC Errata Fredrik Lundh’s “unofficial errata, intended to clarify certain details in the XML-RPC specification, as well as hint at ‘best practices’ to use when designing your own XML-RPC implementations.”
20.23.1 ServerProxy Objects A ServerProxy instance has a method corresponding to each remote procedure call accepted by the XML-RPC server. Calling the method performs an RPC, dispatched by both name and argument signature (e.g. the same method name can be overloaded with multiple argument signatures). The RPC finishes by returning a value, which may be either returned data in a conformant type or a Fault or ProtocolError object indicating an error. Servers that support the XML introspection API support some common methods grouped under the reserved system attribute: ServerProxy.system.listMethods() This method returns a list of strings, one for each (non-system) method supported by the XML-RPC server. ServerProxy.system.methodSignature(name) This method takes one parameter, the name of a method implemented by the XML-RPC server. It returns an array of possible signatures for this method. A signature is an array of types. The first of these types is the return type of the method, the rest are parameters. Because multiple signatures (ie. overloading) is permitted, this method returns a list of signatures rather than a singleton. Signatures themselves are restricted to the top level parameters expected by a method. For instance if a method expects one array of structs as a parameter, and it returns a string, its signature is simply “string, array”. If it expects three integers and returns a string, its signature is “string, int, int, int”. If no signature is defined for the method, a non-array value is returned. In Python this means that the type of the returned value will be something other than list. ServerProxy.system.methodHelp(name) This method takes one parameter, the name of a method implemented by the XML-RPC server. It returns a documentation string describing the use of that method. If no such string is available, an empty string is returned. The documentation string may contain HTML markup. A working example follows. The server code: from xmlrpc.server import SimpleXMLRPCServer def is_even(n): return n%2 == 0 server = SimpleXMLRPCServer(("localhost", 8000)) print("Listening on port 8000...") server.register_function(is_even, "is_even") server.serve_forever() The client code for the preceding server: 20.23. xmlrpc.client — XML-RPC client access
919
The Python Library Reference, Release 3.2.3
import xmlrpc.client proxy = xmlrpc.client.ServerProxy("http://localhost:8000/") print("3 is even: %s" % str(proxy.is_even(3))) print("100 is even: %s" % str(proxy.is_even(100)))
20.23.2 DateTime Objects This class may be initialized with seconds since the epoch, a time tuple, an ISO 8601 time/date string, or a datetime.datetime instance. It has the following methods, supported mainly for internal use by the marshalling/unmarshalling code: DateTime.decode(string) Accept a string as the instance’s new time value. DateTime.encode(out) Write the XML-RPC encoding of this DateTime item to the out stream object. It also supports certain of Python’s built-in operators through rich comparison and __repr__() methods. A working example follows. The server code: import datetime from xmlrpc.server import SimpleXMLRPCServer import xmlrpc.client def today(): today = datetime.datetime.today() return xmlrpc.client.DateTime(today) server = SimpleXMLRPCServer(("localhost", 8000)) print("Listening on port 8000...") server.register_function(today, "today") server.serve_forever() The client code for the preceding server: import xmlrpc.client import datetime proxy = xmlrpc.client.ServerProxy("http://localhost:8000/") today = proxy.today() # convert the ISO8601 string to a datetime object converted = datetime.datetime.strptime(today.value, "%Y%m%dT%H:%M:%S") print("Today: %s" % converted.strftime("%d.%m.%Y, %H:%M"))
20.23.3 Binary Objects This class may be initialized from string data (which may include NULs). The primary access to the content of a Binary object is provided by an attribute: Binary.data The binary data encapsulated by the Binary instance. The data is provided as an 8-bit string. Binary objects have the following methods, supported mainly for internal use by the marshalling/unmarshalling code: 920
Chapter 20. Internet Protocols and Support
The Python Library Reference, Release 3.2.3
Binary.decode(string) Accept a base64 string and decode it as the instance’s new data. Binary.encode(out) Write the XML-RPC base 64 encoding of this binary item to the out stream object. The encoded data will have newlines every 76 characters as per RFC 2045 section 6.8, which was the de facto standard base64 specification when the XML-RPC spec was written. It also supports certain of Python’s built-in operators through __eq__() and __ne__() methods. Example usage of the binary objects. We’re going to transfer an image over XMLRPC: from xmlrpc.server import SimpleXMLRPCServer import xmlrpc.client def python_logo(): with open("python_logo.jpg", "rb") as handle: return xmlrpc.client.Binary(handle.read()) server = SimpleXMLRPCServer(("localhost", 8000)) print("Listening on port 8000...") server.register_function(python_logo, ’python_logo’) server.serve_forever() The client gets the image and saves it to a file: import xmlrpc.client proxy = xmlrpc.client.ServerProxy("http://localhost:8000/") with open("fetched_python_logo.jpg", "wb") as handle: handle.write(proxy.python_logo().data)
20.23.4 Fault Objects A Fault object encapsulates the content of an XML-RPC fault tag. Fault objects have the following attributes: Fault.faultCode A string indicating the fault type. Fault.faultString A string containing a diagnostic message associated with the fault. In the following example we’re going to intentionally cause a Fault by returning a complex type object. The server code: from xmlrpc.server import SimpleXMLRPCServer # A marshalling error is going to occur because we’re returning a # complex number def add(x,y): return x+y+0j server = SimpleXMLRPCServer(("localhost", 8000)) print("Listening on port 8000...") server.register_function(add, ’add’) server.serve_forever() 20.23. xmlrpc.client — XML-RPC client access
921
The Python Library Reference, Release 3.2.3
The client code for the preceding server: import xmlrpc.client proxy = xmlrpc.client.ServerProxy("http://localhost:8000/") try: proxy.add(2, 5) except xmlrpc.client.Fault as err: print("A fault occurred") print("Fault code: %d" % err.faultCode) print("Fault string: %s" % err.faultString)
20.23.5 ProtocolError Objects A ProtocolError object describes a protocol error in the underlying transport layer (such as a 404 ‘not found’ error if the server named by the URI does not exist). It has the following attributes: ProtocolError.url The URI or URL that triggered the error. ProtocolError.errcode The error code. ProtocolError.errmsg The error message or diagnostic string. ProtocolError.headers A dict containing the headers of the HTTP/HTTPS request that triggered the error. In the following example we’re going to intentionally cause a ProtocolError by providing an invalid URI: import xmlrpc.client # create a ServerProxy with an URI that doesn’t respond to XMLRPC requests proxy = xmlrpc.client.ServerProxy("http://google.com/") try: proxy.some_method() except xmlrpc.client.ProtocolError as err: print("A protocol error occurred") print("URL: %s" % err.url) print("HTTP/HTTPS headers: %s" % err.headers) print("Error code: %d" % err.errcode) print("Error message: %s" % err.errmsg)
20.23.6 MultiCall Objects The MultiCall object provides a way to encapsulate multiple calls to a remote server into a single request 3 . class xmlrpc.client.MultiCall(server) Create an object used to boxcar method calls. server is the eventual target of the call. Calls can be made to the result object, but they will immediately return None, and only store the call name and parameters in the MultiCall object. Calling the object itself causes all stored calls to be transmitted as a single system.multicall request. The result of this call is a generator; iterating over this generator yields the individual results. 3
This approach has been first presented in a discussion on xmlrpc.com.
922
Chapter 20. Internet Protocols and Support
The Python Library Reference, Release 3.2.3
A usage example of this class follows. The server code from xmlrpc.server import SimpleXMLRPCServer def add(x,y): return x+y def subtract(x, y): return x-y def multiply(x, y): return x*y def divide(x, y): return x/y # A simple server with simple arithmetic functions server = SimpleXMLRPCServer(("localhost", 8000)) print("Listening on port 8000...") server.register_multicall_functions() server.register_function(add, ’add’) server.register_function(subtract, ’subtract’) server.register_function(multiply, ’multiply’) server.register_function(divide, ’divide’) server.serve_forever() The client code for the preceding server: import xmlrpc.client proxy = xmlrpc.client.ServerProxy("http://localhost:8000/") multicall = xmlrpc.client.MultiCall(proxy) multicall.add(7,3) multicall.subtract(7,3) multicall.multiply(7,3) multicall.divide(7,3) result = multicall() print("7+3=%d, 7-3=%d, 7*3=%d, 7/3=%d" % tuple(result))
20.23.7 Convenience Functions xmlrpc.client.dumps(params, methodname=None, methodresponse=None, encoding=None, allow_none=False) Convert params into an XML-RPC request. or into a response if methodresponse is true. params can be either a tuple of arguments or an instance of the Fault exception class. If methodresponse is true, only a single value can be returned, meaning that params must be of length 1. encoding, if supplied, is the encoding to use in the generated XML; the default is UTF-8. Python’s None value cannot be used in standard XML-RPC; to allow using it via an extension, provide a true value for allow_none. xmlrpc.client.loads(data, use_datetime=False) Convert an XML-RPC request or response into Python objects, a (params, methodname). params is a tuple of argument; methodname is a string, or None if no method name is present in the packet. If the XMLRPC packet represents a fault condition, this function will raise a Fault exception. The use_datetime flag can be used to cause date/time values to be presented as datetime.datetime objects; this is false by default.
20.23. xmlrpc.client — XML-RPC client access
923
The Python Library Reference, Release 3.2.3
20.23.8 Example of Client Usage # simple test program (from the XML-RPC specification) from xmlrpc.client import ServerProxy, Error # server = ServerProxy("http://localhost:8000") # local server server = ServerProxy("http://betty.userland.com") print(server) try: print(server.examples.getStateName(41)) except Error as v: print("ERROR", v) To access an XML-RPC server through a proxy, you need to define a custom transport. The following example shows how: import xmlrpc.client, http.client class ProxiedTransport(xmlrpc.client.Transport): def set_proxy(self, proxy): self.proxy = proxy def make_connection(self, host): self.realhost = host h = http.client.HTTP(self.proxy) return h def send_request(self, connection, handler, request_body): connection.putrequest("POST", ’http://%s%s’ % (self.realhost, handler)) def send_host(self, connection, host): connection.putheader(’Host’, self.realhost) p = ProxiedTransport() p.set_proxy(’proxy-server:8080’) server = xmlrpc.client.Server(’http://time.xmlrpc.com/RPC2’, transport=p) print(server.currentTime.getCurrentTime())
20.23.9 Example of Client and Server Usage See SimpleXMLRPCServer Example.
The xmlrpc.server module provides a basic server framework for XML-RPC servers written in Python. Servers can either be free standing, using SimpleXMLRPCServer, or embedded in a CGI environment, using CGIXMLRPCRequestHandler.
924
Chapter 20. Internet Protocols and Support
The Python Library Reference, Release 3.2.3
class xmlrpc.server.SimpleXMLRPCServer(addr, requestHandler=SimpleXMLRPCRequestHandler, logRequests=True, allow_none=False, encoding=None, bind_and_activate=True) Create a new server instance. This class provides methods for registration of functions that can be called by the XML-RPC protocol. The requestHandler parameter should be a factory for request handler instances; it defaults to SimpleXMLRPCRequestHandler. The addr and requestHandler parameters are passed to the socketserver.TCPServer constructor. If logRequests is true (the default), requests will be logged; setting this parameter to false will turn off logging. The allow_none and encoding parameters are passed on to xmlrpc.client and control the XML-RPC responses that will be returned from the server. The bind_and_activate parameter controls whether server_bind() and server_activate() are called immediately by the constructor; it defaults to true. Setting it to false allows code to manipulate the allow_reuse_address class variable before the address is bound. class xmlrpc.server.CGIXMLRPCRequestHandler(allow_none=False, encoding=None) Create a new instance to handle XML-RPC requests in a CGI environment. The allow_none and encoding parameters are passed on to xmlrpc.client and control the XML-RPC responses that will be returned from the server. class xmlrpc.server.SimpleXMLRPCRequestHandler Create a new request handler instance. This request handler supports POST requests and modifies logging so that the logRequests parameter to the SimpleXMLRPCServer constructor parameter is honored.
20.24.1 SimpleXMLRPCServer Objects The SimpleXMLRPCServer class is based on socketserver.TCPServer and provides a means of creating simple, stand alone XML-RPC servers. SimpleXMLRPCServer.register_function(function, name=None) Register a function that can respond to XML-RPC requests. If name is given, it will be the method name associated with function, otherwise function.__name__ will be used. name can be either a normal or Unicode string, and may contain characters not legal in Python identifiers, including the period character. SimpleXMLRPCServer.register_instance(instance, allow_dotted_names=False) Register an object which is used to expose method names which have not been registered using register_function(). If instance contains a _dispatch() method, it is called with the requested method name and the parameters from the request. Its API is def _dispatch(self, method, params) (note that params does not represent a variable argument list). If it calls an underlying function to perform its task, that function is called as func(*params), expanding the parameter list. The return value from _dispatch() is returned to the client as the result. If instance does not have a _dispatch() method, it is searched for an attribute matching the name of the requested method. If the optional allow_dotted_names argument is true and the instance does not have a _dispatch() method, then if the requested method name contains periods, each component of the method name is searched for individually, with the effect that a simple hierarchical search is performed. The value found from this search is then called with the parameters from the request, and the return value is passed back to the client. Warning: Enabling the allow_dotted_names option allows intruders to access your module’s global variables and may allow intruders to execute arbitrary code on your machine. Only use this option on a secure, closed network. SimpleXMLRPCServer.register_introspection_functions() Registers the XML-RPC introspection functions system.listMethods, system.methodHelp and system.methodSignature. SimpleXMLRPCServer.register_multicall_functions() Registers the XML-RPC multicall function system.multicall.
20.24. xmlrpc.server — Basic XML-RPC servers
925
The Python Library Reference, Release 3.2.3
SimpleXMLRPCRequestHandler.rpc_paths An attribute value that must be a tuple listing valid path portions of the URL for receiving XML-RPC requests. Requests posted to other paths will result in a 404 “no such page” HTTP error. If this tuple is empty, all paths will be considered valid. The default value is (’/’, ’/RPC2’). SimpleXMLRPCServer Example Server code: from xmlrpc.server import SimpleXMLRPCServer from xmlrpc.server import SimpleXMLRPCRequestHandler # Restrict to a particular path. class RequestHandler(SimpleXMLRPCRequestHandler): rpc_paths = (’/RPC2’,) # Create server server = SimpleXMLRPCServer(("localhost", 8000), requestHandler=RequestHandler) server.register_introspection_functions() # Register pow() function; this will use the value of # pow.__name__ as the name, which is just ’pow’. server.register_function(pow) # Register a function under a different name def adder_function(x,y): return x + y server.register_function(adder_function, ’add’) # Register an instance; all the methods of the instance are # published as XML-RPC methods (in this case, just ’mul’). class MyFuncs: def mul(self, x, y): return x * y server.register_instance(MyFuncs()) # Run the server’s main loop server.serve_forever() The following client code will call the methods made available by the preceding server: import xmlrpc.client s = xmlrpc.client.ServerProxy(’http://localhost:8000’) print(s.pow(2,3)) # Returns 2**3 = 8 print(s.add(2,3)) # Returns 5 print(s.mul(5,2)) # Returns 5*2 = 10 # Print list of available methods print(s.system.listMethods())
926
Chapter 20. Internet Protocols and Support
The Python Library Reference, Release 3.2.3
20.24.2 CGIXMLRPCRequestHandler The CGIXMLRPCRequestHandler class can be used to handle XML-RPC requests sent to Python CGI scripts. CGIXMLRPCRequestHandler.register_function(function, name=None) Register a function that can respond to XML-RPC requests. If name is given, it will be the method name associated with function, otherwise function.__name__ will be used. name can be either a normal or Unicode string, and may contain characters not legal in Python identifiers, including the period character. CGIXMLRPCRequestHandler.register_instance(instance) Register an object which is used to expose method names which have not been registered using register_function(). If instance contains a _dispatch() method, it is called with the requested method name and the parameters from the request; the return value is returned to the client as the result. If instance does not have a _dispatch() method, it is searched for an attribute matching the name of the requested method; if the requested method name contains periods, each component of the method name is searched for individually, with the effect that a simple hierarchical search is performed. The value found from this search is then called with the parameters from the request, and the return value is passed back to the client. CGIXMLRPCRequestHandler.register_introspection_functions() Register the XML-RPC introspection functions system.listMethods, system.methodHelp and system.methodSignature. CGIXMLRPCRequestHandler.register_multicall_functions() Register the XML-RPC multicall function system.multicall. CGIXMLRPCRequestHandler.handle_request(request_text=None) Handle a XML-RPC request. If request_text is given, it should be the POST data provided by the HTTP server, otherwise the contents of stdin will be used. Example: class MyFuncs: def mul(self, x, y): return x * y
20.24.3 Documenting XMLRPC server These classes extend the above classes to serve HTML documentation in response to HTTP GET requests. Servers can either be free standing, using DocXMLRPCServer, or embedded in a CGI environment, using DocCGIXMLRPCRequestHandler. class xmlrpc.server.DocXMLRPCServer(addr, requestHandler=DocXMLRPCRequestHandler, logRequests=True, allow_none=False, encoding=None, bind_and_activate=True) Create a new server instance. All parameters have the same meaning as for SimpleXMLRPCServer; requestHandler defaults to DocXMLRPCRequestHandler. class xmlrpc.server.DocCGIXMLRPCRequestHandler Create a new instance to handle XML-RPC requests in a CGI environment.
20.24. xmlrpc.server — Basic XML-RPC servers
927
The Python Library Reference, Release 3.2.3
class xmlrpc.server.DocXMLRPCRequestHandler Create a new request handler instance. This request handler supports XML-RPC POST requests, documentation GET requests, and modifies logging so that the logRequests parameter to the DocXMLRPCServer constructor parameter is honored.
20.24.4 DocXMLRPCServer Objects The DocXMLRPCServer class is derived from SimpleXMLRPCServer and provides a means of creating selfdocumenting, stand alone XML-RPC servers. HTTP POST requests are handled as XML-RPC method calls. HTTP GET requests are handled by generating pydoc-style HTML documentation. This allows a server to provide its own web-based documentation. DocXMLRPCServer.set_server_title(server_title) Set the title used in the generated HTML documentation. This title will be used inside the HTML “title” element. DocXMLRPCServer.set_server_name(server_name) Set the name used in the generated HTML documentation. This name will appear at the top of the generated documentation inside a “h1” element. DocXMLRPCServer.set_server_documentation(server_documentation) Set the description used in the generated HTML documentation. This description will appear as a paragraph, below the server name, in the documentation.
20.24.5 DocCGIXMLRPCRequestHandler The DocCGIXMLRPCRequestHandler class is derived from CGIXMLRPCRequestHandler and provides a means of creating self-documenting, XML-RPC CGI scripts. HTTP POST requests are handled as XML-RPC method calls. HTTP GET requests are handled by generating pydoc-style HTML documentation. This allows a server to provide its own web-based documentation. DocCGIXMLRPCRequestHandler.set_server_title(server_title) Set the title used in the generated HTML documentation. This title will be used inside the HTML “title” element. DocCGIXMLRPCRequestHandler.set_server_name(server_name) Set the name used in the generated HTML documentation. This name will appear at the top of the generated documentation inside a “h1” element. DocCGIXMLRPCRequestHandler.set_server_documentation(server_documentation) Set the description used in the generated HTML documentation. This description will appear as a paragraph, below the server name, in the documentation.
928
Chapter 20. Internet Protocols and Support
CHAPTER
TWENTYONE
MULTIMEDIA SERVICES The modules described in this chapter implement various algorithms or interfaces that are mainly useful for multimedia applications. They are available at the discretion of the installation. Here’s an overview:
21.1 audioop — Manipulate raw audio data The audioop module contains some useful operations on sound fragments. It operates on sound fragments consisting of signed integer samples 8, 16 or 32 bits wide, stored in Python strings. All scalar items are integers, unless specified otherwise. This module provides support for a-LAW, u-LAW and Intel/DVI ADPCM encodings. A few of the more complicated operations only take 16-bit samples, otherwise the sample size (in bytes) is always a parameter of the operation. The module defines the following variables and functions: exception audioop.error This exception is raised on all errors, such as unknown number of bytes per sample, etc. audioop.add(fragment1, fragment2, width) Return a fragment which is the addition of the two samples passed as parameters. width is the sample width in bytes, either 1, 2 or 4. Both fragments should have the same length. audioop.adpcm2lin(adpcmfragment, width, state) Decode an Intel/DVI ADPCM coded fragment to a linear fragment. See the description of lin2adpcm() for details on ADPCM coding. Return a tuple (sample, newstate) where the sample has the width specified in width. audioop.alaw2lin(fragment, width) Convert sound fragments in a-LAW encoding to linearly encoded sound fragments. a-LAW encoding always uses 8 bits samples, so width refers only to the sample width of the output fragment here. audioop.avg(fragment, width) Return the average over all samples in the fragment. audioop.avgpp(fragment, width) Return the average peak-peak value over all samples in the fragment. No filtering is done, so the usefulness of this routine is questionable. audioop.bias(fragment, width, bias) Return a fragment that is the original fragment with a bias added to each sample. audioop.cross(fragment, width) Return the number of zero crossings in the fragment passed as an argument. 929
The Python Library Reference, Release 3.2.3
audioop.findfactor(fragment, reference) Return a factor F such that rms(add(fragment, mul(reference, -F))) is minimal, i.e., return the factor with which you should multiply reference to make it match as well as possible to fragment. The fragments should both contain 2-byte samples. The time taken by this routine is proportional to len(fragment). audioop.findfit(fragment, reference) Try to match reference as well as possible to a portion of fragment (which should be the longer fragment). This is (conceptually) done by taking slices out of fragment, using findfactor() to compute the best match, and minimizing the result. The fragments should both contain 2-byte samples. Return a tuple (offset, factor) where offset is the (integer) offset into fragment where the optimal match started and factor is the (floating-point) factor as per findfactor(). audioop.findmax(fragment, length) Search fragment for a slice of length length samples (not bytes!) with maximum energy, i.e., return i for which rms(fragment[i*2:(i+length)*2]) is maximal. The fragments should both contain 2-byte samples. The routine takes time proportional to len(fragment). audioop.getsample(fragment, width, index) Return the value of sample index from the fragment. audioop.lin2adpcm(fragment, width, state) Convert samples to 4 bit Intel/DVI ADPCM encoding. ADPCM coding is an adaptive coding scheme, whereby each 4 bit number is the difference between one sample and the next, divided by a (varying) step. The Intel/DVI ADPCM algorithm has been selected for use by the IMA, so it may well become a standard. state is a tuple containing the state of the coder. The coder returns a tuple (adpcmfrag, newstate), and the newstate should be passed to the next call of lin2adpcm(). In the initial call, None can be passed as the state. adpcmfrag is the ADPCM coded fragment packed 2 4-bit values per byte. audioop.lin2alaw(fragment, width) Convert samples in the audio fragment to a-LAW encoding and return this as a Python string. a-LAW is an audio encoding format whereby you get a dynamic range of about 13 bits using only 8 bit samples. It is used by the Sun audio hardware, among others. audioop.lin2lin(fragment, width, newwidth) Convert samples between 1-, 2- and 4-byte formats. Note: In some audio formats, such as .WAV files, 16 and 32 bit samples are signed, but 8 bit samples are unsigned. So when converting to 8 bit wide samples for these formats, you need to also add 128 to the result: new_frames = audioop.lin2lin(frames, old_width, 1) new_frames = audioop.bias(new_frames, 1, 128) The same, in reverse, has to be applied when converting from 8 to 16 or 32 bit width samples. audioop.lin2ulaw(fragment, width) Convert samples in the audio fragment to u-LAW encoding and return this as a Python string. u-LAW is an audio encoding format whereby you get a dynamic range of about 14 bits using only 8 bit samples. It is used by the Sun audio hardware, among others. audioop.minmax(fragment, width) Return a tuple consisting of the minimum and maximum values of all samples in the sound fragment. audioop.max(fragment, width) Return the maximum of the absolute value of all samples in a fragment.
930
Chapter 21. Multimedia Services
The Python Library Reference, Release 3.2.3
audioop.maxpp(fragment, width) Return the maximum peak-peak value in the sound fragment. audioop.mul(fragment, width, factor) Return a fragment that has all samples in the original fragment multiplied by the floating-point value factor. Overflow is silently ignored. audioop.ratecv(fragment, width, nchannels, inrate, outrate, state[, weightA[, weightB ]]) Convert the frame rate of the input fragment. state is a tuple containing the state of the converter. The converter returns a tuple (newfragment, newstate), and newstate should be passed to the next call of ratecv(). The initial call should pass None as the state. The weightA and weightB arguments are parameters for a simple digital filter and default to 1 and 0 respectively. audioop.reverse(fragment, width) Reverse the samples in a fragment and returns the modified fragment. audioop.rms(fragment, width) Return the root-mean-square of the fragment, i.e. sqrt(sum(S_i^2)/n). This is a measure of the power in an audio signal. audioop.tomono(fragment, width, lfactor, rfactor) Convert a stereo fragment to a mono fragment. The left channel is multiplied by lfactor and the right channel by rfactor before adding the two channels to give a mono signal. audioop.tostereo(fragment, width, lfactor, rfactor) Generate a stereo fragment from a mono fragment. Each pair of samples in the stereo fragment are computed from the mono sample, whereby left channel samples are multiplied by lfactor and right channel samples by rfactor. audioop.ulaw2lin(fragment, width) Convert sound fragments in u-LAW encoding to linearly encoded sound fragments. u-LAW encoding always uses 8 bits samples, so width refers only to the sample width of the output fragment here. Note that operations such as mul() or max() make no distinction between mono and stereo fragments, i.e. all samples are treated equal. If this is a problem the stereo fragment should be split into two mono fragments first and recombined later. Here is an example of how to do that: def mul_stereo(sample, width, lfactor, rfactor): lsample = audioop.tomono(sample, width, 1, 0) rsample = audioop.tomono(sample, width, 0, 1) lsample = audioop.mul(lsample, width, lfactor) rsample = audioop.mul(rsample, width, rfactor) lsample = audioop.tostereo(lsample, width, 1, 0) rsample = audioop.tostereo(rsample, width, 0, 1) return audioop.add(lsample, rsample, width) If you use the ADPCM coder to build network packets and you want your protocol to be stateless (i.e. to be able to tolerate packet loss) you should not only transmit the data but also the state. Note that you should send the initial state (the one you passed to lin2adpcm()) along to the decoder, not the final state (as returned by the coder). If you want to use struct.struct() to store the state in binary you can code the first element (the predicted value) in 16 bits and the second (the delta index) in 8. The ADPCM coders have never been tried against other ADPCM coders, only against themselves. It could well be that I misinterpreted the standards in which case they will not be interoperable with the respective standards. The find*() routines might look a bit funny at first sight. They are primarily meant to do echo cancellation. A reasonably fast way to do this is to pick the most energetic piece of the output sample, locate that in the input sample
21.1. audioop — Manipulate raw audio data
931
The Python Library Reference, Release 3.2.3
and subtract the whole output sample from the input sample: def echocancel(outputdata, inputdata): pos = audioop.findmax(outputdata, 800) # one tenth second out_test = outputdata[pos*2:] in_test = inputdata[pos*2:] ipos, factor = audioop.findfit(in_test, out_test) # Optional (for better cancellation): # factor = audioop.findfactor(in_test[ipos*2:ipos*2+len(out_test)], # out_test) prefill = ’\0’*(pos+ipos)*2 postfill = ’\0’*(len(inputdata)-len(prefill)-len(outputdata)) outputdata = prefill + audioop.mul(outputdata,2,-factor) + postfill return audioop.add(inputdata, outputdata, 2)
21.2 aifc — Read and write AIFF and AIFC files Source code: Lib/aifc.py
This module provides support for reading and writing AIFF and AIFF-C files. AIFF is Audio Interchange File Format, a format for storing digital audio samples in a file. AIFF-C is a newer version of the format that includes the ability to compress the audio data. Note: Some operations may only work under IRIX; these will raise ImportError when attempting to import the cl module, which is only available on IRIX. Audio files have a number of parameters that describe the audio data. The sampling rate or frame rate is the number of times per second the sound is sampled. The number of channels indicate if the audio is mono, stereo, or quadro. Each frame consists of one sample per channel. The sample size is the size in bytes of each sample. Thus a frame consists of nchannels**samplesize* bytes, and a second’s worth of audio consists of nchannels**samplesize***framerate* bytes. For example, CD quality audio has a sample size of two bytes (16 bits), uses two channels (stereo) and has a frame rate of 44,100 frames/second. This gives a frame size of 4 bytes (2*2), and a second’s worth occupies 2*2*44100 bytes (176,400 bytes). Module aifc defines the following function: aifc.open(file, mode=None) Open an AIFF or AIFF-C file and return an object instance with methods that are described below. The argument file is either a string naming a file or a file object. mode must be ’r’ or ’rb’ when the file must be opened for reading, or ’w’ or ’wb’ when the file must be opened for writing. If omitted, file.mode is used if it exists, otherwise ’rb’ is used. When used for writing, the file object should be seekable, unless you know ahead of time how many samples you are going to write in total and use writeframesraw() and setnframes(). Objects returned by open() when a file is opened for reading have the following methods: aifc.getnchannels() Return the number of audio channels (1 for mono, 2 for stereo). aifc.getsampwidth() Return the size in bytes of individual samples. aifc.getframerate() Return the sampling rate (number of audio frames per second).
932
Chapter 21. Multimedia Services
The Python Library Reference, Release 3.2.3
aifc.getnframes() Return the number of audio frames in the file. aifc.getcomptype() Return a bytes array of length 4 describing the type of compression used in the audio file. For AIFF files, the returned value is b’NONE’. aifc.getcompname() Return a bytes array convertible to a human-readable description of the type of compression used in the audio file. For AIFF files, the returned value is b’not compressed’. aifc.getparams() Return a tuple consisting of all of the above values in the above order. aifc.getmarkers() Return a list of markers in the audio file. A marker consists of a tuple of three elements. The first is the mark ID (an integer), the second is the mark position in frames from the beginning of the data (an integer), the third is the name of the mark (a string). aifc.getmark(id) Return the tuple as described in getmarkers() for the mark with the given id. aifc.readframes(nframes) Read and return the next nframes frames from the audio file. The returned data is a string containing for each frame the uncompressed samples of all channels. aifc.rewind() Rewind the read pointer. The next readframes() will start from the beginning. aifc.setpos(pos) Seek to the specified frame number. aifc.tell() Return the current frame number. aifc.close() Close the AIFF file. After calling this method, the object can no longer be used. Objects returned by open() when a file is opened for writing have all the above methods, except for readframes() and setpos(). In addition the following methods exist. The get*() methods can only be called after the corresponding set*() methods have been called. Before the first writeframes() or writeframesraw(), all parameters except for the number of frames must be filled in. aifc.aiff() Create an AIFF file. The default is that an AIFF-C file is created, unless the name of the file ends in ’.aiff’ in which case the default is an AIFF file. aifc.aifc() Create an AIFF-C file. The default is that an AIFF-C file is created, unless the name of the file ends in ’.aiff’ in which case the default is an AIFF file. aifc.setnchannels(nchannels) Specify the number of channels in the audio file. aifc.setsampwidth(width) Specify the size in bytes of audio samples. aifc.setframerate(rate) Specify the sampling frequency in frames per second.
21.2. aifc — Read and write AIFF and AIFC files
933
The Python Library Reference, Release 3.2.3
aifc.setnframes(nframes) Specify the number of frames that are to be written to the audio file. If this parameter is not set, or not set correctly, the file needs to support seeking. aifc.setcomptype(type, name) Specify the compression type. If not specified, the audio data will not be compressed. In AIFF files, compression is not possible. The name parameter should be a human-readable description of the compression type as a bytes array, the type parameter should be a bytes array of length 4. Currently the following compression types are supported: b’NONE’, b’ULAW’, b’ALAW’, b’G722’. aifc.setparams(nchannels, sampwidth, framerate, comptype, compname) Set all the above parameters at once. The argument is a tuple consisting of the various parameters. This means that it is possible to use the result of a getparams() call as argument to setparams(). aifc.setmark(id, pos, name) Add a mark with the given id (larger than 0), and the given name at the given position. This method can be called at any time before close(). aifc.tell() Return the current write position in the output file. Useful in combination with setmark(). aifc.writeframes(data) Write data to the output file. This method can only be called after the audio file parameters have been set. aifc.writeframesraw(data) Like writeframes(), except that the header of the audio file is not updated. aifc.close() Close the AIFF file. The header of the file is updated to reflect the actual size of the audio data. After calling this method, the object can no longer be used.
21.3 sunau — Read and write Sun AU files Source code: Lib/sunau.py
The sunau module provides a convenient interface to the Sun AU sound format. Note that this module is interfacecompatible with the modules aifc and wave. An audio file consists of a header followed by the data. The fields of the header are: Field magic word header size data size encoding sample rate # of channels info
Contents The four bytes .snd. Size of the header, including info, in bytes. Physical size of the data, in bytes. Indicates how the audio samples are encoded. The sampling rate. The number of channels in the samples. ASCII string giving a description of the audio file (padded with null bytes).
Apart from the info field, all header fields are 4 bytes in size. They are all 32-bit unsigned integers encoded in big-endian byte order. The sunau module defines the following functions: sunau.open(file, mode) If file is a string, open the file by that name, otherwise treat it as a seekable file-like object. mode can be any of ’r’ Read only mode. 934
Chapter 21. Multimedia Services
The Python Library Reference, Release 3.2.3
’w’ Write only mode. Note that it does not allow read/write files. A mode of ’r’ returns a AU_read object, while a mode of ’w’ or ’wb’ returns a AU_write object. sunau.openfp(file, mode) A synonym for open(), maintained for backwards compatibility. The sunau module defines the following exception: exception sunau.Error An error raised when something is impossible because of Sun AU specs or implementation deficiency. The sunau module defines the following data items: sunau.AUDIO_FILE_MAGIC An integer every valid Sun AU file begins with, stored in big-endian form. This is the string .snd interpreted as an integer. sunau.AUDIO_FILE_ENCODING_MULAW_8 sunau.AUDIO_FILE_ENCODING_LINEAR_8 sunau.AUDIO_FILE_ENCODING_LINEAR_16 sunau.AUDIO_FILE_ENCODING_LINEAR_24 sunau.AUDIO_FILE_ENCODING_LINEAR_32 sunau.AUDIO_FILE_ENCODING_ALAW_8 Values of the encoding field from the AU header which are supported by this module. sunau.AUDIO_FILE_ENCODING_FLOAT sunau.AUDIO_FILE_ENCODING_DOUBLE sunau.AUDIO_FILE_ENCODING_ADPCM_G721 sunau.AUDIO_FILE_ENCODING_ADPCM_G722 sunau.AUDIO_FILE_ENCODING_ADPCM_G723_3 sunau.AUDIO_FILE_ENCODING_ADPCM_G723_5 Additional known values of the encoding field from the AU header, but which are not supported by this module.
21.3.1 AU_read Objects AU_read objects, as returned by open() above, have the following methods: AU_read.close() Close the stream, and make the instance unusable. (This is called automatically on deletion.) AU_read.getnchannels() Returns number of audio channels (1 for mone, 2 for stereo). AU_read.getsampwidth() Returns sample width in bytes. AU_read.getframerate() Returns sampling frequency. AU_read.getnframes() Returns number of audio frames. AU_read.getcomptype() Returns compression type. Supported compression types are ’ULAW’, ’ALAW’ and ’NONE’. AU_read.getcompname() Human-readable version of getcomptype(). The supported types have the respective names ’CCITT G.711 u-law’, ’CCITT G.711 A-law’ and ’not compressed’.
21.3. sunau — Read and write Sun AU files
935
The Python Library Reference, Release 3.2.3
AU_read.getparams() Returns a tuple (nchannels, sampwidth, framerate, nframes, comptype, compname), equivalent to output of the get*() methods. AU_read.readframes(n) Reads and returns at most n frames of audio, as a string of bytes. The data will be returned in linear format. If the original data is in u-LAW format, it will be converted. AU_read.rewind() Rewind the file pointer to the beginning of the audio stream. The following two methods define a term “position” which is compatible between them, and is otherwise implementation dependent. AU_read.setpos(pos) Set the file pointer to the specified position. Only values returned from tell() should be used for pos. AU_read.tell() Return current file pointer position. Note that the returned value has nothing to do with the actual position in the file. The following two functions are defined for compatibility with the aifc, and don’t do anything interesting. AU_read.getmarkers() Returns None. AU_read.getmark(id) Raise an error.
21.3.2 AU_write Objects AU_write objects, as returned by open() above, have the following methods: AU_write.setnchannels(n) Set the number of channels. AU_write.setsampwidth(n) Set the sample width (in bytes.) AU_write.setframerate(n) Set the frame rate. AU_write.setnframes(n) Set the number of frames. This can be later changed, when and if more frames are written. AU_write.setcomptype(type, name) Set the compression type and description. Only ’NONE’ and ’ULAW’ are supported on output. AU_write.setparams(tuple) The tuple should be (nchannels, sampwidth, framerate, nframes, comptype, compname), with values valid for the set*() methods. Set all parameters. AU_write.tell() Return current position in the file, with the same disclaimer for the AU_read.tell() and AU_read.setpos() methods. AU_write.writeframesraw(data) Write audio frames, without correcting nframes. AU_write.writeframes(data) Write audio frames and make sure nframes is correct.
936
Chapter 21. Multimedia Services
The Python Library Reference, Release 3.2.3
AU_write.close() Make sure nframes is correct, and close the file. This method is called upon deletion. Note that it is invalid to set any parameters after calling writeframes() or writeframesraw().
The wave module provides a convenient interface to the WAV sound format. sion/decompression, but it does support mono/stereo.
It does not support compres-
The wave module defines the following function and exception: wave.open(file, mode=None) If file is a string, open the file by that name, otherwise treat it as a seekable file-like object. mode can be any of ’r’, ’rb’ Read only mode. ’w’, ’wb’ Write only mode. Note that it does not allow read/write WAV files. A mode of ’r’ or ’rb’ returns a Wave_read object, while a mode of ’w’ or ’wb’ returns a Wave_write object. If mode is omitted and a file-like object is passed as file, file.mode is used as the default value for mode (the ’b’ flag is still added if necessary). If you pass in a file-like object, the wave object will not close it when its close() method is called; it is the caller’s responsibility to close the file object. wave.openfp(file, mode) A synonym for open(), maintained for backwards compatibility. exception wave.Error An error raised when something is impossible because it violates the WAV specification or hits an implementation deficiency.
21.4.1 Wave_read Objects Wave_read objects, as returned by open(), have the following methods: Wave_read.close() Close the stream if it was opened by wave, and make the instance unusable. This is called automatically on object collection. Wave_read.getnchannels() Returns number of audio channels (1 for mono, 2 for stereo). Wave_read.getsampwidth() Returns sample width in bytes. Wave_read.getframerate() Returns sampling frequency. Wave_read.getnframes() Returns number of audio frames.
21.4. wave — Read and write WAV files
937
The Python Library Reference, Release 3.2.3
Wave_read.getcomptype() Returns compression type (’NONE’ is the only supported type). Wave_read.getcompname() Human-readable version of getcomptype(). Usually ’not compressed’ parallels ’NONE’. Wave_read.getparams() Returns a tuple (nchannels, sampwidth, framerate, nframes, comptype, compname), equivalent to output of the get*() methods. Wave_read.readframes(n) Reads and returns at most n frames of audio, as a string of bytes. Wave_read.rewind() Rewind the file pointer to the beginning of the audio stream. The following two methods are defined for compatibility with the aifc module, and don’t do anything interesting. Wave_read.getmarkers() Returns None. Wave_read.getmark(id) Raise an error. The following two methods define a term “position” which is compatible between them, and is otherwise implementation dependent. Wave_read.setpos(pos) Set the file pointer to the specified position. Wave_read.tell() Return current file pointer position.
21.4.2 Wave_write Objects Wave_write objects, as returned by open(), have the following methods: Wave_write.close() Make sure nframes is correct, and close the file if it was opened by wave. This method is called upon object collection. Wave_write.setnchannels(n) Set the number of channels. Wave_write.setsampwidth(n) Set the sample width to n bytes. Wave_write.setframerate(n) Set the frame rate to n. Changed in version 3.2: A non-integral input to this method is rounded to the nearest integer. Wave_write.setnframes(n) Set the number of frames to n. This will be changed later if more frames are written. Wave_write.setcomptype(type, name) Set the compression type and description. At the moment, only compression type NONE is supported, meaning no compression. Wave_write.setparams(tuple) The tuple should be (nchannels, sampwidth, framerate, nframes, comptype, compname), with values valid for the set*() methods. Sets all parameters.
938
Chapter 21. Multimedia Services
The Python Library Reference, Release 3.2.3
Wave_write.tell() Return current position in the file, with the same disclaimer for the Wave_read.tell() and Wave_read.setpos() methods. Wave_write.writeframesraw(data) Write audio frames, without correcting nframes. Wave_write.writeframes(data) Write audio frames and make sure nframes is correct. Note that it is invalid to set any parameters after calling writeframes() or writeframesraw(), and any attempt to do so will raise wave.Error.
21.5 chunk — Read IFF chunked data This module provides an interface for reading files that use EA IFF 85 chunks. 1 This format is used in at least the Audio Interchange File Format (AIFF/AIFF-C) and the Real Media File Format (RMFF). The WAVE audio file format is closely related and can also be read using this module. A chunk has the following structure: Offset 0 4 8 8+n
Length 4 4 n 0 or 1
Contents Chunk ID Size of chunk in big-endian byte order, not including the header Data bytes, where n is the size given in the preceding field Pad byte needed if n is odd and chunk alignment is used
The ID is a 4-byte string which identifies the type of chunk. The size field (a 32-bit value, encoded using big-endian byte order) gives the size of the chunk data, not including the 8-byte header. Usually an IFF-type file consists of one or more chunks. The proposed usage of the Chunk class defined here is to instantiate an instance at the start of each chunk and read from the instance until it reaches the end, after which a new instance can be instantiated. At the end of the file, creating a new instance will fail with a EOFError exception. class chunk.Chunk(file, align=True, bigendian=True, inclheader=False) Class which represents a chunk. The file argument is expected to be a file-like object. An instance of this class is specifically allowed. The only method that is needed is read(). If the methods seek() and tell() are present and don’t raise an exception, they are also used. If these methods are present and raise an exception, they are expected to not have altered the object. If the optional argument align is true, chunks are assumed to be aligned on 2-byte boundaries. If align is false, no alignment is assumed. The default value is true. If the optional argument bigendian is false, the chunk size is assumed to be in little-endian order. This is needed for WAVE audio files. The default value is true. If the optional argument inclheader is true, the size given in the chunk header includes the size of the header. The default value is false. A Chunk object supports the following methods: getname() Returns the name (ID) of the chunk. This is the first 4 bytes of the chunk. getsize() Returns the size of the chunk. close() Close and skip to the end of the chunk. This does not close the underlying file. The remaining methods will raise IOError if called after the close() method has been called. 1
“EA IFF 85” Standard for Interchange Format Files, Jerry Morrison, Electronic Arts, January 1985.
21.5. chunk — Read IFF chunked data
939
The Python Library Reference, Release 3.2.3
isatty() Returns False. seek(pos, whence=0) Set the chunk’s current position. The whence argument is optional and defaults to 0 (absolute file positioning); other values are 1 (seek relative to the current position) and 2 (seek relative to the file’s end). There is no return value. If the underlying file does not allow seek, only forward seeks are allowed. tell() Return the current position into the chunk. read(size=-1) Read at most size bytes from the chunk (less if the read hits the end of the chunk before obtaining size bytes). If the size argument is negative or omitted, read all data until the end of the chunk. The bytes are returned as a string object. An empty string is returned when the end of the chunk is encountered immediately. skip() Skip to the end of the chunk. All further calls to read() for the chunk will return ”. If you are not interested in the contents of the chunk, this method should be called so that the file points to the start of the next chunk.
21.6 colorsys — Conversions between color systems Source code: Lib/colorsys.py
The colorsys module defines bidirectional conversions of color values between colors expressed in the RGB (Red Green Blue) color space used in computer monitors and three other coordinate systems: YIQ, HLS (Hue Lightness Saturation) and HSV (Hue Saturation Value). Coordinates in all of these color spaces are floating point values. In the YIQ space, the Y coordinate is between 0 and 1, but the I and Q coordinates can be positive or negative. In all other spaces, the coordinates are all between 0 and 1. See Also: More information about color spaces can be found at http://www.poynton.com/ColorFAQ.html and http://www.cambridgeincolour.com/tutorials/color-spaces.htm. The colorsys module defines the following functions: colorsys.rgb_to_yiq(r, g, b) Convert the color from RGB coordinates to YIQ coordinates. colorsys.yiq_to_rgb(y, i, q) Convert the color from YIQ coordinates to RGB coordinates. colorsys.rgb_to_hls(r, g, b) Convert the color from RGB coordinates to HLS coordinates. colorsys.hls_to_rgb(h, l, s) Convert the color from HLS coordinates to RGB coordinates. colorsys.rgb_to_hsv(r, g, b) Convert the color from RGB coordinates to HSV coordinates. colorsys.hsv_to_rgb(h, s, v) Convert the color from HSV coordinates to RGB coordinates. Example:
21.7 imghdr — Determine the type of an image Source code: Lib/imghdr.py
The imghdr module determines the type of image contained in a file or byte stream. The imghdr module defines the following function: imghdr.what(filename, h=None) Tests the image data contained in the file named by filename, and returns a string describing the image type. If optional h is provided, the filename is ignored and h is assumed to contain the byte stream to test. The following image types are recognized, as listed below with the return value from what(): Value ’rgb’ ’gif’ ’pbm’ ’pgm’ ’ppm’ ’tiff’ ’rast’ ’xbm’ ’jpeg’ ’bmp’ ’png’
Image format SGI ImgLib Files GIF 87a and 89a Files Portable Bitmap Files Portable Graymap Files Portable Pixmap Files TIFF Files Sun Raster Files X Bitmap Files JPEG data in JFIF or Exif formats BMP files Portable Network Graphics
You can extend the list of file types imghdr can recognize by appending to this variable: imghdr.tests A list of functions performing the individual tests. Each function takes two arguments: the byte-stream and an open file-like object. When what() is called with a byte-stream, the file-like object will be None. The test function should return a string describing the image type if the test succeeded, or None if it failed. Example: >>> import imghdr >>> imghdr.what(’/tmp/bass.gif’) ’gif’
21.8 sndhdr — Determine type of sound file Source code: Lib/sndhdr.py
The sndhdr provides utility functions which attempt to determine the type of sound data which is in a file. When these functions are able to determine what type of sound data is stored in a file, they return a tuple (type, 21.7. imghdr — Determine the type of an image
941
The Python Library Reference, Release 3.2.3
sampling_rate, channels, frames, bits_per_sample). The value for type indicates the data type and will be one of the strings ’aifc’, ’aiff’, ’au’, ’hcom’, ’sndr’, ’sndt’, ’voc’, ’wav’, ’8svx’, ’sb’, ’ub’, or ’ul’. The sampling_rate will be either the actual value or 0 if unknown or difficult to decode. Similarly, channels will be either the number of channels or 0 if it cannot be determined or if the value is difficult to decode. The value for frames will be either the number of frames or -1. The last item in the tuple, bits_per_sample, will either be the sample size in bits or ’A’ for A-LAW or ’U’ for u-LAW. sndhdr.what(filename) Determines the type of sound data stored in the file filename using whathdr(). If it succeeds, returns a tuple as described above, otherwise None is returned. sndhdr.whathdr(filename) Determines the type of sound data stored in a file based on the file header. The name of the file is given by filename. This function returns a tuple as described above on success, or None.
21.9 ossaudiodev — Access to OSS-compatible audio devices Platforms: Linux, FreeBSD This module allows you to access the OSS (Open Sound System) audio interface. OSS is available for a wide range of open-source and commercial Unices, and is the standard audio interface for Linux and recent versions of FreeBSD. See Also: Open Sound System Programmer’s Guide the official documentation for the OSS C API The module defines a large number of constants supplied by the OSS device driver; see on either Linux or FreeBSD for a listing . ossaudiodev defines the following variables and functions: exception ossaudiodev.OSSAudioError This exception is raised on certain errors. The argument is a string describing what went wrong. (If ossaudiodev receives an error from a system call such as open(), write(), or ioctl(), it raises IOError. Errors detected directly by ossaudiodev result in OSSAudioError.) (For backwards compatibility, the exception class is also available as ossaudiodev.error.) ossaudiodev.open([device ], mode) Open an audio device and return an OSS audio device object. This object supports many file-like methods, such as read(), write(), and fileno() (although there are subtle differences between conventional Unix read/write semantics and those of OSS audio devices). It also supports a number of audio-specific methods; see below for the complete list of methods. device is the audio device filename to use. If it is not specified, this module first looks in the environment variable AUDIODEV for a device to use. If not found, it falls back to /dev/dsp. mode is one of ’r’ for read-only (record) access, ’w’ for write-only (playback) access and ’rw’ for both. Since many sound cards only allow one process to have the recorder or player open at a time, it is a good idea to open the device only for the activity needed. Further, some sound cards are half-duplex: they can be opened for reading or writing, but not both at once. Note the unusual calling syntax: the first argument is optional, and the second is required. This is a historical artifact for compatibility with the older linuxaudiodev module which ossaudiodev supersedes. ossaudiodev.openmixer([device ]) Open a mixer device and return an OSS mixer device object. device is the mixer device filename to use. If it is not specified, this module first looks in the environment variable MIXERDEV for a device to use. If not found, it falls back to /dev/mixer. 942
Chapter 21. Multimedia Services
The Python Library Reference, Release 3.2.3
21.9.1 Audio Device Objects Before you can write to or read from an audio device, you must call three methods in the correct order: 1. setfmt() to set the output format 2. channels() to set the number of channels 3. speed() to set the sample rate Alternately, you can use the setparameters() method to set all three audio parameters at once. This is more convenient, but may not be as flexible in all cases. The audio device objects returned by open() define the following methods and (read-only) attributes: oss_audio_device.close() Explicitly close the audio device. When you are done writing to or reading from an audio device, you should explicitly close it. A closed device cannot be used again. oss_audio_device.fileno() Return the file descriptor associated with the device. oss_audio_device.read(size) Read size bytes from the audio input and return them as a Python string. Unlike most Unix device drivers, OSS audio devices in blocking mode (the default) will block read() until the entire requested amount of data is available. oss_audio_device.write(data) Write the Python string data to the audio device and return the number of bytes written. If the audio device is in blocking mode (the default), the entire string is always written (again, this is different from usual Unix device semantics). If the device is in non-blocking mode, some data may not be written —see writeall(). oss_audio_device.writeall(data) Write the entire Python string data to the audio device: waits until the audio device is able to accept data, writes as much data as it will accept, and repeats until data has been completely written. If the device is in blocking mode (the default), this has the same effect as write(); writeall() is only useful in non-blocking mode. Has no return value, since the amount of data written is always equal to the amount of data supplied. Changed in version 3.2: Audio device objects also support the context manager protocol, i.e. they can be used in a with statement. The following methods each map to exactly one ioctl() system call. The correspondence is obvious: for example, setfmt() corresponds to the SNDCTL_DSP_SETFMT ioctl, and sync() to SNDCTL_DSP_SYNC (this can be useful when consulting the OSS documentation). If the underlying ioctl() fails, they all raise IOError. oss_audio_device.nonblock() Put the device into non-blocking mode. Once in non-blocking mode, there is no way to return it to blocking mode. oss_audio_device.getfmts() Return a bitmask of the audio output formats supported by the soundcard. Some of the formats supported by OSS are:
21.9. ossaudiodev — Access to OSS-compatible audio devices
943
The Python Library Reference, Release 3.2.3
Format AFMT_MU_LAW AFMT_A_LAW AFMT_IMA_ADPCM AFMT_U8 AFMT_S16_LE AFMT_S16_BE AFMT_S8 AFMT_U16_LE AFMT_U16_BE
Description a logarithmic encoding (used by Sun .au files and /dev/audio) a logarithmic encoding a 4:1 compressed format defined by the Interactive Multimedia Association Unsigned, 8-bit audio Signed, 16-bit audio, little-endian byte order (as used by Intel processors) Signed, 16-bit audio, big-endian byte order (as used by 68k, PowerPC, Sparc) Signed, 8 bit audio Unsigned, 16-bit little-endian audio Unsigned, 16-bit big-endian audio
Consult the OSS documentation for a full list of audio formats, and note that most devices support only a subset of these formats. Some older devices only support AFMT_U8; the most common format used today is AFMT_S16_LE. oss_audio_device.setfmt(format) Try to set the current audio format to format—see getfmts() for a list. Returns the audio format that the device was set to, which may not be the requested format. May also be used to return the current audio format— do this by passing an “audio format” of AFMT_QUERY. oss_audio_device.channels(nchannels) Set the number of output channels to nchannels. A value of 1 indicates monophonic sound, 2 stereophonic. Some devices may have more than 2 channels, and some high-end devices may not support mono. Returns the number of channels the device was set to. oss_audio_device.speed(samplerate) Try to set the audio sampling rate to samplerate samples per second. Returns the rate actually set. Most sound devices don’t support arbitrary sampling rates. Common rates are: Rate 8000 11025 22050 44100 96000
Description default rate for /dev/audio speech recording CD quality audio (at 16 bits/sample and 2 channels) DVD quality audio (at 24 bits/sample)
oss_audio_device.sync() Wait until the sound device has played every byte in its buffer. (This happens implicitly when the device is closed.) The OSS documentation recommends closing and re-opening the device rather than using sync(). oss_audio_device.reset() Immediately stop playing or recording and return the device to a state where it can accept commands. The OSS documentation recommends closing and re-opening the device after calling reset(). oss_audio_device.post() Tell the driver that there is likely to be a pause in the output, making it possible for the device to handle the pause more intelligently. You might use this after playing a spot sound effect, before waiting for user input, or before doing disk I/O. The following convenience methods combine several ioctls, or one ioctl and some simple calculations. oss_audio_device.setparameters(format, nchannels, samplerate[, strict=False ]) Set the key audio sampling parameters—sample format, number of channels, and sampling rate—in one method call. format, nchannels, and samplerate should be as specified in the setfmt(), channels(), and speed() methods. If strict is true, setparameters() checks to see if each parameter was actually set to the requested value, and raises OSSAudioError if not. Returns a tuple (format, nchannels, samplerate) indicating the parameter values that were actually set by the device driver (i.e., the same as the return values of setfmt(), channels(), and speed()).
944
Chapter 21. Multimedia Services
The Python Library Reference, Release 3.2.3
For example, (fmt, channels, rate) = dsp.setparameters(fmt, channels, rate) is equivalent to fmt = dsp.setfmt(fmt) channels = dsp.channels(channels) rate = dsp.rate(channels) oss_audio_device.bufsize() Returns the size of the hardware buffer, in samples. oss_audio_device.obufcount() Returns the number of samples that are in the hardware buffer yet to be played. oss_audio_device.obuffree() Returns the number of samples that could be queued into the hardware buffer to be played without blocking. Audio device objects also support several read-only attributes: oss_audio_device.closed Boolean indicating whether the device has been closed. oss_audio_device.name String containing the name of the device file. oss_audio_device.mode The I/O mode for the file, either "r", "rw", or "w".
21.9.2 Mixer Device Objects The mixer object provides two file-like methods: oss_mixer_device.close() This method closes the open mixer device file. Any further attempts to use the mixer after this file is closed will raise an IOError. oss_mixer_device.fileno() Returns the file handle number of the open mixer device file. Changed in version 3.2: Mixer objects also support the context manager protocol. The remaining methods are specific to audio mixing: oss_mixer_device.controls() This method returns a bitmask specifying the available mixer controls (“Control” being a specific mixable “channel”, such as SOUND_MIXER_PCM or SOUND_MIXER_SYNTH). This bitmask indicates a subset of all available mixer controls—the SOUND_MIXER_* constants defined at module level. To determine if, for example, the current mixer object supports a PCM mixer, use the following Python code: mixer=ossaudiodev.openmixer() if mixer.controls() & (1 > import locale >>> loc = locale.getlocale() # get current locale # use German locale; name might vary with platform >>> locale.setlocale(locale.LC_ALL, ’de_DE’) >>> locale.strcoll(’f\xe4n’, ’foo’) # compare a string containing an umlaut >>> locale.setlocale(locale.LC_ALL, ’’) # use user’s preferred locale >>> locale.setlocale(locale.LC_ALL, ’C’) # use default (C) locale >>> locale.setlocale(locale.LC_ALL, loc) # restore saved locale
22.2.1 Background, details, hints, tips and caveats The C standard defines the locale as a program-wide property that may be relatively expensive to change. On top of that, some implementation are broken in such a way that frequent locale changes may cause core dumps. This makes the locale somewhat painful to use correctly. Initially, when a program is started, the locale is the C locale, no matter what the user’s preferred locale is. The program must explicitly say that it wants the user’s preferred locale settings by calling setlocale(LC_ALL, ”). It is generally a bad idea to call setlocale() in some library routine, since as a side effect it affects the entire program. Saving and restoring it is almost as bad: it is expensive and affects other threads that happen to run before the settings have been restored. If, when coding a module for general use, you need a locale independent version of an operation that is affected by the locale (such as certain formats used with time.strftime()), you will have to find a way to do it without using the standard library routine. Even better is convincing yourself that using locale settings is okay. Only as a last resort should you document that your module is not compatible with non-C locale settings. The only way to perform numeric operations according to the locale is to use the special functions defined by this module: atof(), atoi(), format(), str(). There is no way to perform case conversions and character classifications according to the locale. For (Unicode) text strings these are done according to the character value only, while for byte strings, the conversions and classifications are done according to the ASCII value of the byte, and bytes whose high bit is set (i.e., non-ASCII bytes) are never converted or considered part of a character class such as letter or whitespace.
22.2.2 For extension writers and programs that embed Python Extension modules should never call setlocale(), except to find out what the current locale is. But since the return value can only be used portably to restore it, that is not very useful (except perhaps to find out whether or not the locale is C). When Python code uses the locale module to change the locale, this also affects the embedding application. If the embedding application doesn’t want this to happen, it should remove the _locale extension module (which does all the work) from the table of built-in modules in the config.c file, and make sure that the _locale module is not accessible as a shared library.
22.2.3 Access to message catalogs The locale module exposes the C library’s gettext interface on systems that provide this interface. It consists of the functions gettext(), dgettext(), dcgettext(), textdomain(), bindtextdomain(), and bind_textdomain_codeset(). These are similar to the same functions in the gettext module, but use the C library’s binary format for message catalogs, and the C library’s search algorithms for locating message catalogs.
960
Chapter 22. Internationalization
The Python Library Reference, Release 3.2.3
Python applications should normally find no need to invoke these functions, and should use gettext instead. A known exception to this rule are applications that link with additional C libraries which internally invoke gettext() or dcgettext(). For these applications, it may be necessary to bind the text domain, so that the libraries can properly locate their message catalogs.
22.2. locale — Internationalization services
961
The Python Library Reference, Release 3.2.3
962
Chapter 22. Internationalization
CHAPTER
TWENTYTHREE
PROGRAM FRAMEWORKS The modules described in this chapter are frameworks that will largely dictate the structure of your program. Currently the modules described here are all oriented toward writing command-line interfaces. The full list of modules described in this chapter is:
23.1 turtle — Turtle graphics 23.1.1 Introduction Turtle graphics is a popular way for introducing programming to kids. It was part of the original Logo programming language developed by Wally Feurzig and Seymour Papert in 1966. Imagine a robotic turtle starting at (0, 0) in the x-y plane. After an import turtle, give it the command turtle.forward(15), and it moves (on-screen!) 15 pixels in the direction it is facing, drawing a line as it moves. Give it the command turtle.right(25), and it rotates in-place 25 degrees clockwise.
963
The Python Library Reference, Release 3.2.3
Turtle star Turtle can draw intricate shapes using programs that repeat simple moves.
from turtle import * color(’red’, ’yellow’) begin_fill() while True: forward(200) left(170) if abs(pos()) < 1: break end_fill() done() By combining together these and similar commands, intricate shapes and pictures can easily be drawn. The turtle module is an extended reimplementation of the same-named module from the Python standard distribution up to version Python 2.5. It tries to keep the merits of the old turtle module and to be (nearly) 100% compatible with it. This means in the first place to enable the learning programmer to use all the commands, classes and methods interactively when using the module from within IDLE run with the -n switch. The turtle module provides turtle graphics primitives, in both object-oriented and procedure-oriented ways. Because it uses tkinter for the underlying graphics, it needs a version of Python installed with Tk support. The object-oriented interface uses essentially two+two classes: 1. The TurtleScreen class defines graphics windows as a playground for the drawing turtles. Its constructor needs a tkinter.Canvas or a ScrolledCanvas as argument. It should be used when turtle is used as part of some application. The function Screen() returns a singleton object of a TurtleScreen subclass. This function should be used when turtle is used as a standalone tool for doing graphics. As a singleton object, inheriting from its class is not possible. All methods of TurtleScreen/Screen also exist as functions, i.e. as part of the procedure-oriented interface.
964
Chapter 23. Program Frameworks
The Python Library Reference, Release 3.2.3
2. RawTurtle (alias: RawPen) defines Turtle objects which draw on a TurtleScreen. Its constructor needs a Canvas, ScrolledCanvas or TurtleScreen as argument, so the RawTurtle objects know where to draw. Derived from RawTurtle is the subclass Turtle (alias: Pen), which draws on “the” Screen instance which is automatically created, if not already present. All methods of RawTurtle/Turtle also exist as functions, i.e. part of the procedure-oriented interface. The procedural interface provides functions which are derived from the methods of the classes Screen and Turtle. They have the same names as the corresponding methods. A screen object is automatically created whenever a function derived from a Screen method is called. An (unnamed) turtle object is automatically created whenever any of the functions derived from a Turtle method is called. To use multiple turtles on a screen one has to use the object-oriented interface. Note: In the following documentation the argument list for functions is given. Methods, of course, have the additional first argument self which is omitted here.
degrees() radians() Pen control Drawing state pendown() | pd() | down() penup() | pu() | up() pensize() | width() pen() isdown() Color control color() pencolor() fillcolor() Filling filling() begin_fill() end_fill() More drawing control reset() clear() write() Turtle state Visibility showturtle() | st() hideturtle() | ht() isvisible() Appearance shape() resizemode() shapesize() | turtlesize() shearfactor() settiltangle() tiltangle() tilt() shapetransform() get_shapepoly() Using events onclick() onrelease() ondrag() Special Turtle methods
966
Chapter 23. Program Frameworks
The Python Library Reference, Release 3.2.3
begin_poly() end_poly() get_poly() clone() getturtle() | getpen() getscreen() setundobuffer() undobufferentries() Methods of TurtleScreen/Screen Window control bgcolor() bgpic() clear() | clearscreen() reset() | resetscreen() screensize() setworldcoordinates() Animation control delay() tracer() update() Using screen events listen() onkey() | onkeyrelease() onkeypress() onclick() | onscreenclick() ontimer() mainloop() | done() Settings and special methods mode() colormode() getcanvas() getshapes() register_shape() | addshape() turtles() window_height() window_width() Input methods textinput() numinput() Methods specific to Screen bye()
23.1. turtle — Turtle graphics
967
The Python Library Reference, Release 3.2.3
exitonclick() setup() title()
23.1.3 Methods of RawTurtle/Turtle and corresponding functions Most of the examples in this section refer to a Turtle instance called turtle. Turtle motion turtle.forward(distance) turtle.fd(distance) Parameters distance – a number (integer or float) Move the turtle forward by the specified distance, in the direction the turtle is headed. >>> turtle.position() (0.00,0.00) >>> turtle.forward(25) >>> turtle.position() (25.00,0.00) >>> turtle.forward(-75) >>> turtle.position() (-50.00,0.00) turtle.back(distance) turtle.bk(distance) turtle.backward(distance) Parameters distance – a number Move the turtle backward by distance, opposite to the direction the turtle is headed. Do not change the turtle’s heading. >>> turtle.position() (0.00,0.00) >>> turtle.backward(30) >>> turtle.position() (-30.00,0.00) turtle.right(angle) turtle.rt(angle) Parameters angle – a number (integer or float) Turn turtle right by angle units. (Units are by default degrees, but can be set via the degrees() and radians() functions.) Angle orientation depends on the turtle mode, see mode(). >>> turtle.heading() 22.0 >>> turtle.right(45) >>> turtle.heading() 337.0
968
Chapter 23. Program Frameworks
The Python Library Reference, Release 3.2.3
turtle.left(angle) turtle.lt(angle) Parameters angle – a number (integer or float) Turn turtle left by angle units. (Units are by default degrees, but can be set via the degrees() and radians() functions.) Angle orientation depends on the turtle mode, see mode(). >>> turtle.heading() 22.0 >>> turtle.left(45) >>> turtle.heading() 67.0 turtle.goto(x, y=None) turtle.setpos(x, y=None) turtle.setposition(x, y=None) Parameters • x – a number or a pair/vector of numbers • y – a number or None If y is None, x must be a pair of coordinates or a Vec2D (e.g. as returned by pos()). Move turtle to an absolute position. If the pen is down, draw line. Do not change the turtle’s orientation. >>> tp = turtle.pos() >>> tp (0.00,0.00) >>> turtle.setpos(60,30) >>> turtle.pos() (60.00,30.00) >>> turtle.setpos((20,80)) >>> turtle.pos() (20.00,80.00) >>> turtle.setpos(tp) >>> turtle.pos() (0.00,0.00) turtle.setx(x) Parameters x – a number (integer or float) Set the turtle’s first coordinate to x, leave second coordinate unchanged. >>> turtle.position() (0.00,240.00) >>> turtle.setx(10) >>> turtle.position() (10.00,240.00) turtle.sety(y) Parameters y – a number (integer or float) Set the turtle’s second coordinate to y, leave first coordinate unchanged.
23.1. turtle — Turtle graphics
969
The Python Library Reference, Release 3.2.3
>>> turtle.position() (0.00,40.00) >>> turtle.sety(-10) >>> turtle.position() (0.00,-10.00) turtle.setheading(to_angle) turtle.seth(to_angle) Parameters to_angle – a number (integer or float) Set the orientation of the turtle to to_angle. Here are some common directions in degrees: standard mode 0 - east 90 - north 180 - west 270 - south
logo mode 0 - north 90 - east 180 - south 270 - west
>>> turtle.setheading(90) >>> turtle.heading() 90.0 turtle.home() Move turtle to the origin – coordinates (0,0) – and set its heading to its start-orientation (which depends on the mode, see mode()). >>> turtle.heading() 90.0 >>> turtle.position() (0.00,-10.00) >>> turtle.home() >>> turtle.position() (0.00,0.00) >>> turtle.heading() 0.0 turtle.circle(radius, extent=None, steps=None) Parameters • radius – a number • extent – a number (or None) • steps – an integer (or None) Draw a circle with given radius. The center is radius units left of the turtle; extent – an angle – determines which part of the circle is drawn. If extent is not given, draw the entire circle. If extent is not a full circle, one endpoint of the arc is the current pen position. Draw the arc in counterclockwise direction if radius is positive, otherwise in clockwise direction. Finally the direction of the turtle is changed by the amount of extent. As the circle is approximated by an inscribed regular polygon, steps determines the number of steps to use. If not given, it will be calculated automatically. May be used to draw regular polygons. >>> turtle.home() >>> turtle.position() (0.00,0.00)
turtle.dot(size=None, *color) Parameters • size – an integer >= 1 (if given) • color – a colorstring or a numeric color tuple Draw a circular dot with diameter size, using color. If size is not given, the maximum of pensize+4 and 2*pensize is used. >>> turtle.home() >>> turtle.dot() >>> turtle.fd(50); turtle.dot(20, "blue"); turtle.fd(50) >>> turtle.position() (100.00,-0.00) >>> turtle.heading() 0.0 turtle.stamp() Stamp a copy of the turtle shape onto the canvas at the current turtle position. Return a stamp_id for that stamp, which can be used to delete it by calling clearstamp(stamp_id). >>> turtle.color("blue") >>> turtle.stamp() 11 >>> turtle.fd(50) turtle.clearstamp(stampid) Parameters stampid – an integer, must be return value of previous stamp() call Delete stamp with given stampid. >>> turtle.position() (150.00,-0.00) >>> turtle.color("blue") >>> astamp = turtle.stamp() >>> turtle.fd(50) >>> turtle.position() (200.00,-0.00) >>> turtle.clearstamp(astamp) >>> turtle.position() (200.00,-0.00)
23.1. turtle — Turtle graphics
971
The Python Library Reference, Release 3.2.3
turtle.clearstamps(n=None) Parameters n – an integer (or None) Delete all or first/last n of turtle’s stamps. If n is None, delete all stamps, if n > 0 delete first n stamps, else if n < 0 delete last n stamps. >>> ... 13 14 15 16 17 18 19 20 >>> >>> >>>
turtle.undo() Undo (repeatedly) the last turtle action(s). Number of available undo actions is determined by the size of the undobuffer. >>> for i in range(4): ... turtle.fd(50); turtle.lt(80) ... >>> for i in range(8): ... turtle.undo() turtle.speed(speed=None) Parameters speed – an integer in the range 0..10 or a speedstring (see below) Set the turtle’s speed to an integer value in the range 0..10. If no argument is given, return current speed. If input is a number greater than 10 or smaller than 0.5, speed is set to 0. Speedstrings are mapped to speedvalues as follows: •“fastest”: 0 •“fast”: 10 •“normal”: 6 •“slow”: 3 •“slowest”: 1 Speeds from 1 to 10 enforce increasingly faster animation of line drawing and turtle turning. Attention: speed = 0 means that no animation takes place. forward/back makes turtle jump and likewise left/right make the turtle turn instantly. >>> turtle.speed() 3 >>> turtle.speed(’normal’) >>> turtle.speed() 6
972
Chapter 23. Program Frameworks
The Python Library Reference, Release 3.2.3
>>> turtle.speed(9) >>> turtle.speed() 9 Tell Turtle’s state turtle.position() turtle.pos() Return the turtle’s current location (x,y) (as a Vec2D vector). >>> turtle.pos() (440.00,-0.00) turtle.towards(x, y=None) Parameters • x – a number or a pair/vector of numbers or a turtle instance • y – a number if x is a number, else None Return the angle between the line from turtle position to position specified by (x,y), the vector or the other turtle. This depends on the turtle’s start orientation which depends on the mode - “standard”/”world” or “logo”). >>> turtle.goto(10, 10) >>> turtle.towards(0,0) 225.0 turtle.xcor() Return the turtle’s x coordinate. >>> turtle.home() >>> turtle.left(50) >>> turtle.forward(100) >>> turtle.pos() (64.28,76.60) >>> print(round(turtle.xcor(), 5)) 64.27876 turtle.ycor() Return the turtle’s y coordinate. >>> turtle.home() >>> turtle.left(60) >>> turtle.forward(100) >>> print(turtle.pos()) (50.00,86.60) >>> print(round(turtle.ycor(), 5)) 86.60254 turtle.heading() Return the turtle’s current heading (value depends on the turtle mode, see mode()). >>> turtle.home() >>> turtle.left(67)
23.1. turtle — Turtle graphics
973
The Python Library Reference, Release 3.2.3
>>> turtle.heading() 67.0 turtle.distance(x, y=None) Parameters • x – a number or a pair/vector of numbers or a turtle instance • y – a number if x is a number, else None Return the distance from the turtle to (x,y), the given vector, or the given other turtle, in turtle step units. >>> turtle.home() >>> turtle.distance(30,40) 50.0 >>> turtle.distance((30,40)) 50.0 >>> joe = Turtle() >>> joe.forward(77) >>> turtle.distance(joe) 77.0 Settings for measurement turtle.degrees(fullcircle=360.0) Parameters fullcircle – a number Set angle measurement units, i.e. set number of “degrees” for a full circle. Default value is 360 degrees. >>> turtle.home() >>> turtle.left(90) >>> turtle.heading() 90.0 Change angle measurement unit to grad (also known as gon, grade, or gradian and equals 1/100-th of the right angle.) >>> turtle.degrees(400.0) >>> turtle.heading() 100.0 >>> turtle.degrees(360) >>> turtle.heading() 90.0 turtle.radians() Set the angle measurement units to radians. Equivalent to degrees(2*math.pi). >>> turtle.home() >>> turtle.left(90) >>> turtle.heading() 90.0 >>> turtle.radians() >>> turtle.heading() 1.5707963267948966
974
Chapter 23. Program Frameworks
The Python Library Reference, Release 3.2.3
Pen control Drawing state
turtle.pendown() turtle.pd() turtle.down() Pull the pen down – drawing when moving. turtle.penup() turtle.pu() turtle.up() Pull the pen up – no drawing when moving. turtle.pensize(width=None) turtle.width(width=None) Parameters width – a positive number Set the line thickness to width or return it. If resizemode is set to “auto” and turtleshape is a polygon, that polygon is drawn with the same line thickness. If no argument is given, the current pensize is returned. >>> turtle.pensize() 1 >>> turtle.pensize(10)
# from here on lines of width 10 are drawn
turtle.pen(pen=None, **pendict) Parameters • pen – a dictionary with some or all of the below listed keys • pendict – one or more keyword-arguments with the below listed keys as keywords Return or set the pen’s attributes in a “pen-dictionary” with the following key/value pairs: •“shown”: True/False •“pendown”: True/False •“pencolor”: color-string or color-tuple •“fillcolor”: color-string or color-tuple •“pensize”: positive number •“speed”: number in range 0..10 •“resizemode”: “auto” or “user” or “noresize” •“stretchfactor”: (positive number, positive number) •“outline”: positive number •“tilt”: number This dictionary can be used as argument for a subsequent call to pen() to restore the former pen-state. Moreover one or more of these attributes can be provided as keyword-arguments. This can be used to set several pen attributes in one statement. >>> turtle.pen(fillcolor="black", pencolor="red", pensize=10) >>> sorted(turtle.pen().items()) [(’fillcolor’, ’black’), (’outline’, 1), (’pencolor’, ’red’),
turtle.pencolor(*args) Return or set the pencolor. Four input formats are allowed: pencolor() Return the current pencolor as color specification string or as a tuple (see example). May be used as input to another color/pencolor/fillcolor call. pencolor(colorstring) Set pencolor to colorstring, which is a Tk color specification string, such as "red", "yellow", or "#33cc8c". pencolor((r, g, b)) Set pencolor to the RGB color represented by the tuple of r, g, and b. Each of r, g, and b must be in the range 0..colormode, where colormode is either 1.0 or 255 (see colormode()). pencolor(r, g, b) Set pencolor to the RGB color represented by r, g, and b. Each of r, g, and b must be in the range 0..colormode. If turtleshape is a polygon, the outline of that polygon is drawn with the newly set pencolor. >>> colormode() 1.0 >>> turtle.pencolor() ’red’ >>> turtle.pencolor("brown") >>> turtle.pencolor() ’brown’ >>> tup = (0.2, 0.8, 0.55) >>> turtle.pencolor(tup) >>> turtle.pencolor() (0.2, 0.8, 0.5490196078431373)
976
Chapter 23. Program Frameworks
The Python Library Reference, Release 3.2.3
>>> colormode(255) >>> turtle.pencolor() (51.0, 204.0, 140.0) >>> turtle.pencolor(’#32c18f’) >>> turtle.pencolor() (50.0, 193.0, 143.0) turtle.fillcolor(*args) Return or set the fillcolor. Four input formats are allowed: fillcolor() Return the current fillcolor as color specification string, possibly in tuple format (see example). May be used as input to another color/pencolor/fillcolor call. fillcolor(colorstring) Set fillcolor to colorstring, which is a Tk color specification string, such as "red", "yellow", or "#33cc8c". fillcolor((r, g, b)) Set fillcolor to the RGB color represented by the tuple of r, g, and b. Each of r, g, and b must be in the range 0..colormode, where colormode is either 1.0 or 255 (see colormode()). fillcolor(r, g, b) Set fillcolor to the RGB color represented by r, g, and b. Each of r, g, and b must be in the range 0..colormode. If turtleshape is a polygon, the interior of that polygon is drawn with the newly set fillcolor. >>> turtle.fillcolor("violet") >>> turtle.fillcolor() ’violet’ >>> col = turtle.pencolor() >>> col (50.0, 193.0, 143.0) >>> turtle.fillcolor(col) >>> turtle.fillcolor() (50.0, 193.0, 143.0) >>> turtle.fillcolor(’#ffffff’) >>> turtle.fillcolor() (255.0, 255.0, 255.0) turtle.color(*args) Return or set pencolor and fillcolor. Several input formats are allowed. They use 0 to 3 arguments as follows: color() Return the current pencolor and the current fillcolor as a pair of color specification strings or tuples as returned by pencolor() and fillcolor(). color(colorstring), color((r,g,b)), color(r,g,b) Inputs as in pencolor(), set both, fillcolor and pencolor, to the given value. color(colorstring1, colorstring2), color((r1,g1,b1), (r2,g2,b2)) Equivalent to pencolor(colorstring1) and fillcolor(colorstring2) and analogously if the other input format is used. If turtleshape is a polygon, outline and interior of that polygon is drawn with the newly set colors.
turtle.filling() Return fillstate (True if filling, False else). >>> turtle.begin_fill() >>> if turtle.filling(): ... turtle.pensize(5) ... else: ... turtle.pensize(3) turtle.begin_fill() To be called just before drawing a shape to be filled. turtle.end_fill() Fill the shape drawn after the last call to begin_fill(). >>> >>> >>> >>>
turtle.reset() Delete the turtle’s drawings from the screen, re-center the turtle and set variables to the default values. >>> turtle.goto(0,-22) >>> turtle.left(100) >>> turtle.position() (0.00,-22.00) >>> turtle.heading() 100.0 >>> turtle.reset() >>> turtle.position() (0.00,0.00) >>> turtle.heading() 0.0 turtle.clear() Delete the turtle’s drawings from the screen. Do not move turtle. State and position of the turtle as well as drawings of other turtles are not affected. turtle.write(arg, move=False, align=”left”, font=(“Arial”, 8, “normal”))
978
Chapter 23. Program Frameworks
The Python Library Reference, Release 3.2.3
Parameters • arg – object to be written to the TurtleScreen • move – True/False • align – one of the strings “left”, “center” or right” • font – a triple (fontname, fontsize, fonttype) Write text - the string representation of arg - at the current turtle position according to align (“left”, “center” or right”) and with the given font. If move is True, the pen is moved to the bottom-right corner of the text. By default, move is False. >>> turtle.write("Home = ", True, align="center") >>> turtle.write((0,0), True) Turtle state Visibility
turtle.hideturtle() turtle.ht() Make the turtle invisible. It’s a good idea to do this while you’re in the middle of doing some complex drawing, because hiding the turtle speeds up the drawing observably. >>> turtle.hideturtle() turtle.showturtle() turtle.st() Make the turtle visible. >>> turtle.showturtle() turtle.isvisible() Return True if the Turtle is shown, False if it’s hidden. >>> turtle.hideturtle() >>> turtle.isvisible() False >>> turtle.showturtle() >>> turtle.isvisible() True Appearance
turtle.shape(name=None) Parameters name – a string which is a valid shapename Set turtle shape to shape with given name or, if name is not given, return name of current shape. Shape with name must exist in the TurtleScreen’s shape dictionary. Initially there are the following polygon shapes: “arrow”, “turtle”, “circle”, “square”, “triangle”, “classic”. To learn about how to deal with shapes see Screen method register_shape().
23.1. turtle — Turtle graphics
979
The Python Library Reference, Release 3.2.3
>>> turtle.shape() ’classic’ >>> turtle.shape("turtle") >>> turtle.shape() ’turtle’ turtle.resizemode(rmode=None) Parameters rmode – one of the strings “auto”, “user”, “noresize” Set resizemode to one of the values: “auto”, “user”, “noresize”. If rmode is not given, return current resizemode. Different resizemodes have the following effects: •“auto”: adapts the appearance of the turtle corresponding to the value of pensize. •“user”: adapts the appearance of the turtle according to the values of stretchfactor and outlinewidth (outline), which are set by shapesize(). •“noresize”: no adaption of the turtle’s appearance takes place. resizemode(“user”) is called by shapesize() when used with arguments. >>> turtle.resizemode() ’noresize’ >>> turtle.resizemode("auto") >>> turtle.resizemode() ’auto’ turtle.shapesize(stretch_wid=None, stretch_len=None, outline=None) turtle.turtlesize(stretch_wid=None, stretch_len=None, outline=None) Parameters • stretch_wid – positive number • stretch_len – positive number • outline – positive number Return or set the pen’s attributes x/y-stretchfactors and/or outline. Set resizemode to “user”. If and only if resizemode is set to “user”, the turtle will be displayed stretched according to its stretchfactors: stretch_wid is stretchfactor perpendicular to its orientation, stretch_len is stretchfactor in direction of its orientation, outline determines the width of the shapes’s outline. >>> turtle.shapesize() (1.0, 1.0, 1) >>> turtle.resizemode("user") >>> turtle.shapesize(5, 5, 12) >>> turtle.shapesize() (5, 5, 12) >>> turtle.shapesize(outline=8) >>> turtle.shapesize() (5, 5, 8) turtle.shearfactor(shear=None) Parameters shear – number (optional) Set or return the current shearfactor. Shear the turtleshape according to the given shearfactor shear, which is the tangent of the shear angle. Do not change the turtle’s heading (direction of movement). If shear is not given:
980
Chapter 23. Program Frameworks
The Python Library Reference, Release 3.2.3
return the current shearfactor, i. e. the tangent of the shear angle, by which lines parallel to the heading of the turtle are sheared. >>> >>> >>> >>> 0.5
turtle.tilt(angle) Parameters angle – a number Rotate the turtleshape by angle from its current tilt-angle, but do not change the turtle’s heading (direction of movement). >>> >>> >>> >>> >>> >>> >>>
turtle.settiltangle(angle) Parameters angle – a number Rotate the turtleshape to point in the direction specified by angle, regardless of its current tilt-angle. Do not change the turtle’s heading (direction of movement). >>> >>> >>> >>> >>> >>> >>>
Deprecated since version 3.1. turtle.tiltangle(angle=None) Parameters angle – a number (optional) Set or return the current tilt-angle. If angle is given, rotate the turtleshape to point in the direction specified by angle, regardless of its current tilt-angle. Do not change the turtle’s heading (direction of movement). If angle is not given: return the current tilt-angle, i. e. the angle between the orientation of the turtleshape and the heading of the turtle (its direction of movement). >>> turtle.reset() >>> turtle.shape("circle") >>> turtle.shapesize(5,2) >>> turtle.tilt(45) >>> turtle.tiltangle() 45.0
23.1. turtle — Turtle graphics
981
The Python Library Reference, Release 3.2.3
turtle.shapetransform(t11=None, t12=None, t21=None, t22=None) Parameters • t11 – a number (optional) • t12 – a number (optional) • t21 – a number (optional) • t12 – a number (optional) Set or return the current transformation matrix of the turtle shape. If none of the matrix elements are given, return the transformation matrix as a tuple of 4 elements. Otherwise set the given elements and transform the turtleshape according to the matrix consisting of first row t11, t12 and second row t21, 22. The determinant t11 * t22 - t12 * t21 must not be zero, otherwise an error is raised. Modify stretchfactor, shearfactor and tiltangle according to the given matrix. >>> turtle = Turtle() >>> turtle.shape("square") >>> turtle.shapesize(4,2) >>> turtle.shearfactor(-0.5) >>> turtle.shapetransform() (4.0, -1.0, -0.0, 2.0) turtle.get_shapepoly() Return the current shape polygon as tuple of coordinate pairs. This can be used to define a new shape or components of a compound shape. >>> turtle.shape("square") >>> turtle.shapetransform(4, -1, 0, 2) >>> turtle.get_shapepoly() ((50, -20), (30, 20), (-50, 20), (-30, -20)) Using events turtle.onclick(fun, btn=1, add=None) Parameters • fun – a function with two arguments which will be called with the coordinates of the clicked point on the canvas • num – number of the mouse-button, defaults to 1 (left mouse button) • add – True or False – if True, a new binding will be added, otherwise it will replace a former binding Bind fun to mouse-click events on this turtle. If fun is None, existing bindings are removed. Example for the anonymous turtle, i.e. the procedural way: >>> def turn(x, y): ... left(180) ... >>> onclick(turn) # Now clicking into the turtle will turn it. >>> onclick(None) # event-binding will be removed turtle.onrelease(fun, btn=1, add=None)
982
Chapter 23. Program Frameworks
The Python Library Reference, Release 3.2.3
Parameters • fun – a function with two arguments which will be called with the coordinates of the clicked point on the canvas • num – number of the mouse-button, defaults to 1 (left mouse button) • add – True or False – if True, a new binding will be added, otherwise it will replace a former binding Bind fun to mouse-button-release events on this turtle. If fun is None, existing bindings are removed. >>> ... ... ... ... ... >>> >>> >>>
class MyTurtle(Turtle): def glow(self,x,y): self.fillcolor("red") def unglow(self,x,y): self.fillcolor("") turtle = MyTurtle() turtle.onclick(turtle.glow) # clicking on turtle turns fillcolor red, turtle.onrelease(turtle.unglow) # releasing turns it to transparent.
turtle.ondrag(fun, btn=1, add=None) Parameters • fun – a function with two arguments which will be called with the coordinates of the clicked point on the canvas • num – number of the mouse-button, defaults to 1 (left mouse button) • add – True or False – if True, a new binding will be added, otherwise it will replace a former binding Bind fun to mouse-move events on this turtle. If fun is None, existing bindings are removed. Remark: Every sequence of mouse-move-events on a turtle is preceded by a mouse-click event on that turtle. >>> turtle.ondrag(turtle.goto) Subsequently, clicking and dragging the Turtle will move it across the screen thereby producing handdrawings (if pen is down). Special Turtle methods turtle.begin_poly() Start recording the vertices of a polygon. Current turtle position is first vertex of polygon. turtle.end_poly() Stop recording the vertices of a polygon. Current turtle position is last vertex of polygon. This will be connected with the first vertex. turtle.get_poly() Return the last recorded polygon. >>> >>> >>> >>>
turtle.fd(30) turtle.left(60) turtle.fd(50) turtle.end_poly() p = turtle.get_poly() register_shape("myFavouriteShape", p)
turtle.clone() Create and return a clone of the turtle with same position, heading and turtle properties. >>> mick = Turtle() >>> joe = mick.clone() turtle.getturtle() turtle.getpen() Return the Turtle object itself. Only reasonable use: as a function to return the “anonymous turtle”: >>> pet = getturtle() >>> pet.fd(50) >>> pet turtle.getscreen() Return the TurtleScreen object the turtle is drawing on. TurtleScreen methods can then be called for that object. >>> ts = turtle.getscreen() >>> ts >>> ts.bgcolor("pink") turtle.setundobuffer(size) Parameters size – an integer or None Set or disable undobuffer. If size is an integer an empty undobuffer of given size is installed. size gives the maximum number of turtle actions that can be undone by the undo() method/function. If size is None, the undobuffer is disabled. >>> turtle.setundobuffer(42) turtle.undobufferentries() Return number of entries in the undobuffer. >>> while undobufferentries(): ... undo() Compound shapes To use compound turtle shapes, which consist of several polygons of different color, you must use the helper class Shape explicitly as described below: 1. Create an empty Shape object of type “compound”.
984
Chapter 23. Program Frameworks
The Python Library Reference, Release 3.2.3
2. Add as many components to this object as desired, using the addcomponent() method. For example: >>> >>> >>> >>> >>>
3. Now add the Shape to the Screen’s shapelist and use it: >>> register_shape("myshape", s) >>> shape("myshape") Note: The Shape class is used internally by the register_shape() method in different ways. The application programmer has to deal with the Shape class only when using compound shapes like shown above!
23.1.4 Methods of TurtleScreen/Screen and corresponding functions Most of the examples in this section refer to a TurtleScreen instance called screen. Window control turtle.bgcolor(*args) Parameters args – a color string or three numbers in the range 0..colormode or a 3-tuple of such numbers Set or return background color of the TurtleScreen. >>> screen.bgcolor("orange") >>> screen.bgcolor() ’orange’ >>> screen.bgcolor("#800080") >>> screen.bgcolor() (128.0, 0.0, 128.0) turtle.bgpic(picname=None) Parameters picname – a string, name of a gif-file or "nopic", or None Set background image or return name of current backgroundimage. If picname is a filename, set the corresponding image as background. If picname is "nopic", delete background image, if present. If picname is None, return the filename of the current backgroundimage. >>> screen.bgpic() ’nopic’ >>> screen.bgpic("landscape.gif") >>> screen.bgpic() "landscape.gif" turtle.clear()
23.1. turtle — Turtle graphics
985
The Python Library Reference, Release 3.2.3
turtle.clearscreen() Delete all drawings and all turtles from the TurtleScreen. Reset the now empty TurtleScreen to its initial state: white background, no background image, no event bindings and tracing on. Note: This TurtleScreen method is available as a global function only under the name clearscreen. The global function clear is a different one derived from the Turtle method clear. turtle.reset() turtle.resetscreen() Reset all Turtles on the Screen to their initial state. Note: This TurtleScreen method is available as a global function only under the name resetscreen. The global function reset is another one derived from the Turtle method reset. turtle.screensize(canvwidth=None, canvheight=None, bg=None) Parameters • canvwidth – positive integer, new width of canvas in pixels • canvheight – positive integer, new height of canvas in pixels • bg – colorstring or color-tuple, new background color If no arguments are given, return current (canvaswidth, canvasheight). Else resize the canvas the turtles are drawing on. Do not alter the drawing window. To observe hidden parts of the canvas, use the scrollbars. With this method, one can make visible those parts of a drawing which were outside the canvas before. >>> screen.screensize() (400, 300) >>> screen.screensize(2000,1500) >>> screen.screensize() (2000, 1500) e.g. to search for an erroneously escaped turtle ;-) turtle.setworldcoordinates(llx, lly, urx, ury) Parameters • llx – a number, x-coordinate of lower left corner of canvas • lly – a number, y-coordinate of lower left corner of canvas • urx – a number, x-coordinate of upper right corner of canvas • ury – a number, y-coordinate of upper right corner of canvas Set up user-defined coordinate system and switch to mode “world” if necessary. This performs a screen.reset(). If mode “world” is already active, all drawings are redrawn according to the new coordinates. ATTENTION: in user-defined coordinate systems angles may appear distorted. >>> screen.reset() >>> screen.setworldcoordinates(-50,-7.5,50,7.5) >>> for _ in range(72): ... left(10) ...
986
Chapter 23. Program Frameworks
The Python Library Reference, Release 3.2.3
>>> for _ in range(8): ... left(45); fd(2)
# a regular octagon
Animation control turtle.delay(delay=None) Parameters delay – positive integer Set or return the drawing delay in milliseconds. (This is approximately the time interval between two consecutive canvas updates.) The longer the drawing delay, the slower the animation. Optional argument: >>> screen.delay() 10 >>> screen.delay(5) >>> screen.delay() 5 turtle.tracer(n=None, delay=None) Parameters • n – nonnegative integer • delay – nonnegative integer Turn turtle animation on/off and set delay for update drawings. If n is given, only each n-th regular screen update is really performed. (Can be used to accelerate the drawing of complex graphics.) When called without arguments, returns the currently stored value of n. Second argument sets delay value (see delay()). >>> screen.tracer(8, 25) >>> dist = 2 >>> for i in range(200): ... fd(dist) ... rt(90) ... dist += 2 turtle.update() Perform a TurtleScreen update. To be used when tracer is turned off. See also the RawTurtle/Turtle method speed(). Using screen events turtle.listen(xdummy=None, ydummy=None) Set focus on TurtleScreen (in order to collect key-events). Dummy arguments are provided in order to be able to pass listen() to the onclick method. turtle.onkey(fun, key) turtle.onkeyrelease(fun, key) Parameters • fun – a function with no arguments or None • key – a string: key (e.g. “a”) or key-symbol (e.g. “space”)
23.1. turtle — Turtle graphics
987
The Python Library Reference, Release 3.2.3
Bind fun to key-release event of key. If fun is None, event bindings are removed. Remark: in order to be able to register key-events, TurtleScreen must have the focus. (See method listen().) >>> def f(): ... fd(50) ... lt(60) ... >>> screen.onkey(f, "Up") >>> screen.listen() turtle.onkeypress(fun, key=None) Parameters • fun – a function with no arguments or None • key – a string: key (e.g. “a”) or key-symbol (e.g. “space”) Bind fun to key-press event of key if key is given, or to any key-press-event if no key is given. Remark: in order to be able to register key-events, TurtleScreen must have focus. (See method listen().) >>> def f(): ... fd(50) ... >>> screen.onkey(f, "Up") >>> screen.listen() turtle.onclick(fun, btn=1, add=None) turtle.onscreenclick(fun, btn=1, add=None) Parameters • fun – a function with two arguments which will be called with the coordinates of the clicked point on the canvas • num – number of the mouse-button, defaults to 1 (left mouse button) • add – True or False – if True, a new binding will be added, otherwise it will replace a former binding Bind fun to mouse-click events on this screen. If fun is None, existing bindings are removed. Example for a TurtleScreen instance named screen and a Turtle instance named turtle: >>> screen.onclick(turtle.goto) # Subsequently clicking into the TurtleScreen will >>> # make the turtle move to the clicked point. >>> screen.onclick(None) # remove event binding again
Note: This TurtleScreen method is available as a global function only under the name onscreenclick. The global function onclick is another one derived from the Turtle method onclick. turtle.ontimer(fun, t=0) Parameters • fun – a function with no arguments • t – a number >= 0 Install a timer that calls fun after t milliseconds. 988
Chapter 23. Program Frameworks
The Python Library Reference, Release 3.2.3
>>> >>> ... ... ... ... >>> >>>
running = True def f(): if running: fd(50) lt(60) screen.ontimer(f, 250) f() ### makes the turtle march around running = False
turtle.mainloop() turtle.done() Starts event loop - calling Tkinter’s mainloop function. Must be the last statement in a turtle graphics program. Must not be used if a script is run from within IDLE in -n mode (No subprocess) - for interactive use of turtle graphics. >>> screen.mainloop() Input methods turtle.textinput(title, prompt) Parameters • title – string • prompt – string Pop up a dialog window for input of a string. Parameter title is the title of the dialog window, propmt is a text mostly describing what information to input. Return the string input. If the dialog is canceled, return None. >>> screen.textinput("NIM", "Name of first player:") turtle.numinput(title, prompt, default=None, minval=None, maxval=None) Parameters • title – string • prompt – string • default – number (optional) • minval – number (optional) • maxval – number (optional) Pop up a dialog window for input of a number. title is the title of the dialog window, prompt is a text mostly describing what numerical information to input. default: default value, minval: minimum value for imput, maxval: maximum value for input The number input must be in the range minval .. maxval if these are given. If not, a hint is issued and the dialog remains open for correction. Return the number input. If the dialog is canceled, return None. >>> screen.numinput("Poker", "Your stakes:", 1000, minval=10, maxval=10000) Settings and special methods turtle.mode(mode=None) Parameters mode – one of the strings “standard”, “logo” or “world” 23.1. turtle — Turtle graphics
989
The Python Library Reference, Release 3.2.3
Set turtle mode (“standard”, “logo” or “world”) and perform reset. If mode is not given, current mode is returned. Mode “standard” is compatible with old turtle. Mode “logo” is compatible with most Logo turtle graphics. Mode “world” uses user-defined “world coordinates”. Attention: in this mode angles appear distorted if x/y unit-ratio doesn’t equal 1. Mode “standard” “logo”
Initial turtle heading to the right (east) upward (north)
>>> mode("logo") >>> mode() ’logo’
positive angles counterclockwise clockwise
# resets turtle heading to north
turtle.colormode(cmode=None) Parameters cmode – one of the values 1.0 or 255 Return the colormode or set it to 1.0 or 255. Subsequently r, g, b values of color triples have to be in the range 0..cmode. >>> screen.colormode(1) >>> turtle.pencolor(240, 160, 80) Traceback (most recent call last): ... TurtleGraphicsError: bad color sequence: (240, 160, 80) >>> screen.colormode() 1.0 >>> screen.colormode(255) >>> screen.colormode() 255 >>> turtle.pencolor(240,160,80) turtle.getcanvas() Return the Canvas of this TurtleScreen. Useful for insiders who know what to do with a Tkinter Canvas. >>> cv = screen.getcanvas() >>> cv turtle.getshapes() Return a list of names of all currently available turtle shapes. >>> screen.getshapes() [’arrow’, ’blank’, ’circle’, ..., ’turtle’] turtle.register_shape(name, shape=None) turtle.addshape(name, shape=None) There are three different ways to call this function: 1.name is the name of a gif-file and shape is None: Install the corresponding image shape. >>> screen.register_shape("turtle.gif")
Note: Image shapes do not rotate when turning the turtle, so they do not display the heading of the turtle!
990
Chapter 23. Program Frameworks
The Python Library Reference, Release 3.2.3
2.name is an arbitrary string and shape is a tuple of pairs of coordinates: Install the corresponding polygon shape. >>> screen.register_shape("triangle", ((5,-3), (0,5), (-5,-3))) 3.name is an arbitrary string and shape is a (compound) Shape object: Install the corresponding compound shape. Add a turtle shape to TurtleScreen’s shapelist. Only thusly registered shapes can be used by issuing the command shape(shapename). turtle.turtles() Return the list of turtles on the screen. >>> for turtle in screen.turtles(): ... turtle.color("red") turtle.window_height() Return the height of the turtle window. >>> screen.window_height() 480 turtle.window_width() Return the width of the turtle window. >>> screen.window_width() 640 Methods specific to Screen, not inherited from TurtleScreen turtle.bye() Shut the turtlegraphics window. turtle.exitonclick() Bind bye() method to mouse clicks on the Screen. If the value “using_IDLE” in the configuration dictionary is False (default value), also enter mainloop. Remark: If IDLE with the -n switch (no subprocess) is used, this value should be set to True in turtle.cfg. In this case IDLE’s own mainloop is active also for the client script. turtle.setup(width=_CFG[”width”], height=_CFG[”height”], startx=_CFG[”leftright”], starty=_CFG[”topbottom”]) Set the size and position of the main window. Default values of arguments are stored in the configuration dictionary and can be changed via a turtle.cfg file. Parameters • width – if an integer, a size in pixels, if a float, a fraction of the screen; default is 50% of screen • height – if an integer, the height in pixels, if a float, a fraction of the screen; default is 75% of screen • startx – if positive, starting position in pixels from the left edge of the screen, if negative from the right edge, if None, center window horizontally
23.1. turtle — Turtle graphics
991
The Python Library Reference, Release 3.2.3
• startx – if positive, starting position in pixels from the top edge of the screen, if negative from the bottom edge, if None, center window vertically >>> screen.setup (width=200, height=200, startx=0, starty=0) >>> # sets window to 200x200 pixels, in upper left of screen >>> screen.setup(width=.75, height=0.5, startx=None, starty=None) >>> # sets window to 75% of screen by 50% of screen and centers turtle.title(titlestring) Parameters titlestring – a string that is shown in the titlebar of the turtle graphics window Set title of turtle window to titlestring. >>> screen.title("Welcome to the turtle zoo!")
23.1.5 Public classes class turtle.RawTurtle(canvas) class turtle.RawPen(canvas) Parameters canvas – a tkinter.Canvas, a ScrolledCanvas or a TurtleScreen Create a turtle. The turtle has all methods described above as “methods of Turtle/RawTurtle”. class turtle.Turtle Subclass of RawTurtle, has the same interface but draws on a default Screen object created automatically when needed for the first time. class turtle.TurtleScreen(cv) Parameters cv – a tkinter.Canvas Provides screen oriented methods like setbg() etc. that are described above. class turtle.Screen Subclass of TurtleScreen, with four methods added. class turtle.ScrolledCanvas(master) Parameters master – some Tkinter widget to contain the ScrolledCanvas, i.e. a Tkinter-canvas with scrollbars added Used by class Screen, which thus automatically provides a ScrolledCanvas as playground for the turtles. class turtle.Shape(type_, data) Parameters type_ – one of the strings “polygon”, “image”, “compound” Data structure modeling shapes. The pair (type_, data) must follow this specification: type_ “polygon” “image” “compound”
data a polygon-tuple, i.e. a tuple of pairs of coordinates an image (in this form only used internally!) None (a compound shape has to be constructed using the addcomponent() method)
addcomponent(poly, fill, outline=None) Parameters • poly – a polygon, i.e. a tuple of pairs of numbers • fill – a color the poly will be filled with
992
Chapter 23. Program Frameworks
The Python Library Reference, Release 3.2.3
• outline – a color for the poly’s outline (if given) Example: >>> >>> >>> >>>
poly = ((0,0),(10,-5),(0,10),(-10,-5)) s = Shape("compound") s.addcomponent(poly, "red", "blue") # ... add more components and then use register_shape()
See Compound shapes. class turtle.Vec2D(x, y) A two-dimensional vector class, used as a helper class for implementing turtle graphics. May be useful for turtle graphics programs too. Derived from tuple, so a vector is a tuple! Provides (for a, b vectors, k number): •a + b vector addition •a - b vector subtraction •a * b inner product •k * a and a * k multiplication with scalar •abs(a) absolute value of a •a.rotate(angle) rotation
23.1.6 Help and configuration How to use help The public methods of the Screen and Turtle classes are documented extensively via docstrings. So these can be used as online-help via the Python help facilities: • When using IDLE, tooltips show the signatures and first lines of the docstrings of typed in function-/method calls. • Calling help() on methods or functions displays the docstrings: >>> help(Screen.bgcolor) Help on method bgcolor in module turtle: bgcolor(self, *args) unbound turtle.Screen method Set or return backgroundcolor of the TurtleScreen. Arguments (if given): a color string or three numbers in the range 0..colormode or a 3-tuple of such numbers.
Help on method penup in module turtle: penup(self) unbound turtle.Turtle method Pull the pen up -- no drawing when moving. Aliases: penup | pu | up No argument >>> turtle.penup() • The docstrings of the functions which are derived from methods have a modified form: >>> help(bgcolor) Help on function bgcolor in module turtle: bgcolor(*args) Set or return backgroundcolor of the TurtleScreen. Arguments (if given): a color string or three numbers in the range 0..colormode or a 3-tuple of such numbers. Example:: >>> bgcolor("orange") >>> bgcolor() "orange" >>> bgcolor(0.5,0,0.5) >>> bgcolor() "#800080" >>> help(penup) Help on function penup in module turtle: penup() Pull the pen up -- no drawing when moving. Aliases: penup | pu | up No argument Example: >>> penup() These modified docstrings are created automatically together with the function definitions that are derived from the methods at import time. Translation of docstrings into different languages There is a utility to create a dictionary the keys of which are the method names and the values of which are the docstrings of the public methods of the classes Screen and Turtle. turtle.write_docstringdict(filename=”turtle_docstringdict”) Parameters filename – a string, used as filename
994
Chapter 23. Program Frameworks
The Python Library Reference, Release 3.2.3
Create and write docstring-dictionary to a Python script with the given filename. This function has to be called explicitly (it is not used by the turtle graphics classes). The docstring dictionary will be written to the Python script filename.py. It is intended to serve as a template for translation of the docstrings into different languages. If you (or your students) want to use turtle with online help in your native language, you have to translate the docstrings and save the resulting file as e.g. turtle_docstringdict_german.py. If you have an appropriate entry in your turtle.cfg file this dictionary will be read in at import time and will replace the original English docstrings. At the time of this writing there are docstring dictionaries in German and in Italian. (Requests please to [email protected].) How to configure Screen and Turtles The built-in default configuration mimics the appearance and behaviour of the old turtle module in order to retain best possible compatibility with it. If you want to use a different configuration which better reflects the features of this module or which better fits to your needs, e.g. for use in a classroom, you can prepare a configuration file turtle.cfg which will be read at import time and modify the configuration according to its settings. The built in configuration would correspond to the following turtle.cfg: width = 0.5 height = 0.75 leftright = None topbottom = None canvwidth = 400 canvheight = 300 mode = standard colormode = 1.0 delay = 10 undobuffersize = 1000 shape = classic pencolor = black fillcolor = black resizemode = noresize visible = True language = english exampleturtle = turtle examplescreen = screen title = Python Turtle Graphics using_IDLE = False Short explanation of selected entries: • The first four lines correspond to the arguments of the Screen.setup() method. • Line 5 and 6 correspond to the arguments of the method Screen.screensize(). • shape can be any of the built-in shapes, e.g: arrow, turtle, etc. For more info try help(shape). • If you want to use no fillcolor (i.e. make the turtle transparent), you have to write fillcolor = "" (but all nonempty strings must not have quotes in the cfg-file). • If you want to reflect the turtle its state, you have to use resizemode = auto. • If you set e.g. language = italian the docstringdict turtle_docstringdict_italian.py will be loaded at import time (if present on the import path, e.g. in the same directory as turtle. 23.1. turtle — Turtle graphics
995
The Python Library Reference, Release 3.2.3
• The entries exampleturtle and examplescreen define the names of these objects as they occur in the docstrings. The transformation of method-docstrings to function-docstrings will delete these names from the docstrings. • using_IDLE: Set this to True if you regularly work with IDLE and its -n switch (“no subprocess”). This will prevent exitonclick() to enter the mainloop. There can be a turtle.cfg file in the directory where turtle is stored and an additional one in the current working directory. The latter will override the settings of the first one. The Lib/turtledemo directory contains a turtle.cfg file. You can study it as an example and see its effects when running the demos (preferably not from within the demo-viewer).
23.1.7 Demo scripts There is a set of demo scripts in the turtledemo package. These scripts can be run and viewed using the supplied demo viewer as follows: python -m turtledemo Alternatively, you can run the demo scripts individually. For example, python -m turtledemo.bytedesign The turtledemo package directory contains: • a set of 15 demo scripts demonstrating different features of the new module turtle; • a demo viewer __main__.py which can be used to view the sourcecode of the scripts and run them at the same time. 14 of the examples can be accessed via the Examples menu; all of them can also be run standalone. • The example turtledemo.two_canvases demonstrates the simultaneous use of two canvases with the turtle module. Therefore it only can be run standalone. • There is a turtle.cfg file in this directory, which serves as an example for how to write and use such files. The demo scripts are:
996
Chapter 23. Program Frameworks
The Python Library Reference, Release 3.2.3
Name bytedesign chaos clock colormixer fractalcurves lindenmayer minimal_hanoi nim paint peace
Description complex classical turtle graphics pattern graphs Verhulst dynamics, shows that computer’s computations can generate results sometimes against the common sense expectations analog clock showing time of your computer
Features tracer(), delay, update() world coordinates
experiment with r, g, b
turtles as clock’s hands, ontimer ondrag()
Hilbert & Koch curves
recursion
ethnomathematics (indian kolams)
L-System
Towers of Hanoi
Rectangular Turtles as Hanoi discs (shape, shapesize) turtles as nimsticks, event driven (mouse, keyboard) onclick() turtle: appearance and animation stamp() compound shapes, Vec2D compound shapes, clone shapesize, tilt, get_shapepoly, update clone() clone(), undo() circle()
play the classical nim game with three heaps of sticks against the computer. super minimalistic drawing program elementary
penrose aperiodic tiling with kites and darts planet_and_moon simulation of gravitational system round_dancedancing turtles rotating pairwise in opposite direction
tree a (graphical) breadth first tree (using generators) wikipedia a pattern from the wikipedia article on turtle graphics yingyang another elementary example Have fun!
23.1.8 Changes since Python 2.6 • The methods Turtle.tracer(), Turtle.window_width() and Turtle.window_height() have been eliminated. Methods with these names and functionality are now available only as methods of Screen. The functions derived from these remain available. (In fact already in Python 2.6 these methods were merely duplications of the corresponding TurtleScreen/Screen-methods.) • The method Turtle.fill() has been eliminated. The behaviour of begin_fill() and end_fill() have changed slightly: now every filling-process must be completed with an end_fill() call. • A method Turtle.filling() has been added. It returns a boolean value: True if a filling process is under way, False otherwise. This behaviour corresponds to a fill() call without arguments in Python 2.6.
23.1.9 Changes since Python 3.0 • The methods Turtle.shearfactor(), Turtle.shapetransform() and Turtle.get_shapepoly() have been added. Thus the full range of regular linear transforms is now available for transforming turtle shapes. Turtle.tiltangle() has been enhanced in functionality: it now can be used to get or set the tiltangle. Turtle.settiltangle() has been deprecated. • The method Screen.onkeypress() has been added as a complement to Screen.onkey() which in fact binds actions to the keyrelease event. Accordingly the latter has got an alias: Screen.onkeyrelease().
23.1. turtle — Turtle graphics
997
The Python Library Reference, Release 3.2.3
• The method Screen.mainloop() has been added. So when working only with Screen and Turtle objects one must not additonally import mainloop() anymore. • Two input methods has been added Screen.textinput() and Screen.numinput(). These popup input dialogs and return strings and numbers respectively. • Two example scripts tdemo_nim.py and tdemo_round_dance.py have been added to the Lib/turtledemo directory.
23.2 cmd — Support for line-oriented command interpreters Source code: Lib/cmd.py
The Cmd class provides a simple framework for writing line-oriented command interpreters. These are often useful for test harnesses, administrative tools, and prototypes that will later be wrapped in a more sophisticated interface. class cmd.Cmd(completekey=’tab’, stdin=None, stdout=None) A Cmd instance or subclass instance is a line-oriented interpreter framework. There is no good reason to instantiate Cmd itself; rather, it’s useful as a superclass of an interpreter class you define yourself in order to inherit Cmd‘s methods and encapsulate action methods. The optional argument completekey is the readline name of a completion key; it defaults to Tab. If completekey is not None and readline is available, command completion is done automatically. The optional arguments stdin and stdout specify the input and output file objects that the Cmd instance or subclass instance will use for input and output. If not specified, they will default to sys.stdin and sys.stdout. If you want a given stdin to be used, make sure to set the instance’s use_rawinput attribute to False, otherwise stdin will be ignored.
23.2.1 Cmd Objects A Cmd instance has the following methods: Cmd.cmdloop(intro=None) Repeatedly issue a prompt, accept input, parse an initial prefix off the received input, and dispatch to action methods, passing them the remainder of the line as argument. The optional argument is a banner or intro string to be issued before the first prompt (this overrides the intro class attribute). If the readline module is loaded, input will automatically inherit bash-like history-list editing (e.g. Control-P scrolls back to the last command, Control-N forward to the next one, Control-F moves the cursor to the right non-destructively, Control-B moves the cursor to the left non-destructively, etc.). An end-of-file on input is passed back as the string ’EOF’. An interpreter instance will recognize a command name foo if and only if it has a method do_foo(). As a special case, a line beginning with the character ’?’ is dispatched to the method do_help(). As another special case, a line beginning with the character ’!’ is dispatched to the method do_shell() (if such a method is defined). This method will return when the postcmd() method returns a true value. The stop argument to postcmd() is the return value from the command’s corresponding do_*() method.
998
Chapter 23. Program Frameworks
The Python Library Reference, Release 3.2.3
If completion is enabled, completing commands will be done automatically, and completing of commands args is done by calling complete_foo() with arguments text, line, begidx, and endidx. text is the string prefix we are attempting to match: all returned matches must begin with it. line is the current input line with leading whitespace removed, begidx and endidx are the beginning and ending indexes of the prefix text, which could be used to provide different completion depending upon which position the argument is in. All subclasses of Cmd inherit a predefined do_help(). This method, called with an argument ’bar’, invokes the corresponding method help_bar(), and if that is not present, prints the docstring of do_bar(), if available. With no argument, do_help() lists all available help topics (that is, all commands with corresponding help_*() methods or commands that have docstrings), and also lists any undocumented commands. Cmd.onecmd(str) Interpret the argument as though it had been typed in response to the prompt. This may be overridden, but should not normally need to be; see the precmd() and postcmd() methods for useful execution hooks. The return value is a flag indicating whether interpretation of commands by the interpreter should stop. If there is a do_*() method for the command str, the return value of that method is returned, otherwise the return value from the default() method is returned. Cmd.emptyline() Method called when an empty line is entered in response to the prompt. If this method is not overridden, it repeats the last nonempty command entered. Cmd.default(line) Method called on an input line when the command prefix is not recognized. If this method is not overridden, it prints an error message and returns. Cmd.completedefault(text, line, begidx, endidx) Method called to complete an input line when no command-specific complete_*() method is available. By default, it returns an empty list. Cmd.precmd(line) Hook method executed just before the command line line is interpreted, but after the input prompt is generated and issued. This method is a stub in Cmd; it exists to be overridden by subclasses. The return value is used as the command which will be executed by the onecmd() method; the precmd() implementation may re-write the command or simply return line unchanged. Cmd.postcmd(stop, line) Hook method executed just after a command dispatch is finished. This method is a stub in Cmd; it exists to be overridden by subclasses. line is the command line which was executed, and stop is a flag which indicates whether execution will be terminated after the call to postcmd(); this will be the return value of the onecmd() method. The return value of this method will be used as the new value for the internal flag which corresponds to stop; returning false will cause interpretation to continue. Cmd.preloop() Hook method executed once when cmdloop() is called. This method is a stub in Cmd; it exists to be overridden by subclasses. Cmd.postloop() Hook method executed once when cmdloop() is about to return. This method is a stub in Cmd; it exists to be overridden by subclasses. Instances of Cmd subclasses have some public instance variables: Cmd.prompt The prompt issued to solicit input. Cmd.identchars The string of characters accepted for the command prefix.
23.2. cmd — Support for line-oriented command interpreters
999
The Python Library Reference, Release 3.2.3
Cmd.lastcmd The last nonempty command prefix seen. Cmd.intro A string to issue as an intro or banner. May be overridden by giving the cmdloop() method an argument. Cmd.doc_header The header to issue if the help output has a section for documented commands. Cmd.misc_header The header to issue if the help output has a section for miscellaneous help topics (that is, there are help_*() methods without corresponding do_*() methods). Cmd.undoc_header The header to issue if the help output has a section for undocumented commands (that is, there are do_*() methods without corresponding help_*() methods). Cmd.ruler The character used to draw separator lines under the help-message headers. If empty, no ruler line is drawn. It defaults to ’=’. Cmd.use_rawinput A flag, defaulting to true. If true, cmdloop() uses input() to display a prompt and read the next command; if false, sys.stdout.write() and sys.stdin.readline() are used. (This means that by importing readline, on systems that support it, the interpreter will automatically support Emacs-like line editing and command-history keystrokes.)
23.2.2 Cmd Example The cmd module is mainly useful for building custom shells that let a user work with a program interactively. This section presents a simple example of how to build a shell around a few of the commands in the turtle module. Basic turtle commands such as forward() are added to a Cmd subclass with method named do_forward(). The argument is converted to a number and dispatched to the turtle module. The docstring is used in the help utility provided by the shell. The example also includes a basic record and playback facility implemented with the precmd() method which is responsible for converting the input to lowercase and writing the commands to a file. The do_playback() method reads the file and adds the recorded commands to the cmdqueue for immediate playback: import cmd, sys from turtle import * class TurtleShell(cmd.Cmd): intro = ’Welcome to the turtle shell. prompt = ’(turtle) ’ file = None
Type help or ? to list commands.\n’
# ----- basic turtle commands ----def do_forward(self, arg): ’Move the turtle forward by the specified distance: FORWARD 10’ forward(*parse(arg)) def do_right(self, arg): ’Turn turtle right by given number of degrees: RIGHT 20’ right(*parse(arg)) def do_left(self, arg): ’Turn turtle left by given number of degrees: LEFT 90’
1000
Chapter 23. Program Frameworks
The Python Library Reference, Release 3.2.3
left(*parse(arg)) def do_goto(self, arg): ’Move turtle to an absolute position with changing orientation. GOTO 100 200’ goto(*parse(arg)) def do_home(self, arg): ’Return turtle to the home postion: HOME’ home() def do_circle(self, arg): ’Draw circle with given radius an options extent and steps: CIRCLE 50’ circle(*parse(arg)) def do_position(self, arg): ’Print the current turle position: POSITION’ print(’Current position is %d %d\n’ % position()) def do_heading(self, arg): ’Print the current turle heading in degrees: HEADING’ print(’Current heading is %d\n’ % (heading(),)) def do_color(self, arg): ’Set the color: COLOR BLUE’ color(arg.lower()) def do_undo(self, arg): ’Undo (repeatedly) the last turtle action(s): UNDO’ def do_reset(self, arg): ’Clear the screen and return turtle to center: RESET’ reset() def do_bye(self, arg): ’Stop recording, close the turtle window, and exit: BYE’ print(’Thank you for using Turtle’) self.close() bye() sys.exit(0) # ----- record and playback ----def do_record(self, arg): ’Save future commands to filename: RECORD rose.cmd’ self.file = open(arg, ’w’) def do_playback(self, arg): ’Playback commands from a file: PLAYBACK rose.cmd’ self.close() cmds = open(arg).read().splitlines() self.cmdqueue.extend(cmds) def precmd(self, line): line = line.lower() if self.file and ’playback’ not in line: print(line, file=self.file) return line def close(self): if self.file: self.file.close() self.file = None def parse(arg): ’Convert a series of zero or more numbers to an argument tuple’ return tuple(map(int, arg.split()))
23.2. cmd — Support for line-oriented command interpreters
1001
The Python Library Reference, Release 3.2.3
if __name__ == ’__main__’: TurtleShell().cmdloop() Here is a sample session with the turtle shell showing the help functions, using blank lines to repeat commands, and the simple record and playback facility: Welcome to the turtle shell.
Type help or ? to list commands.
(turtle) ? Documented commands (type help ): ======================================== bye color goto home playback circle forward heading left position
record reset
(turtle) help forward Move the turtle forward by the specified distance: (turtle) record spiral.cmd (turtle) position Current position is 0 0
right undo
FORWARD 10
(turtle) heading Current heading is 0 (turtle) reset (turtle) circle 20 (turtle) right 30 (turtle) circle 40 (turtle) right 30 (turtle) circle 60 (turtle) right 30 (turtle) circle 80 (turtle) right 30 (turtle) circle 100 (turtle) right 30 (turtle) circle 120 (turtle) right 30 (turtle) circle 120 (turtle) heading Current heading is 180 (turtle) (turtle) (turtle) (turtle) (turtle) (turtle) (turtle) (turtle) (turtle) (turtle) (turtle) (turtle) (turtle) (turtle)
1002
forward 100 right 90 forward 100 right 90 forward 400 right 90 forward 500 right 90 forward 400 right 90 forward 300 playback spiral.cmd
Chapter 23. Program Frameworks
The Python Library Reference, Release 3.2.3
Current position is 0 0 Current heading is 0 Current heading is 180 (turtle) bye Thank you for using Turtle
The shlex class makes it easy to write lexical analyzers for simple syntaxes resembling that of the Unix shell. This will often be useful for writing minilanguages, (for example, in run control files for Python applications) or for parsing quoted strings. The shlex module defines the following functions: shlex.split(s, comments=False, posix=True) Split the string s using shell-like syntax. If comments is False (the default), the parsing of comments in the given string will be disabled (setting the commenters attribute of the shlex instance to the empty string). This function operates in POSIX mode by default, but uses non-POSIX mode if the posix argument is false. Note: Since the split() function instantiates a shlex instance, passing None for s will read the string to split from standard input. The shlex module defines the following class: class shlex.shlex(instream=None, infile=None, posix=False) A shlex instance or subclass instance is a lexical analyzer object. The initialization argument, if present, specifies where to read characters from. It must be a file-/stream-like object with read() and readline() methods, or a string. If no argument is given, input will be taken from sys.stdin. The second optional argument is a filename string, which sets the initial value of the infile attribute. If the instream argument is omitted or equal to sys.stdin, this second argument defaults to “stdin”. The posix argument defines the operational mode: when posix is not true (default), the shlex instance will operate in compatibility mode. When operating in POSIX mode, shlex will try to be as close as possible to the POSIX shell parsing rules. See Also: Module configparser Parser for configuration files similar to the Windows .ini files.
23.3.1 shlex Objects A shlex instance has the following methods: shlex.get_token() Return a token. If tokens have been stacked using push_token(), pop a token off the stack. Otherwise, read one from the input stream. If reading encounters an immediate end-of-file, self.eof is returned (the empty string (”) in non-POSIX mode, and None in POSIX mode). shlex.push_token(str) Push the argument onto the token stack.
23.3. shlex — Simple lexical analysis
1003
The Python Library Reference, Release 3.2.3
shlex.read_token() Read a raw token. Ignore the pushback stack, and do not interpret source requests. (This is not ordinarily a useful entry point, and is documented here only for the sake of completeness.) shlex.sourcehook(filename) When shlex detects a source request (see source below) this method is given the following token as argument, and expected to return a tuple consisting of a filename and an open file-like object. Normally, this method first strips any quotes off the argument. If the result is an absolute pathname, or there was no previous source request in effect, or the previous source was a stream (such as sys.stdin), the result is left alone. Otherwise, if the result is a relative pathname, the directory part of the name of the file immediately before it on the source inclusion stack is prepended (this behavior is like the way the C preprocessor handles #include "file.h"). The result of the manipulations is treated as a filename, and returned as the first component of the tuple, with open() called on it to yield the second component. (Note: this is the reverse of the order of arguments in instance initialization!) This hook is exposed so that you can use it to implement directory search paths, addition of file extensions, and other namespace hacks. There is no corresponding ‘close’ hook, but a shlex instance will call the close() method of the sourced input stream when it returns EOF. For more explicit control of source stacking, use the push_source() and pop_source() methods. shlex.push_source(newstream, newfile=None) Push an input source stream onto the input stack. If the filename argument is specified it will later be available for use in error messages. This is the same method used internally by the sourcehook() method. shlex.pop_source() Pop the last-pushed input source from the input stack. This is the same method used internally when the lexer reaches EOF on a stacked input stream. shlex.error_leader(infile=None, lineno=None) This method generates an error message leader in the format of a Unix C compiler error label; the format is ’"%s", line %d: ’, where the %s is replaced with the name of the current source file and the %d with the current input line number (the optional arguments can be used to override these). This convenience is provided to encourage shlex users to generate error messages in the standard, parseable format understood by Emacs and other Unix tools. Instances of shlex subclasses have some public instance variables which either control lexical analysis or can be used for debugging: shlex.commenters The string of characters that are recognized as comment beginners. All characters from the comment beginner to end of line are ignored. Includes just ’#’ by default. shlex.wordchars The string of characters that will accumulate into multi-character tokens. By default, includes all ASCII alphanumerics and underscore. shlex.whitespace Characters that will be considered whitespace and skipped. Whitespace bounds tokens. By default, includes space, tab, linefeed and carriage-return. shlex.escape Characters that will be considered as escape. This will be only used in POSIX mode, and includes just ’\’ by default. shlex.quotes Characters that will be considered string quotes. The token accumulates until the same quote is encountered
1004
Chapter 23. Program Frameworks
The Python Library Reference, Release 3.2.3
again (thus, different quote types protect each other as in the shell.) By default, includes ASCII single and double quotes. shlex.escapedquotes Characters in quotes that will interpret escape characters defined in escape. This is only used in POSIX mode, and includes just ’"’ by default. shlex.whitespace_split If True, tokens will only be split in whitespaces. This is useful, for example, for parsing command lines with shlex, getting tokens in a similar way to shell arguments. shlex.infile The name of the current input file, as initially set at class instantiation time or stacked by later source requests. It may be useful to examine this when constructing error messages. shlex.instream The input stream from which this shlex instance is reading characters. shlex.source This attribute is None by default. If you assign a string to it, that string will be recognized as a lexical-level inclusion request similar to the source keyword in various shells. That is, the immediately following token will opened as a filename and input taken from that stream until EOF, at which point the close() method of that stream will be called and the input source will again become the original input stream. Source requests may be stacked any number of levels deep. shlex.debug If this attribute is numeric and 1 or more, a shlex instance will print verbose progress output on its behavior. If you need to use this, you can read the module source code to learn the details. shlex.lineno Source line number (count of newlines seen so far plus one). shlex.token The token buffer. It may be useful to examine this when catching exceptions. shlex.eof Token used to determine end of file. This will be set to the empty string (”), in non-POSIX mode, and to None in POSIX mode.
23.3.2 Parsing Rules When operating in non-POSIX mode, shlex will try to obey to the following rules. • Quote characters are not recognized within words (Do"Not"Separate is parsed as the single word Do"Not"Separate); • Escape characters are not recognized; • Enclosing characters in quotes preserve the literal value of all characters within the quotes; • Closing quotes separate words ("Do"Separate is parsed as "Do" and Separate); • If whitespace_split is False, any character not declared to be a word character, whitespace, or a quote will be returned as a single-character token. If it is True, shlex will only split words in whitespaces; • EOF is signaled with an empty string (”); • It’s not possible to parse empty strings, even if quoted. When operating in POSIX mode, shlex will try to obey to the following parsing rules.
23.3. shlex — Simple lexical analysis
1005
The Python Library Reference, Release 3.2.3
• Quotes are stripped out, and do not separate words ("Do"Not"Separate" is parsed as the single word DoNotSeparate); • Non-quoted escape characters (e.g. ’\’) preserve the literal value of the next character that follows; • Enclosing characters in quotes which are not part of escapedquotes (e.g. "’") preserve the literal value of all characters within the quotes; • Enclosing characters in quotes which are part of escapedquotes (e.g. ’"’) preserves the literal value of all characters within the quotes, with the exception of the characters mentioned in escape. The escape characters retain its special meaning only when followed by the quote in use, or the escape character itself. Otherwise the escape character will be considered a normal character. • EOF is signaled with a None value; • Quoted empty strings (”) are allowed;
1006
Chapter 23. Program Frameworks
CHAPTER
TWENTYFOUR
GRAPHICAL USER INTERFACES WITH TK Tk/Tcl has long been an integral part of Python. It provides a robust and platform independent windowing toolkit, that is available to Python programmers using the tkinter package, and its extension, the tkinter.tix and the tkinter.ttk modules. The tkinter package is a thin object-oriented layer on top of Tcl/Tk. To use tkinter, you don’t need to write Tcl code, but you will need to consult the Tk documentation, and occasionally the Tcl documentation. tkinter is a set of wrappers that implement the Tk widgets as Python classes. In addition, the internal module _tkinter provides a threadsafe mechanism which allows Python and Tcl to interact. tkinter‘s chief virtues are that it is fast, and that it usually comes bundled with Python. Although its standard documentation is weak, good material is available, which includes: references, tutorials, a book and others. tkinter is also famous for having an outdated look and feel, which has been vastly improved in Tk 8.5. Nevertheless, there are many other GUI libraries that you could be interested in. For more information about alternatives, see the Other Graphical User Interface Packages section.
24.1 tkinter — Python interface to Tcl/Tk The tkinter package (“Tk interface”) is the standard Python interface to the Tk GUI toolkit. Both Tk and tkinter are available on most Unix platforms, as well as on Windows systems. (Tk itself is not part of Python; it is maintained at ActiveState.) You can check that tkinter is properly installed on your system by running python -m tkinter from the command line; this should open a window demonstrating a simple Tk interface. See Also: Python Tkinter Resources The Python Tkinter Topic Guide provides a great deal of information on using Tk from Python and links to other sources of information on Tk. An Introduction to Tkinter Fredrik Lundh’s on-line reference material. Tkinter reference: a GUI for Python On-line reference material. Python and Tkinter Programming The book by John Grayson (ISBN 1-884777-81-3).
24.1.1 Tkinter Modules Most of the time, tkinter is all you really need, but a number of additional modules are available as well. The Tk interface is located in a binary module named _tkinter. This module contains the low-level interface to Tk, and
1007
The Python Library Reference, Release 3.2.3
should never be used directly by application programmers. It is usually a shared library (or DLL), but might in some cases be statically linked with the Python interpreter. In addition to the Tk interface module, tkinter includes a number of Python modules, tkinter.constants being one of the most important. Importing tkinter will automatically import tkinter.constants, so, usually, to use Tkinter all you need is a simple import statement: import tkinter Or, more often: from tkinter import * class tkinter.Tk(screenName=None, baseName=None, className=’Tk’, useTk=1) The Tk class is instantiated without arguments. This creates a toplevel widget of Tk which usually is the main window of an application. Each instance has its own associated Tcl interpreter. tkinter.Tcl(screenName=None, baseName=None, className=’Tk’, useTk=0) The Tcl() function is a factory function which creates an object much like that created by the Tk class, except that it does not initialize the Tk subsystem. This is most often useful when driving the Tcl interpreter in an environment where one doesn’t want to create extraneous toplevel windows, or where one cannot (such as Unix/Linux systems without an X server). An object created by the Tcl() object can have a Toplevel window created (and the Tk subsystem initialized) by calling its loadtk() method. Other modules that provide Tk support include: tkinter.scrolledtext Text widget with a vertical scroll bar built in. tkinter.colorchooser Dialog to let the user choose a color. tkinter.commondialog Base class for the dialogs defined in the other modules listed here. tkinter.filedialog Common dialogs to allow the user to specify a file to open or save. tkinter.font Utilities to help work with fonts. tkinter.messagebox Access to standard Tk dialog boxes. tkinter.simpledialog Basic dialogs and convenience functions. tkinter.dnd Drag-and-drop support for tkinter. This is experimental and should become deprecated when it is replaced with the Tk DND. turtle Turtle graphics in a Tk window.
24.1.2 Tkinter Life Preserver This section is not designed to be an exhaustive tutorial on either Tk or Tkinter. Rather, it is intended as a stop gap, providing some introductory orientation on the system. Credits: • Tk was written by John Ousterhout while at Berkeley. • Tkinter was written by Steen Lumholt and Guido van Rossum. • This Life Preserver was written by Matt Conway at the University of Virginia. • The HTML rendering, and some liberal editing, was produced from a FrameMaker version by Ken Manheimer. • Fredrik Lundh elaborated and revised the class interface descriptions, to get them current with Tk 4.2. • Mike Clarkson converted the documentation to LaTeX, and compiled the User Interface chapter of the reference manual.
1008
Chapter 24. Graphical User Interfaces with Tk
The Python Library Reference, Release 3.2.3
How To Use This Section This section is designed in two parts: the first half (roughly) covers background material, while the second half can be taken to the keyboard as a handy reference. When trying to answer questions of the form “how do I do blah”, it is often best to find out how to do”blah” in straight Tk, and then convert this back into the corresponding tkinter call. Python programmers can often guess at the correct Python command by looking at the Tk documentation. This means that in order to use Tkinter, you will have to know a little bit about Tk. This document can’t fulfill that role, so the best we can do is point you to the best documentation that exists. Here are some hints: • The authors strongly suggest getting a copy of the Tk man pages. Specifically, the man pages in the manN directory are most useful. The man3 man pages describe the C interface to the Tk library and thus are not especially helpful for script writers. • Addison-Wesley publishes a book called Tcl and the Tk Toolkit by John Ousterhout (ISBN 0-201-63337-X) which is a good introduction to Tcl and Tk for the novice. The book is not exhaustive, and for many details it defers to the man pages. • tkinter/__init__.py is a last resort for most, but can be a good place to go when nothing else makes sense. See Also: Tcl/Tk 8.6 man pages The Tcl/Tk manual on www.tcl.tk. ActiveState Tcl Home Page The Tk/Tcl development is largely taking place at ActiveState. Tcl and the Tk Toolkit The book by John Ousterhout, the inventor of Tcl . Practical Programming in Tcl and Tk Brent Welch’s encyclopedic book. A Simple Hello World Program from tkinter import * class Application(Frame): def say_hi(self): print("hi there, everyone!") def createWidgets(self): self.QUIT = Button(self) self.QUIT["text"] = "QUIT" self.QUIT["fg"] = "red" self.QUIT["command"] = self.quit self.QUIT.pack({"side": "left"}) self.hi_there = Button(self) self.hi_there["text"] = "Hello", self.hi_there["command"] = self.say_hi self.hi_there.pack({"side": "left"}) def __init__(self, master=None): Frame.__init__(self, master) self.pack() self.createWidgets() 24.1. tkinter — Python interface to Tcl/Tk
24.1.3 A (Very) Quick Look at Tcl/Tk The class hierarchy looks complicated, but in actual practice, application programmers almost always refer to the classes at the very bottom of the hierarchy. Notes: • These classes are provided for the purposes of organizing certain functions under one namespace. They aren’t meant to be instantiated independently. • The Tk class is meant to be instantiated only once in an application. Application programmers need not instantiate one explicitly, the system creates one whenever any of the other classes are instantiated. • The Widget class is not meant to be instantiated, it is meant only for subclassing to make “real” widgets (in C++, this is called an ‘abstract class’). To make use of this reference material, there will be times when you will need to know how to read short passages of Tk and how to identify the various parts of a Tk command. (See section Mapping Basic Tk into Tkinter for the tkinter equivalents of what’s below.) Tk scripts are Tcl programs. Like all Tcl programs, Tk scripts are just lists of tokens separated by spaces. A Tk widget is just its class, the options that help configure it, and the actions that make it do useful things. To make a widget in Tk, the command is always of the form: classCommand newPathname options classCommand denotes which kind of widget to make (a button, a label, a menu...) newPathname is the new name for this widget. All names in Tk must be unique. To help enforce this, widgets in Tk are named with pathnames, just like files in a file system. The top level widget, the root, is called . (period) and children are delimited by more periods. For example, .myApp.controlPanel.okButton might be the name of a widget. options configure the widget’s appearance and in some cases, its behavior. The options come in the form of a list of flags and values. Flags are preceded by a ‘-‘, like Unix shell command flags, and values are put in quotes if they are more than one word. For example: button ^ | class command
.fred ^ | new widget
-fg red -text "hi there" \______________________/ | options (-opt val -opt val ...)
Once created, the pathname to the widget becomes a new command. This new widget command is the programmer’s handle for getting the new widget to perform some action. In C, you’d express this as someAction(fred, someOptions), in C++, you would express this as fred.someAction(someOptions), and in Tk, you say: .fred someAction someOptions Note that the object name, .fred, starts with a dot. As you’d expect, the legal values for someAction will depend on the widget’s class: .fred disable works if fred is a button (fred gets greyed out), but does not work if fred is a label (disabling of labels is not supported in Tk). 1010
Chapter 24. Graphical User Interfaces with Tk
The Python Library Reference, Release 3.2.3
The legal values of someOptions is action dependent. Some actions, like disable, require no arguments, others, like a text-entry box’s delete command, would need arguments to specify what range of text to delete.
24.1.4 Mapping Basic Tk into Tkinter Class commands in Tk correspond to class constructors in Tkinter. button .fred
=====>
fred = Button()
The master of an object is implicit in the new name given to it at creation time. In Tkinter, masters are specified explicitly. button .panel.fred
=====>
fred = Button(panel)
The configuration options in Tk are given in lists of hyphened tags followed by values. In Tkinter, options are specified as keyword-arguments in the instance constructor, and keyword-args for configure calls or as instance indices, in dictionary style, for established instances. See section Setting Options on setting options. button .fred -fg red .fred configure -fg red
=====> =====> OR ==>
fred = Button(panel, fg="red") fred["fg"] = red fred.config(fg="red")
In Tk, to perform an action on a widget, use the widget name as a command, and follow it with an action name, possibly with arguments (options). In Tkinter, you call methods on the class instance to invoke actions on the widget. The actions (methods) that a given widget can perform are listed in tkinter/__init__.py. .fred invoke
=====>
fred.invoke()
To give a widget to the packer (geometry manager), you call pack with optional arguments. In Tkinter, the Pack class holds all this functionality, and the various forms of the pack command are implemented as methods. All widgets in tkinter are subclassed from the Packer, and so inherit all the packing methods. See the tkinter.tix module documentation for additional information on the Form geometry manager. pack .fred -side left
=====>
fred.pack(side="left")
24.1.5 How Tk and Tkinter are Related From the top down: Your App Here (Python) A Python application makes a tkinter call. tkinter (Python Package) This call (say, for example, creating a button widget), is implemented in the tkinter package, which is written in Python. This Python function will parse the commands and the arguments and convert them into a form that makes them look as if they had come from a Tk script instead of a Python script. _tkinter (C) These commands and their arguments will be passed to a C function in the _tkinter - note the underscore - extension module. Tk Widgets (C and Tcl) This C function is able to make calls into other C modules, including the C functions that make up the Tk library. Tk is implemented in C and some Tcl. The Tcl part of the Tk widgets is used to bind certain default behaviors to widgets, and is executed once at the point where the Python tkinter package is imported. (The user never sees this stage). Tk (C) The Tk part of the Tk Widgets implement the final mapping to ... Xlib (C) the Xlib library to draw graphics on the screen.
24.1. tkinter — Python interface to Tcl/Tk
1011
The Python Library Reference, Release 3.2.3
24.1.6 Handy Reference Setting Options Options control things like the color and border width of a widget. Options can be set in three ways: At object creation time, using keyword arguments fred = Button(self, fg="red", bg="blue") After object creation, treating the option name like a dictionary index fred["fg"] = "red" fred["bg"] = "blue" Use the config() method to update multiple attrs subsequent to object creation fred.config(fg="red", bg="blue") For a complete explanation of a given option and its behavior, see the Tk man pages for the widget in question. Note that the man pages list “STANDARD OPTIONS” and “WIDGET SPECIFIC OPTIONS” for each widget. The former is a list of options that are common to many widgets, the latter are the options that are idiosyncratic to that particular widget. The Standard Options are documented on the options(3) man page. No distinction between standard and widget-specific options is made in this document. Some options don’t apply to some kinds of widgets. Whether a given widget responds to a particular option depends on the class of the widget; buttons have a command option, labels do not. The options supported by a given widget are listed in that widget’s man page, or can be queried at runtime by calling the config() method without arguments, or by calling the keys() method on that widget. The return value of these calls is a dictionary whose key is the name of the option as a string (for example, ’relief’) and whose values are 5-tuples. Some options, like bg are synonyms for common options with long names (bg is shorthand for “background”). Passing the config() method the name of a shorthand option will return a 2-tuple, not 5-tuple. The 2-tuple passed back will contain the name of the synonym and the “real” option (such as (’bg’, ’background’)). Index 0 1 2 3 4
Meaning option name option name for database lookup option class for database lookup default value current value
Example ’relief’ ’relief’ ’Relief’ ’raised’ ’groove’
Example: >>> print(fred.config()) {’relief’ : (’relief’, ’relief’, ’Relief’, ’raised’, ’groove’)} Of course, the dictionary printed will include all the options available and their values. This is meant only as an example. The Packer The packer is one of Tk’s geometry-management mechanisms. Geometry managers are used to specify the relative positioning of the positioning of widgets within their container - their mutual master. In contrast to the more cumbersome placer (which is used less commonly, and we do not cover here), the packer takes qualitative relationship specification - above, to the left of, filling, etc - and works everything out to determine the exact placement coordinates for you.
1012
Chapter 24. Graphical User Interfaces with Tk
The Python Library Reference, Release 3.2.3
The size of any master widget is determined by the size of the “slave widgets” inside. The packer is used to control where slave widgets appear inside the master into which they are packed. You can pack widgets into frames, and frames into other frames, in order to achieve the kind of layout you desire. Additionally, the arrangement is dynamically adjusted to accommodate incremental changes to the configuration, once it is packed. Note that widgets do not appear until they have had their geometry specified with a geometry manager. It’s a common early mistake to leave out the geometry specification, and then be surprised when the widget is created but nothing appears. A widget will appear only after it has had, for example, the packer’s pack() method applied to it. The pack() method can be called with keyword-option/value pairs that control where the widget is to appear within its container, and how it is to behave when the main application window is resized. Here are some examples: fred.pack() fred.pack(side="left") fred.pack(expand=1)
# defaults to side = "top"
Packer Options For more extensive information on the packer and the options that it can take, see the man pages and page 183 of John Ousterhout’s book. anchor Anchor type. Denotes where the packer is to place each slave in its parcel. expand Boolean, 0 or 1. fill Legal values: ’x’, ’y’, ’both’, ’none’. ipadx and ipady A distance - designating internal padding on each side of the slave widget. padx and pady A distance - designating external padding on each side of the slave widget. side Legal values are: ’left’, ’right’, ’top’, ’bottom’. Coupling Widget Variables The current-value setting of some widgets (like text entry widgets) can be connected directly to application variables by using special options. These options are variable, textvariable, onvalue, offvalue, and value. This connection works both ways: if the variable changes for any reason, the widget it’s connected to will be updated to reflect the new value. Unfortunately, in the current implementation of tkinter it is not possible to hand over an arbitrary Python variable to a widget through a variable or textvariable option. The only kinds of variables for which this works are variables that are subclassed from a class called Variable, defined in tkinter. There are many useful subclasses of Variable already defined: StringVar, IntVar, DoubleVar, and BooleanVar. To read the current value of such a variable, call the get() method on it, and to change its value you call the set() method. If you follow this protocol, the widget will always track the value of the variable, with no further intervention on your part. For example: class App(Frame): def __init__(self, master=None): Frame.__init__(self, master) self.pack() self.entrythingy = Entry() self.entrythingy.pack()
24.1. tkinter — Python interface to Tcl/Tk
1013
The Python Library Reference, Release 3.2.3
# here is the application variable self.contents = StringVar() # set it to some value self.contents.set("this is a variable") # tell the entry widget to watch this variable self.entrythingy["textvariable"] = self.contents # and here we get a callback when the user hits return. # we will have the program print out the value of the # application variable when the user hits return self.entrythingy.bind(’’, self.print_contents) def print_contents(self, event): print("hi. contents of entry is now ---->", self.contents.get()) The Window Manager In Tk, there is a utility command, wm, for interacting with the window manager. Options to the wm command allow you to control things like titles, placement, icon bitmaps, and the like. In tkinter, these commands have been implemented as methods on the Wm class. Toplevel widgets are subclassed from the Wm class, and so can call the Wm methods directly. To get at the toplevel window that contains a given widget, you can often just refer to the widget’s master. Of course if the widget has been packed inside of a frame, the master won’t represent a toplevel window. To get at the toplevel window that contains an arbitrary widget, you can call the _root() method. This method begins with an underscore to denote the fact that this function is part of the implementation, and not an interface to Tk functionality. Here are some examples of typical usage: from tkinter import * class App(Frame): def __init__(self, master=None): Frame.__init__(self, master) self.pack()
# create the application myapp = App() # # here are method calls to the window manager class # myapp.master.title("My Do-Nothing Application") myapp.master.maxsize(1000, 400) # start the program myapp.mainloop() Tk Option Data Types anchor Legal values are points of the compass: "n", "ne", "e", "se", "s", "sw", "w", "nw", and also "center".
1014
Chapter 24. Graphical User Interfaces with Tk
The Python Library Reference, Release 3.2.3
bitmap There are eight built-in, named bitmaps: ’error’, ’gray25’, ’gray50’, ’hourglass’, ’info’, ’questhead’, ’question’, ’warning’. To specify an X bitmap filename, give the full path to the file, preceded with an @, as in "@/usr/contrib/bitmap/gumby.bit". boolean You can pass integers 0 or 1 or the strings "yes" or "no" . callback This is any Python function that takes no arguments. For example: def print_it(): print("hi there") fred["command"] = print_it color Colors can be given as the names of X colors in the rgb.txt file, or as strings representing RGB values in 4 bit: "#RGB", 8 bit: "#RRGGBB", 12 bit” "#RRRGGGBBB", or 16 bit "#RRRRGGGGBBBB" ranges, where R,G,B here represent any legal hex digit. See page 160 of Ousterhout’s book for details. cursor The standard X cursor names from cursorfont.h can be used, without the XC_ prefix. For example to get a hand cursor (XC_hand2), use the string "hand2". You can also specify a bitmap and mask file of your own. See page 179 of Ousterhout’s book. distance Screen distances can be specified in either pixels or absolute distances. Pixels are given as numbers and absolute distances as strings, with the trailing character denoting units: c for centimetres, i for inches, m for millimetres, p for printer’s points. For example, 3.5 inches is expressed as "3.5i". font Tk uses a list font name format, such as {courier 10 bold}. Font sizes with positive numbers are measured in points; sizes with negative numbers are measured in pixels. geometry This is a string of the form widthxheight, where width and height are measured in pixels for most widgets (in characters for widgets displaying text). For example: fred["geometry"] = "200x100". justify Legal values are the strings: "left", "center", "right", and "fill". region This is a string with four space-delimited elements, each of which is a legal distance (see above). For example: "2 3 4 5" and "3i 2i 4.5i 2i" and "3c 2c 4c 10.43c" are all legal regions. relief Determines what the border style of a widget will be. Legal values are: "raised", "sunken", "flat", "groove", and "ridge". scrollcommand This is almost always the set() method of some scrollbar widget, but can be any widget method that takes a single argument. wrap: Must be one of: "none", "char", or "word". Bindings and Events The bind method from the widget command allows you to watch for certain events and to have a callback function trigger when that event type occurs. The form of the bind method is: def bind(self, sequence, func, add=’’): where: sequence is a string that denotes the target kind of event. (See the bind man page and page 201 of John Ousterhout’s book for details). func is a Python function, taking one argument, to be invoked when the event occurs. An Event instance will be passed as the argument. (Functions deployed this way are commonly known as callbacks.) add is optional, either ” or ’+’. Passing an empty string denotes that this binding is to replace any other bindings that this event is associated with. Passing a ’+’ means that this function is to be added to the list of functions bound to this event type. For example: 24.1. tkinter — Python interface to Tcl/Tk
1015
The Python Library Reference, Release 3.2.3
def turnRed(self, event): event.widget["activeforeground"] = "red" self.button.bind("", self.turnRed) Notice how the widget field of the event is being accessed in the turnRed() callback. This field contains the widget that caught the X event. The following table lists the other event fields you can access, and how they are denoted in Tk, which can be useful when referring to the Tk man pages. Tk %f %h %k %s %t %w %x %y
Tkinter Event Field focus height keycode state time width x y
Tk %A %E %K %N %T %W %X %Y
Tkinter Event Field char send_event keysym keysym_num type widget x_root y_root
The index Parameter A number of widgets require “index” parameters to be passed. These are used to point at a specific place in a Text widget, or to particular characters in an Entry widget, or to particular menu items in a Menu widget. Entry widget indexes (index, view index, etc.) Entry widgets have options that refer to character positions in the text being displayed. You can use these tkinter functions to access these special points in text widgets: AtEnd() refers to the last position in the text AtInsert() refers to the point where the text cursor is AtSelFirst() indicates the beginning point of the selected text AtSelLast() denotes the last point of the selected text and finally At(x[, y]) refers to the character at pixel location x, y (with y not used in the case of a text entry widget, which contains a single line of text). Text widget indexes The index notation for Text widgets is very rich and is best described in the Tk man pages. Menu indexes (menu.invoke(), menu.entryconfig(), etc.) Some options and methods for menus manipulate specific menu entries. Anytime a menu index is needed for an option or a parameter, you may pass in: • an integer which refers to the numeric position of the entry in the widget, counted from the top, starting with 0; • the string "active", which refers to the menu position that is currently under the cursor; • the string "last" which refers to the last menu item; • An integer preceded by @, as in @6, where the integer is interpreted as a y pixel coordinate in the menu’s coordinate system; • the string "none", which indicates no menu entry at all, most often used with menu.activate() to deactivate all entries, and finally, • a text string that is pattern matched against the label of the menu entry, as scanned from the top of the menu to the bottom. Note that this index type is considered after all the others, which means that matches for menu items labelled last, active, or none may be interpreted as the above literals, instead.
1016
Chapter 24. Graphical User Interfaces with Tk
The Python Library Reference, Release 3.2.3
Images Bitmap/Pixelmap images can be created through the subclasses of tkinter.Image: • BitmapImage can be used for X11 bitmap data. • PhotoImage can be used for GIF and PPM/PGM color bitmaps. Either type of image is created through either the file or the data option (other options are available as well). The image object can then be used wherever an image option is supported by some widget (e.g. labels, buttons, menus). In these cases, Tk will not keep a reference to the image. When the last Python reference to the image object is deleted, the image data is deleted as well, and Tk will display an empty box wherever the image was used.
24.2 tkinter.ttk — Tk themed widgets The tkinter.ttk module provides access to the Tk themed widget set, introduced in Tk 8.5. If Python has not been compiled against Tk 8.5, this module can still be accessed if Tile has been installed. The former method using Tk 8.5 provides additional benefits including anti-aliased font rendering under X11 and window transparency (requiring a composition window manager on X11). The basic idea for tkinter.ttk is to separate, to the extent possible, the code implementing a widget’s behavior from the code implementing its appearance. See Also: Tk Widget Styling Support A document introducing theming support for Tk
24.2.1 Using Ttk To start using Ttk, import its module: from tkinter import ttk To override the basic Tk widgets, the import should follow the Tk import: from tkinter import * from tkinter.ttk import * That code causes several tkinter.ttk widgets (Button, Checkbutton, Entry, Frame, Label, LabelFrame, Menubutton, PanedWindow, Radiobutton, Scale and Scrollbar) to automatically replace the Tk widgets. This has the direct benefit of using the new widgets which gives a better look and feel across platforms; however, the replacement widgets are not completely compatible. The main difference is that widget options such as “fg”, “bg” and others related to widget styling are no longer present in Ttk widgets. Instead, use the ttk.Style class for improved styling effects. See Also: Converting existing applications to use Tile widgets A monograph (using Tcl terminology) about differences typically encountered when moving applications to use the new widgets.
24.2.2 Ttk Widgets Ttk comes with 17 widgets, eleven of which already existed in tkinter: Button, Checkbutton, Entry, Frame, Label, LabelFrame, Menubutton, PanedWindow, Radiobutton, Scale and Scrollbar. The other six
24.2. tkinter.ttk — Tk themed widgets
1017
The Python Library Reference, Release 3.2.3
are new: Combobox, Notebook, Progressbar, Separator, Sizegrip and Treeview. And all them are subclasses of Widget. Using the Ttk widgets gives the application an improved look and feel. As discussed above, there are differences in how the styling is coded. Tk code: l1 = tkinter.Label(text="Test", fg="black", bg="white") l2 = tkinter.Label(text="Test", fg="black", bg="white") Ttk code: style = ttk.Style() style.configure("BW.TLabel", foreground="black", background="white") l1 = ttk.Label(text="Test",) l2 = ttk.Label(text="Test",) For more information about TtkStyling, see the Style class documentation.
24.2.3 Widget ttk.Widget defines standard options and methods supported by Tk themed widgets and is not supposed to be directly instantiated. Standard Options All the ttk Widgets accepts the following options: Option class
cursor takefocus
style
Description Specifies the window class. The class is used when querying the option database for the window’s other options, to determine the default bindtags for the window, and to select the widget’s default layout and style. This is a read-only which may only be specified when the window is created Specifies the mouse cursor to be used for the widget. If set to the empty string (the default), the cursor is inherited for the parent widget. Determines whether the window accepts the focus during keyboard traversal. 0, 1 or an empty string is returned. If 0 is returned, it means that the window should be skipped entirely during keyboard traversal. If 1, it means that the window should receive the input focus as long as it is viewable. And an empty string means that the traversal scripts make the decision about whether or not to focus on the window. May be used to specify a custom widget style.
Scrollable Widget Options The following options are supported by widgets that are controlled by a scrollbar.
1018
Chapter 24. Graphical User Interfaces with Tk
The Python Library Reference, Release 3.2.3
option xscrollcommand
description Used to communicate with horizontal scrollbars. When the view in the widget’s window change, the widget will generate a Tcl command based on the scrollcommand. Usually this option consists of the method Scrollbar.set() of some scrollbar. This will cause the scrollbar to be updated whenever the view in the window changes. Used to communicate with vertical scrollbars. For some more information, see above.
yscrollcommand Label Options
The following options are supported by labels, buttons and other button-like widgets. option text textvariable underline image
compound
width
description Specifies a text string to be displayed inside the widget. Specifies a name whose value will be used in place of the text option resource. If set, specifies the index (0-based) of a character to underline in the text string. The underline character is used for mnemonic activation. Specifies an image to display. This is a list of 1 or more elements. The first element is the default image name. The rest of the list if a sequence of statespec/value pairs as defined by Style.map(), specifying different images to use when the widget is in a particular state or a combination of states. All images in the list should have the same size. Specifies how to display the image relative to the text, in the case both text and images options are present. Valid values are: • text: display text only • image: display image only • top, bottom, left, right: display image above, below, left of, or right of the text, respectively. • none: the default. display the image if present, otherwise the text. If greater than zero, specifies how much space, in character widths, to allocate for the text label, if less than zero, specifies a minimum width. If zero or unspecified, the natural width of the text label is used.
Compatibility Options option state
description May be set to “normal” or “disabled” to control the “disabled” state bit. This is a write-only option: setting it changes the widget state, but the Widget.state() method does not affect this option.
Widget States The widget state is a bitmap of independent state flags.
24.2. tkinter.ttk — Tk themed widgets
1019
The Python Library Reference, Release 3.2.3
flag active disabled focus pressed selected background readonly alternate invalid
description The mouse cursor is over the widget and pressing a mouse button will cause some action to occur Widget is disabled under program control Widget has keyboard focus Widget is being pressed “On”, “true”, or “current” for things like Checkbuttons and radiobuttons Windows and Mac have a notion of an “active” or foreground window. The background state is set for widgets in a background window, and cleared for those in the foreground window Widget should not allow user modification A widget-specific alternate display format The widget’s value is invalid
A state specification is a sequence of state names, optionally prefixed with an exclamation point indicating that the bit is off. ttk.Widget Besides the methods described below, the ttk.Widget supports the methods tkinter.Widget.cget() and tkinter.Widget.configure(). class tkinter.ttk.Widget identify(x, y) Returns the name of the element at position x y, or the empty string if the point does not lie within any element. x and y are pixel coordinates relative to the widget. instate(statespec, callback=None, *args, **kw) Test the widget’s state. If a callback is not specified, returns True if the widget state matches statespec and False otherwise. If callback is specified then it is called with args if widget state matches statespec. state(statespec=None) Modify or inquire widget state. If statespec is specified, sets the widget state according to it and return a new statespec indicating which flags were changed. If statespec is not specified, returns the currentlyenabled state flags. statespec will usually be a list or a tuple.
24.2.4 Combobox The ttk.Combobox widget combines a text field with a pop-down list of values. This widget is a subclass of Entry. Besides the methods inherited from Widget: Widget.cget(), Widget.configure(), Widget.identify(), Widget.instate() and Widget.state(), and the following inherited from Entry: Entry.bbox(), Entry.delete(), Entry.icursor(), Entry.index(), Entry.inset(), Entry.selection(), Entry.xview(), it has some other methods, described at ttk.Combobox.
1020
Chapter 24. Graphical User Interfaces with Tk
The Python Library Reference, Release 3.2.3
Options This widget accepts the following specific options: option exportselection justify height postcommand state
textvariable values width
description Boolean value. If set, the widget selection is linked to the Window Manager selection (which can be returned by invoking Misc.selection_get, for example). Specifies how the text is aligned within the widget. One of “left”, “center”, or “right”. Specifies the height of the pop-down listbox, in rows. A script (possibly registered with Misc.register) that is called immediately before displaying the values. It may specify which values to display. One of “normal”, “readonly”, or “disabled”. In the “readonly” state, the value may not be edited directly, and the user can only selection of the values from the dropdown list. In the “normal” state, the text field is directly editable. In the “disabled” state, no interaction is possible. Specifies a name whose value is linked to the widget value. Whenever the value associated with that name changes, the widget value is updated, and vice versa. See tkinter.StringVar. Specifies the list of values to display in the drop-down listbox. Specifies an integer value indicating the desired width of the entry window, in average-size characters of the widget’s font.
Virtual events The combobox widgets generates a virtual event when the user selects an element from the list of values. ttk.Combobox class tkinter.ttk.Combobox current(newindex=None) If newindex is specified, sets the combobox value to the element position newindex. Otherwise, returns the index of the current value or -1 if the current value is not in the values list. get() Returns the current value of the combobox. set(value) Sets the value of the combobox to value.
24.2.5 Notebook Ttk Notebook widget manages a collection of windows and displays a single one at a time. Each child window is associated with a tab, which the user may select to change the currently-displayed window. Options This widget accepts the following specific options:
24.2. tkinter.ttk — Tk themed widgets
1021
The Python Library Reference, Release 3.2.3
opdescription tion height If present and greater than zero, specifies the desired height of the pane area (not including internal padding or tabs). Otherwise, the maximum height of all panes is used. paddingSpecifies the amount of extra space to add around the outside of the notebook. The padding is a list up to four length specifications left top right bottom. If fewer than four elements are specified, bottom defaults to top, right defaults to left, and top defaults to left. width If present and greater than zero, specified the desired width of the pane area (not including internal padding). Otherwise, the maximum width of all panes is used. Tab Options There are also specific options for tabs: option state
description
Either “normal”, “disabled” or “hidden”. If “disabled”, then the tab is not selectable. If “hidden”, then the tab is not shown. sticky Specifies how the child window is positioned within the pane area. Value is a string containing zero or more of the characters “n”, “s”, “e” or “w”. Each letter refers to a side (north, south, east or west) that the child window will stick to, as per the grid() geometry manager. padding Specifies the amount of extra space to add between the notebook and this pane. Syntax is the same as for the option padding used by this widget. text Specifies a text to be displayed in the tab. imSpecifies an image to display in the tab. See the option image described in Widget. age comSpecifies how to display the image relative to the text, in the case both options text and pound image are present. See Label Options for legal values. unSpecifies the index (0-based) of a character to underline in the text string. The underlined dercharacter is used for mnemonic activation if Notebook.enable_traversal() is line called. Tab Identifiers The tab_id present in several methods of ttk.Notebook may take any of the following forms: • An integer between zero and the number of tabs • The name of a child window • A positional specification of the form “@x,y”, which identifies the tab • The literal string “current”, which identifies the currently-selected tab • The literal string “end”, which returns the number of tabs (only valid for Notebook.index()) Virtual Events This widget generates a virtual event after a new tab is selected.
1022
Chapter 24. Graphical User Interfaces with Tk
The Python Library Reference, Release 3.2.3
ttk.Notebook class tkinter.ttk.Notebook add(child, **kw) Adds a new tab to the notebook. If window is currently managed by the notebook but hidden, it is restored to its previous position. See Tab Options for the list of available options. forget(tab_id) Removes the tab specified by tab_id, unmaps and unmanages the associated window. hide(tab_id) Hides the tab specified by tab_id. The tab will not be displayed, but the associated window remains managed by the notebook and its configuration remembered. Hidden tabs may be restored with the add() command. identify(x, y) Returns the name of the tab element at position x, y, or the empty string if none. index(tab_id) Returns the numeric index of the tab specified by tab_id, or the total number of tabs if tab_id is the string “end”. insert(pos, child, **kw) Inserts a pane at the specified position. pos is either the string “end”, an integer index, or the name of a managed child. If child is already managed by the notebook, moves it to the specified position. See Tab Options for the list of available options. select(tab_id=None) Selects the specified tab_id. The associated child window will be displayed, and the previously-selected window (if different) is unmapped. If tab_id is omitted, returns the widget name of the currently selected pane. tab(tab_id, option=None, **kw) Query or modify the options of the specific tab_id. If kw is not given, returns a dictionary of the tab option values. If option is specified, returns the value of that option. Otherwise, sets the options to the corresponding values. tabs() Returns a list of windows managed by the notebook. enable_traversal() Enable keyboard traversal for a toplevel window containing this notebook. This will extend the bindings for the toplevel window containing the notebook as follows: •Control-Tab: selects the tab following the currently selected one. •Shift-Control-Tab: selects the tab preceding the currently selected one. •Alt-K: where K is the mnemonic (underlined) character of any tab, will select that tab. Multiple notebooks in a single toplevel may be enabled for traversal, including nested notebooks. However, notebook traversal only works properly if all panes have the notebook they are in as master.
24.2. tkinter.ttk — Tk themed widgets
1023
The Python Library Reference, Release 3.2.3
24.2.6 Progressbar The ttk.Progressbar widget shows the status of a long-running operation. It can operate in two modes: 1) the determinate mode which shows the amount completed relative to the total amount of work to be done and 2) the indeterminate mode which provides an animated display to let the user know that work is progressing. Options This widget accepts the following specific options: opdescription tion oriOne of “horizontal” or “vertical”. Specifies the orientation of the progress bar. ent length Specifies the length of the long axis of the progress bar (width if horizontal, height if vertical). mode One of “determinate” or “indeterminate”. max- A number specifying the maximum value. Defaults to 100. imum value The current value of the progress bar. In “determinate” mode, this represents the amount of work completed. In “indeterminate” mode, it is interpreted as modulo maximum; that is, the progress bar completes one “cycle” when its value increases by maximum. variA name which is linked to the option value. If specified, the value of the progress bar is able automatically set to the value of this name whenever the latter is modified. phase Read-only option. The widget periodically increments the value of this option whenever its value is greater than 0 and, in determinate mode, less than maximum. This option may be used by the current theme to provide additional animation effects. ttk.Progressbar class tkinter.ttk.Progressbar start(interval=None) Begin autoincrement mode: schedules a recurring timer event that calls Progressbar.step() every interval milliseconds. If omitted, interval defaults to 50 milliseconds. step(amount=None) Increments the progress bar’s value by amount. amount defaults to 1.0 if omitted. stop() Stop autoincrement mode: cancels any recurring timer event initiated by Progressbar.start() for this progress bar.
24.2.7 Separator The ttk.Separator widget displays a horizontal or vertical separator bar. It has no other methods besides the ones inherited from ttk.Widget.
1024
Chapter 24. Graphical User Interfaces with Tk
The Python Library Reference, Release 3.2.3
Options This widget accepts the following specific option: option orient
description One of “horizontal” or “vertical”. Specifies the orientation of the separator.
24.2.8 Sizegrip The ttk.Sizegrip widget (also known as a grow box) allows the user to resize the containing toplevel window by pressing and dragging the grip. This widget has neither specific options nor specific methods, besides the ones inherited from ttk.Widget. Platform-specific notes • On MacOS X, toplevel windows automatically include a built-in size grip by default. Adding a Sizegrip is harmless, since the built-in grip will just mask the widget. Bugs • If the containing toplevel’s position was specified relative to the right or bottom of the screen (e.g. ....), the Sizegrip widget will not resize the window. • This widget supports only “southeast” resizing.
24.2.9 Treeview The ttk.Treeview widget displays a hierarchical collection of items. Each item has a textual label, an optional image, and an optional list of data values. The data values are displayed in successive columns after the tree label. The order in which data values are displayed may be controlled by setting the widget option displaycolumns. The tree widget can also display column headings. Columns may be accessed by number or symbolic names listed in the widget option columns. See Column Identifiers. Each item is identified by an unique name. The widget will generate item IDs if they are not supplied by the caller. There is a distinguished root item, named {}. The root item itself is not displayed; its children appear at the top level of the hierarchy. Each item also has a list of tags, which can be used to associate event bindings with individual items and control the appearance of the item. The Treeview widget supports horizontal and vertical scrolling, according to the options described in Scrollable Widget Options and the methods Treeview.xview() and Treeview.yview(). Options This widget accepts the following specific options:
description A list of column identifiers, specifying the number of columns and their names. A list of column identifiers (either symbolic or integer indices) specifying which data columns are displayed and the order in which they appear, or the string “#all”. Specifies the number of rows which should be visible. Note: the requested width is determined from the sum of the column widths. Specifies the internal padding for the widget. The padding is a list of up to four length specifications. Controls how the built-in class bindings manage the selection. One of “extended”, “browse” or “none”. If set to “extended” (the default), multiple items may be selected. If “browse”, only a single item will be selected at a time. If “none”, the selection will not be changed. Note that the application code and tag bindings can set the selection however they wish, regardless of the value of this option. A list containing zero or more of the following values, specifying which elements of the tree to display. • tree: display tree labels in column #0. • headings: display the heading row. The default is “tree headings”, i.e., show all elements. Note: Column #0 always refers to the tree column, even if show=”tree” is not specified.
Item Options The following item options may be specified for items in the insert and item widget commands. option text image values
open tags
description The textual label to display for the item. A Tk Image, displayed to the left of the label. The list of values associated with the item. Each item should have the same number of values as the widget option columns. If there are fewer values than columns, the remaining values are assumed empty. If there are more values than columns, the extra values are ignored. True/False value indicating whether the item’s children should be displayed or hidden. A list of tags associated with this item.
Tag Options The following options may be specified on tags: option foreground background font image
description Specifies the text foreground color. Specifies the cell or item background color. Specifies the font to use when drawing text. Specifies the item image, in case the item’s image option is empty.
Column Identifiers Column identifiers take any of the following forms: • A symbolic name from the list of columns option.
1026
Chapter 24. Graphical User Interfaces with Tk
The Python Library Reference, Release 3.2.3
• An integer n, specifying the nth data column. • A string of the form #n, where n is an integer, specifying the nth display column. Notes: • Item’s option values may be displayed in a different order than the order in which they are stored. • Column #0 always refers to the tree column, even if show=”tree” is not specified. A data column number is an index into an item’s option values list; a display column number is the column number in the tree where the values are displayed. Tree labels are displayed in column #0. If option displaycolumns is not set, then data column n is displayed in column #n+1. Again, column #0 always refers to the tree column. Virtual Events The Treeview widget generates the following virtual events. event
description Generated whenever the selection changes. Generated just before settings the focus item to open=True. Generated just after setting the focus item to open=False.
The Treeview.focus() and Treeview.selection() methods can be used to determine the affected item or items. ttk.Treeview class tkinter.ttk.Treeview bbox(item, column=None) Returns the bounding box (relative to the treeview widget’s window) of the specified item in the form (x, y, width, height). If column is specified, returns the bounding box of that cell. If the item is not visible (i.e., if it is a descendant of a closed item or is scrolled offscreen), returns an empty string. get_children(item=None) Returns the list of children belonging to item. If item is not specified, returns root children. set_children(item, *newchildren) Replaces item‘s child with newchildren. Children present in item that are not present in newchildren are detached from the tree. No items in newchildren may be an ancestor of item. Note that not specifying newchildren results in detaching item‘s children. column(column, option=None, **kw) Query or modify the options for the specified column. If kw is not given, returns a dict of the column option values. If option is specified then the value for that option is returned. Otherwise, sets the options to the corresponding values. The valid options/values are: •id Returns the column name. This is a read-only option. •anchor: One of the standard Tk anchor values. Specifies how the text in this column should be aligned with respect to the cell. 24.2. tkinter.ttk — Tk themed widgets
1027
The Python Library Reference, Release 3.2.3
•minwidth: width The minimum width of the column in pixels. The treeview widget will not make the column any smaller than specified by this option when the widget is resized or the user drags a column. •stretch: True/False Specifies whether the column’s width should be adjusted when the widget is resized. •width: width The width of the column in pixels. To configure the tree column, call this with column = “#0” delete(*items) Delete all specified items and all their descendants. The root item may not be deleted. detach(*items) Unlinks all of the specified items from the tree. The items and all of their descendants are still present, and may be reinserted at another point in the tree, but will not be displayed. The root item may not be detached. exists(item) Returns True if the specified item is present in the tree. focus(item=None) If item is specified, sets the focus item to item. Otherwise, returns the current focus item, or ‘’ if there is none. heading(column, option=None, **kw) Query or modify the heading options for the specified column. If kw is not given, returns a dict of the heading option values. If option is specified then the value for that option is returned. Otherwise, sets the options to the corresponding values. The valid options/values are: •text: text The text to display in the column heading. •image: imageName Specifies an image to display to the right of the column heading. •anchor: anchor Specifies how the heading text should be aligned. One of the standard Tk anchor values. •command: callback A callback to be invoked when the heading label is pressed. To configure the tree column heading, call this with column = “#0”. identify(component, x, y) Returns a description of the specified component under the point given by x and y, or the empty string if no such component is present at that position. identify_row(y) Returns the item ID of the item at position y. identify_column(x) Returns the data column identifier of the cell at position x. The tree column has ID #0. identify_region(x, y) Returns one of:
1028
Chapter 24. Graphical User Interfaces with Tk
The Python Library Reference, Release 3.2.3
region heading separator tree cell
meaning Tree heading area. Space between two columns headings. The tree area. A data cell.
Availability: Tk 8.6. identify_element(x, y) Returns the element at position x, y. Availability: Tk 8.6. index(item) Returns the integer index of item within its parent’s list of children. insert(parent, index, iid=None, **kw) Creates a new item and returns the item identifier of the newly created item. parent is the item ID of the parent item, or the empty string to create a new top-level item. index is an integer, or the value “end”, specifying where in the list of parent’s children to insert the new item. If index is less than or equal to zero, the new node is inserted at the beginning; if index is greater than or equal to the current number of children, it is inserted at the end. If iid is specified, it is used as the item identifier; iid must not already exist in the tree. Otherwise, a new unique identifier is generated. See Item Options for the list of available points. item(item, option=None, **kw) Query or modify the options for the specified item. If no options are given, a dict with options/values for the item is returned. If option is specified then the value for that option is returned. Otherwise, sets the options to the corresponding values as given by kw. move(item, parent, index) Moves item to position index in parent‘s list of children. It is illegal to move an item under one of its descendants. If index is less than or equal to zero, item is moved to the beginning; if greater than or equal to the number of children, it is moved to the end. If item was detached it is reattached. next(item) Returns the identifier of item‘s next sibling, or ‘’ if item is the last child of its parent. parent(item) Returns the ID of the parent of item, or ‘’ if item is at the top level of the hierarchy. prev(item) Returns the identifier of item‘s previous sibling, or ‘’ if item is the first child of its parent. reattach(item, parent, index) An alias for Treeview.move(). see(item) Ensure that item is visible. Sets all of item‘s ancestors open option to True, and scrolls the widget if necessary so that item is within the visible portion of the tree. selection(selop=None, items=None) If selop is not specified, returns selected items. Otherwise, it will act according to the following selection methods.
24.2. tkinter.ttk — Tk themed widgets
1029
The Python Library Reference, Release 3.2.3
selection_set(items) items becomes the new selection. selection_add(items) Add items to the selection. selection_remove(items) Remove items from the selection. selection_toggle(items) Toggle the selection state of each item in items. set(item, column=None, value=None) With one argument, returns a dictionary of column/value pairs for the specified item. With two arguments, returns the current value of the specified column. With three arguments, sets the value of given column in given item to the specified value. tag_bind(tagname, sequence=None, callback=None) Bind a callback for the given event sequence to the tag tagname. When an event is delivered to an item, the callbacks for each of the item’s tags option are called. tag_configure(tagname, option=None, **kw) Query or modify the options for the specified tagname. If kw is not given, returns a dict of the option settings for tagname. If option is specified, returns the value for that option for the specified tagname. Otherwise, sets the options to the corresponding values for the given tagname. tag_has(tagname, item=None) If item is specified, returns 1 or 0 depending on whether the specified item has the given tagname. Otherwise, returns a list of all items that have the specified tag. Availability: Tk 8.6 xview(*args) Query or modify horizontal position of the treeview. yview(*args) Query or modify vertical position of the treeview.
24.2.10 Ttk Styling Each widget in ttk is assigned a style, which specifies the set of elements making up the widget and how they are arranged, along with dynamic and default settings for element options. By default the style name is the same as the widget’s class name, but it may be overriden by the widget’s style option. If you don’t know the class name of a widget, use the method Misc.winfo_class() (somewidget.winfo_class()). See Also: Tcl‘2004 conference presentation This document explains how the theme engine works class tkinter.ttk.Style This class is used to manipulate the style database. configure(style, query_opt=None, **kw) Query or set the default value of the specified option(s) in style. Each key in kw is an option and each value is a string identifying the value for that option. For example, to change every default button to be a flat button with some padding and a different background color:
1030
Chapter 24. Graphical User Interfaces with Tk
The Python Library Reference, Release 3.2.3
from tkinter import ttk import tkinter root = tkinter.Tk() ttk.Style().configure("TButton", padding=6, relief="flat", background="#ccc") btn = ttk.Button(text="Sample") btn.pack() root.mainloop() map(style, query_opt=None, **kw) Query or sets dynamic values of the specified option(s) in style. Each key in kw is an option and each value should be a list or a tuple (usually) containing statespecs grouped in tuples, lists, or some other preference. A statespec is a compound of one or more states and then a value. An example may make it more understandable: import tkinter from tkinter import ttk root = tkinter.Tk() style = ttk.Style() style.map("C.TButton", foreground=[(’pressed’, ’red’), (’active’, ’blue’)], background=[(’pressed’, ’!disabled’, ’black’), (’active’, ’white’)] ) colored_btn = ttk.Button(text="Test",).pack() root.mainloop() Note that the order of the (states, value) sequences for an option does matter, if the order is changed to [(’active’, ’blue’), (’pressed’, ’red’)] in the foreground option, for example, the result would be a blue foreground when the widget were in active or pressed states. lookup(style, option, state=None, default=None) Returns the value specified for option in style. If state is specified, it is expected to be a sequence of one or more states. If the default argument is set, it is used as a fallback value in case no specification for option is found. To check what font a Button uses by default: from tkinter import ttk print(ttk.Style().lookup("TButton", "font")) layout(style, layoutspec=None) Define the widget layout for given style. If layoutspec is omitted, return the layout specification for given style.
24.2. tkinter.ttk — Tk themed widgets
1031
The Python Library Reference, Release 3.2.3
layoutspec, if specified, is expected to be a list or some other sequence type (excluding strings), where each item should be a tuple and the first item is the layout name and the second item should have the format described in Layouts. To understand the format, see the following example (it is not intended to do anything useful): from tkinter import ttk import tkinter root = tkinter.Tk() style = ttk.Style() style.layout("TMenubutton", [ ("Menubutton.background", None), ("Menubutton.button", {"children": [("Menubutton.focus", {"children": [("Menubutton.padding", {"children": [("Menubutton.label", {"side": "left", "expand": 1})] })] })] }), ]) mbtn = ttk.Menubutton(text=’Text’) mbtn.pack() root.mainloop() element_create(elementname, etype, *args, **kw) Create a new element in the current theme, of the given etype which is expected to be either “image”, “from” or “vsapi”. The latter is only available in Tk 8.6a for Windows XP and Vista and is not described here. If “image” is used, args should contain the default image name followed by statespec/value pairs (this is the imagespec), and kw may have the following options: •border=padding padding is a list of up to four integers, specifying the left, top, right, and bottom borders, respectively. •height=height Specifies a minimum height for the element. If less than zero, the base image’s height is used as a default. •padding=padding Specifies the element’s interior padding. Defaults to border’s value if not specified. •sticky=spec Specifies how the image is placed within the final parcel. spec contains zero or more characters “n”, “s”, “w”, or “e”. •width=width Specifies a minimum width for the element. If less than zero, the base image’s width is used as a default. If “from” is used as the value of etype, element_create() will clone an existing element. args is expected to contain a themename, from which the element will be cloned, and optionally an element to clone from. If this element to clone from is not specified, an empty element will be used. kw is discarded. element_names() Returns the list of elements defined in the current theme. element_options(elementname) Returns the list of elementname‘s options.
1032
Chapter 24. Graphical User Interfaces with Tk
The Python Library Reference, Release 3.2.3
theme_create(themename, parent=None, settings=None) Create a new theme. It is an error if themename already exists. If parent is specified, the new theme will inherit styles, elements and layouts from the parent theme. If settings are present they are expected to have the same syntax used for theme_settings(). theme_settings(themename, settings) Temporarily sets the current theme to themename, apply specified settings and then restore the previous theme. Each key in settings is a style and each value may contain the keys ‘configure’, ‘map’, ‘layout’ and ‘element create’ and they are expected to have the same format as specified by the methods Style.configure(), Style.map(), Style.layout() and Style.element_create() respectively. As an example, let’s change the Combobox for the default theme a bit: from tkinter import ttk import tkinter root = tkinter.Tk() style = ttk.Style() style.theme_settings("default", { "TCombobox": { "configure": {"padding": 5}, "map": { "background": [("active", "green2"), ("!disabled", "green4")], "fieldbackground": [("!disabled", "green3")], "foreground": [("focus", "OliveDrab1"), ("!disabled", "OliveDrab2")] } } }) combo = ttk.Combobox().pack() root.mainloop() theme_names() Returns a list of all known themes. theme_use(themename=None) If themename is not given, returns the theme in use. Otherwise, sets the current theme to themename, refreshes all widgets and emits a event. Layouts A layout can be just None, if it takes no options, or a dict of options specifying how to arrange the element. The layout mechanism uses a simplified version of the pack geometry manager: given an initial cavity, each element is allocated a parcel. Valid options/values are: • side: whichside Specifies which side of the cavity to place the element; one of top, right, bottom or left. If omitted, the element occupies the entire cavity.
24.2. tkinter.ttk — Tk themed widgets
1033
The Python Library Reference, Release 3.2.3
• sticky: nswe Specifies where the element is placed inside its allocated parcel. • unit: 0 or 1 If set to 1, causes the element and all of its descendants to be treated as a single element for the purposes of Widget.identify() et al. It’s used for things like scrollbar thumbs with grips. • children: [sublayout... ] Specifies a list of elements to place inside the element. Each element is a tuple (or other sequence type) where the first item is the layout name, and the other is a Layout.
24.3 tkinter.tix — Extension widgets for Tk The tkinter.tix (Tk Interface Extension) module provides an additional rich set of widgets. Although the standard Tk library has many useful widgets, they are far from complete. The tkinter.tix library provides most of the commonly needed widgets that are missing from standard Tk: HList, ComboBox, Control (a.k.a. SpinBox) and an assortment of scrollable widgets. tkinter.tix also includes many more widgets that are generally useful in a wide range of applications: NoteBook, FileEntry, PanedWindow, etc; there are more than 40 of them. With all these new widgets, you can introduce new interaction techniques into applications, creating more useful and more intuitive user interfaces. You can design your application by choosing the most appropriate widgets to match the special needs of your application and users. See Also: Tix Homepage The home page for Tix. This includes links to additional documentation and downloads. Tix Man Pages On-line version of the man pages and reference material. Tix Programming Guide On-line version of the programmer’s reference material. Tix Development Applications Tix applications for development of Tix and Tkinter programs. Tide applications work under Tk or Tkinter, and include TixInspect, an inspector to remotely modify and debug Tix/Tk/Tkinter applications.
24.3.1 Using Tix class tkinter.tix.Tk(screenName=None, baseName=None, className=’Tix’) Toplevel widget of Tix which represents mostly the main window of an application. It has an associated Tcl interpreter. Classes in the tkinter.tix module subclasses the classes in the tkinter. The former imports the latter, so to use tkinter.tix with Tkinter, all you need to do is to import one module. In general, you can just import tkinter.tix, and replace the toplevel call to tkinter.Tk with tix.Tk: from tkinter import tix from tkinter.constants import * root = tix.Tk() To use tkinter.tix, you must have the Tix widgets installed, usually alongside your installation of the Tk widgets. To test your installation, try the following: from tkinter import tix root = tix.Tk() root.tk.eval(’package require Tix’) If this fails, you have a Tk installation problem which must be resolved before proceeding. Use the environment variable TIX_LIBRARY to point to the installed Tix library directory, and make sure you have the dynamic object library (tix8183.dll or libtix8183.so) in the same directory that contains your Tk dynamic object library
1034
Chapter 24. Graphical User Interfaces with Tk
The Python Library Reference, Release 3.2.3
(tk8183.dll or libtk8183.so). The directory with the dynamic object library should also have a file called pkgIndex.tcl (case sensitive), which contains the line: package ifneeded Tix 8.1 [list load "[file join $dir tix8183.dll]" Tix]
24.3.2 Tix Widgets Tix introduces over 40 widget classes to the tkinter repertoire. Basic Widgets class tkinter.tix.Balloon A Balloon that pops up over a widget to provide help. When the user moves the cursor inside a widget to which a Balloon widget has been bound, a small pop-up window with a descriptive message will be shown on the screen. class tkinter.tix.ButtonBox The ButtonBox widget creates a box of buttons, such as is commonly used for Ok Cancel. class tkinter.tix.ComboBox The ComboBox widget is similar to the combo box control in MS Windows. The user can select a choice by either typing in the entry subwidget or selecting from the listbox subwidget. class tkinter.tix.Control The Control widget is also known as the SpinBox widget. The user can adjust the value by pressing the two arrow buttons or by entering the value directly into the entry. The new value will be checked against the user-defined upper and lower limits. class tkinter.tix.LabelEntry The LabelEntry widget packages an entry widget and a label into one mega widget. It can be used be used to simplify the creation of “entry-form” type of interface. class tkinter.tix.LabelFrame The LabelFrame widget packages a frame widget and a label into one mega widget. To create widgets inside a LabelFrame widget, one creates the new widgets relative to the frame subwidget and manage them inside the frame subwidget. class tkinter.tix.Meter The Meter widget can be used to show the progress of a background job which may take a long time to execute. class tkinter.tix.OptionMenu The OptionMenu creates a menu button of options. class tkinter.tix.PopupMenu The PopupMenu widget can be used as a replacement of the tk_popup command. The advantage of the Tix PopupMenu widget is it requires less application code to manipulate. class tkinter.tix.Select The Select widget is a container of button subwidgets. It can be used to provide radio-box or check-box style of selection options for the user. class tkinter.tix.StdButtonBox The StdButtonBox widget is a group of standard buttons for Motif-like dialog boxes.
24.3. tkinter.tix — Extension widgets for Tk
1035
The Python Library Reference, Release 3.2.3
File Selectors class tkinter.tix.DirList The DirList widget displays a list view of a directory, its previous directories and its sub-directories. The user can choose one of the directories displayed in the list or change to another directory. class tkinter.tix.DirTree The DirTree widget displays a tree view of a directory, its previous directories and its sub-directories. The user can choose one of the directories displayed in the list or change to another directory. class tkinter.tix.DirSelectDialog The DirSelectDialog widget presents the directories in the file system in a dialog window. The user can use this dialog window to navigate through the file system to select the desired directory. class tkinter.tix.DirSelectBox The DirSelectBox is similar to the standard Motif(TM) directory-selection box. It is generally used for the user to choose a directory. DirSelectBox stores the directories mostly recently selected into a ComboBox widget so that they can be quickly selected again. class tkinter.tix.ExFileSelectBox The ExFileSelectBox widget is usually embedded in a tixExFileSelectDialog widget. It provides an convenient method for the user to select files. The style of the ExFileSelectBox widget is very similar to the standard file dialog on MS Windows 3.1. class tkinter.tix.FileSelectBox The FileSelectBox is similar to the standard Motif(TM) file-selection box. It is generally used for the user to choose a file. FileSelectBox stores the files mostly recently selected into a ComboBox widget so that they can be quickly selected again. class tkinter.tix.FileEntry The FileEntry widget can be used to input a filename. The user can type in the filename manually. Alternatively, the user can press the button widget that sits next to the entry, which will bring up a file selection dialog. Hierarchical ListBox class tkinter.tix.HList The HList widget can be used to display any data that have a hierarchical structure, for example, file system directory trees. The list entries are indented and connected by branch lines according to their places in the hierarchy. class tkinter.tix.CheckList The CheckList widget displays a list of items to be selected by the user. CheckList acts similarly to the Tk checkbutton or radiobutton widgets, except it is capable of handling many more items than checkbuttons or radiobuttons. class tkinter.tix.Tree The Tree widget can be used to display hierarchical data in a tree form. The user can adjust the view of the tree by opening or closing parts of the tree. Tabular ListBox class tkinter.tix.TList The TList widget can be used to display data in a tabular format. The list entries of a TList widget are similar to the entries in the Tk listbox widget. The main differences are (1) the TList widget can display the list entries in a two dimensional format and (2) you can use graphical images as well as multiple colors and fonts for the list entries.
1036
Chapter 24. Graphical User Interfaces with Tk
The Python Library Reference, Release 3.2.3
Manager Widgets class tkinter.tix.PanedWindow The PanedWindow widget allows the user to interactively manipulate the sizes of several panes. The panes can be arranged either vertically or horizontally. The user changes the sizes of the panes by dragging the resize handle between two panes. class tkinter.tix.ListNoteBook The ListNoteBook widget is very similar to the TixNoteBook widget: it can be used to display many windows in a limited space using a notebook metaphor. The notebook is divided into a stack of pages (windows). At one time only one of these pages can be shown. The user can navigate through these pages by choosing the name of the desired page in the hlist subwidget. class tkinter.tix.NoteBook The NoteBook widget can be used to display many windows in a limited space using a notebook metaphor. The notebook is divided into a stack of pages. At one time only one of these pages can be shown. The user can navigate through these pages by choosing the visual “tabs” at the top of the NoteBook widget. Image Types The tkinter.tix module adds: • pixmap capabilities to all tkinter.tix and tkinter widgets to create color images from XPM files. • Compound image types can be used to create images that consists of multiple horizontal lines; each line is composed of a series of items (texts, bitmaps, images or spaces) arranged from left to right. For example, a compound image can be used to display a bitmap and a text string simultaneously in a Tk Button widget. Miscellaneous Widgets class tkinter.tix.InputOnly The InputOnly widgets are to accept inputs from the user, which can be done with the bind command (Unix only). Form Geometry Manager In addition, tkinter.tix augments tkinter by providing: class tkinter.tix.Form The Form geometry manager based on attachment rules for all Tk widgets.
24.3.3 Tix Commands class tkinter.tix.tixCommand The tix commands provide access to miscellaneous elements of Tix‘s internal state and the Tix application context. Most of the information manipulated by these methods pertains to the application as a whole, or to a screen or display, rather than to a particular window. To view the current settings, the common usage is: from tkinter import tix root = tix.Tk() print(root.tix_configure())
24.3. tkinter.tix — Extension widgets for Tk
1037
The Python Library Reference, Release 3.2.3
tixCommand.tix_configure([cnf ], **kw) Query or modify the configuration options of the Tix application context. If no option is specified, returns a dictionary all of the available options. If option is specified with no value, then the method returns a list describing the one named option (this list will be identical to the corresponding sublist of the value returned if no option is specified). If one or more option-value pairs are specified, then the method modifies the given option(s) to have the given value(s); in this case the method returns an empty string. Option may be any of the configuration options. tixCommand.tix_cget(option) Returns the current value of the configuration option given by option. Option may be any of the configuration options. tixCommand.tix_getbitmap(name) Locates a bitmap file of the name name.xpm or name in one of the bitmap directories (see the tix_addbitmapdir() method). By using tix_getbitmap(), you can avoid hard coding the pathnames of the bitmap files in your application. When successful, it returns the complete pathname of the bitmap file, prefixed with the character @. The returned value can be used to configure the bitmap option of the Tk and Tix widgets. tixCommand.tix_addbitmapdir(directory) Tix maintains a list of directories under which the tix_getimage() and tix_getbitmap() methods will search for image files. The standard bitmap directory is $TIX_LIBRARY/bitmaps. The tix_addbitmapdir() method adds directory into this list. By using this method, the image files of an applications can also be located using the tix_getimage() or tix_getbitmap() method. tixCommand.tix_filedialog([dlgclass ]) Returns the file selection dialog that may be shared among different calls from this application. This method will create a file selection dialog widget when it is called the first time. This dialog will be returned by all subsequent calls to tix_filedialog(). An optional dlgclass parameter can be passed as a string to specified what type of file selection dialog widget is desired. Possible options are tix, FileSelectDialog or tixExFileSelectDialog. tixCommand.tix_getimage(self, name) Locates an image file of the name name.xpm, name.xbm or name.ppm in one of the bitmap directories (see the tix_addbitmapdir() method above). If more than one file with the same name (but different extensions) exist, then the image type is chosen according to the depth of the X display: xbm images are chosen on monochrome displays and color images are chosen on color displays. By using tix_getimage(), you can avoid hard coding the pathnames of the image files in your application. When successful, this method returns the name of the newly created image, which can be used to configure the image option of the Tk and Tix widgets. tixCommand.tix_option_get(name) Gets the options maintained by the Tix scheme mechanism. tixCommand.tix_resetoptions(newScheme, newFontSet[, newScmPrio ]) Resets the scheme and fontset of the Tix application to newScheme and newFontSet, respectively. This affects only those widgets created after this call. Therefore, it is best to call the resetoptions method before the creation of any widgets in a Tix application. The optional parameter newScmPrio can be given to reset the priority level of the Tk options set by the Tix schemes. Because of the way Tk handles the X option database, after Tix has been has imported and inited, it is not possible to reset the color schemes and font sets using the tix_config() method. Instead, the tix_resetoptions() method must be used.
1038
Chapter 24. Graphical User Interfaces with Tk
The Python Library Reference, Release 3.2.3
24.4 tkinter.scrolledtext — Scrolled Text Widget Platforms: Tk The tkinter.scrolledtext module provides a class of the same name which implements a basic text widget which has a vertical scroll bar configured to do the “right thing.” Using the ScrolledText class is a lot easier than setting up a text widget and scroll bar directly. The constructor is the same as that of the tkinter.Text class. The text widget and scrollbar are packed together in a Frame, and the methods of the Grid and Pack geometry managers are acquired from the Frame object. This allows the ScrolledText widget to be used directly to achieve most normal geometry management behavior. Should more specific control be necessary, the following attributes are available: ScrolledText.frame The frame which surrounds the text and scroll bar widgets. ScrolledText.vbar The scroll bar widget.
24.5 IDLE IDLE is the Python IDE built with the tkinter GUI toolkit. IDLE has the following features: • coded in 100% pure Python, using the tkinter GUI toolkit • cross-platform: works on Windows and Unix • multi-window text editor with multiple undo, Python colorizing and many other features, e.g. smart indent and call tips • Python shell window (a.k.a. interactive interpreter) • debugger (not complete, but you can set breakpoints, view and step)
24.5.1 Menus File menu New window create a new editing window Open... open an existing file Open module... open an existing module (searches sys.path) Class browser show classes and methods in current file Path browser show sys.path directories, modules, classes and methods Save save current window to the associated file (unsaved windows have a * before and after the window title) Save As... save current window to new file, which becomes the associated file Save Copy As... save current window to different file without changing the associated file Close close current window (asks to save if unsaved) Exit close all windows and quit IDLE (asks to save if unsaved)
24.4. tkinter.scrolledtext — Scrolled Text Widget
1039
The Python Library Reference, Release 3.2.3
Edit menu Undo Undo last change to current window (max 1000 changes) Redo Redo last undone change to current window Cut Copy selection into system-wide clipboard; then delete selection Copy Copy selection into system-wide clipboard Paste Insert system-wide clipboard into window Select All Select the entire contents of the edit buffer Find... Open a search dialog box with many options Find again Repeat last search Find selection Search for the string in the selection Find in Files... Open a search dialog box for searching files Replace... Open a search-and-replace dialog box Go to line Ask for a line number and show that line Indent region Shift selected lines right 4 spaces Dedent region Shift selected lines left 4 spaces Comment out region Insert ## in front of selected lines Uncomment region Remove leading # or ## from selected lines Tabify region Turns leading stretches of spaces into tabs Untabify region Turn all tabs into the right number of spaces Expand word Expand the word you have typed to match another word in the same buffer; repeat to get a different expansion Format Paragraph Reformat the current blank-line-separated paragraph Import module Import or reload the current module Run script Execute the current file in the __main__ namespace Windows menu Zoom Height toggles the window between normal size (24x80) and maximum height. The rest of this menu lists the names of all open windows; select one to bring it to the foreground (deiconifying it if necessary). Debug menu (in the Python Shell window only) Go to file/line look around the insert point for a filename and linenumber, open the file, and show the line. Open stack viewer show the stack traceback of the last exception Debugger toggle Run commands in the shell under the debugger JIT Stack viewer toggle Open stack viewer on traceback
1040
Chapter 24. Graphical User Interfaces with Tk
The Python Library Reference, Release 3.2.3
24.5.2 Basic editing and navigation • Backspace deletes to the left; Del deletes to the right • Arrow keys and Page Up/Page Down to move around • Home/End go to begin/end of line • C-Home/C-End go to begin/end of file • Some Emacs bindings may also work, including C-B, C-P, C-A, C-E, C-D, C-L Automatic indentation After a block-opening statement, the next line is indented by 4 spaces (in the Python Shell window by one tab). After certain keywords (break, return etc.) the next line is dedented. In leading indentation, Backspace deletes up to 4 spaces if they are there. Tab inserts 1-4 spaces (in the Python Shell window one tab). See also the indent/dedent region commands in the edit menu. Python Shell window • C-C interrupts executing command • C-D sends end-of-file; closes window if typed at a >>> prompt • Alt-p retrieves previous command matching what you have typed • Alt-n retrieves next • Return while on any previous command retrieves that command • Alt-/ (Expand word) is also useful here
24.5.3 Syntax colors The coloring is applied in a background “thread,” so you may occasionally see uncolorized text. To change the color scheme, edit the [Colors] section in config.txt. Python syntax colors: Keywords orange Strings green Comments red Definitions blue Shell colors: Console output brown stdout blue stderr dark green stdin black
24.5. IDLE
1041
The Python Library Reference, Release 3.2.3
24.5.4 Startup Upon startup with the -s option, IDLE will execute the file referenced by the environment variables IDLESTARTUP or PYTHONSTARTUP. Idle first checks for IDLESTARTUP; if IDLESTARTUP is present the file referenced is run. If IDLESTARTUP is not present, Idle checks for PYTHONSTARTUP. Files referenced by these environment variables are convenient places to store functions that are used frequently from the Idle shell, or for executing import statements to import common modules. In addition, Tk also loads a startup file if it is present. Note that the Tk file is loaded unconditionally. This additional file is .Idle.py and is looked for in the user’s home directory. Statements in this file will be executed in the Tk namespace, so this file is not useful for importing functions to be used from Idle’s Python shell. Command line usage idle.py [-c command] [-d] [-e] [-s] [-t title] [arg] ... -c command -d -e -s -t title
run this command enable debugger edit mode; arguments are files to be edited run $IDLESTARTUP or $PYTHONSTARTUP first set title of shell window
If there are arguments: 1. If -e is used, arguments are files opened for editing and sys.argv reflects the arguments passed to IDLE itself. 2. Otherwise, if -c is used, all arguments are placed in sys.argv[1:...], with sys.argv[0] set to ’-c’. 3. Otherwise, if neither -e nor -c is used, the first argument is a script which is executed with the remaining arguments in sys.argv[1:...] and sys.argv[0] set to the script name. If the script name is ‘-‘, no script is executed but an interactive Python session is started; the arguments are still available in sys.argv.
24.6 Other Graphical User Interface Packages Major cross-platform (Windows, Mac OS X, Unix-like) GUI toolkits are available for Python: See Also: PyGObject provides introspection bindings for C libraries using GObject. One of these libraries is the GTK+ 3 widget set. GTK+ comes with many more widgets than Tkinter provides. An online Python GTK+ 3 Tutorial is available. PyGTK provides bindings for an older version of the library, GTK+ 2. It provides an object oriented interface that is slightly higher level than the C one. There are also bindings to GNOME. One well known PyGTK application is PythonCAD. An online tutorial is available. PyQt PyQt is a sip-wrapped binding to the Qt toolkit. Qt is an extensive C++ GUI application development framework that is available for Unix, Windows and Mac OS X. sip is a tool for generating bindings for C++ libraries as Python classes, and is specifically designed for Python. The PyQt3 bindings have a book, GUI Programming with Python: QT Edition by Boudewijn Rempt. The PyQt4 bindings also have a book, Rapid GUI Programming with Python and Qt, by Mark Summerfield. PySide is a newer binding to the Qt toolkit, provided by Nokia. Compared to PyQt, its licensing scheme is friendlier to non-open source applications.
1042
Chapter 24. Graphical User Interfaces with Tk
The Python Library Reference, Release 3.2.3
wxPython wxPython is a cross-platform GUI toolkit for Python that is built around the popular wxWidgets (formerly wxWindows) C++ toolkit. It provides a native look and feel for applications on Windows, Mac OS X, and Unix systems by using each platform’s native widgets where ever possible, (GTK+ on Unix-like systems). In addition to an extensive set of widgets, wxPython provides classes for online documentation and context sensitive help, printing, HTML viewing, low-level device context drawing, drag and drop, system clipboard access, an XMLbased resource format and more, including an ever growing library of user-contributed modules. wxPython has a book, wxPython in Action, by Noel Rappin and Robin Dunn. PyGTK, PyQt, and wxPython, all have a modern look and feel and more widgets than Tkinter. In addition, there are many other GUI toolkits for Python, both cross-platform, and platform-specific. See the GUI Programming page in the Python Wiki for a much more complete list, and also for links to documents where the different GUI toolkits are compared.
24.6. Other Graphical User Interface Packages
1043
The Python Library Reference, Release 3.2.3
1044
Chapter 24. Graphical User Interfaces with Tk
CHAPTER
TWENTYFIVE
DEVELOPMENT TOOLS The modules described in this chapter help you write software. For example, the pydoc module takes a module and generates documentation based on the module’s contents. The doctest and unittest modules contains frameworks for writing unit tests that automatically exercise code and verify that the expected output is produced. 2to3 can translate Python 2.x source code into valid Python 3.x code. The list of modules described in this chapter is:
25.1 pydoc — Documentation generator and online help system Source code: Lib/pydoc.py
The pydoc module automatically generates documentation from Python modules. The documentation can be presented as pages of text on the console, served to a Web browser, or saved to HTML files. The built-in function help() invokes the online help system in the interactive interpreter, which uses pydoc to generate its documentation as text on the console. The same text documentation can also be viewed from outside the Python interpreter by running pydoc as a script at the operating system’s command prompt. For example, running pydoc sys at a shell prompt will display documentation on the sys module, in a style similar to the manual pages shown by the Unix man command. The argument to pydoc can be the name of a function, module, or package, or a dotted reference to a class, method, or function within a module or module in a package. If the argument to pydoc looks like a path (that is, it contains the path separator for your operating system, such as a slash in Unix), and refers to an existing Python source file, then documentation is produced for that file. Note: In order to find objects and their documentation, pydoc imports the module(s) to be documented. Therefore, any code on module level will be executed on that occasion. Use an if __name__ == ’__main__’: guard to only execute code when a file is invoked as a script and not just imported. Specifying a -w flag before the argument will cause HTML documentation to be written out to a file in the current directory, instead of displaying text on the console. Specifying a -k flag before the argument will search the synopsis lines of all available modules for the keyword given as the argument, again in a manner similar to the Unix man command. The synopsis line of a module is the first line of its documentation string. You can also use pydoc to start an HTTP server on the local machine that will serve documentation to visiting Web browsers. pydoc -p 1234 will start a HTTP server on port 1234, allowing you to browse the documentation
1045
The Python Library Reference, Release 3.2.3
at http://localhost:1234/ in your preferred Web browser. Specifying 0 as the port number will select an arbitrary unused port. pydoc -g will start the server and additionally bring up a small tkinter-based graphical interface to help you search for documentation pages. The -g option is deprecated, since the server can now be controlled directly from HTTP clients. pydoc -b will start the server and additionally open a web browser to a module index page. Each served page has a navigation bar at the top where you can Get help on an individual item, Search all modules with a keyword in their synopsis line, and go to the Module index, Topics and Keywords pages. When pydoc generates documentation, it uses the current environment and path to locate modules. Thus, invoking pydoc spam documents precisely the version of the module you would get if you started the Python interpreter and typed import spam. Module docs for core modules are assumed to reside in http://docs.python.org/X.Y/library/ where X and Y are the major and minor version numbers of the Python interpreter. This can be overridden by setting the PYTHONDOCS environment variable to a different URL or to a local directory containing the Library Reference Manual pages. Changed in version 3.2: Added the -b option, deprecated the -g option.
25.2 doctest — Test interactive Python examples The doctest module searches for pieces of text that look like interactive Python sessions, and then executes those sessions to verify that they work exactly as shown. There are several common ways to use doctest: • To check that a module’s docstrings are up-to-date by verifying that all interactive examples still work as documented. • To perform regression testing by verifying that interactive examples from a test file or a test object work as expected. • To write tutorial documentation for a package, liberally illustrated with input-output examples. Depending on whether the examples or the expository text are emphasized, this has the flavor of “literate testing” or “executable documentation”. Here’s a complete but small example module: """ This is the "example" module. The example module supplies one function, factorial().
For example,
>>> factorial(5) 120 """ def factorial(n): """Return the factorial of n, an exact integer >= 0. >>> [factorial(n) for n in range(6)] [1, 1, 2, 6, 24, 120] >>> factorial(30) 265252859812191058636308480000000 >>> factorial(-1) Traceback (most recent call last): ... ValueError: n must be >= 0 1046
Chapter 25. Development Tools
The Python Library Reference, Release 3.2.3
Factorials of floats are OK, but the float must be an exact integer: >>> factorial(30.1) Traceback (most recent call last): ... ValueError: n must be exact integer >>> factorial(30.0) 265252859812191058636308480000000 It must also not be ridiculously large: >>> factorial(1e100) Traceback (most recent call last): ... OverflowError: n too large """ import math if not n >= 0: raise ValueError("n must be >= 0") if math.floor(n) != n: raise ValueError("n must be exact integer") if n+1 == n: # catch a value like 1e300 raise OverflowError("n too large") result = 1 factor = 2 while factor >> from example import factorial Now use it: >>> factorial(6) 120 Running doctest.testfile("example.txt") then finds the error in this documentation: File "./example.txt", line 14, in example.txt Failed example: factorial(6) Expected: 120 Got: 720 As with testmod(), testfile() won’t display anything unless an example fails. If an example does fail, then the failing example(s) and the cause(s) of the failure(s) are printed to stdout, using the same format as testmod(). By default, testfile() looks for files in the calling module’s directory. See section Basic API for a description of the optional arguments that can be used to tell it to look for files in other locations. Like testmod(), testfile()‘s verbosity can be set with the -v command-line switch or with the optional keyword argument verbose. There is also a command line shortcut for running testfile(). You can instruct the Python interpreter to run the doctest module directly from the standard library and pass the file name(s) on the command line: python -m doctest -v example.txt Because the file name does not end with .py, doctest infers that it must be run with testfile(), not testmod(). For more information on testfile(), see section Basic API.
25.2. doctest — Test interactive Python examples
1049
The Python Library Reference, Release 3.2.3
25.2.3 How It Works This section examines in detail how doctest works: which docstrings it looks at, how it finds interactive examples, what execution context it uses, how it handles exceptions, and how option flags can be used to control its behavior. This is the information that you need to know to write doctest examples; for information about actually running doctest on these examples, see the following sections. Which Docstrings Are Examined? The module docstring, and all function, class and method docstrings are searched. Objects imported into the module are not searched. In addition, if M.__test__ exists and “is true”, it must be a dict, and each entry maps a (string) name to a function object, class object, or string. Function and class object docstrings found from M.__test__ are searched, and strings are treated as if they were docstrings. In output, a key K in M.__test__ appears with name .__test__.K Any classes found are recursively searched similarly, to test docstrings in their contained methods and nested classes. How are Docstring Examples Recognized? In most cases a copy-and-paste of an interactive console session works fine, but doctest isn’t trying to do an exact emulation of any specific Python shell. >>> # comments are ignored >>> x = 12 >>> x 12 >>> if x == 13: ... print("yes") ... else: ... print("no") ... print("NO") ... print("NO!!!") ... no NO NO!!! >>> Any expected output must immediately follow the final ’>>> ’ or ’... expected output (if any) extends to the next ’>>> ’ or all-whitespace line.
’ line containing the code, and the
The fine print: • Expected output cannot contain an all-whitespace line, since such a line is taken to signal the end of expected output. If expected output does contain a blank line, put in your doctest example each place a blank line is expected. • All hard tab characters are expanded to spaces, using 8-column tab stops. Tabs in output generated by the tested code are not modified. Because any hard tabs in the sample output are expanded, this means that if the code output includes hard tabs, the only way the doctest can pass is if the NORMALIZE_WHITESPACE option or directive is in effect. Alternatively, the test can be rewritten to capture the output and compare it to an expected value as part of the test. This handling of tabs in the source was arrived at through trial and error, and has proven to be the least error prone way of handling them. It is possible to use a different algorithm for handling tabs by writing a custom DocTestParser class. 1050
Chapter 25. Development Tools
The Python Library Reference, Release 3.2.3
• Output to stdout is captured, but not output to stderr (exception tracebacks are captured via a different means). • If you continue a line via backslashing in an interactive session, or for any other reason use a backslash, you should use a raw docstring, which will preserve your backslashes exactly as you type them: >>> def f(x): ... r’’’Backslashes in a raw docstring: m\n’’’ >>> print(f.__doc__) Backslashes in a raw docstring: m\n Otherwise, the backslash will be interpreted as part of the string. For example, the “\” above would be interpreted as a newline character. Alternatively, you can double each backslash in the doctest version (and not use a raw string): >>> def f(x): ... ’’’Backslashes in a raw docstring: m\\n’’’ >>> print(f.__doc__) Backslashes in a raw docstring: m\n • The starting column doesn’t matter: >>> assert "Easy!" >>> import math >>> math.floor(1.9) 1 and as many leading whitespace characters are stripped from the expected output as appeared in the initial ’>>> ’ line that started the example. What’s the Execution Context? By default, each time doctest finds a docstring to test, it uses a shallow copy of M‘s globals, so that running tests doesn’t change the module’s real globals, and so that one test in M can’t leave behind crumbs that accidentally allow another test to work. This means examples can freely use any names defined at top-level in M, and names defined earlier in the docstring being run. Examples cannot see names defined in other docstrings. You can force use of your own dict as the execution context by passing globs=your_dict to testmod() or testfile() instead. What About Exceptions? No problem, provided that the traceback is the only output produced by the example: just paste in the traceback. 1 Since tracebacks contain details that are likely to change rapidly (for example, exact file paths and line numbers), this is one case where doctest works hard to be flexible in what it accepts. Simple example: >>> [1, 2, 3].remove(42) Traceback (most recent call last): File "", line 1, in ? ValueError: list.remove(x): x not in list That doctest succeeds if ValueError is raised, with the list.remove(x): shown.
x not in list detail as
1
Examples containing both expected output and an exception are not supported. Trying to guess where one ends and the other begins is too error-prone, and that also makes for a confusing test.
25.2. doctest — Test interactive Python examples
1051
The Python Library Reference, Release 3.2.3
The expected output for an exception must start with a traceback header, which may be either of the following two lines, indented the same as the first line of the example: Traceback (most recent call last): Traceback (innermost last): The traceback header is followed by an optional traceback stack, whose contents are ignored by doctest. The traceback stack is typically omitted, or copied verbatim from an interactive session. The traceback stack is followed by the most interesting part: the line(s) containing the exception type and detail. This is usually the last line of a traceback, but can extend across multiple lines if the exception has a multi-line detail: >>> raise ValueError(’multi\n line\ndetail’) Traceback (most recent call last): File "", line 1, in ? ValueError: multi line detail The last three lines (starting with ValueError) are compared against the exception’s type and detail, and the rest are ignored. Best practice is to omit the traceback stack, unless it adds significant documentation value to the example. So the last example is probably better as: >>> raise ValueError(’multi\n line\ndetail’) Traceback (most recent call last): ... ValueError: multi line detail Note that tracebacks are treated very specially. In particular, in the rewritten example, the use of ... is independent of doctest’s ELLIPSIS option. The ellipsis in that example could be left out, or could just as well be three (or three hundred) commas or digits, or an indented transcript of a Monty Python skit. Some details you should read once, but won’t need to remember: • Doctest can’t guess whether your expected output came from an exception traceback or from ordinary printing. So, e.g., an example that expects ValueError: 42 is prime will pass whether ValueError is actually raised or if the example merely prints that traceback text. In practice, ordinary output rarely begins with a traceback header line, so this doesn’t create real problems. • Each line of the traceback stack (if present) must be indented further than the first line of the example, or start with a non-alphanumeric character. The first line following the traceback header indented the same and starting with an alphanumeric is taken to be the start of the exception detail. Of course this does the right thing for genuine tracebacks. • When the IGNORE_EXCEPTION_DETAIL doctest option is specified, everything following the leftmost colon and any module information in the exception name is ignored. • The interactive shell omits the traceback header line for some SyntaxErrors. But doctest uses the traceback header line to distinguish exceptions from non-exceptions. So in the rare case where you need to test a SyntaxError that omits the traceback header, you will need to manually add the traceback header line to your test example. • For some SyntaxErrors, Python displays the character position of the syntax error, using a ^ marker: >>> 1 1 File "", line 1 1 1
1052
Chapter 25. Development Tools
The Python Library Reference, Release 3.2.3
^ SyntaxError: invalid syntax Since the lines showing the position of the error come before the exception type and detail, they are not checked by doctest. For example, the following test would pass, even though it puts the ^ marker in the wrong location: >>> 1 1 Traceback (most recent call last): File "", line 1 1 1 ^ SyntaxError: invalid syntax Option Flags and Directives A number of option flags control various aspects of doctest’s behavior. Symbolic names for the flags are supplied as module constants, which can be or’ed together and passed to various functions. The names can also be used in doctest directives (see below). The first group of options define test semantics, controlling aspects of how doctest decides whether actual output matches an example’s expected output: doctest.DONT_ACCEPT_TRUE_FOR_1 By default, if an expected output block contains just 1, an actual output block containing just 1 or just True is considered to be a match, and similarly for 0 versus False. When DONT_ACCEPT_TRUE_FOR_1 is specified, neither substitution is allowed. The default behavior caters to that Python changed the return type of many functions from integer to boolean; doctests expecting “little integer” output still work in these cases. This option will probably go away, but not for several years. doctest.DONT_ACCEPT_BLANKLINE By default, if an expected output block contains a line containing only the string , then that line will match a blank line in the actual output. Because a genuinely blank line delimits the expected output, this is the only way to communicate that a blank line is expected. When DONT_ACCEPT_BLANKLINE is specified, this substitution is not allowed. doctest.NORMALIZE_WHITESPACE When specified, all sequences of whitespace (blanks and newlines) are treated as equal. Any sequence of whitespace within the expected output will match any sequence of whitespace within the actual output. By default, whitespace must match exactly. NORMALIZE_WHITESPACE is especially useful when a line of expected output is very long, and you want to wrap it across multiple lines in your source. doctest.ELLIPSIS When specified, an ellipsis marker (...) in the expected output can match any substring in the actual output. This includes substrings that span line boundaries, and empty substrings, so it’s best to keep usage of this simple. Complicated uses can lead to the same kinds of “oops, it matched too much!” surprises that .* is prone to in regular expressions. doctest.IGNORE_EXCEPTION_DETAIL When specified, an example that expects an exception passes if an exception of the expected type is raised, even if the exception detail does not match. For example, an example expecting ValueError: 42 will pass if the actual exception raised is ValueError: 3*14, but will fail, e.g., if TypeError is raised. It will also ignore the module name used in Python 3 doctest reports. Hence both these variations will work regardless of whether the test is run under Python 2.7 or Python 3.2 (or later versions): >>> raise CustomError(’message’) Traceback (most recent call last): CustomError: message 25.2. doctest — Test interactive Python examples
1053
The Python Library Reference, Release 3.2.3
>>> raise CustomError(’message’) Traceback (most recent call last): my_module.CustomError: message Note that ELLIPSIS can also be used to ignore the details of the exception message, but such a test may still fail based on whether or not the module details are printed as part of the exception name. Using IGNORE_EXCEPTION_DETAIL and the details from Python 2.3 is also the only clear way to write a doctest that doesn’t care about the exception detail yet continues to pass under Python 2.3 or earlier (those releases do not support doctest directives and ignore them as irrelevant comments). For example, >>> (1, 2)[3] = ’moo’ Traceback (most recent call last): File "", line 1, in ? TypeError: object doesn’t support item assignment passes under Python 2.3 and later Python versions, even though the detail changed in Python 2.4 to say “does not” instead of “doesn’t”. Changed in version 3.2: IGNORE_EXCEPTION_DETAIL now also ignores any information relating to the module containing the exception under test. doctest.SKIP When specified, do not run the example at all. This can be useful in contexts where doctest examples serve as both documentation and test cases, and an example should be included for documentation purposes, but should not be checked. E.g., the example’s output might be random; or the example might depend on resources which would be unavailable to the test driver. The SKIP flag can also be used for temporarily “commenting out” examples. doctest.COMPARISON_FLAGS A bitmask or’ing together all the comparison flags above. The second group of options controls how test failures are reported: doctest.REPORT_UDIFF When specified, failures that involve multi-line expected and actual outputs are displayed using a unified diff. doctest.REPORT_CDIFF When specified, failures that involve multi-line expected and actual outputs will be displayed using a context diff. doctest.REPORT_NDIFF When specified, differences are computed by difflib.Differ, using the same algorithm as the popular ndiff.py utility. This is the only method that marks differences within lines as well as across lines. For example, if a line of expected output contains digit 1 where actual output contains letter l, a line is inserted with a caret marking the mismatching column positions. doctest.REPORT_ONLY_FIRST_FAILURE When specified, display the first failing example in each doctest, but suppress output for all remaining examples. This will prevent doctest from reporting correct examples that break because of earlier failures; but it might also hide incorrect examples that fail independently of the first failure. When REPORT_ONLY_FIRST_FAILURE is specified, the remaining examples are still run, and still count towards the total number of failures reported; only the output is suppressed. doctest.REPORTING_FLAGS A bitmask or’ing together all the reporting flags above. “Doctest directives” may be used to modify the option flags for individual examples. Doctest directives are expressed as a special Python comment following an example’s source code:
Whitespace is not allowed between the + or - and the directive option name. The directive option name can be any of the option flag names explained above. An example’s doctest directives modify doctest’s behavior for that single example. Use + to enable the named behavior, or - to disable it. For example, this test passes: >>> print(list(range(20))) [0, 1, 2, 3, 4, 5, 6, 7, 8, 9, 10, 11, 12, 13, 14, 15, 16, 17, 18, 19] Without the directive it would fail, both because the actual output doesn’t have two blanks before the single-digit list elements, and because the actual output is on a single line. This test also passes, and also requires a directive to do so: >>> print(list(range(20))) [0, 1, ..., 18, 19] Multiple directives can be used on a single physical line, separated by commas: >>> print(list(range(20))) [0, 1, ..., 18, 19] If multiple directive comments are used for a single example, then they are combined: >>> print(list(range(20))) ... [0, 1, ..., 18, 19] As the previous example shows, you can add ... lines to your example containing only directives. This can be useful when an example is too long for a directive to comfortably fit on the same line: >>> print(list(range(5)) + list(range(10, 20)) + list(range(30, 40))) ... [0, ..., 4, 10, ..., 19, 30, ..., 39] Note that since all options are disabled by default, and directives apply only to the example they appear in, enabling options (via + in a directive) is usually the only meaningful choice. However, option flags can also be passed to functions that run doctests, establishing different defaults. In such cases, disabling an option via - in a directive can be useful. There’s also a way to register new option flag names, although this isn’t useful unless you intend to extend doctest internals via subclassing: doctest.register_optionflag(name) Create a new option flag with a given name, and return the new flag’s integer value. register_optionflag() can be used when subclassing OutputChecker or DocTestRunner to create new options that are supported by your subclasses. register_optionflag() should always be called using the following idiom: MY_FLAG = register_optionflag(’MY_FLAG’)
25.2. doctest — Test interactive Python examples
1055
The Python Library Reference, Release 3.2.3
Warnings doctest is serious about requiring exact matches in expected output. If even a single character doesn’t match, the test fails. This will probably surprise you a few times, as you learn exactly what Python does and doesn’t guarantee about output. For example, when printing a dict, Python doesn’t guarantee that the key-value pairs will be printed in any particular order, so a test like >>> foo() {"Hermione": "hippogryph", "Harry": "broomstick"} is vulnerable! One workaround is to do >>> foo() == {"Hermione": "hippogryph", "Harry": "broomstick"} True instead. Another is to do >>> d = sorted(foo().items()) >>> d [(’Harry’, ’broomstick’), (’Hermione’, ’hippogryph’)] There are others, but you get the idea. Another bad idea is to print things that embed an object address, like >>> id(1.0) # certain to fail some of the time 7948648 >>> class C: pass >>> C() # the default repr() for instances embeds an address The ELLIPSIS directive gives a nice approach for the last example: >>> C() Floating-point numbers are also subject to small output variations across platforms, because Python defers to the platform C library for float formatting, and C libraries vary widely in quality here. >>> 1./7 # risky 0.14285714285714285 >>> print(1./7) # safer 0.142857142857 >>> print(round(1./7, 6)) # much safer 0.142857 Numbers of the form I/2.**J are safe across all platforms, and I often contrive doctest examples to produce numbers of that form: >>> 3./4 0.75
# utterly safe
Simple fractions are also easier for people to understand, and that makes for better documentation.
25.2.4 Basic API The functions testmod() and testfile() provide a simple interface to doctest that should be sufficient for most basic uses. For a less formal introduction to these two functions, see sections Simple Usage: Checking Examples in Docstrings and Simple Usage: Checking Examples in a Text File.
1056
Chapter 25. Development Tools
The Python Library Reference, Release 3.2.3
doctest.testfile(filename, module_relative=True, name=None, package=None, globs=None, verbose=None, report=True, optionflags=0, extraglobs=None, raise_on_error=False, parser=DocTestParser(), encoding=None) All arguments except filename are optional, and should be specified in keyword form. Test examples in the file named filename. Return (failure_count, test_count). Optional argument module_relative specifies how the filename should be interpreted: •If module_relative is True (the default), then filename specifies an OS-independent module-relative path. By default, this path is relative to the calling module’s directory; but if the package argument is specified, then it is relative to that package. To ensure OS-independence, filename should use / characters to separate path segments, and may not be an absolute path (i.e., it may not begin with /). •If module_relative is False, then filename specifies an OS-specific path. The path may be absolute or relative; relative paths are resolved with respect to the current working directory. Optional argument name gives the name os.path.basename(filename) is used.
of
the
test;
by
default,
or
if
None,
Optional argument package is a Python package or the name of a Python package whose directory should be used as the base directory for a module-relative filename. If no package is specified, then the calling module’s directory is used as the base directory for module-relative filenames. It is an error to specify package if module_relative is False. Optional argument globs gives a dict to be used as the globals when executing examples. A new shallow copy of this dict is created for the doctest, so its examples start with a clean slate. By default, or if None, a new empty dict is used. Optional argument extraglobs gives a dict merged into the globals used to execute examples. This works like dict.update(): if globs and extraglobs have a common key, the associated value in extraglobs appears in the combined dict. By default, or if None, no extra globals are used. This is an advanced feature that allows parameterization of doctests. For example, a doctest can be written for a base class, using a generic name for the class, then reused to test any number of subclasses by passing an extraglobs dict mapping the generic name to the subclass to be tested. Optional argument verbose prints lots of stuff if true, and prints only failures if false; by default, or if None, it’s true if and only if ’-v’ is in sys.argv. Optional argument report prints a summary at the end when true, else prints nothing at the end. In verbose mode, the summary is detailed, else the summary is very brief (in fact, empty if all tests passed). Optional argument optionflags or’s together option flags. See section Option Flags and Directives. Optional argument raise_on_error defaults to false. If true, an exception is raised upon the first failure or unexpected exception in an example. This allows failures to be post-mortem debugged. Default behavior is to continue running examples. Optional argument parser specifies a DocTestParser (or subclass) that should be used to extract tests from the files. It defaults to a normal parser (i.e., DocTestParser()). Optional argument encoding specifies an encoding that should be used to convert the file to unicode. doctest.testmod(m=None, name=None, globs=None, verbose=None, report=True, optionflags=0, extraglobs=None, raise_on_error=False, exclude_empty=False) All arguments are optional, and all except for m should be specified in keyword form. Test examples in docstrings in functions and classes reachable from module m (or module __main__ if m is not supplied or is None), starting with m.__doc__. Also test examples reachable from dict m.__test__, if it exists and is not None. m.__test__ maps names (strings) to functions, classes and strings; function and class docstrings are searched for examples; strings are searched directly, as if they were docstrings. 25.2. doctest — Test interactive Python examples
1057
The Python Library Reference, Release 3.2.3
Only docstrings attached to objects belonging to module m are searched. Return (failure_count, test_count). Optional argument name gives the name of the module; by default, or if None, m.__name__ is used. Optional argument exclude_empty defaults to false. If true, objects for which no doctests are found are excluded from consideration. The default is a backward compatibility hack, so that code still using doctest.master.summarize() in conjunction with testmod() continues to get output for objects with no tests. The exclude_empty argument to the newer DocTestFinder constructor defaults to true. Optional arguments extraglobs, verbose, report, optionflags, raise_on_error, and globs are the same as for function testfile() above, except that globs defaults to m.__dict__. There’s also a function to run the doctests associated with a single object. This function is provided for backward compatibility. There are no plans to deprecate it, but it’s rarely useful: doctest.run_docstring_examples(f, globs, verbose=False, name=”NoName”, compileflags=None, optionflags=0) Test examples associated with object f ; for example, f may be a module, function, or class object. A shallow copy of dictionary argument globs is used for the execution context. Optional argument name is used in failure messages, and defaults to "NoName". If optional argument verbose is true, output is generated even if there are no failures. By default, output is generated only in case of an example failure. Optional argument compileflags gives the set of flags that should be used by the Python compiler when running the examples. By default, or if None, flags are deduced corresponding to the set of future features found in globs. Optional argument optionflags works as for function testfile() above.
25.2.5 Unittest API As your collection of doctest’ed modules grows, you’ll want a way to run all their doctests systematically. doctest provides two functions that can be used to create unittest test suites from modules and text files containing doctests. To integrate with unittest test discovery, include a load_tests() function in your test module: import unittest import doctest import my_module_with_doctests def load_tests(loader, tests, ignore): tests.addTests(doctest.DocTestSuite(my_module_with_doctests)) return tests There are two main functions for creating unittest.TestSuite instances from text files and modules with doctests: doctest.DocFileSuite(*paths, module_relative=True, package=None, setUp=None, tearDown=None, globs=None, optionflags=0, parser=DocTestParser(), encoding=None) Convert doctest tests from one or more text files to a unittest.TestSuite. The returned unittest.TestSuite is to be run by the unittest framework and runs the interactive examples in each file. If an example in any file fails, then the synthesized unit test fails, and a failureException exception is raised showing the name of the file containing the test and a (sometimes approximate) line number. Pass one or more paths (as strings) to text files to be examined. Options may be provided as keyword arguments: 1058
Chapter 25. Development Tools
The Python Library Reference, Release 3.2.3
Optional argument module_relative specifies how the filenames in paths should be interpreted: •If module_relative is True (the default), then each filename in paths specifies an OS-independent modulerelative path. By default, this path is relative to the calling module’s directory; but if the package argument is specified, then it is relative to that package. To ensure OS-independence, each filename should use / characters to separate path segments, and may not be an absolute path (i.e., it may not begin with /). •If module_relative is False, then each filename in paths specifies an OS-specific path. The path may be absolute or relative; relative paths are resolved with respect to the current working directory. Optional argument package is a Python package or the name of a Python package whose directory should be used as the base directory for module-relative filenames in paths. If no package is specified, then the calling module’s directory is used as the base directory for module-relative filenames. It is an error to specify package if module_relative is False. Optional argument setUp specifies a set-up function for the test suite. This is called before running the tests in each file. The setUp function will be passed a DocTest object. The setUp function can access the test globals as the globs attribute of the test passed. Optional argument tearDown specifies a tear-down function for the test suite. This is called after running the tests in each file. The tearDown function will be passed a DocTest object. The setUp function can access the test globals as the globs attribute of the test passed. Optional argument globs is a dictionary containing the initial global variables for the tests. A new copy of this dictionary is created for each test. By default, globs is a new empty dictionary. Optional argument optionflags specifies the default doctest options for the tests, created by oring together individual option flags. See section Option Flags and Directives. See function set_unittest_reportflags() below for a better way to set reporting options. Optional argument parser specifies a DocTestParser (or subclass) that should be used to extract tests from the files. It defaults to a normal parser (i.e., DocTestParser()). Optional argument encoding specifies an encoding that should be used to convert the file to unicode. The global __file__ is added to the globals provided to doctests loaded from a text file using DocFileSuite(). doctest.DocTestSuite(module=None, globs=None, extraglobs=None, test_finder=None, setUp=None, tearDown=None, checker=None) Convert doctest tests for a module to a unittest.TestSuite. The returned unittest.TestSuite is to be run by the unittest framework and runs each doctest in the module. If any of the doctests fail, then the synthesized unit test fails, and a failureException exception is raised showing the name of the file containing the test and a (sometimes approximate) line number. Optional argument module provides the module to be tested. It can be a module object or a (possibly dotted) module name. If not specified, the module calling this function is used. Optional argument globs is a dictionary containing the initial global variables for the tests. A new copy of this dictionary is created for each test. By default, globs is a new empty dictionary. Optional argument extraglobs specifies an extra set of global variables, which is merged into globs. By default, no extra globals are used. Optional argument test_finder is the DocTestFinder object (or a drop-in replacement) that is used to extract doctests from the module. Optional arguments setUp, tearDown, and optionflags are the same as for function DocFileSuite() above. This function uses the same search technique as testmod().
25.2. doctest — Test interactive Python examples
1059
The Python Library Reference, Release 3.2.3
Under the covers, DocTestSuite() creates a unittest.TestSuite out of doctest.DocTestCase instances, and DocTestCase is a subclass of unittest.TestCase. DocTestCase isn’t documented here (it’s an internal detail), but studying its code can answer questions about the exact details of unittest integration. Similarly, DocFileSuite() creates a unittest.TestSuite out of doctest.DocFileCase instances, and DocFileCase is a subclass of DocTestCase. So both ways of creating a unittest.TestSuite run instances of DocTestCase. This is important for a subtle reason: when you run doctest functions yourself, you can control the doctest options in use directly, by passing option flags to doctest functions. However, if you’re writing a unittest framework, unittest ultimately controls when and how tests get run. The framework author typically wants to control doctest reporting options (perhaps, e.g., specified by command line options), but there’s no way to pass options through unittest to doctest test runners. For this reason, doctest also supports a notion of doctest reporting flags specific to unittest support, via this function: doctest.set_unittest_reportflags(flags) Set the doctest reporting flags to use. Argument flags or’s together option flags. See section Option Flags and Directives. Only “reporting flags” can be used. This is a module-global setting, and affects all future doctests run by module unittest: the runTest() method of DocTestCase looks at the option flags specified for the test case when the DocTestCase instance was constructed. If no reporting flags were specified (which is the typical and expected case), doctest‘s unittest reporting flags are or’ed into the option flags, and the option flags so augmented are passed to the DocTestRunner instance created to run the doctest. If any reporting flags were specified when the DocTestCase instance was constructed, doctest‘s unittest reporting flags are ignored. The value of the unittest reporting flags in effect before the function was called is returned by the function.
25.2.6 Advanced API The basic API is a simple wrapper that’s intended to make doctest easy to use. It is fairly flexible, and should meet most users’ needs; however, if you require more fine-grained control over testing, or wish to extend doctest’s capabilities, then you should use the advanced API. The advanced API revolves around two container classes, which are used to store the interactive examples extracted from doctest cases: • Example: A single Python statement, paired with its expected output. • DocTest: A collection of Examples, typically extracted from a single docstring or text file. Additional processing classes are defined to find, parse, and run, and check doctest examples: • DocTestFinder: Finds all docstrings in a given module, and uses a DocTestParser to create a DocTest from every docstring that contains interactive examples. • DocTestParser: Creates a DocTest object from a string (such as an object’s docstring). • DocTestRunner: Executes the examples in a DocTest, and uses an OutputChecker to verify their output. • OutputChecker: Compares the actual output from a doctest example with the expected output, and decides whether they match. The relationships among these processing classes are summarized in the following diagram:
1060
Chapter 25. Development Tools
The Python Library Reference, Release 3.2.3
list of: +------+ +---------+ |module| --DocTestFinder-> | DocTest | --DocTestRunner-> results +------+ | ^ +---------+ | ^ (printed) | | | Example | | | v | | ... | v | DocTestParser | Example | OutputChecker +---------+ DocTest Objects class doctest.DocTest(examples, globs, name, filename, lineno, docstring) A collection of doctest examples that should be run in a single namespace. The constructor arguments are used to initialize the attributes of the same names. DocTest defines the following attributes. They are initialized by the constructor, and should not be modified directly. examples A list of Example objects encoding the individual interactive Python examples that should be run by this test. globs The namespace (aka globals) that the examples should be run in. This is a dictionary mapping names to values. Any changes to the namespace made by the examples (such as binding new variables) will be reflected in globs after the test is run. name A string name identifying the DocTest. Typically, this is the name of the object or file that the test was extracted from. filename The name of the file that this DocTest was extracted from; or None if the filename is unknown, or if the DocTest was not extracted from a file. lineno The line number within filename where this DocTest begins, or None if the line number is unavailable. This line number is zero-based with respect to the beginning of the file. docstring The string that the test was extracted from, or ‘None’ if the string is unavailable, or if the test was not extracted from a string. Example Objects class doctest.Example(source, want, exc_msg=None, lineno=0, indent=0, options=None) A single interactive example, consisting of a Python statement and its expected output. The constructor arguments are used to initialize the attributes of the same names. Example defines the following attributes. They are initialized by the constructor, and should not be modified directly. source A string containing the example’s source code. This source code consists of a single Python statement, and always ends with a newline; the constructor adds a newline when necessary.
25.2. doctest — Test interactive Python examples
1061
The Python Library Reference, Release 3.2.3
want The expected output from running the example’s source code (either from stdout, or a traceback in case of exception). want ends with a newline unless no output is expected, in which case it’s an empty string. The constructor adds a newline when necessary. exc_msg The exception message generated by the example, if the example is expected to generate an exception; or None if it is not expected to generate an exception. This exception message is compared against the return value of traceback.format_exception_only(). exc_msg ends with a newline unless it’s None. The constructor adds a newline if needed. lineno The line number within the string containing this example where the example begins. This line number is zero-based with respect to the beginning of the containing string. indent The example’s indentation in the containing string, i.e., the number of space characters that precede the example’s first prompt. options A dictionary mapping from option flags to True or False, which is used to override default options for this example. Any option flags not contained in this dictionary are left at their default value (as specified by the DocTestRunner‘s optionflags). By default, no options are set. DocTestFinder objects class doctest.DocTestFinder(verbose=False, parser=DocTestParser(), recurse=True, exclude_empty=True) A processing class used to extract the DocTests that are relevant to a given object, from its docstring and the docstrings of its contained objects. DocTests can currently be extracted from the following object types: modules, functions, classes, methods, staticmethods, classmethods, and properties. The optional argument verbose can be used to display the objects searched by the finder. It defaults to False (no output). The optional argument parser specifies the DocTestParser object (or a drop-in replacement) that is used to extract doctests from docstrings. If the optional argument recurse is false, then DocTestFinder.find() will only examine the given object, and not any contained objects. If the optional argument exclude_empty is false, then DocTestFinder.find() will include tests for objects with empty docstrings. DocTestFinder defines the following method: find(obj[, name][, module][, globs][, extraglobs]) Return a list of the DocTests that are defined by obj‘s docstring, or by any of its contained objects’ docstrings. The optional argument name specifies the object’s name; this name will be used to construct names for the returned DocTests. If name is not specified, then obj.__name__ is used. The optional parameter module is the module that contains the given object. If the module is not specified or is None, then the test finder will attempt to automatically determine the correct module. The object’s module is used: •As a default namespace, if globs is not specified.
1062
Chapter 25. Development Tools
The Python Library Reference, Release 3.2.3
•To prevent the DocTestFinder from extracting DocTests from objects that are imported from other modules. (Contained objects with modules other than module are ignored.) •To find the name of the file containing the object. •To help find the line number of the object within its file. If module is False, no attempt to find the module will be made. This is obscure, of use mostly in testing doctest itself: if module is False, or is None but cannot be found automatically, then all objects are considered to belong to the (non-existent) module, so all contained objects will (recursively) be searched for doctests. The globals for each DocTest is formed by combining globs and extraglobs (bindings in extraglobs override bindings in globs). A new shallow copy of the globals dictionary is created for each DocTest. If globs is not specified, then it defaults to the module’s __dict__, if specified, or {} otherwise. If extraglobs is not specified, then it defaults to {}. DocTestParser objects class doctest.DocTestParser A processing class used to extract interactive examples from a string, and use them to create a DocTest object. DocTestParser defines the following methods: get_doctest(string, globs, name, filename, lineno) Extract all doctest examples from the given string, and collect them into a DocTest object. globs, name, filename, and lineno are attributes for the new DocTest object. See the documentation for DocTest for more information. get_examples(string, name=’’) Extract all doctest examples from the given string, and return them as a list of Example objects. Line numbers are 0-based. The optional argument name is a name identifying this string, and is only used for error messages. parse(string, name=’’) Divide the given string into examples and intervening text, and return them as a list of alternating Examples and strings. Line numbers for the Examples are 0-based. The optional argument name is a name identifying this string, and is only used for error messages. DocTestRunner objects class doctest.DocTestRunner(checker=None, verbose=None, optionflags=0) A processing class used to execute and verify the interactive examples in a DocTest. The comparison between expected outputs and actual outputs is done by an OutputChecker. This comparison may be customized with a number of option flags; see section Option Flags and Directives for more information. If the option flags are insufficient, then the comparison may also be customized by passing a subclass of OutputChecker to the constructor. The test runner’s display output can be controlled in two ways. First, an output function can be passed to TestRunner.run(); this function will be called with strings that should be displayed. It defaults to sys.stdout.write. If capturing the output is not sufficient, then the display output can be also customized by subclassing DocTestRunner, and overriding the methods report_start(), report_success(), report_unexpected_exception(), and report_failure(). The optional keyword argument checker specifies the OutputChecker object (or drop-in replacement) that should be used to compare the expected outputs to the actual outputs of doctest examples.
25.2. doctest — Test interactive Python examples
1063
The Python Library Reference, Release 3.2.3
The optional keyword argument verbose controls the DocTestRunner‘s verbosity. If verbose is True, then information is printed about each example, as it is run. If verbose is False, then only failures are printed. If verbose is unspecified, or None, then verbose output is used iff the command-line switch -v is used. The optional keyword argument optionflags can be used to control how the test runner compares expected output to actual output, and how it displays failures. For more information, see section Option Flags and Directives. DocTestParser defines the following methods: report_start(out, test, example) Report that the test runner is about to process the given example. This method is provided to allow subclasses of DocTestRunner to customize their output; it should not be called directly. example is the example about to be processed. test is the test containing example. out is the output function that was passed to DocTestRunner.run(). report_success(out, test, example, got) Report that the given example ran successfully. This method is provided to allow subclasses of DocTestRunner to customize their output; it should not be called directly. example is the example about to be processed. got is the actual output from the example. test is the test containing example. out is the output function that was passed to DocTestRunner.run(). report_failure(out, test, example, got) Report that the given example failed. This method is provided to allow subclasses of DocTestRunner to customize their output; it should not be called directly. example is the example about to be processed. got is the actual output from the example. test is the test containing example. out is the output function that was passed to DocTestRunner.run(). report_unexpected_exception(out, test, example, exc_info) Report that the given example raised an unexpected exception. This method is provided to allow subclasses of DocTestRunner to customize their output; it should not be called directly. example is the example about to be processed. exc_info is a tuple containing information about the unexpected exception (as returned by sys.exc_info()). test is the test containing example. out is the output function that was passed to DocTestRunner.run(). run(test, compileflags=None, out=None, clear_globs=True) Run the examples in test (a DocTest object), and display the results using the writer function out. The examples are run in the namespace test.globs. If clear_globs is true (the default), then this namespace will be cleared after the test runs, to help with garbage collection. If you would like to examine the namespace after the test completes, then use clear_globs=False. compileflags gives the set of flags that should be used by the Python compiler when running the examples. If not specified, then it will default to the set of future-import flags that apply to globs. The output of each example is checked using the DocTestRunner‘s output checker, and the results are formatted by the DocTestRunner.report_*() methods. summarize(verbose=None) Print a summary of all the test cases that have been run by this DocTestRunner, and return a named tuple TestResults(failed, attempted). The optional verbose argument controls how detailed the summary is. If the verbosity is not specified, then the DocTestRunner‘s verbosity is used.
1064
Chapter 25. Development Tools
The Python Library Reference, Release 3.2.3
OutputChecker objects class doctest.OutputChecker A class used to check the whether the actual output from a doctest example matches the expected output. OutputChecker defines two methods: check_output(), which compares a given pair of outputs, and returns true if they match; and output_difference(), which returns a string describing the differences between two outputs. OutputChecker defines the following methods: check_output(want, got, optionflags) Return True iff the actual output from an example (got) matches the expected output (want). These strings are always considered to match if they are identical; but depending on what option flags the test runner is using, several non-exact match types are also possible. See section Option Flags and Directives for more information about option flags. output_difference(example, got, optionflags) Return a string describing the differences between the expected output for a given example (example) and the actual output (got). optionflags is the set of option flags used to compare want and got.
25.2.7 Debugging Doctest provides several mechanisms for debugging doctest examples: • Several functions convert doctests to executable Python programs, which can be run under the Python debugger, pdb. • The DebugRunner class is a subclass of DocTestRunner that raises an exception for the first failing example, containing information about that example. This information can be used to perform post-mortem debugging on the example. • The unittest cases generated by DocTestSuite() support the debug() method defined by unittest.TestCase. • You can add a call to pdb.set_trace() in a doctest example, and you’ll drop into the Python debugger when that line is executed. Then you can inspect current values of variables, and so on. For example, suppose a.py contains just this module docstring: """ >>> def f(x): ... g(x*2) >>> def g(x): ... print(x+3) ... import pdb; pdb.set_trace() >>> f(3) 9 """ Then an interactive Python session may look like this: >>> import a, doctest >>> doctest.testmod(a) --Return-> (3)g()->None -> import pdb; pdb.set_trace() (Pdb) list 1 def g(x): 2 print(x+3)
25.2. doctest — Test interactive Python examples
1065
The Python Library Reference, Release 3.2.3
3 -> import pdb; pdb.set_trace() [EOF] (Pdb) p x 6 (Pdb) step --Return-> (2)f()->None -> g(x*2) (Pdb) list 1 def f(x): 2 -> g(x*2) [EOF] (Pdb) p x 3 (Pdb) step --Return-> (1)?()->None -> f(3) (Pdb) cont (0, 3) >>> Functions that convert doctests to Python code, and possibly run the synthesized code under the debugger: doctest.script_from_examples(s) Convert text with examples to a script. Argument s is a string containing doctest examples. The string is converted to a Python script, where doctest examples in s are converted to regular code, and everything else is converted to Python comments. The generated script is returned as a string. For example, import doctest print(doctest.script_from_examples(r""" Set x and y to 1 and 2. >>> x, y = 1, 2 Print their sum: >>> print(x+y) 3 """)) displays: # Set x and y to 1 and 2. x, y = 1, 2 # # Print their sum: print(x+y) # Expected: ## 3 This function is used internally by other functions (see below), but can also be useful when you want to transform an interactive Python session into a Python script. doctest.testsource(module, name) Convert the doctest for an object to a script.
1066
Chapter 25. Development Tools
The Python Library Reference, Release 3.2.3
Argument module is a module object, or dotted name of a module, containing the object whose doctests are of interest. Argument name is the name (within the module) of the object with the doctests of interest. The result is a string, containing the object’s docstring converted to a Python script, as described for script_from_examples() above. For example, if module a.py contains a top-level function f(), then import a, doctest print(doctest.testsource(a, "a.f")) prints a script version of function f()‘s docstring, with doctests converted to code, and the rest placed in comments. doctest.debug(module, name, pm=False) Debug the doctests for an object. The module and name arguments are the same as for function testsource() above. The synthesized Python script for the named object’s docstring is written to a temporary file, and then that file is run under the control of the Python debugger, pdb. A shallow copy of module.__dict__ is used for both local and global execution context. Optional argument pm controls whether post-mortem debugging is used. If pm has a true value, the script file is run directly, and the debugger gets involved only if the script terminates via raising an unhandled exception. If it does, then post-mortem debugging is invoked, via pdb.post_mortem(), passing the traceback object from the unhandled exception. If pm is not specified, or is false, the script is run under the debugger from the start, via passing an appropriate exec() call to pdb.run(). doctest.debug_src(src, pm=False, globs=None) Debug the doctests in a string. This is like function debug() above, except that a string containing doctest examples is specified directly, via the src argument. Optional argument pm has the same meaning as in function debug() above. Optional argument globs gives a dictionary to use as both local and global execution context. If not specified, or None, an empty dictionary is used. If specified, a shallow copy of the dictionary is used. The DebugRunner class, and the special exceptions it may raise, are of most interest to testing framework authors, and will only be sketched here. See the source code, and especially DebugRunner‘s docstring (which is a doctest!) for more details: class doctest.DebugRunner(checker=None, verbose=None, optionflags=0) A subclass of DocTestRunner that raises an exception as soon as a failure is encountered. If an unexpected exception occurs, an UnexpectedException exception is raised, containing the test, the example, and the original exception. If the output doesn’t match, then a DocTestFailure exception is raised, containing the test, the example, and the actual output. For information about the constructor parameters and methods, see the documentation for DocTestRunner in section Advanced API. There are two exceptions that may be raised by DebugRunner instances: exception doctest.DocTestFailure(test, example, got) An exception raised by DocTestRunner to signal that a doctest example’s actual output did not match its expected output. The constructor arguments are used to initialize the attributes of the same names. DocTestFailure defines the following attributes: DocTestFailure.test The DocTest object that was being run when the example failed.
25.2. doctest — Test interactive Python examples
1067
The Python Library Reference, Release 3.2.3
DocTestFailure.example The Example that failed. DocTestFailure.got The example’s actual output. exception doctest.UnexpectedException(test, example, exc_info) An exception raised by DocTestRunner to signal that a doctest example raised an unexpected exception. The constructor arguments are used to initialize the attributes of the same names. UnexpectedException defines the following attributes: UnexpectedException.test The DocTest object that was being run when the example failed. UnexpectedException.example The Example that failed. UnexpectedException.exc_info A tuple containing information about the unexpected exception, as returned by sys.exc_info().
25.2.8 Soapbox As mentioned in the introduction, doctest has grown to have three primary uses: 1. Checking examples in docstrings. 2. Regression testing. 3. Executable documentation / literate testing. These uses have different requirements, and it is important to distinguish them. In particular, filling your docstrings with obscure test cases makes for bad documentation. When writing a docstring, choose docstring examples with care. There’s an art to this that needs to be learned—it may not be natural at first. Examples should add genuine value to the documentation. A good example can often be worth many words. If done with care, the examples will be invaluable for your users, and will pay back the time it takes to collect them many times over as the years go by and things change. I’m still amazed at how often one of my doctest examples stops working after a “harmless” change. Doctest also makes an excellent tool for regression testing, especially if you don’t skimp on explanatory text. By interleaving prose and examples, it becomes much easier to keep track of what’s actually being tested, and why. When a test fails, good prose can make it much easier to figure out what the problem is, and how it should be fixed. It’s true that you could write extensive comments in code-based testing, but few programmers do. Many have found that using doctest approaches instead leads to much clearer tests. Perhaps this is simply because doctest makes writing prose a little easier than writing code, while writing comments in code is a little harder. I think it goes deeper than just that: the natural attitude when writing a doctest-based test is that you want to explain the fine points of your software, and illustrate them with examples. This in turn naturally leads to test files that start with the simplest features, and logically progress to complications and edge cases. A coherent narrative is the result, instead of a collection of isolated functions that test isolated bits of functionality seemingly at random. It’s a different attitude, and produces different results, blurring the distinction between testing and explaining. Regression testing is best confined to dedicated objects or files. There are several options for organizing tests: • Write text files containing test cases as interactive examples, and test the files using testfile() or DocFileSuite(). This is recommended, although is easiest to do for new projects, designed from the start to use doctest. • Define functions named _regrtest_topic that consist of single docstrings, containing test cases for the named topics. These functions can be included in the same file as the module, or separated out into a separate test file. 1068
Chapter 25. Development Tools
The Python Library Reference, Release 3.2.3
• Define a __test__ dictionary mapping from regression test topics to docstrings containing test cases.
25.3 unittest — Unit testing framework (If you are already familiar with the basic concepts of testing, you might want to skip to the list of assert methods.) The Python unit testing framework, sometimes referred to as “PyUnit,” is a Python language version of JUnit, by Kent Beck and Erich Gamma. JUnit is, in turn, a Java version of Kent’s Smalltalk testing framework. Each is the de facto standard unit testing framework for its respective language. unittest supports test automation, sharing of setup and shutdown code for tests, aggregation of tests into collections, and independence of the tests from the reporting framework. The unittest module provides classes that make it easy to support these qualities for a set of tests. To achieve this, unittest supports some important concepts: test fixture A test fixture represents the preparation needed to perform one or more tests, and any associate cleanup actions. This may involve, for example, creating temporary or proxy databases, directories, or starting a server process. test case A test case is the smallest unit of testing. It checks for a specific response to a particular set of inputs. unittest provides a base class, TestCase, which may be used to create new test cases. test suite A test suite is a collection of test cases, test suites, or both. It is used to aggregate tests that should be executed together. test runner A test runner is a component which orchestrates the execution of tests and provides the outcome to the user. The runner may use a graphical interface, a textual interface, or return a special value to indicate the results of executing the tests. The test case and test fixture concepts are supported through the TestCase and FunctionTestCase classes; the former should be used when creating new tests, and the latter can be used when integrating existing test code with a unittest-driven framework. When building test fixtures using TestCase, the setUp() and tearDown() methods can be overridden to provide initialization and cleanup for the fixture. With FunctionTestCase, existing functions can be passed to the constructor for these purposes. When the test is run, the fixture initialization is run first; if it succeeds, the cleanup method is run after the test has been executed, regardless of the outcome of the test. Each instance of the TestCase will only be used to run a single test method, so a new fixture is created for each test. Test suites are implemented by the TestSuite class. This class allows individual tests and test suites to be aggregated; when the suite is executed, all tests added directly to the suite and in “child” test suites are run. A test runner is an object that provides a single method, run(), which accepts a TestCase or TestSuite object as a parameter, and returns a result object. The class TestResult is provided for use as the result object. unittest provides the TextTestRunner as an example test runner which reports test results on the standard error stream by default. Alternate runners can be implemented for other environments (such as graphical environments) without any need to derive from a specific class. See Also: Module doctest Another test-support module with a very different flavor. unittest2: A backport of new unittest features for Python 2.4-2.6 Many new features were added to unittest in Python 2.7, including test discovery. unittest2 allows you to use these features with earlier versions of Python. Simple Smalltalk Testing: With Patterns Kent Beck’s original paper on testing frameworks using the pattern shared by unittest. Nose and py.test Third-party unittest frameworks with a lighter-weight syntax for writing tests. For example, assert func(10) == 42.
25.3. unittest — Unit testing framework
1069
The Python Library Reference, Release 3.2.3
The Python Testing Tools Taxonomy An extensive list of Python testing tools including functional testing frameworks and mock object libraries. Testing in Python Mailing List A special-interest-group for discussion of testing, and testing tools, in Python. The script Tools/unittestgui/unittestgui.py in the Python source distribution is a GUI tool for test discovery and execution. This is intended largely for ease of use for those new to unit testing. For production environments it is recommended that tests be driven by a continuous integration system such as Hudson or Buildbot.
25.3.1 Basic example The unittest module provides a rich set of tools for constructing and running tests. This section demonstrates that a small subset of the tools suffice to meet the needs of most users. Here is a short script to test three functions from the random module: import random import unittest class TestSequenceFunctions(unittest.TestCase): def setUp(self): self.seq = list(range(10)) def test_shuffle(self): # make sure the shuffled sequence does not lose any elements random.shuffle(self.seq) self.seq.sort() self.assertEqual(self.seq, list(range(10))) # should raise an exception for an immutable sequence self.assertRaises(TypeError, random.shuffle, (1,2,3)) def test_choice(self): element = random.choice(self.seq) self.assertTrue(element in self.seq) def test_sample(self): with self.assertRaises(ValueError): random.sample(self.seq, 20) for element in random.sample(self.seq, 5): self.assertTrue(element in self.seq) if __name__ == ’__main__’: unittest.main() A testcase is created by subclassing unittest.TestCase. The three individual tests are defined with methods whose names start with the letters test. This naming convention informs the test runner about which methods represent tests. The crux of each test is a call to assertEqual() to check for an expected result; assertTrue() to verify a condition; or assertRaises() to verify that an expected exception gets raised. These methods are used instead of the assert statement so the test runner can accumulate all test results and produce a report. When a setUp() method is defined, the test runner will run that method prior to each test. Likewise, if a tearDown() method is defined, the test runner will invoke that method after each test. In the example, setUp() was used to create a fresh sequence for each test. 1070
Chapter 25. Development Tools
The Python Library Reference, Release 3.2.3
The final block shows a simple way to run the tests. unittest.main() provides a command-line interface to the test script. When run from the command line, the above script produces an output that looks like this: ... ---------------------------------------------------------------------Ran 3 tests in 0.000s OK Instead of unittest.main(), there are other ways to run the tests with a finer level of control, less terse output, and no requirement to be run from the command line. For example, the last two lines may be replaced with: suite = unittest.TestLoader().loadTestsFromTestCase(TestSequenceFunctions) unittest.TextTestRunner(verbosity=2).run(suite) Running the revised script from the interpreter or another script produces the following output: test_choice (__main__.TestSequenceFunctions) ... ok test_sample (__main__.TestSequenceFunctions) ... ok test_shuffle (__main__.TestSequenceFunctions) ... ok ---------------------------------------------------------------------Ran 3 tests in 0.110s OK The above examples show the most commonly used unittest features which are sufficient to meet many everyday testing needs. The remainder of the documentation explores the full feature set from first principles.
25.3.2 Command-Line Interface The unittest module can be used from the command line to run tests from modules, classes or even individual test methods: python -m unittest test_module1 test_module2 python -m unittest test_module.TestClass python -m unittest test_module.TestClass.test_method You can pass in a list with any combination of module names, and fully qualified class or method names. Test modules can be specified by file path as well: python -m unittest tests/test_something.py This allows you to use the shell filename completion to specify the test module. The file specified must still be importable as a module. The path is converted to a module name by removing the ‘.py’ and converting path separators into ‘.’. If you want to execute a test file that isn’t importable as a module you should execute the file directly instead. You can run tests with more detail (higher verbosity) by passing in the -v flag: python -m unittest -v test_module When executed without arguments Test Discovery is started: python -m unittest For a list of all the command-line options: python -m unittest -h Changed in version 3.2: In earlier versions it was only possible to run individual test methods and not modules or classes.
25.3. unittest — Unit testing framework
1071
The Python Library Reference, Release 3.2.3
Command-line options unittest supports these command-line options: -b, -buffer The standard output and standard error streams are buffered during the test run. Output during a passing test is discarded. Output is echoed normally on test fail or error and is added to the failure messages. -c, -catch Control-C during the test run waits for the current test to end and then reports all the results so far. A second control-C raises the normal KeyboardInterrupt exception. See Signal Handling for the functions that provide this functionality. -f, -failfast Stop the test run on the first error or failure. New in version 3.2: The command-line options -b, -c and -f were added. The command line can also be used for test discovery, for running all of the tests in a project or just a subset.
25.3.3 Test Discovery New in version 3.2. Unittest supports simple test discovery. In order to be compatible with test discovery, all of the test files must be modules or packages importable from the top-level directory of the project (this means that their filenames must be valid identifiers). Test discovery is implemented in TestLoader.discover(), but can also be used from the command line. The basic command-line usage is: cd project_directory python -m unittest discover Note: As a shortcut, python -m unittest is the equivalent of python -m unittest discover. If you want to pass arguments to test discovery the discover sub-command must be used explicitly. The discover sub-command has the following options: -v, -verbose Verbose output -s directory Directory to start discovery (. default) -p pattern Pattern to match test files (test*.py default) -t directory Top level directory of project (defaults to start directory) The -s, -p, and -t options can be passed in as positional arguments in that order. The following two command lines are equivalent: python -m unittest discover -s project_directory -p ’*_test.py’ python -m unittest discover project_directory ’*_test.py’ As well as being a path it is possible to pass a package name, for example myproject.subpackage.test, as the start directory. The package name you supply will then be imported and its location on the filesystem will be used as the start directory.
1072
Chapter 25. Development Tools
The Python Library Reference, Release 3.2.3
Caution: Test discovery loads tests by importing them. Once test discovery has found all the test files from the start directory you specify it turns the paths into package names to import. For example foo/bar/baz.py will be imported as foo.bar.baz. If you have a package installed globally and attempt test discovery on a different copy of the package then the import could happen from the wrong place. If this happens test discovery will warn you and exit. If you supply the start directory as a package name rather than a path to a directory then discover assumes that whichever location it imports from is the location you intended, so you will not get the warning. Test modules and packages can customize test loading and discovery by through the load_tests protocol.
25.3.4 Organizing test code The basic building blocks of unit testing are test cases — single scenarios that must be set up and checked for correctness. In unittest, test cases are represented by unittest.TestCase instances. To make your own test cases you must write subclasses of TestCase or use FunctionTestCase. An instance of a TestCase-derived class is an object that can completely run a single test method, together with optional set-up and tidy-up code. The testing code of a TestCase instance should be entirely self contained, such that it can be run either in isolation or in arbitrary combination with any number of other test cases. The simplest TestCase subclass will simply override the runTest() method in order to perform specific testing code: import unittest class DefaultWidgetSizeTestCase(unittest.TestCase): def runTest(self): widget = Widget(’The widget’) self.assertEqual(widget.size(), (50, 50), ’incorrect default size’) Note that in order to test something, we use one of the assert*() methods provided by the TestCase base class. If the test fails, an exception will be raised, and unittest will identify the test case as a failure. Any other exceptions will be treated as errors. This helps you identify where the problem is: failures are caused by incorrect results - a 5 where you expected a 6. Errors are caused by incorrect code - e.g., a TypeError caused by an incorrect function call. The way to run a test case will be described later. For now, note that to construct an instance of such a test case, we call its constructor without arguments: testCase = DefaultWidgetSizeTestCase() Now, such test cases can be numerous, and their set-up can be repetitive. In the above case, constructing a Widget in each of 100 Widget test case subclasses would mean unsightly duplication. Luckily, we can factor out such set-up code by implementing a method called setUp(), which the testing framework will automatically call for us when we run the test: import unittest class SimpleWidgetTestCase(unittest.TestCase): def setUp(self): self.widget = Widget(’The widget’) class DefaultWidgetSizeTestCase(SimpleWidgetTestCase): def runTest(self):
25.3. unittest — Unit testing framework
1073
The Python Library Reference, Release 3.2.3
self.assertEqual(self.widget.size(), (50,50), ’incorrect default size’) class WidgetResizeTestCase(SimpleWidgetTestCase): def runTest(self): self.widget.resize(100,150) self.assertEqual(self.widget.size(), (100,150), ’wrong size after resize’) If the setUp() method raises an exception while the test is running, the framework will consider the test to have suffered an error, and the runTest() method will not be executed. Similarly, we can provide a tearDown() method that tidies up after the runTest() method has been run: import unittest class SimpleWidgetTestCase(unittest.TestCase): def setUp(self): self.widget = Widget(’The widget’) def tearDown(self): self.widget.dispose() self.widget = None If setUp() succeeded, the tearDown() method will be run whether runTest() succeeded or not. Such a working environment for the testing code is called a fixture. Often, many small test cases will use the same fixture. In this case, we would end up subclassing SimpleWidgetTestCase into many small one-method classes such as DefaultWidgetSizeTestCase. This is time-consuming and discouraging, so in the same vein as JUnit, unittest provides a simpler mechanism: import unittest class WidgetTestCase(unittest.TestCase): def setUp(self): self.widget = Widget(’The widget’) def tearDown(self): self.widget.dispose() self.widget = None def test_default_size(self): self.assertEqual(self.widget.size(), (50,50), ’incorrect default size’) def test_resize(self): self.widget.resize(100,150) self.assertEqual(self.widget.size(), (100,150), ’wrong size after resize’) Here we have not provided a runTest() method, but have instead provided two different test methods. Class instances will now each run one of the test_*() methods, with self.widget created and destroyed separately for each instance. When creating an instance we must specify the test method it is to run. We do this by passing the method name in the constructor: defaultSizeTestCase = WidgetTestCase(’test_default_size’) resizeTestCase = WidgetTestCase(’test_resize’)
1074
Chapter 25. Development Tools
The Python Library Reference, Release 3.2.3
Test case instances are grouped together according to the features they test. unittest provides a mechanism for this: the test suite, represented by unittest‘s TestSuite class: widgetTestSuite = unittest.TestSuite() widgetTestSuite.addTest(WidgetTestCase(’test_default_size’)) widgetTestSuite.addTest(WidgetTestCase(’test_resize’)) For the ease of running tests, as we will see later, it is a good idea to provide in each test module a callable object that returns a pre-built test suite: def suite(): suite = unittest.TestSuite() suite.addTest(WidgetTestCase(’test_default_size’)) suite.addTest(WidgetTestCase(’test_resize’)) return suite or even: def suite(): tests = [’test_default_size’, ’test_resize’] return unittest.TestSuite(map(WidgetTestCase, tests)) Since it is a common pattern to create a TestCase subclass with many similarly named test functions, unittest provides a TestLoader class that can be used to automate the process of creating a test suite and populating it with individual tests. For example, suite = unittest.TestLoader().loadTestsFromTestCase(WidgetTestCase) will create a test suite that will run WidgetTestCase.test_default_size() and WidgetTestCase.test_resize. TestLoader uses the ’test’ method name prefix to identify test methods automatically. Note that the order in which the various test cases will be run is determined by sorting the test function names with respect to the built-in ordering for strings. Often it is desirable to group suites of test cases together, so as to run tests for the whole system at once. This is easy, since TestSuite instances can be added to a TestSuite just as TestCase instances can be added to a TestSuite: suite1 = module1.TheTestSuite() suite2 = module2.TheTestSuite() alltests = unittest.TestSuite([suite1, suite2]) You can place the definitions of test cases and test suites in the same modules as the code they are to test (such as widget.py), but there are several advantages to placing the test code in a separate module, such as test_widget.py: • The test module can be run standalone from the command line. • The test code can more easily be separated from shipped code. • There is less temptation to change test code to fit the code it tests without a good reason. • Test code should be modified much less frequently than the code it tests. • Tested code can be refactored more easily. • Tests for modules written in C must be in separate modules anyway, so why not be consistent? • If the testing strategy changes, there is no need to change the source code.
25.3. unittest — Unit testing framework
1075
The Python Library Reference, Release 3.2.3
25.3.5 Re-using old test code Some users will find that they have existing test code that they would like to run from unittest, without converting every old test function to a TestCase subclass. For this reason, unittest provides a FunctionTestCase class. This subclass of TestCase can be used to wrap an existing test function. Set-up and tear-down functions can also be provided. Given the following test function: def testSomething(): something = makeSomething() assert something.name is not None # ... one can create an equivalent test case instance as follows: testcase = unittest.FunctionTestCase(testSomething) If there are additional set-up and tear-down methods that should be called as part of the test case’s operation, they can also be provided like so: testcase = unittest.FunctionTestCase(testSomething, setUp=makeSomethingDB, tearDown=deleteSomethingDB) To make migrating existing test suites easier, unittest supports tests raising AssertionError to indicate test failure. However, it is recommended that you use the explicit TestCase.fail*() and TestCase.assert*() methods instead, as future versions of unittest may treat AssertionError differently. Note: Even though FunctionTestCase can be used to quickly convert an existing test base over to a unittestbased system, this approach is not recommended. Taking the time to set up proper TestCase subclasses will make future test refactorings infinitely easier. In some cases, the existing tests may have been written using the doctest module. If so, doctest provides a DocTestSuite class that can automatically build unittest.TestSuite instances from the existing doctestbased tests.
25.3.6 Skipping tests and expected failures New in version 3.1. Unittest supports skipping individual test methods and even whole classes of tests. In addition, it supports marking a test as a “expected failure,” a test that is broken and will fail, but shouldn’t be counted as a failure on a TestResult. Skipping a test is simply a matter of using the skip() decorator or one of its conditional variants. Basic skipping looks like this: class MyTestCase(unittest.TestCase): @unittest.skip("demonstrating skipping") def test_nothing(self): self.fail("shouldn’t happen") @unittest.skipIf(mylib.__version__ < (1, 3), "not supported in this library version") def test_format(self): # Tests that work for only a certain version of the library.
1076
Chapter 25. Development Tools
The Python Library Reference, Release 3.2.3
pass @unittest.skipUnless(sys.platform.startswith("win"), "requires Windows") def test_windows_support(self): # windows specific testing code pass This is the output of running the example above in verbose mode: test_format (__main__.MyTestCase) ... skipped ’not supported in this library version’ test_nothing (__main__.MyTestCase) ... skipped ’demonstrating skipping’ test_windows_support (__main__.MyTestCase) ... skipped ’requires Windows’ ---------------------------------------------------------------------Ran 3 tests in 0.005s OK (skipped=3) Classes can be skipped just like methods: @unittest.skip("showing class skipping") class MySkippedTestCase(unittest.TestCase): def test_not_run(self): pass TestCase.setUp() can also skip the test. This is useful when a resource that needs to be set up is not available. Expected failures use the expectedFailure() decorator. class ExpectedFailureTestCase(unittest.TestCase): @unittest.expectedFailure def test_fail(self): self.assertEqual(1, 0, "broken") It’s easy to roll your own skipping decorators by making a decorator that calls skip() on the test when it wants it to be skipped. This decorator skips the test unless the passed object has a certain attribute: def skipUnlessHasattr(obj, attr): if hasattr(obj, attr): return lambda func: func return unittest.skip("{0!r} doesn’t have {1!r}".format(obj, attr)) The following decorators implement test skipping and expected failures: @unittest.skip(reason) Unconditionally skip the decorated test. reason should describe why the test is being skipped. @unittest.skipIf(condition, reason) Skip the decorated test if condition is true. @unittest.skipUnless(condition, reason) Skip the decorated test unless condition is true. @unittest.expectedFailure Mark the test as an expected failure. If the test fails when run, the test is not counted as a failure. Skipped tests will not have setUp() or tearDown() run around them. setUpClass() or tearDownClass() run.
25.3. unittest — Unit testing framework
Skipped classes will not have
1077
The Python Library Reference, Release 3.2.3
25.3.7 Classes and functions This section describes in depth the API of unittest. Test cases class unittest.TestCase(methodName=’runTest’) Instances of the TestCase class represent the smallest testable units in the unittest universe. This class is intended to be used as a base class, with specific tests being implemented by concrete subclasses. This class implements the interface needed by the test runner to allow it to drive the test, and methods that the test code can use to check for and report various kinds of failure. Each instance of TestCase will run a single test method: the method named methodName. If you remember, we had an earlier example that went something like this: def suite(): suite = unittest.TestSuite() suite.addTest(WidgetTestCase(’test_default_size’)) suite.addTest(WidgetTestCase(’test_resize’)) return suite Here, we create two instances of WidgetTestCase, each of which runs a single test. Changed in version 3.2: TestCase can be instantiated successfully without providing a method name. This makes it easier to experiment with TestCase from the interactive interpreter. methodName defaults to runTest(). TestCase instances provide three groups of methods: one group used to run the test, another used by the test implementation to check conditions and report failures, and some inquiry methods allowing information about the test itself to be gathered. Methods in the first group (running the test) are: setUp() Method called to prepare the test fixture. This is called immediately before calling the test method; any exception raised by this method will be considered an error rather than a test failure. The default implementation does nothing. tearDown() Method called immediately after the test method has been called and the result recorded. This is called even if the test method raised an exception, so the implementation in subclasses may need to be particularly careful about checking internal state. Any exception raised by this method will be considered an error rather than a test failure. This method will only be called if the setUp() succeeds, regardless of the outcome of the test method. The default implementation does nothing. setUpClass() A class method called before tests in an individual class run. setUpClass is called with the class as the only argument and must be decorated as a classmethod(): @classmethod def setUpClass(cls): ... See Class and Module Fixtures for more details. New in version 3.2. tearDownClass() A class method called after tests in an individual class have run. tearDownClass is called with the class as the only argument and must be decorated as a classmethod():
1078
Chapter 25. Development Tools
The Python Library Reference, Release 3.2.3
@classmethod def tearDownClass(cls): ... See Class and Module Fixtures for more details. New in version 3.2. run(result=None) Run the test, collecting the result into the test result object passed as result. If result is omitted or None, a temporary result object is created (by calling the defaultTestResult() method) and used. The result object is not returned to run()‘s caller. The same effect may be had by simply calling the TestCase instance. skipTest(reason) Calling this during a test method or setUp() skips the current test. See Skipping tests and expected failures for more information. New in version 3.1. debug() Run the test without collecting the result. This allows exceptions raised by the test to be propagated to the caller, and can be used to support running tests under a debugger. The TestCase class provides a number of methods to check for and report failures, such as: Method assertEqual(a, b) assertNotEqual(a, b) assertTrue(x) assertFalse(x) assertIs(a, b) assertIsNot(a, b) assertIsNone(x) assertIsNotNone(x) assertIn(a, b) assertNotIn(a, b) assertIsInstance(a, b) assertNotIsInstance(a, b)
Checks that a == b a != b bool(x) is True bool(x) is False a is b a is not b x is None x is not None a in b a not in b isinstance(a, b) not isinstance(a, b)
New in
3.1 3.1 3.1 3.1 3.1 3.1 3.2 3.2
All the assert methods (except assertRaises(), assertRaisesRegex(), assertWarns(), assertWarnsRegex()) accept a msg argument that, if specified, is used as the error message on failure (see also longMessage). assertEqual(first, second, msg=None) Test that first and second are equal. If the values do not compare equal, the test will fail. In addition, if first and second are the exact same type and one of list, tuple, dict, set, frozenset or str or any type that a subclass registers with addTypeEqualityFunc() the type-specific equality function will be called in order to generate a more useful default error message (see also the list of type-specific methods). Changed in version 3.1: Added the automatic calling of type-specific equality function.Changed in version 3.2: assertMultiLineEqual() added as the default type equality function for comparing strings. assertNotEqual(first, second, msg=None) Test that first and second are not equal. If the values do compare equal, the test will fail. assertTrue(expr, msg=None) assertFalse(expr, msg=None) Test that expr is true (or false). Note that this is equivalent to bool(expr) is True and not to expr is True (use assertIs(expr, True) for the latter). This method should also be avoided when more specific 25.3. unittest — Unit testing framework
1079
The Python Library Reference, Release 3.2.3
methods are available (e.g. assertEqual(a, b) instead of assertTrue(a == b)), because they provide a better error message in case of failure. assertIs(first, second, msg=None) assertIsNot(first, second, msg=None) Test that first and second evaluate (or don’t evaluate) to the same object. New in version 3.1. assertIsNone(expr, msg=None) assertIsNotNone(expr, msg=None) Test that expr is (or is not) None. New in version 3.1. assertIn(first, second, msg=None) assertNotIn(first, second, msg=None) Test that first is (or is not) in second. New in version 3.1. assertIsInstance(obj, cls, msg=None) assertNotIsInstance(obj, cls, msg=None) Test that obj is (or is not) an instance of cls (which can be a class or a tuple of classes, as supported by isinstance()). To check for the exact type, use assertIs(type(obj), cls). New in version 3.2. It is also possible to check that exceptions and warnings are raised using the following methods: Method assertRaises(exc, fun, **kwds) assertRaisesRegex(exc, *args, **kwds) assertWarns(warn, fun, **kwds) assertWarnsRegex(warn, *args, **kwds)
Checks that
New in
*args,
fun(*args, **kwds) raises exc
re, fun,
fun(*args, **kwds) raises exc and the message matches re fun(*args, **kwds) raises warn
3.1
fun(*args, **kwds) raises warn and the message matches re
3.2
*args, re, fun,
3.2
assertRaises(exception, callable, *args, **kwds) assertRaises(exception) Test that an exception is raised when callable is called with any positional or keyword arguments that are also passed to assertRaises(). The test passes if exception is raised, is an error if another exception is raised, or fails if no exception is raised. To catch any of a group of exceptions, a tuple containing the exception classes may be passed as exception. If only the exception argument is given, returns a context manager so that the code under test can be written inline rather than as a function: with self.assertRaises(SomeException): do_something() The context manager will store the caught exception object in its exception attribute. This can be useful if the intention is to perform additional checks on the exception raised: with self.assertRaises(SomeException) as cm: do_something() the_exception = cm.exception self.assertEqual(the_exception.error_code, 3) Changed in version 3.1: Added the ability to use assertRaises() as a context manager.Changed in version 3.2: Added the exception attribute. 1080
Chapter 25. Development Tools
The Python Library Reference, Release 3.2.3
assertRaisesRegex(exception, regex, callable, *args, **kwds) assertRaisesRegex(exception, regex) Like assertRaises() but also tests that regex matches on the string representation of the raised exception. regex may be a regular expression object or a string containing a regular expression suitable for use by re.search(). Examples: self.assertRaisesRegex(ValueError, ’invalid literal for.*XYZ$’, int, ’XYZ’) or: with self.assertRaisesRegex(ValueError, ’literal’): int(’XYZ’) New in version 3.1: under the name assertRaisesRegexp.Changed in version 3.2: Renamed to assertRaisesRegex(). assertWarns(warning, callable, *args, **kwds) assertWarns(warning) Test that a warning is triggered when callable is called with any positional or keyword arguments that are also passed to assertWarns(). The test passes if warning is triggered and fails if it isn’t. Also, any unexpected exception is an error. To catch any of a group of warnings, a tuple containing the warning classes may be passed as warnings. If only the warning argument is given, returns a context manager so that the code under test can be written inline rather than as a function: with self.assertWarns(SomeWarning): do_something() The context manager will store the caught warning object in its warning attribute, and the source line which triggered the warnings in the filename and lineno attributes. This can be useful if the intention is to perform additional checks on the exception raised: with self.assertWarns(SomeWarning) as cm: do_something() self.assertIn(’myfile.py’, cm.filename) self.assertEqual(320, cm.lineno) This method works regardless of the warning filters in place when it is called. New in version 3.2. assertWarnsRegex(warning, regex, callable, *args, **kwds) assertWarnsRegex(warning, regex) Like assertWarns() but also tests that regex matches on the message of the triggered warning. regex may be a regular expression object or a string containing a regular expression suitable for use by re.search(). Example: self.assertWarnsRegex(DeprecationWarning, r’legacy_function\(\) is deprecated’, legacy_function, ’XYZ’) or:
25.3. unittest — Unit testing framework
1081
The Python Library Reference, Release 3.2.3
with self.assertWarnsRegex(RuntimeWarning, ’unsafe frobnicating’): frobnicate(’/etc/passwd’) New in version 3.2. There are also other methods used to perform more specific checks, such as: Method
Checks that
New in
assertAlmostEqual(a, round(a-b, 7) == 0 b) assertNotAlmostEqual(a, round(a-b, 7) != 0 b) assertGreater(a, b) a > b assertGreaterEqual(a, a >= b b) assertLess(a, b) a < b assertLessEqual(a, b) a , >=, < or >> self.assertGreaterEqual(3, 4) AssertionError: "3" unexpectedly not greater than or equal to "4" New in version 3.1. assertRegex(text, regex, msg=None) assertNotRegex(text, regex, msg=None) Test that a regex search matches (or does not match) text. In case of failure, the error message will include the pattern and the text (or the pattern and the part of text that unexpectedly matched). regex may be a regular expression object or a string containing a regular expression suitable for use by re.search(). New in version 3.1: under the name assertRegexpMatches.Changed in version
1082
Chapter 25. Development Tools
The Python Library Reference, Release 3.2.3
3.2: The method assertRegexpMatches() has been renamed to assertRegex().New in version 3.2: assertNotRegex(). assertDictContainsSubset(subset, dictionary, msg=None) Tests whether the key/value pairs in dictionary are a superset of those in subset. If not, an error message listing the missing keys and mismatched values is generated. Note, the arguments are in the opposite order of what the method name dictates. Instead, consider using the set-methods on dictionary views, for example: d.keys() > from unittest import main >>> main(module=’test_module’, exit=False) The failfast, catchbreak and buffer parameters have the same effect as the same-name command-line options. The warning argument specifies the warning filter that should be used while running the tests. If it’s not specified, it will remain None if a -W option is passed to python, otherwise it will be set to ’default’. Calling main actually returns an instance of the TestProgram class. This stores the result of the tests run as the result attribute. Changed in version 3.1: The exit parameter was added.Changed in version 3.2: The verbosity, failfast, catchbreak, buffer and warnings parameters were added. load_tests Protocol
New in version 3.2. Modules or packages can customize how tests are loaded from them during normal test runs or test discovery by implementing a function called load_tests. If a test module defines load_tests it will be called by TestLoader.loadTestsFromModule() with the following arguments: load_tests(loader, standard_tests, None) It should return a TestSuite. loader is the instance of TestLoader doing the loading. standard_tests are the tests that would be loaded by default from the module. It is common for test modules to only want to add or remove tests from the standard set of tests. The third argument is used when loading packages as part of test discovery. A typical load_tests function that loads tests from a specific set of TestCase classes may look like: test_cases = (TestCase1, TestCase2, TestCase3) def load_tests(loader, tests, pattern): suite = TestSuite() for test_class in test_cases: tests = loader.loadTestsFromTestCase(test_class) suite.addTests(tests) return suite If discovery is started, either from the command line or by calling TestLoader.discover(), with a pattern that matches a package name then the package __init__.py will be checked for load_tests. Note: The default pattern is ‘test*.py’. This matches all Python files that start with ‘test’ but won’t match any test directories. A pattern like ‘test*’ will match test packages as well as modules. If the package __init__.py defines load_tests then it will be called and discovery not continued into the package. load_tests is called with the following arguments: load_tests(loader, standard_tests, pattern) This should return a TestSuite representing all the tests from the package. (standard_tests will only contain tests collected from __init__.py.)
25.3. unittest — Unit testing framework
1091
The Python Library Reference, Release 3.2.3
Because the pattern is passed into load_tests the package is free to continue (and potentially modify) test discovery. A ‘do nothing’ load_tests function for a test package would look like: def load_tests(loader, standard_tests, pattern): # top level directory cached on loader instance this_dir = os.path.dirname(__file__) package_tests = loader.discover(start_dir=this_dir, pattern=pattern) standard_tests.addTests(package_tests) return standard_tests
25.3.8 Class and Module Fixtures Class and module level fixtures are implemented in TestSuite. When the test suite encounters a test from a new class then tearDownClass() from the previous class (if there is one) is called, followed by setUpClass() from the new class. Similarly if a test is from a different module from the previous test then tearDownModule from the previous module is run, followed by setUpModule from the new module. After all the tests have run the final tearDownClass and tearDownModule are run. Note that shared fixtures do not play well with [potential] features like test parallelization and they break test isolation. They should be used with care. The default ordering of tests created by the unittest test loaders is to group all tests from the same modules and classes together. This will lead to setUpClass / setUpModule (etc) being called exactly once per class and module. If you randomize the order, so that tests from different modules and classes are adjacent to each other, then these shared fixture functions may be called multiple times in a single test run. Shared fixtures are not intended to work with suites with non-standard ordering. A BaseTestSuite still exists for frameworks that don’t want to support shared fixtures. If there are any exceptions raised during one of the shared fixture functions the test is reported as an error. Because there is no corresponding test instance an _ErrorHolder object (that has the same interface as a TestCase) is created to represent the error. If you are just using the standard unittest test runner then this detail doesn’t matter, but if you are a framework author it may be relevant. setUpClass and tearDownClass These must be implemented as class methods: import unittest class Test(unittest.TestCase): @classmethod def setUpClass(cls): cls._connection = createExpensiveConnectionObject() @classmethod def tearDownClass(cls): cls._connection.destroy() If you want the setUpClass and tearDownClass on base classes called then you must call up to them yourself. The implementations in TestCase are empty.
1092
Chapter 25. Development Tools
The Python Library Reference, Release 3.2.3
If an exception is raised during a setUpClass then the tests in the class are not run and the tearDownClass is not run. Skipped classes will not have setUpClass or tearDownClass run. If the exception is a SkipTest exception then the class will be reported as having been skipped instead of as an error. setUpModule and tearDownModule These should be implemented as functions: def setUpModule(): createConnection() def tearDownModule(): closeConnection() If an exception is raised in a setUpModule then none of the tests in the module will be run and the tearDownModule will not be run. If the exception is a SkipTest exception then the module will be reported as having been skipped instead of as an error.
25.3.9 Signal Handling New in version 3.2. The -c/--catch command-line option to unittest, along with the catchbreak parameter to unittest.main(), provide more friendly handling of control-C during a test run. With catch break behavior enabled control-C will allow the currently running test to complete, and the test run will then end and report all the results so far. A second control-c will raise a KeyboardInterrupt in the usual way. The control-c handling signal handler attempts to remain compatible with code or tests that install their own signal.SIGINT handler. If the unittest handler is called but isn’t the installed signal.SIGINT handler, i.e. it has been replaced by the system under test and delegated to, then it calls the default handler. This will normally be the expected behavior by code that replaces an installed handler and delegates to it. For individual tests that need unittest control-c handling disabled the removeHandler() decorator can be used. There are a few utility functions for framework authors to enable control-c handling functionality within test frameworks. unittest.installHandler() Install the control-c handler. When a signal.SIGINT is received (usually in response to the user pressing control-c) all registered results have stop() called. unittest.registerResult(result) Register a TestResult object for control-c handling. Registering a result stores a weak reference to it, so it doesn’t prevent the result from being garbage collected. Registering a TestResult object has no side-effects if control-c handling is not enabled, so test frameworks can unconditionally register all results they create independently of whether or not handling is enabled. unittest.removeResult(result) Remove a registered result. Once a result has been removed then stop() will no longer be called on that result object in response to a control-c. unittest.removeHandler(function=None) When called without arguments this function removes the control-c handler if it has been installed. This function can also be used as a test decorator to temporarily remove the handler whilst the test is being executed: @unittest.removeHandler def test_signal_handling(self): ...
25.3. unittest — Unit testing framework
1093
The Python Library Reference, Release 3.2.3
25.4 2to3 - Automated Python 2 to 3 code translation 2to3 is a Python program that reads Python 2.x source code and applies a series of fixers to transform it into valid Python 3.x code. The standard library contains a rich set of fixers that will handle almost all code. 2to3 supporting library lib2to3 is, however, a flexible and generic library, so it is possible to write your own fixers for 2to3. lib2to3 could also be adapted to custom applications in which Python code needs to be edited automatically.
25.4.1 Using 2to3 2to3 will usually be installed with the Python interpreter as a script. It is also located in the Tools/scripts directory of the Python root. 2to3’s basic arguments are a list of files or directories to transform. The directories are to recursively traversed for Python sources. Here is a sample Python 2.x source file, example.py: def greet(name): print "Hello, {0}!".format(name) print "What’s your name?" name = raw_input() greet(name) It can be converted to Python 3.x code via 2to3 on the command line: $ 2to3 example.py A diff against the original source file is printed. 2to3 can also write the needed modifications right back to the source file. (A backup of the original file is made unless -n is also given.) Writing the changes back is enabled with the -w flag: $ 2to3 -w example.py After transformation, example.py looks like this: def greet(name): print("Hello, {0}!".format(name)) print("What’s your name?") name = input() greet(name) Comments and exact indentation are preserved throughout the translation process. By default, 2to3 runs a set of predefined fixers. The -l flag lists all available fixers. An explicit set of fixers to run can be given with -f. Likewise the -x explicitly disables a fixer. The following example runs only the imports and has_key fixers: $ 2to3 -f imports -f has_key example.py This command runs every fixer except the apply fixer: $ 2to3 -x apply example.py Some fixers are explicit, meaning they aren’t run by default and must be listed on the command line to be run. Here, in addition to the default fixers, the idioms fixer is run: $ 2to3 -f all -f idioms example.py Notice how passing all enables all default fixers.
1094
Chapter 25. Development Tools
The Python Library Reference, Release 3.2.3
Sometimes 2to3 will find a place in your source code that needs to be changed, but 2to3 cannot fix automatically. In this case, 2to3 will print a warning beneath the diff for a file. You should address the warning in order to have compliant 3.x code. 2to3 can also refactor doctests. To enable this mode, use the -d flag. Note that only doctests will be refactored. This also doesn’t require the module to be valid Python. For example, doctest like examples in a reST document could also be refactored with this option. The -v option enables output of more information on the translation process. Since some print statements can be parsed as function calls or statements, 2to3 cannot always read files containing the print function. When 2to3 detects the presence of the from __future__ import print_function compiler directive, it modifies its internal grammar to interpret print() as a function. This change can also be enabled manually with the -p flag. Use -p to run fixers on code that already has had its print statements converted. The -o or --output-dir option allows specification of an alternate directory for processed output files to be written to. The -n flag is required when using this as backup files do not make sense when not overwriting the input files. New in version 3.2.3: The -o option was added. The -W or --write-unchanged-files flag tells 2to3 to always write output files even if no changes were required to the file. This is most useful with -o so that an entire Python source tree is copied with translation from one directory to another. This option implies the -w flag as it would not make sense otherwise. New in version 3.2.3: The -W flag was added. The --add-suffix option specifies a string to append to all output filenames. The -n flag is required when specifying this as backups are not necessary when writing to different filenames. Example: $ 2to3 -n -W --add-suffix=3 example.py Will cause a converted file named example.py3 to be written. New in version 3.2.3: The --add-suffix option was added. To translate an entire project from one directory tree to another use: $ 2to3 --output-dir=python3-version/mycode -W -n python2-version/mycode
25.4.2 Fixers Each step of transforming code is encapsulated in a fixer. The command 2to3 -l lists them. As documented above, each can be turned on and off individually. They are described here in more detail. apply Removes usage of apply(). For example apply(function, *args, **kwargs) is converted to function(*args, **kwargs). basestring Converts basestring to str. buffer Converts buffer to memoryview. This fixer is optional because the memoryview API is similar but not exactly the same as that of buffer. callable Converts callable(x) to isinstance(x, collections.Callable), adding an import to collections if needed. Note callable(x) has returned in Python 3.2, so if you do not intend to support Python 3.1, you can disable this fixer. dict Fixes dictionary iteration methods. dict.iteritems() is converted to dict.items(), dict.iterkeys() to dict.keys(), and dict.itervalues() to dict.values(). Similarly, dict.viewitems(), dict.viewkeys() and dict.viewvalues() are converted respectively to dict.items(), dict.keys() and dict.values(). It also wraps existing usages of dict.items(), dict.keys(), and dict.values() in a call to list.
25.4. 2to3 - Automated Python 2 to 3 code translation
1095
The Python Library Reference, Release 3.2.3
except Converts except X, T to except X as T. exec Converts the exec statement to the exec() function. execfile Removes usage of execfile(). compile(), and exec().
The argument to execfile() is wrapped in calls to open(),
exitfunc Changes assignment of sys.exitfunc to use of the atexit module. filter Wraps filter() usage in a list call. funcattrs Fixes function attributes that have been renamed. For example, my_function.func_closure is converted to my_function.__closure__. future Removes from __future__ import new_feature statements. getcwdu Renames os.getcwdu() to os.getcwd(). has_key Changes dict.has_key(key) to key in dict. idioms This optional fixer performs several transformations that make Python code more idiomatic. Type comparisons like type(x) is SomeClass and type(x) == SomeClass are converted to isinstance(x, SomeClass). while 1 becomes while True. This fixer also tries to make use of sorted() in appropriate places. For example, this block L = list(some_iterable) L.sort() is changed to L = sorted(some_iterable) import Detects sibling imports and converts them to relative imports. imports Handles module renames in the standard library. imports2 Handles other modules renames in the standard library. It is separate from the imports fixer only because of technical limitations. input Converts input(prompt) to eval(input(prompt)) intern Converts intern() to sys.intern(). isinstance Fixes duplicate types in the second argument of isinstance(). For example, isinstance(x, (int, int)) is converted to isinstance(x, (int)).
1096
Chapter 25. Development Tools
The Python Library Reference, Release 3.2.3
itertools_imports Removes imports of itertools.ifilter(), itertools.izip(), and itertools.imap(). Imports of itertools.ifilterfalse() are also changed to itertools.filterfalse(). itertools Changes usage of itertools.ifilter(), itertools.izip(), and itertools.imap() to their built-in equivalents. itertools.ifilterfalse() is changed to itertools.filterfalse(). long Strips the L prefix on long literals and renames long to int. map Wraps map() in a list call. It also changes map(None, x) to list(x). future_builtins import map disables this fixer.
Using from
metaclass Converts the old metaclass syntax (__metaclass__ = Meta in the class body) to the new (class X(metaclass=Meta)). methodattrs Fixes old method attribute names. For example, meth.im_func is converted to meth.__func__. ne Converts the old not-equal syntax, , to !=. next Converts the use of iterator’s next() methods to the next() function. It also renames next() methods to __next__(). nonzero Renames __nonzero__() to __bool__(). numliterals Converts octal literals into the new syntax. operator Converts calls to various functions in the operator module to other, but equivalent, function calls. When needed, the appropriate import statements are added, e.g. import collections. The following mapping are made: From operator.isCallable(obj) operator.sequenceIncludes(obj) operator.isSequenceType(obj) operator.isMappingType(obj) operator.isNumberType(obj) operator.repeat(obj, n) operator.irepeat(obj, n)
paren Add extra parenthesis where they are required in list comprehensions. For example, [x for x in 1, 2] becomes [x for x in (1, 2)]. print Converts the print statement to the print() function. raise Converts raise E, V to raise E(V), and raise E, V, T to raise E(V).with_traceback(T). If E is a tuple, the translation will be incorrect because substituting tuples for exceptions has been removed in 3.0.
25.4. 2to3 - Automated Python 2 to 3 code translation
1097
The Python Library Reference, Release 3.2.3
raw_input Converts raw_input() to input(). reduce Handles the move of reduce() to functools.reduce(). renames Changes sys.maxint to sys.maxsize. repr Replaces backtick repr with the repr() function. set_literal Replaces use of the set constructor with set literals. This fixer is optional. standard_error Renames StandardError to Exception. sys_exc Changes the deprecated sys.exc_info().
sys.exc_value,
sys.exc_type,
sys.exc_traceback
to
use
throw Fixes the API change in generator’s throw() method. tuple_params Removes implicit tuple parameter unpacking. This fixer inserts temporary variables. types Fixes code broken from the removal of some members in the types module. unicode Renames unicode to str. urllib Handles the rename of urllib and urllib2 to the urllib package. ws_comma Removes excess whitespace from comma separated items. This fixer is optional. xrange Renames xrange() to range() and wraps existing range() calls with list. xreadlines Changes for x in file.xreadlines() to for x in file. zip Wraps zip() usage in a list call. This is disabled when from future_builtins import zip appears.
25.4.3 lib2to3 - 2to3’s library Note: The lib2to3 API should be considered unstable and may change drastically in the future.
25.5 test — Regression tests package for Python
1098
Chapter 25. Development Tools
The Python Library Reference, Release 3.2.3
Note: The test package is meant for internal use by Python only. It is documented for the benefit of the core developers of Python. Any use of this package outside of Python’s standard library is discouraged as code mentioned here can change or be removed without notice between releases of Python. The test package contains all regression tests for Python as well as the modules test.support and test.regrtest. test.support is used to enhance your tests while test.regrtest drives the testing suite. Each module in the test package whose name starts with test_ is a testing suite for a specific module or feature. All new tests should be written using the unittest or doctest module. Some older tests are written using a “traditional” testing style that compares output printed to sys.stdout; this style of test is considered deprecated. See Also: Module unittest Writing PyUnit regression tests. Module doctest Tests embedded in documentation strings.
25.5.1 Writing Unit Tests for the test package It is preferred that tests that use the unittest module follow a few guidelines. One is to name the test module by starting it with test_ and end it with the name of the module being tested. The test methods in the test module should start with test_ and end with a description of what the method is testing. This is needed so that the methods are recognized by the test driver as test methods. Also, no documentation string for the method should be included. A comment (such as # Tests function returns only True or False) should be used to provide documentation for test methods. This is done because documentation strings get printed out if they exist and thus what test is being run is not stated. A basic boilerplate is often used: import unittest from test import support class MyTestCase1(unittest.TestCase): # Only use setUp() and tearDown() if necessary def setUp(self): ... code to execute in preparation for tests ... def tearDown(self): ... code to execute to clean up after tests ... def test_feature_one(self): # Test feature one. ... testing code ... def test_feature_two(self): # Test feature two. ... testing code ... ... more test methods ... class MyTestCase2(unittest.TestCase): ... same structure as MyTestCase1 ... ... more test classes ... 25.5. test — Regression tests package for Python
1099
The Python Library Reference, Release 3.2.3
def test_main(): support.run_unittest(MyTestCase1, MyTestCase2, ... list other tests ... ) if __name__ == ’__main__’: test_main() This boilerplate code allows the testing suite to be run by test.regrtest as well as on its own as a script. The goal for regression testing is to try to break code. This leads to a few guidelines to be followed: • The testing suite should exercise all classes, functions, and constants. This includes not just the external API that is to be presented to the outside world but also “private” code. • Whitebox testing (examining the code being tested when the tests are being written) is preferred. Blackbox testing (testing only the published user interface) is not complete enough to make sure all boundary and edge cases are tested. • Make sure all possible values are tested including invalid ones. This makes sure that not only all valid values are acceptable but also that improper values are handled correctly. • Exhaust as many code paths as possible. Test where branching occurs and thus tailor input to make sure as many different paths through the code are taken. • Add an explicit test for any bugs discovered for the tested code. This will make sure that the error does not crop up again if the code is changed in the future. • Make sure to clean up after your tests (such as close and remove all temporary files). • If a test is dependent on a specific condition of the operating system then verify the condition already exists before attempting the test. • Import as few modules as possible and do it as soon as possible. This minimizes external dependencies of tests and also minimizes possible anomalous behavior from side-effects of importing a module. • Try to maximize code reuse. On occasion, tests will vary by something as small as what type of input is used. Minimize code duplication by subclassing a basic test class with a class that specifies the input: class TestFuncAcceptsSequences(unittest.TestCase): func = mySuperWhammyFunction def test_func(self): self.func(self.arg) class AcceptLists(TestFuncAcceptsSequences): arg = [1, 2, 3] class AcceptStrings(TestFuncAcceptsSequences): arg = ’abc’ class AcceptTuples(TestFuncAcceptsSequences): arg = (1, 2, 3) See Also: Test Driven Development A book by Kent Beck on writing tests before code.
1100
Chapter 25. Development Tools
The Python Library Reference, Release 3.2.3
25.5.2 Running tests using the command-line interface The test package can be run as a script to drive Python’s regression test suite, thanks to the -m option: python -m test. Under the hood, it uses test.regrtest; the call python -m test.regrtest used in previous Python versions still works). Running the script by itself automatically starts running all regression tests in the test package. It does this by finding all modules in the package whose name starts with test_, importing them, and executing the function test_main() if present. The names of tests to execute may also be passed to the script. Specifying a single regression test (python -m test test_spam) will minimize output and only print whether the test passed or failed and thus minimize output. Running test directly allows what resources are available for tests to use to be set. You do this by using the -u command-line option. Specifying all as the value for the -u option enables all possible resources: python -m test -uall. If all but one resource is desired (a more common case), a comma-separated list of resources that are not desired may be listed after all. The command python -m test -uall,-audio,-largefile will run test with all resources except the audio and largefile resources. For a list of all resources and more command-line options, run python -m test -h. Some other ways to execute the regression tests depend on what platform the tests are being executed on. On Unix, you can run make test at the top-level directory where Python was built. On Windows, executing rt.bat from your PCBuild directory will run all regression tests.
25.6 test.support — Utilities for the Python test suite The test.support module provides support for Python’s regression test suite. Note: test.support is not a public module. It is documented here to help Python developers write tests. The API of this module is subject to change without backwards compatibility concerns between releases. This module defines the following exceptions: exception test.support.TestFailed Exception to be raised when a test fails. This is deprecated in favor of unittest-based tests and unittest.TestCase‘s assertion methods. exception test.support.ResourceDenied Subclass of unittest.SkipTest. Raised when a resource (such as a network connection) is not available. Raised by the requires() function. The test.support module defines the following constants: test.support.verbose True when verbose output is enabled. Should be checked when more detailed information is desired about a running test. verbose is set by test.regrtest. test.support.is_jython True if the running interpreter is Jython. test.support.TESTFN Set to a name that is safe to use as the name of a temporary file. Any temporary file that is created should be closed and unlinked (removed). The test.support module defines the following functions: test.support.forget(module_name) Remove the module named module_name from sys.modules and delete any byte-compiled files of the module.
25.6. test.support — Utilities for the Python test suite
1101
The Python Library Reference, Release 3.2.3
test.support.is_resource_enabled(resource) Return True if resource is enabled and available. test.regrtest is executing the tests.
The list of available resources is only set when
test.support.requires(resource, msg=None) Raise ResourceDenied if resource is not available. msg is the argument to ResourceDenied if it is raised. Always returns True if called by a function whose __name__ is ’__main__’. Used when tests are executed by test.regrtest. test.support.findfile(filename) Return the path to the file named filename. If no match is found filename is returned. This does not equal a failure since it could be the path to the file. test.support.run_unittest(*classes) Execute unittest.TestCase subclasses passed to the function. The function scans the classes for methods starting with the prefix test_ and executes the tests individually. It is also legal to pass strings as parameters; these should be keys in sys.modules. Each associated module will be scanned by unittest.TestLoader.loadTestsFromModule(). This is usually seen in the following test_main() function: def test_main(): support.run_unittest(__name__) This will run all tests defined in the named module. test.support.check_warnings(*filters, quiet=True) A convenience wrapper for warnings.catch_warnings() that makes it easier to test that a warning was correctly raised. It is approximately equivalent to calling warnings.catch_warnings(record=True) with warnings.simplefilter() set to always and with the option to automatically validate the results that are recorded. check_warnings accepts 2-tuples of the form ("message regexp", WarningCategory) as positional arguments. If one or more filters are provided, or if the optional keyword argument quiet is False, it checks to make sure the warnings are as expected: each specified filter must match at least one of the warnings raised by the enclosed code or the test fails, and if any warnings are raised that do not match any of the specified filters the test fails. To disable the first of these checks, set quiet to True. If no arguments are specified, it defaults to: check_warnings(("", Warning), quiet=True) In this case all warnings are caught and no errors are raised. On entry to the context manager, a WarningRecorder instance is returned. The underlying warnings list from catch_warnings() is available via the recorder object’s warnings attribute. As a convenience, the attributes of the object representing the most recent warning can also be accessed directly through the recorder object (see example below). If no warning has been raised, then any of the attributes that would otherwise be expected on an object representing a warning will return None. The recorder object also has a reset() method, which clears the warnings list. The context manager is designed to be used like this: with check_warnings(("assertion is always true", SyntaxWarning), ("", UserWarning)): exec(’assert(False, "Hey!")’) warnings.warn(UserWarning("Hide me!"))
1102
Chapter 25. Development Tools
The Python Library Reference, Release 3.2.3
In this case if either warning was not raised, or some other warning was raised, check_warnings() would raise an error. When a test needs to look more deeply into the warnings, rather than just checking whether or not they occurred, code like this can be used: with check_warnings(quiet=True) as w: warnings.warn("foo") assert str(w.args[0]) == "foo" warnings.warn("bar") assert str(w.args[0]) == "bar" assert str(w.warnings[0].args[0]) == "foo" assert str(w.warnings[1].args[0]) == "bar" w.reset() assert len(w.warnings) == 0 Here all warnings will be caught, and the test code tests the captured warnings directly. Changed in version 3.2: New optional arguments filters and quiet. test.support.captured_stdout() This is a context manager that runs the with statement body using a StringIO.StringIO object as sys.stdout. That object can be retrieved using the as clause of the with statement. Example use: with captured_stdout() as s: print("hello") assert s.getvalue() == "hello\n" test.support.import_module(name, deprecated=False) This function imports and returns the named module. Unlike a normal import, this function raises unittest.SkipTest if the module cannot be imported. Module and package deprecation messages are suppressed during this import if deprecated is True. New in version 3.1. test.support.import_fresh_module(name, fresh=(), blocked=(), deprecated=False) This function imports and returns a fresh copy of the named Python module by removing the named module from sys.modules before doing the import. Note that unlike reload(), the original module is not affected by this operation. fresh is an iterable of additional module names that are also removed from the sys.modules cache before doing the import. blocked is an iterable of module names that are replaced with 0 in the module cache during the import to ensure that attempts to import them raise ImportError. The named module and any modules named in the fresh and blocked parameters are saved before starting the import and then reinserted into sys.modules when the fresh import is complete. Module and package deprecation messages are suppressed during this import if deprecated is True. This function will raise unittest.SkipTest is the named module cannot be imported. Example use: # Get copies of the warnings module for testing without # affecting the version being used by the rest of the test suite # One copy uses the C implementation, the other is forced to use
25.6. test.support — Utilities for the Python test suite
1103
The Python Library Reference, Release 3.2.3
# the pure Python fallback implementation py_warnings = import_fresh_module(’warnings’, blocked=[’_warnings’]) c_warnings = import_fresh_module(’warnings’, fresh=[’_warnings’]) New in version 3.1. The test.support module defines the following classes: class test.support.TransientResource(exc, **kwargs) Instances are a context manager that raises ResourceDenied if the specified exception type is raised. Any keyword arguments are treated as attribute/value pairs to be compared against any exception raised within the with statement. Only if all pairs match properly against attributes on the exception is ResourceDenied raised. class test.support.EnvironmentVarGuard Class used to temporarily set or unset environment variables. Instances can be used as a context manager and have a complete dictionary interface for querying/modifying the underlying os.environ. After exit from the context manager all changes to environment variables done through this instance will be rolled back. Changed in version 3.1: Added dictionary interface. EnvironmentVarGuard.set(envvar, value) Temporarily set the environment variable envvar to the value of value. EnvironmentVarGuard.unset(envvar) Temporarily unset the environment variable envvar. class test.support.WarningsRecorder Class used to record warnings for unit tests. See documentation of check_warnings() above for more details.
1104
Chapter 25. Development Tools
CHAPTER
TWENTYSIX
DEBUGGING AND PROFILING These libraries help you with Python development: the debugger enables you to step through code, analyze stack frames and set breakpoints etc., and the profilers run code and give you a detailed breakdown of execution times, allowing you to identify bottlenecks in your programs.
The bdb module handles basic debugger functions, like setting breakpoints or managing execution via the debugger. The following exception is defined: exception bdb.BdbQuit Exception raised by the Bdb class for quitting the debugger. The bdb module also defines two classes: class bdb.Breakpoint(self, file, line, temporary=0, cond=None, funcname=None) This class implements temporary breakpoints, ignore counts, disabling and (re-)enabling, and conditionals. Breakpoints are indexed by number through a list called bpbynumber and by (file, line) pairs through bplist. The former points to a single instance of class Breakpoint. The latter points to a list of such instances since there may be more than one breakpoint per line. When creating a breakpoint, its associated filename should be in canonical form. If a funcname is defined, a breakpoint hit will be counted when the first line of that function is executed. A conditional breakpoint always counts a hit. Breakpoint instances have the following methods: deleteMe() Delete the breakpoint from the list associated to a file/line. If it is the last breakpoint in that position, it also deletes the entry for the file/line. enable() Mark the breakpoint as enabled. disable() Mark the breakpoint as disabled. bpformat() Return a string with all the information about the breakpoint, nicely formatted:
1105
The Python Library Reference, Release 3.2.3
•The breakpoint number. •If it is temporary or not. •Its file,line position. •The condition that causes a break. •If it must be ignored the next N times. •The breakpoint hit count. New in version 3.2. bpprint(out=None) Print the output of bpformat() to the file out, or if it is None, to standard output. class bdb.Bdb(skip=None) The Bdb class acts as a generic Python debugger base class. This class takes care of the details of the trace facility; a derived class should implement user interaction. The standard debugger class (pdb.Pdb) is an example. The skip argument, if given, must be an iterable of glob-style module name patterns. The debugger will not step into frames that originate in a module that matches one of these patterns. Whether a frame is considered to originate in a certain module is determined by the __name__ in the frame globals. New in version 3.1: The skip argument. The following methods of Bdb normally don’t need to be overridden. canonic(filename) Auxiliary method for getting a filename in a canonical form, that is, as a case-normalized (on caseinsensitive filesystems) absolute path, stripped of surrounding angle brackets. reset() Set the botframe, stopframe, returnframe and quitting attributes with values ready to start debugging. trace_dispatch(frame, event, arg) This function is installed as the trace function of debugged frames. Its return value is the new trace function (in most cases, that is, itself). The default implementation decides how to dispatch a frame, depending on the type of event (passed as a string) that is about to be executed. event can be one of the following: •"line": A new line of code is going to be executed. •"call": A function is about to be called, or another code block entered. •"return": A function or other code block is about to return. •"exception": An exception has occurred. •"c_call": A C function is about to be called. •"c_return": A C function has returned. •"c_exception": A C function has raised an exception. For the Python events, specialized functions (see below) are called. For the C events, no action is taken. The arg parameter depends on the previous event. See the documentation for sys.settrace() for more information on the trace function. For more information on code and frame objects, refer to types.
1106
Chapter 26. Debugging and Profiling
The Python Library Reference, Release 3.2.3
dispatch_line(frame) If the debugger should stop on the current line, invoke the user_line() method (which should be overridden in subclasses). Raise a BdbQuit exception if the Bdb.quitting flag is set (which can be set from user_line()). Return a reference to the trace_dispatch() method for further tracing in that scope. dispatch_call(frame, arg) If the debugger should stop on this function call, invoke the user_call() method (which should be overridden in subclasses). Raise a BdbQuit exception if the Bdb.quitting flag is set (which can be set from user_call()). Return a reference to the trace_dispatch() method for further tracing in that scope. dispatch_return(frame, arg) If the debugger should stop on this function return, invoke the user_return() method (which should be overridden in subclasses). Raise a BdbQuit exception if the Bdb.quitting flag is set (which can be set from user_return()). Return a reference to the trace_dispatch() method for further tracing in that scope. dispatch_exception(frame, arg) If the debugger should stop at this exception, invokes the user_exception() method (which should be overridden in subclasses). Raise a BdbQuit exception if the Bdb.quitting flag is set (which can be set from user_exception()). Return a reference to the trace_dispatch() method for further tracing in that scope. Normally derived classes don’t override the following methods, but they may if they want to redefine the definition of stopping and breakpoints. stop_here(frame) This method checks if the frame is somewhere below botframe in the call stack. botframe is the frame in which debugging started. break_here(frame) This method checks if there is a breakpoint in the filename and line belonging to frame or, at least, in the current function. If the breakpoint is a temporary one, this method deletes it. break_anywhere(frame) This method checks if there is a breakpoint in the filename of the current frame. Derived classes should override these methods to gain control over debugger operation. user_call(frame, argument_list) This method is called from dispatch_call() when there is the possibility that a break might be necessary anywhere inside the called function. user_line(frame) This method is called from dispatch_line() when either stop_here() or break_here() yields True. user_return(frame, return_value) This method is called from dispatch_return() when stop_here() yields True. user_exception(frame, exc_info) This method is called from dispatch_exception() when stop_here() yields True. do_clear(arg) Handle how a breakpoint must be removed when it is a temporary one. This method must be implemented by derived classes. Derived classes and clients can call the following methods to affect the stepping state.
26.1. bdb — Debugger framework
1107
The Python Library Reference, Release 3.2.3
set_step() Stop after one line of code. set_next(frame) Stop on the next line in or below the given frame. set_return(frame) Stop when returning from the given frame. set_until(frame) Stop when the line with the line no greater than the current one is reached or when returning from current frame set_trace([frame ]) Start debugging from frame. If frame is not specified, debugging starts from caller’s frame. set_continue() Stop only at breakpoints or when finished. If there are no breakpoints, set the system trace function to None. set_quit() Set the quitting attribute to True. This raises BdbQuit in the next call to one of the dispatch_*() methods. Derived classes and clients can call the following methods to manipulate breakpoints. These methods return a string containing an error message if something went wrong, or None if all is well. set_break(filename, lineno, temporary=0, cond, funcname) Set a new breakpoint. If the lineno line doesn’t exist for the filename passed as argument, return an error message. The filename should be in canonical form, as described in the canonic() method. clear_break(filename, lineno) Delete the breakpoints in filename and lineno. If none were set, an error message is returned. clear_bpbynumber(arg) Delete the breakpoint which has the index arg in the Breakpoint.bpbynumber. If arg is not numeric or out of range, return an error message. clear_all_file_breaks(filename) Delete all breakpoints in filename. If none were set, an error message is returned. clear_all_breaks() Delete all existing breakpoints. get_bpbynumber(arg) Return a breakpoint specified by the given number. If arg is a string, it will be converted to a number. If arg is a non-numeric string, if the given breakpoint never existed or has been deleted, a ValueError is raised. New in version 3.2. get_break(filename, lineno) Check if there is a breakpoint for lineno of filename. get_breaks(filename, lineno) Return all breakpoints for lineno in filename, or an empty list if none are set. get_file_breaks(filename) Return all breakpoints in filename, or an empty list if none are set. get_all_breaks() Return all breakpoints that are set. Derived classes and clients can call the following methods to get a data structure representing a stack trace.
1108
Chapter 26. Debugging and Profiling
The Python Library Reference, Release 3.2.3
get_stack(f, t) Get a list of records for a frame and all higher (calling) and lower frames, and the size of the higher part. format_stack_entry(frame_lineno, lprefix=’: ‘) Return a string with information about a stack entry, identified by a (frame, lineno) tuple: •The canonical form of the filename which contains the frame. •The function name, or "". •The input arguments. •The return value. •The line of code (if it exists). The following two methods can be called by clients to use a debugger to debug a statement, given as a string. run(cmd, globals=None, locals=None) Debug a statement executed via the exec() function. globals defaults to __main__.__dict__, locals defaults to globals. runeval(expr, globals=None, locals=None) Debug an expression executed via the eval() function. globals and locals have the same meaning as in run(). runctx(cmd, globals, locals) For backwards compatibility. Calls the run() method. runcall(func, *args, **kwds) Debug a single function call, and return its result. Finally, the module defines the following functions: bdb.checkfuncname(b, frame) Check whether we should break here, depending on the way the breakpoint b was set. If it was set via line number, it checks if b.line is the same as the one in the frame also passed as argument. If the breakpoint was set via function name, we have to check we are in the right frame (the right function) and if we are in its first executable line. bdb.effective(file, line, frame) Determine if there is an effective (active) breakpoint at this line of code. Return a tuple of the breakpoint and a boolean that indicates if it is ok to delete a temporary breakpoint. Return (None, None) if there is no matching breakpoint. bdb.set_trace() Start debugging with a Bdb instance from caller’s frame.
26.2 pdb — The Python Debugger The module pdb defines an interactive source code debugger for Python programs. It supports setting (conditional) breakpoints and single stepping at the source line level, inspection of stack frames, source code listing, and evaluation of arbitrary Python code in the context of any stack frame. It also supports post-mortem debugging and can be called under program control. The debugger is extensible – it is actually defined as the class Pdb. This is currently undocumented but easily understood by reading the source. The extension interface uses the modules bdb and cmd. The debugger’s prompt is (Pdb). Typical usage to run a program under control of the debugger is:
26.2. pdb — The Python Debugger
1109
The Python Library Reference, Release 3.2.3
>>> import pdb >>> import mymodule >>> pdb.run(’mymodule.test()’) > (0)?() (Pdb) continue > (1)?() (Pdb) continue NameError: ’spam’ > (1)?() (Pdb) pdb.py can also be invoked as a script to debug other scripts. For example: python3 -m pdb myscript.py When invoked as a script, pdb will automatically enter post-mortem debugging if the program being debugged exits abnormally. After post-mortem debugging (or after normal exit of the program), pdb will restart the program. Automatic restarting preserves pdb’s state (such as breakpoints) and in most cases is more useful than quitting the debugger upon program’s exit. New in version 3.2: pdb.py now accepts a -c option that executes commands as if given in a .pdbrc file, see Debugger Commands. The typical usage to break into the debugger from a running program is to insert import pdb; pdb.set_trace() at the location you want to break into the debugger. You can then step through the code following this statement, and continue running without the debugger using the continue command. The typical usage to inspect a crashed program is: >>> import pdb >>> import mymodule >>> mymodule.test() Traceback (most recent call last): File "", line 1, in ? File "./mymodule.py", line 4, in test test2() File "./mymodule.py", line 3, in test2 print(spam) NameError: spam >>> pdb.pm() > ./mymodule.py(3)test2() -> print(spam) (Pdb) The module defines the following functions; each enters the debugger in a slightly different way: pdb.run(statement, globals=None, locals=None) Execute the statement (given as a string or a code object) under debugger control. The debugger prompt appears before any code is executed; you can set breakpoints and type continue, or you can step through the statement using step or next (all these commands are explained below). The optional globals and locals arguments specify the environment in which the code is executed; by default the dictionary of the module __main__ is used. (See the explanation of the built-in exec() or eval() functions.) pdb.runeval(expression, globals=None, locals=None) Evaluate the expression (given as a string or a code object) under debugger control. When runeval() returns, it returns the value of the expression. Otherwise this function is similar to run(). pdb.runcall(function, *args, **kwds) Call the function (a function or method object, not a string) with the given arguments. When runcall()
1110
Chapter 26. Debugging and Profiling
The Python Library Reference, Release 3.2.3
returns, it returns whatever the function call returned. The debugger prompt appears as soon as the function is entered. pdb.set_trace() Enter the debugger at the calling stack frame. This is useful to hard-code a breakpoint at a given point in a program, even if the code is not otherwise being debugged (e.g. when an assertion fails). pdb.post_mortem(traceback=None) Enter post-mortem debugging of the given traceback object. If no traceback is given, it uses the one of the exception that is currently being handled (an exception must be being handled if the default is to be used). pdb.pm() Enter post-mortem debugging of the traceback found in sys.last_traceback. The run* functions and set_trace() are aliases for instantiating the Pdb class and calling the method of the same name. If you want to access further features, you have to do this yourself: class pdb.Pdb(completekey=’tab’, stdin=None, stdout=None, skip=None, nosigint=False) Pdb is the debugger class. The completekey, stdin and stdout arguments are passed to the underlying cmd.Cmd class; see the description there. The skip argument, if given, must be an iterable of glob-style module name patterns. The debugger will not step into frames that originate in a module that matches one of these patterns. 1 By default, Pdb sets a handler for the SIGINT signal (which is sent when the user presses Ctrl-C on the console) when you give a continue command. This allows you to break into the debugger again by pressing Ctrl-C. If you want Pdb not to touch the SIGINT handler, set nosigint tot true. Example call to enable tracing with skip: import pdb; pdb.Pdb(skip=[’django.*’]).set_trace() New in version 3.1: The skip argument.New in version 3.2: The nosigint argument. Previously, a SIGINT handler was never set by Pdb. run(statement, globals=None, locals=None) runeval(expression, globals=None, locals=None) runcall(function, *args, **kwds) set_trace() See the documentation for the functions explained above.
26.2.1 Debugger Commands The commands recognized by the debugger are listed below. Most commands can be abbreviated to one or two letters as indicated; e.g. h(elp) means that either h or help can be used to enter the help command (but not he or hel, nor H or Help or HELP). Arguments to commands must be separated by whitespace (spaces or tabs). Optional arguments are enclosed in square brackets ([]) in the command syntax; the square brackets must not be typed. Alternatives in the command syntax are separated by a vertical bar (|). Entering a blank line repeats the last command entered. Exception: if the last command was a list command, the next 11 lines are listed. Commands that the debugger doesn’t recognize are assumed to be Python statements and are executed in the context of the program being debugged. Python statements can also be prefixed with an exclamation point (!). This is a powerful way to inspect the program being debugged; it is even possible to change a variable or call a function. When an exception occurs in such a statement, the exception name is printed but the debugger’s state is not changed. 1
Whether a frame is considered to originate in a certain module is determined by the __name__ in the frame globals.
26.2. pdb — The Python Debugger
1111
The Python Library Reference, Release 3.2.3
The debugger supports aliases. Aliases can have parameters which allows one a certain level of adaptability to the context under examination. Multiple commands may be entered on a single line, separated by ;;. (A single ; is not used as it is the separator for multiple commands in a line that is passed to the Python parser.) No intelligence is applied to separating the commands; the input is split at the first ;; pair, even if it is in the middle of a quoted string. If a file .pdbrc exists in the user’s home directory or in the current directory, it is read in and executed as if it had been typed at the debugger prompt. This is particularly useful for aliases. If both files exist, the one in the home directory is read first and aliases defined there can be overridden by the local file. Changed in version 3.2: .pdbrc can now contain commands that continue debugging, such as continue or next. Previously, these commands had no effect. h(elp) [command] Without argument, print the list of available commands. With a command as argument, print help about that command. help pdb displays the full documentation (the docstring of the pdb module). Since the command argument must be an identifier, help exec must be entered to get help on the ! command. w(here) Print a stack trace, with the most recent frame at the bottom. An arrow indicates the current frame, which determines the context of most commands. d(own) [count] Move the current frame count (default one) levels down in the stack trace (to a newer frame). u(p) [count] Move the current frame count (default one) levels up in the stack trace (to an older frame). b(reak) [([filename:]lineno | function) [, condition]] With a lineno argument, set a break there in the current file. With a function argument, set a break at the first executable statement within that function. The line number may be prefixed with a filename and a colon, to specify a breakpoint in another file (probably one that hasn’t been loaded yet). The file is searched on sys.path. Note that each breakpoint is assigned a number to which all the other breakpoint commands refer. If a second argument is present, it is an expression which must evaluate to true before the breakpoint is honored. Without argument, list all breaks, including for each breakpoint, the number of times that breakpoint has been hit, the current ignore count, and the associated condition if any. tbreak [([filename:]lineno | function) [, condition]] Temporary breakpoint, which is removed automatically when it is first hit. The arguments are the same as for break. cl(ear) [filename:lineno | bpnumber [bpnumber ...]] With a filename:lineno argument, clear all the breakpoints at this line. With a space separated list of breakpoint numbers, clear those breakpoints. Without argument, clear all breaks (but first ask confirmation). disable [bpnumber [bpnumber ...]] Disable the breakpoints given as a space separated list of breakpoint numbers. Disabling a breakpoint means it cannot cause the program to stop execution, but unlike clearing a breakpoint, it remains in the list of breakpoints and can be (re-)enabled. enable [bpnumber [bpnumber ...]] Enable the breakpoints specified. ignore bpnumber [count] Set the ignore count for the given breakpoint number. If count is omitted, the ignore count is set to 0. A breakpoint becomes active when the ignore count is zero. When non-zero, the count is decremented each time the breakpoint is reached and the breakpoint is not disabled and any associated condition evaluates to true.
1112
Chapter 26. Debugging and Profiling
The Python Library Reference, Release 3.2.3
condition bpnumber [condition] Set a new condition for the breakpoint, an expression which must evaluate to true before the breakpoint is honored. If condition is absent, any existing condition is removed; i.e., the breakpoint is made unconditional. commands [bpnumber] Specify a list of commands for breakpoint number bpnumber. The commands themselves appear on the following lines. Type a line containing just end to terminate the commands. An example: (Pdb) commands 1 (com) print some_variable (com) end (Pdb) To remove all commands from a breakpoint, type commands and follow it immediately with end; that is, give no commands. With no bpnumber argument, commands refers to the last breakpoint set. You can use breakpoint commands to start your program up again. Simply use the continue command, or step, or any other command that resumes execution. Specifying any command resuming execution (currently continue, step, next, return, jump, quit and their abbreviations) terminates the command list (as if that command was immediately followed by end). This is because any time you resume execution (even with a simple next or step), you may encounter another breakpoint–which could have its own command list, leading to ambiguities about which list to execute. If you use the ‘silent’ command in the command list, the usual message about stopping at a breakpoint is not printed. This may be desirable for breakpoints that are to print a specific message and then continue. If none of the other commands print anything, you see no sign that the breakpoint was reached. s(tep) Execute the current line, stop at the first possible occasion (either in a function that is called or on the next line in the current function). n(ext) Continue execution until the next line in the current function is reached or it returns. (The difference between next and step is that step stops inside a called function, while next executes called functions at (nearly) full speed, only stopping at the next line in the current function.) unt(il) [lineno] Without argument, continue execution until the line with a number greater than the current one is reached. With a line number, continue execution until a line with a number greater or equal to that is reached. In both cases, also stop when the current frame returns. Changed in version 3.2: Allow giving an explicit line number. r(eturn) Continue execution until the current function returns. c(ont(inue)) Continue execution, only stop when a breakpoint is encountered. j(ump) lineno Set the next line that will be executed. Only available in the bottom-most frame. This lets you jump back and execute code again, or jump forward to skip code that you don’t want to run. It should be noted that not all jumps are allowed – for instance it is not possible to jump into the middle of a for loop or out of a finally clause. l(ist) [first[, last]] List source code for the current file. Without arguments, list 11 lines around the current line or continue the previous listing. With . as argument, list 11 lines around the current line. With one argument, list 11 lines
26.2. pdb — The Python Debugger
1113
The Python Library Reference, Release 3.2.3
around at that line. With two arguments, list the given range; if the second argument is less than the first, it is interpreted as a count. The current line in the current frame is indicated by ->. If an exception is being debugged, the line where the exception was originally raised or propagated is indicated by >>, if it differs from the current line. New in version 3.2: The >> marker. ll | longlist List all source code for the current function or frame. Interesting lines are marked as for list. New in version 3.2. a(rgs) Print the argument list of the current function. p(rint) expression Evaluate the expression in the current context and print its value. pp expression Like the print command, except the value of the expression is pretty-printed using the pprint module. whatis expression Print the type of the expression. source expression Try to get source code for the given object and display it. New in version 3.2. display [expression] Display the value of the expression if it changed, each time execution stops in the current frame. Without expression, list all display expressions for the current frame. New in version 3.2. undisplay [expression] Do not display the expression any more in the current frame. Without expression, clear all display expressions for the current frame. New in version 3.2. interact Start an interative interpreter (using the code module) whose global namespace contains all the (global and local) names found in the current scope. New in version 3.2. alias [name [command]] Create an alias called name that executes command. The command must not be enclosed in quotes. Replaceable parameters can be indicated by %1, %2, and so on, while %* is replaced by all the parameters. If no command is given, the current alias for name is shown. If no arguments are given, all aliases are listed. Aliases may be nested and can contain anything that can be legally typed at the pdb prompt. Note that internal pdb commands can be overridden by aliases. Such a command is then hidden until the alias is removed. Aliasing is recursively applied to the first word of the command line; all other words in the line are left alone. As an example, here are two useful aliases (especially when placed in the .pdbrc file): # Print instance variables (usage "pi classInst") alias pi for k in %1.__dict__.keys(): print("%1.",k,"=",%1.__dict__[k]) # Print instance variables in self alias ps pi self unalias name Delete the specified alias. ! statement Execute the (one-line) statement in the context of the current stack frame. The exclamation point can be omitted
1114
Chapter 26. Debugging and Profiling
The Python Library Reference, Release 3.2.3
unless the first word of the statement resembles a debugger command. To set a global variable, you can prefix the assignment command with a global statement on the same line, e.g.: (Pdb) global list_options; list_options = [’-l’] (Pdb) run [args ...] restart [args ...] Restart the debugged Python program. If an argument is supplied, it is split with shlex and the result is used as the new sys.argv. History, breakpoints, actions and debugger options are preserved. restart is an alias for run. q(uit) Quit from the debugger. The program being executed is aborted.
26.3 The Python Profilers Source code: Lib/profile.py and Lib/pstats.py
26.3.1 Introduction to the profilers A profiler is a program that describes the run time performance of a program, providing a variety of statistics. This documentation describes the profiler functionality provided in the modules cProfile, profile and pstats. This profiler provides deterministic profiling of Python programs. It also provides a series of report generation tools to allow users to rapidly examine the results of a profile operation. The Python standard library provides two different profilers: 1. cProfile is recommended for most users; it’s a C extension with reasonable overhead that makes it suitable for profiling long-running programs. Based on lsprof, contributed by Brett Rosen and Ted Czotter. 2. profile, a pure Python module whose interface is imitated by cProfile. Adds significant overhead to profiled programs. If you’re trying to extend the profiler in some way, the task might be easier with this module. The profile and cProfile modules export the same interface, so they are mostly interchangeable; cProfile has a much lower overhead but is newer and might not be available on all systems. cProfile is really a compatibility layer on top of the internal _lsprof module. Note: The profiler modules are designed to provide an execution profile for a given program, not for benchmarking purposes (for that, there is timeit for reasonably accurate results). This particularly applies to benchmarking Python code against C code: the profilers introduce overhead for Python code, but not for C-level functions, and so the C code would seem faster than any Python one.
26.3.2 Instant User’s Manual This section is provided for users that “don’t want to read the manual.” It provides a very brief overview, and allows a user to rapidly perform profiling on an existing application. To profile an application with a main entry point of foo(), you would add the following to your module:
26.3. The Python Profilers
1115
The Python Library Reference, Release 3.2.3
import cProfile cProfile.run(’foo()’) (Use profile instead of cProfile if the latter is not available on your system.) The above action would cause foo() to be run, and a series of informative lines (the profile) to be printed. The above approach is most useful when working with the interpreter. If you would like to save the results of a profile into a file for later examination, you can supply a file name as the second argument to the run() function: import cProfile cProfile.run(’foo()’, ’fooprof’) The file cProfile.py can also be invoked as a script to profile another script. For example: python -m cProfile myscript.py cProfile.py accepts two optional arguments on the command line: cProfile.py [-o output_file] [-s sort_order] -s only applies to standard output (-o is not supplied). Look in the Stats documentation for valid sort values. When you wish to review the profile, you should use the methods in the pstats module. Typically you would load the statistics data as follows: import pstats p = pstats.Stats(’fooprof’) The class Stats (the above code just created an instance of this class) has a variety of methods for manipulating and printing the data that was just read into p. When you ran cProfile.run() above, what was printed was the result of three method calls: p.strip_dirs().sort_stats(-1).print_stats() The first method removed the extraneous path from all the module names. The second method sorted all the entries according to the standard module/line/name string that is printed. The third method printed out all the statistics. You might try the following sort calls: p.sort_stats(’name’) p.print_stats() The first call will actually sort the list by function name, and the second call will print out the statistics. The following are some interesting calls to experiment with: p.sort_stats(’cumulative’).print_stats(10) This sorts the profile by cumulative time in a function, and then only prints the ten most significant lines. If you want to understand what algorithms are taking time, the above line is what you would use. If you were looking to see what functions were looping a lot, and taking a lot of time, you would do: p.sort_stats(’time’).print_stats(10) to sort according to time spent within each function, and then print the statistics for the top ten functions. You might also try: p.sort_stats(’file’).print_stats(’__init__’) This will sort all the statistics by file name, and then print out statistics for only the class init methods (since they are spelled with __init__ in them). As one final example, you could try: p.sort_stats(’time’, ’cum’).print_stats(.5, ’init’)
1116
Chapter 26. Debugging and Profiling
The Python Library Reference, Release 3.2.3
This line sorts statistics with a primary key of time, and a secondary key of cumulative time, and then prints out some of the statistics. To be specific, the list is first culled down to 50% (re: .5) of its original size, then only lines containing init are maintained, and that sub-sub-list is printed. If you wondered what functions called the above functions, you could now (p is still sorted according to the last criteria) do: p.print_callers(.5, ’init’) and you would get a list of callers for each of the listed functions. If you want more functionality, you’re going to have to read the manual, or guess what the following functions do: p.print_callees() p.add(’fooprof’) Invoked as a script, the pstats module is a statistics browser for reading and examining profile dumps. It has a simple line-oriented interface (implemented using cmd) and interactive help.
26.3.3 What Is Deterministic Profiling? Deterministic profiling is meant to reflect the fact that all function call, function return, and exception events are monitored, and precise timings are made for the intervals between these events (during which time the user’s code is executing). In contrast, statistical profiling (which is not done by this module) randomly samples the effective instruction pointer, and deduces where time is being spent. The latter technique traditionally involves less overhead (as the code does not need to be instrumented), but provides only relative indications of where time is being spent. In Python, since there is an interpreter active during execution, the presence of instrumented code is not required to do deterministic profiling. Python automatically provides a hook (optional callback) for each event. In addition, the interpreted nature of Python tends to add so much overhead to execution, that deterministic profiling tends to only add small processing overhead in typical applications. The result is that deterministic profiling is not that expensive, yet provides extensive run time statistics about the execution of a Python program. Call count statistics can be used to identify bugs in code (surprising counts), and to identify possible inline-expansion points (high call counts). Internal time statistics can be used to identify “hot loops” that should be carefully optimized. Cumulative time statistics should be used to identify high level errors in the selection of algorithms. Note that the unusual handling of cumulative times in this profiler allows statistics for recursive implementations of algorithms to be directly compared to iterative implementations.
26.3.4 Reference Manual – profile and cProfile The primary entry point for the profiler is the global function profile.run() (resp. cProfile.run()). It is typically used to create any profile information. The reports are formatted and printed using methods of the class pstats.Stats. The following is a description of all of these standard entry points and functions. For a more in-depth view of some of the code, consider reading the later section on Profiler Extensions, which includes discussion of how to derive “better” profilers from the classes presented, or reading the source code for these modules. cProfile.run(command, filename=None, sort=-1) This function takes a single argument that can be passed to the exec() function, and an optional file name. In all cases this routine attempts to exec() its first argument, and gather profiling statistics from the execution. If no file name is present, then this function automatically prints a simple profiling report, sorted by the standard name string (file/line/function-name) that is presented in each line. The following is a typical output from such a call: 2706 function calls (2004 primitive calls) in 4.504 CPU seconds Ordered by: standard name 26.3. The Python Profilers
The first line indicates that 2706 calls were monitored. Of those calls, 2004 were primitive. We define primitive to mean that the call was not induced via recursion. The next line: Ordered by: standard name, indicates that the text string in the far right column was used to sort the output. The column headings include: ncalls for the number of calls, tottime for the total time spent in the given function (and excluding time made in calls to sub-functions), percall is the quotient of tottime divided by ncalls cumtime is the total time spent in this and all subfunctions (from invocation till exit). This figure is accurate even for recursive functions. percall is the quotient of cumtime divided by primitive calls filename:lineno(function) provides the respective data of each function When there are two numbers in the first column (for example, 43/3), then the latter is the number of primitive calls, and the former is the actual number of calls. Note that when the function does not recurse, these two values are the same, and only the single figure is printed. If sort is given, it can be one of ’stdname’ (sort by filename:lineno), ’calls’ (sort by number of calls), ’time’ (sort by total time) or ’cumulative’ (sort by cumulative time). The default is ’stdname’. cProfile.runctx(command, globals, locals, filename=None) This function is similar to run(), with added arguments to supply the globals and locals dictionaries for the command string. Analysis of the profiler data is done using the pstats.Stats class. class pstats.Stats(*filenames, stream=sys.stdout) This class constructor creates an instance of a “statistics object” from a filename (or set of filenames). Stats objects are manipulated by methods, in order to print useful reports. You may specify an alternate output stream by giving the keyword argument, stream. The file selected by the above constructor must have been created by the corresponding version of profile or cProfile. To be specific, there is no file compatibility guaranteed with future versions of this profiler, and there is no compatibility with files produced by other profilers. If several files are provided, all the statistics for identical functions will be coalesced, so that an overall view of several processes can be considered in a single report. If additional files need to be combined with data in an existing Stats object, the add() method can be used. The Stats Class Stats objects have the following methods: Stats.strip_dirs() This method for the Stats class removes all leading path information from file names. It is very useful in reducing the size of the printout to fit within (close to) 80 columns. This method modifies the object, and the stripped information is lost. After performing a strip operation, the object is considered to have its entries in a “random” order, as it was just after object initialization and loading. If strip_dirs() causes two function names to be indistinguishable (they are on the same line of the same filename, and have the same function name), then the statistics for these two entries are accumulated into a single entry.
1118
Chapter 26. Debugging and Profiling
The Python Library Reference, Release 3.2.3
Stats.add(*filenames) This method of the Stats class accumulates additional profiling information into the current profiling object. Its arguments should refer to filenames created by the corresponding version of profile.run() or cProfile.run(). Statistics for identically named (re: file, line, name) functions are automatically accumulated into single function statistics. Stats.dump_stats(filename) Save the data loaded into the Stats object to a file named filename. The file is created if it does not exist, and is overwritten if it already exists. This is equivalent to the method of the same name on the profile.Profile and cProfile.Profile classes. Stats.sort_stats(*keys) This method modifies the Stats object by sorting it according to the supplied criteria. The argument is typically a string identifying the basis of a sort (example: ’time’ or ’name’). When more than one key is provided, then additional keys are used as secondary criteria when there is equality in all keys selected before them. For example, sort_stats(’name’, ’file’) will sort all the entries according to their function name, and resolve all ties (identical function names) by sorting by file name. Abbreviations can be used for any key names, as long as the abbreviation is unambiguous. The following are the keys currently defined: Valid Arg ’calls’ ’cumulative’ ’file’ ’module’ ’pcalls’ ’line’ ’name’ ’nfl’ ’stdname’ ’time’
Meaning call count cumulative time file name file name primitive call count line number function name name/file/line standard name internal time
Note that all sorts on statistics are in descending order (placing most time consuming items first), where as name, file, and line number searches are in ascending order (alphabetical). The subtle distinction between ’nfl’ and ’stdname’ is that the standard name is a sort of the name as printed, which means that the embedded line numbers get compared in an odd way. For example, lines 3, 20, and 40 would (if the file names were the same) appear in the string order 20, 3 and 40. In contrast, ’nfl’ does a numeric compare of the line numbers. In fact, sort_stats(’nfl’) is the same as sort_stats(’name’, ’file’, ’line’). For backward-compatibility reasons, the numeric arguments -1, 0, 1, and 2 are permitted. They are interpreted as ’stdname’, ’calls’, ’time’, and ’cumulative’ respectively. If this old style format (numeric) is used, only one sort key (the numeric key) will be used, and additional arguments will be silently ignored. Stats.reverse_order() This method for the Stats class reverses the ordering of the basic list within the object. Note that by default ascending vs descending order is properly selected based on the sort key of choice. Stats.print_stats(*restrictions) This method for the Stats class prints out a report as described in the profile.run() definition. The order of the printing is based on the last sort_stats() operation done on the object (subject to caveats in add() and strip_dirs()). The arguments provided (if any) can be used to limit the list down to the significant entries. Initially, the list is taken to be the complete set of profiled functions. Each restriction is either an integer (to select a count of lines), or a decimal fraction between 0.0 and 1.0 inclusive (to select a percentage of lines), or a regular expression (to pattern match the standard name that is printed; as of Python 1.5b1, this uses the Perl-style regular expression
26.3. The Python Profilers
1119
The Python Library Reference, Release 3.2.3
syntax defined by the re module). If several restrictions are provided, then they are applied sequentially. For example: print_stats(.1, ’foo:’) would first limit the printing to first 10% of list, and then only print functions that were part of filename .*foo:. In contrast, the command: print_stats(’foo:’, .1) would limit the list to all functions having file names .*foo:, and then proceed to only print the first 10% of them. Stats.print_callers(*restrictions) This method for the Stats class prints a list of all functions that called each function in the profiled database. The ordering is identical to that provided by print_stats(), and the definition of the restricting argument is also identical. Each caller is reported on its own line. The format differs slightly depending on the profiler that produced the stats: •With profile, a number is shown in parentheses after each caller to show how many times this specific call was made. For convenience, a second non-parenthesized number repeats the cumulative time spent in the function at the right. •With cProfile, each caller is preceded by three numbers: the number of times this specific call was made, and the total and cumulative times spent in the current function while it was invoked by this specific caller. Stats.print_callees(*restrictions) This method for the Stats class prints a list of all function that were called by the indicated function. Aside from this reversal of direction of calls (re: called vs was called by), the arguments and ordering are identical to the print_callers() method.
26.3.5 Limitations One limitation has to do with accuracy of timing information. There is a fundamental problem with deterministic profilers involving accuracy. The most obvious restriction is that the underlying “clock” is only ticking at a rate (typically) of about .001 seconds. Hence no measurements will be more accurate than the underlying clock. If enough measurements are taken, then the “error” will tend to average out. Unfortunately, removing this first error induces a second source of error. The second problem is that it “takes a while” from when an event is dispatched until the profiler’s call to get the time actually gets the state of the clock. Similarly, there is a certain lag when exiting the profiler event handler from the time that the clock’s value was obtained (and then squirreled away), until the user’s code is once again executing. As a result, functions that are called many times, or call many functions, will typically accumulate this error. The error that accumulates in this fashion is typically less than the accuracy of the clock (less than one clock tick), but it can accumulate and become very significant. The problem is more important with profile than with the lower-overhead cProfile. For this reason, profile provides a means of calibrating itself for a given platform so that this error can be probabilistically (on the average) removed. After the profiler is calibrated, it will be more accurate (in a least square sense), but it will sometimes produce negative numbers (when call counts are exceptionally low, and the gods of probability work against you :-). ) Do not be alarmed by negative numbers in the profile. They should only appear if you have calibrated your profiler, and the results are actually better than without calibration.
1120
Chapter 26. Debugging and Profiling
The Python Library Reference, Release 3.2.3
26.3.6 Calibration The profiler of the profile module subtracts a constant from each event handling time to compensate for the overhead of calling the time function, and socking away the results. By default, the constant is 0. The following procedure can be used to obtain a better constant for a given platform (see discussion in section Limitations above). import profile pr = profile.Profile() for i in range(5): print(pr.calibrate(10000)) The method executes the number of Python calls given by the argument, directly and again under the profiler, measuring the time for both. It then computes the hidden overhead per profiler event, and returns that as a float. For example, on an 800 MHz Pentium running Windows 2000, and using Python’s time.clock() as the timer, the magical number is about 12.5e-6. The object of this exercise is to get a fairly consistent result. If your computer is very fast, or your timer function has poor resolution, you might have to pass 100000, or even 1000000, to get consistent results. When you have a consistent answer, there are three ways you can use it: import profile # 1. Apply computed bias to all Profile instances created hereafter. profile.Profile.bias = your_computed_bias # 2. Apply computed bias to a specific Profile instance. pr = profile.Profile() pr.bias = your_computed_bias # 3. Specify computed bias in instance constructor. pr = profile.Profile(bias=your_computed_bias) If you have a choice, you are better off choosing a smaller constant, and then your results will “less often” show up as negative in profile statistics.
26.3.7 Extensions — Deriving Better Profilers The Profile class of both modules, profile and cProfile, were written so that derived classes could be developed to extend the profiler. The details are not described here, as doing this successfully requires an expert understanding of how the Profile class works internally. Study the source code of the module carefully if you want to pursue this. If all you want to do is change how current time is determined (for example, to force use of wall-clock time or elapsed process time), pass the timing function you want to the Profile class constructor: pr = profile.Profile(your_time_func) The resulting profiler will then call your_time_func(). profile.Profile your_time_func() should return a single number, or a list of numbers whose sum is the current time (like what os.times() returns). If the function returns a single time number, or the list of returned numbers has length 2, then you will get an especially fast version of the dispatch routine. Be warned that you should calibrate the profiler class for the timer function that you choose. For most machines, a timer that returns a lone integer value will provide the best results in terms of low overhead during profiling. (os.times() is pretty bad, as it returns a tuple of floating point values). If you want to substitute a better timer in the cleanest fashion, derive a class and hardwire a replacement dispatch method that best handles your timer call, along with the appropriate calibration constant. 26.3. The Python Profilers
1121
The Python Library Reference, Release 3.2.3
cProfile.Profile your_time_func() should return a single number. If it returns integers, you can also invoke the class constructor with a second argument specifying the real duration of one unit of time. For example, if your_integer_time_func() returns times measured in thousands of seconds, you would construct the Profile instance as follows: pr = profile.Profile(your_integer_time_func, 0.001) As the cProfile.Profile class cannot be calibrated, custom timer functions should be used with care and should be as fast as possible. For the best results with a custom timer, it might be necessary to hard-code it in the C source of the internal _lsprof module.
26.4 timeit — Measure execution time of small code snippets Source code: Lib/timeit.py
This module provides a simple way to time small bits of Python code. It has both command line as well as callable interfaces. It avoids a number of common traps for measuring execution times. See also Tim Peters’ introduction to the “Algorithms” chapter in the Python Cookbook, published by O’Reilly. The module defines the following public class: class timeit.Timer(stmt=’pass’, setup=’pass’, timer=) Class for timing execution speed of small code snippets. The constructor takes a statement to be timed, an additional statement used for setup, and a timer function. Both statements default to ’pass’; the timer function is platform-dependent (see the module doc string). stmt and setup may also contain multiple statements separated by ; or newlines, as long as they don’t contain multi-line string literals. To measure the execution time of the first statement, use the timeit() method. The repeat() method is a convenience to call timeit() multiple times and return a list of results. The stmt and setup parameters can also take objects that are callable without arguments. This will embed calls to them in a timer function that will then be executed by timeit(). Note that the timing overhead is a little larger in this case because of the extra function calls. Timer.print_exc(file=None) Helper to print a traceback from the timed code. Typical use: t = Timer(...) try: t.timeit(...) except: t.print_exc()
# outside the try/except # or t.repeat(...)
The advantage over the standard traceback is that source lines in the compiled template will be displayed. The optional file argument directs where the traceback is sent; it defaults to sys.stderr. Timer.repeat(repeat=3, number=1000000) Call timeit() a few times. This is a convenience function that calls the timeit() repeatedly, returning a list of results. The first argument specifies how many times to call timeit(). The second argument specifies the number argument for timeit().
1122
Chapter 26. Debugging and Profiling
The Python Library Reference, Release 3.2.3
Note: It’s tempting to calculate mean and standard deviation from the result vector and report these. However, this is not very useful. In a typical case, the lowest value gives a lower bound for how fast your machine can run the given code snippet; higher values in the result vector are typically not caused by variability in Python’s speed, but by other processes interfering with your timing accuracy. So the min() of the result is probably the only number you should be interested in. After that, you should look at the entire vector and apply common sense rather than statistics. Timer.timeit(number=1000000) Time number executions of the main statement. This executes the setup statement once, and then returns the time it takes to execute the main statement a number of times, measured in seconds as a float. The argument is the number of times through the loop, defaulting to one million. The main statement, the setup statement and the timer function to be used are passed to the constructor. Note: By default, timeit() temporarily turns off garbage collection during the timing. The advantage of this approach is that it makes independent timings more comparable. This disadvantage is that GC may be an important component of the performance of the function being measured. If so, GC can be re-enabled as the first statement in the setup string. For example: timeit.Timer(’for i in range(10): oct(i)’, ’gc.enable()’).timeit()
The module also defines three convenience functions: timeit.default_timer() Define a default timer, in a platform specific manner. On Windows, time.clock() has microsecond granularity but time.time()‘s granularity is 1/60th of a second; on Unix, time.clock() has 1/100th of a second granularity and time.time() is much more precise. On either platform, default_timer() measures wall clock time, not the CPU time. This means that other processes running on the same computer may interfere with the timing. timeit.repeat(stmt=’pass’, setup=’pass’, timer=, repeat=3, number=1000000) Create a Timer instance with the given statement, setup code and timer function and run its repeat() method with the given repeat count and number executions. timeit.timeit(stmt=’pass’, setup=’pass’, timer=, number=1000000) Create a Timer instance with the given statement, setup code and timer function and run its timeit() method with number executions.
26.4.1 Command Line Interface When called as a program from the command line, the following form is used: python -m timeit [-n N] [-r N] [-s S] [-t] [-c] [-h] [statement ...] Where the following options are understood: -n N, -number=N how many times to execute ‘statement’ -r N, -repeat=N how many times to repeat the timer (default 3) -s S, -setup=S statement to be executed once initially (default pass) -t, -time use time.time() (default on all platforms but Windows)
26.4. timeit — Measure execution time of small code snippets
1123
The Python Library Reference, Release 3.2.3
-c, -clock use time.clock() (default on Windows) -v, -verbose print raw timing results; repeat for more digits precision -h, -help print a short usage message and exit A multi-line statement may be given by specifying each line as a separate statement argument; indented lines are possible by enclosing an argument in quotes and using leading spaces. Multiple -s options are treated similarly. If -n is not given, a suitable number of loops is calculated by trying successive powers of 10 until the total time is at least 0.2 seconds. default_timer() measurations can be affected by other programs running on the same machine, so the best thing to do when accurate timing is necessary is to repeat the timing a few times and use the best time. The -r option is good for this; the default of 3 repetitions is probably enough in most cases. On Unix, you can use time.clock() to measure CPU time. Note: There is a certain baseline overhead associated with executing a pass statement. The code here doesn’t try to hide it, but you should be aware of it. The baseline overhead can be measured by invoking the program without arguments. The baseline overhead differs between Python versions! Also, to fairly compare older Python versions to Python 2.3, you may want to use Python’s -O option for the older versions to avoid timing SET_LINENO instructions.
26.4.2 Examples Here are two example sessions (one using the command line, one using the module interface) that compare the cost of using hasattr() vs. try/except to test for missing and present object attributes. $ python -m timeit ’try:’ ’ str.__bool__’ ’except AttributeError:’ ’ 100000 loops, best of 3: 15.7 usec per loop $ python -m timeit ’if hasattr(str, "__bool__"): pass’ 100000 loops, best of 3: 4.26 usec per loop $ python -m timeit ’try:’ ’ int.__bool__’ ’except AttributeError:’ ’ 1000000 loops, best of 3: 1.43 usec per loop $ python -m timeit ’if hasattr(int, "__bool__"): pass’ 100000 loops, best of 3: 2.23 usec per loop
4.85 usec/pass >>> s = """\ ... try: ... int.__bool__ ... except AttributeError: ... pass ... """ >>> t = timeit.Timer(stmt=s) >>> print("%.2f usec/pass" % (1000000 * t.timeit(number=100000)/100000)) 1.97 usec/pass >>> s = """\ ... if hasattr(int, ’__bool__’): pass ... """ >>> t = timeit.Timer(stmt=s) >>> print("%.2f usec/pass" % (1000000 * t.timeit(number=100000)/100000)) 3.15 usec/pass To give the timeit module access to functions you define, you can pass a setup parameter which contains an import statement: def test(): """Stupid test function""" L = [i for i in range(100)] if __name__ == ’__main__’: from timeit import Timer t = Timer("test()", "from __main__ import test") print(t.timeit())
The trace module allows you to trace program execution, generate annotated statement coverage listings, print caller/callee relationships and list functions executed during a program run. It can be used in another program or from the command line.
26.5.1 Command-Line Usage The trace module can be invoked from the command line. It can be as simple as python -m trace --count -C . somefile.py ... The above will execute somefile.py and generate annotated listings of all Python modules imported during the execution into the current directory. -help Display usage and exit. -version Display the version of the module and exit.
26.5. trace — Trace or track Python statement execution
1125
The Python Library Reference, Release 3.2.3
Main options At least one of the following options must be specified when invoking trace. The --listfuncs option is mutually exclusive with the --trace and --counts options . When --listfuncs is provided, neither --counts nor --trace are accepted, and vice versa. -c, -count Produce a set of annotated listing files upon program completion that shows how many times each statement was executed. See also --coverdir, --file and --no-report below. -t, -trace Display lines as they are executed. -l, -listfuncs Display the functions executed by running the program. -r, -report Produce an annotated list from an earlier program run that used the --count and --file option. This does not execute any code. -T, -trackcalls Display the calling relationships exposed by running the program. Modifiers -f, -file= Name of a file to accumulate counts over several tracing runs. Should be used with the --count option. -C, -coverdir= Directory where the report files go. dir/package/module.cover.
The coverage report for package.module is written to file
-m, -missing When generating annotated listings, mark lines which were not executed with >>>>>>. -s, -summary When using --count or --report, write a brief summary to stdout for each file processed. -R, -no-report Do not generate annotated listings. This is useful if you intend to make several runs with --count, and then produce a single set of annotated listings at the end. -g, -timing Prefix each line with the time since the program started. Only used while tracing. Filters These options may be repeated multiple times. -ignore-module= Ignore each of the given module names and its submodules (if it is a package). The argument can be a list of names separated by a comma. -ignore-dir= Ignore all modules and packages in the named directory and subdirectories. The argument can be a list of directories separated by os.pathsep.
1126
Chapter 26. Debugging and Profiling
The Python Library Reference, Release 3.2.3
26.5.2 Programmatic Interface class trace.Trace(count=1, trace=1, countfuncs=0, countcallers=0, ignoremods=(), ignoredirs=(), infile=None, outfile=None, timing=False) Create an object to trace execution of a single statement or expression. All parameters are optional. count enables counting of line numbers. trace enables line execution tracing. countfuncs enables listing of the functions called during the run. countcallers enables call relationship tracking. ignoremods is a list of modules or packages to ignore. ignoredirs is a list of directories whose modules or packages should be ignored. infile is the name of the file from which to read stored count information. outfile is the name of the file in which to write updated count information. timing enables a timestamp relative to when tracing was started to be displayed. run(cmd) Execute the command and gather statistics from the execution with the current tracing parameters. cmd must be a string or code object, suitable for passing into exec(). runctx(cmd, globals=None, locals=None) Execute the command and gather statistics from the execution with the current tracing parameters, in the defined global and local environments. If not defined, globals and locals default to empty dictionaries. runfunc(func, *args, **kwds) Call func with the given arguments under control of the Trace object with the current tracing parameters. results() Return a CoverageResults object that contains the cumulative results of all previous calls to run, runctx and runfunc for the given Trace instance. Does not reset the accumulated trace results. class trace.CoverageResults A container for coverage results, created by Trace.results(). Should not be created directly by the user. update(other) Merge in data from another CoverageResults object. write_results(show_missing=True, summary=False, coverdir=None) Write coverage results. Set show_missing to show lines that had no hits. Set summary to include in the output the coverage summary per module. coverdir specifies the directory into which the coverage result files will be output. If None, the results for each source file are placed in its directory. A simple example demonstrating the use of the programmatic interface: import sys import trace # create a Trace object, telling it what to ignore, and whether to # do tracing or line-counting or both. tracer = trace.Trace( ignoredirs=[sys.prefix, sys.exec_prefix], trace=0, count=1) # run the new command using the given tracer tracer.run(’main()’) # make a report, placing output in /tmp r = tracer.results() r.write_results(show_missing=True, coverdir="/tmp") 26.5. trace — Trace or track Python statement execution
1127
The Python Library Reference, Release 3.2.3
1128
Chapter 26. Debugging and Profiling
CHAPTER
TWENTYSEVEN
PYTHON RUNTIME SERVICES The modules described in this chapter provide a wide range of services related to the Python interpreter and its interaction with its environment. Here’s an overview:
27.1 sys — System-specific parameters and functions This module provides access to some variables used or maintained by the interpreter and to functions that interact strongly with the interpreter. It is always available. sys.abiflags On POSIX systems where Python is build with the standard configure script, this contains the ABI flags as specified by PEP 3149. New in version 3.2. sys.argv The list of command line arguments passed to a Python script. argv[0] is the script name (it is operating system dependent whether this is a full pathname or not). If the command was executed using the -c command line option to the interpreter, argv[0] is set to the string ’-c’. If no script name was passed to the Python interpreter, argv[0] is the empty string. To loop over the standard input, or the list of files given on the command line, see the fileinput module. sys.byteorder An indicator of the native byte order. This will have the value ’big’ on big-endian (most-significant byte first) platforms, and ’little’ on little-endian (least-significant byte first) platforms. sys.builtin_module_names A tuple of strings giving the names of all modules that are compiled into this Python interpreter. (This information is not available in any other way — modules.keys() only lists the imported modules.) sys.call_tracing(func, args) Call func(*args), while tracing is enabled. The tracing state is saved, and restored afterwards. This is intended to be called from a debugger from a checkpoint, to recursively debug some other code. sys.copyright A string containing the copyright pertaining to the Python interpreter. sys._clear_type_cache() Clear the internal type cache. The type cache is used to speed up attribute and method lookups. Use the function only to drop unnecessary references during reference leak debugging. This function should be used for internal and specialized purposes only. sys._current_frames() Return a dictionary mapping each thread’s identifier to the topmost stack frame currently active in that thread
1129
The Python Library Reference, Release 3.2.3
at the time the function is called. Note that functions in the traceback module can build the call stack given such a frame. This is most useful for debugging deadlock: this function does not require the deadlocked threads’ cooperation, and such threads’ call stacks are frozen for as long as they remain deadlocked. The frame returned for a nondeadlocked thread may bear no relationship to that thread’s current activity by the time calling code examines the frame. This function should be used for internal and specialized purposes only. sys.dllhandle Integer specifying the handle of the Python DLL. Availability: Windows. sys.displayhook(value) If value is not None, this function prints repr(value) to sys.stdout, and saves value in builtins._. If repr(value) is not encodable to sys.stdout.encoding with sys.stdout.errors error handler (which is probably ’strict’), encode it to sys.stdout.encoding with ’backslashreplace’ error handler. sys.displayhook is called on the result of evaluating an expression entered in an interactive Python session. The display of these values can be customized by assigning another one-argument function to sys.displayhook. Pseudo-code: def displayhook(value): if value is None: return # Set ’_’ to None to avoid recursion builtins._ = None text = repr(value) try: sys.stdout.write(text) except UnicodeEncodeError: bytes = text.encode(sys.stdout.encoding, ’backslashreplace’) if hasattr(sys.stdout, ’buffer’): sys.stdout.buffer.write(bytes) else: text = bytes.decode(sys.stdout.encoding, ’strict’) sys.stdout.write(text) sys.stdout.write("\n") builtins._ = value Changed in version 3.2: Use ’backslashreplace’ error handler on UnicodeEncodeError. sys.dont_write_bytecode If this is true, Python won’t try to write .pyc or .pyo files on the import of source modules. This value is initially set to True or False depending on the -B command line option and the PYTHONDONTWRITEBYTECODE environment variable, but you can set it yourself to control bytecode file generation. sys.excepthook(type, value, traceback) This function prints out a given traceback and exception to sys.stderr. When an exception is raised and uncaught, the interpreter calls sys.excepthook with three arguments, the exception class, exception instance, and a traceback object. In an interactive session this happens just before control is returned to the prompt; in a Python program this happens just before the program exits.
1130
Chapter 27. Python Runtime Services
The Python Library Reference, Release 3.2.3
The handling of such top-level exceptions can be customized by assigning another three-argument function to sys.excepthook. sys.__displayhook__ sys.__excepthook__ These objects contain the original values of displayhook and excepthook at the start of the program. They are saved so that displayhook and excepthook can be restored in case they happen to get replaced with broken objects. sys.exc_info() This function returns a tuple of three values that give information about the exception that is currently being handled. The information returned is specific both to the current thread and to the current stack frame. If the current stack frame is not handling an exception, the information is taken from the calling stack frame, or its caller, and so on until a stack frame is found that is handling an exception. Here, “handling an exception” is defined as “executing an except clause.” For any stack frame, only information about the exception being currently handled is accessible. If no exception is being handled anywhere on the stack, a tuple containing three None values is returned. Otherwise, the values returned are (type, value, traceback). Their meaning is: type gets the type of the exception being handled (a subclass of BaseException); value gets the exception instance (an instance of the exception type); traceback gets a traceback object (see the Reference Manual) which encapsulates the call stack at the point where the exception originally occurred. Warning: Assigning the traceback return value to a local variable in a function that is handling an exception will cause a circular reference. Since most functions don’t need access to the traceback, the best solution is to use something like exctype, value = sys.exc_info()[:2] to extract only the exception type and value. If you do need the traceback, make sure to delete it after use (best done with a try ... finally statement) or to call exc_info() in a function that does not itself handle an exception. Such cycles are normally automatically reclaimed when garbage collection is enabled and they become unreachable, but it remains more efficient to avoid creating cycles. sys.exec_prefix A string giving the site-specific directory prefix where the platform-dependent Python files are installed; by default, this is also ’/usr/local’. This can be set at build time with the --exec-prefix argument to the configure script. Specifically, all configuration files (e.g. the pyconfig.h header file) are installed in the directory exec_prefix/lib/pythonX.Y/config, and shared library modules are installed in exec_prefix/lib/pythonX.Y/lib-dynload, where X.Y is the version number of Python, for example 3.2. sys.executable A string giving the absolute path of the executable binary for the Python interpreter, on systems where this makes sense. If Python is unable to retrieve the real path to its executable, sys.executable will be an empty string or None. sys.exit([arg ]) Exit from Python. This is implemented by raising the SystemExit exception, so cleanup actions specified by finally clauses of try statements are honored, and it is possible to intercept the exit attempt at an outer level. The optional argument arg can be an integer giving the exit status (defaulting to zero), or another type of object. If it is an integer, zero is considered “successful termination” and any nonzero value is considered “abnormal termination” by shells and the like. Most systems require it to be in the range 0-127, and produce undefined results otherwise. Some systems have a convention for assigning specific meanings to specific exit codes, but these are generally underdeveloped; Unix programs generally use 2 for command line syntax errors and 1 for all other kind of errors. If another type of object is passed, None is equivalent to passing zero, and any other object is printed to stderr and results in an exit code of 1. In particular, sys.exit("some error message") is a quick way to exit a program when an error occurs.
27.1. sys — System-specific parameters and functions
1131
The Python Library Reference, Release 3.2.3
Since exit() ultimately “only” raises an exception, it will only exit the process when called from the main thread, and the exception is not intercepted. sys.flags The struct sequence flags exposes the status of command line flags. The attributes are read only. attribute debug division_warning inspect interactive optimize dont_write_bytecode no_user_site no_site ignore_environment verbose bytes_warning quiet hash_randomization
flag -d -Q -i -i -O or -OO -B -s -S -E -v -b -q -R
Changed in version 3.2: Added quiet attribute for the new -q flag.New in version 3.2.3: hash_randomization attribute.
The
sys.float_info A structseq holding information about the float type. It contains low level information about the precision and internal representation. The values correspond to the various floating-point constants defined in the standard header file float.h for the ‘C’ programming language; see section 5.2.4.2.2 of the 1999 ISO/IEC C standard [C99], ‘Characteristics of floating types’, for details. atfloat.h explanation tribute macro epsilonDBL_EPSILON difference between 1 and the least value greater than 1 that is representable as a float dig DBL_DIG maximum number of decimal digits that can be faithfully represented in a float; see below mant_dig DBL_MANT_DIG float precision: the number of base-radix digits in the significand of a float max DBL_MAX maximum representable finite float max_expDBL_MAX_EXP maximum integer e such that radix**(e-1) is a representable finite float max_10_exp DBL_MAX_10_EXP maximum integer e such that 10**e is in the range of representable finite floats min DBL_MIN minimum positive normalized float min_expDBL_MIN_EXP minimum integer e such that radix**(e-1) is a normalized float min_10_exp DBL_MIN_10_EXP minimum integer e such that 10**e is a normalized float radix FLT_RADIX radix of exponent representation rounds FLT_ROUNDS integer constant representing the rounding mode used for arithmetic operations. This reflects the value of the system FLT_ROUNDS macro at interpreter startup time. See section 5.2.4.2.2 of the C99 standard for an explanation of the possible values and their meanings. The attribute sys.float_info.dig needs further explanation. If s is any string representing a decimal number with at most sys.float_info.dig significant digits, then converting s to a float and back again will recover a string representing the same decimal value: >>> import sys >>> sys.float_info.dig 15 >>> s = ’3.14159265358979’
1132
# decimal string with 15 significant digits
Chapter 27. Python Runtime Services
The Python Library Reference, Release 3.2.3
>>> format(float(s), ’.15g’) ’3.14159265358979’
# convert to float and back -> same value
But for strings with more than sys.float_info.dig significant digits, this isn’t always true: >>> s = ’9876543211234567’ >>> format(float(s), ’.16g’) ’9876543211234568’
# 16 significant digits is too many! # conversion changes value
sys.float_repr_style A string indicating how the repr() function behaves for floats. If the string has value ’short’ then for a finite float x, repr(x) aims to produce a short string with the property that float(repr(x)) == x. This is the usual behaviour in Python 3.1 and later. Otherwise, float_repr_style has value ’legacy’ and repr(x) behaves in the same way as it did in versions of Python prior to 3.1. New in version 3.1. sys.getcheckinterval() Return the interpreter’s “check interval”; see setcheckinterval(). Deprecated since version 3.2: Use getswitchinterval() instead. sys.getdefaultencoding() Return the name of the current default string encoding used by the Unicode implementation. sys.getdlopenflags() Return the current value of the flags that are used for dlopen() calls. The flag constants are defined in the ctypes and DLFCN modules. Availability: Unix. sys.getfilesystemencoding() Return the name of the encoding used to convert Unicode filenames into system file names. The result value depends on the operating system: •On Mac OS X, the encoding is ’utf-8’. •On Unix, the encoding is the user’s preference according to the result of nl_langinfo(CODESET), or ’utf-8’ if nl_langinfo(CODESET) failed. •On Windows NT+, file names are Unicode natively, so no conversion is performed. getfilesystemencoding() still returns ’mbcs’, as this is the encoding that applications should use when they explicitly want to convert Unicode strings to byte strings that are equivalent when used as file names. •On Windows 9x, the encoding is ’mbcs’. Changed in version 3.2: On Unix, use ’utf-8’ instead of None if nl_langinfo(CODESET) failed. getfilesystemencoding() result cannot be None. sys.getrefcount(object) Return the reference count of the object. The count returned is generally one higher than you might expect, because it includes the (temporary) reference as an argument to getrefcount(). sys.getrecursionlimit() Return the current value of the recursion limit, the maximum depth of the Python interpreter stack. This limit prevents infinite recursion from causing an overflow of the C stack and crashing Python. It can be set by setrecursionlimit(). sys.getsizeof(object[, default ]) Return the size of an object in bytes. The object can be any type of object. All built-in objects will return correct results, but this does not have to hold true for third-party extensions as it is implementation specific. If given, default will be returned if the object does not provide means to retrieve the size. Otherwise a TypeError will be raised.
27.1. sys — System-specific parameters and functions
1133
The Python Library Reference, Release 3.2.3
getsizeof() calls the object’s __sizeof__ method and adds an additional garbage collector overhead if the object is managed by the garbage collector. See recursive sizeof recipe for an example of using getsizeof() recursively to find the size of containers and all their contents. sys.getswitchinterval() Return the interpreter’s “thread switch interval”; see setswitchinterval(). New in version 3.2. sys._getframe([depth ]) Return a frame object from the call stack. If optional integer depth is given, return the frame object that many calls below the top of the stack. If that is deeper than the call stack, ValueError is raised. The default for depth is zero, returning the frame at the top of the call stack. CPython implementation detail: This function should be used for internal and specialized purposes only. It is not guaranteed to exist in all implementations of Python. sys.getprofile() Get the profiler function as set by setprofile(). sys.gettrace() Get the trace function as set by settrace(). CPython implementation detail: The gettrace() function is intended only for implementing debuggers, profilers, coverage tools and the like. Its behavior is part of the implementation platform, rather than part of the language definition, and thus may not be available in all Python implementations. sys.getwindowsversion() Return a named tuple describing the Windows version currently running. The named elements are major, minor, build, platform, service_pack, service_pack_minor, service_pack_major, suite_mask, and product_type. service_pack contains a string while all other values are integers. The components can also be accessed by name, so sys.getwindowsversion()[0] is equivalent to sys.getwindowsversion().major. For compatibility with prior versions, only the first 5 elements are retrievable by indexing. platform may be one of the following values: Constant 0 (VER_PLATFORM_WIN32s) 1 (VER_PLATFORM_WIN32_WINDOWS) 2 (VER_PLATFORM_WIN32_NT) 3 (VER_PLATFORM_WIN32_CE)
Platform Win32s on Windows 3.1 Windows 95/98/ME Windows NT/2000/XP/x64 Windows CE
product_type may be one of the following values: Constant 1 (VER_NT_WORKSTATION) 2 (VER_NT_DOMAIN_CONTROLLER) 3 (VER_NT_SERVER)
Meaning The system is a workstation. The system is a domain controller. The system is a server, but not a domain controller.
This function wraps the Win32 GetVersionEx() function; see the Microsoft documentation on OSVERSIONINFOEX() for more information about these fields. Availability: Windows. Changed in version 3.2: Changed to a named tuple and added service_pack_minor, service_pack_major, suite_mask, and product_type. sys.hash_info A structseq giving parameters of the numeric hash implementation. For more details about hashing of numeric types, see Hashing of numeric types.
1134
Chapter 27. Python Runtime Services
The Python Library Reference, Release 3.2.3
attribute width modulus inf nan imag
explanation width in bits used for hash values prime modulus P used for numeric hash scheme hash value returned for a positive infinity hash value returned for a nan multiplier used for the imaginary part of a complex number
New in version 3.2. sys.hexversion The version number encoded as a single integer. This is guaranteed to increase with each version, including proper support for non-production releases. For example, to test that the Python interpreter is at least version 1.5.2, use: if sys.hexversion >= 0x010502F0: # use some advanced feature ... else: # use an alternative implementation or warn the user ... This is called hexversion since it only really looks meaningful when viewed as the result of passing it to the built-in hex() function. The struct sequence sys.version_info may be used for a more human-friendly encoding of the same information. The hexversion is a 32-bit number with the following layout: Bits (big endian order) 1-8 9-16 17-24 25-28 29-32
Meaning PY_MAJOR_VERSION (the 2 in 2.1.0a3) PY_MINOR_VERSION (the 1 in 2.1.0a3) PY_MICRO_VERSION (the 0 in 2.1.0a3) PY_RELEASE_LEVEL (0xA for alpha, 0xB for beta, 0xC for release candidate and 0xF for final) PY_RELEASE_SERIAL (the 3 in 2.1.0a3, zero for final releases)
Thus 2.1.0a3 is hexversion 0x020100a3. sys.int_info A struct sequence that holds information about Python’s internal representation of integers. The attributes are read only. Attribute Explanation bits_per_digit number of bits held in each digit. Python integers are stored internally in base 2**int_info.bits_per_digit sizeof_digit size in bytes of the C type used to represent a digit New in version 3.1. sys.intern(string) Enter string in the table of “interned” strings and return the interned string – which is string itself or a copy. Interning strings is useful to gain a little performance on dictionary lookup – if the keys in a dictionary are interned, and the lookup key is interned, the key comparisons (after hashing) can be done by a pointer compare instead of a string compare. Normally, the names used in Python programs are automatically interned, and the dictionaries used to hold module, class or instance attributes have interned keys. Interned strings are not immortal; you must keep a reference to the return value of intern() around to benefit from it.
27.1. sys — System-specific parameters and functions
1135
The Python Library Reference, Release 3.2.3
sys.last_type sys.last_value sys.last_traceback These three variables are not always defined; they are set when an exception is not handled and the interpreter prints an error message and a stack traceback. Their intended use is to allow an interactive user to import a debugger module and engage in post-mortem debugging without having to re-execute the command that caused the error. (Typical use is import pdb; pdb.pm() to enter the post-mortem debugger; see pdb module for more information.) The meaning of the variables is the same as that of the return values from exc_info() above. sys.maxsize An integer giving the maximum value a variable of type Py_ssize_t can take. It’s usually 2**31 - 1 on a 32-bit platform and 2**63 - 1 on a 64-bit platform. sys.maxunicode An integer giving the largest supported code point for a Unicode character. The value of this depends on the configuration option that specifies whether Unicode characters are stored as UCS-2 or UCS-4. sys.meta_path A list of finder objects that have their find_module() methods called to see if one of the objects can find the module to be imported. The find_module() method is called at least with the absolute name of the module being imported. If the module to be imported is contained in package then the parent package’s __path__ attribute is passed in as a second argument. The method returns None if the module cannot be found, else returns a loader. sys.meta_path is searched before any implicit default finders or sys.path. See PEP 302 for the original specification. sys.modules This is a dictionary that maps module names to modules which have already been loaded. This can be manipulated to force reloading of modules and other tricks. sys.path A list of strings that specifies the search path for modules. PYTHONPATH, plus an installation-dependent default.
Initialized from the environment variable
As initialized upon program startup, the first item of this list, path[0], is the directory containing the script that was used to invoke the Python interpreter. If the script directory is not available (e.g. if the interpreter is invoked interactively or if the script is read from standard input), path[0] is the empty string, which directs Python to search modules in the current directory first. Notice that the script directory is inserted before the entries inserted as a result of PYTHONPATH. A program is free to modify this list for its own purposes. See Also: Module site This describes how to use .pth files to extend sys.path. sys.path_hooks A list of callables that take a path argument to try to create a finder for the path. If a finder can be created, it is to be returned by the callable, else raise ImportError. Originally specified in PEP 302. sys.path_importer_cache A dictionary acting as a cache for finder objects. The keys are paths that have been passed to sys.path_hooks and the values are the finders that are found. If a path is a valid file system path but no explicit finder is found on sys.path_hooks then None is stored to represent the implicit default finder should be used. If the path is not an existing path then imp.NullImporter is set.
1136
Chapter 27. Python Runtime Services
The Python Library Reference, Release 3.2.3
Originally specified in PEP 302. sys.platform This string contains a platform identifier that can be used to append platform-specific components to sys.path, for instance. For most Unix systems, this is the lowercased OS name as returned by uname -s with the first part of the version as returned by uname -r appended, e.g. ’sunos5’, at the time when Python was built. Unless you want to test for a specific system version, it is therefore recommended to use the following idiom: if sys.platform.startswith(’freebsd’): # FreeBSD-specific code here... elif sys.platform.startswith(’linux’): # Linux-specific code here... Changed in version 3.2.2: Since lots of code check for sys.platform == ’linux2’, and there is no essential change between Linux 2.x and 3.x, sys.platform is always set to ’linux2’, even on Linux 3.x. In Python 3.3 and later, the value will always be set to ’linux’, so it is recommended to always use the startswith idiom presented above. For other systems, the values are: System Linux (2.x and 3.x) Windows Windows/Cygwin Mac OS X OS/2 OS/2 EMX
platform value ’linux2’ ’win32’ ’cygwin’ ’darwin’ ’os2’ ’os2emx’
See Also: os.name has a coarser granularity. os.uname() gives system-dependent version information. The platform module provides detailed checks for the system’s identity. sys.prefix A string giving the site-specific directory prefix where the platform independent Python files are installed; by default, this is the string ’/usr/local’. This can be set at build time with the --prefix argument to the configure script. The main collection of Python library modules is installed in the directory prefix/lib/pythonX.Y‘ while the platform independent header files (all except pyconfig.h) are stored in prefix/include/pythonX.Y, where X.Y is the version number of Python, for example 3.2. sys.ps1 sys.ps2 Strings specifying the primary and secondary prompt of the interpreter. These are only defined if the interpreter is in interactive mode. Their initial values in this case are ’>>> ’ and ’... ’. If a non-string object is assigned to either variable, its str() is re-evaluated each time the interpreter prepares to read a new interactive command; this can be used to implement a dynamic prompt. sys.setcheckinterval(interval) Set the interpreter’s “check interval”. This integer value determines how often the interpreter checks for periodic things such as thread switches and signal handlers. The default is 100, meaning the check is performed every 100 Python virtual instructions. Setting it to a larger value may increase performance for programs using threads. Setting it to a value >> import sys >>> sys._xoptions {’a’: ’b’, ’c’: True} CPython implementation detail: This is a CPython-specific way of accessing options passed through -X. Other implementations may export them through other means, or not at all. New in version 3.2. Citations
27.2 sysconfig — Provide access to Python’s configuration information New in version 3.2. Source code: Lib/sysconfig.py
The sysconfig module provides access to Python’s configuration information like the list of installation paths and the configuration variables relevant for the current platform.
27.2.1 Configuration variables A Python distribution contains a Makefile and a pyconfig.h header file that are necessary to build both the Python binary itself and third-party C extensions compiled using distutils. sysconfig puts all variables found in these files in a dictionary that can be accessed using get_config_vars() or get_config_var(). Notice that on Windows, it’s a much smaller set. sysconfig.get_config_vars(*args) With no arguments, return a dictionary of all configuration variables relevant for the current platform. With arguments, return a list of values that result from looking up each argument in the configuration variable dictionary. For each argument, if the value is not found, return None. sysconfig.get_config_var(name) Return the value of a single variable name. Equivalent to get_config_vars().get(name). If name is not found, return None. Example of usage: >>> import sysconfig >>> sysconfig.get_config_var(’Py_ENABLE_SHARED’) 0 >>> sysconfig.get_config_var(’LIBDIR’) ’/usr/local/lib’ >>> sysconfig.get_config_vars(’AR’, ’CXX’) [’ar’, ’g++’]
27.2. sysconfig — Provide access to Python’s configuration information
1141
The Python Library Reference, Release 3.2.3
27.2.2 Installation paths Python uses an installation scheme that differs depending on the platform and on the installation options. These schemes are stored in sysconfig under unique identifiers based on the value returned by os.name. Every new component that is installed using distutils or a Distutils-based system will follow the same scheme to copy its file in the right places. Python currently supports seven schemes: • posix_prefix: scheme for Posix platforms like Linux or Mac OS X. This is the default scheme used when Python or a component is installed. • posix_home: scheme for Posix platforms used when a home option is used upon installation. This scheme is used when a component is installed through Distutils with a specific home prefix. • posix_user: scheme for Posix platforms used when a component is installed through Distutils and the user option is used. This scheme defines paths located under the user home directory. • nt: scheme for NT platforms like Windows. • nt_user: scheme for NT platforms, when the user option is used. • os2: scheme for OS/2 platforms. • os2_home: scheme for OS/2 patforms, when the user option is used. Each scheme is itself composed of a series of paths and each path has a unique identifier. Python currently uses eight paths: • stdlib: directory containing the standard Python library files that are not platform-specific. • platstdlib: directory containing the standard Python library files that are platform-specific. • platlib: directory for site-specific, platform-specific files. • purelib: directory for site-specific, non-platform-specific files. • include: directory for non-platform-specific header files. • platinclude: directory for platform-specific header files. • scripts: directory for script files. • data: directory for data files. sysconfig provides some functions to determine these paths. sysconfig.get_scheme_names() Return a tuple containing all schemes currently supported in sysconfig. sysconfig.get_path_names() Return a tuple containing all path names currently supported in sysconfig. sysconfig.get_path(name[, scheme[, vars[, expand ]]]) Return an installation path corresponding to the path name, from the install scheme named scheme. name has to be a value from the list returned by get_path_names(). sysconfig stores installation paths corresponding to each path name, for each platform, with variables to be expanded. For instance the stdlib path for the nt scheme is: {base}/Lib. get_path() will use the variables returned by get_config_vars() to expand the path. All variables have default values for each platform so one may call this function and get the default value. If scheme is provided, it must be a value from the list returned by get_scheme_names(). Otherwise, the default scheme for the current platform is used. 1142
Chapter 27. Python Runtime Services
The Python Library Reference, Release 3.2.3
If vars is provided, it must be a dictionary of variables that will update the dictionary return by get_config_vars(). If expand is set to False, the path will not be expanded using the variables. If name is not found, return None. sysconfig.get_paths([scheme[, vars[, expand ]]]) Return a dictionary containing all installation paths corresponding to an installation scheme. See get_path() for more information. If scheme is not provided, will use the default scheme for the current platform. If vars is provided, it must be a dictionary of variables that will update the dictionary used to expand the paths. If expand is set to False, the paths will not be expanded. If scheme is not an existing scheme, get_paths() will raise a KeyError.
27.2.3 Other functions sysconfig.get_python_version() Return the MAJOR.MINOR Python version number as a string. Similar to sys.version[:3]. sysconfig.get_platform() Return a string that identifies the current platform. This is used mainly to distinguish platform-specific build directories and platform-specific built distributions. Typically includes the OS name and version and the architecture (as supplied by os.uname()), although the exact information included depends on the OS; e.g. for IRIX the architecture isn’t particularly important (IRIX only runs on SGI hardware), but for Linux the kernel version isn’t particularly important. Examples of returned values: •linux-i586 •linux-alpha (?) •solaris-2.6-sun4u •irix-5.3 •irix64-6.2 Windows will return one of: •win-amd64 (64bit Windows on AMD64 (aka x86_64, Intel64, EM64T, etc) •win-ia64 (64bit Windows on Itanium) •win32 (all others - specifically, sys.platform is returned) Mac OS X can return: •macosx-10.6-ppc •macosx-10.4-ppc64 •macosx-10.3-i386 •macosx-10.4-fat For other non-POSIX platforms, currently just returns sys.platform. sysconfig.is_python_build() Return True if the current Python installation was built from source.
27.2. sysconfig — Provide access to Python’s configuration information
1143
The Python Library Reference, Release 3.2.3
sysconfig.parse_config_h(fp[, vars ]) Parse a config.h-style file. fp is a file-like object pointing to the config.h-like file. A dictionary containing name/value pairs is returned. If an optional dictionary is passed in as the second argument, it is used instead of a new dictionary, and updated with the values read in the file. sysconfig.get_config_h_filename() Return the path of pyconfig.h. sysconfig.get_makefile_filename() Return the path of Makefile.
27.2.4 Using sysconfig as a script You can use sysconfig as a script with Python’s -m option: $ python -m sysconfig Platform: "macosx-10.4-i386" Python version: "3.2" Current installation scheme: "posix_prefix" Paths: data = "/usr/local" include = "/Users/tarek/Dev/svn.python.org/py3k/Include" platinclude = "." platlib = "/usr/local/lib/python3.2/site-packages" platstdlib = "/usr/local/lib/python3.2" purelib = "/usr/local/lib/python3.2/site-packages" scripts = "/usr/local/bin" stdlib = "/usr/local/lib/python3.2" Variables: AC_APPLE_UNIVERSAL_BUILD = "0" AIX_GENUINE_CPLUSPLUS = "0" AR = "ar" ARFLAGS = "rc" ASDLGEN = "./Parser/asdl_c.py" ... This call will print in the standard output the information returned get_python_version(), get_path() and get_config_vars().
by
get_platform(),
27.3 builtins — Built-in objects This module provides direct access to all ‘built-in’ identifiers of Python; for example, builtins.open is the full name for the built-in function open(). See Built-in Functions and Built-in Constants for documentation. This module is not normally accessed explicitly by most applications, but can be useful in modules that provide objects with the same name as a built-in value, but in which the built-in of that name is also needed. For example, in a module that wants to implement an open() function that wraps the built-in open(), this module can be used directly: import builtins
1144
Chapter 27. Python Runtime Services
The Python Library Reference, Release 3.2.3
def open(path): f = builtins.open(path, ’r’) return UpperCaser(f) class UpperCaser: ’’’Wrapper around a file that converts output to upper-case.’’’ def __init__(self, f): self._f = f def read(self, count=-1): return self._f.read(count).upper() # ... As an implementation detail, most modules have the name __builtins__ made available as part of their globals. The value of __builtins__ is normally either this module or the value of this module’s __dict__ attribute. Since this is an implementation detail, it may not be used by alternate implementations of Python.
27.4 __main__ — Top-level script environment This module represents the (otherwise anonymous) scope in which the interpreter’s main program executes — commands read either from standard input, from a script file, or from an interactive prompt. It is this environment in which the idiomatic “conditional script” stanza causes a script to run: if __name__ == "__main__": main()
27.5 warnings — Warning control Source code: Lib/warnings.py
Warning messages are typically issued in situations where it is useful to alert the user of some condition in a program, where that condition (normally) doesn’t warrant raising an exception and terminating the program. For example, one might want to issue a warning when a program uses an obsolete module. Python programmers issue warnings by calling the warn() function defined in this module. (C programmers use PyErr_WarnEx(); see exceptionhandling for details). Warning messages are normally written to sys.stderr, but their disposition can be changed flexibly, from ignoring all warnings to turning them into exceptions. The disposition of warnings can vary based on the warning category (see below), the text of the warning message, and the source location where it is issued. Repetitions of a particular warning for the same source location are typically suppressed. There are two stages in warning control: first, each time a warning is issued, a determination is made whether a message should be issued or not; next, if a message is to be issued, it is formatted and printed using a user-settable hook. The determination whether to issue a warning message is controlled by the warning filter, which is a sequence of matching rules and actions. Rules can be added to the filter by calling filterwarnings() and reset to its default state by calling resetwarnings().
27.4. __main__ — Top-level script environment
1145
The Python Library Reference, Release 3.2.3
The printing of warning messages is done by calling showwarning(), which may be overridden; the default implementation of this function formats the message by calling formatwarning(), which is also available for use by custom implementations. See Also: logging.captureWarnings() allows you to handle all warnings with the standard logging infrastructure.
27.5.1 Warning Categories There are a number of built-in exceptions that represent warning categories. This categorization is useful to be able to filter out groups of warnings. The following warnings category classes are currently defined: Class Warning
Description This is the base class of all warning category classes. It is a subclass of Exception. UserWarning The default category for warn(). DeprecationWarning Base category for warnings about deprecated features (ignored by default). SyntaxWarning Base category for warnings about dubious syntactic features. RuntimeWarning Base category for warnings about dubious runtime features. FutureWarning Base category for warnings about constructs that will change semantically in the future. PendingDeprecationWarning Base category for warnings about features that will be deprecated in the future (ignored by default). ImportWarning Base category for warnings triggered during the process of importing a module (ignored by default). UnicodeWarning Base category for warnings related to Unicode. BytesWarning Base category for warnings related to bytes and buffer. ResourceWarning Base category for warnings related to resource usage. While these are technically built-in exceptions, they are documented here, because conceptually they belong to the warnings mechanism. User code can define additional warning categories by subclassing one of the standard warning categories. A warning category must always be a subclass of the Warning class.
27.5.2 The Warnings Filter The warnings filter controls whether warnings are ignored, displayed, or turned into errors (raising an exception). Conceptually, the warnings filter maintains an ordered list of filter specifications; any specific warning is matched against each filter specification in the list in turn until a match is found; the match determines the disposition of the match. Each entry is a tuple of the form (action, message, category, module, lineno), where: • action is one of the following strings: Value "error" "ignore" "always" "default" "module" "once"
Disposition turn matching warnings into exceptions never print matching warnings always print matching warnings print the first occurrence of matching warnings for each location where the warning is issued print the first occurrence of matching warnings for each module where the warning is issued print only the first occurrence of matching warnings, regardless of location
• message is a string containing a regular expression that the warning message must match (the match is compiled to always be case-insensitive).
1146
Chapter 27. Python Runtime Services
The Python Library Reference, Release 3.2.3
• category is a class (a subclass of Warning) of which the warning category must be a subclass in order to match. • module is a string containing a regular expression that the module name must match (the match is compiled to be case-sensitive). • lineno is an integer that the line number where the warning occurred must match, or 0 to match all line numbers. Since the Warning class is derived from the built-in Exception class, to turn a warning into an error we simply raise category(message). The warnings filter is initialized by -W options passed to the Python interpreter command line. The interpreter saves the arguments for all -W options without interpretation in sys.warnoptions; the warnings module parses these when it is first imported (invalid options are ignored, after printing a message to sys.stderr). Default Warning Filters By default, Python installs several warning filters, which can be overridden by the command-line options passed to -W and calls to filterwarnings(). • DeprecationWarning and PendingDeprecationWarning, and ImportWarning are ignored. • BytesWarning is ignored unless the -b option is given once or twice; in this case this warning is either printed (-b) or turned into an exception (-bb). • ResourceWarning is ignored unless Python was built in debug mode. Changed in version 3.2: DeprecationWarning PendingDeprecationWarning.
is
now
ignored
by
default
in
addition
to
27.5.3 Temporarily Suppressing Warnings If you are using code that you know will raise a warning, such as a deprecated function, but do not want to see the warning, then it is possible to suppress the warning using the catch_warnings context manager: import warnings def fxn(): warnings.warn("deprecated", DeprecationWarning) with warnings.catch_warnings(): warnings.simplefilter("ignore") fxn() While within the context manager all warnings will simply be ignored. This allows you to use known-deprecated code without having to see the warning while not suppressing the warning for other code that might not be aware of its use of deprecated code. Note: this can only be guaranteed in a single-threaded application. If two or more threads use the catch_warnings context manager at the same time, the behavior is undefined.
27.5.4 Testing Warnings To test warnings raised by code, use the catch_warnings context manager. With it you can temporarily mutate the warnings filter to facilitate your testing. For instance, do the following to capture all raised warnings to check: import warnings def fxn(): warnings.warn("deprecated", DeprecationWarning)
27.5. warnings — Warning control
1147
The Python Library Reference, Release 3.2.3
with warnings.catch_warnings(record=True) as w: # Cause all warnings to always be triggered. warnings.simplefilter("always") # Trigger a warning. fxn() # Verify some things assert len(w) == 1 assert issubclass(w[-1].category, DeprecationWarning) assert "deprecated" in str(w[-1].message) One can also cause all warnings to be exceptions by using error instead of always. One thing to be aware of is that if a warning has already been raised because of a once/default rule, then no matter what filters are set the warning will not be seen again unless the warnings registry related to the warning has been cleared. Once the context manager exits, the warnings filter is restored to its state when the context was entered. This prevents tests from changing the warnings filter in unexpected ways between tests and leading to indeterminate test results. The showwarning() function in the module is also restored to its original value. Note: this can only be guaranteed in a single-threaded application. If two or more threads use the catch_warnings context manager at the same time, the behavior is undefined. When testing multiple operations that raise the same kind of warning, it is important to test them in a manner that confirms each operation is raising a new warning (e.g. set warnings to be raised as exceptions and check the operations raise exceptions, check that the length of the warning list continues to increase after each operation, or else delete the previous entries from the warnings list before each new operation).
27.5.5 Updating Code For New Versions of Python Warnings that are only of interest to the developer are ignored by default. As such you should make sure to test your code with typically ignored warnings made visible. You can do this from the command-line by passing -Wd to the interpreter (this is shorthand for -W default). This enables default handling for all warnings, including those that are ignored by default. To change what action is taken for encountered warnings you simply change what argument is passed to -W, e.g. -W error. See the -W flag for more details on what is possible. To programmatically do the same as -Wd, use: warnings.simplefilter(’default’) Make sure to execute this code as soon as possible. This prevents the registering of what warnings have been raised from unexpectedly influencing how future warnings are treated. Having certain warnings ignored by default is done to prevent a user from seeing warnings that are only of interest to the developer. As you do not necessarily have control over what interpreter a user uses to run their code, it is possible that a new version of Python will be released between your release cycles. The new interpreter release could trigger new warnings in your code that were not there in an older interpreter, e.g. DeprecationWarning for a module that you are using. While you as a developer want to be notified that your code is using a deprecated module, to a user this information is essentially noise and provides no benefit to them. The unittest module has been also updated to use the ’default’ filter while running tests.
27.5.6 Available Functions warnings.warn(message, category=None, stacklevel=1) Issue a warning, or maybe ignore it or raise an exception. The category argument, if given, must be a warning category class (see above); it defaults to UserWarning. Alternatively message can be a Warning instance, in which case category will be ignored and message.__class__ will be used. In this case the message text
1148
Chapter 27. Python Runtime Services
The Python Library Reference, Release 3.2.3
will be str(message). This function raises an exception if the particular warning issued is changed into an error by the warnings filter see above. The stacklevel argument can be used by wrapper functions written in Python, like this: def deprecation(message): warnings.warn(message, DeprecationWarning, stacklevel=2) This makes the warning refer to deprecation()‘s caller, rather than to the source of deprecation() itself (since the latter would defeat the purpose of the warning message). warnings.warn_explicit(message, category, filename, lineno, module=None, registry=None, module_globals=None) This is a low-level interface to the functionality of warn(), passing in explicitly the message, category, filename and line number, and optionally the module name and the registry (which should be the __warningregistry__ dictionary of the module). The module name defaults to the filename with .py stripped; if no registry is passed, the warning is never suppressed. message must be a string and category a subclass of Warning or message may be a Warning instance, in which case category will be ignored. module_globals, if supplied, should be the global namespace in use by the code for which the warning is issued. (This argument is used to support displaying source for modules found in zipfiles or other non-filesystem import sources). warnings.showwarning(message, category, filename, lineno, file=None, line=None) Write a warning to a file. The default implementation calls formatwarning(message, category, filename, lineno, line) and writes the resulting string to file, which defaults to sys.stderr. You may replace this function with an alternative implementation by assigning to warnings.showwarning. line is a line of source code to be included in the warning message; if line is not supplied, showwarning() will try to read the line specified by filename and lineno. warnings.formatwarning(message, category, filename, lineno, line=None) Format a warning the standard way. This returns a string which may contain embedded newlines and ends in a newline. line is a line of source code to be included in the warning message; if line is not supplied, formatwarning() will try to read the line specified by filename and lineno. warnings.filterwarnings(action, message=’‘, category=Warning, module=’‘, lineno=0, append=False) Insert an entry into the list of warnings filter specifications. The entry is inserted at the front by default; if append is true, it is inserted at the end. This checks the types of the arguments, compiles the message and module regular expressions, and inserts them as a tuple in the list of warnings filters. Entries closer to the front of the list override entries later in the list, if both match a particular warning. Omitted arguments default to a value that matches everything. warnings.simplefilter(action, category=Warning, lineno=0, append=False) Insert a simple entry into the list of warnings filter specifications. The meaning of the function parameters is as for filterwarnings(), but regular expressions are not needed as the filter inserted always matches any message in any module as long as the category and line number match. warnings.resetwarnings() Reset the warnings filter. This discards the effect of all previous calls to filterwarnings(), including that of the -W command line options and calls to simplefilter().
27.5.7 Available Context Managers class warnings.catch_warnings(*, record=False, module=None) A context manager that copies and, upon exit, restores the warnings filter and the showwarning() function. If the record argument is False (the default) the context manager returns None on entry. If record is True, a list is returned that is progressively populated with objects as seen by a custom showwarning() function 27.5. warnings — Warning control
1149
The Python Library Reference, Release 3.2.3
(which also suppresses output to sys.stdout). Each object in the list has attributes with the same names as the arguments to showwarning(). The module argument takes a module that will be used instead of the module returned when you import warnings whose filter will be protected. This argument exists primarily for testing the warnings module itself. Note: The catch_warnings manager works by replacing and then later restoring the module’s showwarning() function and internal list of filter specifications. This means the context manager is modifying global state and therefore is not thread-safe.
27.6 contextlib — Utilities for with-statement contexts Source code: Lib/contextlib.py
This module provides utilities for common tasks involving the with statement. For more information see also Context Manager Types and context-managers. Functions provided: @contextlib.contextmanager This function is a decorator that can be used to define a factory function for with statement context managers, without needing to create a class or separate __enter__() and __exit__() methods. A simple example (this is not recommended as a real way of generating HTML!): from contextlib import contextmanager @contextmanager def tag(name): print("" % name) yield print("" % name) >>> with tag("h1"): ... print("foo") ...
foo
The function being decorated must return a generator-iterator when called. This iterator must yield exactly one value, which will be bound to the targets in the with statement’s as clause, if any. At the point where the generator yields, the block nested in the with statement is executed. The generator is then resumed after the block is exited. If an unhandled exception occurs in the block, it is reraised inside the generator at the point where the yield occurred. Thus, you can use a try...except...finally statement to trap the error (if any), or ensure that some cleanup takes place. If an exception is trapped merely in order to log it or to perform some action (rather than to suppress it entirely), the generator must reraise that exception. Otherwise the generator context manager will indicate to the with statement that the exception has been handled, and execution will resume with the statement immediately following the with statement.
1150
Chapter 27. Python Runtime Services
The Python Library Reference, Release 3.2.3
contextmanager() uses ContextDecorator so the context managers it creates can be used as decorators as well as in with statements. When used as a decorator, a new generator instance is implicitly created on each function call (this allows the otherwise “one-shot” context managers created by contextmanager() to meet the requirement that context managers support multiple invocations in order to be used as decorators). Changed in version 3.2: Use of ContextDecorator. contextlib.closing(thing) Return a context manager that closes thing upon completion of the block. This is basically equivalent to: from contextlib import contextmanager @contextmanager def closing(thing): try: yield thing finally: thing.close() And lets you write code like this: from contextlib import closing from urllib.request import urlopen with closing(urlopen(’http://www.python.org’)) as page: for line in page: print(line) without needing to explicitly close page. Even if an error occurs, page.close() will be called when the with block is exited. class contextlib.ContextDecorator A base class that enables a context manager to also be used as a decorator. Context managers inheriting from ContextDecorator have to implement __enter__ and __exit__ as normal. __exit__ retains its optional exception handling even when used as a decorator. ContextDecorator is used by contextmanager(), so you get this functionality automatically. Example of ContextDecorator: from contextlib import ContextDecorator class mycontext(ContextDecorator): def __enter__(self): print(’Starting’) return self def __exit__(self, *exc): print(’Finishing’) return False >>> @mycontext() ... def function(): ... print(’The bit in the middle’) ... >>> function()
27.6. contextlib — Utilities for with-statement contexts
1151
The Python Library Reference, Release 3.2.3
Starting The bit in the middle Finishing >>> with mycontext(): ... print(’The bit in the middle’) ... Starting The bit in the middle Finishing This change is just syntactic sugar for any construct of the following form: def f(): with cm(): # Do stuff ContextDecorator lets you instead write: @cm() def f(): # Do stuff It makes it clear that the cm applies to the whole function, rather than just a piece of it (and saving an indentation level is nice, too). Existing context managers that already have a base class can be extended by using ContextDecorator as a mixin class: from contextlib import ContextDecorator class mycontext(ContextBaseClass, ContextDecorator): def __enter__(self): return self def __exit__(self, *exc): return False
Note: As the decorated function must be able to be called multiple times, the underlying context manager must support use in multiple with statements. If this is not the case, then the original construct with the explicit with statement inside the function should be used. New in version 3.2. See Also: PEP 0343 - The “with” statement The specification, background, and examples for the Python with statement.
27.7 abc — Abstract Base Classes Source code: Lib/abc.py
1152
Chapter 27. Python Runtime Services
The Python Library Reference, Release 3.2.3
This module provides the infrastructure for defining abstract base classes (ABCs) in Python, as outlined in PEP 3119; see the PEP for why this was added to Python. (See also PEP 3141 and the numbers module regarding a type hierarchy for numbers based on ABCs.) The collections module has some concrete classes that derive from ABCs; these can, of course, be further derived. In addition the collections module has some ABCs that can be used to test whether a class or instance provides a particular interface, for example, is it hashable or a mapping. This module provides the following class: class abc.ABCMeta Metaclass for defining Abstract Base Classes (ABCs). Use this metaclass to create an ABC. An ABC can be subclassed directly, and then acts as a mix-in class. You can also register unrelated concrete classes (even built-in classes) and unrelated ABCs as “virtual subclasses” – these and their descendants will be considered subclasses of the registering ABC by the built-in issubclass() function, but the registering ABC won’t show up in their MRO (Method Resolution Order) nor will method implementations defined by the registering ABC be callable (not even via super()). 1 Classes created with a metaclass of ABCMeta have the following method: register(subclass) Register subclass as a “virtual subclass” of this ABC. For example: from abc import ABCMeta class MyABC(metaclass=ABCMeta): pass MyABC.register(tuple) assert issubclass(tuple, MyABC) assert isinstance((), MyABC) You can also override this method in an abstract base class: __subclasshook__(subclass) (Must be defined as a class method.) Check whether subclass is considered a subclass of this ABC. This means that you can customize the behavior of issubclass further without the need to call register() on every class you want to consider a subclass of the ABC. (This class method is called from the __subclasscheck__() method of the ABC.) This method should return True, False or NotImplemented. If it returns True, the subclass is considered a subclass of this ABC. If it returns False, the subclass is not considered a subclass of this ABC, even if it would normally be one. If it returns NotImplemented, the subclass check is continued with the usual mechanism. For a demonstration of these concepts, look at this example ABC definition: class Foo: def __getitem__(self, index): ... def __len__(self): ... def get_iterator(self): 1
C++ programmers should note that Python’s virtual base class concept is not the same as C++’s.
27.7. abc — Abstract Base Classes
1153
The Python Library Reference, Release 3.2.3
return iter(self) class MyIterable(metaclass=ABCMeta): @abstractmethod def __iter__(self): while False: yield None def get_iterator(self): return self.__iter__() @classmethod def __subclasshook__(cls, C): if cls is MyIterable: if any("__iter__" in B.__dict__ for B in C.__mro__): return True return NotImplemented MyIterable.register(Foo) The ABC MyIterable defines the standard iterable method, __iter__(), as an abstract method. The implementation given here can still be called from subclasses. The get_iterator() method is also part of the MyIterable abstract base class, but it does not have to be overridden in non-abstract derived classes. The __subclasshook__() class method defined here says that any class that has an __iter__() method in its __dict__ (or in that of one of its base classes, accessed via the __mro__ list) is considered a MyIterable too. Finally, the last line makes Foo a virtual subclass of MyIterable, even though it does not define an __iter__() method (it uses the old-style iterable protocol, defined in terms of __len__() and __getitem__()). Note that this will not make get_iterator available as a method of Foo, so it is provided separately. It also provides the following decorators: @abc.abstractmethod(function) A decorator indicating abstract methods. Using this decorator requires that the class’s metaclass is ABCMeta or is derived from it. A class that has a metaclass derived from ABCMeta cannot be instantiated unless all of its abstract methods and properties are overridden. The abstract methods can be called using any of the normal ‘super’ call mechanisms. Dynamically adding abstract methods to a class, or attempting to modify the abstraction status of a method or class once it is created, are not supported. The abstractmethod() only affects subclasses derived using regular inheritance; “virtual subclasses” registered with the ABC’s register() method are not affected. Usage: class C(metaclass=ABCMeta): @abstractmethod def my_abstract_method(self, ...): ...
Note: Unlike Java abstract methods, these abstract methods may have an implementation. This implementation can be called via the super() mechanism from the class that overrides it. This could be useful as an end-point for a super-call in a framework that uses cooperative multiple-inheritance. 1154
Chapter 27. Python Runtime Services
The Python Library Reference, Release 3.2.3
@abc.abstractclassmethod(function) A subclass of the built-in classmethod(), indicating an abstract classmethod. Otherwise it is similar to abstractmethod(). Usage: class C(metaclass=ABCMeta): @abstractclassmethod def my_abstract_classmethod(cls, ...): ... New in version 3.2. @abc.abstractstaticmethod(function) A subclass of the built-in staticmethod(), indicating an abstract staticmethod. Otherwise it is similar to abstractmethod(). Usage: class C(metaclass=ABCMeta): @abstractstaticmethod def my_abstract_staticmethod(...): ... New in version 3.2. abc.abstractproperty(fget=None, fset=None, fdel=None, doc=None) A subclass of the built-in property(), indicating an abstract property. Using this function requires that the class’s metaclass is ABCMeta or is derived from it. A class that has a metaclass derived from ABCMeta cannot be instantiated unless all of its abstract methods and properties are overridden. The abstract properties can be called using any of the normal ‘super’ call mechanisms. Usage: class C(metaclass=ABCMeta): @abstractproperty def my_abstract_property(self): ... This defines a read-only property; you can also define a read-write abstract property using the ‘long’ form of property declaration: class C(metaclass=ABCMeta): def getx(self): ... def setx(self, value): ... x = abstractproperty(getx, setx)
27.8 atexit — Exit handlers The atexit module defines functions to register and unregister cleanup functions. Functions thus registered are automatically executed upon normal interpreter termination. The order in which the functions are called is not defined; if you have cleanup operations that depend on each other, you should wrap them in a function and register that one. This keeps atexit simple.
27.8. atexit — Exit handlers
1155
The Python Library Reference, Release 3.2.3
Note: the functions registered via this module are not called when the program is killed by a signal not handled by Python, when a Python fatal internal error is detected, or when os._exit() is called. atexit.register(func, *args, **kargs) Register func as a function to be executed at termination. Any optional arguments that are to be passed to func must be passed as arguments to register(). It is possible to register the same function and arguments more than once. At normal program termination (for instance, if sys.exit() is called or the main module’s execution completes), all functions registered are called in last in, first out order. The assumption is that lower level modules will normally be imported before higher level modules and thus must be cleaned up later. If an exception is raised during execution of the exit handlers, a traceback is printed (unless SystemExit is raised) and the exception information is saved. After all exit handlers have had a chance to run the last exception to be raised is re-raised. This function returns func, which makes it possible to use it as a decorator. atexit.unregister(func) Remove func from the list of functions to be run at interpreter shutdown. After calling unregister(), func is guaranteed not to be called when the interpreter shuts down, even if it was registered more than once. unregister() silently does nothing if func was not previously registered. See Also: Module readline Useful example of atexit to read and write readline history files.
27.8.1 atexit Example The following simple example demonstrates how a module can initialize a counter from a file when it is imported and save the counter’s updated value automatically when the program terminates without relying on the application making an explicit call into this module at termination. try: _count = int(open("/tmp/counter").read()) except IOError: _count = 0 def incrcounter(n): global _count _count = _count + n def savecounter(): open("/tmp/counter", "w").write("%d" % _count) import atexit atexit.register(savecounter) Positional and keyword arguments may also be passed to register() to be passed along to the registered function when it is called: def goodbye(name, adjective): print(’Goodbye, %s, it was %s to meet you.’ % (name, adjective)) import atexit atexit.register(goodbye, ’Donny’, ’nice’)
1156
Chapter 27. Python Runtime Services
The Python Library Reference, Release 3.2.3
# or: atexit.register(goodbye, adjective=’nice’, name=’Donny’) Usage as a decorator: import atexit @atexit.register def goodbye(): print("You are now leaving the Python sector.") This only works with functions that can be called without arguments.
27.9 traceback — Print or retrieve a stack traceback This module provides a standard interface to extract, format and print stack traces of Python programs. It exactly mimics the behavior of the Python interpreter when it prints a stack trace. This is useful when you want to print stack traces under program control, such as in a “wrapper” around the interpreter. The module uses traceback objects — this is the object type that is stored in the sys.last_traceback variable and returned as the third item from sys.exc_info(). The module defines the following functions: traceback.print_tb(traceback, limit=None, file=None) Print up to limit stack trace entries from traceback. If limit is omitted or None, all entries are printed. If file is omitted or None, the output goes to sys.stderr; otherwise it should be an open file or file-like object to receive the output. traceback.print_exception(type, value, traceback, limit=None, file=None, chain=True) Print exception information and up to limit stack trace entries from traceback to file. This differs from print_tb() in the following ways: •if traceback is not None, it prints a header Traceback (most recent call last): •it prints the exception type and value after the stack trace •if type is SyntaxError and value has the appropriate format, it prints the line where the syntax error occurred with a caret indicating the approximate position of the error. If chain is true (the default), then chained exceptions (the __cause__ or __context__ attributes of the exception) will be printed as well, like the interpreter itself does when printing an unhandled exception. traceback.print_exc(limit=None, file=None, chain=True) This is a shorthand for print_exception(*sys.exc_info()). traceback.print_last(limit=None, file=None, chain=True) This is a shorthand for print_exception(sys.last_type, sys.last_value, sys.last_traceback, limit, file). In general it will work only after an exception has reached an interactive prompt (see sys.last_type). traceback.print_stack(f=None, limit=None, file=None) This function prints a stack trace from its invocation point. The optional f argument can be used to specify an alternate stack frame to start. The optional limit and file arguments have the same meaning as for print_exception(). traceback.extract_tb(traceback, limit=None) Return a list of up to limit “pre-processed” stack trace entries extracted from the traceback object traceback. It is useful for alternate formatting of stack traces. If limit is omitted or None, all entries are extracted. A “pre-processed” stack trace entry is a quadruple (filename, line number, function name, text) representing the 27.9. traceback — Print or retrieve a stack traceback
1157
The Python Library Reference, Release 3.2.3
information that is usually printed for a stack trace. The text is a string with leading and trailing whitespace stripped; if the source is not available it is None. traceback.extract_stack(f=None, limit=None) Extract the raw traceback from the current stack frame. The return value has the same format as for extract_tb(). The optional f and limit arguments have the same meaning as for print_stack(). traceback.format_list(list) Given a list of tuples as returned by extract_tb() or extract_stack(), return a list of strings ready for printing. Each string in the resulting list corresponds to the item with the same index in the argument list. Each string ends in a newline; the strings may contain internal newlines as well, for those items whose source text line is not None. traceback.format_exception_only(type, value) Format the exception part of a traceback. The arguments are the exception type and value such as given by sys.last_type and sys.last_value. The return value is a list of strings, each ending in a newline. Normally, the list contains a single string; however, for SyntaxError exceptions, it contains several lines that (when printed) display detailed information about where the syntax error occurred. The message indicating which exception occurred is the always last string in the list. traceback.format_exception(type, value, tb, limit=None, chain=True) Format a stack trace and the exception information. The arguments have the same meaning as the corresponding arguments to print_exception(). The return value is a list of strings, each ending in a newline and some containing internal newlines. When these lines are concatenated and printed, exactly the same text is printed as does print_exception(). traceback.format_exc(limit=None, chain=True) This is like print_exc(limit) but returns a string instead of printing to a file. traceback.format_tb(tb, limit=None) A shorthand for format_list(extract_tb(tb, limit)). traceback.format_stack(f=None, limit=None) A shorthand for format_list(extract_stack(f, limit)).
27.9.1 Traceback Examples This simple example implements a basic read-eval-print loop, similar to (but less useful than) the standard Python interactive interpreter loop. For a more complete implementation of the interpreter loop, refer to the code module. import sys, traceback def run_user_code(envdir): source = input(">>> ") try: exec(source, envdir) except: print("Exception in user code:") print("-"*60) traceback.print_exc(file=sys.stdout) print("-"*60) envdir = {} while True: run_user_code(envdir) The following example demonstrates the different ways to print and format the exception and traceback:
1158
Chapter 27. Python Runtime Services
The Python Library Reference, Release 3.2.3
import sys, traceback def lumberjack(): bright_side_of_death() def bright_side_of_death(): return tuple()[0] try: lumberjack() except IndexError: exc_type, exc_value, exc_traceback = sys.exc_info() print("*** print_tb:") traceback.print_tb(exc_traceback, limit=1, file=sys.stdout) print("*** print_exception:") traceback.print_exception(exc_type, exc_value, exc_traceback, limit=2, file=sys.stdout) print("*** print_exc:") traceback.print_exc() print("*** format_exc, first and last line:") formatted_lines = traceback.format_exc().splitlines() print(formatted_lines[0]) print(formatted_lines[-1]) print("*** format_exception:") print(repr(traceback.format_exception(exc_type, exc_value, exc_traceback))) print("*** extract_tb:") print(repr(traceback.extract_tb(exc_traceback))) print("*** format_tb:") print(repr(traceback.format_tb(exc_traceback))) print("*** tb_lineno:", exc_traceback.tb_lineno) The output for the example would look similar to this: *** print_tb: File "", line 10, in lumberjack() *** print_exception: Traceback (most recent call last): File "", line 10, in lumberjack() File "", line 4, in lumberjack bright_side_of_death() IndexError: tuple index out of range *** print_exc: Traceback (most recent call last): File "", line 10, in lumberjack() File "", line 4, in lumberjack bright_side_of_death() IndexError: tuple index out of range *** format_exc, first and last line: Traceback (most recent call last): IndexError: tuple index out of range *** format_exception: 27.9. traceback — Print or retrieve a stack traceback
1159
The Python Library Reference, Release 3.2.3
[’Traceback (most recent call last):\n’, ’ File "", line 10, in \n lumberjack()\n’, ’ File "", line 4, in lumberjack\n bright_side_of_death()\n’, ’ File "", line 7, in bright_side_of_death\n return tuple()[0]\n’, ’IndexError: tuple index out of range\n’] *** extract_tb: [(’’, 10, ’’, ’lumberjack()’), (’’, 4, ’lumberjack’, ’bright_side_of_death()’), (’’, 7, ’bright_side_of_death’, ’return tuple()[0]’)] *** format_tb: [’ File "", line 10, in \n lumberjack()\n’, ’ File "", line 4, in lumberjack\n bright_side_of_death()\n’, ’ File "", line 7, in bright_side_of_death\n return tuple()[0]\n’] *** tb_lineno: 10 The following example shows the different ways to print and format the stack:
>>> import traceback >>> def another_function(): ... lumberstack() ... >>> def lumberstack(): ... traceback.print_stack() ... print(repr(traceback.extract_stack())) ... print(repr(traceback.format_stack())) ... >>> another_function() File "", line 10, in another_function() File "", line 3, in another_function lumberstack() File "", line 6, in lumberstack traceback.print_stack() [(’’, 10, ’’, ’another_function()’), (’’, 3, ’another_function’, ’lumberstack()’), (’’, 7, ’lumberstack’, ’print(repr(traceback.extract_stack()))’)] [’ File "", line 10, in \n another_function()\n’, ’ File "", line 3, in another_function\n lumberstack()\n’, ’ File "", line 8, in lumberstack\n print(repr(traceback.format_stack()))\n’] This last example demonstrates the final few formatting functions: >>> import traceback >>> traceback.format_list([(’spam.py’, 3, ’’, ’spam.eggs()’), ... (’eggs.py’, 42, ’eggs’, ’return "bacon"’)]) [’ File "spam.py", line 3, in \n spam.eggs()\n’, ’ File "eggs.py", line 42, in eggs\n return "bacon"\n’] >>> an_error = IndexError(’tuple index out of range’) >>> traceback.format_exception_only(type(an_error), an_error) [’IndexError: tuple index out of range\n’]
__future__ is a real module, and serves three purposes: • To avoid confusing existing tools that analyze import statements and expect to find the modules they’re importing. • To ensure that future statements run under releases prior to 2.1 at least yield runtime exceptions (the import of __future__ will fail, because there was no module of that name prior to 2.1). • To document when incompatible changes were introduced, and when they will be — or were — made mandatory. This is a form of executable documentation, and can be inspected programmatically via importing __future__ and examining its contents. Each statement in __future__.py is of the form: FeatureName = _Feature(OptionalRelease, MandatoryRelease, CompilerFlag) where, normally, OptionalRelease is less than MandatoryRelease, and both are 5-tuples of the same form as sys.version_info: (PY_MAJOR_VERSION, PY_MINOR_VERSION, PY_MICRO_VERSION, PY_RELEASE_LEVEL, PY_RELEASE_SERIAL )
# # # # #
the 2 in 2.1.0a3; an int the 1; an int the 0; an int "alpha", "beta", "candidate" or "final"; string the 3; an int
OptionalRelease records the first release in which the feature was accepted. In the case of a MandatoryRelease that has not yet occurred, MandatoryRelease predicts the release in which the feature will become part of the language. Else MandatoryRelease records when the feature became part of the language; in releases at or after that, modules no longer need a future statement to use the feature in question, but may continue to use such imports. MandatoryRelease may also be None, meaning that a planned feature got dropped. Instances of class _Feature getMandatoryRelease().
have
two
corresponding
methods,
getOptionalRelease()
and
CompilerFlag is the (bitfield) flag that should be passed in the fourth argument to the built-in function compile() to enable the feature in dynamically compiled code. This flag is stored in the compiler_flag attribute on _Feature instances. No feature description will ever be deleted from __future__. Since its introduction in Python 2.1 the following features have found their way into the language using this mechanism: feature nested_scopes
optional in 2.1.0b1
mandatory in 2.2
generators
2.2.0a1
2.3
division
2.2.0a2
3.0
absolute_import
2.5.0a1
3.0
with_statement
2.5.0a1
2.6
print_function
2.6.0a2
3.0
unicode_literals
2.6.0a2
3.0
effect PEP 227: Statically Nested Scopes PEP 255: Simple Generators PEP 238: Changing the Division Operator PEP 328: Imports: Multi-Line and Absolute/Relative PEP 343: The “with” Statement PEP 3105: Make print a function PEP 3112: Bytes literals in Python 3000
27.10. __future__ — Future statement definitions
1161
The Python Library Reference, Release 3.2.3
See Also: future How the compiler treats future imports.
27.11 gc — Garbage Collector interface This module provides an interface to the optional garbage collector. It provides the ability to disable the collector, tune the collection frequency, and set debugging options. It also provides access to unreachable objects that the collector found but cannot free. Since the collector supplements the reference counting already used in Python, you can disable the collector if you are sure your program does not create reference cycles. Automatic collection can be disabled by calling gc.disable(). To debug a leaking program call gc.set_debug(gc.DEBUG_LEAK). Notice that this includes gc.DEBUG_SAVEALL, causing garbage-collected objects to be saved in gc.garbage for inspection. The gc module provides the following functions: gc.enable() Enable automatic garbage collection. gc.disable() Disable automatic garbage collection. gc.isenabled() Returns true if automatic collection is enabled. gc.collect(generations=2) With no arguments, run a full collection. The optional argument generation may be an integer specifying which generation to collect (from 0 to 2). A ValueError is raised if the generation number is invalid. The number of unreachable objects found is returned. The free lists maintained for a number of built-in types are cleared whenever a full collection or collection of the highest generation (2) is run. Not all items in some free lists may be freed due to the particular implementation, in particular float. gc.set_debug(flags) Set the garbage collection debugging flags. Debugging information will be written to sys.stderr. See below for a list of debugging flags which can be combined using bit operations to control debugging. gc.get_debug() Return the debugging flags currently set. gc.get_objects() Returns a list of all objects tracked by the collector, excluding the list returned. gc.set_threshold(threshold0[, threshold1[, threshold2 ]]) Set the garbage collection thresholds (the collection frequency). Setting threshold0 to zero disables collection. The GC classifies objects into three generations depending on how many collection sweeps they have survived. New objects are placed in the youngest generation (generation 0). If an object survives a collection it is moved into the next older generation. Since generation 2 is the oldest generation, objects in that generation remain there after a collection. In order to decide when to run, the collector keeps track of the number object allocations and deallocations since the last collection. When the number of allocations minus the number of deallocations exceeds threshold0, collection starts. Initially only generation 0 is examined. If generation 0 has been examined more than threshold1 times since generation 1 has been examined, then generation 1 is examined as well. Similarly, threshold2 controls the number of collections of generation 1 before collecting generation 2. gc.get_count() Return the current collection counts as a tuple of (count0, count1, count2).
1162
Chapter 27. Python Runtime Services
The Python Library Reference, Release 3.2.3
gc.get_threshold() Return the current collection thresholds as a tuple of (threshold0, threshold1, threshold2). gc.get_referrers(*objs) Return the list of objects that directly refer to any of objs. This function will only locate those containers which support garbage collection; extension types which do refer to other objects but do not support garbage collection will not be found. Note that objects which have already been dereferenced, but which live in cycles and have not yet been collected by the garbage collector can be listed among the resulting referrers. To get only currently live objects, call collect() before calling get_referrers(). Care must be taken when using objects returned by get_referrers() because some of them could still be under construction and hence in a temporarily invalid state. Avoid using get_referrers() for any purpose other than debugging. gc.get_referents(*objs) Return a list of objects directly referred to by any of the arguments. The referents returned are those objects visited by the arguments’ C-level tp_traverse methods (if any), and may not be all objects actually directly reachable. tp_traverse methods are supported only by objects that support garbage collection, and are only required to visit objects that may be involved in a cycle. So, for example, if an integer is directly reachable from an argument, that integer object may or may not appear in the result list. gc.is_tracked(obj) Returns True if the object is currently tracked by the garbage collector, False otherwise. As a general rule, instances of atomic types aren’t tracked and instances of non-atomic types (containers, user-defined objects...) are. However, some type-specific optimizations can be present in order to suppress the garbage collector footprint of simple instances (e.g. dicts containing only atomic keys and values): >>> gc.is_tracked(0) False >>> gc.is_tracked("a") False >>> gc.is_tracked([]) True >>> gc.is_tracked({}) False >>> gc.is_tracked({"a": 1}) False >>> gc.is_tracked({"a": []}) True New in version 3.1. The following variable is provided for read-only access (you can mutate its value but should not rebind it): gc.garbage A list of objects which the collector found to be unreachable but could not be freed (uncollectable objects). By default, this list contains only objects with __del__() methods. Objects that have __del__() methods and are part of a reference cycle cause the entire reference cycle to be uncollectable, including objects not necessarily in the cycle but reachable only from it. Python doesn’t collect such cycles automatically because, in general, it isn’t possible for Python to guess a safe order in which to run the __del__() methods. If you know a safe order, you can force the issue by examining the garbage list, and explicitly breaking cycles due to your objects within the list. Note that these objects are kept alive even so by virtue of being in the garbage list, so they should be removed from garbage too. For example, after breaking cycles, do del gc.garbage[:] to empty the list. It’s generally better to avoid the issue by not creating cycles containing objects with __del__() methods, and garbage can be examined in that case to verify that no such cycles are being created.
27.11. gc — Garbage Collector interface
1163
The Python Library Reference, Release 3.2.3
If DEBUG_SAVEALL is set, then all unreachable objects will be added to this list rather than freed. Changed in version 3.2: If this list is non-empty at interpreter shutdown, a ResourceWarning is emitted, which is silent by default. If DEBUG_UNCOLLECTABLE is set, in addition all uncollectable objects are printed. The following constants are provided for use with set_debug(): gc.DEBUG_STATS Print statistics during collection. This information can be useful when tuning the collection frequency. gc.DEBUG_COLLECTABLE Print information on collectable objects found. gc.DEBUG_UNCOLLECTABLE Print information of uncollectable objects found (objects which are not reachable but cannot be freed by the collector). These objects will be added to the garbage list. Changed in version 3.2: Also print the contents of the garbage list at interpreter shutdown, if it isn’t empty. gc.DEBUG_SAVEALL When set, all unreachable objects found will be appended to garbage rather than being freed. This can be useful for debugging a leaking program. gc.DEBUG_LEAK The debugging flags necessary for the collector to print information about a leaking program (equal to DEBUG_COLLECTABLE | DEBUG_UNCOLLECTABLE | DEBUG_SAVEALL).
27.12 inspect — Inspect live objects Source code: Lib/inspect.py
The inspect module provides several useful functions to help get information about live objects such as modules, classes, methods, functions, tracebacks, frame objects, and code objects. For example, it can help you examine the contents of a class, retrieve the source code of a method, extract and format the argument list for a function, or get all the information you need to display a detailed traceback. There are four main kinds of services provided by this module: type checking, getting source code, inspecting classes and functions, and examining the interpreter stack.
27.12.1 Types and members The getmembers() function retrieves the members of an object such as a class or module. The sixteen functions whose names begin with “is” are mainly provided as convenient choices for the second argument to getmembers(). They also help you determine when you can expect to find the following special attributes: Type module class method
Description documentation string filename (missing for built-in modules) documentation string name of module in which this class was defined documentation string name with which this method was defined function object containing implementation of method instance to which this method is bound, or None documentation string Continued on next page Chapter 27. Python Runtime Services
The Python Library Reference, Release 3.2.3
traceback
frame
code
builtin
Table 27.1 – continued from previous page __name__ name with which this function was defined __code__ code object containing compiled function bytecode __defaults__ tuple of any default values for arguments __globals__ global namespace in which this function was defined tb_frame frame object at this level tb_lasti index of last attempted instruction in bytecode tb_lineno current line number in Python source code tb_next next inner traceback object (called by this level) f_back next outer frame object (this frame’s caller) f_builtins builtins namespace seen by this frame f_code code object being executed in this frame f_globals global namespace seen by this frame f_lasti index of last attempted instruction in bytecode f_lineno current line number in Python source code f_locals local namespace seen by this frame f_restricted 0 or 1 if frame is in restricted execution mode f_trace tracing function for this frame, or None co_argcount number of arguments (not including * or ** args) co_code string of raw compiled bytecode co_consts tuple of constants used in the bytecode co_filename name of file in which this code object was created co_firstlineno number of first line in Python source code co_flags bitmap: 1=optimized | 2=newlocals | 4=*arg | 8=**arg co_lnotab encoded mapping of line numbers to bytecode indices co_name name with which this code object was defined co_names tuple of names of local variables co_nlocals number of local variables co_stacksize virtual machine stack space required co_varnames tuple of names of arguments and local variables __doc__ documentation string __name__ original name of this function or method __self__ instance to which a method is bound, or None
inspect.getmembers(object[, predicate ]) Return all the members of an object in a list of (name, value) pairs sorted by name. If the optional predicate argument is supplied, only members for which the predicate returns a true value are included. Note: getmembers() does not return metaclass attributes when the argument is a class (this behavior is inherited from the dir() function). inspect.getmoduleinfo(path) Returns a named tuple ModuleInfo(name, suffix, mode, module_type) of values that describe how Python will interpret the file identified by path if it is a module, or None if it would not be identified as a module. In that tuple, name is the name of the module without the name of any enclosing package, suffix is the trailing part of the file name (which may not be a dot-delimited extension), mode is the open() mode that would be used (’r’ or ’rb’), and module_type is an integer giving the type of the module. module_type will have a value which can be compared to the constants defined in the imp module; see the documentation for that module for more information on module types. inspect.getmodulename(path) Return the name of the module named by the file path, without including the names of enclosing packages. This uses the same algorithm as the interpreter uses when searching for modules. If the name cannot be matched
27.12. inspect — Inspect live objects
1165
The Python Library Reference, Release 3.2.3
according to the interpreter’s rules, None is returned. inspect.ismodule(object) Return true if the object is a module. inspect.isclass(object) Return true if the object is a class, whether built-in or created in Python code. inspect.ismethod(object) Return true if the object is a bound method written in Python. inspect.isfunction(object) Return true if the object is a Python function, which includes functions created by a lambda expression. inspect.isgeneratorfunction(object) Return true if the object is a Python generator function. inspect.isgenerator(object) Return true if the object is a generator. inspect.istraceback(object) Return true if the object is a traceback. inspect.isframe(object) Return true if the object is a frame. inspect.iscode(object) Return true if the object is a code. inspect.isbuiltin(object) Return true if the object is a built-in function or a bound built-in method. inspect.isroutine(object) Return true if the object is a user-defined or built-in function or method. inspect.isabstract(object) Return true if the object is an abstract base class. inspect.ismethoddescriptor(object) Return true if the object is a method descriptor, but not if ismethod(), isclass(), isfunction() or isbuiltin() are true. This, for example, is true of int.__add__. An object passing this test has a __get__ attribute but not a __set__ attribute, but beyond that the set of attributes varies. __name__ is usually sensible, and __doc__ often is. Methods implemented via descriptors that also pass one of the other tests return false from the ismethoddescriptor() test, simply because the other tests promise more – you can, e.g., count on having the __func__ attribute (etc) when an object passes ismethod(). inspect.isdatadescriptor(object) Return true if the object is a data descriptor. Data descriptors have both a __get__ and a __set__ attribute. Examples are properties (defined in Python), getsets, and members. The latter two are defined in C and there are more specific tests available for those types, which is robust across Python implementations. Typically, data descriptors will also have __name__ and __doc__ attributes (properties, getsets, and members have both of these attributes), but this is not guaranteed. inspect.isgetsetdescriptor(object) Return true if the object is a getset descriptor. CPython implementation detail: getsets are attributes defined in extension modules via PyGetSetDef structures. For Python implementations without such types, this method will always return False.
1166
Chapter 27. Python Runtime Services
The Python Library Reference, Release 3.2.3
inspect.ismemberdescriptor(object) Return true if the object is a member descriptor. CPython implementation detail: Member descriptors are attributes defined in extension modules via PyMemberDef structures. For Python implementations without such types, this method will always return False.
27.12.2 Retrieving source code inspect.getdoc(object) Get the documentation string for an object, cleaned up with cleandoc(). inspect.getcomments(object) Return in a single string any lines of comments immediately preceding the object’s source code (for a class, function, or method), or at the top of the Python source file (if the object is a module). inspect.getfile(object) Return the name of the (text or binary) file in which an object was defined. This will fail with a TypeError if the object is a built-in module, class, or function. inspect.getmodule(object) Try to guess which module an object was defined in. inspect.getsourcefile(object) Return the name of the Python source file in which an object was defined. This will fail with a TypeError if the object is a built-in module, class, or function. inspect.getsourcelines(object) Return a list of source lines and starting line number for an object. The argument may be a module, class, method, function, traceback, frame, or code object. The source code is returned as a list of the lines corresponding to the object and the line number indicates where in the original source file the first line of code was found. An IOError is raised if the source code cannot be retrieved. inspect.getsource(object) Return the text of the source code for an object. The argument may be a module, class, method, function, traceback, frame, or code object. The source code is returned as a single string. An IOError is raised if the source code cannot be retrieved. inspect.cleandoc(doc) Clean up indentation from docstrings that are indented to line up with blocks of code. Any whitespace that can be uniformly removed from the second line onwards is removed. Also, all tabs are expanded to spaces.
27.12.3 Classes and functions inspect.getclasstree(classes, unique=False) Arrange the given list of classes into a hierarchy of nested lists. Where a nested list appears, it contains classes derived from the class whose entry immediately precedes the list. Each entry is a 2-tuple containing a class and a tuple of its base classes. If the unique argument is true, exactly one entry appears in the returned structure for each class in the given list. Otherwise, classes using multiple inheritance and their descendants will appear multiple times. inspect.getargspec(func) Get the names and default values of a Python function’s arguments. A named tuple ArgSpec(args, varargs, keywords, defaults) is returned. args is a list of the argument names. varargs and keywords are the names of the * and ** arguments or None. defaults is a tuple of default argument values or None if there are no default arguments; if this tuple has n elements, they correspond to the last n elements listed
27.12. inspect — Inspect live objects
1167
The Python Library Reference, Release 3.2.3
in args. Deprecated since version 3.0: Use getfullargspec() instead, which provides information about keyword-only arguments and annotations. inspect.getfullargspec(func) Get the names and default values of a Python function’s arguments. A named tuple is returned: FullArgSpec(args, varargs, varkw, defaults, kwonlyargs, kwonlydefaults, annotations) args is a list of the argument names. varargs and varkw are the names of the * and ** arguments or None. defaults is an n-tuple of the default values of the last n arguments. kwonlyargs is a list of keyword-only argument names. kwonlydefaults is a dictionary mapping names from kwonlyargs to defaults. annotations is a dictionary mapping argument names to annotations. The first four items in the tuple correspond to getargspec(). inspect.getargvalues(frame) Get information about arguments passed into a particular frame. A named tuple ArgInfo(args, varargs, keywords, locals) is returned. args is a list of the argument names. varargs and keywords are the names of the * and ** arguments or None. locals is the locals dictionary of the given frame. inspect.formatargspec(args[, varargs, varkw, defaults, formatarg, formatvarargs, formatvarkw, formatvalue ]) Format a pretty argument spec from the four values returned by getargspec(). The format* arguments are the corresponding optional formatting functions that are called to turn names and values into strings. inspect.formatargvalues(args[, varargs, varkw, locals, formatarg, formatvarargs, formatvarkw, formatvalue ]) Format a pretty argument spec from the four values returned by getargvalues(). The format* arguments are the corresponding optional formatting functions that are called to turn names and values into strings. inspect.getmro(cls) Return a tuple of class cls’s base classes, including cls, in method resolution order. No class appears more than once in this tuple. Note that the method resolution order depends on cls’s type. Unless a very peculiar user-defined metatype is in use, cls will be the first element of the tuple. inspect.getcallargs(func[, *args][, **kwds]) Bind the args and kwds to the argument names of the Python function or method func, as if it was called with them. For bound methods, bind also the first argument (typically named self) to the associated instance. A dict is returned, mapping the argument names (including the names of the * and ** arguments, if any) to their values from args and kwds. In case of invoking func incorrectly, i.e. whenever func(*args, **kwds) would raise an exception because of incompatible signature, an exception of the same type and the same or similar message is raised. For example: >>> from inspect import getcallargs >>> def f(a, b=1, *pos, **named): ... pass >>> getcallargs(f, 1, 2, 3) {’a’: 1, ’named’: {}, ’b’: 2, ’pos’: (3,)} >>> getcallargs(f, a=2, x=4) {’a’: 2, ’named’: {’x’: 4}, ’b’: 1, ’pos’: ()} >>> getcallargs(f) Traceback (most recent call last): ... TypeError: f() takes at least 1 argument (0 given) New in version 3.2.
1168
Chapter 27. Python Runtime Services
The Python Library Reference, Release 3.2.3
27.12.4 The interpreter stack When the following functions return “frame records,” each record is a tuple of six items: the frame object, the filename, the line number of the current line, the function name, a list of lines of context from the source code, and the index of the current line within that list. Note: Keeping references to frame objects, as found in the first element of the frame records these functions return, can cause your program to create reference cycles. Once a reference cycle has been created, the lifespan of all objects which can be accessed from the objects which form the cycle can become much longer even if Python’s optional cycle detector is enabled. If such cycles must be created, it is important to ensure they are explicitly broken to avoid the delayed destruction of objects and increased memory consumption which occurs. Though the cycle detector will catch these, destruction of the frames (and local variables) can be made deterministic by removing the cycle in a finally clause. This is also important if the cycle detector was disabled when Python was compiled or using gc.disable(). For example: def handle_stackframe_without_leak(): frame = inspect.currentframe() try: # do something with the frame finally: del frame The optional context argument supported by most of these functions specifies the number of lines of context to return, which are centered around the current line. inspect.getframeinfo(frame, context=1) Get information about a frame or traceback object. A named tuple Traceback(filename, lineno, function, code_context, index) is returned. inspect.getouterframes(frame, context=1) Get a list of frame records for a frame and all outer frames. These frames represent the calls that lead to the creation of frame. The first entry in the returned list represents frame; the last entry represents the outermost call on frame‘s stack. inspect.getinnerframes(traceback, context=1) Get a list of frame records for a traceback’s frame and all inner frames. These frames represent calls made as a consequence of frame. The first entry in the list represents traceback; the last entry represents where the exception was raised. inspect.currentframe() Return the frame object for the caller’s stack frame. CPython implementation detail: This function relies on Python stack frame support in the interpreter, which isn’t guaranteed to exist in all implementations of Python. If running in an implementation without Python stack frame support this function returns None. inspect.stack(context=1) Return a list of frame records for the caller’s stack. The first entry in the returned list represents the caller; the last entry represents the outermost call on the stack. inspect.trace(context=1) Return a list of frame records for the stack between the current frame and the frame in which an exception currently being handled was raised in. The first entry in the list represents the caller; the last entry represents where the exception was raised.
27.12. inspect — Inspect live objects
1169
The Python Library Reference, Release 3.2.3
27.12.5 Fetching attributes statically Both getattr() and hasattr() can trigger code execution when fetching or checking for the existence of attributes. Descriptors, like properties, will be invoked and __getattr__() and __getattribute__() may be called. For cases where you want passive introspection, like documentation tools, this can be inconvenient. getattr_static() has the same signature as getattr() but avoids executing code when it fetches attributes. inspect.getattr_static(obj, attr, default=None) Retrieve attributes without triggering dynamic lookup via the descriptor protocol, __getattr__() or __getattribute__(). Note: this function may not be able to retrieve all attributes that getattr can fetch (like dynamically created attributes) and may find attributes that getattr can’t (like descriptors that raise AttributeError). It can also return descriptors objects instead of instance members. If the instance __dict__ is shadowed by another member (for example a property) then this function will be unable to find instance members. New in version 3.2. getattr_static() does not resolve descriptors, for example slot descriptors or getset descriptors on objects implemented in C. The descriptor object is returned instead of the underlying attribute. You can handle these with code like the following. Note that for arbitrary getset descriptors invoking these may trigger code execution: # example code for resolving the builtin descriptor types class _foo: __slots__ = [’foo’] slot_descriptor = type(_foo.foo) getset_descriptor = type(type(open(__file__)).name) wrapper_descriptor = type(str.__dict__[’__add__’]) descriptor_types = (slot_descriptor, getset_descriptor, wrapper_descriptor) result = getattr_static(some_object, ’foo’) if type(result) in descriptor_types: try: result = result.__get__() except AttributeError: # descriptors can raise AttributeError to # indicate there is no underlying value # in which case the descriptor itself will # have to do pass
27.12.6 Current State of a Generator When implementing coroutine schedulers and for other advanced uses of generators, it is useful to determine whether a generator is currently executing, is waiting to start or resume or execution, or has already terminated. getgeneratorstate() allows the current state of a generator to be determined easily. inspect.getgeneratorstate(generator) Get current state of a generator-iterator. Possible states are: • GEN_CREATED: Waiting to start execution.
1170
Chapter 27. Python Runtime Services
The Python Library Reference, Release 3.2.3
• GEN_RUNNING: Currently being executed by the interpreter. • GEN_SUSPENDED: Currently suspended at a yield expression. • GEN_CLOSED: Execution has completed. New in version 3.2.
27.13 site — Site-specific configuration hook Source code: Lib/site.py
This module is automatically imported during initialization. The automatic import can be suppressed using the interpreter’s -S option. Importing this module will append site-specific paths to the module search path and add a few builtins. It starts by constructing up to four directories from a head and a tail part. For the head part, it uses sys.prefix and sys.exec_prefix; empty heads are skipped. For the tail part, it uses the empty string and then lib/site-packages (on Windows) or lib/python|version|/site-packages and then lib/site-python (on Unix and Macintosh). For each of the distinct head-tail combinations, it sees if it refers to an existing directory, and if so, adds it to sys.path and also inspects the newly added path for configuration files. A path configuration file is a file whose name has the form name.pth and exists in one of the four directories mentioned above; its contents are additional items (one per line) to be added to sys.path. Non-existing items are never added to sys.path, and no check is made that the item refers to a directory rather than a file. No item is added to sys.path more than once. Blank lines and lines beginning with # are skipped. Lines starting with import (followed by space or tab) are executed. For example, suppose sys.prefix and sys.exec_prefix are set to /usr/local. The Python X.Y library is then installed in /usr/local/lib/pythonX.Y. Suppose this has a subdirectory /usr/local/lib/pythonX.Y/site-packages with three subsubdirectories, foo, bar and spam, and two path configuration files, foo.pth and bar.pth. Assume foo.pth contains the following: # foo package configuration foo bar bletch and bar.pth contains: # bar package configuration bar Then the following version-specific directories are added to sys.path, in this order: /usr/local/lib/pythonX.Y/site-packages/bar /usr/local/lib/pythonX.Y/site-packages/foo Note that bletch is omitted because it doesn’t exist; the bar directory precedes the foo directory because bar.pth comes alphabetically before foo.pth; and spam is omitted because it is not mentioned in either path configuration file. After these path manipulations, an attempt is made to import a module named sitecustomize, which can perform arbitrary site-specific customizations. It is typically created by a system administrator in the site-packages directory. If this import fails with an ImportError exception, it is silently ignored.
27.13. site — Site-specific configuration hook
1171
The Python Library Reference, Release 3.2.3
After this, an attempt is made to import a module named usercustomize, which can perform arbitrary user-specific customizations, if ENABLE_USER_SITE is true. This file is intended to be created in the user site-packages directory (see below), which is part of sys.path unless disabled by -s. An ImportError will be silently ignored. Note that for some non-Unix systems, sys.prefix and sys.exec_prefix are empty, and the path manipulations are skipped; however the import of sitecustomize and usercustomize is still attempted. site.PREFIXES A list of prefixes for site-packages directories. site.ENABLE_USER_SITE Flag showing the status of the user site-packages directory. True means that it is enabled and was added to sys.path. False means that it was disabled by user request (with -s or PYTHONNOUSERSITE). None means it was disabled for security reasons (mismatch between user or group id and effective id) or by an administrator. site.USER_SITE Path to the user site-packages for the running Python. Can be None if getusersitepackages() hasn’t been called yet. Default value is ~/.local/lib/pythonX.Y/site-packages for UNIX and non-framework Mac OS X builds, ~/Library/Python/X.Y/lib/python/site-packages for Mac framework builds, and %APPDATA%\Python\PythonXY\site-packages on Windows. This directory is a site directory, which means that .pth files in it will be processed. site.USER_BASE Path to the base directory for the user site-packages. Can be None if getuserbase() hasn’t been called yet. Default value is ~/.local for UNIX and Mac OS X non-framework builds, ~/Library/Python/X.Y for Mac framework builds, and %APPDATA%\Python for Windows. This value is used by Distutils to compute the installation directories for scripts, data files, Python modules, etc. for the user installation scheme. See also PYTHONUSERBASE. site.addsitedir(sitedir, known_paths=None) Add a directory to sys.path and process its .pth files. usercustomize (see above).
Typically used in sitecustomize or
site.getsitepackages() Return a list containing all global site-packages directories (and possibly site-python). New in version 3.2. site.getuserbase() Return the path of the user base directory, USER_BASE. If it is not initialized yet, this function will also set it, respecting PYTHONUSERBASE. New in version 3.2. site.getusersitepackages() Return the path of the user-specific site-packages directory, USER_SITE. If it is not initialized yet, this function will also set it, respecting PYTHONNOUSERSITE and USER_BASE. New in version 3.2. The site module also provides a way to get the user directories from the command line: $ python3 -m site --user-site /home/user/.local/lib/python3.3/site-packages If it is called without arguments, it will print the contents of sys.path on the standard output, followed by the value of USER_BASE and whether the directory exists, then the same thing for USER_SITE, and finally the value of ENABLE_USER_SITE. -user-base Print the path to the user base directory. -user-site Print the path to the user site-packages directory.
1172
Chapter 27. Python Runtime Services
The Python Library Reference, Release 3.2.3
If both options are given, user base and user site will be printed (always in this order), separated by os.pathsep. If any option is given, the script will exit with one of these values: O if the user site-packages directory is enabled, 1 if it was disabled by the user, 2 if it is disabled for security reasons or by an administrator, and a value greater than 2 if there is an error. See Also: PEP 370 – Per user site-packages directory
27.14 fpectl — Floating point exception control Platforms: Unix Note: The fpectl module is not built by default, and its usage is discouraged and may be dangerous except in the hands of experts. See also the section Limitations and other considerations on limitations for more details. Most computers carry out floating point operations in conformance with the so-called IEEE-754 standard. On any real computer, some floating point operations produce results that cannot be expressed as a normal floating point value. For example, try >>> import math >>> math.exp(1000) inf >>> math.exp(1000) / math.exp(1000) nan (The example above will work on many platforms. DEC Alpha may be one exception.) “Inf” is a special, non-numeric value in IEEE-754 that stands for “infinity”, and “nan” means “not a number.” Note that, other than the non-numeric results, nothing special happened when you asked Python to carry out those calculations. That is in fact the default behaviour prescribed in the IEEE-754 standard, and if it works for you, stop reading now. In some circumstances, it would be better to raise an exception and stop processing at the point where the faulty operation was attempted. The fpectl module is for use in that situation. It provides control over floating point units from several hardware manufacturers, allowing the user to turn on the generation of SIGFPE whenever any of the IEEE-754 exceptions Division by Zero, Overflow, or Invalid Operation occurs. In tandem with a pair of wrapper macros that are inserted into the C code comprising your python system, SIGFPE is trapped and converted into the Python FloatingPointError exception. The fpectl module defines the following functions and may raise the given exception: fpectl.turnon_sigfpe() Turn on the generation of SIGFPE, and set up an appropriate signal handler. fpectl.turnoff_sigfpe() Reset default handling of floating point exceptions. exception fpectl.FloatingPointError After turnon_sigfpe() has been executed, a floating point operation that raises one of the IEEE-754 exceptions Division by Zero, Overflow, or Invalid operation will in turn raise this standard Python exception.
27.14.1 Example The following example demonstrates how to start up and test operation of the fpectl module.
27.14. fpectl — Floating point exception control
1173
The Python Library Reference, Release 3.2.3
>>> import fpectl >>> import fpetest >>> fpectl.turnon_sigfpe() >>> fpetest.test() overflow PASS FloatingPointError: Overflow div by 0 PASS FloatingPointError: Division by zero [ more output from test elided ] >>> import math >>> math.exp(1000) Traceback (most recent call last): File "", line 1, in ? FloatingPointError: in math_1
27.14.2 Limitations and other considerations Setting up a given processor to trap IEEE-754 floating point errors currently requires custom code on a per-architecture basis. You may have to modify fpectl to control your particular hardware. Conversion of an IEEE-754 exception to a Python exception requires that the wrapper macros PyFPE_START_PROTECT and PyFPE_END_PROTECT be inserted into your code in an appropriate fashion. Python itself has been modified to support the fpectl module, but many other codes of interest to numerical analysts have not. The fpectl module is not thread-safe. See Also: Some files in the source distribution may be interesting in learning more about how this module operates. The include file Include/pyfpe.h discusses the implementation of this module at some length. Modules/fpetestmodule.c gives several examples of use. Many additional examples can be found in Objects/floatobject.c.
27.15 distutils — Building and installing Python modules The distutils package provides support for building and installing additional modules into a Python installation. The new modules may be either 100%-pure Python, or may be extension modules written in C, or may be collections of Python packages which include modules coded in both Python and C. This package is discussed in two separate chapters: See Also: distutils-index The manual for developers and packagers of Python modules. This describes how to prepare distutils-based packages so that they may be easily installed into an existing Python installation. install-index An “administrators” manual which includes information on installing modules into an existing Python installation. You do not need to be a Python programmer to read this manual.
1174
Chapter 27. Python Runtime Services
CHAPTER
TWENTYEIGHT
CUSTOM PYTHON INTERPRETERS The modules described in this chapter allow writing interfaces similar to Python’s interactive interpreter. If you want a Python interpreter that supports some special feature in addition to the Python language, you should look at the code module. (The codeop module is lower-level, used to support compiling a possibly-incomplete chunk of Python code.) The full list of modules described in this chapter is:
28.1 code — Interpreter base classes The code module provides facilities to implement read-eval-print loops in Python. Two classes and convenience functions are included which can be used to build applications which provide an interactive interpreter prompt. class code.InteractiveInterpreter(locals=None) This class deals with parsing and interpreter state (the user’s namespace); it does not deal with input buffering or prompting or input file naming (the filename is always passed in explicitly). The optional locals argument specifies the dictionary in which code will be executed; it defaults to a newly created dictionary with key ’__name__’ set to ’__console__’ and key ’__doc__’ set to None. class code.InteractiveConsole(locals=None, filename=””) Closely emulate the behavior of the interactive Python interpreter. This class builds on InteractiveInterpreter and adds prompting using the familiar sys.ps1 and sys.ps2, and input buffering. code.interact(banner=None, readfunc=None, local=None) Convenience function to run a read-eval-print loop. This creates a new instance of InteractiveConsole and sets readfunc to be used as the raw_input() method, if provided. If local is provided, it is passed to the InteractiveConsole constructor for use as the default namespace for the interpreter loop. The interact() method of the instance is then run with banner passed as the banner to use, if provided. The console object is discarded after use. code.compile_command(source, filename=””, symbol=”single”) This function is useful for programs that want to emulate Python’s interpreter main loop (a.k.a. the read-evalprint loop). The tricky part is to determine when the user has entered an incomplete command that can be completed by entering more text (as opposed to a complete command or a syntax error). This function almost always makes the same decision as the real interpreter main loop. source is the source string; filename is the optional filename from which source was read, defaulting to ’’; and symbol is the optional grammar start symbol, which should be either ’single’ (the default) or ’eval’. Returns a code object (the same as compile(source, filename, symbol)) if the command is complete and valid; None if the command is incomplete; raises SyntaxError if the command is complete and 1175
The Python Library Reference, Release 3.2.3
contains a syntax error, or raises OverflowError or ValueError if the command contains an invalid literal.
28.1.1 Interactive Interpreter Objects InteractiveInterpreter.runsource(source, filename=””, symbol=”single”) Compile and run some source in the interpreter. Arguments are the same as for compile_command(); the default for filename is ’’, and for symbol is ’single’. One several things can happen: •The input is incorrect; compile_command() raised an exception (SyntaxError or OverflowError). A syntax traceback will be printed by calling the showsyntaxerror() method. runsource() returns False. •The input is incomplete, and more input is required; compile_command() returned None. runsource() returns True. •The input is complete; compile_command() returned a code object. The code is executed by calling the runcode() (which also handles run-time exceptions, except for SystemExit). runsource() returns False. The return value can be used to decide whether to use sys.ps1 or sys.ps2 to prompt the next line. InteractiveInterpreter.runcode(code) Execute a code object. When an exception occurs, showtraceback() is called to display a traceback. All exceptions are caught except SystemExit, which is allowed to propagate. A note about KeyboardInterrupt: this exception may occur elsewhere in this code, and may not always be caught. The caller should be prepared to deal with it. InteractiveInterpreter.showsyntaxerror(filename=None) Display the syntax error that just occurred. This does not display a stack trace because there isn’t one for syntax errors. If filename is given, it is stuffed into the exception instead of the default filename provided by Python’s parser, because it always uses ’’ when reading from a string. The output is written by the write() method. InteractiveInterpreter.showtraceback() Display the exception that just occurred. We remove the first stack item because it is within the interpreter object implementation. The output is written by the write() method. InteractiveInterpreter.write(data) Write a string to the standard error stream (sys.stderr). Derived classes should override this to provide the appropriate output handling as needed.
28.1.2 Interactive Console Objects The InteractiveConsole class is a subclass of InteractiveInterpreter, and so offers all the methods of the interpreter objects as well as the following additions. InteractiveConsole.interact(banner=None) Closely emulate the interactive Python console. The optional banner argument specify the banner to print before the first interaction; by default it prints a banner similar to the one printed by the standard Python interpreter, followed by the class name of the console object in parentheses (so as not to confuse this with the real interpreter – since it’s so close!). InteractiveConsole.push(line) Push a line of source text to the interpreter. The line should not have a trailing newline; it may have internal newlines. The line is appended to a buffer and the interpreter’s runsource() method is called with the concatenated contents of the buffer as source. If this indicates that the command was executed or invalid, the 1176
Chapter 28. Custom Python Interpreters
The Python Library Reference, Release 3.2.3
buffer is reset; otherwise, the command is incomplete, and the buffer is left as it was after the line was appended. The return value is True if more input is required, False if the line was dealt with in some way (this is the same as runsource()). InteractiveConsole.resetbuffer() Remove any unhandled source text from the input buffer. InteractiveConsole.raw_input(prompt=”“) Write a prompt and read a line. The returned line does not include the trailing newline. When the user enters the EOF key sequence, EOFError is raised. The base implementation reads from sys.stdin; a subclass may replace this with a different implementation.
28.2 codeop — Compile Python code The codeop module provides utilities upon which the Python read-eval-print loop can be emulated, as is done in the code module. As a result, you probably don’t want to use the module directly; if you want to include such a loop in your program you probably want to use the code module instead. There are two parts to this job: 1. Being able to tell if a line of input completes a Python statement: in short, telling whether to print ‘>>>‘ or ‘...‘ next. 2. Remembering which future statements the user has entered, so subsequent input can be compiled with these in effect. The codeop module provides a way of doing each of these things, and a way of doing them both. To do just the former: codeop.compile_command(source, filename=””, symbol=”single”) Tries to compile source, which should be a string of Python code and return a code object if source is valid Python code. In that case, the filename attribute of the code object will be filename, which defaults to ’’. Returns None if source is not valid Python code, but is a prefix of valid Python code. If there is a problem with source, an exception will be raised. SyntaxError is raised if there is invalid Python syntax, and OverflowError or ValueError if there is an invalid literal. The symbol argument determines whether source is compiled as a statement (’single’, the default) or as an expression (’eval’). Any other value will cause ValueError to be raised. Note: It is possible (but not likely) that the parser stops parsing with a successful outcome before reaching the end of the source; in this case, trailing symbols may be ignored instead of causing an error. For example, a backslash followed by two newlines may be followed by arbitrary garbage. This will be fixed once the API for the parser is better. class codeop.Compile Instances of this class have __call__() methods identical in signature to the built-in function compile(), but with the difference that if the instance compiles program text containing a __future__ statement, the instance ‘remembers’ and compiles all subsequent program texts with the statement in force. class codeop.CommandCompiler Instances of this class have __call__() methods identical in signature to compile_command(); the difference is that if the instance compiles program text containing a __future__ statement, the instance ‘remembers’ and compiles all subsequent program texts with the statement in force.
28.2. codeop — Compile Python code
1177
The Python Library Reference, Release 3.2.3
1178
Chapter 28. Custom Python Interpreters
CHAPTER
TWENTYNINE
IMPORTING MODULES The modules described in this chapter provide new ways to import other Python modules and hooks for customizing the import process. The full list of modules described in this chapter is:
29.1 imp — Access the import internals This module provides an interface to the mechanisms used to implement the import statement. It defines the following constants and functions: imp.get_magic() Return the magic string value used to recognize byte-compiled code files (.pyc files). (This value may be different for each Python version.) imp.get_suffixes() Return a list of 3-element tuples, each describing a particular type of module. Each triple has the form (suffix, mode, type), where suffix is a string to be appended to the module name to form the filename to search for, mode is the mode string to pass to the built-in open() function to open the file (this can be ’r’ for text files or ’rb’ for binary files), and type is the file type, which has one of the values PY_SOURCE, PY_COMPILED, or C_EXTENSION, described below. imp.find_module(name[, path ]) Try to find the module name. If path is omitted or None, the list of directory names given by sys.path is searched, but first a few special places are searched: the function tries to find a built-in module with the given name (C_BUILTIN), then a frozen module (PY_FROZEN), and on some systems some other places are looked in as well (on Windows, it looks in the registry which may point to a specific file). Otherwise, path must be a list of directory names; each directory is searched for files with any of the suffixes returned by get_suffixes() above. Invalid names in the list are silently ignored (but all list items must be strings). If search is successful, the return value is a 3-element tuple (file, pathname, description): file is an open file object positioned at the beginning, pathname is the pathname of the file found, and description is a 3-element tuple as contained in the list returned by get_suffixes() describing the kind of module found. If the module does not live in a file, the returned file is None, pathname is the empty string, and the description tuple contains empty strings for its suffix and mode; the module type is indicated as given in parentheses above. If the search is unsuccessful, ImportError is raised. Other exceptions indicate problems with the arguments or environment.
1179
The Python Library Reference, Release 3.2.3
If the module is a package, file is None, pathname is the package path and the last item in the description tuple is PKG_DIRECTORY. This function does not handle hierarchical module names (names containing dots). In order to find P.M, that is, submodule M of package P, use find_module() and load_module() to find and load package P, and then use find_module() with the path argument set to P.__path__. When P itself has a dotted name, apply this recipe recursively. imp.load_module(name, file, pathname, description) Load a module that was previously found by find_module() (or by an otherwise conducted search yielding compatible results). This function does more than importing the module: if the module was already imported, it will reload the module! The name argument indicates the full module name (including the package name, if this is a submodule of a package). The file argument is an open file, and pathname is the corresponding file name; these can be None and ”, respectively, when the module is a package or not being loaded from a file. The description argument is a tuple, as would be returned by get_suffixes(), describing what kind of module must be loaded. If the load is successful, the return value is the module object; otherwise, an exception (usually ImportError) is raised. Important: the caller is responsible for closing the file argument, if it was not None, even when an exception is raised. This is best done using a try ... finally statement. imp.new_module(name) Return a new empty module object called name. This object is not inserted in sys.modules. imp.lock_held() Return True if the import lock is currently held, else False. On platforms without threads, always return False. On platforms with threads, a thread executing an import holds an internal lock until the import is complete. This lock blocks other threads from doing an import until the original import completes, which in turn prevents other threads from seeing incomplete module objects constructed by the original thread while in the process of completing its import (and the imports, if any, triggered by that). imp.acquire_lock() Acquire the interpreter’s import lock for the current thread. This lock should be used by import hooks to ensure thread-safety when importing modules. Once a thread has acquired the import lock, the same thread may acquire it again without blocking; the thread must release it once for each time it has acquired it. On platforms without threads, this function does nothing. imp.release_lock() Release the interpreter’s import lock. On platforms without threads, this function does nothing. imp.reload(module) Reload a previously imported module. The argument must be a module object, so it must have been successfully imported before. This is useful if you have edited the module source file using an external editor and want to try out the new version without leaving the Python interpreter. The return value is the module object (the same as the module argument). When reload(module) is executed: •Python modules’ code is recompiled and the module-level code reexecuted, defining a new set of objects which are bound to names in the module’s dictionary. The init function of extension modules is not called a second time. •As with all other objects in Python the old objects are only reclaimed after their reference counts drop to zero.
1180
Chapter 29. Importing Modules
The Python Library Reference, Release 3.2.3
•The names in the module namespace are updated to point to any new or changed objects. •Other references to the old objects (such as names external to the module) are not rebound to refer to the new objects and must be updated in each namespace where they occur if that is desired. There are a number of other caveats: If a module is syntactically correct but its initialization fails, the first import statement for it does not bind its name locally, but does store a (partially initialized) module object in sys.modules. To reload the module you must first import it again (this will bind the name to the partially initialized module object) before you can reload() it. When a module is reloaded, its dictionary (containing the module’s global variables) is retained. Redefinitions of names will override the old definitions, so this is generally not a problem. If the new version of a module does not define a name that was defined by the old version, the old definition remains. This feature can be used to the module’s advantage if it maintains a global table or cache of objects — with a try statement it can test for the table’s presence and skip its initialization if desired: try: cache except NameError: cache = {} It is legal though generally not very useful to reload built-in or dynamically loaded modules, except for sys, __main__ and __builtin__. In many cases, however, extension modules are not designed to be initialized more than once, and may fail in arbitrary ways when reloaded. If a module imports objects from another module using from ... import ..., calling reload() for the other module does not redefine the objects imported from it — one way around this is to re-execute the from statement, another is to use import and qualified names (module.*name*) instead. If a module instantiates instances of a class, reloading the module that defines the class does not affect the method definitions of the instances — they continue to use the old class definition. The same is true for derived classes. The following functions are conveniences for handling PEP 3147 byte-compiled file paths. New in version 3.2. imp.cache_from_source(path, debug_override=None) Return the PEP 3147 path to the byte-compiled file associated with the source path. For example, if path is /foo/bar/baz.py the return value would be /foo/bar/__pycache__/baz.cpython-32.pyc for Python 3.2. The cpython-32 string comes from the current magic tag (see get_tag()). The returned path will end in .pyc when __debug__ is True or .pyo for an optimized Python (i.e. __debug__ is False). By passing in True or False for debug_override you can override the system’s value for __debug__ for extension selection. path need not exist. imp.source_from_cache(path) Given the path to a PEP 3147 file name, return the associated source code file path. For example, if path is /foo/bar/__pycache__/baz.cpython-32.pyc the returned path would be /foo/bar/baz.py. path need not exist, however if it does not conform to PEP 3147 format, a ValueError is raised. imp.get_tag() Return the PEP 3147 magic tag string matching this version of Python’s magic number, as returned by get_magic(). The following constants with integer values, defined in this module, are used to indicate the search result of find_module().
29.1. imp — Access the import internals
1181
The Python Library Reference, Release 3.2.3
imp.PY_SOURCE The module was found as a source file. imp.PY_COMPILED The module was found as a compiled code object file. imp.C_EXTENSION The module was found as dynamically loadable shared library. imp.PKG_DIRECTORY The module was found as a package directory. imp.C_BUILTIN The module was found as a built-in module. imp.PY_FROZEN The module was found as a frozen module. class imp.NullImporter(path_string) The NullImporter type is a PEP 302 import hook that handles non-directory path strings by failing to find any modules. Calling this type with an existing directory or empty string raises ImportError. Otherwise, a NullImporter instance is returned. Python adds instances of this type to sys.path_importer_cache for any path entries that are not directories and are not handled by any other path hooks on sys.path_hooks. Instances have only one method: find_module(fullname[, path ]) This method always returns None, indicating that the requested module could not be found.
29.1.1 Examples The following function emulates what was the standard import statement up to Python 1.4 (no hierarchical module names). (This implementation wouldn’t work in that version, since find_module() has been extended and load_module() has been added in 1.4.) import imp import sys def __import__(name, globals=None, locals=None, fromlist=None): # Fast path: see if the module has already been imported. try: return sys.modules[name] except KeyError: pass # If any of the following calls raises an exception, # there’s a problem we can’t handle -- let the caller handle it. fp, pathname, description = imp.find_module(name) try: return imp.load_module(name, fp, pathname, description) finally: # Since we may exit via an exception, close fp explicitly. if fp: fp.close()
1182
Chapter 29. Importing Modules
The Python Library Reference, Release 3.2.3
29.2 zipimport — Import modules from Zip archives This module adds the ability to import Python modules (*.py, *.py[co]) and packages from ZIP-format archives. It is usually not needed to use the zipimport module explicitly; it is automatically used by the built-in import mechanism for sys.path items that are paths to ZIP archives. Typically, sys.path is a list of directory names as strings. This module also allows an item of sys.path to be a string naming a ZIP file archive. The ZIP archive can contain a subdirectory structure to support package imports, and a path within the archive can be specified to only import from a subdirectory. For example, the path /tmp/example.zip/lib/ would only import from the lib/ subdirectory within the archive. Any files may be present in the ZIP archive, but only files .py and .py[co] are available for import. ZIP import of dynamic modules (.pyd, .so) is disallowed. Note that if an archive only contains .py files, Python will not attempt to modify the archive by adding the corresponding .pyc or .pyo file, meaning that if a ZIP archive doesn’t contain .pyc files, importing may be rather slow. ZIP archives with an archive comment are currently not supported. See Also: PKZIP Application Note Documentation on the ZIP file format by Phil Katz, the creator of the format and algorithms used. PEP 273 - Import Modules from Zip Archives Written by James C. Ahlstrom, who also provided an implementation. Python 2.3 follows the specification in PEP 273, but uses an implementation written by Just van Rossum that uses the import hooks described in PEP 302. PEP 302 - New Import Hooks The PEP to add the import hooks that help this module work. This module defines an exception: exception zipimport.ZipImportError Exception raised by zipimporter objects. ImportError, too.
It’s a subclass of ImportError, so it can be caught as
29.2.1 zipimporter Objects zipimporter is the class for importing ZIP files. class zipimport.zipimporter(archivepath) Create a new zipimporter instance. archivepath must be a path to a ZIP file, or to a specific path within a ZIP file. For example, an archivepath of foo/bar.zip/lib will look for modules in the lib directory inside the ZIP file foo/bar.zip (provided that it exists). ZipImportError is raised if archivepath doesn’t point to a valid ZIP archive. find_module(fullname[, path ]) Search for a module specified by fullname. fullname must be the fully qualified (dotted) module name. It returns the zipimporter instance itself if the module was found, or None if it wasn’t. The optional path argument is ignored—it’s there for compatibility with the importer protocol. get_code(fullname) Return the code object for the specified module. Raise ZipImportError if the module couldn’t be found. get_data(pathname) Return the data associated with pathname. Raise IOError if the file wasn’t found.
29.2. zipimport — Import modules from Zip archives
1183
The Python Library Reference, Release 3.2.3
get_filename(fullname) Return the value __file__ would be set to if the specified module was imported. ZipImportError if the module couldn’t be found. New in version 3.1.
Raise
get_source(fullname) Return the source code for the specified module. Raise ZipImportError if the module couldn’t be found, return None if the archive does contain the module, but has no source for it. is_package(fullname) Return True if the module specified by fullname is a package. Raise ZipImportError if the module couldn’t be found. load_module(fullname) Load the module specified by fullname. fullname must be the fully qualified (dotted) module name. It returns the imported module, or raises ZipImportError if it wasn’t found. archive The file name of the importer’s associated ZIP file, without a possible subpath. prefix The subpath within the ZIP file where modules are searched. This is the empty string for zipimporter objects which point to the root of the ZIP file. The archive and prefix attributes, when combined with a slash, equal the original archivepath argument given to the zipimporter constructor.
29.2.2 Examples Here is an example that imports a module from a ZIP archive - note that the zipimport module is not explicitly used. $ unzip -l /tmp/example.zip Archive: /tmp/example.zip Length Date Time Name ----------------8467 11-26-02 22:30 jwzthreading.py -------------8467 1 file $ ./python Python 2.3 (#1, Aug 1 2003, 19:54:32) >>> import sys >>> sys.path.insert(0, ’/tmp/example.zip’) # Add .zip file to front of path >>> import jwzthreading >>> jwzthreading.__file__ ’/tmp/example.zip/jwzthreading.py’
This module provides utilities for the import system, in particular package support. pkgutil.extend_path(path, name) Extend the search path for the modules which comprise a package. Intended use is to place the following code in a package’s __init__.py: 1184
Chapter 29. Importing Modules
The Python Library Reference, Release 3.2.3
from pkgutil import extend_path __path__ = extend_path(__path__, __name__) This will add to the package’s __path__ all subdirectories of directories on sys.path named after the package. This is useful if one wants to distribute different parts of a single logical package as multiple directories. It also looks for *.pkg files beginning where * matches the name argument. This feature is similar to *.pth files (see the site module for more information), except that it doesn’t special-case lines starting with import. A *.pkg file is trusted at face value: apart from checking for duplicates, all entries found in a *.pkg file are added to the path, regardless of whether they exist on the filesystem. (This is a feature.) If the input path is not a list (as is the case for frozen packages) it is returned unchanged. The input path is not modified; an extended copy is returned. Items are only appended to the copy at the end. It is assumed that sys.path is a sequence. Items of sys.path that are not strings referring to existing directories are ignored. Unicode items on sys.path that cause errors when used as filenames may cause this function to raise an exception (in line with os.path.isdir() behavior). class pkgutil.ImpImporter(dirname=None) PEP 302 Importer that wraps Python’s “classic” import algorithm. If dirname is a string, a PEP 302 importer is created that searches that directory. If dirname is None, a PEP 302 importer is created that searches the current sys.path, plus any modules that are frozen or built-in. Note that ImpImporter does not currently support being used by placement on sys.meta_path. class pkgutil.ImpLoader(fullname, file, filename, etc) PEP 302 Loader that wraps Python’s “classic” import algorithm. pkgutil.find_loader(fullname) Find a PEP 302 “loader” object for fullname. If fullname contains dots, path must be the containing package’s __path__. Returns None if the module cannot be found or imported. This function uses iter_importers(), and is thus subject to the same limitations regarding platform-specific special import locations such as the Windows registry. pkgutil.get_importer(path_item) Retrieve a PEP 302 importer for the given path_item. The returned importer is cached in sys.path_importer_cache if it was newly created by a path hook. If there is no importer, a wrapper around the basic import machinery is returned. This wrapper is never inserted into the importer cache (None is inserted instead). The cache (or part of it) can be cleared manually if a rescan of sys.path_hooks is necessary. pkgutil.get_loader(module_or_name) Get a PEP 302 “loader” object for module_or_name. If the module or package is accessible via the normal import mechanism, a wrapper around the relevant part of that machinery is returned. Returns None if the module cannot be found or imported. If the named module is not already imported, its containing package (if any) is imported, in order to establish the package __path__. This function uses iter_importers(), and is thus subject to the same limitations regarding platformspecific special import locations such as the Windows registry. pkgutil.iter_importers(fullname=’‘) Yield PEP 302 importers for the given module name. If fullname contains a ‘.’, the importers will be for the package containing fullname, otherwise they will be importers for sys.meta_path, sys.path, and Python’s “classic” import machinery, in that order. If the named module is in a package, that package is imported as a side effect of invoking this function.
29.3. pkgutil — Package extension utility
1185
The Python Library Reference, Release 3.2.3
Non- PEP 302 mechanisms (e.g. the Windows registry) used by the standard import machinery to find files in alternative locations are partially supported, but are searched after sys.path. Normally, these locations are searched before sys.path, preventing sys.path entries from shadowing them. For this to cause a visible difference in behaviour, there must be a module or package name that is accessible via both sys.path and one of the non- PEP 302 file system mechanisms. In this case, the emulation will find the former version, while the builtin import mechanism will find the latter. Items of the following types can be affected by this discrepancy: imp.C_EXTENSION, imp.PY_SOURCE, imp.PY_COMPILED, imp.PKG_DIRECTORY. pkgutil.iter_modules(path=None, prefix=’‘) Yields (module_loader, name, ispkg) for all submodules on path, or, if path is None, all top-level modules on sys.path. path should be either None or a list of paths to look for modules in. prefix is a string to output on the front of every module name on output. pkgutil.walk_packages(path=None, prefix=’‘, onerror=None) Yields (module_loader, name, ispkg) for all modules recursively on path, or, if path is None, all accessible modules. path should be either None or a list of paths to look for modules in. prefix is a string to output on the front of every module name on output. Note that this function must import all packages (not all modules!) on the given path, in order to access the __path__ attribute to find submodules. onerror is a function which gets called with one argument (the name of the package which was being imported) if any exception occurs while trying to import a package. If no onerror function is supplied, ImportErrors are caught and ignored, while all other exceptions are propagated, terminating the search. Examples: # list all modules python can access walk_packages() # list all submodules of ctypes walk_packages(ctypes.__path__, ctypes.__name__ + ’.’) pkgutil.get_data(package, resource) Get a resource from a package. This is a wrapper for the PEP 302 loader get_data() API. The package argument should be the name of a package, in standard module format (foo.bar). The resource argument should be in the form of a relative filename, using / as the path separator. The parent directory name .. is not allowed, and nor is a rooted name (starting with a /). The function returns a binary string that is the contents of the specified resource. For packages located in the filesystem, which have already been imported, this is the rough equivalent of: d = os.path.dirname(sys.modules[package].__file__) data = open(os.path.join(d, resource), ’rb’).read() If the package cannot be located or loaded, or it uses a PEP 302 loader which does not support get_data(), then None is returned.
1186
Chapter 29. Importing Modules
The Python Library Reference, Release 3.2.3
29.4 modulefinder — Find modules used by a script Source code: Lib/modulefinder.py
This module provides a ModuleFinder class that can be used to determine the set of modules imported by a script. modulefinder.py can also be run as a script, giving the filename of a Python script as its argument, after which a report of the imported modules will be printed. modulefinder.AddPackagePath(pkg_name, path) Record that the package named pkg_name can be found in the specified path. modulefinder.ReplacePackage(oldname, newname) Allows specifying that the module named oldname is in fact the package named newname. class modulefinder.ModuleFinder(path=None, debug=0, excludes=[], replace_paths=[]) This class provides run_script() and report() methods to determine the set of modules imported by a script. path can be a list of directories to search for modules; if not specified, sys.path is used. debug sets the debugging level; higher values make the class print debugging messages about what it’s doing. excludes is a list of module names to exclude from the analysis. replace_paths is a list of (oldpath, newpath) tuples that will be replaced in module paths. report() Print a report to standard output that lists the modules imported by the script and their paths, as well as modules that are missing or seem to be missing. run_script(pathname) Analyze the contents of the pathname file, which must contain Python code. modules A dictionary mapping module names to modules. See Example usage of ModuleFinder
29.4.1 Example usage of ModuleFinder The script that is going to get analyzed later on (bacon.py): import re, itertools try: import baconhameggs except ImportError: pass try: import guido.python.ham except ImportError: pass The script that will output the report of bacon.py: from modulefinder import ModuleFinder finder = ModuleFinder() finder.run_script(’bacon.py’) print(’Loaded modules:’) for name, mod in finder.modules.items(): 29.4. modulefinder — Find modules used by a script
The runpy module is used to locate and run Python modules without importing them first. Its main use is to implement the -m command line switch that allows scripts to be located using the Python module namespace rather than the filesystem. The runpy module provides two functions: runpy.run_module(mod_name, init_globals=None, run_name=None, alter_sys=False) Execute the code of the specified module and return the resulting module globals dictionary. The module’s code is first located using the standard import mechanism (refer to PEP 302 for details) and then executed in a fresh module namespace. If the supplied module name refers to a package rather than a normal module, then that package is imported and the __main__ submodule within that package is then executed and the resulting module globals dictionary returned. The optional dictionary argument init_globals may be used to pre-populate the module’s globals dictionary before the code is executed. The supplied dictionary will not be modified. If any of the special global variables below are defined in the supplied dictionary, those definitions are overridden by run_module(). The special global variables __name__, __file__, __cached__, __loader__ and __package__ are set in the globals dictionary before the module code is executed (Note that this is a minimal set of variables other variables may be set implicitly as an interpreter implementation detail).
1188
Chapter 29. Importing Modules
The Python Library Reference, Release 3.2.3
__name__ is set to run_name if this optional argument is not None, to mod_name + ’.__main__’ if the named module is a package and to the mod_name argument otherwise. __file__ is set to the name provided by the module loader. If the loader does not make filename information available, this variable is set to None. __cached__ will be set to None. __loader__ is set to the PEP 302 module loader used to retrieve the code for the module (This loader may be a wrapper around the standard import mechanism). __package__ is set to mod_name if mod_name.rpartition(’.’)[0] otherwise.
the
named
module
is
a
package
and
to
If the argument alter_sys is supplied and evaluates to True, then sys.argv[0] is updated with the value of __file__ and sys.modules[__name__] is updated with a temporary module object for the module being executed. Both sys.argv[0] and sys.modules[__name__] are restored to their original values before the function returns. Note that this manipulation of sys is not thread-safe. Other threads may see the partially initialised module, as well as the altered list of arguments. It is recommended that the sys module be left alone when invoking this function from threaded code. Changed in version 3.1: Added ability to execute packages by looking for a __main__ submodule.Changed in version 3.2: Added __cached__ global variable (see PEP 3147). runpy.run_path(file_path, init_globals=None, run_name=None) Execute the code at the named filesystem location and return the resulting module globals dictionary. As with a script name supplied to the CPython command line, the supplied path may refer to a Python source file, a compiled bytecode file or a valid sys.path entry containing a __main__ module (e.g. a zipfile containing a top-level __main__.py file). For a simple script, the specified code is simply executed in a fresh module namespace. For a valid sys.path entry (typically a zipfile or directory), the entry is first added to the beginning of sys.path. The function then looks for and executes a __main__ module using the updated path. Note that there is no special protection against invoking an existing __main__ entry located elsewhere on sys.path if there is no such module at the specified location. The optional dictionary argument init_globals may be used to pre-populate the module’s globals dictionary before the code is executed. The supplied dictionary will not be modified. If any of the special global variables below are defined in the supplied dictionary, those definitions are overridden by run_path(). The special global variables __name__, __file__, __loader__ and __package__ are set in the globals dictionary before the module code is executed (Note that this is a minimal set of variables - other variables may be set implicitly as an interpreter implementation detail). __name__ is set to run_name if this optional argument is not None and to ’’ otherwise. __file__ is set to the name provided by the module loader. If the loader does not make filename information available, this variable is set to None. For a simple script, this will be set to file_path. __loader__ is set to the PEP 302 module loader used to retrieve the code for the module (This loader may be a wrapper around the standard import mechanism). For a simple script, this will be set to None. __package__ is set to __name__.rpartition(’.’)[0]. A number of alterations are also made to the sys module. Firstly, sys.path may be altered as described above. sys.argv[0] is updated with the value of file_path and sys.modules[__name__] is updated with a temporary module object for the module being executed. All modifications to items in sys are reverted before the function returns. Note that, unlike run_module(), the alterations made to sys are not optional in this function as these adjustments are essential to allowing the execution of sys.path entries. As the thread-safety limitations still apply,
29.5. runpy — Locating and executing Python modules
1189
The Python Library Reference, Release 3.2.3
use of this function in threaded code should be either serialised with the import lock or delegated to a separate process. New in version 3.2. See Also: PEP 338 - Executing modules as scripts PEP written and implemented by Nick Coghlan. PEP 366 - Main module explicit relative imports PEP written and implemented by Nick Coghlan. using-on-general - CPython command line details
29.6 importlib – An implementation of import New in version 3.1.
29.6.1 Introduction The purpose of the importlib package is two-fold. One is to provide an implementation of the import statement (and thus, by extension, the __import__() function) in Python source code. This provides an implementation of import which is portable to any Python interpreter. This also provides a reference implementation which is easier to comprehend than one implemented in a programming language other than Python. Two, the components to implement import are exposed in this package, making it easier for users to create their own custom objects (known generically as an importer) to participate in the import process. Details on custom importers can be found in PEP 302. See Also: import The language reference for the import statement. Packages specification Original specification of packages. Some semantics have changed since the writing of this document (e.g. redirecting based on None in sys.modules). The __import__() function The import statement is syntactic sugar for this function. PEP 235 Import on Case-Insensitive Platforms PEP 263 Defining Python Source Code Encodings PEP 302 New Import Hooks PEP 328 Imports: Multi-Line and Absolute/Relative PEP 366 Main module explicit relative imports PEP 3120 Using UTF-8 as the Default Source Encoding PEP 3147 PYC Repository Directories
29.6.2 Functions importlib.__import__(name, globals={}, locals={}, fromlist=list(), level=0) An implementation of the built-in __import__() function. importlib.import_module(name, package=None) Import a module. The name argument specifies what module to import in absolute or relative terms (e.g. either pkg.mod or ..mod). If the name is specified in relative terms, then the package argument must be set to the name of the package which is to act as the anchor for resolving the package name (e.g. import_module(’..mod’, ’pkg.subpkg’) will import pkg.mod).
1190
Chapter 29. Importing Modules
The Python Library Reference, Release 3.2.3
The import_module() function acts as a simplifying wrapper around importlib.__import__(). This means all semantics of the function are derived from importlib.__import__(), including requiring the package from which an import is occurring to have been previously imported (i.e., package must already be imported). The most important difference is that import_module() returns the most nested package or module that was imported (e.g. pkg.mod), while __import__() returns the top-level package or module (e.g. pkg).
29.6.3 importlib.abc – Abstract base classes related to import The importlib.abc module contains all of the core abstract base classes used by import. Some subclasses of the core abstract base classes are also provided to help in implementing the core ABCs. class importlib.abc.Finder An abstract base class representing a finder. See PEP 302 for the exact definition for a finder. find_module(fullname, path=None) An abstract method for finding a loader for the specified module. If the finder is found on sys.meta_path and the module to be searched for is a subpackage or module then path will be the value of __path__ from the parent package. If a loader cannot be found, None is returned. class importlib.abc.Loader An abstract base class for a loader. See PEP 302 for the exact definition for a loader. load_module(fullname) An abstract method for loading a module. If the module cannot be loaded, ImportError is raised, otherwise the loaded module is returned. If the requested module already exists in sys.modules, that module should be used and reloaded. Otherwise the loader should create a new module and insert it into sys.modules before any loading begins, to prevent recursion from the import. If the loader inserted a module and the load fails, it must be removed by the loader from sys.modules; modules already in sys.modules before the loader began execution should be left alone. The importlib.util.module_for_loader() decorator handles all of these details. The loader should set several attributes on the module. (Note that some of these attributes can change when a module is reloaded.) •__name__ The name of the module. •__file__ The path to where the module data is stored (not set for built-in modules). •__path__ A list of strings specifying the search path within a package. This attribute is not set on modules. •__package__ The parent package for the module/package. If the module is top-level then it has a value of the empty string. The importlib.util.set_package() decorator can handle the details for __package__. •__loader__ The loader used to load the module. (This is not set by the built-in import machinery, but it should be set whenever a loader is used.) class importlib.abc.ResourceLoader An abstract base class for a loader which implements the optional PEP 302 protocol for loading arbitrary resources from the storage back-end. get_data(path) An abstract method to return the bytes for the data located at path. Loaders that have a file-like storage back-end that allows storing arbitrary data can implement this abstract method to give direct access to the
29.6. importlib – An implementation of import
1191
The Python Library Reference, Release 3.2.3
data stored. IOError is to be raised if the path cannot be found. The path is expected to be constructed using a module’s __file__ attribute or an item from a package’s __path__. class importlib.abc.InspectLoader An abstract base class for a loader which implements the optional PEP 302 protocol for loaders that inspect modules. get_code(fullname) An abstract method to return the code object for a module. None is returned if the module does not have a code object (e.g. built-in module). ImportError is raised if loader cannot find the requested module. get_source(fullname) An abstract method to return the source of a module. It is returned as a text string with universal newlines. Returns None if no source is available (e.g. a built-in module). Raises ImportError if the loader cannot find the module specified. is_package(fullname) An abstract method to return a true value if the module is a package, a false value otherwise. ImportError is raised if the loader cannot find the module. class importlib.abc.ExecutionLoader An abstract base class which inherits from InspectLoader that, when implemented, helps a module to be executed as a script. The ABC represents an optional PEP 302 protocol. get_filename(fullname) An abstract method that is to return the value of __file__ for the specified module. If no path is available, ImportError is raised. If source code is available, then the method should return the path to the source file, regardless of whether a bytecode was used to load the module. class importlib.abc.SourceLoader An abstract base class for implementing source (and optionally bytecode) file loading. The class inherits from both ResourceLoader and ExecutionLoader, requiring the implementation of: •ResourceLoader.get_data() •ExecutionLoader.get_filename() Should only return the path to the source file; sourceless loading is not supported. The abstract methods defined by this class are to add optional bytecode file support. Not implementing these optional methods causes the loader to only work with source code. Implementing the methods allows the loader to work with source and bytecode files; it does not allow for sourceless loading where only bytecode is provided. Bytecode files are an optimization to speed up loading by removing the parsing step of Python’s compiler, and so no bytecode-specific API is exposed. path_mtime(self, path) Optional abstract method which returns the modification time for the specified path. set_data(self, path, data) Optional abstract method which writes the specified bytes to a file path. Any intermediate directories which do not exist are to be created automatically. When writing to the path fails because the path is read-only (errno.EACCES), do not propagate the exception. get_code(self, fullname) Concrete implementation of InspectLoader.get_code(). load_module(self, fullname) Concrete implementation of Loader.load_module().
1192
Chapter 29. Importing Modules
The Python Library Reference, Release 3.2.3
get_source(self, fullname) Concrete implementation of InspectLoader.get_source(). is_package(self, fullname) Concrete implementation of InspectLoader.is_package(). A module is determined to be a package if its file path is a file named __init__ when the file extension is removed. class importlib.abc.PyLoader An abstract base class inheriting from ExecutionLoader and ResourceLoader designed to ease the loading of Python source modules (bytecode is not handled; see SourceLoader for a source/bytecode ABC). A subclass implementing this ABC will only need to worry about exposing how the source code is stored; all other details for loading Python source code will be handled by the concrete implementations of key methods. Deprecated since version 3.2: This class has been deprecated in favor of SourceLoader and is slated for removal in Python 3.4. See below for how to create a subclass that is compatible with Python 3.1 onwards. If compatibility with Python 3.1 is required, then use the following idiom to implement a subclass that will work with Python 3.1 onwards (make sure to implement ExecutionLoader.get_filename()): try: from importlib.abc import SourceLoader except ImportError: from importlib.abc import PyLoader as SourceLoader
class CustomLoader(SourceLoader): def get_filename(self, fullname): """Return the path to the source file.""" # Implement ... def source_path(self, fullname): """Implement source_path in terms of get_filename.""" try: return self.get_filename(fullname) except ImportError: return None def is_package(self, fullname): """Implement is_package by looking for an __init__ file name as returned by get_filename.""" filename = os.path.basename(self.get_filename(fullname)) return os.path.splitext(filename)[0] == ’__init__’ source_path(fullname) An abstract method that returns the path to the source code for a module. Should return None if there is no source code. Raises ImportError if the loader knows it cannot handle the module. get_filename(fullname) A concrete implementation of importlib.abc.ExecutionLoader.get_filename() that relies on source_path(). If source_path() returns None, then ImportError is raised. load_module(fullname) A concrete implementation of importlib.abc.Loader.load_module() that loads Python source code. All needed information comes from the abstract methods required by this ABC. The only pertinent assumption made by this method is that when loading a package __path__ is set to [os.path.dirname(__file__)]. get_code(fullname)
29.6. importlib – An implementation of import
1193
The Python Library Reference, Release 3.2.3
A concrete implementation of importlib.abc.InspectLoader.get_code() that creates code objects from Python source code, by requesting the source code (using source_path() and get_data()) and compiling it with the built-in compile() function. get_source(fullname) A concrete implementation of importlib.abc.InspectLoader.get_source(). Uses importlib.abc.ResourceLoader.get_data() and source_path() to get the source code. It tries to guess the source encoding using tokenize.detect_encoding(). class importlib.abc.PyPycLoader An abstract base class inheriting from PyLoader. This ABC is meant to help in creating loaders that support both Python source and bytecode. Deprecated since version 3.2: This class has been deprecated in favor of SourceLoader and to properly support PEP 3147. If compatibility is required with Python 3.1, implement both SourceLoader and PyLoader; instructions on how to do so are included in the documentation for PyLoader. Do note that this solution will not support sourceless/bytecode-only loading; only source and bytecode loading. source_mtime(fullname) An abstract method which returns the modification time for the source code of the specified module. The modification time should be an integer. If there is no source code, return None. If the module cannot be found then ImportError is raised. bytecode_path(fullname) An abstract method which returns the path to the bytecode for the specified module, if it exists. It returns None if no bytecode exists (yet). Raises ImportError if the loader knows it cannot handle the module. get_filename(fullname) A concrete implementation of ExecutionLoader.get_filename() that relies on PyLoader.source_path() and bytecode_path(). If source_path() returns a path, then that value is returned. Else if bytecode_path() returns a path, that path will be returned. If a path is not available from both methods, ImportError is raised. write_bytecode(fullname, bytecode) An abstract method which has the loader write bytecode for future use. If the bytecode is written, return True. Return False if the bytecode could not be written. This method should not be called if sys.dont_write_bytecode is true. The bytecode argument should be a bytes string or bytes array.
29.6.4 importlib.machinery – Importers and path hooks This module contains the various objects that help import find and load modules. class importlib.machinery.BuiltinImporter An importer for built-in modules. All known built-in modules are listed in sys.builtin_module_names. This class implements the importlib.abc.Finder and importlib.abc.InspectLoader ABCs. Only class methods are defined by this class to alleviate the need for instantiation. class importlib.machinery.FrozenImporter An importer for frozen modules. This class implements the importlib.abc.Finder and importlib.abc.InspectLoader ABCs. Only class methods are defined by this class to alleviate the need for instantiation. class importlib.machinery.PathFinder Finder for sys.path. This class implements the importlib.abc.Finder ABC. This class does not perfectly mirror the semantics of import in terms of sys.path. No implicit path hooks are assumed for simplification of the class and its semantics. Only class methods are defined by this class to alleviate the need for instantiation. 1194
Chapter 29. Importing Modules
The Python Library Reference, Release 3.2.3
classmethod find_module(fullname, path=None) Class method that attempts to find a loader for the module specified by fullname on sys.path or, if defined, on path. For each path entry that is searched, sys.path_importer_cache is checked. If an non-false object is found then it is used as the finder to look for the module being searched for. If no entry is found in sys.path_importer_cache, then sys.path_hooks is searched for a finder for the path entry and, if found, is stored in sys.path_importer_cache along with being queried about the module. If no finder is ever found then None is returned.
29.6.5 importlib.util – Utility code for importers This module contains the various objects that help in the construction of an importer. @importlib.util.module_for_loader A decorator for a loader method, to handle selecting the proper module object to load with. The decorated method is expected to have a call signature taking two positional arguments (e.g. load_module(self, module)) for which the second argument will be the module object to be used by the loader. Note that the decorator will not work on static methods because of the assumption of two arguments. The decorated method will take in the name of the module to be loaded as expected for a loader. If the module is not found in sys.modules then a new one is constructed with its __name__ attribute set. Otherwise the module found in sys.modules will be passed into the method. If an exception is raised by the decorated method and a module was added to sys.modules it will be removed to prevent a partially initialized module from being in left in sys.modules. If the module was already in sys.modules then it is left alone. Use of this decorator handles all the details of which module object a loader should initialize as specified by PEP 302. @importlib.util.set_loader A decorator for a loader method, to set the __loader__ attribute on loaded modules. If the attribute is already set the decorator does nothing. It is assumed that the first positional argument to the wrapped method is what __loader__ should be set to. @importlib.util.set_package A decorator for a loader to set the __package__ attribute on the module returned by the loader. If __package__ is set and has a value other than None it will not be changed. Note that the module returned by the loader is what has the attribute set on and not the module found in sys.modules. Reliance on this decorator is discouraged when it is possible to set __package__ before the execution of the code is possible. By setting it before the code for the module is executed it allows the attribute to be used at the global level of the module during initialization.
29.6. importlib – An implementation of import
1195
The Python Library Reference, Release 3.2.3
1196
Chapter 29. Importing Modules
CHAPTER
THIRTY
PYTHON LANGUAGE SERVICES Python provides a number of modules to assist in working with the Python language. These modules support tokenizing, parsing, syntax analysis, bytecode disassembly, and various other facilities. These modules include:
30.1 parser — Access Python parse trees The parser module provides an interface to Python’s internal parser and byte-code compiler. The primary purpose for this interface is to allow Python code to edit the parse tree of a Python expression and create executable code from this. This is better than trying to parse and modify an arbitrary Python code fragment as a string because parsing is performed in a manner identical to the code forming the application. It is also faster. Note: From Python 2.5 onward, it’s much more convenient to cut in at the Abstract Syntax Tree (AST) generation and compilation stage, using the ast module. There are a few things to note about this module which are important to making use of the data structures created. This is not a tutorial on editing the parse trees for Python code, but some examples of using the parser module are presented. Most importantly, a good understanding of the Python grammar processed by the internal parser is required. For full information on the language syntax, refer to reference-index. The parser itself is created from a grammar specification defined in the file Grammar/Grammar in the standard Python distribution. The parse trees stored in the ST objects created by this module are the actual output from the internal parser when created by the expr() or suite() functions, described below. The ST objects created by sequence2st() faithfully simulate those structures. Be aware that the values of the sequences which are considered “correct” will vary from one version of Python to another as the formal grammar for the language is revised. However, transporting code from one Python version to another as source text will always allow correct parse trees to be created in the target version, with the only restriction being that migrating to an older version of the interpreter will not support more recent language constructs. The parse trees are not typically compatible from one version to another, whereas source code has always been forward-compatible. Each element of the sequences returned by st2list() or st2tuple() has a simple form. Sequences representing non-terminal elements in the grammar always have a length greater than one. The first element is an integer which identifies a production in the grammar. These integers are given symbolic names in the C header file Include/graminit.h and the Python module symbol. Each additional element of the sequence represents a component of the production as recognized in the input string: these are always sequences which have the same form as the parent. An important aspect of this structure which should be noted is that keywords used to identify the parent node type, such as the keyword if in an if_stmt, are included in the node tree without any special treatment. For example, the if keyword is represented by the tuple (1, ’if’), where 1 is the numeric value associated with all NAME tokens, including variable and function names defined by the user. In an alternate form returned when line
1197
The Python Library Reference, Release 3.2.3
number information is requested, the same token might be represented as (1, ’if’, 12), where the 12 represents the line number at which the terminal symbol was found. Terminal elements are represented in much the same way, but without any child elements and the addition of the source text which was identified. The example of the if keyword above is representative. The various types of terminal symbols are defined in the C header file Include/token.h and the Python module token. The ST objects are not required to support the functionality of this module, but are provided for three purposes: to allow an application to amortize the cost of processing complex parse trees, to provide a parse tree representation which conserves memory space when compared to the Python list or tuple representation, and to ease the creation of additional modules in C which manipulate parse trees. A simple “wrapper” class may be created in Python to hide the use of ST objects. The parser module defines functions for a few distinct purposes. The most important purposes are to create ST objects and to convert ST objects to other representations such as parse trees and compiled code objects, but there are also functions which serve to query the type of parse tree represented by an ST object. See Also: Module symbol Useful constants representing internal nodes of the parse tree. Module token Useful constants representing leaf nodes of the parse tree and functions for testing node values.
30.1.1 Creating ST Objects ST objects may be created from source code or from a parse tree. When creating an ST object from source, different functions are used to create the ’eval’ and ’exec’ forms. parser.expr(source) The expr() function parses the parameter source as if it were an input to compile(source, ’file.py’, ’eval’). If the parse succeeds, an ST object is created to hold the internal parse tree representation, otherwise an appropriate exception is raised. parser.suite(source) The suite() function parses the parameter source as if it were an input to compile(source, ’file.py’, ’exec’). If the parse succeeds, an ST object is created to hold the internal parse tree representation, otherwise an appropriate exception is raised. parser.sequence2st(sequence) This function accepts a parse tree represented as a sequence and builds an internal representation if possible. If it can validate that the tree conforms to the Python grammar and all nodes are valid node types in the host version of Python, an ST object is created from the internal representation and returned to the called. If there is a problem creating the internal representation, or if the tree cannot be validated, a ParserError exception is raised. An ST object created this way should not be assumed to compile correctly; normal exceptions raised by compilation may still be initiated when the ST object is passed to compilest(). This may indicate problems not related to syntax (such as a MemoryError exception), but may also be due to constructs such as the result of parsing del f(0), which escapes the Python parser but is checked by the bytecode compiler. Sequences representing terminal tokens may be represented as either two-element lists of the form (1, ’name’) or as three-element lists of the form (1, ’name’, 56). If the third element is present, it is assumed to be a valid line number. The line number may be specified for any subset of the terminal symbols in the input tree. parser.tuple2st(sequence) This is the same function as sequence2st(). This entry point is maintained for backward compatibility.
1198
Chapter 30. Python Language Services
The Python Library Reference, Release 3.2.3
30.1.2 Converting ST Objects ST objects, regardless of the input used to create them, may be converted to parse trees represented as list- or tupletrees, or may be compiled into executable code objects. Parse trees may be extracted with or without line numbering information. parser.st2list(st, line_info=False, col_info=False) This function accepts an ST object from the caller in st and returns a Python list representing the equivalent parse tree. The resulting list representation can be used for inspection or the creation of a new parse tree in list form. This function does not fail so long as memory is available to build the list representation. If the parse tree will only be used for inspection, st2tuple() should be used instead to reduce memory consumption and fragmentation. When the list representation is required, this function is significantly faster than retrieving a tuple representation and converting that to nested lists. If line_info is true, line number information will be included for all terminal tokens as a third element of the list representing the token. Note that the line number provided specifies the line on which the token ends. This information is omitted if the flag is false or omitted. parser.st2tuple(st, line_info=False, col_info=False) This function accepts an ST object from the caller in st and returns a Python tuple representing the equivalent parse tree. Other than returning a tuple instead of a list, this function is identical to st2list(). If line_info is true, line number information will be included for all terminal tokens as a third element of the list representing the token. This information is omitted if the flag is false or omitted. parser.compilest(st, filename=’’) The Python byte compiler can be invoked on an ST object to produce code objects which can be used as part of a call to the built-in exec() or eval() functions. This function provides the interface to the compiler, passing the internal parse tree from st to the parser, using the source file name specified by the filename parameter. The default value supplied for filename indicates that the source was an ST object. Compiling an ST object may result in exceptions related to compilation; an example would be a SyntaxError caused by the parse tree for del f(0): this statement is considered legal within the formal grammar for Python but is not a legal language construct. The SyntaxError raised for this condition is actually generated by the Python byte-compiler normally, which is why it can be raised at this point by the parser module. Most causes of compilation failure can be diagnosed programmatically by inspection of the parse tree.
30.1.3 Queries on ST Objects Two functions are provided which allow an application to determine if an ST was created as an expression or a suite. Neither of these functions can be used to determine if an ST was created from source code via expr() or suite() or from a parse tree via sequence2st(). parser.isexpr(st) When st represents an ’eval’ form, this function returns true, otherwise it returns false. This is useful, since code objects normally cannot be queried for this information using existing built-in functions. Note that the code objects created by compilest() cannot be queried like this either, and are identical to those created by the built-in compile() function. parser.issuite(st) This function mirrors isexpr() in that it reports whether an ST object represents an ’exec’ form, commonly known as a “suite.” It is not safe to assume that this function is equivalent to not isexpr(st), as additional syntactic fragments may be supported in the future.
30.1. parser — Access Python parse trees
1199
The Python Library Reference, Release 3.2.3
30.1.4 Exceptions and Error Handling The parser module defines a single exception, but may also pass other built-in exceptions from other portions of the Python runtime environment. See each function for information about the exceptions it can raise. exception parser.ParserError Exception raised when a failure occurs within the parser module. This is generally produced for validation failures rather than the built-in SyntaxError raised during normal parsing. The exception argument is either a string describing the reason of the failure or a tuple containing a sequence causing the failure from a parse tree passed to sequence2st() and an explanatory string. Calls to sequence2st() need to be able to handle either type of exception, while calls to other functions in the module will only need to be aware of the simple string values. Note that the functions compilest(), expr(), and suite() may raise exceptions which are normally raised by the parsing and compilation process. These include the built in exceptions MemoryError, OverflowError, SyntaxError, and SystemError. In these cases, these exceptions carry all the meaning normally associated with them. Refer to the descriptions of each function for detailed information.
30.1.5 ST Objects Ordered and equality comparisons are supported between ST objects. Pickling of ST objects (using the pickle module) is also supported. parser.STType The type of the objects returned by expr(), suite() and sequence2st(). ST objects have the following methods: ST.compile(filename=’’) Same as compilest(st, filename). ST.isexpr() Same as isexpr(st). ST.issuite() Same as issuite(st). ST.tolist(line_info=False, col_info=False) Same as st2list(st, line_info, col_info). ST.totuple(line_info=False, col_info=False) Same as st2tuple(st, line_info, col_info).
30.1.6 Example: Emulation of compile() While many useful operations may take place between parsing and bytecode generation, the simplest operation is to do nothing. For this purpose, using the parser module to produce an intermediate data structure is equivalent to the code >>> code = compile(’a + 5’, ’file.py’, ’eval’) >>> a = 5 >>> eval(code) 10 The equivalent operation using the parser module is somewhat longer, and allows the intermediate internal parse tree to be retained as an ST object:
1200
Chapter 30. Python Language Services
The Python Library Reference, Release 3.2.3
>>> >>> >>> >>> >>> 10
import parser st = parser.expr(’a + 5’) code = st.compile(’file.py’) a = 5 eval(code)
An application which needs both ST and code objects can package this code into readily available functions: import parser def load_suite(source_string): st = parser.suite(source_string) return st, st.compile() def load_expression(source_string): st = parser.expr(source_string) return st, st.compile()
30.2 ast — Abstract Syntax Trees Source code: Lib/ast.py
The ast module helps Python applications to process trees of the Python abstract syntax grammar. The abstract syntax itself might change with each Python release; this module helps to find out programmatically what the current grammar looks like. An abstract syntax tree can be generated by passing ast.PyCF_ONLY_AST as a flag to the compile() built-in function, or using the parse() helper provided in this module. The result will be a tree of objects whose classes all inherit from ast.AST. An abstract syntax tree can be compiled into a Python code object using the built-in compile() function.
30.2.1 Node classes class ast.AST This is the base of all AST node classes. The actual node classes are derived from the Parser/Python.asdl file, which is reproduced below. They are defined in the _ast C module and re-exported in ast. There is one class defined for each left-hand side symbol in the abstract grammar (for example, ast.stmt or ast.expr). In addition, there is one class defined for each constructor on the right-hand side; these classes inherit from the classes for the left-hand side trees. For example, ast.BinOp inherits from ast.expr. For production rules with alternatives (aka “sums”), the left-hand side class is abstract: only instances of specific constructor nodes are ever created. _fields Each concrete class has an attribute _fields which gives the names of all child nodes. Each instance of a concrete class has one attribute for each child node, of the type as defined in the grammar. For example, ast.BinOp instances have an attribute left of type ast.expr. If these attributes are marked as optional in the grammar (using a question mark), the value might be None. If the attributes can have zero-or-more values (marked with an asterisk), the values are represented as Python lists. All possible attributes must be present and have valid values when compiling an AST with compile(). 30.2. ast — Abstract Syntax Trees
1201
The Python Library Reference, Release 3.2.3
lineno col_offset Instances of ast.expr and ast.stmt subclasses have lineno and col_offset attributes. The lineno is the line number of source text (1-indexed so the first line is line 1) and the col_offset is the UTF-8 byte offset of the first token that generated the node. The UTF-8 offset is recorded because the parser uses UTF-8 internally. The constructor of a class ast.T parses its arguments as follows: •If there are positional arguments, there must be as many as there are items in T._fields; they will be assigned as attributes of these names. •If there are keyword arguments, they will set the attributes of the same names to the given values. For example, to create and populate an ast.UnaryOp node, you could use node = ast.UnaryOp() node.op = ast.USub() node.operand = ast.Num() node.operand.n = 5 node.operand.lineno = 0 node.operand.col_offset = 0 node.lineno = 0 node.col_offset = 0 or the more compact node = ast.UnaryOp(ast.USub(), ast.Num(5, lineno=0, col_offset=0), lineno=0, col_offset=0)
30.2.2 Abstract Grammar The module defines a string constant __version__ which is the decimal Subversion revision number of the file shown below. The abstract grammar is currently defined as follows: -- ASDL’s four builtin types are identifier, int, string, object module Python { mod = | |
version "$Revision$" Module(stmt* body) Interactive(stmt* body) Expression(expr body)
-- not really an actual node but useful in Jython’s typesystem. | Suite(stmt* body) stmt = FunctionDef(identifier name, arguments args, stmt* body, expr* decorator_list, expr? returns) | ClassDef(identifier name, expr* bases, keyword* keywords, expr? starargs, expr? kwargs, stmt* body,
-- XXX Jython will be different -- col_offset is the byte offset in the utf8 string the parser uses attributes (int lineno, int col_offset) -- BoolOp() can use left & right? expr = BoolOp(boolop op, expr* values) | BinOp(expr left, operator op, expr right) | UnaryOp(unaryop op, expr operand) | Lambda(arguments args, expr body) | IfExp(expr test, expr body, expr orelse) | Dict(expr* keys, expr* values) | Set(expr* elts) | ListComp(expr elt, comprehension* generators) | SetComp(expr elt, comprehension* generators) | DictComp(expr key, expr value, comprehension* generators) | GeneratorExp(expr elt, comprehension* generators) -- the grammar constrains where yield expressions can occur | Yield(expr? value) -- need sequences for compare to distinguish between -- x < 4 < 3 and (x < 4) < 3 | Compare(expr left, cmpop* ops, expr* comparators) | Call(expr func, expr* args, keyword* keywords, expr? starargs, expr? kwargs) | Num(object n) -- a number as a PyObject. | Str(string s) -- need to specify raw, unicode, etc? | Bytes(string s) | Ellipsis -- other literals? bools?
30.2. ast — Abstract Syntax Trees
1203
The Python Library Reference, Release 3.2.3
-- the following expression can appear in assignment context | Attribute(expr value, identifier attr, expr_context ctx) | Subscript(expr value, slice slice, expr_context ctx) | Starred(expr value, expr_context ctx) | Name(identifier id, expr_context ctx) | List(expr* elts, expr_context ctx) | Tuple(expr* elts, expr_context ctx) -- col_offset is the byte offset in the utf8 string the parser uses attributes (int lineno, int col_offset) expr_context = Load | Store | Del | AugLoad | AugStore | Param slice = Slice(expr? lower, expr? upper, expr? step) | ExtSlice(slice* dims) | Index(expr value) boolop = And | Or operator = Add | Sub | Mult | Div | Mod | Pow | LShift | RShift | BitOr | BitXor | BitAnd | FloorDiv unaryop = Invert | Not | UAdd | USub cmpop = Eq | NotEq | Lt | LtE | Gt | GtE | Is | IsNot | In | NotIn comprehension = (expr target, expr iter, expr* ifs) -- not sure what to call the first argument for raise and except excepthandler = ExceptHandler(expr? type, identifier? name, stmt* body) attributes (int lineno, int col_offset) arguments = (arg* args, identifier? vararg, expr? varargannotation, arg* kwonlyargs, identifier? kwarg, expr? kwargannotation, expr* defaults, expr* kw_defaults) arg = (identifier arg, expr? annotation) -- keyword arguments supplied to call keyword = (identifier arg, expr value) -- import name with optional ’as’ alias. alias = (identifier name, identifier? asname) }
30.2.3 ast Helpers Apart from the node classes, ast module defines these utility functions and classes for traversing abstract syntax trees: ast.parse(source, filename=’’, mode=’exec’) Parse the source into an AST node. Equivalent to compile(source, filename, mode, ast.PyCF_ONLY_AST). 1204
Chapter 30. Python Language Services
The Python Library Reference, Release 3.2.3
ast.literal_eval(node_or_string) Safely evaluate an expression node or a string containing a Python expression. The string or node provided may only consist of the following Python literal structures: strings, bytes, numbers, tuples, lists, dicts, sets, booleans, and None. This can be used for safely evaluating strings containing Python expressions from untrusted sources without the need to parse the values oneself. Changed in version 3.2: Now allows bytes and set literals. ast.get_docstring(node, clean=True) Return the docstring of the given node (which must be a FunctionDef, ClassDef or Module node), or None if it has no docstring. If clean is true, clean up the docstring’s indentation with inspect.cleandoc(). ast.fix_missing_locations(node) When you compile a node tree with compile(), the compiler expects lineno and col_offset attributes for every node that supports them. This is rather tedious to fill in for generated nodes, so this helper adds these attributes recursively where not already set, by setting them to the values of the parent node. It works recursively starting at node. ast.increment_lineno(node, n=1) Increment the line number of each node in the tree starting at node by n. This is useful to “move code” to a different location in a file. ast.copy_location(new_node, old_node) Copy source location (lineno and col_offset) from old_node to new_node if possible, and return new_node. ast.iter_fields(node) Yield a tuple of (fieldname, value) for each field in node._fields that is present on node. ast.iter_child_nodes(node) Yield all direct child nodes of node, that is, all fields that are nodes and all items of fields that are lists of nodes. ast.walk(node) Recursively yield all descendant nodes in the tree starting at node (including node itself), in no specified order. This is useful if you only want to modify nodes in place and don’t care about the context. class ast.NodeVisitor A node visitor base class that walks the abstract syntax tree and calls a visitor function for every node found. This function may return a value which is forwarded by the visit() method. This class is meant to be subclassed, with the subclass adding visitor methods. visit(node) Visit a node. The default implementation calls the method called ‘self.visit_classname’ where classname is the name of the node class, or generic_visit() if that method doesn’t exist. generic_visit(node) This visitor calls visit() on all children of the node. Note that child nodes of nodes that have a custom visitor method won’t be visited unless the visitor calls generic_visit() or visits them itself. Don’t use the NodeVisitor if you want to apply changes to nodes during traversal. For this a special visitor exists (NodeTransformer) that allows modifications. class ast.NodeTransformer A NodeVisitor subclass that walks the abstract syntax tree and allows modification of nodes. The NodeTransformer will walk the AST and use the return value of the visitor methods to replace or remove the old node. If the return value of the visitor method is None, the node will be removed from its location, otherwise it is replaced with the return value. The return value may be the original node in which case no replacement takes place.
30.2. ast — Abstract Syntax Trees
1205
The Python Library Reference, Release 3.2.3
Here is an example transformer that rewrites all occurrences of name lookups (foo) to data[’foo’]: class RewriteName(NodeTransformer): def visit_Name(self, node): return copy_location(Subscript( value=Name(id=’data’, ctx=Load()), slice=Index(value=Str(s=node.id)), ctx=node.ctx ), node) Keep in mind that if the node you’re operating on has child nodes you must either transform the child nodes yourself or call the generic_visit() method for the node first. For nodes that were part of a collection of statements (that applies to all statement nodes), the visitor may also return a list of nodes rather than just a single node. Usually you use the transformer like this: node = YourTransformer().visit(node) ast.dump(node, annotate_fields=True, include_attributes=False) Return a formatted dump of the tree in node. This is mainly useful for debugging purposes. The returned string will show the names and the values for fields. This makes the code impossible to evaluate, so if evaluation is wanted annotate_fields must be set to False. Attributes such as line numbers and column offsets are not dumped by default. If this is wanted, include_attributes can be set to True.
30.3 symtable — Access to the compiler’s symbol tables Symbol tables are generated by the compiler from AST just before bytecode is generated. The symbol table is responsible for calculating the scope of every identifier in the code. symtable provides an interface to examine these tables.
30.3.1 Generating Symbol Tables symtable.symtable(code, filename, compile_type) Return the toplevel SymbolTable for the Python source code. filename is the name of the file containing the code. compile_type is like the mode argument to compile().
30.3.2 Examining Symbol Tables class symtable.SymbolTable A namespace table for a block. The constructor is not public. get_type() Return the type of the symbol table. Possible values are ’class’, ’module’, and ’function’. get_id() Return the table’s identifier. get_name() Return the table’s name. This is the name of the class if the table is for a class, the name of the function if the table is for a function, or ’top’ if the table is global (get_type() returns ’module’).
1206
Chapter 30. Python Language Services
The Python Library Reference, Release 3.2.3
get_lineno() Return the number of the first line in the block this table represents. is_optimized() Return True if the locals in this table can be optimized. is_nested() Return True if the block is a nested class or function. has_children() Return True if the block has nested namespaces within it. get_children().
These can be obtained with
has_exec() Return True if the block uses exec. has_import_star() Return True if the block uses a starred from-import. get_identifiers() Return a list of names of symbols in this table. lookup(name) Lookup name in the table and return a Symbol instance. get_symbols() Return a list of Symbol instances for names in the table. get_children() Return a list of the nested symbol tables. class symtable.Function A namespace for a function or method. This class inherits SymbolTable. get_parameters() Return a tuple containing names of parameters to this function. get_locals() Return a tuple containing names of locals in this function. get_globals() Return a tuple containing names of globals in this function. get_frees() Return a tuple containing names of free variables in this function. class symtable.Class A namespace of a class. This class inherits SymbolTable. get_methods() Return a tuple containing the names of methods declared in the class. class symtable.Symbol An entry in a SymbolTable corresponding to an identifier in the source. The constructor is not public. get_name() Return the symbol’s name. is_referenced() Return True if the symbol is used in its block. is_imported() Return True if the symbol is created from an import statement.
30.3. symtable — Access to the compiler’s symbol tables
1207
The Python Library Reference, Release 3.2.3
is_parameter() Return True if the symbol is a parameter. is_global() Return True if the symbol is global. is_declared_global() Return True if the symbol is declared global with a global statement. is_local() Return True if the symbol is local to its block. is_free() Return True if the symbol is referenced in its block, but not assigned to. is_assigned() Return True if the symbol is assigned to in its block. is_namespace() Return True if name binding introduces new namespace. If the name is used as the target of a function or class statement, this will be true. For example: >>> table = symtable.symtable("def some_func(): pass", "string", "exec") >>> table.lookup("some_func").is_namespace() True Note that a single name can be bound to multiple objects. If the result is True, the name may also be bound to other objects, like an int or list, that does not introduce a new namespace. get_namespaces() Return a list of namespaces bound to this name. get_namespace() Return the namespace bound to this name. If more than one namespace is bound, a ValueError is raised.
30.4 symbol — Constants used with Python parse trees Source code: Lib/symbol.py
This module provides constants which represent the numeric values of internal nodes of the parse tree. Unlike most Python constants, these use lower-case names. Refer to the file Grammar/Grammar in the Python distribution for the definitions of the names in the context of the language grammar. The specific numeric values which the names map to may change between Python versions. This module also provides one additional data object: symbol.sym_name Dictionary mapping the numeric values of the constants defined in this module back to name strings, allowing more human-readable representation of parse trees to be generated.
1208
Chapter 30. Python Language Services
The Python Library Reference, Release 3.2.3
30.5 token — Constants used with Python parse trees Source code: Lib/token.py
This module provides constants which represent the numeric values of leaf nodes of the parse tree (terminal tokens). Refer to the file Grammar/Grammar in the Python distribution for the definitions of the names in the context of the language grammar. The specific numeric values which the names map to may change between Python versions. The module also provides a mapping from numeric codes to names and some functions. The functions mirror definitions in the Python C header files. token.tok_name Dictionary mapping the numeric values of the constants defined in this module back to name strings, allowing more human-readable representation of parse trees to be generated. token.ISTERMINAL(x) Return true for terminal token values. token.ISNONTERMINAL(x) Return true for non-terminal token values. token.ISEOF(x) Return true if x is the marker indicating the end of input. The token constants are: token.ENDMARKER token.NAME token.NUMBER token.STRING token.NEWLINE token.INDENT token.DEDENT token.LPAR token.RPAR token.LSQB token.RSQB token.COLON token.COMMA token.SEMI token.PLUS token.MINUS token.STAR token.SLASH token.VBAR token.AMPER token.LESS token.GREATER token.EQUAL token.DOT token.PERCENT token.LBRACE token.RBRACE token.EQEQUAL token.NOTEQUAL token.LESSEQUAL 30.5. token — Constants used with Python parse trees
1209
The Python Library Reference, Release 3.2.3
token.GREATEREQUAL token.TILDE token.CIRCUMFLEX token.LEFTSHIFT token.RIGHTSHIFT token.DOUBLESTAR token.PLUSEQUAL token.MINEQUAL token.STAREQUAL token.SLASHEQUAL token.PERCENTEQUAL token.AMPEREQUAL token.VBAREQUAL token.CIRCUMFLEXEQUAL token.LEFTSHIFTEQUAL token.RIGHTSHIFTEQUAL token.DOUBLESTAREQUAL token.DOUBLESLASH token.DOUBLESLASHEQUAL token.AT token.RARROW token.ELLIPSIS token.OP token.ERRORTOKEN token.N_TOKENS token.NT_OFFSET See Also: Module parser The second example for the parser module shows how to use the symbol module.
30.6 keyword — Testing for Python keywords Source code: Lib/keyword.py
This module allows a Python program to determine if a string is a keyword. keyword.iskeyword(s) Return true if s is a Python keyword. keyword.kwlist Sequence containing all the keywords defined for the interpreter. If any keywords are defined to only be active when particular __future__ statements are in effect, these will be included as well.
30.7 tokenize — Tokenizer for Python source Source code: Lib/tokenize.py
The tokenize module provides a lexical scanner for Python source code, implemented in Python. The scanner in this module returns comments as tokens as well, making it useful for implementing “pretty-printers,” including colorizers for on-screen displays. 1210
Chapter 30. Python Language Services
The Python Library Reference, Release 3.2.3
To simplify token stream handling, all operators and delimiters tokens are returned using the generic token.OP token type. The exact type can be determined by checking the token string field on the named tuple returned from tokenize.tokenize() for the character sequence that identifies a specific operator token. The primary entry point is a generator: tokenize.tokenize(readline) The tokenize() generator requires one argument, readline, which must be a callable object which provides the same interface as the io.IOBase.readline() method of file objects. Each call to the function should return one line of input as bytes. The generator produces 5-tuples with these members: the token type; the token string; a 2-tuple (srow, scol) of ints specifying the row and column where the token begins in the source; a 2-tuple (erow, ecol) of ints specifying the row and column where the token ends in the source; and the line on which the token was found. The line passed (the last tuple item) is the logical line; continuation lines are included. The 5 tuple is returned as a named tuple with the field names: type string start end line. Changed in version 3.1: Added support for named tuples. tokenize() determines the source encoding of the file by looking for a UTF-8 BOM or encoding cookie, according to PEP 263. All constants from the token module are also exported from tokenize, as are three additional token type values: tokenize.COMMENT Token value used to indicate a comment. tokenize.NL Token value used to indicate a non-terminating newline. The NEWLINE token indicates the end of a logical line of Python code; NL tokens are generated when a logical line of code is continued over multiple physical lines. tokenize.ENCODING Token value that indicates the encoding used to decode the source bytes into text. The first token returned by tokenize() will always be an ENCODING token. Another function is provided to reverse the tokenization process. This is useful for creating tools that tokenize a script, modify the token stream, and write back the modified script. tokenize.untokenize(iterable) Converts tokens back into Python source code. The iterable must return sequences with at least two elements, the token type and the token string. Any additional sequence elements are ignored. The reconstructed script is returned as a single string. The result is guaranteed to tokenize back to match the input so that the conversion is lossless and round-trips are assured. The guarantee applies only to the token type and token string as the spacing between tokens (column positions) may change. It returns bytes, encoded using the ENCODING token, which is the first token sequence output by tokenize(). tokenize() needs to detect the encoding of source files it tokenizes. The function it uses to do this is available: tokenize.detect_encoding(readline) The detect_encoding() function is used to detect the encoding that should be used to decode a Python source file. It requires one argument, readline, in the same way as the tokenize() generator. It will call readline a maximum of twice, and return the encoding used (as a string) and a list of any lines (not decoded from bytes) it has read in. It detects the encoding from the presence of a UTF-8 BOM or an encoding cookie as specified in PEP 263. If both a BOM and a cookie are present, but disagree, a SyntaxError will be raised. Note that if the BOM is found, ’utf-8-sig’ will be returned as an encoding. If no encoding is specified, then the default of ’utf-8’ will be returned.
30.7. tokenize — Tokenizer for Python source
1211
The Python Library Reference, Release 3.2.3
Use open() to open Python source files: it uses detect_encoding() to detect the file encoding. tokenize.open(filename) Open a file in read only mode using the encoding detected by detect_encoding(). New in version 3.2. Example of a script rewriter that transforms float literals into Decimal objects: from tokenize import tokenize, untokenize, NUMBER, STRING, NAME, OP from io import BytesIO def decistmt(s): """Substitute Decimals for floats in a string of statements. >>> from decimal import Decimal >>> s = ’print(+21.3e-5*-.1234/81.7)’ >>> decistmt(s) "print (+Decimal (’21.3e-5’)*-Decimal (’.1234’)/Decimal (’81.7’))" The format of the exponent is inherited from the platform C library. Known cases are "e-007" (Windows) and "e-07" (not Windows). Since we’re only showing 12 digits, and the 13th isn’t close to 5, the rest of the output should be platform-independent. >>> exec(s) #doctest: +ELLIPSIS -3.21716034272e-0...7 Output from calculations with Decimal should be identical across all platforms. >>> exec(decistmt(s)) -3.217160342717258261933904529E-7 """ result = [] g = tokenize(BytesIO(s.encode(’utf-8’)).readline) # tokenize the string for toknum, tokval, _, _, _ in g: if toknum == NUMBER and ’.’ in tokval: # replace NUMBER tokens result.extend([ (NAME, ’Decimal’), (OP, ’(’), (STRING, repr(tokval)), (OP, ’)’) ]) else: result.append((toknum, tokval)) return untokenize(result).decode(’utf-8’)
30.8 tabnanny — Detection of ambiguous indentation Source code: Lib/tabnanny.py
For the time being this module is intended to be called as a script. However it is possible to import it into an IDE and use the function check() described below.
1212
Chapter 30. Python Language Services
The Python Library Reference, Release 3.2.3
Note: The API provided by this module is likely to change in future releases; such changes may not be backward compatible. tabnanny.check(file_or_dir) If file_or_dir is a directory and not a symbolic link, then recursively descend the directory tree named by file_or_dir, checking all .py files along the way. If file_or_dir is an ordinary Python source file, it is checked for whitespace related problems. The diagnostic messages are written to standard output using the print() function. tabnanny.verbose Flag indicating whether to print verbose messages. This is incremented by the -v option if called as a script. tabnanny.filename_only Flag indicating whether to print only the filenames of files containing whitespace related problems. This is set to true by the -q option if called as a script. exception tabnanny.NannyNag Raised by tokeneater() if detecting an ambiguous indent. Captured and handled in check(). tabnanny.tokeneater(type, token, start, end, line) This function is used by check() as a callback parameter to the function tokenize.tokenize(). See Also: Module tokenize Lexical scanner for Python source code.
30.9 pyclbr — Python class browser support Source code: Lib/pyclbr.py
The pyclbr module can be used to determine some limited information about the classes, methods and top-level functions defined in a module. The information provided is sufficient to implement a traditional three-pane class browser. The information is extracted from the source code rather than by importing the module, so this module is safe to use with untrusted code. This restriction makes it impossible to use this module with modules not implemented in Python, including all standard and optional extension modules. pyclbr.readmodule(module, path=None) Read a module and return a dictionary mapping class names to class descriptor objects. The parameter module should be the name of a module as a string; it may be the name of a module within a package. The path parameter should be a sequence, and is used to augment the value of sys.path, which is used to locate module source code. pyclbr.readmodule_ex(module, path=None) Like readmodule(), but the returned dictionary, in addition to mapping class names to class descriptor objects, also maps top-level function names to function descriptor objects. Moreover, if the module being read is a package, the key ’__path__’ in the returned dictionary has as its value a list which contains the package search path.
30.9.1 Class Objects The Class objects used as values in the dictionary returned by readmodule() and readmodule_ex() provide the following data attributes: Class.module The name of the module defining the class described by the class descriptor. 30.9. pyclbr — Python class browser support
1213
The Python Library Reference, Release 3.2.3
Class.name The name of the class. Class.super A list of Class objects which describe the immediate base classes of the class being described. Classes which are named as superclasses but which are not discoverable by readmodule() are listed as a string with the class name instead of as Class objects. Class.methods A dictionary mapping method names to line numbers. Class.file Name of the file containing the class statement defining the class. Class.lineno The line number of the class statement within the file named by file.
30.9.2 Function Objects The Function objects used as values in the dictionary returned by readmodule_ex() provide the following attributes: Function.module The name of the module defining the function described by the function descriptor. Function.name The name of the function. Function.file Name of the file containing the def statement defining the function. Function.lineno The line number of the def statement within the file named by file.
The py_compile module provides a function to generate a byte-code file from a source file, and another function used when the module source file is invoked as a script. Though not often needed, this function can be useful when installing modules for shared use, especially if some of the users may not have permission to write the byte-code cache files in the directory containing the source code. exception py_compile.PyCompileError Exception raised when an error occurs while attempting to compile the file. py_compile.compile(file, cfile=None, dfile=None, doraise=False, optimize=-1) Compile a source file to byte-code and write out the byte-code cache file. The source code is loaded from the file name file. The byte-code is written to cfile, which defaults to the PEP 3147 path, ending in .pyc (.pyo if optimization is enabled in the current interpreter). For example, if file is /foo/bar/baz.py cfile will default to /foo/bar/__pycache__/baz.cpython-32.pyc for Python 3.2. If dfile is specified, it is used as the name of the source file in error messages when instead of file. If doraise is true, a PyCompileError is raised when an error is encountered while compiling file. If doraise is false (the default), an error string is written to sys.stderr, but no exception is raised. This function returns the path to byte-compiled file, i.e. whatever cfile value was used. 1214
Chapter 30. Python Language Services
The Python Library Reference, Release 3.2.3
optimize controls the optimization level and is passed to the built-in compile() function. The default of -1 selects the optimization level of the current interpreter. Changed in version 3.2: Changed default value of cfile to be PEP 3147-compliant. Previous default was file + ’c’ (’o’ if optimization was enabled). Also added the optimize parameter. py_compile.main(args=None) Compile several source files. The files named in args (or on the command line, if args is None) are compiled and the resulting bytecode is cached in the normal manner. This function does not search a directory structure to locate source files; it only compiles files named explicitly. If ’-’ is the only parameter in args, the list of files is taken from standard input. Changed in version 3.2: Added support for ’-’. When this module is run as a script, the main() is used to compile all the files named on the command line. The exit status is nonzero if one of the files could not be compiled. See Also: Module compileall Utilities to compile all Python source files in a directory tree.
30.11 compileall — Byte-compile Python libraries This module provides some utility functions to support installing Python libraries. These functions compile Python source files in a directory tree. This module can be used to create the cached byte-code files at library installation time, which makes them available for use even by users who don’t have write permission to the library directories.
30.11.1 Command-line use This module can work as a script (using python -m compileall) to compile Python sources. [directory|file]... Positional arguments are files to compile or directories that contain source files, traversed recursively. If no argument is given, behave as if the command line was -l . -l Do not recurse into subdirectories, only compile source code files directly contained in the named or implied directories. -f Force rebuild even if timestamps are up-to-date. -q Do not print the list of files compiled, print only error messages. -d destdir Directory prepended to the path to each file being compiled. This will appear in compilation time tracebacks, and is also compiled in to the byte-code file, where it will be used in tracebacks and other messages in cases where the source file does not exist at the time the byte-code file is executed. -x regex regex is used to search the full path to each file considered for compilation, and if the regex produces a match, the file is skipped. -i list Read the file list and add each line that it contains to the list of files and directories to compile. If list is -, read lines from stdin. -b Write the byte-code files to their legacy locations and names, which may overwrite byte-code files created by
30.11. compileall — Byte-compile Python libraries
1215
The Python Library Reference, Release 3.2.3
another version of Python. The default is to write files to their PEP 3147 locations and names, which allows byte-code files from multiple versions of Python to coexist. Changed in version 3.2: Added the -i, -b and -h options. There is no command-line option to control the optimization level used by the compile() function, because the Python interpreter itself already provides the option: python -O -m compileall.
30.11.2 Public functions compileall.compile_dir(dir, maxlevels=10, ddir=None, force=False, rx=None, quiet=False, legacy=False, optimize=-1) Recursively descend the directory tree named by dir, compiling all .py files along the way. The maxlevels parameter is used to limit the depth of the recursion; it defaults to 10. If ddir is given, it is prepended to the path to each file being compiled for use in compilation time tracebacks, and is also compiled in to the byte-code file, where it will be used in tracebacks and other messages in cases where the source file does not exist at the time the byte-code file is executed. If force is true, modules are re-compiled even if the timestamps are up to date. If rx is given, its search method is called on the complete path to each file considered for compilation, and if it returns a true value, the file is skipped. If quiet is true, nothing is printed to the standard output unless errors occur. If legacy is true, byte-code files are written to their legacy locations and names, which may overwrite byte-code files created by another version of Python. The default is to write files to their PEP 3147 locations and names, which allows byte-code files from multiple versions of Python to coexist. optimize specifies the optimization level for the compiler. It is passed to the built-in compile() function. Changed in version 3.2: Added the legacy and optimize parameter. compileall.compile_file(fullname, ddir=None, force=False, rx=None, quiet=False, legacy=False, optimize=-1) Compile the file with path fullname. If ddir is given, it is prepended to the path to the file being compiled for use in compilation time tracebacks, and is also compiled in to the byte-code file, where it will be used in tracebacks and other messages in cases where the source file does not exist at the time the byte-code file is executed. If rx is given, its search method is passed the full path name to the file being compiled, and if it returns a true value, the file is not compiled and True is returned. If quiet is true, nothing is printed to the standard output unless errors occur. If legacy is true, byte-code files are written to their legacy locations and names, which may overwrite byte-code files created by another version of Python. The default is to write files to their PEP 3147 locations and names, which allows byte-code files from multiple versions of Python to coexist. optimize specifies the optimization level for the compiler. It is passed to the built-in compile() function. New in version 3.2. compileall.compile_path(skip_curdir=True, maxlevels=0, force=False, legacy=False, optimize=-1) Byte-compile all the .py files found along sys.path. If skip_curdir is true (the default), the current directory is not included in the search. All other parameters are passed to the compile_dir() function. Note that unlike the other compile functions, maxlevels defaults to 0. Changed in version 3.2: Added the legacy and optimize parameter. To force a recompile of all the .py files in the Lib/ subdirectory and all its subdirectories:
1216
Chapter 30. Python Language Services
The Python Library Reference, Release 3.2.3
import compileall compileall.compile_dir(’Lib/’, force=True) # Perform same compilation, excluding files in .svn directories. import re compileall.compile_dir(’Lib/’, rx=re.compile(’/[.]svn’), force=True) See Also: Module py_compile Byte-compile a single source file.
30.12 dis — Disassembler for Python bytecode Source code: Lib/dis.py
The dis module supports the analysis of CPython bytecode by disassembling it. The CPython bytecode which this module takes as an input is defined in the file Include/opcode.h and used by the compiler and the interpreter. CPython implementation detail: Bytecode is an implementation detail of the CPython interpreter. No guarantees are made that bytecode will not be added, removed, or changed between versions of Python. Use of this module should not be considered to work across Python VMs or Python releases. Example: Given the function myfunc(): def myfunc(alist): return len(alist) the following command can be used to get the disassembly of myfunc(): >>> dis.dis(myfunc) 2 0 LOAD_GLOBAL 3 LOAD_FAST 6 CALL_FUNCTION 9 RETURN_VALUE
0 (len) 0 (alist) 1
(The “2” is a line number). The dis module defines the following functions and constants: dis.code_info(x) Return a formatted multi-line string with detailed code object information for the supplied function, method, source code string or code object. Note that the exact contents of code info strings are highly implementation dependent and they may change arbitrarily across Python VMs or Python releases. New in version 3.2. dis.show_code(x) Print detailed code object information for the supplied function, method, source code string or code object to stdout. This is a convenient shorthand for print(code_info(x)), intended for interactive exploration at the interpreter prompt. New in version 3.2. dis.dis(x=None) Disassemble the x object. x can denote either a module, a class, a method, a function, a code object, a string of source code or a byte sequence of raw bytecode. For a module, it disassembles all functions. For a class, it disassembles all methods. For a code object or sequence of raw bytecode, it prints one line per bytecode
30.12. dis — Disassembler for Python bytecode
1217
The Python Library Reference, Release 3.2.3
instruction. Strings are first compiled to code objects with the compile() built-in function before being disassembled. If no object is provided, this function disassembles the last traceback. dis.distb(tb=None) Disassemble the top-of-stack function of a traceback, using the last traceback if none was passed. The instruction causing the exception is indicated. dis.disassemble(code, lasti=-1) dis.disco(code, lasti=-1) Disassemble a code object, indicating the last instruction if lasti was provided. The output is divided in the following columns: 1.the line number, for the first instruction of each line 2.the current instruction, indicated as -->, 3.a labelled instruction, indicated with >>, 4.the address of the instruction, 5.the operation code name, 6.operation parameters, and 7.interpretation of the parameters in parentheses. The parameter interpretation recognizes local and global variable names, constant values, branch targets, and compare operators. dis.findlinestarts(code) This generator function uses the co_firstlineno and co_lnotab attributes of the code object code to find the offsets which are starts of lines in the source code. They are generated as (offset, lineno) pairs. dis.findlabels(code) Detect all offsets in the code object code which are jump targets, and return a list of these offsets. dis.opname Sequence of operation names, indexable using the bytecode. dis.opmap Dictionary mapping operation names to bytecodes. dis.cmp_op Sequence of all compare operation names. dis.hasconst Sequence of bytecodes that have a constant parameter. dis.hasfree Sequence of bytecodes that access a free variable. dis.hasname Sequence of bytecodes that access an attribute by name. dis.hasjrel Sequence of bytecodes that have a relative jump target. dis.hasjabs Sequence of bytecodes that have an absolute jump target. dis.haslocal Sequence of bytecodes that access a local variable. dis.hascompare Sequence of bytecodes of Boolean operations.
1218
Chapter 30. Python Language Services
The Python Library Reference, Release 3.2.3
30.12.1 Python Bytecode Instructions The Python compiler currently generates the following bytecode instructions. General instructions STOP_CODE Indicates end-of-code to the compiler, not used by the interpreter. NOP Do nothing code. Used as a placeholder by the bytecode optimizer. POP_TOP Removes the top-of-stack (TOS) item. ROT_TWO Swaps the two top-most stack items. ROT_THREE Lifts second and third stack item one position up, moves top down to position three. DUP_TOP Duplicates the reference on top of the stack. DUP_TOP_TWO Duplicates the two references on top of the stack, leaving them in the same order. Unary operations Unary operations take the top of the stack, apply the operation, and push the result back on the stack. UNARY_POSITIVE Implements TOS = +TOS. UNARY_NEGATIVE Implements TOS = -TOS. UNARY_NOT Implements TOS = not TOS. UNARY_INVERT Implements TOS = ~TOS. GET_ITER Implements TOS = iter(TOS). Binary operations Binary operations remove the top of the stack (TOS) and the second top-most stack item (TOS1) from the stack. They perform the operation, and put the result back on the stack. BINARY_POWER Implements TOS = TOS1 ** TOS. BINARY_MULTIPLY Implements TOS = TOS1 * TOS. BINARY_FLOOR_DIVIDE Implements TOS = TOS1 // TOS. BINARY_TRUE_DIVIDE Implements TOS = TOS1 / TOS. BINARY_MODULO Implements TOS = TOS1 % TOS. 30.12. dis — Disassembler for Python bytecode
1219
The Python Library Reference, Release 3.2.3
BINARY_ADD Implements TOS = TOS1 + TOS. BINARY_SUBTRACT Implements TOS = TOS1 - TOS. BINARY_SUBSCR Implements TOS = TOS1[TOS]. BINARY_LSHIFT Implements TOS = TOS1 > TOS. BINARY_AND Implements TOS = TOS1 & TOS. BINARY_XOR Implements TOS = TOS1 ^ TOS. BINARY_OR Implements TOS = TOS1 | TOS. In-place operations In-place operations are like binary operations, in that they remove TOS and TOS1, and push the result back on the stack, but the operation is done in-place when TOS1 supports it, and the resulting TOS may be (but does not have to be) the original TOS1. INPLACE_POWER Implements in-place TOS = TOS1 ** TOS. INPLACE_MULTIPLY Implements in-place TOS = TOS1 * TOS. INPLACE_FLOOR_DIVIDE Implements in-place TOS = TOS1 // TOS. INPLACE_TRUE_DIVIDE Implements in-place TOS = TOS1 / TOS. INPLACE_MODULO Implements in-place TOS = TOS1 % TOS. INPLACE_ADD Implements in-place TOS = TOS1 + TOS. INPLACE_SUBTRACT Implements in-place TOS = TOS1 - TOS. INPLACE_LSHIFT Implements in-place TOS = TOS1 > TOS. INPLACE_AND Implements in-place TOS = TOS1 & TOS. INPLACE_XOR Implements in-place TOS = TOS1 ^ TOS.
1220
Chapter 30. Python Language Services
The Python Library Reference, Release 3.2.3
INPLACE_OR Implements in-place TOS = TOS1 | TOS. STORE_SUBSCR Implements TOS1[TOS] = TOS2. DELETE_SUBSCR Implements del TOS1[TOS]. Miscellaneous opcodes PRINT_EXPR Implements the expression statement for the interactive mode. TOS is removed from the stack and printed. In non-interactive mode, an expression statement is terminated with POP_STACK. BREAK_LOOP Terminates a loop due to a break statement. CONTINUE_LOOP(target) Continues a loop due to a continue statement. target is the address to jump to (which should be a FOR_ITER instruction). SET_ADD(i) Calls set.add(TOS1[-i], TOS). Used to implement set comprehensions. LIST_APPEND(i) Calls list.append(TOS[-i], TOS). Used to implement list comprehensions. MAP_ADD(i) Calls dict.setitem(TOS1[-i], TOS, TOS1). Used to implement dict comprehensions. For all of the SET_ADD, LIST_APPEND and MAP_ADD instructions, while the added value or key/value pair is popped off, the container object remains on the stack so that it is available for further iterations of the loop. RETURN_VALUE Returns with TOS to the caller of the function. YIELD_VALUE Pops TOS and yields it from a generator. IMPORT_STAR Loads all symbols not starting with ’_’ directly from the module TOS to the local namespace. The module is popped after loading all names. This opcode implements from module import *. POP_BLOCK Removes one block from the block stack. Per frame, there is a stack of blocks, denoting nested loops, try statements, and such. POP_EXCEPT Removes one block from the block stack. The popped block must be an exception handler block, as implicitly created when entering an except handler. In addition to popping extraneous values from the frame stack, the last three popped values are used to restore the exception state. END_FINALLY Terminates a finally clause. The interpreter recalls whether the exception has to be re-raised, or whether the function returns, and continues with the outer-next block. LOAD_BUILD_CLASS Pushes builtins.__build_class__() onto the stack. It is later called by CALL_FUNCTION to construct a class. SETUP_WITH(delta) This opcode performs several operations before a with block starts. First, it loads __exit__() from the
30.12. dis — Disassembler for Python bytecode
1221
The Python Library Reference, Release 3.2.3
context manager and pushes it onto the stack for later use by WITH_CLEANUP. Then, __enter__() is called, and a finally block pointing to delta is pushed. Finally, the result of calling the enter method is pushed onto the stack. The next opcode will either ignore it (POP_TOP), or store it in (a) variable(s) (STORE_FAST, STORE_NAME, or UNPACK_SEQUENCE). WITH_CLEANUP Cleans up the stack when a with statement block exits. TOS is the context manager’s __exit__() bound method. Below TOS are 1–3 values indicating how/why the finally clause was entered: •SECOND = None •(SECOND, THIRD) = (WHY_{RETURN,CONTINUE}), retval •SECOND = WHY_*; no retval below it •(SECOND, THIRD, FOURTH) = exc_info() In the last case, TOS(SECOND, THIRD, FOURTH) is called, otherwise TOS(None, None, None). In addition, TOS is removed from the stack. If the stack represents an exception, and the function call returns a ‘true’ value, this information is “zapped” and replaced with a single WHY_SILENCED to prevent END_FINALLY from re-raising the exception. (But non-local gotos will still be resumed.) STORE_LOCALS Pops TOS from the stack and stores it as the current frame’s f_locals. This is used in class construction. All of the following opcodes expect arguments. An argument is two bytes, with the more significant byte last. STORE_NAME(namei) Implements name = TOS. namei is the index of name in the attribute co_names of the code object. The compiler tries to use STORE_FAST or STORE_GLOBAL if possible. DELETE_NAME(namei) Implements del name, where namei is the index into co_names attribute of the code object. UNPACK_SEQUENCE(count) Unpacks TOS into count individual values, which are put onto the stack right-to-left. UNPACK_EX(counts) Implements assignment with a starred target: Unpacks an iterable in TOS into individual values, where the total number of values can be smaller than the number of items in the iterable: one the new values will be a list of all leftover items. The low byte of counts is the number of values before the list value, the high byte of counts the number of values after it. The resulting values are put onto the stack right-to-left. STORE_ATTR(namei) Implements TOS.name = TOS1, where namei is the index of name in co_names. DELETE_ATTR(namei) Implements del TOS.name, using namei as index into co_names. STORE_GLOBAL(namei) Works as STORE_NAME, but stores the name as a global. DELETE_GLOBAL(namei) Works as DELETE_NAME, but deletes a global name. LOAD_CONST(consti) Pushes co_consts[consti] onto the stack. LOAD_NAME(namei) Pushes the value associated with co_names[namei] onto the stack.
1222
Chapter 30. Python Language Services
The Python Library Reference, Release 3.2.3
BUILD_TUPLE(count) Creates a tuple consuming count items from the stack, and pushes the resulting tuple onto the stack. BUILD_LIST(count) Works as BUILD_TUPLE, but creates a list. BUILD_SET(count) Works as BUILD_TUPLE, but creates a set. BUILD_MAP(count) Pushes a new dictionary object onto the stack. The dictionary is pre-sized to hold count entries. LOAD_ATTR(namei) Replaces TOS with getattr(TOS, co_names[namei]). COMPARE_OP(opname) Performs a Boolean operation. The operation name can be found in cmp_op[opname]. IMPORT_NAME(namei) Imports the module co_names[namei]. TOS and TOS1 are popped and provide the fromlist and level arguments of __import__(). The module object is pushed onto the stack. The current namespace is not affected: for a proper import statement, a subsequent STORE_FAST instruction modifies the namespace. IMPORT_FROM(namei) Loads the attribute co_names[namei] from the module found in TOS. The resulting object is pushed onto the stack, to be subsequently stored by a STORE_FAST instruction. JUMP_FORWARD(delta) Increments bytecode counter by delta. POP_JUMP_IF_TRUE(target) If TOS is true, sets the bytecode counter to target. TOS is popped. POP_JUMP_IF_FALSE(target) If TOS is false, sets the bytecode counter to target. TOS is popped. JUMP_IF_TRUE_OR_POP(target) If TOS is true, sets the bytecode counter to target and leaves TOS on the stack. Otherwise (TOS is false), TOS is popped. JUMP_IF_FALSE_OR_POP(target) If TOS is false, sets the bytecode counter to target and leaves TOS on the stack. Otherwise (TOS is true), TOS is popped. JUMP_ABSOLUTE(target) Set bytecode counter to target. FOR_ITER(delta) TOS is an iterator. Call its __next__() method. If this yields a new value, push it on the stack (leaving the iterator below it). If the iterator indicates it is exhausted TOS is popped, and the byte code counter is incremented by delta. LOAD_GLOBAL(namei) Loads the global named co_names[namei] onto the stack. SETUP_LOOP(delta) Pushes a block for a loop onto the block stack. The block spans from the current instruction with a size of delta bytes. SETUP_EXCEPT(delta) Pushes a try block from a try-except clause onto the block stack. delta points to the first except block.
30.12. dis — Disassembler for Python bytecode
1223
The Python Library Reference, Release 3.2.3
SETUP_FINALLY(delta) Pushes a try block from a try-except clause onto the block stack. delta points to the finally block. STORE_MAP Store a key and value pair in a dictionary. Pops the key and value while leaving the dictionary on the stack. LOAD_FAST(var_num) Pushes a reference to the local co_varnames[var_num] onto the stack. STORE_FAST(var_num) Stores TOS into the local co_varnames[var_num]. DELETE_FAST(var_num) Deletes local co_varnames[var_num]. LOAD_CLOSURE(i) Pushes a reference to the cell contained in slot i of the cell and free variable storage. The name of the variable is co_cellvars[i] if i is less than the length of co_cellvars. Otherwise it is co_freevars[i len(co_cellvars)]. LOAD_DEREF(i) Loads the cell contained in slot i of the cell and free variable storage. Pushes a reference to the object the cell contains on the stack. STORE_DEREF(i) Stores TOS into the cell contained in slot i of the cell and free variable storage. DELETE_DEREF(i) Empties the cell contained in slot i of the cell and free variable storage. Used by the del statement. RAISE_VARARGS(argc) Raises an exception. argc indicates the number of parameters to the raise statement, ranging from 0 to 3. The handler will find the traceback as TOS2, the parameter as TOS1, and the exception as TOS. CALL_FUNCTION(argc) Calls a function. The low byte of argc indicates the number of positional parameters, the high byte the number of keyword parameters. On the stack, the opcode finds the keyword parameters first. For each keyword argument, the value is on top of the key. Below the keyword parameters, the positional parameters are on the stack, with the right-most parameter on top. Below the parameters, the function object to call is on the stack. Pops all function arguments, and the function itself off the stack, and pushes the return value. MAKE_FUNCTION(argc) Pushes a new function object on the stack. TOS is the code associated with the function. The function object is defined to have argc default parameters, which are found below TOS. MAKE_CLOSURE(argc) Creates a new function object, sets its __closure__ slot, and pushes it on the stack. TOS is the code associated with the function, TOS1 the tuple containing cells for the closure’s free variables. The function also has argc default parameters, which are found below the cells. BUILD_SLICE(argc) Pushes a slice object on the stack. argc must be 2 or 3. If it is 2, slice(TOS1, TOS) is pushed; if it is 3, slice(TOS2, TOS1, TOS) is pushed. See the slice() built-in function for more information. EXTENDED_ARG(ext) Prefixes any opcode which has an argument too big to fit into the default two bytes. ext holds two additional bytes which, taken together with the subsequent opcode’s argument, comprise a four-byte argument, ext being the two most-significant bytes. CALL_FUNCTION_VAR(argc) Calls a function. argc is interpreted as in CALL_FUNCTION. The top element on the stack contains the variable
1224
Chapter 30. Python Language Services
The Python Library Reference, Release 3.2.3
argument list, followed by keyword and positional arguments. CALL_FUNCTION_KW(argc) Calls a function. argc is interpreted as in CALL_FUNCTION. The top element on the stack contains the keyword arguments dictionary, followed by explicit keyword and positional arguments. CALL_FUNCTION_VAR_KW(argc) Calls a function. argc is interpreted as in CALL_FUNCTION. The top element on the stack contains the keyword arguments dictionary, followed by the variable-arguments tuple, followed by explicit keyword and positional arguments. HAVE_ARGUMENT This is not really an opcode. It identifies the dividing line between opcodes which don’t take arguments < HAVE_ARGUMENT and those which do >= HAVE_ARGUMENT.
30.13 pickletools — Tools for pickle developers Source code: Lib/pickletools.py
This module contains various constants relating to the intimate details of the pickle module, some lengthy comments about the implementation, and a few useful functions for analyzing pickled data. The contents of this module are useful for Python core developers who are working on the pickle; ordinary users of the pickle module probably won’t find the pickletools module relevant.
30.13.1 Command line usage New in version 3.2. When invoked from the command line, python -m pickletools will disassemble the contents of one or more pickle files. Note that if you want to see the Python object stored in the pickle rather than the details of pickle format, you may want to use -m pickle instead. However, when the pickle file that you want to examine comes from an untrusted source, -m pickletools is a safer option because it does not execute pickle bytecode. For example, with a tuple (1, 2) pickled in file x.pickle: $ python -m pickle x.pickle (1, 2) $ python -m pickletools x.pickle 0: \x80 PROTO 3 2: K BININT1 1 4: K BININT1 2 6: \x86 TUPLE2 7: q BINPUT 0 9: . STOP highest protocol among opcodes = 2 Command line options -a, -annotate Annotate each line with a short opcode description. -o, -output= Name of a file where the output should be written. 30.13. pickletools — Tools for pickle developers
1225
The Python Library Reference, Release 3.2.3
-l, -indentlevel= The number of blanks by which to indent a new MARK level. -m, -memo When multiple objects are disassembled, preserve memo between disassemblies. -p, -preamble= When more than one pickle file are specified, print given preamble before each disassembly.
30.13.2 Programmatic Interface pickletools.dis(pickle, out=None, memo=None, indentlevel=4, annotate=0) Outputs a symbolic disassembly of the pickle to the file-like object out, defaulting to sys.stdout. pickle can be a string or a file-like object. memo can be a Python dictionary that will be used as the pickle’s memo; it can be used to perform disassemblies across multiple pickles created by the same pickler. Successive levels, indicated by MARK opcodes in the stream, are indented by indentlevel spaces. If a nonzero value is given to annotate, each opcode in the output is annotated with a short description. The value of annotate is used as a hint for the column where annotation should start. New in version 3.2: The annotate argument. pickletools.genops(pickle) Provides an iterator over all of the opcodes in a pickle, returning a sequence of (opcode, arg, pos) triples. opcode is an instance of an OpcodeInfo class; arg is the decoded value, as a Python object, of the opcode’s argument; pos is the position at which this opcode is located. pickle can be a string or a file-like object. pickletools.optimize(picklestring) Returns a new equivalent pickle string after eliminating unused PUT opcodes. The optimized pickle is shorter, takes less transmission time, requires less storage space, and unpickles more efficiently.
1226
Chapter 30. Python Language Services
CHAPTER
THIRTYONE
MISCELLANEOUS SERVICES The modules described in this chapter provide miscellaneous services that are available in all Python versions. Here’s an overview:
31.1 formatter — Generic output formatting This module supports two interface definitions, each with multiple implementations: The formatter interface, and the writer interface which is required by the formatter interface. Formatter objects transform an abstract flow of formatting events into specific output events on writer objects. Formatters manage several stack structures to allow various properties of a writer object to be changed and restored; writers need not be able to handle relative changes nor any sort of “change back” operation. Specific writer properties which may be controlled via formatter objects are horizontal alignment, font, and left margin indentations. A mechanism is provided which supports providing arbitrary, non-exclusive style settings to a writer as well. Additional interfaces facilitate formatting events which are not reversible, such as paragraph separation. Writer objects encapsulate device interfaces. Abstract devices, such as file formats, are supported as well as physical devices. The provided implementations all work with abstract devices. The interface makes available mechanisms for setting the properties which formatter objects manage and inserting data into the output.
31.1.1 The Formatter Interface Interfaces to create formatters are dependent on the specific formatter class being instantiated. The interfaces described below are the required interfaces which all formatters must support once initialized. One data element is defined at the module level: formatter.AS_IS Value which can be used in the font specification passed to the push_font() method described below, or as the new value to any other push_property() method. Pushing the AS_IS value allows the corresponding pop_property() method to be called without having to track whether the property was changed. The following attributes are defined for formatter instance objects: formatter.writer The writer instance with which the formatter interacts. formatter.end_paragraph(blanklines) Close any open paragraphs and insert at least blanklines before the next paragraph. formatter.add_line_break() Add a hard line break if one does not already exist. This does not break the logical paragraph.
1227
The Python Library Reference, Release 3.2.3
formatter.add_hor_rule(*args, **kw) Insert a horizontal rule in the output. A hard break is inserted if there is data in the current paragraph, but the logical paragraph is not broken. The arguments and keywords are passed on to the writer’s send_line_break() method. formatter.add_flowing_data(data) Provide data which should be formatted with collapsed whitespace. Whitespace from preceding and successive calls to add_flowing_data() is considered as well when the whitespace collapse is performed. The data which is passed to this method is expected to be word-wrapped by the output device. Note that any wordwrapping still must be performed by the writer object due to the need to rely on device and font information. formatter.add_literal_data(data) Provide data which should be passed to the writer unchanged. Whitespace, including newline and tab characters, are considered legal in the value of data. formatter.add_label_data(format, counter) Insert a label which should be placed to the left of the current left margin. This should be used for constructing bulleted or numbered lists. If the format value is a string, it is interpreted as a format specification for counter, which should be an integer. The result of this formatting becomes the value of the label; if format is not a string it is used as the label value directly. The label value is passed as the only argument to the writer’s send_label_data() method. Interpretation of non-string label values is dependent on the associated writer. Format specifications are strings which, in combination with a counter value, are used to compute label values. Each character in the format string is copied to the label value, with some characters recognized to indicate a transform on the counter value. Specifically, the character ’1’ represents the counter value formatter as an Arabic number, the characters ’A’ and ’a’ represent alphabetic representations of the counter value in upper and lower case, respectively, and ’I’ and ’i’ represent the counter value in Roman numerals, in upper and lower case. Note that the alphabetic and roman transforms require that the counter value be greater than zero. formatter.flush_softspace() Send any pending whitespace buffered from a previous call to add_flowing_data() to the associated writer object. This should be called before any direct manipulation of the writer object. formatter.push_alignment(align) Push a new alignment setting onto the alignment stack. This may be AS_IS if no change is desired. If the alignment value is changed from the previous setting, the writer’s new_alignment() method is called with the align value. formatter.pop_alignment() Restore the previous alignment. formatter.push_font((size, italic, bold, teletype)) Change some or all font properties of the writer object. Properties which are not set to AS_IS are set to the values passed in while others are maintained at their current settings. The writer’s new_font() method is called with the fully resolved font specification. formatter.pop_font() Restore the previous font. formatter.push_margin(margin) Increase the number of left margin indentations by one, associating the logical tag margin with the new indentation. The initial margin level is 0. Changed values of the logical tag must be true values; false values other than AS_IS are not sufficient to change the margin. formatter.pop_margin() Restore the previous margin. formatter.push_style(*styles) Push any number of arbitrary style specifications. All styles are pushed onto the styles stack in order. A tuple representing the entire stack, including AS_IS values, is passed to the writer’s new_styles() method.
1228
Chapter 31. Miscellaneous Services
The Python Library Reference, Release 3.2.3
formatter.pop_style(n=1) Pop the last n style specifications passed to push_style(). A tuple representing the revised stack, including AS_IS values, is passed to the writer’s new_styles() method. formatter.set_spacing(spacing) Set the spacing style for the writer. formatter.assert_line_data(flag=1) Inform the formatter that data has been added to the current paragraph out-of-band. This should be used when the writer has been manipulated directly. The optional flag argument can be set to false if the writer manipulations produced a hard line break at the end of the output.
31.1.2 Formatter Implementations Two implementations of formatter objects are provided by this module. Most applications may use one of these classes without modification or subclassing. class formatter.NullFormatter(writer=None) A formatter which does nothing. If writer is omitted, a NullWriter instance is created. No methods of the writer are called by NullFormatter instances. Implementations should inherit from this class if implementing a writer interface but don’t need to inherit any implementation. class formatter.AbstractFormatter(writer) The standard formatter. This implementation has demonstrated wide applicability to many writers, and may be used directly in most circumstances. It has been used to implement a full-featured World Wide Web browser.
31.1.3 The Writer Interface Interfaces to create writers are dependent on the specific writer class being instantiated. The interfaces described below are the required interfaces which all writers must support once initialized. Note that while most applications can use the AbstractFormatter class as a formatter, the writer must typically be provided by the application. writer.flush() Flush any buffered output or device control events. writer.new_alignment(align) Set the alignment style. The align value can be any object, but by convention is a string or None, where None indicates that the writer’s “preferred” alignment should be used. Conventional align values are ’left’, ’center’, ’right’, and ’justify’. writer.new_font(font) Set the font style. The value of font will be None, indicating that the device’s default font should be used, or a tuple of the form (size, italic, bold, teletype). Size will be a string indicating the size of font that should be used; specific strings and their interpretation must be defined by the application. The italic, bold, and teletype values are Boolean values specifying which of those font attributes should be used. writer.new_margin(margin, level) Set the margin level to the integer level and the logical tag to margin. Interpretation of the logical tag is at the writer’s discretion; the only restriction on the value of the logical tag is that it not be a false value for non-zero values of level. writer.new_spacing(spacing) Set the spacing style to spacing. writer.new_styles(styles) Set additional styles. The styles value is a tuple of arbitrary values; the value AS_IS should be ignored. The
31.1. formatter — Generic output formatting
1229
The Python Library Reference, Release 3.2.3
styles tuple may be interpreted either as a set or as a stack depending on the requirements of the application and writer implementation. writer.send_line_break() Break the current line. writer.send_paragraph(blankline) Produce a paragraph separation of at least blankline blank lines, or the equivalent. The blankline value will be an integer. Note that the implementation will receive a call to send_line_break() before this call if a line break is needed; this method should not include ending the last line of the paragraph. It is only responsible for vertical spacing between paragraphs. writer.send_hor_rule(*args, **kw) Display a horizontal rule on the output device. The arguments to this method are entirely application- and writer-specific, and should be interpreted with care. The method implementation may assume that a line break has already been issued via send_line_break(). writer.send_flowing_data(data) Output character data which may be word-wrapped and re-flowed as needed. Within any sequence of calls to this method, the writer may assume that spans of multiple whitespace characters have been collapsed to single space characters. writer.send_literal_data(data) Output character data which has already been formatted for display. Generally, this should be interpreted to mean that line breaks indicated by newline characters should be preserved and no new line breaks should be introduced. The data may contain embedded newline and tab characters, unlike data provided to the send_formatted_data() interface. writer.send_label_data(data) Set data to the left of the current left margin, if possible. The value of data is not restricted; treatment of nonstring values is entirely application- and writer-dependent. This method will only be called at the beginning of a line.
31.1.4 Writer Implementations Three implementations of the writer object interface are provided as examples by this module. Most applications will need to derive new writer classes from the NullWriter class. class formatter.NullWriter A writer which only provides the interface definition; no actions are taken on any methods. This should be the base class for all writers which do not need to inherit any implementation methods. class formatter.AbstractWriter A writer which can be used in debugging formatters, but not much else. Each method simply announces itself by printing its name and arguments on standard output. class formatter.DumbWriter(file=None, maxcol=72) Simple writer class which writes output on the file object passed in as file or, if file is omitted, on standard output. The output is simply word-wrapped to the number of columns specified by maxcol. This class is suitable for reflowing a sequence of paragraphs.
1230
Chapter 31. Miscellaneous Services
CHAPTER
THIRTYTWO
MS WINDOWS SPECIFIC SERVICES This chapter describes modules that are only available on MS Windows platforms.
32.1 msilib — Read and write Microsoft Installer files Platforms: Windows The msilib supports the creation of Microsoft Installer (.msi) files. Because these files often contain an embedded “cabinet” file (.cab), it also exposes an API to create CAB files. Support for reading .cab files is currently not implemented; read support for the .msi database is possible. This package aims to provide complete access to all tables in an .msi file, therefore, it is a fairly low-level API. Two primary applications of this package are the distutils command bdist_msi, and the creation of Python installer package itself (although that currently uses a different version of msilib). The package contents can be roughly split into four parts: low-level CAB routines, low-level MSI routines, higher-level MSI routines, and standard table structures. msilib.FCICreate(cabname, files) Create a new CAB file named cabname. files must be a list of tuples, each containing the name of the file on disk, and the name of the file inside the CAB file. The files are added to the CAB file in the order they appear in the list. All files are added into a single CAB file, using the MSZIP compression algorithm. Callbacks to Python for the various steps of MSI creation are currently not exposed. msilib.UuidCreate() Return the string representation of a new unique identifier. UuidCreate() and UuidToString().
This wraps the Windows API functions
msilib.OpenDatabase(path, persist) Return a new database object by calling MsiOpenDatabase. path is the file name of the MSI file; persist can be one of the constants MSIDBOPEN_CREATEDIRECT, MSIDBOPEN_CREATE, MSIDBOPEN_DIRECT, MSIDBOPEN_READONLY, or MSIDBOPEN_TRANSACT, and may include the flag MSIDBOPEN_PATCHFILE. See the Microsoft documentation for the meaning of these flags; depending on the flags, an existing database is opened, or a new one created. msilib.CreateRecord(count) Return a new record object by calling MSICreateRecord(). count is the number of fields of the record. msilib.init_database(name, schema, ProductName, ProductCode, ProductVersion, Manufacturer) Create and return a new database name, initialize it with schema, and set the properties ProductName, ProductCode, ProductVersion, and Manufacturer.
1231
The Python Library Reference, Release 3.2.3
schema must be a module object containing tables and _Validation_records attributes; typically, msilib.schema should be used. The database will contain just the schema and the validation records when this function returns. msilib.add_data(database, table, records) Add all records to the table named table in database. The table argument must be one of the predefined tables in the MSI schema, e.g. ’Feature’, ’File’, ’Component’, ’Dialog’, ’Control’, etc. records should be a list of tuples, each one containing all fields of a record according to the schema of the table. For optional fields, None can be passed. Field values can be int or long numbers, strings, or instances of the Binary class. class msilib.Binary(filename) Represents entries in the Binary table; inserting such an object using add_data() reads the file named filename into the table. msilib.add_tables(database, module) Add all table content from module to database. module must contain an attribute tables listing all tables for which content should be added, and one attribute per table that has the actual content. This is typically used to install the sequence tables. msilib.add_stream(database, name, path) Add the file path into the _Stream table of database, with the stream name name. msilib.gen_uuid() Return a new UUID, in the format that MSI typically requires (i.e. in curly braces, and with all hexdigits in upper-case). See Also: FCICreateFile UuidCreate UuidToString
32.1.1 Database Objects Database.OpenView(sql) Return a view object, by calling MSIDatabaseOpenView(). sql is the SQL statement to execute. Database.Commit() Commit the changes pending in the current transaction, by calling MSIDatabaseCommit(). Database.GetSummaryInformation(count) Return a new summary information object, by calling MsiGetSummaryInformation(). count is the maximum number of updated values. See Also: MSIDatabaseOpenView MSIDatabaseCommit MSIGetSummaryInformation
32.1.2 View Objects View.Execute(params) Execute the SQL query of the view, through MSIViewExecute(). If params is not None, it is a record describing actual values of the parameter tokens in the query.
1232
Chapter 32. MS Windows Specific Services
The Python Library Reference, Release 3.2.3
View.GetColumnInfo(kind) Return a record describing the columns of the view, through calling MsiViewGetColumnInfo(). kind can be either MSICOLINFO_NAMES or MSICOLINFO_TYPES. View.Fetch() Return a result record of the query, through calling MsiViewFetch(). View.Modify(kind, data) Modify the view, by calling MsiViewModify(). kind can be one of MSIMODIFY_SEEK, MSIMODIFY_REFRESH, MSIMODIFY_INSERT, MSIMODIFY_UPDATE, MSIMODIFY_ASSIGN, MSIMODIFY_REPLACE, MSIMODIFY_MERGE, MSIMODIFY_DELETE, MSIMODIFY_INSERT_TEMPORARY, MSIMODIFY_VALIDATE, MSIMODIFY_VALIDATE_NEW, MSIMODIFY_VALIDATE_FIELD, or MSIMODIFY_VALIDATE_DELETE. data must be a record describing the new data. View.Close() Close the view, through MsiViewClose(). See Also: MsiViewExecute MSIViewGetColumnInfo MsiViewFetch MsiViewModify MsiViewClose
32.1.3 Summary Information Objects SummaryInformation.GetProperty(field) Return a property of the summary, through MsiSummaryInfoGetProperty(). field is the name of the property, and can be one of the constants PID_CODEPAGE, PID_TITLE, PID_SUBJECT, PID_AUTHOR, PID_KEYWORDS, PID_COMMENTS, PID_TEMPLATE, PID_LASTAUTHOR, PID_REVNUMBER, PID_LASTPRINTED, PID_CREATE_DTM, PID_LASTSAVE_DTM, PID_PAGECOUNT, PID_WORDCOUNT, PID_CHARCOUNT, PID_APPNAME, or PID_SECURITY. SummaryInformation.GetPropertyCount() Return the number of summary properties, through MsiSummaryInfoGetPropertyCount(). SummaryInformation.SetProperty(field, value) Set a property through MsiSummaryInfoSetProperty(). field can have the same values as in GetProperty(), value is the new value of the property. Possible value types are integer and string. SummaryInformation.Persist() Write the modified properties to the summary information stream, using MsiSummaryInfoPersist(). See Also: MsiSummaryInfoGetProperty MsiSummaryInfoGetPropertyCount MsiSummaryInfoSetProperty MsiSummaryInfoPersist
32.1.4 Record Objects Record.GetFieldCount() Return the number of fields of the record, through MsiRecordGetFieldCount(). Record.GetInteger(field) Return the value of field as an integer where possible. field must be an integer. Record.GetString(field) Return the value of field as a string where possible. field must be an integer.
32.1. msilib — Read and write Microsoft Installer files
1233
The Python Library Reference, Release 3.2.3
Record.SetString(field, value) Set field to value through MsiRecordSetString(). field must be an integer; value a string. Record.SetStream(field, value) Set field to the contents of the file named value, through MsiRecordSetStream(). field must be an integer; value a string. Record.SetInteger(field, value) Set field to value through MsiRecordSetInteger(). Both field and value must be an integer. Record.ClearData() Set all fields of the record to 0, through MsiRecordClearData(). See Also: MsiRecordGetFieldCount MsiRecordSetString MsiRecordSetStream MsiRecordSetInteger MsiRecordClear
32.1.5 Errors All wrappers around MSI functions raise MsiError; the string inside the exception will contain more detail.
32.1.6 CAB Objects class msilib.CAB(name) The class CAB represents a CAB file. During MSI construction, files will be added simultaneously to the Files table, and to a CAB file. Then, when all files have been added, the CAB file can be written, then added to the MSI file. name is the name of the CAB file in the MSI file. append(full, file, logical) Add the file with the pathname full to the CAB file, under the name logical. If there is already a file named logical, a new file name is created. Return the index of the file in the CAB file, and the new name of the file inside the CAB file. commit(database) Generate a CAB file, add it as a stream to the MSI file, put it into the Media table, and remove the generated file from the disk.
32.1.7 Directory Objects class msilib.Directory(database, cab, basedir, physical, logical, default[, componentflags ]) Create a new directory in the Directory table. There is a current component at each point in time for the directory, which is either explicitly created through start_component(), or implicitly when files are added for the first time. Files are added into the current component, and into the cab file. To create a directory, a base directory object needs to be specified (can be None), the path to the physical directory, and a logical directory name. default specifies the DefaultDir slot in the directory table. componentflags specifies the default flags that new components get. start_component(component=None, feature=None, flags=None, keyfile=None, uuid=None) Add an entry to the Component table, and make this component the current component for this directory. If no component name is given, the directory name is used. If no feature is given, the current feature is used. If no flags are given, the directory’s default flags are used. If no keyfile is given, the KeyPath is left null in the Component table.
1234
Chapter 32. MS Windows Specific Services
The Python Library Reference, Release 3.2.3
add_file(file, src=None, version=None, language=None) Add a file to the current component of the directory, starting a new one if there is no current component. By default, the file name in the source and the file table will be identical. If the src file is specified, it is interpreted relative to the current directory. Optionally, a version and a language can be specified for the entry in the File table. glob(pattern, exclude=None) Add a list of files to the current component as specified in the glob pattern. Individual files can be excluded in the exclude list. remove_pyc() Remove .pyc/.pyo files on uninstall. See Also: Directory Table File Table Component Table FeatureComponents Table
32.1.8 Features class msilib.Feature(db, id, title, desc, display, level=1, parent=None, directory=None, attributes=0) Add a new record to the Feature table, using the values id, parent.id, title, desc, display, level, directory, and attributes. The resulting feature object can be passed to the start_component() method of Directory. set_current() Make this feature the current feature of msilib. New components are automatically added to the default feature, unless a feature is explicitly specified. See Also: Feature Table
32.1.9 GUI classes msilib provides several classes that wrap the GUI tables in an MSI database. However, no standard user interface is provided; use bdist_msi to create MSI files with a user-interface for installing Python packages. class msilib.Control(dlg, name) Base class of the dialog controls. dlg is the dialog object the control belongs to, and name is the control’s name. event(event, argument, condition=1, ordering=None) Make an entry into the ControlEvent table for this control. mapping(event, attribute) Make an entry into the EventMapping table for this control. condition(action, condition) Make an entry into the ControlCondition table for this control. class msilib.RadioButtonGroup(dlg, name, property) Create a radio button control named name. property is the installer property that gets set when a radio button is selected. add(name, x, y, width, height, text, value=None) Add a radio button named name to the group, at the coordinates x, y, width, height, and with the label text. If value is None, it defaults to name. class msilib.Dialog(db, name, x, y, w, h, attr, title, first, default, cancel) Return a new Dialog object. An entry in the Dialog table is made, with the specified coordinates, dialog attributes, title, name of the first, default, and cancel controls.
32.1. msilib — Read and write Microsoft Installer files
1235
The Python Library Reference, Release 3.2.3
control(name, type, x, y, width, height, attributes, property, text, control_next, help) Return a new Control object. An entry in the Control table is made with the specified parameters. This is a generic method; for specific types, specialized methods are provided. text(name, x, y, width, height, attributes, text) Add and return a Text control. bitmap(name, x, y, width, height, text) Add and return a Bitmap control. line(name, x, y, width, height) Add and return a Line control. pushbutton(name, x, y, width, height, attributes, text, next_control) Add and return a PushButton control. radiogroup(name, x, y, width, height, attributes, property, text, next_control) Add and return a RadioButtonGroup control. checkbox(name, x, y, width, height, attributes, property, text, next_control) Add and return a CheckBox control. See Also: Dialog Table Control Table Control Types ControlCondition Table ControlEvent Table EventMapping Table RadioButton Table
32.1.10 Precomputed tables msilib provides a few subpackages that contain only schema and table definitions. Currently, these definitions are based on MSI version 2.0. msilib.schema This is the standard MSI schema for MSI 2.0, with the tables variable providing a list of table definitions, and _Validation_records providing the data for MSI validation. msilib.sequence This module contains table contents for the standard sequence tables: AdminExecuteSequence, AdminUISequence, AdvtExecuteSequence, InstallExecuteSequence, and InstallUISequence. msilib.text This module contains definitions for the UIText and ActionText tables, for the standard installer actions.
32.2 msvcrt – Useful routines from the MS VC++ runtime Platforms: Windows These functions provide access to some useful capabilities on Windows platforms. Some higher-level modules use these functions to build the Windows implementations of their services. For example, the getpass module uses this in the implementation of the getpass() function. Further documentation on these functions can be found in the Platform API documentation. The module implements both the normal and wide char variants of the console I/O api. The normal API deals only with ASCII characters and is of limited use for internationalized applications. The wide char API should be used where ever possible
1236
Chapter 32. MS Windows Specific Services
The Python Library Reference, Release 3.2.3
32.2.1 File Operations msvcrt.locking(fd, mode, nbytes) Lock part of a file based on file descriptor fd from the C runtime. Raises IOError on failure. The locked region of the file extends from the current file position for nbytes bytes, and may continue beyond the end of the file. mode must be one of the LK_* constants listed below. Multiple regions in a file may be locked at the same time, but may not overlap. Adjacent regions are not merged; they must be unlocked individually. msvcrt.LK_LOCK msvcrt.LK_RLCK Locks the specified bytes. If the bytes cannot be locked, the program immediately tries again after 1 second. If, after 10 attempts, the bytes cannot be locked, IOError is raised. msvcrt.LK_NBLCK msvcrt.LK_NBRLCK Locks the specified bytes. If the bytes cannot be locked, IOError is raised. msvcrt.LK_UNLCK Unlocks the specified bytes, which must have been previously locked. msvcrt.setmode(fd, flags) Set the line-end translation mode for the file descriptor fd. To set it to text mode, flags should be os.O_TEXT; for binary, it should be os.O_BINARY. msvcrt.open_osfhandle(handle, flags) Create a C runtime file descriptor from the file handle handle. The flags parameter should be a bitwise OR of os.O_APPEND, os.O_RDONLY, and os.O_TEXT. The returned file descriptor may be used as a parameter to os.fdopen() to create a file object. msvcrt.get_osfhandle(fd) Return the file handle for the file descriptor fd. Raises IOError if fd is not recognized.
32.2.2 Console I/O msvcrt.kbhit() Return true if a keypress is waiting to be read. msvcrt.getch() Read a keypress and return the resulting character as a byte string. Nothing is echoed to the console. This call will block if a keypress is not already available, but will not wait for Enter to be pressed. If the pressed key was a special function key, this will return ’\000’ or ’\xe0’; the next call will return the keycode. The Control-C keypress cannot be read with this function. msvcrt.getwch() Wide char variant of getch(), returning a Unicode value. msvcrt.getche() Similar to getch(), but the keypress will be echoed if it represents a printable character. msvcrt.getwche() Wide char variant of getche(), returning a Unicode value. msvcrt.putch(char) Print the byte string char to the console without buffering. msvcrt.putwch(unicode_char) Wide char variant of putch(), accepting a Unicode value.
32.2. msvcrt – Useful routines from the MS VC++ runtime
1237
The Python Library Reference, Release 3.2.3
msvcrt.ungetch(char) Cause the byte string char to be “pushed back” into the console buffer; it will be the next character read by getch() or getche(). msvcrt.ungetwch(unicode_char) Wide char variant of ungetch(), accepting a Unicode value.
32.2.3 Other Functions msvcrt.heapmin() Force the malloc() heap to clean itself up and return unused blocks to the operating system. On failure, this raises IOError.
32.3 winreg – Windows registry access Platforms: Windows These functions expose the Windows registry API to Python. Instead of using an integer as the registry handle, a handle object is used to ensure that the handles are closed correctly, even if the programmer neglects to explicitly close them. This module offers the following functions: winreg.CloseKey(hkey) Closes a previously opened registry key. The hkey argument specifies a previously opened key. Note: If hkey is not closed using this method (or via hkey.Close()), it is closed when the hkey object is destroyed by Python. winreg.ConnectRegistry(computer_name, key) Establishes a connection to a predefined registry handle on another computer, and returns a handle object. computer_name is the name of the remote computer, of the form r"\\computername". If None, the local computer is used. key is the predefined handle to connect to. The return value is the handle of the opened key. If the function fails, a WindowsError exception is raised. winreg.CreateKey(key, sub_key) Creates or opens the specified key, returning a handle object. key is an already open key, or one of the predefined HKEY_* constants. sub_key is a string that names the key this method opens or creates. If key is one of the predefined keys, sub_key may be None. In that case, the handle returned is the same key handle passed in to the function. If the key already exists, this function opens the existing key. The return value is the handle of the opened key. If the function fails, a WindowsError exception is raised. winreg.CreateKeyEx(key, sub_key, reserved=0, access=KEY_ALL_ACCESS) Creates or opens the specified key, returning a handle object. key is an already open key, or one of the predefined HKEY_* constants. sub_key is a string that names the key this method opens or creates. 1238
Chapter 32. MS Windows Specific Services
The Python Library Reference, Release 3.2.3
res is a reserved integer, and must be zero. The default is zero. sam is an integer that specifies an access mask that describes the desired security access for the key. Default is KEY_ALL_ACCESS. See Access Rights for other allowed values. If key is one of the predefined keys, sub_key may be None. In that case, the handle returned is the same key handle passed in to the function. If the key already exists, this function opens the existing key. The return value is the handle of the opened key. If the function fails, a WindowsError exception is raised. New in version 3.2. winreg.DeleteKey(key, sub_key) Deletes the specified key. key is an already open key, or one of the predefined HKEY_* constants. sub_key is a string that must be a subkey of the key identified by the key parameter. This value must not be None, and the key may not have subkeys. This method can not delete keys with subkeys. If the method succeeds, the entire key, including all of its values, is removed. WindowsError exception is raised.
If the method fails, a
winreg.DeleteKeyEx(key, sub_key, access=KEY_ALL_ACCESS, reserved=0) Deletes the specified key. Note: The DeleteKeyEx() function is implemented with the RegDeleteKeyEx Windows API function, which is specific to 64-bit versions of Windows. See the RegDeleteKeyEx documentation. key is an already open key, or one of the predefined HKEY_* constants. sub_key is a string that must be a subkey of the key identified by the key parameter. This value must not be None, and the key may not have subkeys. res is a reserved integer, and must be zero. The default is zero. sam is an integer that specifies an access mask that describes the desired security access for the key. Default is KEY_ALL_ACCESS. See Access Rights for other allowed values. This method can not delete keys with subkeys. If the method succeeds, the entire key, including all of its values, is removed. WindowsError exception is raised.
If the method fails, a
On unsupported Windows versions, NotImplementedError is raised. New in version 3.2. winreg.DeleteValue(key, value) Removes a named value from a registry key. key is an already open key, or one of the predefined HKEY_* constants. value is a string that identifies the value to remove. winreg.EnumKey(key, index) Enumerates subkeys of an open registry key, returning a string. key is an already open key, or one of the predefined HKEY_* constants. index is an integer that identifies the index of the key to retrieve. The function retrieves the name of one subkey each time it is called. It is typically called repeatedly until a WindowsError exception is raised, indicating, no more values are available. 32.3. winreg – Windows registry access
1239
The Python Library Reference, Release 3.2.3
winreg.EnumValue(key, index) Enumerates values of an open registry key, returning a tuple. key is an already open key, or one of the predefined HKEY_* constants. index is an integer that identifies the index of the value to retrieve. The function retrieves the name of one subkey each time it is called. It is typically called repeatedly, until a WindowsError exception is raised, indicating no more values. The result is a tuple of 3 items: Index 0 1 2
Meaning A string that identifies the value name An object that holds the value data, and whose type depends on the underlying registry type An integer that identifies the type of the value data (see table in docs for SetValueEx())
winreg.ExpandEnvironmentStrings(str) Expands environment variable placeholders %NAME% in strings like REG_EXPAND_SZ: >>> ExpandEnvironmentStrings(’%windir%’) ’C:\\Windows’ winreg.FlushKey(key) Writes all the attributes of a key to the registry. key is an already open key, or one of the predefined HKEY_* constants. It is not necessary to call FlushKey() to change a key. Registry changes are flushed to disk by the registry using its lazy flusher. Registry changes are also flushed to disk at system shutdown. Unlike CloseKey(), the FlushKey() method returns only when all the data has been written to the registry. An application should only call FlushKey() if it requires absolute certainty that registry changes are on disk. Note: If you don’t know whether a FlushKey() call is required, it probably isn’t. winreg.LoadKey(key, sub_key, file_name) Creates a subkey under the specified key and stores registration information from a specified file into that subkey. key is a handle returned by ConnectRegistry() or one of the constants HKEY_USERS or HKEY_LOCAL_MACHINE. sub_key is a string that identifies the subkey to load. file_name is the name of the file to load registry data from. This file must have been created with the SaveKey() function. Under the file allocation table (FAT) file system, the filename may not have an extension. A call to LoadKey() fails if the calling process does not have the SE_RESTORE_PRIVILEGE privilege. Note that privileges are different from permissions – see the RegLoadKey documentation for more details. If key is a handle returned by ConnectRegistry(), then the path specified in file_name is relative to the remote computer. winreg.OpenKey(key, sub_key, reserved=0, access=KEY_READ) Opens the specified key, returning a handle object. key is an already open key, or one of the predefined HKEY_* constants. sub_key is a string that identifies the sub_key to open. reserved is a reserved integer, and must be zero. The default is zero.
1240
Chapter 32. MS Windows Specific Services
The Python Library Reference, Release 3.2.3
access is an integer that specifies an access mask that describes the desired security access for the key. Default is KEY_READ. See Access Rights for other allowed values. The result is a new handle to the specified key. If the function fails, WindowsError is raised. Changed in version 3.2: Allow the use of named arguments. winreg.OpenKeyEx() The functionality of OpenKeyEx() is provided via OpenKey(), by the use of default arguments. winreg.QueryInfoKey(key) Returns information about a key, as a tuple. key is an already open key, or one of the predefined HKEY_* constants. The result is a tuple of 3 items: Index 0 1 2
Meaning An integer giving the number of sub keys this key has. An integer giving the number of values this key has. An integer giving when the key was last modified (if available) as 100’s of nanoseconds since Jan 1, 1600.
winreg.QueryValue(key, sub_key) Retrieves the unnamed value for a key, as a string. key is an already open key, or one of the predefined HKEY_* constants. sub_key is a string that holds the name of the subkey with which the value is associated. If this parameter is None or empty, the function retrieves the value set by the SetValue() method for the key identified by key. Values in the registry have name, type, and data components. This method retrieves the data for a key’s first value that has a NULL name. But the underlying API call doesn’t return the type, so always use QueryValueEx() if possible. winreg.QueryValueEx(key, value_name) Retrieves the type and data for a specified value name associated with an open registry key. key is an already open key, or one of the predefined HKEY_* constants. value_name is a string indicating the value to query. The result is a tuple of 2 items: Index 0 1
Meaning The value of the registry item. An integer giving the registry type for this value (see table in docs for SetValueEx())
winreg.SaveKey(key, file_name) Saves the specified key, and all its subkeys to the specified file. key is an already open key, or one of the predefined HKEY_* constants. file_name is the name of the file to save registry data to. This file cannot already exist. If this filename includes an extension, it cannot be used on file allocation table (FAT) file systems by the LoadKey() method. If key represents a key on a remote computer, the path described by file_name is relative to the remote computer. The caller of this method must possess the SeBackupPrivilege security privilege. Note that privileges are different than permissions – see the Conflicts Between User Rights and Permissions documentation for more details. This function passes NULL for security_attributes to the API.
32.3. winreg – Windows registry access
1241
The Python Library Reference, Release 3.2.3
winreg.SetValue(key, sub_key, type, value) Associates a value with a specified key. key is an already open key, or one of the predefined HKEY_* constants. sub_key is a string that names the subkey with which the value is associated. type is an integer that specifies the type of the data. Currently this must be REG_SZ, meaning only strings are supported. Use the SetValueEx() function for support for other data types. value is a string that specifies the new value. If the key specified by the sub_key parameter does not exist, the SetValue function creates it. Value lengths are limited by available memory. Long values (more than 2048 bytes) should be stored as files with the filenames stored in the configuration registry. This helps the registry perform efficiently. The key identified by the key parameter must have been opened with KEY_SET_VALUE access. winreg.SetValueEx(key, value_name, reserved, type, value) Stores data in the value field of an open registry key. key is an already open key, or one of the predefined HKEY_* constants. value_name is a string that names the subkey with which the value is associated. type is an integer that specifies the type of the data. See Value Types for the available types. reserved can be anything – zero is always passed to the API. value is a string that specifies the new value. This method can also set additional value and type information for the specified key. The key identified by the key parameter must have been opened with KEY_SET_VALUE access. To open the key, use the CreateKey() or OpenKey() methods. Value lengths are limited by available memory. Long values (more than 2048 bytes) should be stored as files with the filenames stored in the configuration registry. This helps the registry perform efficiently. winreg.DisableReflectionKey(key) Disables registry reflection for 32-bit processes running on a 64-bit operating system. key is an already open key, or one of the predefined HKEY_* constants. Will generally raise NotImplemented if executed on a 32-bit operating system. If the key is not on the reflection list, the function succeeds but has no effect. Disabling reflection for a key does not affect reflection of any subkeys. winreg.EnableReflectionKey(key) Restores registry reflection for the specified disabled key. key is an already open key, or one of the predefined HKEY_* constants. Will generally raise NotImplemented if executed on a 32-bit operating system. Restoring reflection for a key does not affect reflection of any subkeys. winreg.QueryReflectionKey(key) Determines the reflection state for the specified key. key is an already open key, or one of the predefined HKEY_* constants. Returns True if reflection is disabled. Will generally raise NotImplemented if executed on a 32-bit operating system.
1242
Chapter 32. MS Windows Specific Services
The Python Library Reference, Release 3.2.3
32.3.1 Constants The following constants are defined for use in many _winreg functions. HKEY_* Constants winreg.HKEY_CLASSES_ROOT Registry entries subordinate to this key define types (or classes) of documents and the properties associated with those types. Shell and COM applications use the information stored under this key. winreg.HKEY_CURRENT_USER Registry entries subordinate to this key define the preferences of the current user. These preferences include the settings of environment variables, data about program groups, colors, printers, network connections, and application preferences. winreg.HKEY_LOCAL_MACHINE Registry entries subordinate to this key define the physical state of the computer, including data about the bus type, system memory, and installed hardware and software. winreg.HKEY_USERS Registry entries subordinate to this key define the default user configuration for new users on the local computer and the user configuration for the current user. winreg.HKEY_PERFORMANCE_DATA Registry entries subordinate to this key allow you to access performance data. The data is not actually stored in the registry; the registry functions cause the system to collect the data from its source. winreg.HKEY_CURRENT_CONFIG Contains information about the current hardware profile of the local computer system. winreg.HKEY_DYN_DATA This key is not used in versions of Windows after 98. Access Rights For more information, see Registry Key Security and Access. winreg.KEY_ALL_ACCESS Combines the STANDARD_RIGHTS_REQUIRED, KEY_QUERY_VALUE, KEY_SET_VALUE, KEY_CREATE_SUB_KEY, KEY_ENUMERATE_SUB_KEYS, KEY_NOTIFY, and KEY_CREATE_LINK access rights. winreg.KEY_WRITE Combines the STANDARD_RIGHTS_WRITE, KEY_SET_VALUE, and KEY_CREATE_SUB_KEY access rights. winreg.KEY_READ Combines the STANDARD_RIGHTS_READ, KEY_QUERY_VALUE, KEY_ENUMERATE_SUB_KEYS, and KEY_NOTIFY values. winreg.KEY_EXECUTE Equivalent to KEY_READ. winreg.KEY_QUERY_VALUE Required to query the values of a registry key. winreg.KEY_SET_VALUE Required to create, delete, or set a registry value.
32.3. winreg – Windows registry access
1243
The Python Library Reference, Release 3.2.3
winreg.KEY_CREATE_SUB_KEY Required to create a subkey of a registry key. winreg.KEY_ENUMERATE_SUB_KEYS Required to enumerate the subkeys of a registry key. winreg.KEY_NOTIFY Required to request change notifications for a registry key or for subkeys of a registry key. winreg.KEY_CREATE_LINK Reserved for system use. 64-bit Specific
For more information, see Accessing an Alternate Registry View. winreg.KEY_WOW64_64KEY Indicates that an application on 64-bit Windows should operate on the 64-bit registry view. winreg.KEY_WOW64_32KEY Indicates that an application on 64-bit Windows should operate on the 32-bit registry view. Value Types For more information, see Registry Value Types. winreg.REG_BINARY Binary data in any form. winreg.REG_DWORD 32-bit number. winreg.REG_DWORD_LITTLE_ENDIAN A 32-bit number in little-endian format. winreg.REG_DWORD_BIG_ENDIAN A 32-bit number in big-endian format. winreg.REG_EXPAND_SZ Null-terminated string containing references to environment variables (%PATH%). winreg.REG_LINK A Unicode symbolic link. winreg.REG_MULTI_SZ A sequence of null-terminated strings, terminated by two null characters. (Python handles this termination automatically.) winreg.REG_NONE No defined value type. winreg.REG_RESOURCE_LIST A device-driver resource list. winreg.REG_FULL_RESOURCE_DESCRIPTOR A hardware setting. winreg.REG_RESOURCE_REQUIREMENTS_LIST A hardware resource list.
1244
Chapter 32. MS Windows Specific Services
The Python Library Reference, Release 3.2.3
winreg.REG_SZ A null-terminated string.
32.3.2 Registry Handle Objects This object wraps a Windows HKEY object, automatically closing it when the object is destroyed. To guarantee cleanup, you can call either the Close() method on the object, or the CloseKey() function. All registry functions in this module return one of these objects. All registry functions in this module which accept a handle object also accept an integer, however, use of the handle object is encouraged. Handle objects provide semantics for __bool__() – thus if handle: print("Yes") will print Yes if the handle is currently valid (has not been closed or detached). The object also support comparison semantics, so handle objects will compare true if they both reference the same underlying Windows handle value. Handle objects can be converted to an integer (e.g., using the built-in int() function), in which case the underlying Windows handle value is returned. You can also use the Detach() method to return the integer handle, and also disconnect the Windows handle from the handle object. PyHKEY.Close() Closes the underlying Windows handle. If the handle is already closed, no error is raised. PyHKEY.Detach() Detaches the Windows handle from the handle object. The result is an integer that holds the value of the handle before it is detached. If the handle is already detached or closed, this will return zero. After calling this function, the handle is effectively invalidated, but the handle is not closed. You would call this function when you need the underlying Win32 handle to exist beyond the lifetime of the handle object. PyHKEY.__enter__() PyHKEY.__exit__(*exc_info) The HKEY object implements __enter__() and __exit__() and thus supports the context protocol for the with statement: with OpenKey(HKEY_LOCAL_MACHINE, "foo") as key: ... # work with key will automatically close key when control leaves the with block.
32.4 winsound — Sound-playing interface for Windows Platforms: Windows The winsound module provides access to the basic sound-playing machinery provided by Windows platforms. It includes functions and several constants.
32.4. winsound — Sound-playing interface for Windows
1245
The Python Library Reference, Release 3.2.3
winsound.Beep(frequency, duration) Beep the PC’s speaker. The frequency parameter specifies frequency, in hertz, of the sound, and must be in the range 37 through 32,767. The duration parameter specifies the number of milliseconds the sound should last. If the system is not able to beep the speaker, RuntimeError is raised. winsound.PlaySound(sound, flags) Call the underlying PlaySound() function from the Platform API. The sound parameter may be a filename, audio data as a string, or None. Its interpretation depends on the value of flags, which can be a bitwise ORed combination of the constants described below. If the sound parameter is None, any currently playing waveform sound is stopped. If the system indicates an error, RuntimeError is raised. winsound.MessageBeep(type=MB_OK) Call the underlying MessageBeep() function from the Platform API. This plays a sound as specified in the registry. The type argument specifies which sound to play; possible values are -1, MB_ICONASTERISK, MB_ICONEXCLAMATION, MB_ICONHAND, MB_ICONQUESTION, and MB_OK, all described below. The value -1 produces a “simple beep”; this is the final fallback if a sound cannot be played otherwise. winsound.SND_FILENAME The sound parameter is the name of a WAV file. Do not use with SND_ALIAS. winsound.SND_ALIAS The sound parameter is a sound association name from the registry. If the registry contains no such name, play the system default sound unless SND_NODEFAULT is also specified. If no default sound is registered, raise RuntimeError. Do not use with SND_FILENAME. All Win32 systems support at least the following; most systems support many more: PlaySound() name ’SystemAsterisk’ ’SystemExclamation’ ’SystemExit’ ’SystemHand’ ’SystemQuestion’
Corresponding Control Panel Sound name Asterisk Exclamation Exit Windows Critical Stop Question
For example: import winsound # Play Windows exit sound. winsound.PlaySound("SystemExit", winsound.SND_ALIAS) # Probably play Windows default sound, if any is registered (because # "*" probably isn’t the registered name of any sound). winsound.PlaySound("*", winsound.SND_ALIAS) winsound.SND_LOOP Play the sound repeatedly. The SND_ASYNC flag must also be used to avoid blocking. Cannot be used with SND_MEMORY. winsound.SND_MEMORY The sound parameter to PlaySound() is a memory image of a WAV file, as a string. Note: This module does not support playing from a memory image asynchronously, so a combination of this flag and SND_ASYNC will raise RuntimeError. winsound.SND_PURGE Stop playing all instances of the specified sound.
1246
Chapter 32. MS Windows Specific Services
The Python Library Reference, Release 3.2.3
Note: This flag is not supported on modern Windows platforms. winsound.SND_ASYNC Return immediately, allowing sounds to play asynchronously. winsound.SND_NODEFAULT If the specified sound cannot be found, do not play the system default sound. winsound.SND_NOSTOP Do not interrupt sounds currently playing. winsound.SND_NOWAIT Return immediately if the sound driver is busy. winsound.MB_ICONASTERISK Play the SystemDefault sound. winsound.MB_ICONEXCLAMATION Play the SystemExclamation sound. winsound.MB_ICONHAND Play the SystemHand sound. winsound.MB_ICONQUESTION Play the SystemQuestion sound. winsound.MB_OK Play the SystemDefault sound.
32.4. winsound — Sound-playing interface for Windows
1247
The Python Library Reference, Release 3.2.3
1248
Chapter 32. MS Windows Specific Services
CHAPTER
THIRTYTHREE
UNIX SPECIFIC SERVICES The modules described in this chapter provide interfaces to features that are unique to the Unix operating system, or in some cases to some or many variants of it. Here’s an overview:
33.1 posix — The most common POSIX system calls Platforms: Unix This module provides access to operating system functionality that is standardized by the C Standard and the POSIX standard (a thinly disguised Unix interface). Do not import this module directly. Instead, import the module os, which provides a portable version of this interface. On Unix, the os module provides a superset of the posix interface. On non-Unix operating systems the posix module is not available, but a subset is always available through the os interface. Once os is imported, there is no performance penalty in using it instead of posix. In addition, os provides some additional functionality, such as automatically calling putenv() when an entry in os.environ is changed. Errors are reported as exceptions; the usual exceptions are given for type errors, while errors reported by the system calls raise OSError.
33.1.1 Large File Support Several operating systems (including AIX, HP-UX, Irix and Solaris) provide support for files that are larger than 2 GB from a C programming model where int and long are 32-bit values. This is typically accomplished by defining the relevant size and offset types as 64-bit values. Such files are sometimes referred to as large files. Large file support is enabled in Python when the size of an off_t is larger than a long and the long long type is available and is at least as large as an off_t. It may be necessary to configure and compile Python with certain compiler flags to enable this mode. For example, it is enabled by default with recent versions of Irix, but with Solaris 2.6 and 2.7 you need to do something like: CFLAGS="‘getconf LFS_CFLAGS‘" OPT="-g -O2 $CFLAGS" \ ./configure On large-file-capable Linux systems, this might work: CFLAGS=’-D_LARGEFILE64_SOURCE -D_FILE_OFFSET_BITS=64’ OPT="-g -O2 $CFLAGS" \ ./configure
1249
The Python Library Reference, Release 3.2.3
33.1.2 Notable Module Contents In addition to many functions described in the os module documentation, posix defines the following data item: posix.environ A dictionary representing the string environment at the time the interpreter was started. Keys and values are bytes on Unix and str on Windows. For example, environ[b’HOME’] (environ[’HOME’] on Windows) is the pathname of your home directory, equivalent to getenv("HOME") in C. Modifying this dictionary does not affect the string environment passed on by execv(), popen() or system(); if you need to change the environment, pass environ to execve() or add variable assignments and export statements to the command string for system() or popen(). Changed in version 3.2: On Unix, keys and values are bytes. Note: The os module provides an alternate implementation of environ which updates the environment on modification. Note also that updating os.environ will render this dictionary obsolete. Use of the os module version of this is recommended over direct access to the posix module.
33.2 pwd — The password database Platforms: Unix This module provides access to the Unix user account and password database. It is available on all Unix versions. Password database entries are reported as a tuple-like object, whose attributes correspond to the members of the passwd structure (Attribute field below, see ): Index 0 1 2 3 4 5 6
Meaning Login name Optional encrypted password Numerical user ID Numerical group ID User name or comment field User home directory User command interpreter
The uid and gid items are integers, all others are strings. KeyError is raised if the entry asked for cannot be found. Note: In traditional Unix the field pw_passwd usually contains a password encrypted with a DES derived algorithm (see module crypt). However most modern unices use a so-called shadow password system. On those unices the pw_passwd field only contains an asterisk (’*’) or the letter ’x’ where the encrypted password is stored in a file /etc/shadow which is not world readable. Whether the pw_passwd field contains anything useful is systemdependent. If available, the spwd module should be used where access to the encrypted password is required. It defines the following items: pwd.getpwuid(uid) Return the password database entry for the given numeric user ID. pwd.getpwnam(name) Return the password database entry for the given user name. pwd.getpwall() Return a list of all available password database entries, in arbitrary order.
1250
Chapter 33. Unix Specific Services
The Python Library Reference, Release 3.2.3
See Also: Module grp An interface to the group database, similar to this. Module spwd An interface to the shadow password database, similar to this.
33.3 spwd — The shadow password database Platforms: Unix This module provides access to the Unix shadow password database. It is available on various Unix versions. You must have enough privileges to access the shadow password database (this usually means you have to be root). Shadow password database entries are reported as a tuple-like object, whose attributes correspond to the members of the spwd structure (Attribute field below, see ): Index 0 1 2 3 4 5 6 7 8
Meaning Login name Encrypted password Date of last change Minimal number of days between changes Maximum number of days between changes Number of days before password expires to warn user about it Number of days after password expires until account is blocked Number of days since 1970-01-01 until account is disabled Reserved
The sp_nam and sp_pwd items are strings, all others are integers. KeyError is raised if the entry asked for cannot be found. The following functions are defined: spwd.getspnam(name) Return the shadow password database entry for the given user name. spwd.getspall() Return a list of all available shadow password database entries, in arbitrary order. See Also: Module grp An interface to the group database, similar to this. Module pwd An interface to the normal password database, similar to this.
33.4 grp — The group database Platforms: Unix This module provides access to the Unix group database. It is available on all Unix versions. Group database entries are reported as a tuple-like object, whose attributes correspond to the members of the group structure (Attribute field below, see ): Index 0 1 2 3
Attribute gr_name gr_passwd gr_gid gr_mem
Meaning the name of the group the (encrypted) group password; often empty the numerical group ID all the group member’s user names
33.3. spwd — The shadow password database
1251
The Python Library Reference, Release 3.2.3
The gid is an integer, name and password are strings, and the member list is a list of strings. (Note that most users are not explicitly listed as members of the group they are in according to the password database. Check both databases to get complete membership information. Also note that a gr_name that starts with a + or - is likely to be a YP/NIS reference and may not be accessible via getgrnam() or getgrgid().) It defines the following items: grp.getgrgid(gid) Return the group database entry for the given numeric group ID. KeyError is raised if the entry asked for cannot be found. grp.getgrnam(name) Return the group database entry for the given group name. KeyError is raised if the entry asked for cannot be found. grp.getgrall() Return a list of all available group entries, in arbitrary order. See Also: Module pwd An interface to the user database, similar to this. Module spwd An interface to the shadow password database, similar to this.
33.5 crypt — Function to check Unix passwords Platforms: Unix This module implements an interface to the crypt(3) routine, which is a one-way hash function based upon a modified DES algorithm; see the Unix man page for further details. Possible uses include allowing Python scripts to accept typed passwords from the user, or attempting to crack Unix passwords with a dictionary. Notice that the behavior of this module depends on the actual implementation of the crypt(3) routine in the running system. Therefore, any extensions available on the current implementation will also be available on this module. crypt.crypt(word, salt) word will usually be a user’s password as typed at a prompt or in a graphical interface. salt is usually a random two-character string which will be used to perturb the DES algorithm in one of 4096 ways. The characters in salt must be in the set [./a-zA-Z0-9]. Returns the hashed password as a string, which will be composed of characters from the same alphabet as the salt (the first two characters represent the salt itself). Since a few crypt(3) extensions allow different values, with different sizes in the salt, it is recommended to use the full crypted password as salt when checking for a password. A simple example illustrating typical use: import crypt, getpass, pwd def login(): username = input(’Python login:’) cryptedpasswd = pwd.getpwnam(username)[1] if cryptedpasswd: if cryptedpasswd == ’x’ or cryptedpasswd == ’*’: raise "Sorry, currently no support for shadow passwords" cleartext = getpass.getpass() return crypt.crypt(cleartext, cryptedpasswd) == cryptedpasswd else: return 1
1252
Chapter 33. Unix Specific Services
The Python Library Reference, Release 3.2.3
33.6 termios — POSIX style tty control Platforms: Unix This module provides an interface to the POSIX calls for tty I/O control. For a complete description of these calls, see the POSIX or Unix manual pages. It is only available for those Unix versions that support POSIX termios style tty I/O control (and then only if configured at installation time). All functions in this module take a file descriptor fd as their first argument. This can be an integer file descriptor, such as returned by sys.stdin.fileno(), or a file object, such as sys.stdin itself. This module also defines all the constants needed to work with the functions provided here; these have the same name as their counterparts in C. Please refer to your system documentation for more information on using these terminal control interfaces. The module defines the following functions: termios.tcgetattr(fd) Return a list containing the tty attributes for file descriptor fd, as follows: [iflag, oflag, cflag, lflag, ispeed, ospeed, cc] where cc is a list of the tty special characters (each a string of length 1, except the items with indices VMIN and VTIME, which are integers when these fields are defined). The interpretation of the flags and the speeds as well as the indexing in the cc array must be done using the symbolic constants defined in the termios module. termios.tcsetattr(fd, when, attributes) Set the tty attributes for file descriptor fd from the attributes, which is a list like the one returned by tcgetattr(). The when argument determines when the attributes are changed: TCSANOW to change immediately, TCSADRAIN to change after transmitting all queued output, or TCSAFLUSH to change after transmitting all queued output and discarding all queued input. termios.tcsendbreak(fd, duration) Send a break on file descriptor fd. A zero duration sends a break for 0.25 –0.5 seconds; a nonzero duration has a system dependent meaning. termios.tcdrain(fd) Wait until all output written to file descriptor fd has been transmitted. termios.tcflush(fd, queue) Discard queued data on file descriptor fd. The queue selector specifies which queue: TCIFLUSH for the input queue, TCOFLUSH for the output queue, or TCIOFLUSH for both queues. termios.tcflow(fd, action) Suspend or resume input or output on file descriptor fd. The action argument can be TCOOFF to suspend output, TCOON to restart output, TCIOFF to suspend input, or TCION to restart input. See Also: Module tty Convenience functions for common terminal control operations.
33.6.1 Example Here’s a function that prompts for a password with echoing turned off. Note the technique using a separate tcgetattr() call and a try ... finally statement to ensure that the old tty attributes are restored exactly no matter what happens: def getpass(prompt="Password: "): import termios, sys fd = sys.stdin.fileno() old = termios.tcgetattr(fd)
33.7 tty — Terminal control functions Platforms: Unix The tty module defines functions for putting the tty into cbreak and raw modes. Because it requires the termios module, it will work only on Unix. The tty module defines the following functions: tty.setraw(fd, when=termios.TCSAFLUSH) Change the mode of the file descriptor fd to raw. If when is omitted, it defaults to termios.TCSAFLUSH, and is passed to termios.tcsetattr(). tty.setcbreak(fd, when=termios.TCSAFLUSH) Change the mode of file descriptor fd to cbreak. If when is omitted, it defaults to termios.TCSAFLUSH, and is passed to termios.tcsetattr(). See Also: Module termios Low-level terminal control interface.
33.8 pty — Pseudo-terminal utilities Platforms: Linux The pty module defines operations for handling the pseudo-terminal concept: starting another process and being able to write to and read from its controlling terminal programmatically. Because pseudo-terminal handling is highly platform dependent, there is code to do it only for Linux. (The Linux code is supposed to work on other platforms, but hasn’t been tested yet.) The pty module defines the following functions: pty.fork() Fork. Connect the child’s controlling terminal to a pseudo-terminal. Return value is (pid, fd). Note that the child gets pid 0, and the fd is invalid. The parent’s return value is the pid of the child, and fd is a file descriptor connected to the child’s controlling terminal (and also to the child’s standard input and output). pty.openpty() Open a new pseudo-terminal pair, using os.openpty() if possible, or emulation code for generic Unix systems. Return a pair of file descriptors (master, slave), for the master and the slave end, respectively. pty.spawn(argv[, master_read[, stdin_read ]]) Spawn a process, and connect its controlling terminal with the current process’s standard io. This is often used to baffle programs which insist on reading from the controlling terminal. The functions master_read and stdin_read should be functions which read from a file descriptor. The defaults try to read 1024 bytes each time they are called. 1254
Chapter 33. Unix Specific Services
The Python Library Reference, Release 3.2.3
33.8.1 Example The following program acts like the Unix command script(1), using a pseudo-terminal to record all input and output of a terminal session in a “typescript”. import sys, os, time, getopt import pty mode = ’wb’ shell = ’sh’ filename = ’typescript’ if ’SHELL’ in os.environ: shell = os.environ[’SHELL’] try: opts, args = getopt.getopt(sys.argv[1:], ’ap’) except getopt.error as msg: print(’%s: %s’ % (sys.argv[0], msg)) sys.exit(2) for opt, arg in opts: # option -a: append to typescript file if opt == ’-a’: mode = ’ab’ # option -p: use a Python shell as the terminal command elif opt == ’-p’: shell = sys.executable if args: filename = args[0] script = open(filename, mode) def read(fd): data = os.read(fd, 1024) script.write(data) return data sys.stdout.write(’Script started, file is %s\n’ % filename) script.write((’Script started on %s\n’ % time.asctime()).encode()) pty.spawn(shell, read) script.write((’Script done on %s\n’ % time.asctime()).encode()) sys.stdout.write(’Script done, file is %s\n’ % filename)
33.9 fcntl — The fcntl() and ioctl() system calls Platforms: Unix This module performs file control and I/O control on file descriptors. It is an interface to the fcntl() and ioctl() Unix routines. All functions in this module take a file descriptor fd as their first argument. This can be an integer file descriptor, such as returned by sys.stdin.fileno(), or a io.IOBase object, such as sys.stdin itself, which provides a fileno() that returns a genuine file descriptor.
33.9. fcntl — The fcntl() and ioctl() system calls
1255
The Python Library Reference, Release 3.2.3
The module defines the following functions: fcntl.fcntl(fd, op[, arg ]) Perform the requested operation on file descriptor fd (file objects providing a fileno() method are accepted as well). The operation is defined by op and is operating system dependent. These codes are also found in the fcntl module. The argument arg is optional, and defaults to the integer value 0. When present, it can either be an integer value, or a string. With the argument missing or an integer value, the return value of this function is the integer return value of the C fcntl() call. When the argument is a string it represents a binary structure, e.g. created by struct.pack(). The binary data is copied to a buffer whose address is passed to the C fcntl() call. The return value after a successful call is the contents of the buffer, converted to a string object. The length of the returned string will be the same as the length of the arg argument. This is limited to 1024 bytes. If the information returned in the buffer by the operating system is larger than 1024 bytes, this is most likely to result in a segmentation violation or a more subtle data corruption. If the fcntl() fails, an IOError is raised. fcntl.ioctl(fd, op[, arg[, mutate_flag ]]) This function is identical to the fcntl() function, except that the argument handling is even more complicated. The op parameter is limited to values that can fit in 32-bits. The parameter arg can be one of an integer, absent (treated identically to the integer 0), an object supporting the read-only buffer interface (most likely a plain Python string) or an object supporting the read-write buffer interface. In all but the last case, behaviour is as for the fcntl() function. If a mutable buffer is passed, then the behaviour is determined by the value of the mutate_flag parameter. If it is false, the buffer’s mutability is ignored and behaviour is as for a read-only buffer, except that the 1024 byte limit mentioned above is avoided – so long as the buffer you pass is as least as long as what the operating system wants to put there, things should work. If mutate_flag is true (the default), then the buffer is (in effect) passed to the underlying ioctl() system call, the latter’s return code is passed back to the calling Python, and the buffer’s new contents reflect the action of the ioctl(). This is a slight simplification, because if the supplied buffer is less than 1024 bytes long it is first copied into a static buffer 1024 bytes long which is then passed to ioctl() and copied back into the supplied buffer. An example: >>> import array, fcntl, struct, termios, os >>> os.getpgrp() 13341 >>> struct.unpack(’h’, fcntl.ioctl(0, termios.TIOCGPGRP, " 13341 >>> buf = array.array(’h’, [0]) >>> fcntl.ioctl(0, termios.TIOCGPGRP, buf, 1) 0 >>> buf array(’h’, [13341])
"))[0]
fcntl.flock(fd, op) Perform the lock operation op on file descriptor fd (file objects providing a fileno() method are accepted as well). See the Unix manual flock(2) for details. (On some systems, this function is emulated using fcntl().) fcntl.lockf(fd, operation[, length[, start[, whence ]]]) This is essentially a wrapper around the fcntl() locking calls. fd is the file descriptor of the file to lock or
1256
Chapter 33. Unix Specific Services
The Python Library Reference, Release 3.2.3
unlock, and operation is one of the following values: •LOCK_UN – unlock •LOCK_SH – acquire a shared lock •LOCK_EX – acquire an exclusive lock When operation is LOCK_SH or LOCK_EX, it can also be bitwise ORed with LOCK_NB to avoid blocking on lock acquisition. If LOCK_NB is used and the lock cannot be acquired, an IOError will be raised and the exception will have an errno attribute set to EACCES or EAGAIN (depending on the operating system; for portability, check for both values). On at least some systems, LOCK_EX can only be used if the file descriptor refers to a file opened for writing. length is the number of bytes to lock, start is the byte offset at which the lock starts, relative to whence, and whence is as with fileobj.seek(), specifically: •0 – relative to the start of the file (SEEK_SET) •1 – relative to the current buffer position (SEEK_CUR) •2 – relative to the end of the file (SEEK_END) The default for start is 0, which means to start at the beginning of the file. The default for length is 0 which means to lock to the end of the file. The default for whence is also 0. Examples (all on a SVR4 compliant system): import struct, fcntl, os f = open(...) rv = fcntl.fcntl(f, fcntl.F_SETFL, os.O_NDELAY) lockdata = struct.pack(’hhllhh’, fcntl.F_WRLCK, 0, 0, 0, 0, 0) rv = fcntl.fcntl(f, fcntl.F_SETLKW, lockdata) Note that in the first example the return value variable rv will hold an integer value; in the second example it will hold a string value. The structure lay-out for the lockdata variable is system dependent — therefore using the flock() call may be better. See Also: Module os If the locking flags O_SHLOCK and O_EXLOCK are present in the os module (on BSD only), the os.open() function provides an alternative to the lockf() and flock() functions.
The pipes module defines a class to abstract the concept of a pipeline — a sequence of converters from one file to another. Because the module uses /bin/sh command lines, a POSIX or compatible shell for os.system() and os.popen() is required. The pipes module defines the following class:
33.10. pipes — Interface to shell pipelines
1257
The Python Library Reference, Release 3.2.3
class pipes.Template An abstraction of a pipeline. Example: >>> import pipes >>> t=pipes.Template() >>> t.append(’tr a-z A-Z’, ’--’) >>> f=t.open(’/tmp/1’, ’w’) >>> f.write(’hello world’) >>> f.close() >>> open(’/tmp/1’).read() ’HELLO WORLD’
33.10.1 Template Objects Template objects following methods: Template.reset() Restore a pipeline template to its initial state. Template.clone() Return a new, equivalent, pipeline template. Template.debug(flag) If flag is true, turn debugging on. Otherwise, turn debugging off. When debugging is on, commands to be executed are printed, and the shell is given set -x command to be more verbose. Template.append(cmd, kind) Append a new action at the end. The cmd variable must be a valid bourne shell command. The kind variable consists of two letters. The first letter can be either of ’-’ (which means the command reads its standard input), ’f’ (which means the commands reads a given file on the command line) or ’.’ (which means the commands reads no input, and hence must be first.) Similarly, the second letter can be either of ’-’ (which means the command writes to standard output), ’f’ (which means the command writes a file on the command line) or ’.’ (which means the command does not write anything, and hence must be last.) Template.prepend(cmd, kind) Add a new action at the beginning. See append() for explanations of the arguments. Template.open(file, mode) Return a file-like object, open to file, but read from or written to by the pipeline. Note that only one of ’r’, ’w’ may be given. Template.copy(infile, outfile) Copy infile to outfile through the pipe.
33.11 resource — Resource usage information Platforms: Unix This module provides basic mechanisms for measuring and controlling system resources utilized by a program. Symbolic constants are used to specify particular system resources and to request usage information about either the current process or its children. 1258
Chapter 33. Unix Specific Services
The Python Library Reference, Release 3.2.3
A single exception is defined for errors: exception resource.error The functions described below may raise this error if the underlying system call failures unexpectedly.
33.11.1 Resource Limits Resources usage can be limited using the setrlimit() function described below. Each resource is controlled by a pair of limits: a soft limit and a hard limit. The soft limit is the current limit, and may be lowered or raised by a process over time. The soft limit can never exceed the hard limit. The hard limit can be lowered to any value greater than the soft limit, but not raised. (Only processes with the effective UID of the super-user can raise a hard limit.) The specific resources that can be limited are system dependent. They are described in the getrlimit(2) man page. The resources listed below are supported when the underlying operating system supports them; resources which cannot be checked or controlled by the operating system are not defined in this module for those platforms. resource.getrlimit(resource) Returns a tuple (soft, hard) with the current soft and hard limits of resource. Raises ValueError if an invalid resource is specified, or error if the underlying system call fails unexpectedly. resource.setrlimit(resource, limits) Sets new limits of consumption of resource. The limits argument must be a tuple (soft, hard) of two integers describing the new limits. A value of -1 can be used to specify the maximum possible upper limit. Raises ValueError if an invalid resource is specified, if the new soft limit exceeds the hard limit, or if a process tries to raise its hard limit (unless the process has an effective UID of super-user). Can also raise error if the underlying system call fails. These symbols define resources whose consumption can be controlled using the setrlimit() and getrlimit() functions described below. The values of these symbols are exactly the constants used by C programs. The Unix man page for getrlimit(2) lists the available resources. Note that not all systems use the same symbol or same value to denote the same resource. This module does not attempt to mask platform differences — symbols not defined for a platform will not be available from this module on that platform. resource.RLIMIT_CORE The maximum size (in bytes) of a core file that the current process can create. This may result in the creation of a partial core file if a larger core would be required to contain the entire process image. resource.RLIMIT_CPU The maximum amount of processor time (in seconds) that a process can use. If this limit is exceeded, a SIGXCPU signal is sent to the process. (See the signal module documentation for information about how to catch this signal and do something useful, e.g. flush open files to disk.) resource.RLIMIT_FSIZE The maximum size of a file which the process may create. This only affects the stack of the main thread in a multi-threaded process. resource.RLIMIT_DATA The maximum size (in bytes) of the process’s heap. resource.RLIMIT_STACK The maximum size (in bytes) of the call stack for the current process. resource.RLIMIT_RSS The maximum resident set size that should be made available to the process. resource.RLIMIT_NPROC The maximum number of processes the current process may create.
33.11. resource — Resource usage information
1259
The Python Library Reference, Release 3.2.3
resource.RLIMIT_NOFILE The maximum number of open file descriptors for the current process. resource.RLIMIT_OFILE The BSD name for RLIMIT_NOFILE. resource.RLIMIT_MEMLOCK The maximum address space which may be locked in memory. resource.RLIMIT_VMEM The largest area of mapped memory which the process may occupy. resource.RLIMIT_AS The maximum area (in bytes) of address space which may be taken by the process.
33.11.2 Resource Usage These functions are used to retrieve resource usage information: resource.getrusage(who) This function returns an object that describes the resources consumed by either the current process or its children, as specified by the who parameter. The who parameter should be specified using one of the RUSAGE_* constants described below. The fields of the return value each describe how a particular system resource has been used, e.g. amount of time spent running is user mode or number of times the process was swapped out of main memory. Some values are dependent on the clock tick internal, e.g. the amount of memory the process is using. For backward compatibility, the return value is also accessible as a tuple of 16 elements. The fields ru_utime and ru_stime of the return value are floating point values representing the amount of time spent executing in user mode and the amount of time spent executing in system mode, respectively. The remaining values are integers. Consult the getrusage(2) man page for detailed information about these values. A brief summary is presented here: Index 0 1 2 3 4 5 6 7 8 9 10 11 12 13 14 15
Resource time in user mode (float) time in system mode (float) maximum resident set size shared memory size unshared memory size unshared stack size page faults not requiring I/O page faults requiring I/O number of swap outs block input operations block output operations messages sent messages received signals received voluntary context switches involuntary context switches
This function will raise a ValueError if an invalid who parameter is specified. It may also raise error exception in unusual circumstances. resource.getpagesize() Returns the number of bytes in a system page. (This need not be the same as the hardware page size.) This function is useful for determining the number of bytes of memory a process is using. The third element of the 1260
Chapter 33. Unix Specific Services
The Python Library Reference, Release 3.2.3
tuple returned by getrusage() describes memory usage in pages; multiplying by page size produces number of bytes. The following RUSAGE_* symbols are passed to the getrusage() function to specify which processes information should be provided for. resource.RUSAGE_SELF Pass to getrusage() to request resources consumed by the calling process, which is the sum of resources used by all threads in the process. resource.RUSAGE_CHILDREN Pass to getrusage() to request resources consumed by child processes of the calling process which have been terminated and waited for. resource.RUSAGE_BOTH Pass to getrusage() to request resources consumed by both the current process and child processes. May not be available on all systems. resource.RUSAGE_THREAD Pass to getrusage() to request resources consumed by the current thread. May not be available on all systems. New in version 3.2.
33.12 nis — Interface to Sun’s NIS (Yellow Pages) Platforms: Unix The nis module gives a thin wrapper around the NIS library, useful for central administration of several hosts. Because NIS exists only on Unix systems, this module is only available for Unix. The nis module defines the following functions: nis.match(key, mapname, domain=default_domain) Return the match for key in map mapname, or raise an error (nis.error) if there is none. Both should be strings, key is 8-bit clean. Return value is an arbitrary array of bytes (may contain NULL and other joys). Note that mapname is first checked if it is an alias to another name. The domain argument allows to override the NIS domain used for the lookup. If unspecified, lookup is in the default NIS domain. nis.cat(mapname, domain=default_domain) Return a dictionary mapping key to value such that match(key, mapname)==value. Note that both keys and values of the dictionary are arbitrary arrays of bytes. Note that mapname is first checked if it is an alias to another name. The domain argument allows to override the NIS domain used for the lookup. If unspecified, lookup is in the default NIS domain. nis.maps(domain=default_domain) Return a list of all valid maps. The domain argument allows to override the NIS domain used for the lookup. If unspecified, lookup is in the default NIS domain. nis.get_default_domain() Return the system default NIS domain. The nis module defines the following exception:
33.12. nis — Interface to Sun’s NIS (Yellow Pages)
1261
The Python Library Reference, Release 3.2.3
exception nis.error An error raised when a NIS function returns an error code.
33.13 syslog — Unix syslog library routines Platforms: Unix This module provides an interface to the Unix syslog library routines. Refer to the Unix manual pages for a detailed description of the syslog facility. This module wraps the system syslog family of routines. A pure Python library that can speak to a syslog server is available in the logging.handlers module as SysLogHandler. The module defines the following functions: syslog.syslog([priority ], message) Send the string message to the system logger. A trailing newline is added if necessary. Each message is tagged with a priority composed of a facility and a level. The optional priority argument, which defaults to LOG_INFO, determines the message priority. If the facility is not encoded in priority using logical-or (LOG_INFO | LOG_USER), the value given in the openlog() call is used. If openlog() has not been called prior to the call to syslog(), openlog() will be called with no arguments. syslog.openlog([ident[, logoption[, facility ]]]) Logging options of subsequent syslog() calls can be set by calling openlog(). syslog() will call openlog() with no arguments if the log is not currently open. The optional ident keyword argument is a string which is prepended to every message, and defaults to sys.argv[0] with leading path components stripped. The optional logoption keyword argument (default is 0) is a bit field – see below for possible values to combine. The optional facility keyword argument (default is LOG_USER) sets the default facility for messages which do not have a facility explicitly encoded. Changed in version 3.2: In previous versions, keyword arguments were not allowed, and ident was required. The default for ident was dependent on the system libraries, and often was python instead of the name of the python program file. syslog.closelog() Reset the syslog module values and call the system library closelog(). This causes the module to behave as it does when initially imported. For example, openlog() will be called on the first syslog() call (if openlog() hasn’t already been called), and ident and other openlog() parameters are reset to defaults. syslog.setlogmask(maskpri) Set the priority mask to maskpri and return the previous mask value. Calls to syslog() with a priority level not set in maskpri are ignored. The default is to log all priorities. The function LOG_MASK(pri) calculates the mask for the individual priority pri. The function LOG_UPTO(pri) calculates the mask for all priorities up to and including pri. The module defines the following constants: Priority levels (high to low): LOG_EMERG, LOG_ALERT, LOG_NOTICE, LOG_INFO, LOG_DEBUG.
LOG_CRIT,
LOG_ERR,
LOG_WARNING,
Facilities: LOG_KERN, LOG_USER, LOG_MAIL, LOG_DAEMON, LOG_AUTH, LOG_LPR, LOG_NEWS, LOG_UUCP, LOG_CRON, LOG_SYSLOG and LOG_LOCAL0 to LOG_LOCAL7. Log options: LOG_PID, LOG_CONS, LOG_NDELAY, LOG_NOWAIT and LOG_PERROR if defined in .
1262
Chapter 33. Unix Specific Services
The Python Library Reference, Release 3.2.3
33.13.1 Examples Simple example A simple set of examples: import syslog syslog.syslog(’Processing started’) if error: syslog.syslog(syslog.LOG_ERR, ’Processing started’) An example of setting some log options, these would include the process ID in logged messages, and write the messages to the destination facility used for mail logging: syslog.openlog(logoption=syslog.LOG_PID, facility=syslog.LOG_MAIL) syslog.syslog(’E-mail processing initiated...’)
33.13. syslog — Unix syslog library routines
1263
The Python Library Reference, Release 3.2.3
1264
Chapter 33. Unix Specific Services
CHAPTER
THIRTYFOUR
UNDOCUMENTED MODULES Here’s a quick listing of modules that are currently undocumented, but that should be documented. Feel free to contribute documentation for them! (Send via email to [email protected].) The idea and original contents for this chapter were taken from a posting by Fredrik Lundh; the specific contents of this chapter have been substantially revised.
34.1 Platform specific modules These modules are used to implement the os.path module, and are not documented beyond this mention. There’s little need to document these. ntpath — Implementation of os.path on Win32, Win64, WinCE, and OS/2 platforms. posixpath — Implementation of os.path on POSIX.
1265
The Python Library Reference, Release 3.2.3
1266
Chapter 34. Undocumented Modules
APPENDIX
A
GLOSSARY >>> The default Python prompt of the interactive shell. Often seen for code examples which can be executed interactively in the interpreter. ... The default Python prompt of the interactive shell when entering code for an indented code block or within a pair of matching left and right delimiters (parentheses, square brackets or curly braces). 2to3 A tool that tries to convert Python 2.x code to Python 3.x code by handling most of the incompatibilities which can be detected by parsing the source and traversing the parse tree. 2to3 is available in the standard library as lib2to3; a standalone entry point is provided as Tools/scripts/2to3. See 2to3 - Automated Python 2 to 3 code translation. abstract base class Abstract base classes complement duck-typing by providing a way to define interfaces when other techniques like hasattr() would be clumsy or subtly wrong (for example with magic methods). ABCs introduce virtual subclasses, which are classes that don’t inherit from a class but are still recognized by isinstance() and issubclass(); see the abc module documentation. Python comes with many built-in ABCs for data structures (in the collections module), numbers (in the numbers module), streams (in the io module), import finders and loaders (in the importlib.abc module). You can create your own ABCs with the abc module. argument A value passed to a function or method, assigned to a named local variable in the function body. A function or method may have both positional arguments and keyword arguments in its definition. Positional and keyword arguments may be variable-length: * accepts or passes (if in the function definition or call) several positional arguments in a list, while ** does the same for keyword arguments in a dictionary. Any expression may be used within the argument list, and the evaluated value is passed to the local variable. attribute A value associated with an object which is referenced by name using dotted expressions. For example, if an object o has an attribute a it would be referenced as o.a. BDFL Benevolent Dictator For Life, a.k.a. Guido van Rossum, Python’s creator. bytecode Python source code is compiled into bytecode, the internal representation of a Python program in the CPython interpreter. The bytecode is also cached in .pyc and .pyo files so that executing the same file is faster the second time (recompilation from source to bytecode can be avoided). This “intermediate language” is said to run on a virtual machine that executes the machine code corresponding to each bytecode. Do note that bytecodes are not expected to work between different Python virtual machines, nor to be stable between Python releases. A list of bytecode instructions can be found in the documentation for the dis module. class A template for creating user-defined objects. Class definitions normally contain method definitions which operate on instances of the class. coercion The implicit conversion of an instance of one type to another during an operation which involves two arguments of the same type. For example, int(3.15) converts the floating point number to the integer 3, but
1267
The Python Library Reference, Release 3.2.3
in 3+4.5, each argument is of a different type (one int, one float), and both must be converted to the same type before they can be added or it will raise a TypeError. Without coercion, all arguments of even compatible types would have to be normalized to the same value by the programmer, e.g., float(3)+4.5 rather than just 3+4.5. complex number An extension of the familiar real number system in which all numbers are expressed as a sum of a real part and an imaginary part. Imaginary numbers are real multiples of the imaginary unit (the square root of -1), often written i in mathematics or j in engineering. Python has built-in support for complex numbers, which are written with this latter notation; the imaginary part is written with a j suffix, e.g., 3+1j. To get access to complex equivalents of the math module, use cmath. Use of complex numbers is a fairly advanced mathematical feature. If you’re not aware of a need for them, it’s almost certain you can safely ignore them. context manager An object which controls the environment seen in a with statement by defining __enter__() and __exit__() methods. See PEP 343. CPython The canonical implementation of the Python programming language, as distributed on python.org. The term “CPython” is used when necessary to distinguish this implementation from others such as Jython or IronPython. decorator A function returning another function, usually applied as a function transformation using the @wrapper syntax. Common examples for decorators are classmethod() and staticmethod(). The decorator syntax is merely syntactic sugar, the following two function definitions are semantically equivalent: def f(...): ... f = staticmethod(f) @staticmethod def f(...): ... The same concept exists for classes, but is less commonly used there. See the documentation for function definitions and class definitions for more about decorators. descriptor Any object which defines the methods __get__(), __set__(), or __delete__(). When a class attribute is a descriptor, its special binding behavior is triggered upon attribute lookup. Normally, using a.b to get, set or delete an attribute looks up the object named b in the class dictionary for a, but if b is a descriptor, the respective descriptor method gets called. Understanding descriptors is a key to a deep understanding of Python because they are the basis for many features including functions, methods, properties, class methods, static methods, and reference to super classes. For more information about descriptors’ methods, see descriptors. dictionary An associative array, where arbitrary keys are mapped to values. The keys can be any object with __hash__() and __eq__() methods. Called a hash in Perl. docstring A string literal which appears as the first expression in a class, function or module. While ignored when the suite is executed, it is recognized by the compiler and put into the __doc__ attribute of the enclosing class, function or module. Since it is available via introspection, it is the canonical place for documentation of the object. duck-typing A programming style which does not look at an object’s type to determine if it has the right interface; instead, the method or attribute is simply called or used (“If it looks like a duck and quacks like a duck, it must be a duck.”) By emphasizing interfaces rather than specific types, well-designed code improves its flexibility by allowing polymorphic substitution. Duck-typing avoids tests using type() or isinstance(). (Note, however, that duck-typing can be complemented with abstract base classes.) Instead, it typically employs hasattr() tests or EAFP programming.
1268
Appendix A. Glossary
The Python Library Reference, Release 3.2.3
EAFP Easier to ask for forgiveness than permission. This common Python coding style assumes the existence of valid keys or attributes and catches exceptions if the assumption proves false. This clean and fast style is characterized by the presence of many try and except statements. The technique contrasts with the LBYL style common to many other languages such as C. expression A piece of syntax which can be evaluated to some value. In other words, an expression is an accumulation of expression elements like literals, names, attribute access, operators or function calls which all return a value. In contrast to many other languages, not all language constructs are expressions. There are also statements which cannot be used as expressions, such as if. Assignments are also statements, not expressions. extension module A module written in C or C++, using Python’s C API to interact with the core and with user code. file object An object exposing a file-oriented API (with methods such as read() or write()) to an underlying resource. Depending on the way it was created, a file object can mediate access to a real on-disk file or to another type of storage or communication device (for example standard input/output, in-memory buffers, sockets, pipes, etc.). File objects are also called file-like objects or streams. There are actually three categories of file objects: raw binary files, buffered binary files and text files. Their interfaces are defined in the io module. The canonical way to create a file object is by using the open() function. file-like object A synonym for file object. finder An object that tries to find the loader for a module. It must implement a method named find_module(). See PEP 302 for details and importlib.abc.Finder for an abstract base class. floor division Mathematical division that rounds down to nearest integer. The floor division operator is //. For example, the expression 11 // 4 evaluates to 2 in contrast to the 2.75 returned by float true division. Note that (-11) // 4 is -3 because that is -2.75 rounded downward. See PEP 238. function A series of statements which returns some value to a caller. It can also be passed zero or more arguments which may be used in the execution of the body. See also argument and method. __future__ A pseudo-module which programmers can use to enable new language features which are not compatible with the current interpreter. By importing the __future__ module and evaluating its variables, you can see when a new feature was first added to the language and when it becomes the default: >>> import __future__ >>> __future__.division _Feature((2, 2, 0, ’alpha’, 2), (3, 0, 0, ’alpha’, 0), 8192) garbage collection The process of freeing memory when it is not used anymore. Python performs garbage collection via reference counting and a cyclic garbage collector that is able to detect and break reference cycles. generator A function which returns an iterator. It looks like a normal function except that it contains yield statements for producing a series a values usable in a for-loop or that can be retrieved one at a time with the next() function. Each yield temporarily suspends processing, remembering the location execution state (including local variables and pending try-statements). When the generator resumes, it picks-up where it left-off (in contrast to functions which start fresh on every invocation). generator expression An expression that returns an iterator. It looks like a normal expression followed by a for expression defining a loop variable, range, and an optional if expression. The combined expression generates values for an enclosing function: >>> sum(i*i for i in range(10)) 285
# sum of squares 0, 1, 4, ... 81
GIL See global interpreter lock.
1269
The Python Library Reference, Release 3.2.3
global interpreter lock The mechanism used by the CPython interpreter to assure that only one thread executes Python bytecode at a time. This simplifies the CPython implementation by making the object model (including critical built-in types such as dict) implicitly safe against concurrent access. Locking the entire interpreter makes it easier for the interpreter to be multi-threaded, at the expense of much of the parallelism afforded by multi-processor machines. However, some extension modules, either standard or third-party, are designed so as to release the GIL when doing computationally-intensive tasks such as compression or hashing. Also, the GIL is always released when doing I/O. Past efforts to create a “free-threaded” interpreter (one which locks shared data at a much finer granularity) have not been successful because performance suffered in the common single-processor case. It is believed that overcoming this performance issue would make the implementation much more complicated and therefore costlier to maintain. hashable An object is hashable if it has a hash value which never changes during its lifetime (it needs a __hash__() method), and can be compared to other objects (it needs an __eq__() method). Hashable objects which compare equal must have the same hash value. Hashability makes an object usable as a dictionary key and a set member, because these data structures use the hash value internally. All of Python’s immutable built-in objects are hashable, while no mutable containers (such as lists or dictionaries) are. Objects which are instances of user-defined classes are hashable by default; they all compare unequal, and their hash value is their id(). IDLE An Integrated Development Environment for Python. IDLE is a basic editor and interpreter environment which ships with the standard distribution of Python. immutable An object with a fixed value. Immutable objects include numbers, strings and tuples. Such an object cannot be altered. A new object has to be created if a different value has to be stored. They play an important role in places where a constant hash value is needed, for example as a key in a dictionary. importer An object that both finds and loads a module; both a finder and loader object. interactive Python has an interactive interpreter which means you can enter statements and expressions at the interpreter prompt, immediately execute them and see their results. Just launch python with no arguments (possibly by selecting it from your computer’s main menu). It is a very powerful way to test out new ideas or inspect modules and packages (remember help(x)). interpreted Python is an interpreted language, as opposed to a compiled one, though the distinction can be blurry because of the presence of the bytecode compiler. This means that source files can be run directly without explicitly creating an executable which is then run. Interpreted languages typically have a shorter development/debug cycle than compiled ones, though their programs generally also run more slowly. See also interactive. iterable An object capable of returning its members one at a time. Examples of iterables include all sequence types (such as list, str, and tuple) and some non-sequence types like dict and file and objects of any classes you define with an __iter__() or __getitem__() method. Iterables can be used in a for loop and in many other places where a sequence is needed (zip(), map(), ...). When an iterable object is passed as an argument to the built-in function iter(), it returns an iterator for the object. This iterator is good for one pass over the set of values. When using iterables, it is usually not necessary to call iter() or deal with iterator objects yourself. The for statement does that automatically for you, creating a temporary unnamed variable to hold the iterator for the duration of the loop. See also iterator, sequence, and generator. iterator An object representing a stream of data. Repeated calls to the iterator’s __next__() method (or passing it to the built-in function next()) return successive items in the stream. When no more data are available a StopIteration exception is raised instead. At this point, the iterator object is exhausted and any further calls to its __next__() method just raise StopIteration again. Iterators are required to have an __iter__() method that returns the iterator object itself so every iterator is also iterable and may be used in most places where other iterables are accepted. One notable exception is code which attempts multiple iteration
1270
Appendix A. Glossary
The Python Library Reference, Release 3.2.3
passes. A container object (such as a list) produces a fresh new iterator each time you pass it to the iter() function or use it in a for loop. Attempting this with an iterator will just return the same exhausted iterator object used in the previous iteration pass, making it appear like an empty container. More information can be found in Iterator Types. key function A key function or collation function is a callable that returns a value used for sorting or ordering. For example, locale.strxfrm() is used to produce a sort key that is aware of locale specific sort conventions. A number of tools in Python accept key functions to control how elements are ordered or grouped. They include min(), max(), sorted(), list.sort(), heapq.nsmallest(), heapq.nlargest(), and itertools.groupby(). There are several ways to create a key function. For example. the str.lower() method can serve as a key function for case insensitive sorts. Alternatively, an ad-hoc key function can be built from a lambda expression such as lambda r: (r[0], r[2]). Also, the operator module provides three key function constructors: attrgetter(), itemgetter(), and methodcaller(). See the Sorting HOW TO for examples of how to create and use key functions. keyword argument Arguments which are preceded with a variable_name= in the call. The variable name designates the local name in the function to which the value is assigned. ** is used to accept or pass a dictionary of keyword arguments. See argument. lambda An anonymous inline function consisting of a single expression which is evaluated when the function is called. The syntax to create a lambda function is lambda [arguments]: expression LBYL Look before you leap. This coding style explicitly tests for pre-conditions before making calls or lookups. This style contrasts with the EAFP approach and is characterized by the presence of many if statements. In a multi-threaded environment, the LBYL approach can risk introducing a race condition between “the looking” and “the leaping”. For example, the code, if key in mapping: return mapping[key] can fail if another thread removes key from mapping after the test, but before the lookup. This issue can be solved with locks or by using the EAFP approach. list A built-in Python sequence. Despite its name it is more akin to an array in other languages than to a linked list since access to elements are O(1). list comprehension A compact way to process all or part of the elements in a sequence and return a list with the results. result = [’{:#04x}’.format(x) for x in range(256) if x % 2 == 0] generates a list of strings containing even hex numbers (0x..) in the range from 0 to 255. The if clause is optional. If omitted, all elements in range(256) are processed. loader An object that loads a module. It must define a method named load_module(). A loader is typically returned by a finder. See PEP 302 for details and importlib.abc.Loader for an abstract base class. mapping A container object that supports arbitrary key lookups and implements the methods specified in the Mapping or MutableMapping abstract base classes. Examples include dict, collections.defaultdict, collections.OrderedDict and collections.Counter. metaclass The class of a class. Class definitions create a class name, a class dictionary, and a list of base classes. The metaclass is responsible for taking those three arguments and creating the class. Most object oriented programming languages provide a default implementation. What makes Python special is that it is possible to create custom metaclasses. Most users never need this tool, but when the need arises, metaclasses can provide powerful, elegant solutions. They have been used for logging attribute access, adding thread-safety, tracking object creation, implementing singletons, and many other tasks. More information can be found in metaclasses. method A function which is defined inside a class body. If called as an attribute of an instance of that class, the method will get the instance object as its first argument (which is usually called self). See function and nested scope.
1271
The Python Library Reference, Release 3.2.3
method resolution order Method Resolution Order is the order in which base classes are searched for a member during lookup. See The Python 2.3 Method Resolution Order. MRO See method resolution order. mutable Mutable objects can change their value but keep their id(). See also immutable. named tuple Any tuple-like class whose indexable elements are also accessible using named attributes (for example, time.localtime() returns a tuple-like object where the year is accessible either with an index such as t[0] or with a named attribute like t.tm_year). A named tuple can be a built-in type such as time.struct_time, or it can be created with a regular class definition. A full featured named tuple can also be created with the factory function collections.namedtuple(). The latter approach automatically provides extra features such as a selfdocumenting representation like Employee(name=’jones’, title=’programmer’). namespace The place where a variable is stored. Namespaces are implemented as dictionaries. There are the local, global and built-in namespaces as well as nested namespaces in objects (in methods). Namespaces support modularity by preventing naming conflicts. For instance, the functions builtins.open() and os.open() are distinguished by their namespaces. Namespaces also aid readability and maintainability by making it clear which module implements a function. For instance, writing random.seed() or itertools.islice() makes it clear that those functions are implemented by the random and itertools modules, respectively. nested scope The ability to refer to a variable in an enclosing definition. For instance, a function defined inside another function can refer to variables in the outer function. Note that nested scopes by default work only for reference and not for assignment. Local variables both read and write in the innermost scope. Likewise, global variables read and write to the global namespace. The nonlocal allows writing to outer scopes. new-style class Old name for the flavor of classes now used for all class objects. In earlier Python versions, only new-style classes could use Python’s newer, versatile features like __slots__, descriptors, properties, __getattribute__(), class methods, and static methods. object Any data with state (attributes or value) and defined behavior (methods). Also the ultimate base class of any new-style class. positional argument The arguments assigned to local names inside a function or method, determined by the order in which they were given in the call. * is used to either accept multiple positional arguments (when in the definition), or pass several arguments as a list to a function. See argument. Python 3000 Nickname for the Python 3.x release line (coined long ago when the release of version 3 was something in the distant future.) This is also abbreviated “Py3k”. Pythonic An idea or piece of code which closely follows the most common idioms of the Python language, rather than implementing code using concepts common to other languages. For example, a common idiom in Python is to loop over all elements of an iterable using a for statement. Many other languages don’t have this type of construct, so people unfamiliar with Python sometimes use a numerical counter instead: for i in range(len(food)): print(food[i]) As opposed to the cleaner, Pythonic method: for piece in food: print(piece) reference count The number of references to an object. When the reference count of an object drops to zero, it is deallocated. Reference counting is generally not visible to Python code, but it is a key element of the CPython implementation. The sys module defines a getrefcount() function that programmers can call to return the reference count for a particular object.
1272
Appendix A. Glossary
The Python Library Reference, Release 3.2.3
__slots__ A declaration inside a class that saves memory by pre-declaring space for instance attributes and eliminating instance dictionaries. Though popular, the technique is somewhat tricky to get right and is best reserved for rare cases where there are large numbers of instances in a memory-critical application. sequence An iterable which supports efficient element access using integer indices via the __getitem__() special method and defines a len() method that returns the length of the sequence. Some built-in sequence types are list, str, tuple, and bytes. Note that dict also supports __getitem__() and __len__(), but is considered a mapping rather than a sequence because the lookups use arbitrary immutable keys rather than integers. slice An object usually containing a portion of a sequence. A slice is created using the subscript notation, [] with colons between numbers when several are given, such as in variable_name[1:3:5]. The bracket (subscript) notation uses slice objects internally. special method A method that is called implicitly by Python to execute a certain operation on a type, such as addition. Such methods have names starting and ending with double underscores. Special methods are documented in specialnames. statement A statement is part of a suite (a “block” of code). A statement is either an expression or a one of several constructs with a keyword, such as if, while or for. triple-quoted string A string which is bound by three instances of either a quotation mark (”) or an apostrophe (‘). While they don’t provide any functionality not available with single-quoted strings, they are useful for a number of reasons. They allow you to include unescaped single and double quotes within a string and they can span multiple lines without the use of the continuation character, making them especially useful when writing docstrings. type The type of a Python object determines what kind of object it is; every object has a type. An object’s type is accessible as its __class__ attribute or can be retrieved with type(obj). view The objects returned from dict.keys(), dict.values(), and dict.items() are called dictionary views. They are lazy sequences that will see changes in the underlying dictionary. To force the dictionary view to become a full list use list(dictview). See Dictionary view objects. virtual machine A computer defined entirely in software. Python’s virtual machine executes the bytecode emitted by the bytecode compiler. Zen of Python Listing of Python design principles and philosophies that are helpful in understanding and using the language. The listing can be found by typing “import this” at the interactive prompt.
1273
The Python Library Reference, Release 3.2.3
1274
Appendix A. Glossary
BIBLIOGRAPHY
[C99] ISO/IEC 9899:1999. “Programming languages – C.” A public draft of this standard is available at http://www.open-std.org/jtc1/sc22/wg14/www/docs/n1256.pdf .
1275
The Python Library Reference, Release 3.2.3
1276
Bibliography
APPENDIX
B
ABOUT THESE DOCUMENTS These documents are generated from reStructuredText sources by Sphinx, a document processor specifically written for the Python documentation. Development of the documentation and its toolchain takes place on the [email protected] mailing list. We’re always looking for volunteers wanting to help with the docs, so feel free to send a mail there! Many thanks go to: • Fred L. Drake, Jr., the creator of the original Python documentation toolset and writer of much of the content; • the Docutils project for creating reStructuredText and the Docutils suite; • Fredrik Lundh for his Alternative Python Reference project from which Sphinx got many good ideas. See reporting-bugs for information how to report bugs in this documentation, or Python itself.
B.1 Contributors to the Python Documentation This section lists people who have contributed in some way to the Python documentation. It is probably not complete – if you feel that you or anyone else should be on this list, please let us know (send email to [email protected]), and we’ll be glad to correct the problem. Aahz, Michael Abbott, Steve Alexander, Jim Ahlstrom, Fred Allen, A. Amoroso, Pehr Anderson, Oliver Andrich, Heidi Annexstad, Jesús Cea Avión, Manuel Balsera, Daniel Barclay, Chris Barker, Don Bashford, Anthony Baxter, Alexander Belopolsky, Bennett Benson, Jonathan Black, Robin Boerdijk, Michal Bozon, Aaron Brancotti, Georg Brandl, Keith Briggs, Ian Bruntlett, Lee Busby, Arnaud Calmettes, Lorenzo M. Catucci, Carl Cerecke, Mauro Cicognini, Gilles Civario, Mike Clarkson, Steve Clift, Dave Cole, Matthew Cowles, Jeremy Craven, Andrew Dalke, Ben Darnell, L. Peter Deutsch, Robert Donohue, Fred L. Drake, Jr., Jacques Ducasse, Josip Dzolonga, Jeff Epler, Michael Ernst, Blame Andy Eskilsson, Carey Evans, Martijn Faassen, Carl Feynman, Dan Finnie, Hernán Martínez Foffani, Michael Foord, Stefan Franke, Jim Fulton, Peter Funk, Lele Gaifax, Matthew Gallagher, Gabriel Genellina, Ben Gertzfield, Nadim Ghaznavi, Jonathan Giddy, Matt Giuca, Shelley Gooch, Nathaniel Gray, Grant Griffin, Thomas Guettler, Anders Hammarquist, Mark Hammond, Harald Hanche-Olsen, Manus Hand, Gerhard Häring, Travis B. Hartwell, Tim Hatch, Janko Hauser, Ben Hayden, Thomas Heller, Bernhard Herzog, Magnus L. Hetland, Konrad Hinsen, Stefan Hoffmeister, Albert Hofkamp, Gregor Hoffleit, Steve Holden, Thomas Holenstein, Gerrit Holl, Rob Hooft, Brian Hooper, Randall Hopper, Michael Hudson, Eric Huss, Jeremy Hylton, Roger Irwin, Jack Jansen, Philip H. Jensen, Pedro Diaz Jimenez, Kent Johnson, Lucas de Jonge, Andreas Jung, Robert Kern, Jim Kerr, Jan Kim, Kamil Kisiel, Greg Kochanski, Guido Kollerie, Peter A. Koren, Daniel Kozan, Andrew M. Kuchling, Dave Kuhlman, Erno Kuusela, Ross Lagerwall, Thomas Lamb, Detlef Lannert, Piers Lauder, Glyph Lefkowitz, Robert Lehmann, MarcAndré Lemburg, Ross Light, Gediminas Liktaras, Ulf A. Lindgren, Everett Lipman, Mirko Liss, Martin von Löwis, Fredrik Lundh, Jeff MacDonald, John Machin, Andrew MacIntyre, Vladimir Marangozov, Vincent Marchetti, Westley Martínez, Laura Matson, Daniel May, Rebecca McCreary, Doug Mennella, Paolo Milani, Skip Montanaro, Paul Moore, Ross Moore, Sjoerd Mullender, Dale Nagata, Trent Nelson, Michal Nowikowski, Steffen Daode Nurpmeso, 1277
The Python Library Reference, Release 3.2.3
Ng Pheng Siong, Koray Oner, Tomas Oppelstrup, Denis S. Otkidach, Zooko O’Whielacronx, Shriphani Palakodety, William Park, Joonas Paalasmaa, Harri Pasanen, Bo Peng, Tim Peters, Benjamin Peterson, Christopher Petrilli, Justin D. Pettit, Chris Phoenix, François Pinard, Paul Prescod, Eric S. Raymond, Edward K. Ream, Terry J. Reedy, Sean Reifschneider, Bernhard Reiter, Armin Rigo, Wes Rishel, Armin Ronacher, Jim Roskind, Guido van Rossum, Donald Wallace Rouse II, Mark Russell, Nick Russo, Chris Ryland, Constantina S., Hugh Sasse, Bob Savage, Scott Schram, Neil Schemenauer, Barry Scott, Joakim Sernbrant, Justin Sheehy, Charlie Shepherd, Yue Shuaijie, SilentGhost, Michael Simcich, Ionel Simionescu, Michael Sloan, Gregory P. Smith, Roy Smith, Clay Spence, Nicholas Spies, Tage Stabell-Kulo, Frank Stajano, Anthony Starks, Greg Stein, Peter Stoehr, Mark Summerfield, Reuben Sumner, Kalle Svensson, Jim Tittsler, David Turner, Sandro Tosi, Ville Vainio, Martijn Vries, Charles G. Waldman, Greg Ward, Barry Warsaw, Corran Webster, Glyn Webster, Bob Weiner, Eddy Welbourne, Jeff Wheeler, Mats Wichmann, Gerry Wiener, Timothy Wild, Paul Winkler, Collin Winter, Blake Winton, Dan Wolfe, Adam Woodbeck, Steven Work, Thomas Wouters, Ka-Ping Yee, Rory Yorke, Moshe Zadka, Milan Zamazal, Cheng Zhang. It is only with the input and contributions of the Python community that Python has such wonderful documentation – Thank You!
1278
Appendix B. About these documents
APPENDIX
C
HISTORY AND LICENSE C.1 History of the software Python was created in the early 1990s by Guido van Rossum at Stichting Mathematisch Centrum (CWI, see http://www.cwi.nl/) in the Netherlands as a successor of a language called ABC. Guido remains Python’s principal author, although it includes many contributions from others. In 1995, Guido continued his work on Python at the Corporation for National Research Initiatives (CNRI, see http://www.cnri.reston.va.us/) in Reston, Virginia where he released several versions of the software. In May 2000, Guido and the Python core development team moved to BeOpen.com to form the BeOpen PythonLabs team. In October of the same year, the PythonLabs team moved to Digital Creations (now Zope Corporation; see http://www.zope.com/). In 2001, the Python Software Foundation (PSF, see http://www.python.org/psf/) was formed, a non-profit organization created specifically to own Python-related Intellectual Property. Zope Corporation is a sponsoring member of the PSF. All Python releases are Open Source (see http://www.opensource.org/ for the Open Source Definition). Historically, most, but not all, Python releases have also been GPL-compatible; the table below summarizes the various releases. Release 0.9.0 thru 1.2 1.3 thru 1.5.2 1.6 2.0 1.6.1 2.1 2.0.1 2.1.1 2.2 2.1.2 2.1.3 2.2.1 2.2.2 2.2.3 2.3 2.3.1 2.3.2 2.3.3 2.3.4 2.3.5 2.4
Note: GPL-compatible doesn’t mean that we’re distributing Python under the GPL. All Python licenses, unlike the GPL, let you distribute a modified version without making your changes open source. The GPL-compatible licenses make it possible to combine Python with other software that is released under the GPL; the others don’t. Thanks to the many outside volunteers who have worked under Guido’s direction to make these releases possible.
PSF MAKES NO AND DISCLAIMS ANY REPRESENTATION OR WARRANTY OF MERCHANTABILITY OR FITNESS FOR ANY PARTICULAR PURPOSE OR THAT THE USE OF PYTHON 3.2.3 WILL NOT INFRINGE ANY THIRD PARTY RIGHTS. 5. PSF SHALL NOT BE LIABLE TO LICENSEE OR ANY OTHER USERS OF PYTHON 3.2.3 FOR ANY INCIDENTAL, SPECIAL, OR CONSEQUENTIAL DAMAGES OR LOSS AS A RESULT OF MODIFYING, DISTRIBUTING, OR OTHERWISE USING PYTHON 3.2.3, OR ANY DERIVATIVE THEREOF, EVEN IF ADVISED OF THE POSSIBILITY THEREOF. 6. This License Agreement will automatically terminate upon a material breach of its terms and conditions. 7. Nothing in this License Agreement shall be deemed to create any relationship of agency, partnership, or joint venture between PSF and Licensee. This License Agreement does not grant permission to use PSF trademarks or trade name in a trademark sense to endorse or promote products or services of Licensee, or any third party. 8. By copying, installing or otherwise using Python 3.2.3, Licensee agrees to be bound by the terms and conditions of this License Agreement. BEOPEN.COM LICENSE AGREEMENT FOR PYTHON 2.0 BEOPEN PYTHON OPEN SOURCE LICENSE AGREEMENT VERSION 1 1. This LICENSE AGREEMENT is between BeOpen.com (“BeOpen”), having an office at 160 Saratoga Avenue, Santa Clara, CA 95051, and the Individual or Organization (“Licensee”) accessing and otherwise using this software in source or binary form and its associated documentation (“the Software”). 2. Subject to the terms and conditions of this BeOpen Python License Agreement, BeOpen hereby grants Licensee a non-exclusive, royalty-free, world-wide license to reproduce, analyze, test, perform and/or display publicly, prepare derivative works, distribute, and otherwise use the Software alone or in any derivative version, provided, however, that the BeOpen Python License is retained in the Software, alone or in any derivative version prepared by Licensee. 3. BeOpen is making the Software available to Licensee on an “AS IS” basis. BEOPEN MAKES NO REPRESENTATIONS OR WARRANTIES, EXPRESS OR IMPLIED. BY WAY OF EXAMPLE, BUT NOT LIMITATION, BEOPEN MAKES NO AND DISCLAIMS ANY REPRESENTATION OR WARRANTY OF MERCHANTABILITY OR FITNESS FOR ANY PARTICULAR PURPOSE OR THAT THE USE OF THE SOFTWARE WILL NOT INFRINGE ANY THIRD PARTY RIGHTS. 4. BEOPEN SHALL NOT BE LIABLE TO LICENSEE OR ANY OTHER USERS OF THE SOFTWARE FOR ANY INCIDENTAL, SPECIAL, OR CONSEQUENTIAL DAMAGES OR LOSS AS A RESULT OF USING, MODIFYING OR DISTRIBUTING THE SOFTWARE, OR ANY DERIVATIVE THEREOF, EVEN IF ADVISED OF THE POSSIBILITY THEREOF. 5. This License Agreement will automatically terminate upon a material breach of its terms and conditions. 6. This License Agreement shall be governed by and interpreted in all respects by the law of the State of California, excluding conflict of law provisions. Nothing in this License Agreement shall be deemed to create any relationship of agency, partnership, or joint venture between BeOpen and Licensee. This License Agreement does not grant permission to use BeOpen trademarks or trade names in a trademark sense to endorse or promote products or services of Licensee, or any third party. As an exception, the “BeOpen Python” logos available at http://www.pythonlabs.com/logos.html may be used according to the permissions granted on that web page. 7. By copying, installing or otherwise using the software, Licensee agrees to be bound by the terms and conditions of this License Agreement. CNRI LICENSE AGREEMENT FOR PYTHON 1.6.1 1. This LICENSE AGREEMENT is between the Corporation for National Research Initiatives, having an office at 1895 Preston White Drive, Reston, VA 20191 (“CNRI”), and the Individual or Organization (“Licensee”) accessing and otherwise using Python 1.6.1 software in source or binary form and its associated documentation.
C.2. Terms and conditions for accessing or otherwise using Python
OR PROFITS, WHETHER IN AN ACTION OF CONTRACT, NEGLIGENCE OR OTHER TORTIOUS ACTION, ARISING OUT OF OR IN CONNECTION WITH THE USE OR PERFORMANCE OF THIS SOFTWARE.
C.3 Licenses and Acknowledgements for Incorporated Software This section is an incomplete, but growing list of licenses and acknowledgements for third-party software incorporated in the Python distribution.
C.3.1 Mersenne Twister The _random module includes code based on a download from http://www.math.keio.ac.jp/ matumoto/MT2002/emt19937ar.html. The following are the verbatim comments from the original code: A C-program for MT19937, with initialization improved 2002/1/26. Coded by Takuji Nishimura and Makoto Matsumoto. Before using, initialize the state by using init_genrand(seed) or init_by_array(init_key, key_length). Copyright (C) 1997 - 2002, Makoto Matsumoto and Takuji Nishimura, All rights reserved. Redistribution and use in source and binary forms, with or without modification, are permitted provided that the following conditions are met: 1. Redistributions of source code must retain the above copyright notice, this list of conditions and the following disclaimer. 2. Redistributions in binary form must reproduce the above copyright notice, this list of conditions and the following disclaimer in the documentation and/or other materials provided with the distribution. 3. The names of its contributors may not be used to endorse or promote products derived from this software without specific prior written permission. THIS SOFTWARE IS PROVIDED BY THE COPYRIGHT HOLDERS AND CONTRIBUTORS "AS IS" AND ANY EXPRESS OR IMPLIED WARRANTIES, INCLUDING, BUT NOT LIMITED TO, THE IMPLIED WARRANTIES OF MERCHANTABILITY AND FITNESS FOR A PARTICULAR PURPOSE ARE DISCLAIMED. IN NO EVENT SHALL THE COPYRIGHT OWNER OR CONTRIBUTORS BE LIABLE FOR ANY DIRECT, INDIRECT, INCIDENTAL, SPECIAL, EXEMPLARY, OR CONSEQUENTIAL DAMAGES (INCLUDING, BUT NOT LIMITED TO, PROCUREMENT OF SUBSTITUTE GOODS OR SERVICES; LOSS OF USE, DATA, OR PROFITS; OR BUSINESS INTERRUPTION) HOWEVER CAUSED AND ON ANY THEORY OF LIABILITY, WHETHER IN CONTRACT, STRICT LIABILITY, OR TORT (INCLUDING NEGLIGENCE OR OTHERWISE) ARISING IN ANY WAY OUT OF THE USE OF THIS SOFTWARE, EVEN IF ADVISED OF THE POSSIBILITY OF SUCH DAMAGE.
Any feedback is very welcome.
C.3. Licenses and Acknowledgements for Incorporated Software
C.3.2 Sockets The socket module uses the functions, getaddrinfo(), and getnameinfo(), which are coded in separate source files from the WIDE Project, http://www.wide.ad.jp/. Copyright (C) 1995, 1996, 1997, and 1998 WIDE Project. All rights reserved. Redistribution and use in source and binary forms, with or without modification, are permitted provided that the following conditions are met: 1. Redistributions of source code must retain the above copyright notice, this list of conditions and the following disclaimer. 2. Redistributions in binary form must reproduce the above copyright notice, this list of conditions and the following disclaimer in the documentation and/or other materials provided with the distribution. 3. Neither the name of the project nor the names of its contributors may be used to endorse or promote products derived from this software without specific prior written permission. THIS SOFTWARE IS PROVIDED BY THE PROJECT AND CONTRIBUTORS ‘‘AS IS’’ AND GAI_ANY EXPRESS OR IMPLIED WARRANTIES, INCLUDING, BUT NOT LIMITED TO, THE IMPLIED WARRANTIES OF MERCHANTABILITY AND FITNESS FOR A PARTICULAR PURPOSE ARE DISCLAIMED. IN NO EVENT SHALL THE PROJECT OR CONTRIBUTORS BE LIABLE FOR GAI_ANY DIRECT, INDIRECT, INCIDENTAL, SPECIAL, EXEMPLARY, OR CONSEQUENTIAL DAMAGES (INCLUDING, BUT NOT LIMITED TO, PROCUREMENT OF SUBSTITUTE GOODS OR SERVICES; LOSS OF USE, DATA, OR PROFITS; OR BUSINESS INTERRUPTION) HOWEVER CAUSED AND ON GAI_ANY THEORY OF LIABILITY, WHETHER IN CONTRACT, STRICT LIABILITY, OR TORT (INCLUDING NEGLIGENCE OR OTHERWISE) ARISING IN GAI_ANY WAY OUT OF THE USE OF THIS SOFTWARE, EVEN IF ADVISED OF THE POSSIBILITY OF SUCH DAMAGE.
C.3.3 Floating point exception control The source for the fpectl module includes the following notice: --------------------------------------------------------------------/ Copyright (c) 1996. \ | The Regents of the University of California. | | All rights reserved. | | | | Permission to use, copy, modify, and distribute this software for | | any purpose without fee is hereby granted, provided that this en| | tire notice is included in all copies of any software which is or | | includes a copy or modification of this software and in all | | copies of the supporting documentation for such software. | | | | This work was produced at the University of California, Lawrence | | Livermore National Laboratory under contract no. W-7405-ENG-48 | | between the U.S. Department of Energy and The Regents of the |
1284
Appendix C. History and License
The Python Library Reference, Release 3.2.3
| | | | | | | | | | | | | | | | | | |
University of California for the operation of UC LLNL. DISCLAIMER This software was prepared as an account of work sponsored by an agency of the United States Government. Neither the United States Government nor the University of California nor any of their employees, makes any warranty, express or implied, or assumes any liability or responsibility for the accuracy, completeness, or usefulness of any information, apparatus, product, or process disclosed, or represents that its use would not infringe privately-owned rights. Reference herein to any specific commercial products, process, or service by trade name, trademark, manufacturer, or otherwise, does not necessarily constitute or imply its endorsement, recommendation, or favoring by the United States Government or the University of California. The views and opinions of authors expressed herein do not necessarily state or reflect those of the United States Government or the University of California, and shall not be used for advertising or product \ endorsement purposes. ---------------------------------------------------------------------
| | | | | | | | | | | | | | | | | | | /
C.3.4 Asynchronous socket services The asynchat and asyncore modules contain the following notice: Copyright 1996 by Sam Rushing All Rights Reserved Permission to use, copy, modify, and distribute this software and its documentation for any purpose and without fee is hereby granted, provided that the above copyright notice appear in all copies and that both that copyright notice and this permission notice appear in supporting documentation, and that the name of Sam Rushing not be used in advertising or publicity pertaining to distribution of the software without specific, written prior permission. SAM RUSHING DISCLAIMS ALL WARRANTIES WITH REGARD TO THIS SOFTWARE, INCLUDING ALL IMPLIED WARRANTIES OF MERCHANTABILITY AND FITNESS, IN NO EVENT SHALL SAM RUSHING BE LIABLE FOR ANY SPECIAL, INDIRECT OR CONSEQUENTIAL DAMAGES OR ANY DAMAGES WHATSOEVER RESULTING FROM LOSS OF USE, DATA OR PROFITS, WHETHER IN AN ACTION OF CONTRACT, NEGLIGENCE OR OTHER TORTIOUS ACTION, ARISING OUT OF OR IN CONNECTION WITH THE USE OR PERFORMANCE OF THIS SOFTWARE.
C.3.5 Cookie management The http.cookies module contains the following notice: Copyright 2000 by Timothy O’Malley
C.3. Licenses and Acknowledgements for Incorporated Software
1285
The Python Library Reference, Release 3.2.3
All Rights Reserved Permission to use, copy, modify, and distribute this software and its documentation for any purpose and without fee is hereby granted, provided that the above copyright notice appear in all copies and that both that copyright notice and this permission notice appear in supporting documentation, and that the name of Timothy O’Malley not be used in advertising or publicity pertaining to distribution of the software without specific, written prior permission. Timothy O’Malley DISCLAIMS ALL WARRANTIES WITH REGARD TO THIS SOFTWARE, INCLUDING ALL IMPLIED WARRANTIES OF MERCHANTABILITY AND FITNESS, IN NO EVENT SHALL Timothy O’Malley BE LIABLE FOR ANY SPECIAL, INDIRECT OR CONSEQUENTIAL DAMAGES OR ANY DAMAGES WHATSOEVER RESULTING FROM LOSS OF USE, DATA OR PROFITS, WHETHER IN AN ACTION OF CONTRACT, NEGLIGENCE OR OTHER TORTIOUS ACTION, ARISING OUT OF OR IN CONNECTION WITH THE USE OR PERFORMANCE OF THIS SOFTWARE.
C.3.6 Execution tracing The trace module contains the following notice: portions copyright 2001, Autonomous Zones Industries, Inc., all rights... err... reserved and offered to the public under the terms of the Python 2.2 license. Author: Zooko O’Whielacronx http://zooko.com/ mailto:[email protected] Copyright 2000, Mojam Media, Inc., all rights reserved. Author: Skip Montanaro Copyright 1999, Bioreason, Inc., all rights reserved. Author: Andrew Dalke Copyright 1995-1997, Automatrix, Inc., all rights reserved. Author: Skip Montanaro Copyright 1991-1995, Stichting Mathematisch Centrum, all rights reserved.
Permission to use, copy, modify, and distribute this Python software and its associated documentation for any purpose without fee is hereby granted, provided that the above copyright notice appears in all copies, and that both that copyright notice and this permission notice appear in supporting documentation, and that the name of neither Automatrix, Bioreason or Mojam Media be used in advertising or publicity pertaining to distribution of the software without specific, written prior permission.
1286
Appendix C. History and License
The Python Library Reference, Release 3.2.3
C.3.7 UUencode and UUdecode functions The uu module contains the following notice: Copyright 1994 by Lance Ellinghouse Cathedral City, California Republic, United States of America. All Rights Reserved Permission to use, copy, modify, and distribute this software and its documentation for any purpose and without fee is hereby granted, provided that the above copyright notice appear in all copies and that both that copyright notice and this permission notice appear in supporting documentation, and that the name of Lance Ellinghouse not be used in advertising or publicity pertaining to distribution of the software without specific, written prior permission. LANCE ELLINGHOUSE DISCLAIMS ALL WARRANTIES WITH REGARD TO THIS SOFTWARE, INCLUDING ALL IMPLIED WARRANTIES OF MERCHANTABILITY AND FITNESS, IN NO EVENT SHALL LANCE ELLINGHOUSE CENTRUM BE LIABLE FOR ANY SPECIAL, INDIRECT OR CONSEQUENTIAL DAMAGES OR ANY DAMAGES WHATSOEVER RESULTING FROM LOSS OF USE, DATA OR PROFITS, WHETHER IN AN ACTION OF CONTRACT, NEGLIGENCE OR OTHER TORTIOUS ACTION, ARISING OUT OF OR IN CONNECTION WITH THE USE OR PERFORMANCE OF THIS SOFTWARE. Modified by Jack Jansen, CWI, July 1995: - Use binascii module to do the actual line-by-line conversion between ascii and binary. This results in a 1000-fold speedup. The C version is still 5 times faster, though. - Arguments more compliant with Python standard
C.3.8 XML Remote Procedure Calls The xmlrpc.client module contains the following notice: The XML-RPC client interface is Copyright (c) 1999-2002 by Secret Labs AB Copyright (c) 1999-2002 by Fredrik Lundh By obtaining, using, and/or copying this software and/or its associated documentation, you agree that you have read, understood, and will comply with the following terms and conditions: Permission to use, copy, modify, and distribute this software and its associated documentation for any purpose and without fee is hereby granted, provided that the above copyright notice appears in all copies, and that both that copyright notice and this permission notice appear in supporting documentation, and that the name of Secret Labs AB or the author not be used in advertising or publicity pertaining to distribution of the software without specific, written prior permission. SECRET LABS AB AND THE AUTHOR DISCLAIMS ALL WARRANTIES WITH REGARD TO THIS SOFTWARE, INCLUDING ALL IMPLIED WARRANTIES OF MERCHANTABILITY AND FITNESS. IN NO EVENT SHALL SECRET LABS AB OR THE AUTHOR BE LIABLE FOR ANY SPECIAL, INDIRECT OR CONSEQUENTIAL DAMAGES OR ANY
C.3. Licenses and Acknowledgements for Incorporated Software
1287
The Python Library Reference, Release 3.2.3
DAMAGES WHETHER ACTION, OF THIS
WHATSOEVER RESULTING FROM LOSS OF USE, DATA OR PROFITS, IN AN ACTION OF CONTRACT, NEGLIGENCE OR OTHER TORTIOUS ARISING OUT OF OR IN CONNECTION WITH THE USE OR PERFORMANCE SOFTWARE.
C.3.9 test_epoll The test_epoll contains the following notice: Copyright (c) 2001-2006 Twisted Matrix Laboratories. Permission is hereby granted, free of charge, to any person obtaining a copy of this software and associated documentation files (the "Software"), to deal in the Software without restriction, including without limitation the rights to use, copy, modify, merge, publish, distribute, sublicense, and/or sell copies of the Software, and to permit persons to whom the Software is furnished to do so, subject to the following conditions: The above copyright notice and this permission notice shall be included in all copies or substantial portions of the Software. THE SOFTWARE IS PROVIDED "AS IS", WITHOUT WARRANTY OF ANY KIND, EXPRESS OR IMPLIED, INCLUDING BUT NOT LIMITED TO THE WARRANTIES OF MERCHANTABILITY, FITNESS FOR A PARTICULAR PURPOSE AND NONINFRINGEMENT. IN NO EVENT SHALL THE AUTHORS OR COPYRIGHT HOLDERS BE LIABLE FOR ANY CLAIM, DAMAGES OR OTHER LIABILITY, WHETHER IN AN ACTION OF CONTRACT, TORT OR OTHERWISE, ARISING FROM, OUT OF OR IN CONNECTION WITH THE SOFTWARE OR THE USE OR OTHER DEALINGS IN THE SOFTWARE.
C.3.10 Select kqueue The select and contains the following notice for the kqueue interface: Copyright (c) 2000 Doug White, 2006 James Knight, 2007 Christian Heimes All rights reserved. Redistribution and use in source and binary forms, with or without modification, are permitted provided that the following conditions are met: 1. Redistributions of source code must retain the above copyright notice, this list of conditions and the following disclaimer. 2. Redistributions in binary form must reproduce the above copyright notice, this list of conditions and the following disclaimer in the documentation and/or other materials provided with the distribution. THIS SOFTWARE IS PROVIDED BY THE AUTHOR AND CONTRIBUTORS ‘‘AS IS’’ AND ANY EXPRESS OR IMPLIED WARRANTIES, INCLUDING, BUT NOT LIMITED TO, THE IMPLIED WARRANTIES OF MERCHANTABILITY AND FITNESS FOR A PARTICULAR PURPOSE ARE DISCLAIMED. IN NO EVENT SHALL THE AUTHOR OR CONTRIBUTORS BE LIABLE FOR ANY DIRECT, INDIRECT, INCIDENTAL, SPECIAL, EXEMPLARY, OR CONSEQUENTIAL DAMAGES (INCLUDING, BUT NOT LIMITED TO, PROCUREMENT OF SUBSTITUTE GOODS OR SERVICES; LOSS OF USE, DATA, OR PROFITS; OR BUSINESS INTERRUPTION)
1288
Appendix C. History and License
The Python Library Reference, Release 3.2.3
HOWEVER CAUSED AND ON ANY THEORY OF LIABILITY, WHETHER IN CONTRACT, STRICT LIABILITY, OR TORT (INCLUDING NEGLIGENCE OR OTHERWISE) ARISING IN ANY WAY OUT OF THE USE OF THIS SOFTWARE, EVEN IF ADVISED OF THE POSSIBILITY OF SUCH DAMAGE.
C.3.11 strtod and dtoa The file Python/dtoa.c, which supplies C functions dtoa and strtod for conversion of C doubles to and from strings, is derived from the file of the same name by David M. Gay, currently available from http://www.netlib.org/fp/. The original file, as retrieved on March 16, 2009, contains the following copyright and licensing notice: /**************************************************************** * * The author of this software is David M. Gay. * * Copyright (c) 1991, 2000, 2001 by Lucent Technologies. * * Permission to use, copy, modify, and distribute this software for any * purpose without fee is hereby granted, provided that this entire notice * is included in all copies of any software which is or includes a copy * or modification of this software and in all copies of the supporting * documentation for such software. * * THIS SOFTWARE IS BEING PROVIDED "AS IS", WITHOUT ANY EXPRESS OR IMPLIED * WARRANTY. IN PARTICULAR, NEITHER THE AUTHOR NOR LUCENT MAKES ANY * REPRESENTATION OR WARRANTY OF ANY KIND CONCERNING THE MERCHANTABILITY * OF THIS SOFTWARE OR ITS FITNESS FOR ANY PARTICULAR PURPOSE. * ***************************************************************/
C.3.12 OpenSSL The modules hashlib, posix, ssl, crypt use the OpenSSL library for added performance if made available by the operating system. Additionally, the Windows installers for Python include a copy of the OpenSSL libraries, so we include a copy of the OpenSSL license here: LICENSE ISSUES ============== The OpenSSL toolkit stays under a dual license, i.e. both the conditions of the OpenSSL License and the original SSLeay license apply to the toolkit. See below for the actual license texts. Actually both licenses are BSD-style Open Source licenses. In case of any license issues related to OpenSSL please contact [email protected]. OpenSSL License --------------/* * * * *
==================================================================== Copyright (c) 1998-2008 The OpenSSL Project. All rights reserved. Redistribution and use in source and binary forms, with or without modification, are permitted provided that the following conditions
C.3. Licenses and Acknowledgements for Incorporated Software
1289
The Python Library Reference, Release 3.2.3
* are met: * * 1. Redistributions of source code must retain the above copyright notice, this list of conditions and the following disclaimer. * * * 2. Redistributions in binary form must reproduce the above copyright notice, this list of conditions and the following disclaimer in * the documentation and/or other materials provided with the * distribution. * * * 3. All advertising materials mentioning features or use of this software must display the following acknowledgment: * "This product includes software developed by the OpenSSL Project * for use in the OpenSSL Toolkit. (http://www.openssl.org/)" * * * 4. The names "OpenSSL Toolkit" and "OpenSSL Project" must not be used to endorse or promote products derived from this software without * prior written permission. For written permission, please contact * [email protected]. * * * 5. Products derived from this software may not be called "OpenSSL" nor may "OpenSSL" appear in their names without prior written * permission of the OpenSSL Project. * * * 6. Redistributions of any form whatsoever must retain the following acknowledgment: * "This product includes software developed by the OpenSSL Project * for use in the OpenSSL Toolkit (http://www.openssl.org/)" * * * THIS SOFTWARE IS PROVIDED BY THE OpenSSL PROJECT ‘‘AS IS’’ AND ANY * EXPRESSED OR IMPLIED WARRANTIES, INCLUDING, BUT NOT LIMITED TO, THE * IMPLIED WARRANTIES OF MERCHANTABILITY AND FITNESS FOR A PARTICULAR * PURPOSE ARE DISCLAIMED. IN NO EVENT SHALL THE OpenSSL PROJECT OR * ITS CONTRIBUTORS BE LIABLE FOR ANY DIRECT, INDIRECT, INCIDENTAL, * SPECIAL, EXEMPLARY, OR CONSEQUENTIAL DAMAGES (INCLUDING, BUT * NOT LIMITED TO, PROCUREMENT OF SUBSTITUTE GOODS OR SERVICES; * LOSS OF USE, DATA, OR PROFITS; OR BUSINESS INTERRUPTION) * HOWEVER CAUSED AND ON ANY THEORY OF LIABILITY, WHETHER IN CONTRACT, * STRICT LIABILITY, OR TORT (INCLUDING NEGLIGENCE OR OTHERWISE) * ARISING IN ANY WAY OUT OF THE USE OF THIS SOFTWARE, EVEN IF ADVISED * OF THE POSSIBILITY OF SUCH DAMAGE. * ==================================================================== * * This product includes cryptographic software written by Eric Young * ([email protected]). This product includes software written by Tim * Hudson ([email protected]). * */ Original SSLeay License ----------------------/* Copyright (C) 1995-1998 Eric Young ([email protected]) * All rights reserved. 1290
Appendix C. History and License
The Python Library Reference, Release 3.2.3
* * This package is an SSL implementation written * by Eric Young ([email protected]). * The implementation was written so as to conform with Netscapes SSL. * * This library is free for commercial and non-commercial use as long as * the following conditions are aheared to. The following conditions * apply to all code found in this distribution, be it the RC4, RSA, * lhash, DES, etc., code; not just the SSL code. The SSL documentation * included with this distribution is covered by the same copyright terms * except that the holder is Tim Hudson ([email protected]). * * Copyright remains Eric Young’s, and as such any Copyright notices in * the code are not to be removed. * If this package is used in a product, Eric Young should be given attribution * as the author of the parts of the library used. * This can be in the form of a textual message at program startup or * in documentation (online or textual) provided with the package. * * Redistribution and use in source and binary forms, with or without * modification, are permitted provided that the following conditions * are met: * 1. Redistributions of source code must retain the copyright notice, this list of conditions and the following disclaimer. * * 2. Redistributions in binary form must reproduce the above copyright notice, this list of conditions and the following disclaimer in the * documentation and/or other materials provided with the distribution. * * 3. All advertising materials mentioning features or use of this software must display the following acknowledgement: * "This product includes cryptographic software written by * Eric Young ([email protected])" * The word ’cryptographic’ can be left out if the rouines from the library * being used are not cryptographic related :-). * * 4. If you include any Windows specific code (or a derivative thereof) from the apps directory (application code) you must include an acknowledgement: * "This product includes software written by Tim Hudson ([email protected])" * * * THIS SOFTWARE IS PROVIDED BY ERIC YOUNG ‘‘AS IS’’ AND * ANY EXPRESS OR IMPLIED WARRANTIES, INCLUDING, BUT NOT LIMITED TO, THE * IMPLIED WARRANTIES OF MERCHANTABILITY AND FITNESS FOR A PARTICULAR PURPOSE * ARE DISCLAIMED. IN NO EVENT SHALL THE AUTHOR OR CONTRIBUTORS BE LIABLE * FOR ANY DIRECT, INDIRECT, INCIDENTAL, SPECIAL, EXEMPLARY, OR CONSEQUENTIAL * DAMAGES (INCLUDING, BUT NOT LIMITED TO, PROCUREMENT OF SUBSTITUTE GOODS * OR SERVICES; LOSS OF USE, DATA, OR PROFITS; OR BUSINESS INTERRUPTION) * HOWEVER CAUSED AND ON ANY THEORY OF LIABILITY, WHETHER IN CONTRACT, STRICT * LIABILITY, OR TORT (INCLUDING NEGLIGENCE OR OTHERWISE) ARISING IN ANY WAY * OUT OF THE USE OF THIS SOFTWARE, EVEN IF ADVISED OF THE POSSIBILITY OF * SUCH DAMAGE. * * The licence and distribution terms for any publically available version or * derivative of this code cannot be changed. i.e. this code cannot simply be * copied and put under another distribution licence * [including the GNU Public Licence.] */ C.3. Licenses and Acknowledgements for Incorporated Software
1291
The Python Library Reference, Release 3.2.3
C.3.13 expat The pyexpat extension is built using an included copy of the expat sources unless the build is configured --with-system-expat: Copyright (c) 1998, 1999, 2000 Thai Open Source Software Center Ltd and Clark Cooper Permission is hereby granted, free of charge, to any person obtaining a copy of this software and associated documentation files (the "Software"), to deal in the Software without restriction, including without limitation the rights to use, copy, modify, merge, publish, distribute, sublicense, and/or sell copies of the Software, and to permit persons to whom the Software is furnished to do so, subject to the following conditions: The above copyright notice and this permission notice shall be included in all copies or substantial portions of the Software. THE SOFTWARE IS PROVIDED "AS IS", WITHOUT WARRANTY OF ANY KIND, EXPRESS OR IMPLIED, INCLUDING BUT NOT LIMITED TO THE WARRANTIES OF MERCHANTABILITY, FITNESS FOR A PARTICULAR PURPOSE AND NONINFRINGEMENT. IN NO EVENT SHALL THE AUTHORS OR COPYRIGHT HOLDERS BE LIABLE FOR ANY CLAIM, DAMAGES OR OTHER LIABILITY, WHETHER IN AN ACTION OF CONTRACT, TORT OR OTHERWISE, ARISING FROM, OUT OF OR IN CONNECTION WITH THE SOFTWARE OR THE USE OR OTHER DEALINGS IN THE SOFTWARE.
C.3.14 libffi The _ctypes extension is built using an included copy of the libffi sources unless the build is configured --with-system-libffi: Copyright (c) 1996-2008
Red Hat, Inc and others.
Permission is hereby granted, free of charge, to any person obtaining a copy of this software and associated documentation files (the ‘‘Software’’), to deal in the Software without restriction, including without limitation the rights to use, copy, modify, merge, publish, distribute, sublicense, and/or sell copies of the Software, and to permit persons to whom the Software is furnished to do so, subject to the following conditions: The above copyright notice and this permission notice shall be included in all copies or substantial portions of the Software. THE SOFTWARE IS PROVIDED ‘‘AS IS’’, WITHOUT WARRANTY OF ANY KIND, EXPRESS OR IMPLIED, INCLUDING BUT NOT LIMITED TO THE WARRANTIES OF MERCHANTABILITY, FITNESS FOR A PARTICULAR PURPOSE AND NONINFRINGEMENT. IN NO EVENT SHALL THE AUTHORS OR COPYRIGHT HOLDERS BE LIABLE FOR ANY CLAIM, DAMAGES OR OTHER LIABILITY, WHETHER IN AN ACTION OF CONTRACT, TORT OR OTHERWISE, ARISING FROM, OUT OF OR IN CONNECTION WITH THE SOFTWARE OR THE USE OR OTHER DEALINGS IN THE SOFTWARE.
1292
Appendix C. History and License
The Python Library Reference, Release 3.2.3
C.3.15 zlib The zlib extension is built using an included copy of the zlib sources if the zlib version found on the system is too old to be used for the build: Copyright (C) 1995-2011 Jean-loup Gailly and Mark Adler This software is provided ’as-is’, without any express or implied warranty. In no event will the authors be held liable for any damages arising from the use of this software. Permission is granted to anyone to use this software for any purpose, including commercial applications, and to alter it and redistribute it freely, subject to the following restrictions: 1. The origin of this software must not be misrepresented; you must not claim that you wrote the original software. If you use this software in a product, an acknowledgment in the product documentation would be appreciated but is not required. 2. Altered source versions must be plainly marked as such, and must not be misrepresented as being the original software. 3. This notice may not be removed or altered from any source distribution. Jean-loup Gailly [email protected]
Mark Adler [email protected]
C.3. Licenses and Acknowledgements for Incorporated Software


![[PDF] Python: The Complete Reference - Google Sites](https://m.moam.info/img/260x300/pdf-python-the-complete-reference-google-sites_6477e9c6097c474d228c91a6.jpg)


![Read [PDF] Python Pocket Reference: Python In Your ... - Google Sites](https://m.moam.info/img/260x300/read-pdf-python-pocket-reference-python-in-your-go_6477906f097c474e708bd7c4.jpg)


![[PDF] Python Pocket Reference (Pocket Reference (O ... - Google Sites](https://m.moam.info/img/260x300/pdf-python-pocket-reference-pocket-reference-o-goo_64785a77097c474c228d0ad5.jpg)
![[PDF] Python Essential Reference - Google Sites](https://m.moam.info/img/260x300/pdf-python-essential-reference-google-sites_6477b3d6097c4744708c01bd.jpg)


![[PDF] Download Python Pocket Reference - Google Sites](https://m.moam.info/img/260x300/pdf-download-python-pocket-reference-google-sites_6477e0a0097c47a9708c33dc.jpg)
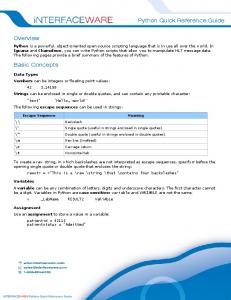


![[PDF] Download Python Pocket Reference - Google Sites](https://m.moam.info/img/260x300/pdf-download-python-pocket-reference-google-sites_647739bf097c474c228bca9b.jpg)