I wanted to design a knife that would incorporate turning with the bread knife that
I already make. ... the top ends of the flanking pieces with the reference line.
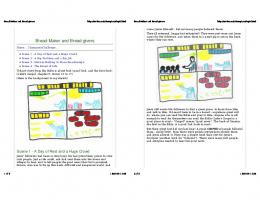
Turned Handle Bread Knife
◆ ◆ ◆ ◆ ◆ ◆ ◆ ◆ ◆ ◆ ◆ ◆ ◆ ◆ ◆ ◆ ◆ ◆ ◆◆ ◆ ◆ ◆ ◆ ◆ ◆ ◆ ◆ ◆ ◆ ◆ ◆ ◆ ◆ ◆ ◆ ◆ ◆◆ ◆ ◆◆ ◆ ◆ ◆ ◆ ◆ ◆
by Joseph M. Herrmann For many years, I have been making a simple, flat bread knife that I sell at craft fairs and on the Internet. They are functional, easy to make, and, better yet, they sell well. If you are interested in how they are made, a reprint of the complete article from Creative Woodworks & Crafts can be found on my website at www.timbertreasures.com. My first love in woodworking, however, is the lathe and I wanted to design a knife that would incorporate turning with the bread knife that I already make. A knife with a simple turned handle is what I finally decided upon. The knife can be made from any cabinet grade hardwood. I chose tiger maple for the handle and walnut for the blade section for the knife featured here. Maple turns extremely well and tearout, a problem often encountered when using a highly-figured wood such as tiger or birdseye maple for cabinet work, is virtually eliminated. Besides, the tiger maple really catches the eye and could help to justify the higher price demanded by this knife!
78 ● Woodturning Design Summer 2004
STOCK PREPARATION One piece of walnut 9/16” x 1-9/16” x 19” and 2 pieces of curly maple 9/16” x 1-9/16” x 5-1/2” are required for this project. Run all three stock pieces through the planer at the same time to ensure that they are the same thickness. The two pieces of tiger maple will be glued on so they flank the walnut, which makes up the main body of the knife. It is important that these two flanking pieces be in a single plane where their tops intersect the body of the knife. If they’re not, one side of the knife handle will stick out farther than the other side. Draw a reference line 5-1/2” away from the end of the stock (see Fig. 1). When gluing, line up the flanking pieces with this line. I used a white-colored pencil that I bought at an art supply store to mark the walnut. As you can see, it shows up much better than an ordinary graphite pencil on the dark wood.
SUPPLIES Wood: walnut – one piece 9/16” x 1-9/16” x 19” for main knife body; maple – two pieces 9/16” x 1-9/16” x 5-1/2” for flanking pieces for handle; 3/4” x 10” scrap wood (optional) Tools: lathe, planer, clamps, jointer, awl, 3/8”-dia. spur center, mill file, large roughing gouge, parting tool, calipers, small spindle gouge, electric drill with sanding discs, bandsaw, spindle sander, small laminate trimmer, 3/16” roundover bit, sharp chisel One 3/8” x 10-1/2” metal blade* Two 3/8” x No. 4 pan head sheet metal screws No. 1 Phillips-head screwdriver Three-step buffing system (Beall’s**) Titebond II wood glue or glue of choice Beeswax Linseed oil mixture Deft lacquer-based finish Assorted abrasive paper and stearated silicon carbide abrasive paper** Spline from plastic term paper cover (optional) White-colored pencil Double-stick tape
*Available from Timber Treasures, 160 West Cedar Street, Jefferson, Ohio 44047-1331; phone: 440-576-7697; website: www.timbertreasures.com; Order: $4.75 ea. includes screws and shipping. **Available from Packard Woodworks; phone: 800-683-8876; website: www.packardwoodworks.com; or from Craft Supplies USA; phone: 800-551-8876; website: www.woodturnerscatalog.com.
1
I marked a reference line 5-1/2” away from the end of the wood so I could line up the top end of the handle. This prevents one side of the handle from being longer than the other.
Any squeezed out glue between the junction of the maple and walnut must be removed with a damp cloth. Adjustable hand screws are a good choice for clamps.
3
GLUE-UP Apply a coat of Titebond II wood glue to both sides of the main body and to just one side of each of the flanking pieces. I like to use Titebond II because it is stickier and doesn’t seem to slide around as much when clamped. Align the top ends of the flanking pieces with the reference line drawn earlier (see Fig. 2). Adjustable hand screws work best to clamp the assembly together. They apply sufficient pressure across the joint and, by using them in multiples, uniform pressure can be applied along the entire length of the joint as well. The glue is going to squeeze out along the joints. This is good because it shows that adequate glue was used and equal clamping pressure was applied (see Fig. 3). Just be sure to wipe off any glue that might have seeped out along the top of the handle adjacent to the end grain. If you don’t wipe the glue off with a damp cloth now, it will stain the wood and be much more difficult to remove than you might think. Rub the joint until all the excess glue appears to be gone...and then rub some more just to be sure! Allow the glue to cure for 24 hours, remove the clamps, and scrape off any dried glue along the edges. Remove about 1/32” from both edges of the stock on the jointer just to clean up the edge.
Glue is applied to all surfaces that touch. Note how I stayed just slightly away from the reference line. I didn’t want too much glue to squeeze out from the end of the handle. It’s hard to remove!
2
4
Find the center of the middle block on the handle side and carefully centerpunch it with a sharp awl. Do the same to the other end as well.
5 A small spur center holds the stock securely and won’t interfere with the turning process.
Woodturning Design Summer 2004 ● 79
6
Form the transition between the blade and the handle. A half-bead and a chamfer work great to join these two elements.
7
I like to grind my gouges to a sharp point. It allows me to get into tight corners without encountering any of the problems associated with the skew.
PREPARING THE STOCK FOR TURNING The handle end of the knife must be squared up to provide a flat surface for the spur center. Cut off the end of the glued blank so the handle is approximately 6-1/4” long. The center of the turning must be positioned along the axis of the long piece of stock in order for the handle of the knife to be symmetrical. Therefore, locating the center point is crucial. With a straight edge and a sharp pencil, connect the corners of the walnut; ignore the flanking pieces entirely. Carefully centerpunch the intersection with a sharp awl, being sure to hit the exact center (see Fig. 4)! Mount the assembly between the centers of the lathe using a small 3/8”-diameter spur center in the headstock end of the lathe (see Fig. 5). The standard spur center that comes with most lathes is too large and will interfere with the turning toward the end of the process. Use a revolving cup center in the tailstock end of the lathe. Always remove any nicks and scratches from the tool rest with a mill file and abrasive paper before starting any turning. The goal is to create smooth, flowing lines. You can’t do this if your chisels are bouncing around as they ride over the hills and valleys created by the nicks and scratches in the tool rest.
TURNING 8 Form the small bead on the end of the handle.
Be careful when removing the completed handle from the lathe so you don’t snap off the almost severed end attached to the ball.
9
10
80 ➐ Woodturning Design Summer 2004
A small piece of scrap stock is used to elevate the knife to compensate for the thicker handle.
I used a large roughing gouge to turn the built-up handle portion to a smooth cylinder approximately 1-1/4” in diameter. Use care, however, not to remove any stock on what will later support the blade of the knife. Measure over 5/16” to the left of the joint of the handle. Make a 1” diameter groove with a parting tool and outside calipers to the left of that line. The front portion of the handle is now approximately 1” in diameter at its widest point, while the flat portion of the knife is still 1-1/2” wide. Obviously some transition shape must be turned to join these two different dimensions into a cohesive form. A half-bead on the blade side and a chamfer on the handle side will solve this problem and can be easily turned with a small spindle gouge (see Fig. 6). Interrupted turning can be difficult if the speed of the lathe is not high enough to produce a “ghost” image of the blade. 2000 RPM appears to be an optimal speed to turn this area. I grind my gouge almost to a sharp point as shown in Fig. 7. Ground this way, I find that it will do the work of a skew and allow me to get in tight at the base of the chamfer and half-bead much easier. And, I don’t have any of the problems normally associated with the skew. Measure over 1-3/8” to the left of the handle joint and make a 3/4”-diameter groove with a parting tool. Finally, measure over 5” to the left of the handle joint to mark the end of the handle; the ball detail will be to the left of this mark. The rest of the handle can now be reduced to a long, flowing cove and bead. As before, this is best accomplished with a spindle gouge or even with the large roughing gouge. The handle will want to flex, so a light touch is necessary and support should be provided with the fingers of your left hand.
Turn a small 5/16”-diameter ball with a small spindle gouge on the very end of the handle to finish the turning (see Fig. 8). This shape is easier to sand than if the handle were reduced to just a point. Besides, it adds more visual interest to an otherwise simple handle form (see Layout Diagram). SANDING Like just about everyone else who works wood, I hate to sand. However, I consider it to be a necessary evil because I know that the secret to a great project is a good finish. And, a good finish starts with a good sanding job. A small sanding disc in a hand-held electric drill reduces the drudgery involved with this task. Start with 150grit abrasive paper attached to a padded Velcro sanding disc and progress to 320-grit. The padded disc works great on the long, flowing portions of the turning but is a little difficult to get into the corners, so use the more rigid, hard rubber sanding disc to do this. This method works so well and is so efficient that it didn’t even take two minutes to sand the bulk of the turning! Ordinary hand sanding techniques, however, are employed to sand the small ball at the end of the handle. Remove the completed blank from between centers, being very careful that you don’t tilt the turning and snap off the small waste nub still attached to the ball (see Fig. 9). If you do, it often will undercut the wood, leaving a crater in the turning that is virtually impossible to remove. Simply nip the small nub off with a bandsaw, allowing enough waste stock so you can round over the top of the ball to a circular shape.
FORMING THE BLADE PORTION Now that the handle is completed, you can begin to form the rest of the bread knife. The blade portion of the Layout Diagram is drawn on a grid. By enlarging that portion of the diagram by 250% on a photocopy machine, you will get a full-size pattern if desired. When full size, each square of the grid will measure 1/4” square and the pattern should be 1-9/16” wide and 12“ long. Trace the pattern (or make your own pattern using the measurements given) and cut out the profile with a bandsaw. Because the blade is thinner than the handle, it will be necessary to elevate the blade portion to bandsaw its shape. To do this, cut into a thicker piece of stock (I used a piece of 3/4” x 10” particle board), stopping about 1/2” away from sawing through its front edge. Attach this piece to the table with double-stick tape so it can’t move (see Fig. 10). Cutting the profile is easy now. Do not cut out the inner “belly” of the knife at this point. This area will be cut out AFTER the top edges have been rounded over. I found that this provides a little extra support for the base of the laminate trimmer that is needed to prevent it from “tipping” as the curves are shaped. An oscillating spindle sander works best to sand the inside and outside curves. (However, a drum sander installed in a drill press could also be used.) But again, just as before, the blade portion must be elevated to do so. Draw a circle in the center of a piece of waste stock slightly larger than the 2” drum used. Cut it out on the bandsaw and use the double stick tape to attach the scrap to the table
An oscillating spindle sander is used to sand the curves. Notice how the blank had to be elevated here as well.
11
12
A 3/16” roundover bit in a laminate trimmer is used to ease the top of the curve. You won’t be able to get in tight by the transition corner.
13 A sharp chisel and abrasive paper smooths over the edge of the curve.
14
The metal blade is attached to the wooden knife through the predrilled holes at either end with two screws. The serrated blade is extremely sharp, so be very careful not to get cut!!
This is the jig I use to flex the body of the knife so the handle will be good and tight. If the blade is loose, it’s worthless!
15
Woodturning Design Summer 2004 ● 81
5” 31⁄ 2” 13⁄ 8”
5⁄16”
5⁄16”
1 9⁄ 16”
1”
3⁄ 4”
1 1⁄ 4”
5⁄16”
171⁄ 4” Layout Diagram (not full size) MUST ENLARGE 250% Each square = 1/4"
of the sander (see Fig. 11). I like to round over the top curves of my knives. It is more visually appealing and definitely feels better when held. Use a 3/16” roundover bit in a small laminate trimmer to do this. As illustrated in Fig. 12, you won’t be able to get right into the transition between the blade and the handle because the base of the trimmer is too large. A sharp chisel and abrasive paper eliminates this abrupt ending and fairs the rounded over edge into the transition (see Fig. 13). Once the top edges have been rounded over and the transition area has been addressed, cut the “belly” of the knife to shape and sand it on the spindle sander. Spend a bit of time hand sanding the blade of the knife, making sure that all the scratches are eliminated and any sharp edges or corners are rounded over. I started with 120grit stearated silicon carbide abrasive paper and sanded down to 320-grit. I like to use the stearated abrasive paper for sanding smaller projects. This paper is treated to prevent clogging and the silicon carbide grains fracture quicker, continually exposing fresh, sharp cutting edges. The paper might be a little more expensive, but the sanding process goes so much quicker!
FINISHING Start the finishing process by applying a liberal coat of boiled linseed oil (thinned two to one with paint thinner) to the surface of the project. Allow it to penetrate the wood for about 15 minutes and then wipe off any excess with a dry cloth. Wiping off the excess oil is important. If it is not removed and is permitted to dry, the excess oil will congeal into a sticky mess that is extremely difficult to remove. I like to start my finishes this way because the oil acts as sort of a clear stain that imparts a slightly yellow cast to the project, which I like. The oil also magnifies any defects but, unlike built up finishes such as varnish or shellac, you can go back and immediately sand them away without removing any surface buildup. A little more oil applied to the sanded area makes everything equal again. Allow the oil mixture to cure overnight. Next, apply a liberal coat of a lacquer-based finish (like Deft) to the entire project. Because this is just intended to be a sealer coat, immediately wipe off any excess with a clean, dry cloth. Allow the Deft to dry for about an hour and
then buff the project using a three-step buffing process detailed as follows: Three separate buffing wheels are used and each are charged with a different compound. The first wheel is charged with a Tripoli compound. It is slightly abrasive and eliminates any tiny scratches that might remain. It also smooths the wood. The second wheel is charged with a white diamond compound that removes any excess Tripoli compound and begins the polishing process. The third wheel is charged with Carnuba wax, producing a protective coating while shining the wood to a glossy finish.
�
ATTACHING THE SHARP BLADE I use an extremely sharp, serrated blade approximately 3/8” wide and about 10-1/2” long for my bread knives. The blade is attached to the wood with two 3/8” x No. 4 pan head sheet metal screws. It is imperative that the blade be taut when it is fixed to the handle. I use a shop-built jig to ensure this. Study the photograph of this simple jig shown in Fig. 14. It consists of two strips of wood that are attached to a small piece of plywood with nails. The gap between the strips is 9/16” (equal to the thickness of the blade portion of the wooden body). Two small pieces of 1/8” stock are glued into the channel, elevating the bread knife body just slightly above the strips when it is placed in the jig. A clamp is used to flex the bread knife body ever so slightly. The blade is attached to the body with the screws located at the very ends of the holes pre-drilled in the metal blade. When the clamping pressure is removed, the bread knife body springs back to its original length, stretching the blade tighter than a violin string! Center the metal blade on the bread knife body so the edge of the blade aligns with the edge of the wood and drill the 1/16” pilot holes. For right-handed users, the blade should be positioned with the teeth facing you (see Fig. 15). For a left-handed user, the blade must be flipped over and attached so the teeth point away from you. Lubricate the screws with beeswax to reduce the danger of them snapping and drive them in with a No. 1 Phillips-head screwdriver. I use the spline from a plastic term paper cover that I buy from the local office equipment store as a guard. Cut it off to 9-3/8” long on the bandsaw so it fits over the blade. I made a sliding jig to help to do this because I cut so many; you can cut it freehand.
82 ➐ Woodturning Design Summer 2004
�
The guard should be placed over the back side of the blade (see Fig. 16). If you try to put it on over the teeth of the blade, it will get caught on the extremely sharp teeth. This is a versatile knife. In addition to unsliced bread, bagels, and English muffins, it will also slice a variety of vegetables (especially tomatoes) so thin you can almost see through them. It will slice warm bread directly from the oven and even cut cold meat. Care for the knife is simple. Do not put the knife into the dishwasher or sink; just wipe down the wooden portion with a DRY cloth. If the metal blade must be washed, wipe it down with a wet sponge or cloth. Be sure to dry it thoroughly with a soft towel; if the blade is left wet, it will rust.
16 The plastic spline from a term paper cover is used for a guard. The guard should be placed over the back edge of the blade. If you try to put it over the teeth of the blade, it will get stuck.
��������������������������������� look what's Turning Square by Steve Worcester
Coming �
In the
Fall issue of
Chef’s Salt Grinder by Ron Hampton with Billy Webb
Aluminum Pen by Emory McLaughlin
Fluted Bowl Description by Bob Heltman
AND MUCH, MUCH MORE!
On Sale August 17, 2004
www.woodturningdesign.com
���������������������������������