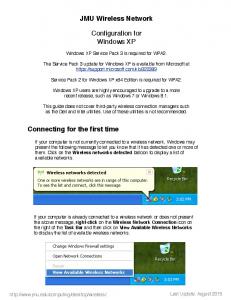
If your computer is not currently connected to a wireless network, Windows may ...
managed by third-party software such as the Dell or Intel wireless utilities.
If the Wireless Zero Configuration Service is activated, Windows will scan for
available wireless access points once the Wireless Notebook Adapter is properly.
This configuration guide requires the use of the Windows Wireless Zero
Configuration (WZC) to configure the wireless settings. If you are confident that
you are ...
will walk you through all the steps to configuring your email program. IMAP ... If
your particular email program is not covered in this guide, you can still use.
You will have to complete the following procedures: 1) Install the Windows.
Server Support Tools; 2) Install the Active Directory Schema Snap-in; and 3).
Set Up a Public Web Server Behind an XTM. Device. Example configuration files
created with — WSM v11.7.2. Revised — 3/22/2013. Use Case.
To begin configuring your computer to do this or change your existing settings, ...
wireless network, Windows Vista will still save the password you used to ...
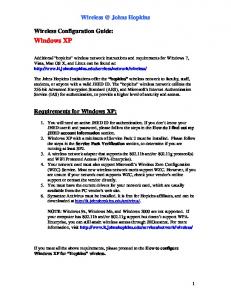
The Johns Hopkins Institutions offer the “hopkins” wireless network to faculty, staff
... Your network card must also support Microsoft's Wireless Zero Configuration.
JMU Wireless Network. Configuration for. Windows 8. Screenshots in this guide
were created using the. Windows 8 Consumer Preview. Please note that ...
JMU Wireless Network. Configuration for. Apple iPad. Screenshots in this guide
were created using an iPad with iOS 3.2. Please note that the iPad is not ...
JMU Wireless Network. Configuration for. iPod touch & iPhone. iOS 2.0 or newer
is required for WPA2-Enterprise support. Information on iOS software updates is ...
of the Composite Display Component in Caplin Trader Client. .... This is the
logical name (id) of a controller – the controller is a JavaScript class that controls
the.
(WiFi@FSU wireless network). To function with FSU's wireless networks, it is
recommended that users purchase a wireless network card that supports 802.11
n.
Click Change advanced settings then click on the Wireless Networks tab. ...
computer information is available box if the computer is University owned and a ...
If the q'ty of the clients exceeds 10 units, the OS of the host server should be
upgraded to Windows Multipoint Server 2011 "Premium". ** Please refer to next ...
... this page. Retrying... Whoops! There was a problem loading this page. Retrying... Main menu. Displaying Resume Examp
Led 30 volunteers to organize the country's largest undergraduate theatre ... Z Dramatics Society â won over 9 nationa
A. Introduction. This document shows the step by step instructions on how to
configure your Blackberry to NUS PEAP wireless. The steps may differ with
different ...
CCNA Exploration. LAN Switching and Wireless: Wireless Concepts and
Configuration. Lab 7.5.2 Challenge Wireless .... Fa0/2 on. 802.1q trunking 1. Fa0/
3 on. 802.1q trunking 1. Fa0/4 on. 802.1q trunking 1. Fa0/5 on. 802.1q trunking 1.
File: Manually Configuring Windows XP for. Page 1 of 7. Rev: 0.1. Wireless
PittNet. Technology Help Desk. 412 624-HELP [4357] http://technology.pitt.edu.
LAB: Basic Wireless Configuration (Linksys) ... In this activity, you will configure a
Linksys wireless router (WRS2, Wireless Remote System 2), allowing for.
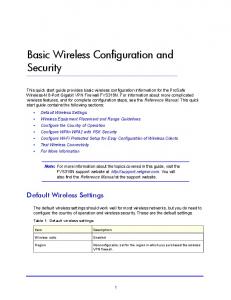
This quick start guide provides basic wireless configuration information for ...
wireless features, and for complete configuration steps, see the Reference
Manual.
Hello there, and thank you for visiting this popular blog. On this website you'll discover everything and whatever to do
Configuration d'une imprimante réseau. Sous Windows XP. Cliquez sur «
Démarrer » puis « Paramètres » puis « Imprimantes et télécopieurs ». Cliquez
sur ...
This section shows an example of how to configure a Windows XP wireless client
using Windows XP's. Wireless Zero Configuration service. 1. On the desktop ...
Figure 148 Example RADIUS Class Attribute for “student”
Window XP Wireless Client Example Configuration This section shows an example of how to configure a Windows XP wireless client using Windows XP’s Wireless Zero Configuration service.
NOTE
The following steps apply to a computer running Windows XP Professional Version 2002 with Service Pack 2. To configure a wireless client on other Windows platforms, see your Microsoft Windows documentation.
1. On the desktop, right-click My Network Places and select Properties. 2. In the Network Connections window, right-click on Wireless Network Connection and select Properties. 3. Select the Wireless Networks tab. This screen displays the available wireless networks and the list of preferred networks. Windows connects to the preferred networks in the order in which they appear in the list. Figure 149 Wireless Networks
4. Click the Advanced button to display the Networks to access window. ArubaOS Version 3.4.1 | User Guide
802.1x Configuration for IAS and Windows Client | 637
Figure 150 Networks to Access
This window determines what types of wireless networks the client can access. By default, Windows connects to any type of wireless network. Make sure that the option Computer-to-computer (ad hoc) networks only is not selected. Click Close. 5. In the Wireless Networks tab, click Add to add a wireless network. 6. Click the Association tab to enter the network properties for the SSID.
NOTE
This tab configures the authentication and encryption used between the wireless client and the Aruba usercentric network. Therefore, the settings for the SSID that you configure on the client must match the configuration for the SSID on the controller.
z
z
z
z
z
For an SSID using dynamic WEP, enter the following:
Network Authentication: Open
Data Encryption: WEP
Select the option “The key is provided for me automatically”. Each client will use a dynamicallygenerated WEP key that is automatically derived during the 802.1x process.
For an SSID using WPA, enter the following:
Network Authentication: WPA
Data Encryption: TKIP
For an SSID using WPA-PSK, enter the following:
Network Authentication: WPA-PSK
Data Encryption: TKIP
Enter the preshared key.
For an SSID using WPA2, enter the following:
Network Authentication: WPA2
Data Encryption: AES
For an SSID using WPA2-PSK, enter the following:
Network Authentication: WPA2-PSK
Data Encryption: AES
Enter the preshared key
638 | 802.1x Configuration for IAS and Windows Client
ArubaOS Version 3.4.1 | User Guide
NOTE
Do not select the option “This is a computer-to-computer (ad hoc) network; wireless access points are not used”. Figure 151 shows the configuration for the SSID WLAN-01 which uses WPA network authentication with TKIP data encryption.
Figure 151 Wireless Network Association
7. Click the Authentication tab to enter the 802.1x authentication parameters for the SSID. This tab configures the EAP type used between the wireless client and the authentication server. Configure the following, as shown in Figure 152: z
Select Enable IEEE 802.1x authentication for this network.
z
Select Protected EAP (PEAP) for the EAP type.
z
Select Authenticate as computer when computer information is available. The client will perform computer authentication when a user is not logged in.
z
Do not select Authenticate as guest when user or computer information is unavailable. The client will not attempt to authenticate as a guest.
Figure 152 Wireless Network Authentication
ArubaOS Version 3.4.1 | User Guide
802.1x Configuration for IAS and Windows Client | 639
8. Under EAP type, select Properties to display the Protected EAP Properties window. Configure the client PEAP properties, as shown in Figure 153: z
Select Validate server certificate. This instructs the client to check the validity of the server certificate from an expiration, identity, and trust perspective.
z
Select the trusted Certification Authority (CA) that can issue server certificates for the network.
z
Select Secured password (EAP-MSCHAP v2) — the PEAP “inner authentication” mechanism will be an MS-CHAPv2 password.
z
Select Enable Fast Reconnect to speed up authentication in some cases.
Figure 153 Protected EAP Properties
9. Under Select Authentication Method, click Configure to display the EAP-MSCHAPv2 Properties window. Select the option Automatically use my Windows logon name and password (and domain if any). This option specifies that the user’s Windows logon information is used for authentication to the wireless network. This option allows the same logon credentials to be used for access to the Windows domain as well as the wireless network. Figure 154 EAP MSCHAPv2 Properties
640 | 802.1x Configuration for IAS and Windows Client