Mar 15, 2007 - sinusoidal signal V cosÏt that occupies the full range of the quantizer. The full-scale ... signal is read vertically downward using the cursor located at the maximum input signal of. 20 V. .... box select Gate-Level Simulation.
book
Mobk066
March 15, 2007
21:18
SAMPLING AND PULSE CODE MODULATION
49
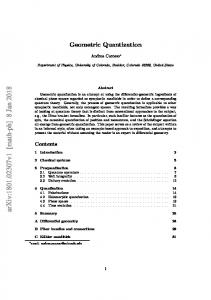
FIGURE 3.14: Magnified sample and hold signals.
3.4
QUANTIZATION NOISE
Quantization noise, q , is an unwanted product produced in the conversion from analog signals into a digital format. Analog to digital converters (ADC) produce this noise and it is reduced by increasing the number of levels, M, in the ADC process. The signal to noise ratio (SNR) in analog circuits is defined as the ratio of the signal amplitude to the noise amplitude present. In sampled systems, however, the signal to quantization noise ratio (SQNR) is the ratio of signal power to quantizing noise power. The easiest way to examine SQNR is to apply a sinusoidal signal V cos ωt that occupies the full range of the quantizer. The full-scale value is VFS = 2n q /2, where n is the number of bits used. The average signal power for full-scale voltage VFS is Pmax
√ √ √ Vrms (VFS / 2)2 (q M/ 2)2 q 2 (2n /2 2)2 q 2 22n = = = = = . R R R R 8R
(3.20)
The quantizing noise voltage is limited to ± q /2 and, except at the signal peak level, the voltage has all values within this range occurring with equal probability. The averaged normalized noise power is determined by integrating the quantization noise voltage (sawtoothed in shape and with a negative slope −q t/T0 over a period T0 ): 1 Nq = T0
�
� � � � T03 q2 q 2 q 2 T03 + = . − t dt = T0 8 12 3T03 8 −T0 /2 T0 /2
(3.21)
book
Mobk066
50
March 15, 2007
21:18
PSPICE FOR DIGITAL COMMUNICATIONS ENGINEERING
The ratio of the signal power to noise power SQNR for a signal that occupies the full scale is � 2n 2 � � � � � Pmax 2 q /8 3 2n 3 2 = 10 log = 10 log SNQR = 10 log10 = 10 log10 2 M 10 10 PN q 2 /12 2 2 (3.22) SNQR = 10 log10 22n + 10 log10 1.5 = 20n log10 2 + 10 log10 1.5 = 6.02n + 1.77 dB. (3.23) However, the SQNR decreases when the input sinusoid is below the full scale of the ADC. Signal power is a function of waveform shape but noise power is independent of the signal shape. The signal power for a sinusoid with amplitude ± A is A2 /2 and A2 for a square wave and A2 /3 for a triangular wave.
3.5
ANALOG TO DIGITAL CONVERSION
An 8-bit analog to digital converter (ADC) and digital to analog conversion (DAC) is shown in Fig. 3.15. The low-pass filter on the output reconstructs the original input signal. To measure the quantization noise we use a notch filter to remove the desired signal leaving the quantization noise. The 8-bit ADC binary output, set to the nearest integer, in given by Vin nbits 2 . Vref
(3.24)
The digital to analog converter (DAC) output produces a rough version of the original input signal. A low-pass filter attenuates the high-frequency components leaving the original signal. Consider the input and reference voltages for an 8-bit system. The VSIN part parameters are as follows: VOFF = 10 V and VAMPL = 10 V, giving a peak input of Vin = 20 V. We set the reference to 256 V in order to read the output in binary directly. The binary equivalent for the ADC reference voltage, VREF, is equal to 256 V and is (20 × 28 /256) equal to 10100. From the PROBE plot read the most significant bit to the least significant as b4 b3 b2 b1 b0.
FIGURE 3.15: PCM coder and decoder system.
book
Mobk066
March 15, 2007
21:18
SAMPLING AND PULSE CODE MODULATION
51
FIGURE 3.16: 20 V input voltage.
The signal in Fig. 3.16 shows the input 10 V offset raising the 10 V AC input. The binary signal is read vertically downward using the cursor located at the maximum input signal of 20 V.
3.5.1
DAC Resolution
The DAC output is calculated as � � D6 D5 D4 D3 D2 D1 D0 D7 + + + + + + + V. Vout = Vref 2 4 8 16 32 64 128 256
(3.25)
The output voltage for a binary DAC output 00001001 and 256 V reference voltage is � � 0 1 0 0 1 0 0 0 Vout = Vref + + + + + + + = 256(1/32 + 1/256) = 9 V. 2 4 8 16 32 64 128 256 (3.26) The DigClock conversion clock has on/off times equal to 20 µs. Set the transient parameters as follows: Output File Options/Print values in the output file = 1ms, Run to time = 20ms, Start saving data after = 2ms. Making the Output File Options/Print values in the output file larger than the 20 ns default value will speed up the simulation time in most instances. However, it must be set to a value smaller than the Run to time. If all eight bits are used, i.e., full scale, then we will have 256 levels available (28 = 256). Table 3.1 shows the relationships between the ADC resolution and the voltage reference Vref.
book
Mobk066
52
March 15, 2007
21:18
PSPICE FOR DIGITAL COMMUNICATIONS ENGINEERING
TABLE 3.1: The ADC and Reference Relationship
VIN (V)
VREF (V)
NO. OF BITS
NO. OF LEVELS
RESOLUTION (V)
9
16
8
2 = 256
0.0625
9
32
7
27 = 128
0.125 V
8
9
64
6
2 = 64
0.25
9
128
5
25 = 32
0.5
4
2 = 16
1
9
256
6
4
The input signal VSIN generator parameters are VOFF = 5 V, VAMPL = 4 V, and FREQUENCY = 1 kHz. To measure the quantization noise, we must attenuate the 1 kHz input signal using a band-stop notch filter.
3.5.2
Band-Stop Filter
The band-stop (notch) filter is implemented using an ABM part called BANDREJ. The filter is characterized by six parameters: four cut-off frequencies and two attenuation values—RIPPLE defines the maximum allowable ripple in the passband and STOP is the minimum attenuation in the stopband. Set the Analysis tab to Analysis type: AC Sweep/Noise, AC Sweep Type to Linear/Logarithmic, Start Frequency = 100, End Frequency = 10 k, Total Points/Decade = 10001. Enter the lowest frequency F0 to highest frequency F3 for the band-stop filter parameters as shown in Fig. 3.17. A value for either of the passband frequencies, say f p1 (or stop frequencies), is calculated by assuming a value for one of the passband frequencies and knowing the center frequency to yield for f p2 � � f 0 = ( f s 1 f s 2 ) = ( f p1 f p2 ) ⇒ f p2 = f 02 / f p1 . (3.27)
FIGURE 3.17: The band-stop part called BANDREJ.
book
Mobk066
March 15, 2007
21:18
SAMPLING AND PULSE CODE MODULATION
53
FIGURE 3.18: The band-stop amplitude response.
The band-stop filter response is shown in Fig. 3.18. We are now in a position to investigate the relationship between the SQNR and the number of bits used. Delete all traces in the PROBE screen and insert a trace, which is the RMS of the output signal from the band-stop filter. Measure the noise RMS value and repeat for a smaller number of bits, by deleting the lines b0 to b7 from the input of the DAC and in turn measuring the SQNR. Alternatively, you may place switches on each bit line, and then open each one in succession.
3.6
PULSE CODE MODULATION
It is not economical to send signals in parallel form over a telephone cable network, so the output from the analog to digital converter (ADC) is multiplexed into a serial bit stream. The multiplexing and demultiplexing process in Fig. 3.19 is an important part of the 8-bit 30-channel TDM PCM system and requires 8-bit parallel to serial conversion. There are many multiplexing IC devices but here we use the 74151 IC where the IC pins S0, S1, and S2, control the sequence of conversion. The STIM4 generator part has four parallel output lines, of which one is unused but is terminated with a line segment name called unused. Command line 1 starts the sequence as 0ms and the parallel bit pattern is 0000. The four parallel signals repeat a number of times using a repeat function on command line 2 and the sequence is terminated on command line 4 with endrepeat. Command line 3 shows the pattern being incremented by 1 every 125 µs. The generator output is terminated with a BUS line using the Place Bus icon (Short-cut key B). Dlclick the bus and type in s[3-0] where each line connected to the bus is named s0,
book
Mobk066
54
March 15, 2007
21:18
PSPICE FOR DIGITAL COMMUNICATIONS ENGINEERING
FIGURE 3.19: Multiplexing and demultiplexing.
s1, s2, and s3. Placing a marker on a bus produces a PROBE display in hexadecimal format. The clock frequency is twice the speed of the STIM4 part increment (i.e. half the time period). In an actual system, the final output s3 could synchronize the system. The serial data is applied using a STIM1 part. Set the Analysis tab to Analysis type: Time Domain (Transient), Run to time = 10ms, and Maximum step size = (left blank), Press F11 to simulate. The waveforms for the mux– demux devices are shown in Fig. 3.20.
3.6.1
Universal Shift Register
74194 LS is a 4-bit bidirectional universal shift register where all data and mode control inputs are edge-triggered and respond to LOW to HIGH clock transitions only. The mode control
FIGURE 3.20: Serial to parallel and parallel to serial conversion.
book
Mobk066
March 15, 2007
21:18
SAMPLING AND PULSE CODE MODULATION
55
TABLE 3.2: 74194 Universal Shift Register
OPERATING MODE
CLR (1)
S1 (10)
S0 (9)
SR (2)
SL (7)
PN (3–6)
QA (15)
QB (14)
QC (13)
QD (12)
Reset
L
X
X
X
X
X
L
L
L
L
Hold
H
L
L
X
X
X
Q0
Q1
Q2
Q3
Shift left
H
H
L
X
L
X
Q1
Q2
Q3
L
H
H
L
X
H
X
Q1
Q2
Q3
H
H
L
H
L
X
X
L
Q0
Q1
Q2
H
L
H
H
X
X
H
Q0
Q1
Q2
H
H
H
X
X
Pn
P0
P1
P2
P3
Shift right Parallel load
and selected data inputs must be stable one setup time prior to the positive transition of the clock pulse. The four parallel data inputs, P0, P1, P2, P3, are D-type inputs (also called A, B, C, and D). When both S0 and S1 are HIGH, signals presented to P0, P1, P2, and P3 inputs are transferred to Q0, Q1, Q2, and Q3 outputs, respectively, following the next LOW to HIGH transition of the clock. This is a parallel-to-parallel conversion. The mode control inputs, S0 and S1, determine the synchronous operation of the device. Table 3.2 shows how data is shifted from left to right (Q0 → Q1), or right to left (Q3 → Q2). Parallel data is entered, by loading all four bits of the register simultaneously. When both S0 and S1 are LOW, the existing data is retained in a “do-nothing” mode without restricting the HIGH to LOW clock transition. D-type serial data inputs (SR, SL) allow multistage shift right or shift left data transfers without interfering with parallel load operation, and will appear on the QA and QC outputs. The asynchronous clear (CLR), when LOW, overrides all other input conditions and forces the Q outputs LOW. In the table, L = low level, H = high level, X = do not care, l = LOW voltage level one setup time prior to the LOW to HIGH clock transition; h = high voltage level one setup time prior to the LOW to HIGH clock transition; P(n) and Q(n), where n indicates the state of the input or output one setup time prior to the LOW to HIGH clock transition.
3.6.2
74194 Universal Shift Register
Draw the schematic in Fig. 3.21. What is the output for the parallel input 0110? Set the Analysis tab to Analysis type: Time Domain (Transient), Run to time = 10ms, and Maximum step size = (left blank), press F11 to simulate.
book
Mobk066
March 15, 2007
21:18
56
FIGURE 3.21: Universal shift register.
FIGURE 3.22: Universal shift register signals.
3.7
SINGLE-CHANNEL 4-BIT PCM TRANSMITTER
The simple PCM system in Fig. 3.23 uses only four of the 8 bits available, but it may be extended to an 8-bit capability using additional IC circuitry (see exercise at the end of the chapter). Here, we apply a 1 kHz sinusoidal signal and sample it at 8000 Hz, which is the rate used in the public switched telephone network (PSTN) and converts the ADC parallel output to a serial bit stream. To test that the circuit is working correctly, we need to reverse the procedure and attach a serial to parallel converter, a latch for temporary store, and a DAC. The DAC output is then low-pass filtered. The registers must be initialized to a certain state. Select the Simulation Setting menu and then select the Options tab. In the Category box select Gate-Level Simulation. This will then show the Timing Mode - select Typical. In the Timing Mode change Digital Setup from Typical to Maximum. The Initialize all flip flops is set to All 1. Failing to do this will result in the flip-flop being in an undetermined state, i.e., All X, and shows up in the plot as two red lines. Set the Analysis tab to Analysis type: Time Domain (Transient), Run to time = 2ms, and Maximum step size = (left blank), Press F11 to simulate.
Mobk066
March 15, 2007
21:18
SAMPLING AND PULSE CODE MODULATION
FIGURE 3.23: Single-channel 4-bit PCM transmitter and receiver.
book
57
book
Mobk066
58
March 15, 2007
21:18
PSPICE FOR DIGITAL COMMUNICATIONS ENGINEERING
FIGURE 3.24: Input and recovered signals.
The recovered 1 kHz sinusoid in Fig. 3.24 has distortion that is displayed using the FFT function. The timing waveforms should be investigated.
3.8
TIME-DIVISION MULTIPLEXING AND DEMULTIPLEXING
In the European E1 PCM telephone systems, 30 voice signals are sampled, coded, and multiplexed, to produce a 2.048 Mb/s digital signal that is transmitted over a high-bandwidth line, coaxial cable, microwave line-of-sight link, optical fiber, etc. Sample binary values are multiplexed using byte interleaving so every 125 µs a framing bit is followed by a coded sample for each of the 30 voice signals. Other housekeeping bits are allocated for different purposes. Also super frames take care of the signaling requirements by 16 frames with the center time slot used for two channel signaling of 4 bits each. The transmission rate is 257 bits every 125 µs (2.048 Mb/s = 8000 × 8 × 32). The U.S. and Japanese 24-channel time-division multiplexed (TDM) PCM system generates a composite bit stream for a total of 24 digitized voice channels and results in a frame structure consisting of 193 bits in each 125 µs time interval. Secondary multiplexed systems combine primary multiplexing digital streams into a higher rate output bit stream called the plesiochronous digital hierarchical structure. A TDM transmitter and receiver, using ABM library parts, are shown in Fig. 3.25. Set the Analysis tab to Analysis type: Time Domain (Transient), Run to time = 4ms, and Maximum step size = (left blank), Press F11 to simulate. Fig. 3.26 shows the TDM and recovered signals.
3.8.1
Time-division Multiplexing of Two PAM Signals
The 4066 IC in Fig. 3.27 multiplexes two signals. One of the electronic switches may be used (see exercise 12 at the end of the chapter) to invert the clock so that the second signal is sampled with a delay of one clock period.