Adding GeoNB map services to ESRI ArcCatalog / ArcMap 9.3.1
Recommend Documents
In this lab, you will explore the ArcGIS applications ArcCatalog and ArcMap. You
will learn how to use ArcCatalog to find maps and data and how to display ...
Part I: Acquiring Data, Setting up Data within ArcCatalog & ArcMap. Important
Topics Covered ..... Page 10 ... are used directly in publication figures or in
PowerPoint presentations. ➢ Left click .... right-hand help screen in the “Add Field
” too
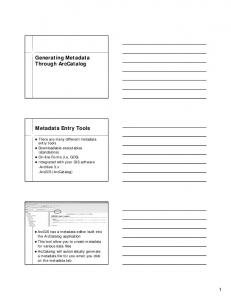
To describe components used to create a map layout in ArcMap. Required Data.
• An image. Introduction and Overview of Procedure Steps. Map composition in ...
www.esri.com. ArcUser April–June 2005 55. ArcCatalog helps users browse,
search, explore, view, and manage data and maps. Here are some.
different types of advanced visualization and analysis to be performed on it from .... with the ArcGIS Server Web Applic
ArcCatalog™ allows the user to easily access and manage geographic data that
is stored in ... ArcToolbox is embedded in both ArcCatalog and ArcMap.
add a new field with the appropriate name and data type using ArcCatalog ...
Open ArcCatalog by clicking on the icon in the toolbar, or from the ArcGIS menu ...
Summary. This document explains how to connect to a SQL Server database
using ESRI. ArcCatalog in order to extract data containing spatial coordinates.
service to return features, and (3) dynamic map service. The three ..... connections over a network, as well as over the Internet using ArcGIS Server geodata.
Cartographic Compilation and. Design. Have all required themes and features been included? Does the map have appropriate
3 Sep 2007 ... Accessing and downloading orthophotos from MassGIS – using an index ......
computer screen, a powerpoint presentation, a web site, or word ...
1. Introduction – Using ArcCatalog. In this tutorial, you will be provided step-by-
step instructions on how and where to set up a project folder – an important step
...
The information contained in this document is the exclusive property of ESRI.
This work is .... of free disk space to store the tutorial data. 1. If the Catalog doesn't
...
Dipartimento di Scienze dell'Informazione. Universit`a degli ... replication, both from the storage space and the network ... both at network and storage level, is.
Jan 22, 2008 - centres, these are strained by health care constraints.5 Unless circumstances ... and the National Health Laboratory Services. The latter body.
Copying or distributing in print or electronic forms without written permission of IGI Global is prohibited. Keywords: ... business units if established in a well-structured organization. .... Tobias Kollmann and Matthias Häsel (2010). Electronic ..
Open ArcMap (hint: click in ArcCatalog on the toolbar icon. • Select to open a new
(blank) map. • Add Data (drag and drop from ArcCatalog). Arrange the ArcMap ...
Apr 14, 2015 - To amend the Internal Revenue Code of 1986 to provide that a deduction equal to fair market value shall b
You can work through the entire tutorial or complete each lesson .... ARCMAP
TUTORIAL. 9. Zooming in on the page. The Layout toolbar controls your view of ...
energy space we give explicit polynomial decay estimates valid for regular initial data. Our method ... (x, t) +. ∂4u. ∂x4. (x, t) +. ∂u. ∂t. (ξ,t) δξ = 0, 0
Apr 14, 2015 - S. 931. To amend the Internal Revenue Code of 1986 to provide that a deduction equal to fair market value
There was a problem previewing this document. Retrying... Download. Connect more apps... Try one of the apps below to op
oleh: Musnanda Satar. Modul ArcCatalog. 1. Pendahuluan. ArcCatalog
merupakan tools dalam ArcGIS yang sangat berguna untuk membatu dan
mempercepat ...
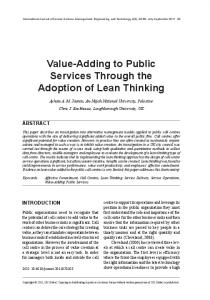
1. Generating Metadata. Through ArcCatalog. Metadata Entry Tools. ▫ There are
many different metadata entry tools. ▫ Downloadable executables. (standalone).
Adding GeoNB map services to ESRI ArcCatalog / ArcMap 9.3.1
Adding GeoNB map services to ESRI ArcCatalog / ArcMap 9.3.1 1) Open ArcCatalog 2) Click “GIS Servers”:
3) Double Click “Add ArcGIS Server“:
4) Select “Use GIS Services”:
Adding GeoNB map services to ESRI ArcCatalog / ArcMap 9.3.1 5) Fill in the “Server URL” with http://geonb.snb.ca/ArcGIS/services Leave User Name and Password blank, then click the Finish button:
6) Open the “geonb.snb.ca” connection; you will see the list of services:
Adding GeoNB map services to ESRI ArcCatalog / ArcMap 9.3.1 7) In ArcMap click on the “Add Data” button. Browse to the “GIS Servers” and double click on the “ArcGIS on geonb.snb.ca”:
8) Double click on one of the map services to add it to your map document. For example the “GeoNB_Basemap_EnhancedImagery” map service:
Adding GeoNB map services to ESRI ArcCatalog / ArcMap 9.3.1 9) ArcMap should now look like this:
Note: Some map services use a scale threshold and are not visible at small scales. For example the “GeoNB_SNB_Parcels”, “GeoNB_SNB_CivicAddress”, and “GeoNB_ENV_Wetlands” map services will not display at scales smaller than 1:32000. If in doubt, zoom-in until the map is visible.


![ArcGIS Server: High-Capacity Map Services - Esri [PDF]](https://m.moam.info/img/260x300/arcgis-server-high-capacity-map-services-esri-pdf_6486e524098a9e17688b45ff.jpg)