KDE helped Qt become the de facto standard for C++ GUI development on .... on Unix, and open hello.app on Mac OS X. To t
The Only Official, Best-Practice Guide to Qt 4.3 Programming ..... showing how to
build Qt applications and Appendix C introducing Qt Jambi, the Java version of ...
... Qt 4 (2nd Edition) (Prentice Hall Open Source Software Development Series) by Jasmin ..... run natively on Windows,
... Embedded Networks Video Digital pharma Unix Video Online payment facility Other ... GUI Programming with Python and
C++ GUI Programming with Qt 3. Introduction. CEEPUS H81 Network. Page 1.
C++ Programming with Qt 3. Introduction .
Increase type safety. Improve performance and ability to work directly with
hardware. Fit into the real world. 5/43. Introduction to C++11 and its use inside Qt
...
www.cppforschool.com. COMPUTER SCIENCE. WITH C++. FOR CBSE CLASS
12. Revision Notes. Part -I. [Structure, Class and Object, Constructor and.
pascal small subset why. 161. 4. Programming Language Design. * The recent
trend in computer science education has been a shift from Pascal to C or C++. I.
GUI Programming. Based on the Abstract Windowing Toolkit, AWT, found in the
package java.awt. • AWT components. • called heavyweight components.
QT Creator: http://qt.nokia.com/downloads/qt-creator-binary-for-windows ... Run
configure.bat in the windows command prompt and use QT Creator to build.
Buy C GUI Programming with Qt4 Prentice Hall Open Source Software ... free delivery Prentice Hall Open Source Software D
Download Best Book C++ GUI Programming with Qt4 (Prentice Hall Open Source .... Rapid GUI Programming with Python and Qt
The Only Official, Best-Practice Guide to Qt 4.3 ProgrammingUsing ... C++ GUI
Programming with Qt 4 is divided into ... C++ for Java and C programmers.
Pearson Education, Inc. Rights and Contracts ..... src.tar.gz, which can be
downloaded from http://oop.mcs.suffolk.edu/dist. A Note about ... The XML and
image processors we used were Apache Ant, Xerces, FOP, Gnu xsltproc,
ReportLab ...
After the invention of ALGOL 60, we waited ten years to begin to enunciate methods for programming in. ALGOL-like languagesâso-called 'structured program-.
If some years ago someone wanting to become a software developer had asked me "Where do I start from", I wouldn't have b
Data programming and DDLite address a core challenge in cre- ating machine learning .... one of the words matched a custom word-form pattern, such as. 3.
Languages, Design. Keywords. Classages, Interaction, Interface, Encapsulation, Relation- ... ual and examples, can be downloaded at ... How such a UML diagram can be implemented in Java is known. ...... with free α-conversion. How mixers ...
GUI indicates Graphics User Interface, which contrasts with the ... problems in
programming GUI. ▫ For GUI programming in Java, we can use AWT (Abstract.
The book is distributed freely under the following license conditions: 1. Book readers (users) may: - distribute free of charge unaltered copies of the book in ...
23 Germany in 1968. At the conference the term software crisis was often heard,
for there was indeed a crisis. The pro- gramming industry was being asked to.
Produced by Nokia, Qt Development Frameworks and Klarälvdalens ... Material
based on Qt 4.7, created on May 21, 2012 ... Network Programming. Protocols.
C++ GUI programming with Qt 4 / Jasmin Blanchette, Mark Summerfield. p. cm.
Includes ...... or release folder, for example, C:\qt-book\hello\release\hello.exe.
C++ GUI Programming with Qt 4
C++ GUI Programming with Qt 4
Jasmin Blanchette Mark Summerfield
In association with Trolltech Press
Upper Saddle River, NJ · Boston · Indianapolis · San Francisco New York · Toronto · Montreal · London · Munich · Paris · Madrid Capetown · Sydney · Tokyo · Singapore · Mexico City
Foreword Why Qt? Why do programmers like us choose Qt? Sure, there are the obvious answers: Qt’s single-source compatibility, its feature richness, its C++ performance, the availability of the source code, its documentation, the high-quality technical support, and all the other items mentioned in Trolltech’s glossy marketing materials. This is all very well, but it misses the most important point: Qt is successful because programmers like it. How come programmers like one technology, but dislike another? Personally I believe software engineers enjoy technology that feels right, but dislike everything that doesn’t. “Feels right” means many things. In the Qt 3 edition of the book, I mentioned Trolltech’s phone system as a particularly good example of some particularly bad technology. The phone system didn’t feel right, because it forced us to do apparently random things depending on some equally random context. Randomness doesn’t feel right. Another thing that doesn’t feel right is repetitiveness and redundancy. Good programmers are lazy. What we love about computers compared to, say, gardening is that we don’t have to do the same things over and over. Let me emphasize this point with a real-world example: travel reimbursement forms. Typically those forms come as fancy spreadsheets; you fill them out, and you get real money. Simple technology, one should think, and given the monetary incentive this should be a simple task for a grown-up engineer. Reality looks different, though. While nobody else in the company seems to have any problems whatsoever dealing with those forms, the engineers do. And having talked to people in other companies, this seems to be a common pattern. We defer reimbursement until the very last moment, and sometimes we might even forget about it. Why is that? Looking at our form, it’s a straightforward, standard procedure. One has to collect receipts, number them, and put those numbers into the proper fields with the date, the location, a description, and the amount. The numbering and copying is designed to ease someone’s work, but strictly speaking it is redundant, given that the date, location, description, and amount unambiguously identify a receipt. A tiny bit of extra work to get your money back, one would think. A small annoyance is the per-diem rate, though, which depends on the travel location. There’s some separate document somewhere that lists the standardized rates for all the different travel locations. You can’t just select “Chicago”; instead you have to look up the rate for Chicago yourself. There’s a similar annoyance with the exchange rate field. One has to find the current exchange rate somewhere—perhaps with Google’s help—and then enter the rate in evix
ery single field. Well, strictly speaking, you should wait for your credit card company to issue a statement to you with the actual exchange rate that they used. While this is not hard to do, looking up different pieces of information from different sources, and then copying the relevant items to several places in the form feels needlessly awkward. Programming can be a lot like filling in travel reimbursement forms, only worse. And this is where Qt comes to the rescue. Qt is different. For one thing, Qt makes sense. And for another, Qt is fun. Qt lets you concentrate on your tasks. When Qt’s original architects faced a problem, they didn’t just look for a good solution, or the simplest solution. They looked for the right solution, and then they documented it. Granted they made mistakes, and granted some of their design decisions didn’t pass the test of time, but they still got a lot of things right, and what wasn’t right could and can be corrected. You can see this by the fact that a system originally designed to bridge Windows 95 and Unix/Motif now unifies modern desktop systems as diverse as Windows XP, Mac OS X, and GNU/Linux, and provides the foundation for the Qtopia application platform for embedded Linux. Long before Qt became so popular and so widely used, the dedication of Qt’s developers to finding the right solutions made Qt special. That dedication is just as strong today and affects everyone who develops and maintains Qt. For us, working on Qt is a responsibility and a privilege. We are proud of helping to make your professional and open source lives easier and more enjoyable. Matthias Ettrich Oslo, Norway June 2006
x
Preface Qt is a comprehensive C++ framework for developing cross-platform GUI applications using a “write once, compile anywhere” approach. Qt lets programmers use a single source tree for applications that will run on Windows 98 to XP, Mac OS X, Linux, Solaris, HP-UX, and many other versions of Unix with X11. The Qt libraries and tools are also part of Qtopia Core, a product that provides its own window system on top of embedded Linux. The purpose of this book is to teach you how to write GUI programs using Qt 4. The book starts with “Hello Qt” and quickly progresses to more advanced topics, such as creating custom widgets and providing drag and drop. The text is complemented by a CD that contains the source code of the example programs. The CD also includes the open source edition of Qt 4.1.1 for all supported platforms, as well as MinGW, a set of freely available development tools that can be used to build Qt applications on Windows. Appendix A explains how to install the software. The book is divided into three parts. Part I covers all the concepts and practices necessary for programming GUI applications using Qt. Knowledge of this part alone is sufficient to write useful GUI applications. Part II covers central Qt topics in greater depth, and Part III provides more specialized and advanced material. The chapters of Parts II and III can be read in any order, but they assume familiarity with the contents of Part I. Readers of the Qt 3 edition of this book will find this new edition familiar in both content and style. This edition has been updated to take advantage of Qt 4’s new features (including some that were introduced with Qt 4.1) and to present code that shows good idiomatic Qt 4 programming techniques. In many cases, we have used examples similar to the ones used in the Qt 3 edition. This will not affect new readers, but will help those who read the previous edition orient themselves to Qt 4’s cleaner, clearer, and more expressive style. This edition includes new chapters covering Qt 4’s model/view architecture, the new plugin framework, and embedded programming with Qtopia, as well a new appendix. And just like the Qt 3 book, the emphasis is on explaining Qt programming rather than simply rehashing or summarizing Qt’s extensive online documentation. We have written the book with the assumption that you have a basic knowledge of C++, Java, or C#. The code examples use a subset of C++, avoiding many C++ features that are rarely needed when programming Qt. In the few places where a more advanced C++ construct is unavoidable, it is explained where it is used. xi
If you already know Java or C# but have little or no experience with C++, we recommend that you begin by reading Appendix B, which provides sufficient introduction to C++ to be able to use this book. For a more thorough introduction to object-oriented programming in C++, we recommend C++ How to Program by Harvey Deitel and Paul Deitel, and the C++ Primer by Stanley B. Lippman, Josée Lajoie, and Barbara E. Moo. Qt made its reputation as a cross-platform framework, but because of its intuitive and powerful API, many organizations use Qt for single-platform development. Adobe Photoshop Album is just one example of a mass-market Windows application written in Qt. Many sophisticated software systems in vertical markets, such as 3D animation tools, digital film processing, electronic design automation (for chip design), oil and gas exploration, financial services, and medical imaging, are built with Qt. If you are making a living with a successful Windows product written in Qt, you can easily create new markets in the Mac OS X and Linux worlds simply by recompiling. Qt is available under various licenses. If you want to build commercial applications, you must buy a commercial Qt license; if you want to build open source programs, you can use the open source (GPL) edition. Qt is the foundation on which the K Desktop Environment (KDE) and the many open source applications that go with it are built. In addition to Qt’s hundreds of classes, there are add-ons that extend Qt’s scope and power. Some of these products, like Qt Script for Applications (QSA) and the Qt Solutions components, are available from Trolltech, while others are supplied by other companies and by the open source community. See http:// www.trolltech.com/products/3rdparty/ for information on Qt add-ons. Qt also has a well-established and thriving user community that uses the qt-interest mailing list; see http://lists.trolltech.com/ for details. If you spot errors in the book, have suggestions for the next edition, or want to give us feedback, we would be delighted to hear from you. You can reach us at [email protected]. The errata will be placed on http://doc.trolltech.com/ qt-book-errata.html.
xii
Acknowledgments Our first acknowledgment is of Eirik Chambe-Eng, Trolltech’s president. Eirik not only enthusiastically encouraged us to write the Qt 3 edition of the book, he also allowed us to spend a considerable amount of our work time writing it. Eirik and Trolltech CEO Haavard Nord both read the manuscript and provided valuable feedback. Their generosity and foresight was aided and abetted by Matthias Ettrich, Trolltech’s lead developer. Matthias cheerfully accepted our neglect of duty as we obsessed over the writing of the first edition of this book and gave us a lot of advice on good Qt programming style. For the Qt 3 edition, we asked two Qt customers, Paul Curtis and Klaus Schmidinger, to be our external reviewers. Both are Qt experts with an amazing attention to technical detail, which they proved by spotting some very subtle errors in our manuscript and suggesting numerous improvements. And within Trolltech, alongside Matthias, our most stalwart reviewer was Reginald Stadlbauer. His technical insight was invaluable, and he taught us how to do some things in Qt that we didn’t even know were possible. For this Qt 4 edition, we have continued to benefit from the unstinting help and support of Eirik, Haavard, and Matthias. Klaus Schmidinger continued to give valuable feedback, and within Trolltech, our key reviewers were Andreas Aardal Hanssen, Henrik Hartz, Vivi Glückstad Karlsen, Trenton Schulz, Andy Shaw, and Pål de Vibe. In addition to the reviewers mentioned above, we received expert help from Harald Fernengel (databases), Volker Hilsheimer (ActiveX), Bradley Hughes (multithreading), Trond Kjernåsen (3D graphics and databases), Lars Knoll (2D graphics and internationalization), Sam Magnuson (qmake), Marius Bugge Monsen (item view classes), Dimitri Papadopoulos (Qt/X11), Paul Olav Tvete (custom widgets and embedded programming), Rainer Schmid (networking and XML), Amrit Pal Singh (introduction to C++), and Gunnar Sletta (2D graphics and event processing). Extra thanks are due to Trolltech’s documentation and support teams for handling documentation-related issues while the book consumed so much of our time, and to Trolltech’s system administrators for keeping our machines running and our networks communicating throughout the project. On the production side, Trenton Schulz created the accompanying CD, and Trolltech’s Cathrine Bore handled the contracts and legalities on our behalf. Thanks also to Nathan Clement for the Troll illustrations. And last but not least, thanks to Lara Wysong from Pearsons, for handling the production practicalities so well. xiii
A Brief History of Qt The Qt framework first became publicly available in May 1995. It was initially developed by Haavard Nord (Trolltech’s CEO) and Eirik Chambe-Eng (Trolltech’s president). Haavard and Eirik met at the Norwegian Institute of Technology in Trondheim, where they both graduated with master’s degrees in computer science. Haavard’s interest in C++ GUI development began in 1988 when he was commissioned by a Swedish company to develop a C++ GUI framework. A couple of years later, in the summer of 1990, Haavard and Eirik were working together on a C++ database application for ultrasound images. The system needed to be able to run with a GUI on Unix, Macintosh, and Windows. One day that summer, Haavard and Eirik went outside to enjoy the sunshine, and as they sat on a park bench, Haavard said, “We need an object-oriented display system.” The resulting discussion laid the intellectual foundation for the object-oriented cross-platform GUI framework they would soon go on to build. In 1991, Haavard started writing the classes that eventually became Qt, collaborating with Eirik on the design. The following year, Eirik came up with the idea for “signals and slots”, a simple but powerful GUI programming paradigm that has now been embraced by several other toolkits. Haavard took the idea and produced a hand-coded implementation. By 1993, Haavard and Eirik had developed Qt’s first graphics kernel and were able to implement their own widgets. At the end of the year, Haavard suggested that they go into business together to build “the world’s best C++ GUI framework”. The year 1994 began inauspiciously with the two young programmers wanting to enter a well-established market, with no customers, an unfinished product, and no money. Fortunately, both their wives were employed and therefore able to support their husbands for the two years Eirik and Haavard expected to need to develop the product and start earning an income. The letter ‘Q’ was chosen as the class prefix because the letter looked beautiful in Haavard’s Emacs font. The ‘t’ was added to stand for “toolkit”, inspired by Xt, the X Toolkit. The company was incorporated on March 4, 1994, originally as Quasar Technologies, then as Troll Tech, and today as Trolltech. In April 1995, thanks to a contact made through one of Haavard’s university professors, the Norwegian company Metis gave them a contract to develop software based on Qt. Around this time, Trolltech hired Arnt Gulbrandsen, who during his six years at Trolltech devised and implemented an ingenious documentation system as well as contributing to Qt’s code. xv
On May 20, 1995, Qt 0.90 was uploaded to sunsite.unc.edu. Six days later, the release was announced on comp.os.linux.announce. This was Qt’s first public release. Qt could be used for both Windows and Unix development, offering the same API on both platforms. Qt was available under two licenses from day one: A commercial license was required for commercial development, and a free software edition was available for open source development. The Metis contract kept Trolltech afloat, while for ten long months no one bought a commercial Qt license. In March 1996, the European Space Agency became the second Qt customer, with a purchase of ten commercial licenses. With unwavering faith, Eirik and Haavard hired another developer. Qt 0.97 was released at the end of May, and on September 24, 1996, Qt 1.0 came out. By the end of the year, Qt had reached version 1.1; eight customers, each in a different country, had bought 18 licenses between them. This year also saw the founding of the KDE project, led by Matthias Ettrich. Qt 1.2 was released in April 1997. Matthias Ettrich’s decision to use Qt to build KDE helped Qt become the de facto standard for C++ GUI development on Linux. Qt 1.3 was released in September 1997. Matthias joined Trolltech in 1998, and the last major Qt 1 release, 1.40, was made in September of that year. Qt 2.0 was released in June 1999. Qt 2 had a new open source license, the Q Public License (QPL), which complied with the Open Source Definition. In August 1999, Qt won the LinuxWorld award for best library/tool. Around this time, Trolltech Pty Ltd (Australia) was established. Trolltech released Qtopia Core (then called Qt/Embedded) in 2000. It was designed to run on embedded Linux devices and provided its own window system as a lightweight replacement for X11. Both Qt/X11 and Qtopia Core were now offered under the widely used GNU General Public License (GPL) as well as under commercial licenses. By the end of 2000, Trolltech had established Trolltech Inc. (USA) and had released the first version of Qtopia, an application platform for mobile phones and PDAs. Qtopia Core won the LinuxWorld “Best Embedded Linux Solution” award in both 2001 and 2002, and Qtopia Phone achieved the same distinction in 2004. Qt 3.0 was released in 2001. Qt was now available on Windows, Mac OS X, Unix, and Linux (desktop and embedded). Qt 3 provided 42 new classes and its code exceeded 500,000 lines. Qt 3 was a major step forward from Qt 2, including considerably improved locale and Unicode support, a completely new text viewing and editing widget, and a Perl-like regular expression class. Qt 3 won the Software Development Times “Jolt Productivity Award” in 2002. In the summer of 2005, Qt 4.0 was released. With about 500 classes and more than 9000 functions, Qt 4 is larger and richer than any previous version, and it has been split into several libraries so that developers only need to link against the parts of Qt that they need. Qt 4 is a huge advance on previous versions with improvements that include a completely new set of efficient and xvi
easy-to-use template containers, advanced model/view functionality, a fast and flexible 2D painting framework, and powerful Unicode text viewing and editing classes, not to mention thousands of smaller enhancements across the complete range of Qt classes. Qt 4 is the first Qt edition to be available for both commercial and open source development on all the platforms it supports. Also in 2005, Trolltech opened a representative office in Beijing to provide customers in China and the region with sales services, training, and technical support for Qtopia. Since Trolltech’s birth, Qt’s popularity has grown unabated and continues to grow to this day. This success is a reflection both of the quality of Qt and of how enjoyable it is to use. In the last decade, Qt has gone from being a product used by a select few “in the know” to one that is used daily by thousands of customers and tens of thousands of open source developers all around the world.
xvii
Part I
Basic Qt
◆
Hello Qt
◆
Making Connections
◆
Laying Out Widgets
◆
Using the Reference Documentation
1. Getting Started This chapter shows how to combine basic C++ with the functionality provided by Qt to create a few small graphical user interface (GUI) applications. This chapter also introduces two key Qt ideas: “signals and slots” and layouts. In Chapter 2, we will go into more depth, and in Chapter 3, we will start building a more realistic application. If you already know Java or C# but have limited experience with C++, you might want to start by reading the C++ introduction in Appendix B.
Hello Qt Let’s start with a very simple Qt program. We will first study it line by line, then we will see how to compile and run it. 001 002
#include #include
003 004 005 006 007 008 009
int main(int argc, char *argv[]) { QApplication app(argc, argv); QLabel *label = new QLabel("Hello Qt!"); label->show(); return app.exec(); }
Lines 1 and 2 include the definitions of the QApplication and QLabel classes. For every Qt class, there is a header file with the same name (and capitalization) as the class that contains the class’s definition. Line 5 creates a QApplication object to manage application-wide resources. The QApplication constructor requires argc and argv because Qt supports a few command-line arguments of its own. Line 6 creates a QLabel widget that displays “Hello Qt!”. In Qt and Unix terminology, a widget is a visual element in a user interface. The term stems from 3
4
1. Getting Started
“window gadget” and is the equivalent of both “control” and “container” in Windows terminology. Buttons, menus, scroll bars, and frames are all examples of widgets. Widgets can contain other widgets; for example, an application window is usually a widget that contains a QMenuBar, a few QToolBars, a QStatusBar, and some other widgets. Most applications use a QMainWindow or a QDialog as the application window, but Qt is so flexible that any widget can be a window. In this example, the QLabel widget is the application window. Line 7 makes the label visible. Widgets are always created hidden, so that we can customize them before showing them, thereby avoiding flicker. Line 8 passes control of the application on to Qt. At this point, the program enters the event loop. This is a kind of stand-by mode where the program waits for user actions such as mouse clicks and key presses. User actions generate events (also called “messages”) to which the program can respond, usually by executing one or more functions. For example, when the user clicks a widget, a “mouse press” and a “mouse release” event are generated. In this respect, GUI applications differ drastically from conventional batch programs, which typically process input, produce results, and terminate without human intervention. For simplicity, we don’t bother calling delete on the QLabel object at the end of the main() function. This memory leak is harmless in such a small program, since the memory will be reclaimed by the operating system when the program terminates.
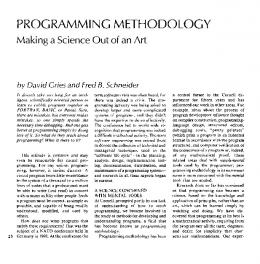
Figure 1.1. Hello on Linux
It is now possible to try the program on your own machine. First, you will need to install Qt 4.1.1 (or a later Qt 4 release), a process that is explained in Appendix A. From now on, we will assume that you have a correctly installed copy of Qt 4 and that Qt’s bin directory is in your PATH environment variable. (On Windows, this is done automatically by the Qt installation program.) You will also need the program’s source code in a file called hello.cpp in a directory called hello. You can type in hello.cpp yourself, or copy it from the CD provided with this book, where it is available as /examples/chap01/hello/hello.cpp. From a command prompt, change the directory to hello, then type qmake -project
to create a platform-independent project file (hello.pro), then type qmake hello.pro
to create a platform-specific makefile from the project file.
5
Hello Qt
Type make to build the program.★ Run it by typing hello on Windows, ./hello on Unix, and open hello.app on Mac OS X. To terminate the program, click the close button in the window’s title bar. If you are using Windows and have installed the Qt Open Source Edition and the MinGW compiler, you will have a shortcut to a DOS Prompt window that has all the environment variables correctly set up for Qt. If you start this window, you can compile Qt applications within it using qmake and make as described above. The executables produced are put in the application’s debug or release folder, for example, C:\qt-book\hello\release\hello.exe. If you are using Microsoft Visual C++, you will need to run nmake instead of make. Alternatively, you can create a Visual Studio project file from hello.pro by typing qmake -tp vc hello.pro
and then build the program in Visual Studio. If you are using Xcode on Mac OS X, you can generate an Xcode project using the command qmake -spec macx-xcode
Figure 1.2. A label with basic HTML formatting
Before we go on to the next example, let’s have some fun: Replace the line QLabel *label = new QLabel("Hello Qt!");
with QLabel *label = new QLabel("
Hello " "Qt!
");
and rebuild the application. As the example illustrates, it’s easy to brighten up a Qt application’s user interface using some simple HTML-style formatting.
Making Connections The second example shows how to respond to user actions. The application consists of a button that the user can click to quit. The source code is very similar to Hello, except that we are using a QPushButton instead of a QLabel as our main widget, and we are connecting a user action (clicking a button) to a piece of code. ★ If you get a compiler error on the include, it probably means that you are using an older version of Qt. Make sure that you are using Qt 4.1.1 or a later Qt 4 release.
6
1. Getting Started
This application’s source code is on the CD in the file /examples/chap01/quit/ quit.cpp. Here’s the contents of the file: 001 002
Qt’s widgets emit signals to indicate that a user action or a change of state has occurred.★ For instance, QPushButton emits a clicked() signal when the user clicks the button. A signal can be connected to a function (called a slot in that context), so that when the signal is emitted, the slot is automatically executed. In our example, we connect the button’s clicked() signal to the QApplication object’s quit() slot. The SIGNAL() and SLOT() macros are part of the syntax; they are explained in more detail in the next chapter.
Figure 1.3. The Quit application
We will now build the application. We assume that you have created a directory called quit containing quit.cpp. Run qmake in the quit directory to generate the project file, then run it again to generate a makefile, as follows:q qmake -project qmake quit.pro
Now build the application, and run it. If you click Quit, or press Space (which presses the button), the application will terminate.
Laying Out Widgets In this section, we will create a small example application that demonstrates how to use layouts to manage the geometry of widgets in a window and how to use signals and slots to synchronize two widgets. The application asks for the user’s age, which the user can enter by manipulating either a spin box or a slider.
★
Qt signals are unrelated to Unix signals. In this book, we are only concerned with Qt signals.
7
Laying Out Widgets
The application consists of three widgets: a QSpinBox, a QSlider, and a QWidget. The QWidget is the application’s main window. The QSpinBox and the QSlider are rendered inside the QWidget; they are children of the QWidget. Alternatively, we can say that the QWidget is the parent of the QSpinBox and the QSlider. The QWidget has no parent itself because it is being used as a top-level window. The constructors for QWidget and all of its subclasses take a QWidget * parameter that specifies the parent widget.
Figure 1.4. The Age application
Here’s the source code: 001 002 003 004
#include #include #include #include
005 006 007
int main(int argc, char *argv[]) { QApplication app(argc, argv);
008 009
QWidget *window = new QWidget; window->setWindowTitle("Enter Your Age");
010 011 012 013
QSpinBox *spinBox = new QSpinBox; QSlider *slider = new QSlider(Qt::Horizontal); spinBox->setRange(0, 130); slider->setRange(0, 130);
QHBoxLayout *layout = new QHBoxLayout; layout->addWidget(spinBox); layout->addWidget(slider); window->setLayout(layout);
023
window->show();
024 025
return app.exec(); }
Lines 8 and 9 set up the QWidget that will serve as the application’s main window. We call setWindowTitle() to set the text displayed in the window’s title bar.
8
1. Getting Started
Lines 10 and 11 create a QSpinBox and a QSlider, and lines 12 and 13 set their valid ranges. We can safely assume that the user is at most 130 years old. We could pass window to the QSpinBox and QSlider constructors, specifying that these widgets should have window as their parent, but it isn’t necessary here because the layout system will figure this out by itself and automatically set the parent of the spin box and the slider, as we will see shortly. The two QObject::connect() calls shown in lines 14 to 17 ensure that the spin box and the slider are synchronized so that they always show the same value. Whenever the value of one widget changes, its valueChanged(int) signal is emitted, and the setValue(int) slot of the other widget is called with the new value. Line 18 sets the spin box value to 35. When this happens, the QSpinBox emits the valueChanged(int) signal with an int argument of 35. This argument is passed to the QSlider’s setValue(int) slot, which sets the slider value to 35. The slider then emits the valueChanged(int) signal, because its own value changed, triggering the spin box’s setValue(int) slot. But at this point, setValue(int) doesn’t emit any signal, since the spin box value is already 35. This prevents infinite recursion. Figure 1.5 summarizes the situation.
1.
00 ↕
♦
setValue(35)
2.
35 ↕
♦
valueChanged(35) setValue(35)
3.
35 ↕
♦ valueChanged(35)
setValue(35)
4.
35 ↕
♦
Figure 1.5. Changing one widget’s value changes both
In lines 19 to 22, we lay out the spin box and slider widgets using a layout manager. A layout manager is an object that sets the size and position of the widgets that lie under its responsibility. Qt has three main layout manager classes:
9
Laying Out Widgets
• QHBoxLayout lays out widgets horizontally from left to right (right to left for some cultures). • QVBoxLayout lays out widgets vertically from top to bottom. • QGridLayout lays out widgets in a grid. The call to QWidget::setLayout() on line 22 installs the layout manager on the window. Behind the scenes, the QSpinBox and QSlider are “reparented” to be children of the widget on which the layout is installed, and for this reason we don’t need to specify an explicit parent when we construct a widget that will be put in a layout. ✕
Window Title QWidget
QSpinBox
QSlider
QHBoxLayout
QHBoxLa QWidget Figure 1.6. The Age application’s widgets
Even though we didn’t set the position or size of any widget explicitly, the QSpinBox and QSlider appear nicely laid out side by side. This is because QHBoxLayout automatically assigns reasonable positions and sizes to the widgets for which it is responsible, based on their needs. The layout managers free us from the chore of hard-coding screen positions in our applications and ensure that windows resize smoothly. Qt’s approach to building user interfaces is simple to understand and very flexible. The most common pattern that Qt programmers use is to instantiate the required widgets and then set their properties as necessary. Programmers add the widgets to layouts, which automatically take care of sizing and positioning. User interface behavior is managed by connecting widgets together using Qt’s signals and slots mechanism.
Using the Reference Documentation Qt’s reference documentation is an essential tool for any Qt developer, since it covers every class and function in Qt. This book makes use of many Qt classes and functions, but it does not cover all of them, nor does it provide every detail of those that are mentioned. To get the most benefit from Qt, you should familiarize yourself with the Qt reference documentation as quickly as possible. The documentation is available in HTML format in Qt’s doc/html directory and can be read using any web browser. You can also use Qt Assistant, the Qt help browser, which has powerful searching and indexing features that make it quicker and easier to use than a web browser. To launch Qt Assistant, click
10
1. Getting Started
Qt by Trolltech v4.x.y|Assistant in the Start menu on Windows, type assistant on the command line on Unix, or double-click Assistant in the Mac OS X Finder.
The links in the “API Reference” section on the home page provide different ways of navigating Qt’s classes. The “All Classes” page lists every class in Qt’s API. The “Main Classes” page lists only the most commonly used Qt classes. As an exercise, you might want to look up the classes and functions that we have used in this chapter.
Figure 1.7. Qt’s documentation in Qt Assistant on Mac OS X
Note that inherited functions are documented in the base class; for example, QPushButton has no show() function of its own, but it inherits one from its ancestor QWidget. Figure 1.8 shows how the classes we have seen so far relate to each other. QObject QCoreApplication
QWidget
QLayout
QApplication
QBoxLayout
QAbstractButton QAbstractSpinBox QPushButton
QSpinBox
QAbstractSlider
QFrame
QSlider
QLabel
QHBoxLayout
Figure 1.8. Inheritance tree for the Qt classes seen so far
11
Using the Reference Documentation
The reference documentation for the current version of Qt and for some earlier versions is available online at http://doc.trolltech.com/. This site also has selected articles from Qt Quarterly, the Qt programmers’ newsletter sent to all commercial licensees.
Widget Styles The screenshots we have seen so far have been taken on Linux, but Qt applications look native on every supported platform. Qt achieves this by emulating the platform’s look and feel, rather than wrapping a particular platform or toolkit’s widget set.
Windows
Plastique
CDE
Motif
Figure 1.9. Styles available everywhere
With Qt/X11 and Qtopia Core, the default style is Plastique, which uses gradients and anti-aliasing to provide a modern look and feel. Qt application users can override the default style by using the -style command-line option. For example, to launch the Age application using the Motif style on X11, simply type ./age -style motif
on the command line.
Windows XP
Mac
Figure 1.10. Platform-specific styles
Unlike the other styles, the Windows XP and Mac styles are only available on their native platforms, since they rely on the platforms’ theme engines.
12
1. Getting Started
This chapter has introduced the key concepts of signal–slot connections and layouts. It has also begun to reveal Qt’s consistent and fully object-oriented approach to the construction and use of widgets. If you browse through Qt’s documentation, you will find a uniformity of approach that makes it straightforward to learn how to use new widgets, and you will also find that Qt’s carefully chosen names for functions, parameters, enums, and so on, make programming in Qt surprisingly pleasant and easy. The following chapters of Part I build on the fundamentals covered here, showing how to create complete GUI applications with menus, toolbars, document windows, a status bar, and dialogs, along with the underlying functionality to read, process, and write files.
◆
Subclassing QDialog
◆
Signals and Slots in Depth
◆
Rapid Dialog Design
◆
Shape-Changing Dialogs
◆
Dynamic Dialogs
◆
Built-in Widget and Dialog Classes
2. Creating Dialogs This chapter will teach you how to create dialog boxes using Qt. Dialog boxes present users with options and choices, and allow them to set the options to their preferred values and to make their choices. They are called dialog boxes, or simply “dialogs”, because they provide a means by which users and applications can “talk to” each other. Most GUI applications consist of a main window with a menu bar and toolbar, along with dozens of dialogs that complement the main window. It is also possible to create dialog applications that respond directly to the user’s choices by performing the appropriate actions (for example, a calculator application). We will create our first dialog purely by writing code to show how it is done. Then we will see how to build dialogs using Qt Designer, Qt’s visual design tool. Using Qt Designer is a lot faster than hand-coding and makes it easy to test different designs and to change designs later.
Subclassing QDialog Our first example is a Find dialog written entirely in C++. We will implement the dialog as a class in its own right. By doing so, we make it an independent, self-contained component, with its own signals and slots.
Figure 2.1. The Find dialog
13
14
2. Creating Dialogs
The source code is spread across two files: finddialog.h and finddialog.cpp. We will start with finddialog.h. 001 002
#ifndef FINDDIALOG_H #define FINDDIALOG_H
003
#include
004 005 006 007
class class class class
QCheckBox; QLabel; QLineEdit; QPushButton;
Lines 1 and 2 (and 27) protect the header file against multiple inclusions. Line 3 includes the definition of QDialog, the base class for dialogs in Qt. QDialog inherits QWidget. Lines 4 to 7 are forward declarations of the Qt classes that we will use to implement the dialog. A forward declaration tells the C++ compiler that a class exists, without giving all the detail that a class definition (usually located in a header file of its own) provides. We will say more about this shortly. Next, we define FindDialog as a subclass of QDialog: 008 009 010
class FindDialog : public QDialog { Q_OBJECT
011 012
public: FindDialog(QWidget *parent = 0);
The Q_OBJECT macro at the beginning of the class definition is necessary for all classes that define signals or slots. The FindDialog constructor is typical of Qt widget classes. The parent parameter specifies the parent widget. The default is a null pointer, meaning that the dialog has no parent. 013 014 015
The signals section declares two signals that the dialog emits when the user clicks the Find button. If the Search backward option is enabled, the dialog emits findPrevious(); otherwise, it emits findNext(). The signals keyword is actually a macro. The C++ preprocessor converts it into standard C++ before the compiler sees it. Qt::CaseSensitivity is an enum type that can take the values Qt::CaseSensitive and Qt::CaseInsensitive. 016 017 018
In the class’s private section, we declare two slots. To implement the slots, we will need to access most of the dialog’s child widgets, so we keep pointers to them as well. The slots keyword is, like signals, a macro that expands into a construct that the C++ compiler can digest. For the private variables, we used forward declarations of their classes. This was possible because they are all pointers and we don’t access them in the header file, so the compiler doesn’t need the full class definitions. We could have included the relevant header files (, , etc.), but using forward declarations when it is possible makes compiling somewhat faster. We will now look at finddialog.cpp, which contains the implementation of the FindDialog class. 001
#include
002
#include "finddialog.h"
First, we include , a header file that contains the definition of Qt’s GUI classes. Qt consists of several modules, each of which lives in its own library. The most important modules are QtCore, QtGui, QtNetwork, QtOpenGL, QtSql, QtSvg, and QtXml. The header file contains the definition of all the classes that are part of the QtCore and QtGui modules. Including this header saves us the bother of including every class individually. In filedialog.h, instead of including and using forward declarations for QCheckBox, QLabel, QLineEdit, and QPushButton, we could simply have included . However, it is generally bad style to include such a big header file from another header file, especially in larger applications. 003 004 005 006 007 008
FindDialog::FindDialog(QWidget *parent) : QDialog(parent) { label = new QLabel(tr("Find &what:")); lineEdit = new QLineEdit; label->setBuddy(lineEdit);
009 010
caseCheckBox = new QCheckBox(tr("Match &case")); backwardCheckBox = new QCheckBox(tr("Search &backward"));
011 012 013
findButton = new QPushButton(tr("&Find")); findButton->setDefault(true); findButton->setEnabled(false);
014
closeButton = new QPushButton(tr("Close"));
16
2. Creating Dialogs
On line 4, we pass on the parent parameter to the base class constructor. Then we create the child widgets. The tr() function calls around the string literals mark them for translation to other languages. The function is declared in QObject and every subclass that contains the Q_OBJECT macro. It’s a good habit to surround user-visible strings with tr(), even if you don’t have immediate plans for translating your applications to other languages. Translating Qt applications is covered in Chapter 17. In the string literals, we use ampersands (‘&’) to indicate shortcut keys. For example, line 11 creates a Find button, which the user can activate by pressing Alt+F on platforms that support shortcut keys. Ampersands can also be used to control focus: On line 6 we create a label with a shortcut key (Alt+W), and on line 8 we set the label’s buddy to be the line editor. A buddy is a widget that accepts the focus when the label’s shortcut key is pressed. So when the user presses Alt+W (the label’s shortcut), the focus goes to the line editor (the label’s buddy). On line 12, we make the Find button the dialog’s default button by calling setDefault(true). The default button is the button that is pressed when the user hits Enter. On line 13, we disable the Find button. When a widget is disabled, it is usually shown grayed out and will not respond to user interaction. 015 016 017 018 019 020
The private slot enableFindButton(const QString &) is called whenever the text in the line editor changes. The private slot findClicked() is called when the user clicks the Find button. The dialog closes itself when the user clicks Close. The close() slot is inherited from QWidget, and its default behavior is to hide the widget from view (without deleting it). We will look at the code for the enableFindButton() and findClicked() slots later on. Since QObject is one of FindDialog’s ancestors, we can omit the QObject:: prefix in front of the connect() calls. 021 022 023
QHBoxLayout *topLeftLayout = new QHBoxLayout; topLeftLayout->addWidget(label); topLeftLayout->addWidget(lineEdit);
024 025 026 027
QVBoxLayout *leftLayout = new QVBoxLayout; leftLayout->addLayout(topLeftLayout); leftLayout->addWidget(caseCheckBox); leftLayout->addWidget(backwardCheckBox);
028 029 030 031
QVBoxLayout *rightLayout = new QVBoxLayout; rightLayout->addWidget(findButton); rightLayout->addWidget(closeButton); rightLayout->addStretch();
17
Subclassing QDialog QHBoxLayout *mainLayout = new QHBoxLayout; mainLayout->addLayout(leftLayout); mainLayout->addLayout(rightLayout); setLayout(mainLayout);
032 033 034 035
Next, we lay out the child widgets using layout managers. Layouts can contain both widgets and other layouts. By nesting QHBoxLayouts, QVBoxLayouts, and QGridLayouts in various combinations, it is possible to build very sophisticated dialogs. ✕
For the Find dialog, we use two QHBoxLayouts and two QVBoxLayouts, as shown in Figure 2.2. The outer layout is the main layout; it is installed on the FindDialog on line 35 and is responsible for the dialog’s entire area. The other three layouts are sub-layouts. The little “spring” at the bottom right of Figure 2.2 is a spacer item (or “stretch”). It uses up the empty space below the Find and Close buttons, ensuring that these buttons occupy the top of their layout. One subtle aspect of the layout manager classes is that they are not widgets. Instead, they inherit QLayout, which in turn inherits QObject. In the figure, widgets are represented by solid outlines and layouts are represented by dashed outlines to highlight the difference between them. In a running application, layouts are invisible. When the sub-layouts are added to the parent layout (lines 25, 33, and 34), the sub-layouts are automatically reparented. Then, when the main layout is installed on the dialog (line 35), it becomes a child of the dialog, and all the widgets in the layouts are reparented to become children of the dialog. The resulting parent–child hierarchy is depicted in Figure 2.3. 036 037 038
Finally, we set the title to be shown in the dialog’s title bar and we set the window to have a fixed height, since there aren’t any widgets in the dialog that
18
2. Creating Dialogs
can meaningfully occupy any extra vertical space. The QWidget::sizeHint() function returns a widget’s “ideal” size. This completes the review of FindDialog’s constructor. Since we used new to create the dialog’s widgets and layouts, it would seem that we need to write a destructor that calls delete on each of the widgets and layouts we created. But this isn’t necessary, since Qt automatically deletes child objects when the parent is destroyed, and the child widgets and layouts are all descendants of the FindDialog. FindDialog QLabel (label) QLineEdit (lineEdit) QCheckBox (caseCheckBox) QCheckBox (backwardCheckBox) QPushButton (findButton) QPushButton (closeButton) QHBoxLayout (mainLayout) QVBoxLayout (leftLayout) QHBoxLayout (topLeftLayout) QVBoxLayout (rightLayout) Figure 2.3. The Find dialog’s parent–child relationships
Now we will look at the dialog’s slots: 039 040 041 042 043 044 045 046 047 048 049 050
The findClicked() slot is called when the user clicks the Find button. It emits the findPrevious() or the findNext() signal, depending on the Search backward option. The emit keyword is specific to Qt; like other Qt extensions it is converted into standard C++ by the C++ preprocessor.
Subclassing QDialog
19
The enableFindButton() slot is called whenever the user changes the text in the line editor. It enables the button if there is some text in the editor, and disables it otherwise. These two slots complete the dialog. We can now create a main.cpp file to test our FindDialog widget: 001
#include
002
#include "finddialog.h"
003 004 005 006 007 008 009
int main(int argc, char *argv[]) { QApplication app(argc, argv); FindDialog *dialog = new FindDialog; dialog->show(); return app.exec(); }
To compile the program, run qmake as usual. Since the FindDialog class definition contains the Q_OBJECT macro, the makefile generated by qmake will include special rules to run moc, Qt’s meta-object compiler. (Qt’s meta-object system is covered in the next section.) For moc to work correctly, we must put the class definition in a header file, separate from the implementation file. The code generated by moc includes this header file and adds some C++ magic of its own. Classes that use the Q_OBJECT macro must have moc run on them. This isn’t a problem because qmake automatically adds the necessary rules to the makefile. But if you forget to regenerate your makefile using qmake and moc isn’t run, the linker will complain that some functions are declared but not implemented. The messages can be fairly obscure. GCC produces warnings like this one: finddialog.o: In function ‘FindDialog::tr(char const*, char const*)’: /usr/lib/qt/src/corelib/global/qglobal.h:1430: undefined reference to ‘FindDialog::staticMetaObject’
Visual C++’s output starts like this: finddialog.obj : error LNK2001: unresolved external symbol "public:~virtual int __thiscall MyClass::qt_metacall(enum QMetaObject ::Call,int,void * *)"
If this ever happens to you, run qmake again to update the makefile, then rebuild the application. Now run the program. If shortcut keys are shown on your platform, verify that the shortcut keys Alt+W, Alt+C, Alt+B, and Alt+F trigger the correct behavior. Press Tab to navigate through the widgets with the keyboard. The default tab order is the order in which the widgets were created. This can be changed using QWidget::setTabOrder().
20
2. Creating Dialogs
Providing a sensible tab order and keyboard shortcuts ensures that users who don’t want to (or cannot) use a mouse are able to make full use of the application. Full keyboard control is also appreciated by fast typists. In Chapter 3, we will use the Find dialog inside a real application, and we will connect the findPrevious() and findNext() signals to some slots.
Signals and Slots in Depth The signals and slots mechanism is fundamental to Qt programming. It enables the application programmer to bind objects together without the objects knowing anything about each other. We have already connected some signals and slots together, declared our own signals and slots, implemented our own slots, and emitted our own signals. Let’s take a moment to look at the mechanism more closely. Slots are almost identical to ordinary C++ member functions. They can be virtual; they can be overloaded; they can be public; protected, or private, they can be directly invoked like any other C++ member functions; and their parameters can be of any types. The difference is that a slot can also be connected to a signal, in which case it is automatically called each time the signal is emitted. The connect() statement looks like this: connect(sender, SIGNAL(signal), receiver, SLOT(slot));
where sender and receiver are pointers to QObjects and where signal and slot are function signatures without parameter names. The SIGNAL() and SLOT() macros essentially convert their argument to a string. In the examples we have seen so far, we have always connected different signals to different slots. There are other possibilities to consider. • One signal can be connected to many slots: connect(slider, SIGNAL(valueChanged(int)), spinBox, SLOT(setValue(int))); connect(slider, SIGNAL(valueChanged(int)), this, SLOT(updateStatusBarIndicator(int)));
When the signal is emitted, the slots are called one after the other, in an unspecified order. • Many signals can be connected to the same slot: connect(lcd, SIGNAL(overflow()), this, SLOT(handleMathError())); connect(calculator, SIGNAL(divisionByZero()), this, SLOT(handleMathError()));
When either signal is emitted, the slot is called.
Signals and Slots in Depth
21
• A signal can be connected to another signal: connect(lineEdit, SIGNAL(textChanged(const QString &)), this, SIGNAL(updateRecord(const QString &)));
When the first signal is emitted, the second signal is emitted as well. Apart from that, signal–signal connections are indistinguishable from signal–slot connections. • Connections can be removed: disconnect(lcd, SIGNAL(overflow()), this, SLOT(handleMathError()));
This is rarely needed, because Qt automatically removes all connections involving an object when that object is deleted. To successfully connect a signal to a slot (or to another signal), they must have the same parameter types in the same order: connect(ftp, SIGNAL(rawCommandReply(int, const QString &)), this, SLOT(processReply(int, const QString &)));
Exceptionally, if a signal has more parameters than the slot it is connected to, the additional parameters are simply ignored: connect(ftp, SIGNAL(rawCommandReply(int, const QString &)), this, SLOT(checkErrorCode(int)));
If the parameter types are incompatible, or if the signal or the slot doesn’t exist, Qt will issue a warning at run-time if the application is built in debug mode. Similarly, Qt will give a warning if parameter names are included in the signal or slot signatures. So far, we have only used signals and slots with widgets. But the mechanism itself is implemented in QObject and isn’t limited to GUI programming. The mechanism can be used by any QObject subclass: class Employee : public QObject { Q_OBJECT public: Employee() { mySalary = 0; } int salary() const { return mySalary; } public slots: void setSalary(int newSalary); signals: void salaryChanged(int newSalary); private: int mySalary; };
Notice how the setSalary() slot is implemented. We only emit the salaryChanged() signal if newSalary != mySalary. This ensures that cyclic connections don’t lead to infinite loops.
Qt’s Meta-Object System One of Qt’s major achievements has been the extension of C++ with a mechanism for creating independent software components that can be bound together without any component knowing anything about the other components it is connected to. The mechanism is called the meta-object system, and it provides two key services: signals–slots and introspection. The introspection functionality is necessary for implementing signals and slots, and allows application programmers to obtain “meta-information” about QObject subclasses at run-time, including the list of signals and slots supported by the object and its class name. The mechanism also supports properties (for Qt Designer) and text translation (for internationalization), and it lays the foundation for Qt Script for Applications (QSA). Standard C++ doesn’t provide support for the dynamic meta-information needed by Qt’s meta-object system. Qt solves this problem by providing a separate tool, moc, that parses Q_OBJECT class definitions and makes the information available through C++ functions. Since moc implements all its functionality using pure C++, Qt’s meta-object system works with any C++ compiler. The mechanism works as follows: • The Q_OBJECT macro declares some introspection functions that must be implemented in every QObject subclass: metaObject(), tr(), qt_ metacall(), and a few more. • Qt’s moc tool generates implementations for the functions declared by Q_OBJECT and for all the signals. • QObject member functions such as connect() and disconnect() use the introspection functions to do their work. All of this is handled automatically by qmake, moc, and QObject, so you rarely need to think about it. But if you are curious, you can check out the QMetaObject class documentation and have a look at the C++ source files generated by moc to see how the implementation works.
23
Rapid Dialog Design
Rapid Dialog Design Qt is designed to be pleasant and intuitive to hand-code, and it is not unusual for programmers to develop entire Qt applications purely by writing C++ source code. Still, many programmers prefer to use a visual approach for designing forms, because they find it more natural and faster than hand-coding, and they want to be able to experiment with and change designs more quickly and easily than is possible with hand-coded forms. Qt Designer expands the options available to programmers by providing a visual design capability. Qt Designer can be used to develop all or just some of an application’s forms. Forms that are created using Qt Designer end up as C++ code, so Qt Designer can be used with a conventional tool chain and imposes no special requirements on the compiler. In this section, we will use Qt Designer to create the Go-to-Cell dialog shown in Figure 2.4. And whether we do it in code or in Qt Designer, creating a dialog always involves the same fundamental steps: • Create and initialize the child widgets. • Put the child widgets in layouts. • Set the tab order. • Establish signal–slot connections. • Implement the dialog’s custom slots.
Figure 2.4. The Go-to-Cell dialog
To launch Qt Designer, click Qt by Trolltech v4.x.y|Designer in the Start menu on Windows, type designer on the command line on Unix, or double-click Designer in the Mac OS X Finder. When Qt Designer starts, it will pop up a list of templates. Click the “Widget” template, then click OK. (The “Dialog with Buttons Bottom” template might look tempting, but for this example we will create the OK and Cancel buttons by hand to show how it is done.) You should now have a window called “Untitled”. By default, Qt Designer’s user interface consists of several top-level windows. If you prefer an MDI-style interface, with one top-level window and several sub-windows, click Edit|User Interface Mode|Docked Window. The first step is to create the child widgets and place them on the form. Create one label, one line editor, one horizontal spacer, and two push buttons. For each
24
2. Creating Dialogs
item, drag its name or icon from Qt Designer’s widget box and drop the item roughly where it should go on the form. The spacer item, which is invisible in the final form, is shown in Qt Designer as a blue spring.
Figure 2.5. Qt Designer in docked window mode on Windows
Now drag the bottom of the form up to make it shorter. This should produce a form that is similar to Figure 2.6. Don’t spend too much time positioning the items on the form; Qt’s layout managers will lay them out precisely later on.
Figure 2.6. The form with some widgets
Set each widget’s properties using Qt Designer’s property editor: 1. Click the text label. Make sure that its objectName property is “label” and set the text property to “&Cell Location:”. 2. Click the line editor. Make sure that the objectName property is “lineEdit”. 3. Click the first button. Set the objectName property to “okButton”, the enabled property to “false”, the text property to “OK”, and the default property to “true”. 4. Click the second button. Set the objectName property to “cancelButton” and the text property to “Cancel”. 5. Click the form’s background to select the form itself. Set objectName to “GoToCellDialog” and windowTitle to “Go to Cell”.
25
Rapid Dialog Design
All the widgets look fine now, except the text label, which shows &Cell Location. Click Edit|Edit Buddies to enter a special mode that allows you to set buddies. Next, click the label and drag the red arrow line to the line editor, then release. The label should now show Cell Location and have the line editor as its buddy. Click Edit|Edit Widgets to leave buddy mode.
Figure 2.7. The form with properties set
The next step is to lay out the widgets on the form: 1. Click the Cell Location label and press Shift as you click the line editor next to it so that they are both selected. Click Form|Lay Out Horizontally. 2. Click the spacer, then hold Shift as you click the form’s OK and Cancel buttons. Click Form|Lay Out Horizontally. 3. Click the background of the form to deselect any selected items, then click Form|Lay Out Vertically. 4. Click Form|Adjust Size to resize the form to its preferred size. The red lines that appear on the form show the layouts that have been created. They don’t appear when the form is run.
Figure 2.8. The form with the layouts
Now click Edit|Edit Tab Order. A number in a blue rectangle will appear next to every widget that can accept focus. Click each widget in turn in the order you want them to accept focus, then click Edit|Edit Widgets to leave tab order mode.
Figure 2.9. Setting the form’s tab order
26
2. Creating Dialogs
To preview the dialog, click the Form|Preview menu option. Check the tab order by pressing Tab repeatedly. Close the dialog using the close button in the title bar. Save the dialog as gotocelldialog.ui in a directory called gotocell, and create a main.cpp file in the same directory using a plain text editor: #include #include #include "ui_gotocelldialog.h" int main(int argc, char *argv[]) { QApplication app(argc, argv); Ui::GoToCellDialog ui; QDialog *dialog = new QDialog; ui.setupUi(dialog); dialog->show(); return app.exec(); }
Now run qmake to create a .pro file and a makefile (qmake -project; qmake gotocell.pro). The qmake tool is smart enough to detect the user interface file gotocelldialog.ui and to generate the appropriate makefile rules to invoke uic, Qt’s user interface compiler. The uic tool converts gotocelldialog.ui into C++ and puts the result in ui_gotocelldialog.h. The generated ui_gotocelldialog.h file contains the definition of the Ui:: GoToCellDialog class, which is a C++ equivalent of the gotocelldialog.ui file. The class declares member variables that store the form’s child widgets and layouts, and a setupUi() function that initializes the form. The generated class looks like this: class Ui::GoToCellDialog { public: QLabel *label; QLineEdit *lineEdit; QSpacerItem *spacerItem; QPushButton *okButton; QPushButton *cancelButton; ... void setupUi(QWidget *widget) { ... } };
The generated class doesn’t inherit any Qt class. When we use the form in main.cpp, we create a QDialog and pass it to setupUi().
Rapid Dialog Design
27
If you run the program now, the dialog will work, but it doesn’t function exactly as we want: • The OK button is always disabled. • The Cancel button does nothing. • The line editor accepts any text, instead of only accepting valid cell locations. We can make the dialog function properly by writing some code. The cleanest approach is to create a new class that inherits both QDialog and Ui::GoToCellDialog and that implements the missing functionality (thus proving the adage that any software problem can be solved simply by adding another layer of indirection). Our naming convention is to give this new class the same name as the uic-generated class but without the Ui:: prefix. Using a text editor, create a file called gotocelldialog.h that contains the following code: #ifndef GOTOCELLDIALOG_H #define GOTOCELLDIALOG_H #include #include "ui_gotocelldialog.h" class GoToCellDialog : public QDialog, public Ui::GoToCellDialog { Q_OBJECT public: GoToCellDialog(QWidget *parent = 0); private slots: void on_lineEdit_textChanged(); }; #endif
In the constructor, we call setupUi() to initialize the form. Thanks to multiple inheritance, we can access Ui::GoToCellDialog’s members directly. After creating the user interface, setupUi() will also automatically connect any slots that follow the naming convention on_objectName_signalName() to the corresponding objectName’s signalName() signal. In our example, this means that setupUi() will establish the following signal–slot connection: connect(lineEdit, SIGNAL(textChanged(const QString &)), this, SLOT(on_lineEdit_textChanged()));
Also in the constructor, we set up a validator to restrict the range of the input. Qt provides three built-in validator classes: QIntValidator, QDoubleValidator, and QRegExpValidator. Here we use a QRegExpValidator with the regular expression “[A-Za-z][1-9][0-9]{0,2}”, which means: Allow one uppercase or lowercase letter, followed by one digit in the range 1 to 9, followed by zero, one, or two digits each in the range 0 to 9. (For an introduction to regular expressions, see the QRegExp class documentation.) By passing this to the QRegExpValidator constructor, we make it a child of the GoToCellDialog object. By doing so, we don’t have to worry about deleting the QRegExpValidator later; it will be deleted automatically when its parent is deleted. Qt’s parent–child mechanism is implemented in QObject. When we create an object (a widget, validator, or any other kind) with a parent, the parent adds the object to the list of its children. When the parent is deleted, it walks through its list of children and deletes each child. The children themselves then delete all of their children, and so on recursively until none remain. The parent–child mechanism greatly simplifies memory management, reducing the risk of memory leaks. The only objects we must delete explicitly are the objects we create with new and that have no parent. And if we delete a child object before its parent, Qt will automatically remove that object from the parent’s list of children. For widgets, the parent has an additional meaning: Child widgets are shown within the parent’s area. When we delete the parent widget, not only does the child vanish from memory, it also vanishes from the screen. At the end of the constructor, we connect the OK button to QDialog’s accept() slot and the Cancel button to the reject() slot. Both slots close the dialog, but accept() sets the dialog’s result value to QDialog::Accepted (which equals 1), and reject() sets the value to QDialog::Rejected (which equals 0). When we use this dialog, we can use the result value to see if the user clicked OK and act accordingly.
Rapid Dialog Design
29
The on_lineEdit_textChanged() slot enables or disables the OK button, according to whether the line edit contains a valid cell location. QLineEdit::hasAcceptableInput() uses the validator we set in the constructor. This completes the dialog. We can now rewrite main.cpp to use it: #include #include "gotocelldialog.h" int main(int argc, char *argv[]) { QApplication app(argc, argv); GoToCellDialog *dialog = new GoToCellDialog; dialog->show(); return app.exec(); }
Rebuild the application (qmake -project; qmake gotocell.pro) and run it again. Type “A12” in the line edit, and notice that the OK button becomes enabled. Try typing some random text to see how the validator does its job. Click Cancel to close the dialog. One of the beauties of using Qt Designer is that it allows programmers great freedom to modify their form designs without being forced to change their source code. When you develop a form purely by writing C++ code, changes to the design can be quite time-consuming. With Qt Designer, no time is lost since uic simply regenerates the source code for any forms that have changed. The dialog’s user interface is saved in a .ui file (an XML-based file format), while custom functionality is implemented by subclassing the uic-generated class.
Shape-Changing Dialogs We have seen how to create dialogs that always show the same widgets whenever they are used. In some cases, it is desirable to provide dialogs that can change shape. The two most common kinds of shape-changing dialogs are extension dialogs and multi-page dialogs. Both types of dialog can be implemented in Qt, either purely in code or using Qt Designer. Extension dialogs usually present a simple appearance but have a toggle button that allows the user to switch between the dialog’s simple and extended appearances. Extension dialogs are commonly used for applications that are trying to cater for both casual and power users, hiding the advanced options unless the user explicitly asks to see them. In this section, we will use Qt Designer to create the extension dialog shown in Figure 2.10. The dialog is a Sort dialog in a spreadsheet application, where the user can select one or several columns to sort on. The dialog’s simple appearance allows the user to enter a single sort key, and its extended appearance provides for two extra sort keys. A More button lets the user switch between the simple and extended appearances.
30
2. Creating Dialogs
➥ Figure 2.10. The Sort dialog with simple and extended appearances
We will create the widget with its extended appearance in Qt Designer, and hide the secondary and tertiary keys at run-time as needed. The widget looks complicated, but it’s fairly easy to do in Qt Designer. The trick is to do the primary key part first, then duplicate it twice to obtain the secondary and tertiary keys: 1. Click File|New Form and choose the “Dialog with Buttons Right” template. 2. Create the More button and drag it into the vertical layout, below the vertical spacer. Set the More button’s text property to “&More”, and its checkable property to “true”. Set the OK button’s default property to “true”. 3. Create a group box, two labels, two comboboxes, and one horizontal spacer, and put them anywhere on the form. 4. Drag the bottom right corner of the group box to make it larger. Then move the other widgets into the group box and position them approximately as shown in Figure 2.11 (a). 5. Drag the right edge of the second combobox to make it about twice as wide as the first combobox. 6. Set the group box’s title property to “&Primary Key”, the first label’s text property to “Column:”, and the second label’s text property to “Order:”. 7. Right-click the first combobox and choose Edit Items from the context menu to pop up Qt Designer’s combobox editor. Create one item with the text “None”. 8. Right-click the second combobox and choose Edit Items. Create an “Ascending” item and a “Descending” item. 9. Click the group box, then click Form|Lay Out in a Grid. Click the group box again and click Form|Adjust Size. This will produce the layout shown in Figure 2.11 (b).
31
Shape-Changing Dialogs
(a) Without layout
(b) With layout
Figure 2.11. Laying out the group box’s children in a grid
If a layout doesn’t turn out quite right or if you make a mistake, you can always click Edit|Undo or Form|Break Layout, then reposition the widgets and try again.
(a) Without layout
(b) With layout
Figure 2.12. Laying out the form’s children in a grid
We will now add the Secondary Key and Tertiary Key group boxes: 1. Make the dialog window tall enough for the extra parts. 2. Hold down the Ctrl key (Alt on the Mac) and click the Primary Key group box to create a copy of the group box (and its contents) on top of the original. Drag the copy below the original group box, while still pressing Ctrl (or Alt). Repeat this process to create a third group box, dragging it below the second group box. 3. Change their title properties to “&Secondary Key” and “&Tertiary Key”. 4. Create one vertical spacer and place it between the primary key group box and the secondary key group box.
32
2. Creating Dialogs
5. Arrange the widgets in the grid-like pattern shown in Figure 2.12 (a). 6. Click the form to deselect any selected widgets, then click Form|Lay Out in a Grid. The form should now match Figure 2.12 (b). 7. Set the two vertical spacer items’ sizeHint property to [20, 0]. The resulting grid layout has two columns and four rows, giving a total of eight cells. The Primary Key group box, the leftmost vertical spacer item, the Secondary Key group box, and the Tertiary Key group box each occupy a single cell. The vertical layout that contains the OK, Cancel, and More buttons occupies two cells. That leaves two empty cells in the bottom-right of the dialog. If this isn’t what you have, undo the layout, reposition the widgets, and try again. Rename the form “SortDialog” and change the window title to “Sort”. Set the names of the child widgets to those shown in Figure 2.13.
Click Edit|Edit Tab Order. Click each combobox in turn from topmost to bottommost, then click the OK, Cancel, and More buttons on the right side. Click Edit|Edit Widgets to leave tab order mode. Now that the form has been designed, we are ready to make it functional by setting up some signal–slot connections. Qt Designer allows us to establish connections between widgets that are part of the same form. We need to establish two connections. Click Edit|Edit Signals/Slots to enter Qt Designer’s connection mode. Connections are represented by blue arrows between the form’s widgets. Because we chose
Shape-Changing Dialogs
33
the “Dialog with Buttons Right” template, the OK and Cancel buttons are already connected to QDialog’s accept() and reject() slots. Connections are also listed in Qt Designer’s signal/slot editor window. To establish a connection between two widgets, click the sender widget and drag the red arrow line to the receiver widget, then release. This pops up a dialog that allows you to choose the signal and the slot to connect.
Figure 2.14. Connecting the form’s widgets
The first connection to establish is between the moreButton and the secondaryGroupBox. Drag the red arrow line between these two widgets, then choose toggled(bool) as the signal and setVisible(bool) as the slot. By default, Qt Designer doesn’t list setVisible(bool) in the list of slots, but it will appear if you enable the Show all signals and slots option.
Figure 2.15. Qt Designer’s connection editor
34
2. Creating Dialogs
The second connection is between the moreButton’s toggled(bool) signal and the tertiaryGroupBox’s setVisible(bool) slot. Once the connections have been made, click Edit|Edit Widgets to leave connection mode. Save the dialog as sortdialog.ui in a directory called sort. To add code to the form, we will use the same multiple inheritance approach that we used for the Go-to-Cell dialog in the previous section. First, create a sortdialog.h file with the following contents: #ifndef SORTDIALOG_H #define SORTDIALOG_H #include #include "ui_sortdialog.h" class SortDialog : public QDialog, public Ui::SortDialog { Q_OBJECT public: SortDialog(QWidget *parent = 0); void setColumnRange(QChar first, QChar last); }; #endif
The constructor hides the secondary and tertiary parts of the dialog. It also sets the sizeConstraint property of the form’s layout to QLayout::SetFixedSize, making the dialog non-resizable by the user. The layout then takes over the responsibility for resizing, and resizes the dialog automatically when child widgets are shown or hidden, ensuring that the dialog is always displayed at its optimal size. The setColumnRange() slot initializes the contents of the comboboxes based on the selected columns in the spreadsheet. We insert a “None” item in the comboboxes for the (optional) secondary and tertiary keys. Lines 19 and 20 present a subtle layout idiom. The QWidget::sizeHint() function returns a widget’s “ideal” size, which the layout system tries to honor. This explains why different kinds of widgets, or similar widgets with different contents, may be assigned different sizes by the layout system. For comboboxes, this means that the secondary and tertiary comboboxes, which contain “None”, end up larger than the primary combobox, which contains only single-letter entries. To avoid this inconsistency, we set the primary combobox’s minimum size to the secondary combobox’s ideal size. Here is a main() test function that sets the range to include columns ‘C’ to ‘F’ and then shows the dialog: #include #include "sortdialog.h" int main(int argc, char *argv[]) { QApplication app(argc, argv); SortDialog *dialog = new SortDialog; dialog->setColumnRange(’C’, ’F’); dialog->show(); return app.exec(); }
That completes the extension dialog. As the example illustrates, an extension dialog isn’t much more difficult to design than a plain dialog: All we needed was a toggle button, a few extra signal–slot connections, and a non-resizable layout. In production applications, it is quite common for the button that controls the extension to show the text Advanced >>> when only the basic dialog is visible and Advanced setIcon(QIcon(":/images/new.png")); newAction->setShortcut(tr("Ctrl+N")); newAction->setStatusTip(tr("Create a new spreadsheet file")); connect(newAction, SIGNAL(triggered()), this, SLOT(newFile()));
The New action has an accelerator (New), a parent (the main window), an icon (new.png), a shortcut key (Ctrl+N), and a status tip. We connect the action’s triggered() signal to the main window’s private newFile() slot, which we will implement in the next section. This connection ensures that when the user chooses the File|New menu item, clicks the New toolbar button, or presses Ctrl+N, the newFile() slot is called.
Creating Menus and Toolbars
49
The Open, Save, and Save As actions are very similar to the New action, so we will skip directly to the “recently opened files” part of the File menu: ••• for (int i = 0; i < MaxRecentFiles; ++i) { recentFileActions[i] = new QAction(this); recentFileActions[i]->setVisible(false); connect(recentFileActions[i], SIGNAL(triggered()), this, SLOT(openRecentFile())); }
We populate the recentFileActions array with actions. Each action is hidden and connected to the openRecentFile() slot. Later on, we will see how the recent file actions are made visible and used. We can now skip to the Select All action: ••• selectAllAction = new QAction(tr("&All"), this); selectAllAction->setShortcut(tr("Ctrl+A")); selectAllAction->setStatusTip(tr("Select all the cells in the " "spreadsheet")); connect(selectAllAction, SIGNAL(triggered()), spreadsheet, SLOT(selectAll()));
The selectAll() slot is provided by one of QTableWidget’s ancestors, QAbstractItemView, so we do not have to implement it ourselves. Let’s skip further to the Show Grid action in the Options menu: ••• showGridAction = new QAction(tr("&Show Grid"), this); showGridAction->setCheckable(true); showGridAction->setChecked(spreadsheet->showGrid()); showGridAction->setStatusTip(tr("Show or hide the spreadsheet’s " "grid")); connect(showGridAction, SIGNAL(toggled(bool)), spreadsheet, SLOT(setShowGrid(bool))); Show Grid is a checkable action. It is rendered with a checkmark in the menu
and implemented as a toggle button in the toolbar. When the action is turned on, the Spreadsheet component displays a grid. We initialize the action with the default for the Spreadsheet component, so that they are synchronized at startup. Then we connect the Show Grid action’s toggled(bool) signal to the Spreadsheet component’s setShowGrid(bool) slot, which it inherits from QTableWidget. Once this action is added to a menu or toolbar, the user can toggle the grid on and off. The Show Grid and Auto-Recalculate actions are independent checkable actions. Qt also supports mutually exclusive actions through the QActionGroup class. ••• aboutQtAction = new QAction(tr("About &Qt"), this); aboutQtAction->setStatusTip(tr("Show the Qt library’s About box"));
50
3. Creating Main Windows connect(aboutQtAction, SIGNAL(triggered()), qApp, SLOT(aboutQt())); }
For the About Qt action, we use the QApplication object’s aboutQt() slot, accessible through the qApp global variable.
Figure 3.4. About Qt
Now that we have created the actions, we can move on to building a menu system containing them: void MainWindow::createMenus() { fileMenu = menuBar()->addMenu(tr("&File")); fileMenu->addAction(newAction); fileMenu->addAction(openAction); fileMenu->addAction(saveAction); fileMenu->addAction(saveAsAction); separatorAction = fileMenu->addSeparator(); for (int i = 0; i < MaxRecentFiles; ++i) fileMenu->addAction(recentFileActions[i]); fileMenu->addSeparator(); fileMenu->addAction(exitAction);
In Qt, menus are instances of QMenu. The addMenu() function creates a QMenu widget with the specified text and adds it to the menu bar. The QMainWindow:: menuBar() function returns a pointer to a QMenuBar. The menu bar is created the first time menuBar() is called. We start by creating the File menu and then add the New, Open, Save, and Save As actions to it. We insert a separator to visually group closely related items together. We use a for loop to add the (initially hidden) actions from the recentFileActions array, and then add the exitAction action at the end. We have kept a pointer to one of the separators. This will allow us to hide the separator (if there are no recent files) or to show it, since we do not want to show two separators with nothing in between. editMenu = menuBar()->addMenu(tr("&Edit")); editMenu->addAction(cutAction); editMenu->addAction(copyAction);
Now we create the Edit menu, adding actions with QMenu::addAction() as we did for the File menu, and adding the submenu with QMenu::addMenu() at the position where we want it to appear. The submenu, like the menu it belongs to, is a QMenu. toolsMenu = menuBar()->addMenu(tr("&Tools")); toolsMenu->addAction(recalculateAction); toolsMenu->addAction(sortAction); optionsMenu = menuBar()->addMenu(tr("&Options")); optionsMenu->addAction(showGridAction); optionsMenu->addAction(autoRecalcAction); menuBar()->addSeparator(); helpMenu = menuBar()->addMenu(tr("&Help")); helpMenu->addAction(aboutAction); helpMenu->addAction(aboutQtAction); }
We create the Tools, Options, and Help menus in a similar fashion. We insert a separator between the Options and Help menu. In Motif and CDE styles, the separator pushes the Help menu to the right; in other styles, the separator is ignored.
Figure 3.5. Menu bar in Motif and Windows styles void MainWindow::createContextMenu() { spreadsheet->addAction(cutAction); spreadsheet->addAction(copyAction); spreadsheet->addAction(pasteAction); spreadsheet->setContextMenuPolicy(Qt::ActionsContextMenu); }
Any Qt widget can have a list of QActions associated with it. To provide a context menu for the application, we add the desired actions to the Spreadsheet
52
3. Creating Main Windows
widget and set that widget’s context menu policy to show a context menu with these actions. Context menus are invoked by right-clicking a widget or by pressing a platform-specific key.
Figure 3.6. The Spreadsheet application’s context menu
A more sophisticated way of providing context menus is to reimplement the QWidget::contextMenuEvent() function, create a QMenu widget, populate it with the desired actions, and call exec() on it. void MainWindow::createToolBars() { fileToolBar = addToolBar(tr("&File")); fileToolBar->addAction(newAction); fileToolBar->addAction(openAction); fileToolBar->addAction(saveAction); editToolBar = addToolBar(tr("&Edit")); editToolBar->addAction(cutAction); editToolBar->addAction(copyAction); editToolBar->addAction(pasteAction); editToolBar->addSeparator(); editToolBar->addAction(findAction); editToolBar->addAction(goToCellAction); }
Creating toolbars is very similar to creating menus. We create a File toolbar and an Edit toolbar. Just like a menu, a toolbar can have separators.
Figure 3.7. The Spreadsheet application’s toolbars
Setting Up the Status Bar With the menus and toolbars complete, we are ready to tackle the Spreadsheet application’s status bar. In its normal state, the status bar contains two indicators: the current cell’s location and the current cell’s formula. The status bar is also used to display status tips and other temporary messages.
53
Setting Up the Status Bar
Normal
Status tip
Temporary message Figure 3.8. The Spreadsheet application’s status bar
The MainWindow constructor calls createStatusBar() to set up the status bar: void MainWindow::createStatusBar() { locationLabel = new QLabel(" W999 "); locationLabel->setAlignment(Qt::AlignHCenter); locationLabel->setMinimumSize(locationLabel->sizeHint()); formulaLabel = new QLabel; formulaLabel->setIndent(3); statusBar()->addWidget(locationLabel); statusBar()->addWidget(formulaLabel, 1); connect(spreadsheet, SIGNAL(currentCellChanged(int, int, int, int)), this, SLOT(updateStatusBar())); connect(spreadsheet, SIGNAL(modified()), this, SLOT(spreadsheetModified())); updateStatusBar(); }
The QMainWindow::statusBar() function returns a pointer to the status bar. (The status bar is created the first time statusBar() is called.) The status indicators are simply QLabels whose text we change whenever necessary. We have added an indent to the formulaLabel so that the text shown in it is offset slightly from the left edge. When the QLabels are added to the status bar, they are automatically reparented to make them children of the status bar. Figure 3.8 shows that the two labels have different space requirements. The cell location indicator requires very little space, and when the window is resized, any extra space should go to the cell formula indicator on the right. This is achieved by specifying a stretch factor of 1 in the formula label’s QStatusBar::addWidget() call. The location indicator has the default stretch factor of 0, meaning that it prefers not to be stretched. When QStatusBar lays out indicator widgets, it tries to respect each widget’s ideal size as given by QWidget::sizeHint() and then stretches any stretchable widgets to fill the available space. A widget’s ideal size is itself dependent on the widget’s contents and varies as we change the contents. To avoid constant resizing of the location indicator, we set its minimum size to be wide enough
54
3. Creating Main Windows
to contain the largest possible text (“W999”), with a little extra space. We also set its alignment to Qt::AlignHCenter to horizontally center the text. Near the end of the function, we connect two of Spreadsheet’s signals to two of MainWindow’s slots: updateStatusBar() and spreadsheetModified(). void MainWindow::updateStatusBar() { locationLabel->setText(spreadsheet->currentLocation()); formulaLabel->setText(spreadsheet->currentFormula()); }
The updateStatusBar() slot updates the cell location and the cell formula indicators. It is called whenever the user moves the cell cursor to a new cell. The slot is also used as an ordinary function at the end of createStatusBar() to initialize the indicators. This is necessary because Spreadsheet doesn’t emit the currentCellChanged() signal at startup. void MainWindow::spreadsheetModified() { setWindowModified(true); updateStatusBar(); }
The spreadsheetModified() slot sets the windowModified property to true, updating the title bar. The function also updates the location and formula indicators so that they reflect the current state of affairs.
Implementing the File Menu In this section, we will implement the slots and private functions necessary to make the File menu options work and to manage the recently opened files list. void MainWindow::newFile() { if (okToContinue()) { spreadsheet->clear(); setCurrentFile(""); } }
The newFile() slot is called when the user clicks the File|New menu option or clicks the New toolbar button. The okToContinue() private function asks the user “Do you want to save your changes?” if there are unsaved changes. It returns true if the user chooses either Yes or No (saving the document on Yes), and it returns false if the user chooses Cancel. The Spreadsheet::clear() function clears all the spreadsheet’s cells and formulas. The setCurrentFile() private function updates the window title to indicate that an untitled document is being edited, in addition to setting the curFile private variable and updating the recently opened files list.
55
Implementing the File Menu
Figure 3.9. “Do you want to save your changes?” bool MainWindow::okToContinue() { if (isWindowModified()) { int r = QMessageBox::warning(this, tr("Spreadsheet"), tr("The document has been modified.\n" "Do you want to save your changes?"), QMessageBox::Yes | QMessageBox::Default, QMessageBox::No, QMessageBox::Cancel | QMessageBox::Escape); if (r == QMessageBox::Yes) { return save(); } else if (r == QMessageBox::Cancel) { return false; } } return true; }
In okToContinue(), we check the state of the windowModified property. If it is true, we display the message box shown in Figure 3.9. The message box has a Yes, a No, and a Cancel button. The QMessageBox::Default modifier makes Yes the default button. The QMessageBox::Escape modifier makes the Esc key a synonym for Cancel. The call to warning() may look a bit intimidating at first sight, but the general syntax is straightforward: QMessageBox::warning(parent, title, message, button0, button1, ...); QMessageBox also provides information(), question(), and critical(), each of which has its own particular icon.
3. Creating Main Windows QString fileName = QFileDialog::getOpenFileName(this, tr("Open Spreadsheet"), ".", tr("Spreadsheet files (*.sp)")); if (!fileName.isEmpty()) loadFile(fileName); } }
The open() slot corresponds to File|Open. Like newFile(), it first calls okToContinue() to handle any unsaved changes. Then it uses the static convenience function QFileDialog::getOpenFileName() to obtain a new file name from the user. The function pops up a file dialog, lets the user choose a file, and returns the file name—or an empty string if the user clicked Cancel. The first argument to QFileDialog::getOpenFileName() is the parent widget. The parent–child relationship doesn’t mean the same thing for dialogs as for other widgets. A dialog is always a window in its own right, but if it has a parent, it is centered on top of the parent by default. A child dialog also shares its parent’s taskbar entry. The second argument is the title the dialog should use. The third argument tells it which directory it should start from, in our case the current directory. The fourth argument specifies the file filters. A file filter consists of a descriptive text and a wildcard pattern. Had we supported comma-separated values files and Lotus 1-2-3 files in addition to Spreadsheet’s native file format, we would have used the following filter: tr("Spreadsheet files (*.sp)\n" "Comma-separated values files (*.csv)\n" "Lotus 1-2-3 files (*.wk1 *.wks)")
The loadFile() private function was called in open() to load the file. We make it an independent function because we will need the same functionality to load recently opened files: bool MainWindow::loadFile(const QString &fileName) { if (!spreadsheet->readFile(fileName)) { statusBar()->showMessage(tr("Loading canceled"), 2000); return false; } setCurrentFile(fileName); statusBar()->showMessage(tr("File loaded"), 2000); return true; }
We use Spreadsheet::readFile() to read the file from disk. If loading is successful, we call setCurrentFile() to update the window title; otherwise, Spreadsheet::readFile() will have already notified the user of the problem through a message box. In general, it is good practice to let the lower-level compo-
Implementing the File Menu
57
nents issue error messages, since they can provide the precise details of what went wrong. In both cases, we display a message in the status bar for 2 seconds (2000 milliseconds) to keep the user informed about what the application is doing. bool MainWindow::save() { if (curFile.isEmpty()) { return saveAs(); } else { return saveFile(curFile); } } bool MainWindow::saveFile(const QString &fileName) { if (!spreadsheet->writeFile(fileName)) { statusBar()->showMessage(tr("Saving canceled"), 2000); return false; } setCurrentFile(fileName); statusBar()->showMessage(tr("File saved"), 2000); return true; }
The save() slot corresponds to File|Save. If the file already has a name because it was opened before or has already been saved, save() calls saveFile() with that name; otherwise, it simply calls saveAs(). bool MainWindow::saveAs() { QString fileName = QFileDialog::getSaveFileName(this, tr("Save Spreadsheet"), ".", tr("Spreadsheet files (*.sp)")); if (fileName.isEmpty()) return false; return saveFile(fileName); }
The saveAs() slot corresponds to File|Save As. We call QFileDialog::getSaveFileName() to obtain a file name from the user. If the user clicks Cancel, we return false, which is propagated up to its caller (save() or okToContinue()). If the file already exists, the getSaveFileName() function will ask the user to confirm that they want to overwrite. This behavior can be changed by passing QFileDialog::DontConfirmOverwrite as an additional argument to getSaveFileName(). void MainWindow::closeEvent(QCloseEvent *event) { if (okToContinue()) { writeSettings();
58
3. Creating Main Windows event->accept(); } else { event->ignore(); } }
When the user clicks File|Exit or clicks the close button in the window’s title bar, the QWidget::close() slot is called. This sends a “close” event to the widget. By reimplementing QWidget::closeEvent(), we can intercept attempts to close the main window and decide whether we want the window to actually close or not. If there are unsaved changes and the user chooses Cancel, we “ignore” the event and leave the window unaffected by it. In the normal case, we accept the event, resulting in Qt hiding the window. We also call the private function writeSettings() to save the application’s current settings. When the last window is closed, the application terminates. If needed, we can disable this behavior by setting QApplication’s quitOnLastWindowClosed property to false, in which case the application keeps running until we call QApplication::quit(). void MainWindow::setCurrentFile(const QString &fileName) { curFile = fileName; setWindowModified(false); QString shownName = "Untitled"; if (!curFile.isEmpty()) { shownName = strippedName(curFile); recentFiles.removeAll(curFile); recentFiles.prepend(curFile); updateRecentFileActions(); } setWindowTitle(tr("%1[*] - %2").arg(shownName) .arg(tr("Spreadsheet"))); } QString MainWindow::strippedName(const QString &fullFileName) { return QFileInfo(fullFileName).fileName(); }
In setCurrentFile(), we set the curFile private variable that stores the name of the file being edited. Before we show the file name in the title bar, we remove the file’s path with strippedName() to make it more user-friendly. Every QWidget has a windowModified property that should be set to true if the window’s document has unsaved changes, and to false otherwise. On Mac OS X, unsaved documents are indicated by a dot in the close button of the window’s title bar; on other platforms, they are indicated by an asterisk following the file name. Qt takes care of this behavior automatically, as long as we
Implementing the File Menu
59
keep the windowModified property up-to-date and place the marker “[*]” in the window title where we want the asterisk to appear when it is required. The text we passed to the setWindowTitle() function was tr("%1[*] - %2").arg(shownName) .arg(tr("Spreadsheet"))
The QString::arg() function replaces the lowest-numbered “%n” parameter with its argument and returns the resulting string. In this case, arg() is used with two “%n” parameters. The first call to arg() replaces “%1”; the second call replaces “%2”. If the file name is “budget.sp” and no translation file is loaded, -- Spreadsheet”. It would have been the resulting string would be “budget.sp[*] + easier to write setWindowTitle(shownName + tr("[*] - Spreadsheet"));
but using arg() provides more flexibility for translators. If there is a file name, we update recentFiles, the application’s recently opened files list. We call removeAll() to remove any occurrences of the file name in the list, to avoid duplicates; then we call prepend() to add the file name as the first item. After updating the list, we call the private function updateRecentFileActions() to update the entries in the File menu. void MainWindow::updateRecentFileActions() { QMutableStringListIterator i(recentFiles); while (i.hasNext()) { if (!QFile::exists(i.next())) i.remove(); } for (int j = 0; j < MaxRecentFiles; ++j) { if (j < recentFiles.count()) { QString text = tr("&%1 %2") .arg(j + 1) .arg(strippedName(recentFiles[j])); recentFileActions[j]->setText(text); recentFileActions[j]->setData(recentFiles[j]); recentFileActions[j]->setVisible(true); } else { recentFileActions[j]->setVisible(false); } } separatorAction->setVisible(!recentFiles.isEmpty()); }
We begin by removing any files that no longer exist using a Java-style iterator. Some files might have been used in a previous session, but have since been deleted. The recentFiles variable is of type QStringList (list of QStrings). Chapter 11 explains container classes such as QStringList in detail, showing how they relate to the C++ Standard Template Library (STL), and the use of Qt’s Java-style iterator classes.
60
3. Creating Main Windows
We then go through the list of files again, this time using array-style indexing. For each file, we create a string consisting of an ampersand, a digit (j + 1), a space, and the file name (without its path). We set the corresponding action to use this text. For example, if the first file was C:\My Documents\tab04.sp, the first action’s text would be “&1 tab04.sp”.
separatorAction recentFileActions[0] recentFileActions[1] recentFileActions[2] recentFileActions[3] recentFileActions[4] Actions[0] Actions[1] Actions[2] Actions[3] Actions[4] Figure 3.11. File menu with recently opened files
Every action can have an associated “data” item of type QVariant. The QVariant type can hold values of many C++ and Qt types; it is covered in Chapter 11. Here, we store the full name of the file in the action’s “data” item so that we can easily retrieve it later. We also set the action to be visible. If there are more file actions than recent files, we simply hide the extra actions. Finally, if there is at least one recent file, we set the separator to be visible. void MainWindow::openRecentFile() { if (okToContinue()) { QAction *action = qobject_cast(sender()); if (action) loadFile(action->data().toString()); } }
When the user chooses a recent file, the openRecentFile() slot is called. The okToContinue() function is used in case there are any unsaved changes, and providing the user did not cancel, we find out which particular action invoked the slot using QObject::sender(). The qobject_cast() function performs a dynamic cast based on the metainformation generated by moc, Qt’s meta-object compiler. It returns a pointer of the requested QObject subclass, or 0 if the object cannot be cast to that type. Unlike the Standard C++ dynamic_cast(), Qt’s qobject_cast() works correctly across dynamic library boundaries. In our example, we use qobject_ cast() to cast a QObject pointer to a QAction pointer. If the cast is successful
Implementing the File Menu
61
(it should be), we call loadFile() with the full file name that we extract from the action’s data. Incidentally, since we know that the sender is a QAction, the program would still work if we used static_cast() or a traditional C-style cast instead. Refer to the “Type Conversions” section of Appendix B for an overview of the different C++ casts.
Using Dialogs In this section, we will explain how to use dialogs in Qt—how to create and initialize them, run them, and respond to choices made by the user interacting with them. We will make use of the Find, Go-to-Cell, and Sort dialogs that we created in Chapter 2. We will also create a simple About box.
Figure 3.12. The Spreadsheet application’s Find dialog
We will begin with the Find dialog. Since we want the user to be able to switch between the main Spreadsheet window and the Find dialog at will, the Find dialog must be modeless. A modeless window is one that runs independently of any other windows in the application. When modeless dialogs are created, they normally have their signals connected to slots that respond to the user’s interactions. void MainWindow::find() { if (!findDialog) { findDialog = new FindDialog(this); connect(findDialog, SIGNAL(findNext(const QString &, Qt::CaseSensitivity)), spreadsheet, SLOT(findNext(const QString &, Qt::CaseSensitivity))); connect(findDialog, SIGNAL(findPrevious(const QString &, Qt::CaseSensitivity)), spreadsheet, SLOT(findPrevious(const QString &, Qt::CaseSensitivity))); } findDialog->show(); findDialog->activateWindow(); }
62
3. Creating Main Windows
The Find dialog is a window that enables the user to search for text in the spreadsheet. The find() slot is called when the user clicks Edit|Find to pop up the Find dialog. At that point, several scenarios are possible: • This is the first time the user has invoked the Find dialog. • The Find dialog was invoked before, but the user closed it. • The Find dialog was invoked before and is still visible. If the Find dialog doesn’t already exist, we create it and connect its findNext() and findPrevious() signals to the corresponding Spreadsheet slots. We could also have created the dialog in the MainWindow constructor, but delaying its creation makes startup faster. Also, if the dialog is never used, it is never created, saving both time and memory. Then we call show() and activateWindow() to ensure that the window is visible and active. A call to show() alone is sufficient to make a hidden window visible and active, but the Find dialog may be invoked when its window is already visible, in which case show() does nothing and activateWindow() is necessary to make the window active. An alternative would have been to write if (findDialog->isHidden()) { findDialog->show(); } else { findDialog->activateWindow(); }
which is the programming equivalent of looking both ways before crossing a one-way street. We will now look at the Go-to-Cell dialog. We want the user to pop it up, use it, and close it without being able to switch to any other window in the application. This means that the Go-to-Cell dialog must be modal. A modal window is a window that pops up when invoked and blocks the application, preventing any other processing or interactions from taking place until the window is closed. The file dialogs and message boxes we used earlier were modal.
Figure 3.13. The Spreadsheet application’s Go-to-Cell dialog
A dialog is modeless if it’s invoked using show() (unless we call setModal() beforehand to make it modal); it is modal if it’s invoked using exec(). void MainWindow::goToCell() { GoToCellDialog dialog(this);
The QDialog::exec() function returns a true value (QDialog::Accepted) if the dialog is accepted, and a false value (QDialog::Rejected) otherwise. Recall that when we created the Go-to-Cell dialog using Qt Designer in Chapter 2, we connected OK to accept() and Cancel to reject(). If the user chooses OK, we set the current cell to the value in the line editor. The QTableWidget::setCurrentCell() function expects two arguments: a row index and a column index. In the Spreadsheet application, cell A1 is cell (0, 0) and cell B27 is cell (26, 1). To obtain the row index from the QString returned by QLineEdit::text(), we extract the row number using QString::mid() (which returns a substring from the start position to the end of the string), convert it to an int using QString::toInt(), and subtract 1. For the column number, we subtract the numeric value of ‘A’ from the numeric value of the string’s uppercased first character. We know that the string will have the correct format because the QRegExpValidator we created for the dialog only allows the OK button to be enabled if we have a letter followed by up to three digits. The goToCell() function differs from all the code seen so far in that it creates a widget (a GoToCellDialog) as a variable on the stack. At the cost of one extra line, we could just as easily have used new and delete: void MainWindow::goToCell() { GoToCellDialog *dialog = new GoToCellDialog(this); if (dialog->exec()) { QString str = dialog->lineEdit->text().toUpper(); spreadsheet->setCurrentCell(str.mid(1).toInt() - 1, str[0].unicode() - ’A’); } delete dialog; }
Creating modal dialogs (and context menus in QWidget::contextMenuEvent() reimplementations) on the stack is a common programming pattern since we usually don’t need the dialog (or menu) after we have used it, and it will automatically be destroyed at the end of the enclosing scope. We will now turn to the Sort dialog. The Sort dialog is a modal dialog that allows the user to sort the currently selected area by the columns they specify. Figure 3.14 shows an example of sorting, with column B as the primary sort key and column A as the secondary sort key (both ascending).
The code in sort() follows a similar pattern to that used for goToCell(): • We create the dialog on the stack and initialize it. • We pop up the dialog using exec(). • If the user clicks OK, we extract the values entered by the user from the dialog’s widgets and make use of them. The setColumnRange() call sets the columns available for sorting to the columns that are selected. For example, using the selection shown in Figure 3.14, range. leftColumn() would yield 0, giving ‘A’ + 0 = ‘A’, and range.rightColumn() would yield 2, giving ‘A’ + 2 = ‘C’.
Using Dialogs
65
The compare object stores the primary, secondary, and tertiary sort keys and their sort orders. (We will see the definition of the SpreadsheetCompare class in the next chapter.) The object is used by Spreadsheet::sort() to compare two rows. The keys array stores the column numbers of the keys. For example, if the selection extends from C2 to E5, column C has position 0. The ascending array stores the order associated with each key as a bool. QComboBox::currentIndex() returns the index of the currently selected item, starting at 0. For the secondary and tertiary keys, we subtract one from the current item to account for the “None” item. The sort() function does the job, but it is a bit fragile. It assumes that the Sort dialog is implemented in a particular way, with comboboxes and “None” items. This means that if we redesign the Sort dialog, we may also need to rewrite this code. While this approach is adequate for a dialog that is only called from one place, it opens the door to maintenance nightmares if the dialog is used in several places. A more robust approach is to make the SortDialog class smarter by having it create a SpreadsheetCompare object itself, which can then be accessed by its caller. This simplifies MainWindow::sort() significantly: void MainWindow::sort() { SortDialog dialog(this); QTableWidgetSelectionRange range = spreadsheet->selectedRange(); dialog.setColumnRange(’A’ + range.leftColumn(), ’A’ + range.rightColumn()); if (dialog.exec()) spreadsheet->performSort(dialog.comparisonObject()); }
This approach leads to loosely coupled components and is almost always the right choice for dialogs that will be called from more than one place. A more radical approach would be to pass a pointer to the Spreadsheet object when initializing the SortDialog object and to allow the dialog to operate directly on the Spreadsheet. This makes the SortDialog much less general, since it will only work on a certain type of widget, but it simplifies the code even further by eliminating the SortDialog::setColumnRange() function. The MainWindow::sort() function then becomes void MainWindow::sort() { SortDialog dialog(this); dialog.setSpreadsheet(spreadsheet); dialog.exec(); }
This approach mirrors the first: Instead of the caller needing intimate knowledge of the dialog, the dialog needs intimate knowledge of the data structures supplied by the caller. This approach may be useful where the dialog needs
66
3. Creating Main Windows
to apply changes live. But just as the caller code is fragile using the first approach, this third approach breaks if the data structures change. Some developers choose just one approach to using dialogs and stick with that. This has the benefit of familiarity and simplicity since all their dialog usages follow the same pattern, but it also misses the benefits of the approaches that are not used. Ideally, the approach to use should be decided on a per-dialog basis. We will round off this section with the About box. We could create a custom dialog like we did for the Find or Go-to-Cell dialogs to present the information about the application, but since most About boxes are highly stylized, Qt provides a simpler solution. void MainWindow::about() { QMessageBox::about(this, tr("About Spreadsheet"), tr("
Spreadsheet is a small application that " "demonstrates QAction, QMainWindow, QMenuBar, " "QStatusBar, QTableWidget, QToolBar, and many other " "Qt classes.")); }
The About box is obtained by calling QMessageBox::about(), a static convenience function. The function is very similar to QMessageBox::warning(), except that it uses the parent window’s icon instead of the standard “warning” icon.
Figure 3.15. About Spreadsheet
So far we have used several convenience static functions from both QMessageBox and QFileDialog. These functions create a dialog, initialize it, and call exec() on it. It is also possible, although less convenient, to create a QMessageBox or a QFileDialog widget like any other widget and explicitly call exec(), or even show(), on it.
Storing Settings
67
Storing Settings In the MainWindow constructor, we called readSettings() to load the application’s stored settings. Similarly, in closeEvent(), we called writeSettings() to save the settings. These two functions are the last MainWindow member functions that need to be implemented. void MainWindow::writeSettings() { QSettings settings("Software Inc.", "Spreadsheet"); settings.setValue("geometry", geometry()); settings.setValue("recentFiles", recentFiles); settings.setValue("showGrid", showGridAction->isChecked()); settings.setValue("autoRecalc", autoRecalcAction->isChecked()); }
The writeSettings() function saves the main window’s geometry (position and size), the list of recently opened files, and the Show Grid and Auto-Recalculate options. By default, QSettings stores the application’s settings in platform-specific locations. On Windows, it uses the system registry; on Unix, it stores the data in text files; on Mac OS X, it uses the Core Foundation Preferences API. The constructor arguments specify the organization’s name and the application’s name. This information is used in a platform-specific way to find a location for the settings. QSettings stores settings as key–value pairs. The key is similar to a file system path. Subkeys can be specified using a path-like syntax (for example, findDialog/matchCase) or using beginGroup() and endGroup(): settings.beginGroup("findDialog"); settings.setValue("matchCase", caseCheckBox->isChecked()); settings.setValue("searchBackward", backwardCheckBox->isChecked()); settings.endGroup();
The value can be an int, a bool, a double, a QString, a QStringList, or any other type supported by QVariant, including registered custom types. void MainWindow::readSettings() { QSettings settings("Software Inc.", "Spreadsheet"); QRect rect = settings.value("geometry", QRect(200, 200, 400, 400)).toRect(); move(rect.topLeft()); resize(rect.size()); recentFiles = settings.value("recentFiles").toStringList(); updateRecentFileActions(); bool showGrid = settings.value("showGrid", true).toBool(); showGridAction->setChecked(showGrid);
68
3. Creating Main Windows bool autoRecalc = settings.value("autoRecalc", true).toBool(); autoRecalcAction->setChecked(autoRecalc); }
The readSettings() function loads the settings that were saved by writeSettings(). The second argument to the value() function specifies a default value, in case there are no settings available. The default values are used the first time the application is run. Since no second argument is given for the recent files list, it will be set to an empty list on the first run. Qt provides a QWidget::setGeometry() function to complement QWidget::geometry(), but it doesn’t always work as we would expect on X11 because of limitations in many window managers. For that reason, we use move() and resize() instead. (See http://doc.trolltech.com/4.1/geometry.html for a detailed explanation.) The arrangement we opted for in MainWindow, with all the QSettings-related code in readSettings() and writeSettings(), is just one of many possible approaches. A QSettings object can be created to query or modify some setting at any time during the execution of the application and from anywhere in the code. We have now completed the Spreadsheet’s MainWindow implementation. In the following sections, we will discuss how the Spreadsheet application can be modified to handle multiple documents and how to implement a splash screen. We will complete its functionality, including handling formulas and sorting, in the next chapter.
Multiple Documents We are now ready to code the Spreadsheet application’s main() function: #include #include "mainwindow.h" int main(int argc, char *argv[]) { QApplication app(argc, argv); MainWindow mainWin; mainWin.show(); return app.exec(); }
This main() function is a little bit different from those we have written so far: We have created the MainWindow instance as a variable on the stack instead of using new. The MainWindow instance is then automatically destroyed when the function terminates. With the main() function shown above, the Spreadsheet application provides a single main window and can only handle one document at a time. If we want to edit multiple documents at the same time, we could start multiple instances of the Spreadsheet application. But this isn’t as convenient for
69
Multiple Documents
users as having a single instance of the application providing multiple main windows, just as one instance of a web browser can provide multiple browser windows simultaneously. We will modify the Spreadsheet application so that it can handle multiple documents. First, we need a slightly different File menu: • File|New creates a new main window with an empty document, instead of reusing the existing main window. • File|Close closes the current main window. • File|Exit closes all windows. In the original version of the File menu, there was no Close option because that would have been the same as Exit.
Figure 3.16. The new File menu
This is the new main() function: int main(int argc, char *argv[]) { QApplication app(argc, argv); MainWindow *mainWin = new MainWindow; mainWin->show(); return app.exec(); }
With multiple windows, it now makes sense to create MainWindow with new, because then we can use delete on a main window when we have finished with it to save memory. This is the new MainWindow::newFile() slot: void MainWindow::newFile() { MainWindow *mainWin = new MainWindow; mainWin->show(); }
We simply create a new MainWindow instance. It may seem odd that we don’t keep any pointer to the new window, but that isn’t a problem since Qt keeps track of all the windows for us.
70
3. Creating Main Windows
These are the actions for Close and Exit: void MainWindow::createActions() { ••• closeAction = new QAction(tr("&Close"), this); closeAction->setShortcut(tr("Ctrl+W")); closeAction->setStatusTip(tr("Close this window")); connect(closeAction, SIGNAL(triggered()), this, SLOT(close())); exitAction = new QAction(tr("E&xit"), this); exitAction->setShortcut(tr("Ctrl+Q")); exitAction->setStatusTip(tr("Exit the application")); connect(exitAction, SIGNAL(triggered()), qApp, SLOT(closeAllWindows())); ••• }
The QApplication::closeAllWindows() slot closes all of the application’s windows, unless one of them rejects the close event. This is exactly the behavior we need here. We don’t have to worry about unsaved changes because that’s handled in MainWindow::closeEvent() whenever a window is closed. It looks as if we have finished making the application capable of handling multiple windows. Unfortunately, there is a hidden problem lurking: If the user keeps creating and closing main windows, the machine might eventually run out of memory. This is because we keep creating MainWindow widgets in newFile() but we never delete them. When the user closes a main window, the default behavior is to hide it, so it still remains in memory. With many main windows, this can be a problem. The solution is to set the Qt::WA_DeleteOnClose attribute in the constructor: MainWindow::MainWindow() { ••• setAttribute(Qt::WA_DeleteOnClose); ••• }
This tells Qt to delete the window when it is closed. The Qt::WA_DeleteOnClose attribute is one of many flags that can be set on a QWidget to influence its behavior. Memory leaking isn’t the only problem that we must deal with. Our original application design included an implied assumption that we would only have one main window. With multiple windows, each main window has its own recently opened files list and its own options. Clearly, the recently opened files list should be global to the whole application. We can achieve this quite easily by declaring the recentFiles variable static, so that only one instance of it exists for the whole application. But then we must ensure that wherever we called updateRecentFileActions() to update the File menu, we must call it on all main windows. Here’s the code to achieve this:
The code uses Qt’s foreach construct (explained in Chapter 11) to iterate over all the application’s windows and calls updateRecentFileActions() on all widgets of type MainWindow. Similar code can be used for synchronizing the Show Grid and Auto-Recalculate options, or to make sure that the same file isn’t loaded twice.
Figure 3.17. SDI versus MDI
Applications that provide one document per main window are said to be SDI (single document interface) applications. A common alternative on Windows is MDI (multiple document interface), where the application has a single main window that manages multiple document windows within its central area. Qt can be used to create both SDI and MDI applications on all its supported platforms. Figure 3.17 shows the Spreadsheet application using both approaches. MDI is explained in Chapter 6 (Layout Management).
Splash Screens Many applications present a splash screen at startup. Some developers use a splash screen to disguise a slow startup, while others do it to satisfy their marketing departments. Adding a splash screen to Qt applications is very easy using the QSplashScreen class. The QSplashScreen class shows an image before the main window appears. It can also write messages on the image to inform the user about the progress of the application’s initialization process. Typically, the splash screen code is located in main(), before the call to QApplication::exec(). Next is an example main() function that uses QSplashScreen to present a splash screen in an application that loads modules and establishes network connections at startup.
72
3. Creating Main Windows int main(int argc, char *argv[]) { QApplication app(argc, argv); QSplashScreen *splash = new QSplashScreen; splash->setPixmap(QPixmap(":/images/splash.png")); splash->show(); Qt::Alignment topRight = Qt::AlignRight | Qt::AlignTop; splash->showMessage(QObject::tr("Setting up the main window..."), topRight, Qt::white); MainWindow mainWin; splash->showMessage(QObject::tr("Loading modules..."), topRight, Qt::white); loadModules(); splash->showMessage(QObject::tr("Establishing connections..."), topRight, Qt::white); establishConnections(); mainWin.show(); splash->finish(&mainWin); delete splash; return app.exec(); }
Figure 3.18. A splash screen
We have now completed the Spreadsheet application’s user interface. In the next chapter, we will complete the application by implementing the core spreadsheet functionality.
◆
The Central Widget
◆
Subclassing QTableWidget
◆
Loading and Saving
◆
Implementing the Edit Menu
◆
Implementing the Other Menus
◆
Subclassing QTableWidgetItem
4. Implementing Application Functionality In the previous two chapters, we explained how to create the Spreadsheet application’s user interface. In this chapter, we will complete the program by coding its underlying functionality. Among other things, we will see how to load and save files, how to store data in memory, how to implement clipboard operations, and how to add support for spreadsheet formulas to QTableWidget.
The Central Widget The central area of a QMainWindow can be occupied by any kind of widget. Here’s an overview of the possibilities: 1. Use a standard Qt widget. A standard widget like QTableWidget or QTextEdit can be used as a central widget. In this case, the application’s functionality, such as loading and saving files, must be implemented elsewhere (for example, in a QMainWindow subclass). 2. Use a custom widget. Specialized applications often need to show data in a custom widget. For example, an icon editor program would have an IconEditor widget as its central widget. Chapter 5 explains how to write custom widgets in Qt. 3. Use a plain QWidget with a layout manager. Sometimes the application’s central area is occupied by many widgets. This can be done by using a QWidget as the parent of all the other widgets, and using layout managers to size and position the child widgets.
73
74
4. Implementing Application Functionality
4. Use a splitter. Another way of using multiple widgets together is to use a QSplitter. The QSplitter arranges its child widgets horizontally or vertically, with splitter handles to give some sizing control to the user. Splitters can contain all kinds of widgets, including other splitters. 5. Use an MDI workspace. If the application uses MDI, the central area is occupied by a QWorkspace widget, and each of the MDI windows is a child of that widget. Layouts, splitters, and MDI workspaces can be combined with standard Qt widgets or with custom widgets. Chapter 6 covers these classes in depth. For the Spreadsheet application, a QTableWidget subclass is used as the central widget. The QTableWidget class already provides most of the spreadsheet capability we need, but it doesn’t support clipboard operations and doesn’t understand spreadsheet formulas like “=A1+A2+A3”. We will implement this missing functionality in the Spreadsheet class.
Subclassing QTableWidget The Spreadsheet class inherits from QTableWidget. A QTableWidget is effectively a grid that represents a two-dimensional sparse array. It displays whichever cells the user scrolls to, within its specified dimensions. When the user enters some text into an empty cell, QTableWidget automatically creates a QTableWidgetItem to store the text. Let’s start implementing Spreadsheet, beginning with the header file: #ifndef SPREADSHEET_H #define SPREADSHEET_H #include class Cell; class SpreadsheetCompare;
The header starts with forward declarations for the Cell and SpreadsheetCompare classes. QObject QWidget QTableWidget
QTableWidgetItem
Spreadsheet
Cell
Figure 4.1. Inheritance trees for Spreadsheet and Cell
Subclassing QTableWidget
75
The attributes of a QTableWidget cell, such as its text and its alignment, are stored in a QTableWidgetItem. Unlike QTableWidget, QTableWidgetItem isn’t a widget class; it is a pure data class. The Cell class inherits QTableWidgetItem and is explained when its implementation is shown in this chapter’s last section. class Spreadsheet : public QTableWidget { Q_OBJECT public: Spreadsheet(QWidget *parent = 0); bool autoRecalculate() const { return autoRecalc; } QString currentLocation() const; QString currentFormula() const; QTableWidgetSelectionRange selectedRange() const; void clear(); bool readFile(const QString &fileName); bool writeFile(const QString &fileName); void sort(const SpreadsheetCompare &compare);
The autoRecalculate() function is implemented inline since it just returns whether or not auto-recalculation is in force. In Chapter 3, we relied on some public functions in Spreadsheet when we implemented MainWindow. For example, we called clear() from MainWindow:: newFile() to reset the spreadsheet. We also used some functions inherited from QTableWidget, notably setCurrentCell() and setShowGrid(). public slots: void cut(); void copy(); void paste(); void del(); void selectCurrentRow(); void selectCurrentColumn(); void recalculate(); void setAutoRecalculate(bool recalc); void findNext(const QString &str, Qt::CaseSensitivity cs); void findPrevious(const QString &str, Qt::CaseSensitivity cs); signals: void modified(); Spreadsheet provides many slots that implement actions from the Edit, Tools, and Options menus, and it provides one signal, modified(), to announce any change
that has occurred. private slots: void somethingChanged();
We define one private slot used internally by the Spreadsheet class. private: enum { MagicNumber = 0x7F51C883, RowCount = 999, ColumnCount = 26 };
76
4. Implementing Application Functionality Cell *cell(int row, int column) const; QString text(int row, int column) const; QString formula(int row, int column) const; void setFormula(int row, int column, const QString &formula); bool autoRecalc; };
In the class’s private section, we declare three constants, four functions, and one variable. class SpreadsheetCompare { public: bool operator()(const QStringList &row1, const QStringList &row2) const; enum { KeyCount = 3 }; int keys[KeyCount]; bool ascending[KeyCount]; }; #endif
The header file ends with the SpreadsheetCompare class definition. We will explain this when we review Spreadsheet::sort(). We will now look at the implementation: #include #include "cell.h" #include "spreadsheet.h" Spreadsheet::Spreadsheet(QWidget *parent) : QTableWidget(parent) { autoRecalc = true; setItemPrototype(new Cell); setSelectionMode(ContiguousSelection); connect(this, SIGNAL(itemChanged(QTableWidgetItem *)), this, SLOT(somethingChanged())); clear(); }
Normally, when the user enters some text on an empty cell, the QTableWidget will automatically create a QTableWidgetItem to hold the text. In our spreadsheet, we want Cell items to be created instead. This is achieved by the setItemPrototype() call in the constructor. Internally, QTableWidget clones the item passed as a prototype every time a new item is required. Also in the constructor, we set the selection mode to QAbstractItemView::ContiguousSelection to allow a single rectangular selection. We connect the table widget’s itemChanged() signal to the private somethingChanged() slot; this en-
77
Subclassing QTableWidget
sures that when the user edits a cell, the somethingChanged() slot is called. Finally, we call clear() to resize the table and to set the column headings. void Spreadsheet::clear() { setRowCount(0); setColumnCount(0); setRowCount(RowCount); setColumnCount(ColumnCount); for (int i = 0; i < ColumnCount; ++i) { QTableWidgetItem *item = new QTableWidgetItem; item->setText(QString(QChar(’A’ + i))); setHorizontalHeaderItem(i, item); } setCurrentCell(0, 0); }
The clear() function is called from the Spreadsheet constructor to initialize the spreadsheet. It is also called from MainWindow::newFile().
verticalHeader()
horizontalHeader()
viewport()
ontalScrollBar() ontalHeader() wpor
verticalScrollBar()
We could have used QTableWidget::clear() to clear all the items and any selections, but that would have left the headers at their current size. Instead, we resize the table down to 0 × 0. This clears the entire spreadsheet, including the headers. We then resize the table to ColumnCount × RowCount (26 × 999) and populate the horizontal header with QTableWidgetItems containing the column names “A”, “B”, …, “Z”. We don’t need to set the vertical header labels, because these default to “1”, “2”, …, “999”. At the end, we move the cell cursor to cell A1.
horizontalScrollBar()
Figure 4.2. QTableWidget’s constituent widgets
A QTableWidget is composed of several child widgets. It has a horizontal QHeaderView at the top, a vertical QHeaderView on the left, and two QScrollBars. The area in the middle is occupied by a special widget called the viewport, on which QTableWidget draws the cells. The different child widgets are accessible through functions inherited from QTableView and QAbstractScrollArea (see Figure 4.2). QAbstractScrollArea provides a scrollable viewport and two scroll bars, which can be turned on and off. Its QScrollArea subclass is covered in Chapter 6.
78
4. Implementing Application Functionality
Storing Data as Items In the Spreadsheet application, every non-empty cell is stored in memory as an individual QTableWidgetItem object. Storing data as items is an approach that is also used by QListWidget and QTreeWidget, which operate on QListWidgetItems and QTreeWidgetItems. Qt’s item classes can be used out of the box as data holders. For example, a QTableWidgetItem already stores a few attributes, including a string, font, color, and icon, and a pointer back to the QTableWidget. The items can also hold data (QVariants), including registered custom types, and by subclassing the item class we can provide additional functionality. Other toolkits provide a void pointer in their item classes to store custom data. In Qt, the more natural approach is to use setData() with a QVariant, but if a void pointer is required, it can be trivially achieved by subclassing an item class and adding a void pointer member variable. For more challenging data handling requirements, such as large data sets, complex data items, database integration, and multiple data views, Qt provides a set of model/view classes that separate the data from their visual representation. These are covered in Chapter 10.
The cell() private function returns the Cell object for a given row and column. It is almost the same as QTableWidget::item(), except that it returns a Cell pointer instead of a QTableWidgetItem pointer. QString Spreadsheet::text(int row, int column) const { Cell *c = cell(row, column); if (c) { return c->text(); } else { return ""; } }
The text() private function returns the text for a given cell. If cell() returns a null pointer, the cell is empty, so we return an empty string. QString Spreadsheet::formula(int row, int column) const { Cell *c = cell(row, column); if (c) { return c->formula(); } else { return "";
Subclassing QTableWidget
79
} }
The formula() function returns the cell’s formula. In many cases, the formula and the text are the same; for example, the formula “Hello” evaluates to the string “Hello”, so if the user types “Hello” into a cell and presses Enter, that cell will show the text “Hello”. But there are a few exceptions: • If the formula is a number, it is interpreted as such. For example, the formula “1.50” evaluates to the double value 1.5, which is rendered as a right-aligned “1.5” in the spreadsheet. • If the formula starts with a single quote, the rest of the formula is interpreted as text. For example, the formula “ ’12345” evaluates to the string “12345”. • If the formula starts with an equals sign (‘=’), the formula is interpreted as an arithmetic formula. For example, if cell A1 contains “12” and cell A2 contains “6”, the formula “=A1+A2” evaluates to 18. The task of converting a formula into a value is performed by the Cell class. For the moment, the thing to bear in mind is that the text shown in the cell is the result of evaluating the formula, not the formula itself. void Spreadsheet::setFormula(int row, int column, const QString &formula) { Cell *c = cell(row, column); if (!c) { c = new Cell; setItem(row, column, c); } c->setFormula(formula); }
The setFormula() private function sets the formula for a given cell. If the cell already has a Cell object, we reuse it. Otherwise, we create a new Cell object and call QTableWidget::setItem() to insert it into the table. At the end, we call the cell’s own setFormula() function, which will cause the cell to be repainted if it’s shown on screen. We don’t need to worry about deleting the Cell object later on; QTableWidget takes ownership of the cell and will delete it automatically at the right time. QString Spreadsheet::currentLocation() const { return QChar(’A’ + currentColumn()) + QString::number(currentRow() + 1); }
The currentLocation() function returns the current cell’s location in the usual spreadsheet format of column letter followed by row number. MainWindow:: updateStatusBar() uses it to show the location in the status bar.
The currentFormula() function returns the current cell’s formula. It is called from MainWindow::updateStatusBar(). void Spreadsheet::somethingChanged() { if (autoRecalc) recalculate(); emit modified(); }
The somethingChanged() private slot recalculates the whole spreadsheet if “auto-recalculate” is enabled. It also emits the modified() signal.
Loading and Saving We will now implement the loading and saving of Spreadsheet files using a custom binary format. We will do this using QFile and QDataStream, which together provide platform-independent binary I/O. We will start with writing a Spreadsheet file: bool Spreadsheet::writeFile(const QString &fileName) { QFile file(fileName); if (!file.open(QIODevice::WriteOnly)) { QMessageBox::warning(this, tr("Spreadsheet"), tr("Cannot write file %1:\n%2.") .arg(file.fileName()) .arg(file.errorString())); return false; } QDataStream out(&file); out.setVersion(QDataStream::Qt_4_1); out > magic; if (magic != MagicNumber) { QMessageBox::warning(this, tr("Spreadsheet"), tr("The file is not a Spreadsheet file.")); return false; } clear(); quint16 row; quint16 column; QString str; QApplication::setOverrideCursor(Qt::WaitCursor); while (!in.atEnd()) { in >> row >> column >> str; setFormula(row, column, str); } QApplication::restoreOverrideCursor(); return true; }
The readFile() function is very similar to writeFile(). We use QFile to read in the file, but this time using the QIODevice::ReadOnly flag rather than QIODevice:: WriteOnly. Then we set the QDataStream version to 7. The format for reading must always be the same as for writing. If the file has the correct magic number at the beginning, we call clear() to blank out all the cells in the spreadsheet, and we read in the cell data. Since the file only contains the data for non-empty cells, and it is very unlikely that every cell in the spreadsheet will be set, we must ensure that all cells are cleared before reading.
Implementing the Edit Menu
83
Implementing the Edit Menu We are now ready to implement the slots that correspond to the application’s Edit menu. void Spreadsheet::cut() { copy(); del(); }
The cut() slot corresponds to Edit|Cut. The implementation is simple since Cut is the same as Copy followed by Delete.
Figure 4.4. The Spreadsheet application’s Edit menu void Spreadsheet::copy() { QTableWidgetSelectionRange range = selectedRange(); QString str; for (int i = 0; i < range.rowCount(); ++i) { if (i > 0) str += "\n"; for (int j = 0; j < range.columnCount(); ++j) { if (j > 0) str += "\t"; str += formula(range.topRow() + i, range.leftColumn() + j); } } QApplication::clipboard()->setText(str); }
The copy() slot corresponds to Edit|Copy. It iterates over the current selection (which is simply the current cell if there is no explicit selection). Each selected cell’s formula is added to a QString, with rows separated by newline characters and columns separated by tab characters. The system clipboard is available in Qt through the QApplication::clipboard() static function. By calling QClipboard::setText(), we make the text available
84
4. Implementing Application Functionality
on the clipboard, both to this application and to other applications that support plain text. Our format with tab and newline characters as separators is understood by a variety of applications, including Microsoft Excel.
➧ "Red \t Green \t Blue \n Cyan \t Magenta \t Yellow" Figure 4.5. Copying a selection onto the clipboard
The QTableWidget::selectedRanges() function returns a list of selection ranges. We know there cannot be more than one because we set the selection mode to QAbstractItemView::ContiguousSelection in the constructor. For our convenience, we define a selectedRange() function that returns the selection range: QTableWidgetSelectionRange Spreadsheet::selectedRange() const { QList ranges = selectedRanges(); if (ranges.isEmpty()) return QTableWidgetSelectionRange(); return ranges.first(); }
If there is a selection at all, we simply return the first (and only) one. The case where there is no selection should never happen since the ContiguousSelection mode treats the current cell as being selected. But to protect against the possibility of a bug in our program that makes no cell current, we handle this case. void Spreadsheet::paste() { QTableWidgetSelectionRange range = selectedRange(); QString str = QApplication::clipboard()->text(); QStringList rows = str.split(’\n’); int numRows = rows.count(); int numColumns = rows.first().count(’\t’) + 1; if (range.rowCount() * range.columnCount() != 1 && (range.rowCount() != numRows || range.columnCount() != numColumns)) { QMessageBox::information(this, tr("Spreadsheet"), tr("The information cannot be pasted because the copy " "and paste areas aren’t the same size.")); return; } for (int i = 0; i < numRows; ++i) { QStringList columns = rows[i].split(’\t’); for (int j = 0; j < numColumns; ++j) {
85
Implementing the Edit Menu int row = range.topRow() + i; int column = range.leftColumn() + j; if (row < RowCount && column < ColumnCount) setFormula(row, column, columns[j]); } } somethingChanged(); }
The paste() slot corresponds to Edit|Paste. We fetch the text on the clipboard and call the static function QString::split() to break the string into a QStringList. Each row becomes one string in the list. Next, we determine the dimension of the copy area. The number of rows is the number of strings in the QStringList; the number of columns is the number of tab characters in the first row, plus 1. If only one cell is selected, we use that cell as the top-left corner of the paste area; otherwise, we use the current selection as the paste area. To perform the paste, we iterate over the rows and split each of them into cells by using QString::split() again, but this time using tab as the separator. Figure 4.6 illustrates the steps. "Red \t Green \t Blue \n Cyan \t Magenta \t Yellow"
➧ Figure 4.6. Pasting clipboard text into the spreadsheet void Spreadsheet::del() { foreach (QTableWidgetItem *item, selectedItems()) delete item; }
The del() slot corresponds to Edit|Delete. It is sufficient to use delete on each of the Cell objects in the selection to clear the cells. The QTableWidget notices when its QTableWidgetItems are deleted and automatically repaints itself if any of the items were visible. If we call cell() with the location of a deleted cell, it will return a null pointer.
The selectCurrentRow() and selectCurrentColumn() functions correspond to the Edit|Select|Row and Edit|Select|Column menu options. The implementations rely on QTableWidget’s selectRow() and selectColumn() functions. We do not need to implement the functionality behind Edit|Select|All, since that is provided by QTableWidget’s inherited function QAbstractItemView::selectAll(). void Spreadsheet::findNext(const QString &str, Qt::CaseSensitivity cs) { int row = currentRow(); int column = currentColumn() + 1; while (row < RowCount) { while (column < ColumnCount) { if (text(row, column).contains(str, cs)) { clearSelection(); setCurrentCell(row, column); activateWindow(); return; } ++column; } column = 0; ++row; } QApplication::beep(); }
The findNext() slot iterates through the cells starting from the cell to the right of the cursor and moving right until the last column is reached, then continues from the first column in the row below, and so on until the text is found or until the very last cell is reached. For example, if the current cell is cell C24, we search D24, E24, …, Z24, then A25, B25, C25, …, Z25, and so on until Z999. If we find a match, we clear the current selection, move the cell cursor to the cell that matched, and make the window that contains the Spreadsheet active. If no match is found, we make the application beep to indicate that the search finished unsuccessfully. void Spreadsheet::findPrevious(const QString &str, Qt::CaseSensitivity cs) { int row = currentRow(); int column = currentColumn() - 1; while (row >= 0) {
The findPrevious() slot is similar to findNext(), except that it iterates backward and stops at cell A1.
Implementing the Other Menus We will now implement the slots for the Tools and Options menus.
Figure 4.7. The Spreadsheet application’s Tools and Options menus void Spreadsheet::recalculate() { for (int row = 0; row < RowCount; ++row) { for (int column = 0; column < ColumnCount; ++column) { if (cell(row, column)) cell(row, column)->setDirty(); } } viewport()->update(); }
The recalculate() slot corresponds to Tools|Recalculate. It is also called automatically by Spreadsheet when necessary. We iterate over all the cells and call setDirty() on every cell to mark each one as requiring recalculation. The next time QTableWidget calls text() on a Cell to obtain the value to show in the spreadsheet, the value will be recalculated. Then we call update() on the viewport to repaint the whole spreadsheet. The repaint code in QTableWidget then calls text() on each visible cell to obtain the value to display. Because we called setDirty() on every cell, the calls to text() will use a freshly calculated value. The calculation may require non-visible cells to be recalculated, cascading the calculation until every cell that needs
88
4. Implementing Application Functionality
to be recalculated to display the correct text in the viewport has been freshly calculated. The calculation is performed by the Cell class. void Spreadsheet::setAutoRecalculate(bool recalc) { autoRecalc = recalc; if (autoRecalc) recalculate(); }
The setAutoRecalculate() slot corresponds to Options|Auto-Recalculate. If the feature is being turned on, we recalculate the whole spreadsheet immediately to make sure that it’s up to date; afterward, recalculate() is called automatically from somethingChanged(). We don’t need to implement anything for Options|Show Grid because QTableWidget already has a setShowGrid() slot, which it inherits from its base class QTableView. All that remains is Spreadsheet::sort(), which is called from MainWindow:: sort(): void Spreadsheet::sort(const SpreadsheetCompare &compare) { QList rows; QTableWidgetSelectionRange range = selectedRange(); int i; for (i = 0; i < range.rowCount(); ++i) { QStringList row; for (int j = 0; j < range.columnCount(); ++j) row.append(formula(range.topRow() + i, range.leftColumn() + j)); rows.append(row); } qStableSort(rows.begin(), rows.end(), compare); for (i = 0; i < range.rowCount(); ++i) { for (int j = 0; j < range.columnCount(); ++j) setFormula(range.topRow() + i, range.leftColumn() + j, rows[i][j]); } clearSelection(); somethingChanged(); }
Sorting operates on the current selection and reorders the rows according to the sort keys and sort orders stored in the compare object. We represent each row of data with a QStringList and store the selection as a list of rows. We use Qt’s qStableSort() algorithm, and for simplicity sort by formula rather than by value. Qt’s standard algorithms and data structures are covered in Chapter 11 (Container Classes).
89
Implementing the Other Menus index
value
0
[ "Edsger", "Dijkstra", "1930-05-11" ]
➧
1
[ "Tony", "Hoare", "1934-01-11" ]
2
[ "Niklaus", "Wirth", "1934-02-15" ]
3
[ "Donald", "Knuth", "1938-01-10" ]
Figure 4.8. Storing the selection as a list of rows
The qStableSort() function accepts a begin iterator, an end iterator, and a comparison function. The comparison function is a function that takes two arguments (two QStringLists) and that returns true if the first argument is “less than” the second argument, false otherwise. The compare object we pass as the comparison function isn’t really a function, but it can be used as one, as we will see shortly. index
value
0
[ "Donald", "Knuth", "1938-01-10" ]
1
[ "Edsger", "Dijkstra", "1930-05-11" ]
2
[ "Niklaus", "Wirth", "1934-02-15" ]
3
[ "Tony", "Hoare", "1934-01-11" ]
➧
Figure 4.9. Putting the data back into the table after sorting
After performing the qStableSort(), we move the data back into the table, clear the selection, and call somethingChanged(). In spreadsheet.h, the SpreadsheetCompare class was defined like this: class SpreadsheetCompare { public: bool operator()(const QStringList &row1, const QStringList &row2) const; enum { KeyCount = 3 }; int keys[KeyCount]; bool ascending[KeyCount]; };
The SpreadsheetCompare class is special because it implements a () operator. This allows us to use the class as if it were a function. Such classes are called function objects, or functors. To understand how functors work, we will start with a simple example: class Square { public: int operator()(int x) const { return x * x; } }
90
4. Implementing Application Functionality
The Square class provides one function, operator()(int), that returns the square of its parameter. By naming the function operator()(int) rather than, say, compute(int), we gain the capability of using an object of type Square as if it were a function: Square square; int y = square(5);
Now let’s see an example involving SpreadsheetCompare: QStringList row1, row2; QSpreadsheetCompare compare; ••• if (compare(row1, row2)) { // row1 is less than row2 }
The compare object can be used just as if it had been a plain compare() function. Additionally, its implementation can access all the sort keys and sort orders, which are stored as member variables. An alternative to this scheme would have been to store the sort keys and sort orders in global variables and use a plain compare() function. However, communicating through global variables is inelegant and can lead to subtle bugs. Functors are a more powerful idiom for interfacing with template functions such as qStableSort(). Here is the implementation of the function that is used to compare two spreadsheet rows: bool SpreadsheetCompare::operator()(const QStringList &row1, const QStringList &row2) const { for (int i = 0; i < KeyCount; ++i) { int column = keys[i]; if (column != -1) { if (row1[column] != row2[column]) { if (ascending[i]) { return row1[column] < row2[column]; } else { return row1[column] > row2[column]; } } } } return false; }
The operator returns true if the first row is less than the second row; otherwise, it returns false. The qStableSort() function uses the result of this function to perform the sort.
Implementing the Other Menus
91
The SpreadsheetCompare object’s keys and ascending arrays are populated in the MainWindow::sort() function (shown in Chapter 2). Each key holds a column --1 (“None”). index, or + We compare the corresponding cell entries in the two rows for each key in order. As soon as we find a difference, we return an appropriate true or false value. If all the comparisons turn out to be equal, we return false. The qStableSort() function uses the order before the sort to resolve tie situations; if row1 preceded row2 originally and neither compares as “less than” the other, row1 will still precede row2 in the result. This is what distinguishes qStableSort() from its unstable cousin qSort(). We have now completed the Spreadsheet class. In the next section, we will review the Cell class. This class is used to hold cell formulas and provides a reimplementation of the QTableWidgetItem::data() function that Spreadsheet calls indirectly, through the QTableWidgetItem::text() function, to display the result of calculating a cell’s formula.
Subclassing QTableWidgetItem The Cell class inherits from QTableWidgetItem. The class is designed to work well with Spreadsheet, but it has no specific dependencies on that class and could in theory be used in any QTableWidget. Here’s the header file: #ifndef CELL_H #define CELL_H #include class Cell : public QTableWidgetItem { public: Cell(); QTableWidgetItem *clone() const; void setData(int role, const QVariant &value); QVariant data(int role) const; void setFormula(const QString &formula); QString formula() const; void setDirty(); private: QVariant QVariant QVariant QVariant
value() const; evalExpression(const QString &str, int &pos) const; evalTerm(const QString &str, int &pos) const; evalFactor(const QString &str, int &pos) const;
The Cell class extends QTableWidgetItem by adding two private variables: • cachedValue caches the cell’s value as a QVariant. • cacheIsDirty is true if the cached value isn’t up to date. We use QVariant because some cells have a double value, while others have a QString value. The cachedValue and cacheIsDirty variables are declared with the C++ mutable keyword. This allows us to modify these variables in const functions. Alternatively, we could recalculate the value each time text() is called, but that would be needlessly inefficient. Notice that there is no Q_OBJECT macro in the class definition. Cell is a plain C++ class, with no signals or slots. In fact, because QTableWidgetItem doesn’t inherit from QObject, we cannot have signals and slots in Cell as it stands. Qt’s item classes don’t inherit from QObject to keep their overhead to the barest minimum. If signals and slots are needed, they can be implemented in the widget that contains the items or, exceptionally, using multiple inheritance with QObject. Here’s the start of cell.cpp: #include #include "cell.h" Cell::Cell() { setDirty(); }
In the constructor, we only need to set the cache as dirty. There is no need to pass a parent; when the cell is inserted into a QTableWidget with setItem(), the QTableWidget will automatically take ownership of it. Every QTableWidgetItem can hold some data, up to one QVariant for each data “role”. The most commonly used roles are Qt::EditRole and Qt::DisplayRole. The edit role is used for data that is to be edited, and the display role is for data that is to be displayed. Often the data for both is the same, but in Cell the edit role corresponds to the cell’s formula and the display role corresponds to the cell’s value (the result of evaluating the formula). QTableWidgetItem *Cell::clone() const { return new Cell(*this); }
The clone() function is called by QTableWidget when it needs to create a new cell—for example, when the user starts typing into an empty cell that has not been used before. The instance passed to QTableWidget::setItemPrototype() is the item that is cloned. Since member-wise copying is sufficient for Cell, we are
Subclassing QTableWidgetItem
93
relying on the default copy constructor automatically created by C++ to create new Cell instances in the clone() function. void Cell::setFormula(const QString &formula) { setData(Qt::EditRole, formula); }
The setFormula() function sets the cell’s formula. It is simply a convenience function for calling setData() with the edit role. It is called from Spreadsheet:: setFormula(). QString Cell::formula() const { return data(Qt::EditRole).toString(); }
The formula() function is called from Spreadsheet::formula(). Like setFormula() it is a convenience function, this time retrieving the item’s EditRole data. void Cell::setData(int role, const QVariant &value) { QTableWidgetItem::setData(role, value); if (role == Qt::EditRole) setDirty(); }
If we have a new formula, we set cacheIsDirty to true to ensure that the cell is recalculated the next time text() is called. There is no text() function defined in Cell, although we call text() on Cell instances in Spreadsheet::text(). The text() function is a convenience function provided by QTableWidgetItem; it is the equivalent of calling data(Qt::DisplayRole).toString(). void Cell::setDirty() { cacheIsDirty = true; }
The setDirty() function is called to force a recalculation of the cell’s value. It simply sets cacheIsDirty to true, meaning that cachedValue is no longer up to date. The recalculation isn’t performed until it is necessary. QVariant Cell::data(int role) const { if (role == Qt::DisplayRole) { if (value().isValid()) { return value().toString(); } else { return "####"; } } else if (role == Qt::TextAlignmentRole) { if (value().type() == QVariant::String) { return int(Qt::AlignLeft | Qt::AlignVCenter);
The data() function is reimplemented from QTableWidgetItem. It returns the text that should be shown in the spreadsheet if called with Qt::DisplayRole, and the formula if called with Qt::EditRole. It returns a suitable alignment if called with Qt::TextAlignmentRole. In the DisplayRole case, it relies on value() to compute the cell’s value. If the value is invalid (because the formula is wrong), we return “####”. The Cell::value() function used in data() returns a QVariant. A QVariant can store values of different types, such as double and QString, and provides functions to convert the variant to other types. For example, calling toString() on a variant that holds a double value produces a string representation of the double. A QVariant constructed using the default constructor is an “invalid” variant. const QVariant Invalid; QVariant Cell::value() const { if (cacheIsDirty) { cacheIsDirty = false; QString formulaStr = formula(); if (formulaStr.startsWith(’\’’)) { cachedValue = formulaStr.mid(1); } else if (formulaStr.startsWith(’=’)) { cachedValue = Invalid; QString expr = formulaStr.mid(1); expr.replace(" ", ""); expr.append(QChar::Null); int pos = 0; cachedValue = evalExpression(expr, pos); if (expr[pos] != QChar::Null) cachedValue = Invalid; } else { bool ok; double d = formulaStr.toDouble(&ok); if (ok) { cachedValue = d; } else { cachedValue = formulaStr; } } } return cachedValue; }
Subclassing QTableWidgetItem
95
The value() private function returns the cell’s value. If cacheIsDirty is true, we need to recalculate the value. If the formula starts with a single quote (for example, “ ’12345”), the single quote occupies position 0 and the value is the string from position 1 to the end. If the formula starts with an equals sign (‘=’), we take the string from position 1 and remove any spaces it may contain. Then we call evalExpression() to compute the value of the expression. The pos argument is passed by reference; it indicates the position of the character where parsing should begin. After the call to evalExpression(), the character at position pos should be the QChar::Null character we appended, if it was successfully parsed. If the parse failed before the end, we set cachedValue to be Invalid. If the formula doesn’t begin with a single quote or an equals sign, we attempt to convert it to a floating-point value using toDouble(). If the conversion works, we set cachedValue to be the resulting number; otherwise, we set cachedValue to be the formula string. For example, a formula of “1.50” causes toDouble() to set ok to true and return 1.5, while a formula of “World Population” causes toDouble() to set ok to false and return 0.0. By giving toDouble() a pointer to a bool, we are able to distinguish between the conversion of a string that represents the numeric value 0.0 and a conversion error (where 0.0 is also returned but the bool is set to false). Sometimes the returning of a zero value on conversion failure is exactly what we need, in which case we do not bother passing a pointer to a bool. For performance and portability reasons, Qt never uses C++ exceptions to report failure. This doesn’t prevent you from using them in Qt programs, providing your compiler supports them. The value() function is declared const. We had to declare cachedValue and cacheIsValid as mutable variables so that the compiler will allow us to modify them in const functions. It might be tempting to make value() non-const and remove the mutable keywords, but that would not compile because we call value() from data(), a const function. We have now completed the Spreadsheet application, apart from parsing formulas. The rest of this section covers evalExpression() and the two helper functions evalTerm() and evalFactor(). The code is a bit complicated, but it is included here to make the application complete. Since the code is not related to GUI programming, you can safely skip it and continue reading from Chapter 5. The evalExpression() function returns the value of a spreadsheet expression. --’ operators. An expression is defined as one or more terms separated by ‘+’ or ‘+ The terms themselves are defined as one or more factors separated by ‘∗’ or ‘/’ operators. By breaking down expressions into terms and terms into factors, we ensure that the operators are applied with the correct precedence.
96
4. Implementing Application Functionality
For example, “2∗C5+D6” is an expression with “2∗C5” as its first term and “D6” as its second term. The term “2∗C5” has “2” as its first factor and “C5” as its second factor, and the term “D6” consists of the single factor “D6”. A factor can be a number (“2”), a cell location (“C5”), or an expression in parentheses, optionally preceded by a unary minus. Expression
Term
Factor
Term
Factor
+
∗
-+
/
Number -+
Cell location (
Expression
)
Figure 4.10. Syntax diagram for spreadsheet expressions
The syntax of spreadsheet expressions is defined in Figure 4.10. For each symbol in the grammar (Expression, Term, and Factor), there is a corresponding member function that parses it and whose structure closely follows the grammar. Parsers written this way are called recursive-descent parsers. Let’s start with evalExpression(), the function that parses an Expression: QVariant Cell::evalExpression(const QString &str, int &pos) const { QVariant result = evalTerm(str, pos); while (str[pos] != QChar::Null) { QChar op = str[pos]; if (op != ’+’ && op != ’-’) return result; ++pos; QVariant term = evalTerm(str, pos); if (result.type() == QVariant::Double && term.type() == QVariant::Double) { if (op == ’+’) { result = result.toDouble() + term.toDouble(); } else { result = result.toDouble() - term.toDouble(); } } else { result = Invalid; } } return result; }
First, we call evalTerm() to get the value of the first term. If the following char--’, we continue by calling evalTerm() a second time; otherwise, the acter is ‘+’ or ‘+ expression consists of a single term, and we return its value as the value of the whole expression. After we have the value of the first two terms, we compute the result of the operation, depending on the operator. If both terms evaluated
Subclassing QTableWidgetItem
97
to a double, we compute the result as a double; otherwise, we set the result to be Invalid. We continue like this until there are no more terms. This works correctly --2+ --3” means because addition and subtraction are left-associative; that is, “1+ --2)+ --3”, not “1+ --(2+ --3)”. “(1+ QVariant Cell::evalTerm(const QString &str, int &pos) const { QVariant result = evalFactor(str, pos); while (str[pos] != QChar::Null) { QChar op = str[pos]; if (op != ’*’ && op != ’/’) return result; ++pos; QVariant factor = evalFactor(str, pos); if (result.type() == QVariant::Double && factor.type() == QVariant::Double) { if (op == ’*’) { result = result.toDouble() * factor.toDouble(); } else { if (factor.toDouble() == 0.0) { result = Invalid; } else { result = result.toDouble() / factor.toDouble(); } } } else { result = Invalid; } } return result; }
The evalTerm() function is very similar to evalExpression(), except that it deals with multiplication and division. The only subtlety in evalTerm() is that we must avoid division by zero, since it is an error on some processors. While it is generally inadvisable to test floating-point values for equality because of rounding errors, it is safe to test for equality against 0.0 to prevent division by zero. QVariant Cell::evalFactor(const QString &str, int &pos) const { QVariant result; bool negative = false; if (str[pos] == ’-’) { negative = true; ++pos; } if (str[pos] == ’(’) { ++pos; result = evalExpression(str, pos);
98
4. Implementing Application Functionality if (str[pos] != ’)’) result = Invalid; ++pos; } else { QRegExp regExp("[A-Za-z][1-9][0-9]{0,2}"); QString token; while (str[pos].isLetterOrNumber() || str[pos] == ’.’) { token += str[pos]; ++pos; } if (regExp.exactMatch(token)) { int column = token[0].toUpper().unicode() - ’A’; int row = token.mid(1).toInt() - 1; Cell *c = static_cast( tableWidget()->item(row, column)); if (c) { result = c->value(); } else { result = 0.0; } } else { bool ok; result = token.toDouble(&ok); if (!ok) result = Invalid; } } if (negative) { if (result.type() == QVariant::Double) { result = -result.toDouble(); } else { result = Invalid; } } return result; }
The evalFactor() function is a bit more complicated than evalExpression() and evalTerm(). We start by noting whether the factor is negated. We then see if it begins with an open parenthesis. If it does, we evaluate the contents of the parentheses as an expression by calling evalExpression(). When parsing a parenthesized expression, evalExpression() calls evalTerm(), which calls evalFactor(), which calls evalExpression() again. This is where recursion occurs in the parser. If the factor isn’t a nested expression, we extract the next token, which should be a cell location or a number. If the token matches the QRegExp, we take it to be a cell reference and we call value() on the cell at the given location. The cell could be anywhere in the spreadsheet, and it could have dependencies on other cells. The dependencies are not a problem; they will simply trigger
Subclassing QTableWidgetItem
99
more value() calls and (for “dirty” cells) more parsing until all the dependent cell values are calculated. If the token isn’t a cell location, we take it to be a number. What happens if cell A1 contains the formula “=A1”? Or if cell A1 contains “=A2” and cell A2 contains “=A1”? Although we have not written any special code to detect circular dependencies, the parser handles these cases gracefully by returning an invalid QVariant. This works because we set cacheIsDirty to false and cachedValue to Invalid in value() before we call evalExpression(). If evalExpression() recursively calls value() on the same cell, it returns Invalid immediately, and the whole expression then evaluates to Invalid. We have now completed the formula parser. It would be straightforward to extend it to handle predefined spreadsheet functions, like “sum()” and “avg()”, by extending the grammatical definition of Factor. Another easy extension is to implement the ‘+’ operator with string operands (as concatenation); this requires no changes to the grammar.
◆
Customizing Qt Widgets
◆
Subclassing QWidget
◆
Integrating Custom Widgets with Qt Designer
◆
Double Buffering
5. Creating Custom Widgets This chapter explains how to develop custom widgets using Qt. Custom widgets can be created by subclassing an existing Qt widget or by subclassing QWidget directly. We will demonstrate both approaches, and we will also see how to integrate a custom widget with Qt Designer so that it can be used just like a built-in Qt widget. We will round off the chapter by presenting a custom widget that uses double buffering, a powerful technique for high-speed drawing.
Customizing Qt Widgets In some cases, we find that a Qt widget requires more customization than is possible by setting its properties in Qt Designer or by calling its functions. A simple and direct solution is to subclass the relevant widget class and adapt it to suit our needs.
Figure 5.1. The HexSpinBox widget
In this section, we will develop a hexadecimal spin box to show how this works. QSpinBox only supports decimal integers, but by subclassing it’s quite easy to make it accept and display hexadecimal values. #ifndef HEXSPINBOX_H #define HEXSPINBOX_H #include class QRegExpValidator; class HexSpinBox : public QSpinBox { Q_OBJECT
The HexSpinBox inherits most of its functionality from QSpinBox. It provides a typical constructor and reimplements three virtual functions from QSpinBox. #include #include "hexspinbox.h" HexSpinBox::HexSpinBox(QWidget *parent) : QSpinBox(parent) { setRange(0, 255); validator = new QRegExpValidator(QRegExp("[0-9A-Fa-f]{1,8}"), this); }
We set the default range to be 0 to 255 (0x00 to 0xFF), which is more appropriate for a hexadecimal spin box than QSpinBox’s default of 0 to 99. The user can modify a spin box’s current value either by clicking its up and down arrows or by typing a value into the spin box’s line editor. In the latter case, we want to restrict the user’s input to legitimate hexadecimal numbers. To achieve this, we use a QRegExpValidator that accepts between one and eight characters, each of which must be in one of the sets, ‘0’ to ‘9’, ‘A’ to ‘F’, and ‘a’ to ‘f’. QValidator::State HexSpinBox::validate(QString &text, int &pos) const { return validator->validate(text, pos); }
This function is called by QSpinBox to see if the text entered so far is valid. There are three possible results: Invalid (the text doesn’t match the regular expression), Intermediate (the text is a plausible part of a valid value), and Acceptable (the text is valid). The QRegExpValidator has a suitable validate() function, so we simply return the result of calling it. In theory, we should return Invalid or Intermediate for values that lie outside the spin box’s range, but QSpinBox is smart enough to detect that condition without any help. QString HexSpinBox::textFromValue(int value) const { return QString::number(value, 16).toUpper(); }
Customizing Qt Widgets
103
The textFromValue() function converts an integer value to a string. QSpinBox calls it to update the editor part of the spin box when the user presses the spin box’s up or down arrows. We use the static function QString::number() with a second argument of 16 to convert the value to lowercase hexadecimal, and call QString::toUpper() on the result to make it uppercase. int HexSpinBox::valueFromText(const QString &text) const { bool ok; return text.toInt(&ok, 16); }
The valueFromText() function performs the reverse conversion, from a string to an integer value. It is called by QSpinBox when the user types a value into the editor part of the spin box and presses Enter. We use the QString::toInt() function to attempt to convert the current text to an integer value, again using base 16. If the string is not valid hexadecimal, ok is set to false and toInt() returns 0. Here, we don’t have to consider this possibility because the validator only permits valid hexadecimal strings to be entered. Instead of passing the address of a dummy variable (ok), we could instead pass a null pointer as the first argument to toInt(). We have now finished the hexadecimal spin box. Customizing other Qt widgets follows the same pattern: Pick a suitable Qt widget, subclass it, and reimplement some virtual functions to change its behavior.
Subclassing QWidget Many custom widgets are simply a combination of existing widgets, whether they are built-in Qt widgets or other custom widgets such as HexSpinBox. Custom widgets that are built by composing existing widgets can usually be developed in Qt Designer: • Create a new form using the “Widget” template. • Add the necessary widgets to the form, and lay them out. • Set up the signals and slots connections. • If behavior beyond what can be achieved through signals and slots is required, write the necessary code in a class that inherits both QWidget and the uic-generated class. Naturally, combining existing widgets can also be done entirely in code. Whichever approach is taken, the resulting class inherits directly from QWidget. If the widget has no signals and slots of its own and doesn’t reimplement any virtual functions, it is even possible to simply assemble the widget by combining existing widgets without a subclass. That’s the approach we used in Chapter 1 to create the Age application, with a QWidget, a QSpinBox, and a
104
5. Creating Custom Widgets
QSlider. Even so, we could just as easily have subclassed QWidget and created the QSpinBox and QSlider in the subclass’s constructor.
When none of Qt’s widgets are suitable for the task at hand, and when there’s no way to combine or adapt existing widgets to obtain the desired result, we can still create the widget we want. This is achieved by subclassing QWidget and reimplementing a few event handlers to paint the widget and to respond to mouse clicks. This approach gives us complete freedom to define and control both the appearance and the behavior of our widget. Qt’s built-in widgets, like QLabel, QPushButton, and QTableWidget, are implemented this way. If they didn’t exist in Qt, it would still be possible to create them ourselves using the public functions provided by QWidget in a completely platform-independent manner. To demonstrate how to write a custom widget using this approach, we will create the IconEditor widget shown in Figure 5.2. The IconEditor is a widget that could be used in an icon editing program.
The IconEditor class uses the Q_PROPERTY() macro to declare three custom properties: penColor, iconImage, and zoomFactor. Each property has a data type, a “read” function, and an optional “write” function. For example, the penColor property is of type QColor and can be read and written using the penColor() and setPenColor() functions. When we make use of the widget in Qt Designer, custom properties appear in Qt Designer’s property editor below the properties inherited from QWidget. Properties may be of any type supported by QVariant. The Q_OBJECT macro is necessary for classes that define properties. protected: void mousePressEvent(QMouseEvent *event); void mouseMoveEvent(QMouseEvent *event); void paintEvent(QPaintEvent *event); private: void setImagePixel(const QPoint &pos, bool opaque); QRect pixelRect(int i, int j) const; QColor curColor; QImage image; int zoom; }; #endif IconEditor reimplements three protected functions from QWidget and has a few
private functions and variables. The three private variables hold the values of the three properties. The implementation file begins with the IconEditor’s constructor: #include #include "iconeditor.h" IconEditor::IconEditor(QWidget *parent) : QWidget(parent) { setAttribute(Qt::WA_StaticContents); setSizePolicy(QSizePolicy::Minimum, QSizePolicy::Minimum); curColor = Qt::black; zoom = 8; image = QImage(16, 16, QImage::Format_ARGB32); image.fill(qRgba(0, 0, 0, 0)); }
106
5. Creating Custom Widgets
The constructor has some subtle aspects such as the Qt::WA_StaticContents attribute and the setSizePolicy() call. We will discuss them shortly. The pen color is set to black. The zoom factor is set to 8, meaning that each pixel in the icon will be rendered as an 8 × 8 square. The icon data is stored in the image member variable and can be accessed through the setIconImage() and iconImage() functions. An icon editor program would typically call setIconImage() when the user opens an icon file and iconImage() to retrieve the icon when the user wants to save it. The image variable is of type QImage. We initialize it to 16 × 16 pixels and 32-bit ARGB format, a format that supports semi-transparency. We clear the image data by filling it with a transparent color. The QImage class stores an image in a hardware-independent fashion. It can be set to use a 1-bit, 8-bit, or 32-bit depth. An image with 32-bit depth uses 8 bits for each of the red, green, and blue components of a pixel. The remaining 8 bits store the pixel’s alpha component (opacity). For example, a pure red color’s red, green, blue, and alpha components have the values 255, 0, 0, and 255. In Qt, this color can be specified as QRgb red = qRgba(255, 0, 0, 255);
or, since the color is opaque, as QRgb red = qRgb(255, 0, 0); QRgb is simply a typedef for unsigned int, and qRgb() and qRgba() are inline functions that combine their arguments into one 32-bit integer value. It is also possible to write QRgb red = 0xFFFF0000;
where the first FF corresponds to the alpha component and the second FF to the red component. In the IconEditor constructor, we fill the QImage with a transparent color by using 0 as the alpha component. Qt provides two types for storing colors: QRgb and QColor. While QRgb is only a typedef used in QImage to store 32-bit pixel data, QColor is a class with many useful functions and is widely used in Qt to store colors. In the IconEditor widget, we only use QRgb when dealing with the QImage; we use QColor for everything else, including the penColor property. QSize IconEditor::sizeHint() const { QSize size = zoom * image.size(); if (zoom >= 3) size += QSize(1, 1); return size; }
The sizeHint() function is reimplemented from QWidget and returns the ideal size of a widget. Here, we take the image size multiplied by the zoom factor,
Subclassing QWidget
107
with one extra pixel in each direction to accommodate a grid if the zoom factor is 3 or more. (We don’t show a grid if the zoom factor is 2 or 1, because the grid would then hardly leave any room for the icon’s pixels.) A widget’s size hint is mostly useful in conjunction with layouts. Qt’s layout managers try as much as possible to respect a widget’s size hint when they lay out a form’s child widgets. For IconEditor to be a good layout citizen, it must report a credible size hint. In addition to the size hint, widgets have a size policy that tells the layout system whether they like to be stretched and shrunk. By calling setSizePolicy() in the constructor with QSizePolicy::Minimum as horizontal and vertical policies, we tell any layout manager that is responsible for this widget that the widget’s size hint is really its minimum size. In other words, the widget can be stretched if required, but it should never shrink below the size hint. This can be overridden in Qt Designer by setting the widget’s sizePolicy property. The meaning of the various size policies is explained in Chapter 6 (Layout Management). void IconEditor::setPenColor(const QColor &newColor) { curColor = newColor; }
The setPenColor() function sets the current pen color. The color will be used for newly drawn pixels. void IconEditor::setIconImage(const QImage &newImage) { if (newImage != image) { image = newImage.convertToFormat(QImage::Format_ARGB32); update(); updateGeometry(); } }
The setIconImage() function sets the image to edit. We call convertToFormat() to make the image 32-bit with an alpha buffer, if it isn’t already. Elsewhere in the code, we will assume that the image data is stored as 32-bit ARGB values. After setting the image variable, we call QWidget::update() to force a repainting of the widget using the new image. Next, we call QWidget::updateGeometry() to tell any layout that contains the widget that the widget’s size hint has changed. The layout will then automatically adapt to the new size hint. void IconEditor::setZoomFactor(int newZoom) { if (newZoom < 1) newZoom = 1; if (newZoom != zoom) { zoom = newZoom; update(); updateGeometry();
108
5. Creating Custom Widgets } }
The setZoomFactor() function sets the zoom factor for the image. To prevent division by zero elsewhere, we correct any value below 1. Again, we call update() and updateGeometry() to repaint the widget and to notify any managing layout about the size hint change. The penColor(), iconImage(), and zoomFactor() functions are implemented as inline functions in the header file. We will now review the code for the paintEvent() function. This function is IconEditor’s most important function. It is called whenever the widget needs repainting. The default implementation in QWidget does nothing, leaving the widget blank. Just like closeEvent(), which we met in Chapter 3, paintEvent() is an event handler. Qt has many other event handlers, each of which corresponds to a different type of event. Chapter 7 covers event processing in depth. There are many situations when a paint event is generated and paintEvent() is called: • When a widget is shown for the first time, the system automatically generates a paint event to force the widget to paint itself. • When a widget is resized, the system generates a paint event. • If the widget is obscured by another window and then revealed again, a paint event is generated for the area that was hidden (unless the window system stored the area). We can also force a paint event by calling QWidget::update() or QWidget::repaint(). The difference between these two functions is that repaint() forces an immediate repaint, whereas update() simply schedules a paint event for when Qt next processes events. (Both functions do nothing if the widget isn’t visible on screen.) If update() is called multiple times, Qt compresses the consecutive paint events into a single paint event to avoid flicker. In IconEditor, we always use update(). Here’s the code: void IconEditor::paintEvent(QPaintEvent *event) { QPainter painter(this); if (zoom >= 3) { painter.setPen(palette().foreground().color()); for (int i = 0; i = 3) { return QRect(zoom * i + 1, zoom * j + 1, zoom - 1, zoom - 1); } else { return QRect(zoom * i, zoom * j, zoom, zoom); } }
The pixelRect() function returns a QRect suitable for QPainter::fillRect(). The i and j parameters are pixel coordinates in the QImage—not in the widget. If the zoom factor is 1, the two coordinate systems coincide exactly.
Subclassing QWidget
111
The QRect constructor has the syntax QRect(x, y, width, height), where (x, y) is the position of the top-left corner of the rectangle and width × height is the size of the rectangle. If the zoom factor is 3 or more, we reduce the size of the rectangle by one pixel horizontally and vertically so that the fill does not draw over the grid lines. void IconEditor::mousePressEvent(QMouseEvent *event) { if (event->button() == Qt::LeftButton) { setImagePixel(event->pos(), true); } else if (event->button() == Qt::RightButton) { setImagePixel(event->pos(), false); } }
When the user presses a mouse button, the system generates a “mouse press” event. By reimplementing QWidget::mousePressEvent(), we can respond to this event and set or clear the image pixel under the mouse cursor. If the user pressed the left mouse button, we call the private function setImagePixel() with true as the second argument, telling it to set the pixel to the current pen color. If the user pressed the right mouse button, we also call setImagePixel(), but pass false to clear the pixel. void IconEditor::mouseMoveEvent(QMouseEvent *event) { if (event->buttons() & Qt::LeftButton) { setImagePixel(event->pos(), true); } else if (event->buttons() & Qt::RightButton) { setImagePixel(event->pos(), false); } }
The mouseMoveEvent() handles “mouse move” events. By default, these events are only generated when the user is holding down a button. It is possible to change this behavior by calling QWidget::setMouseTracking(), but we don’t need to do so for this example. Just as pressing the left or right mouse button sets or clears a pixel, keeping it pressed and hovering over a pixel is also enough to set or clear a pixel. Since it’s possible to hold more than one button pressed down at a time, the value returned by QMouseEvent::buttons() is a bitwise OR of the mouse buttons. We test whether a certain button is pressed down using the & operator, and if this is the case we call setImagePixel(). void IconEditor::setImagePixel(const QPoint &pos, bool opaque) { int i = pos.x() / zoom; int j = pos.y() / zoom; if (image.rect().contains(i, j)) { if (opaque) { image.setPixel(i, j, penColor().rgba());
The setImagePixel() function is called from mousePressEvent() and mouseMoveEvent() to set or clear a pixel. The pos parameter is the position of the mouse on the widget. The first step is to convert the mouse position from widget coordinates to image coordinates. This is done by dividing the x() and y() components of the mouse position by the zoom factor. Next, we check whether the point is within the correct range. The check is easily made using QImage::rect() and QRect:: -- 1 and contains(); this effectively checks that i is between 0 and image.width() + -- 1. that j is between 0 and image.height() + Depending on the opaque parameter, we set or clear the pixel in the image. Clearing a pixel is really setting it to be transparent. We must convert the pen QColor to an 32-bit ARGB value for the QImage::setPixel() call. At the end, we call update() with a QRect of the area that needs to be repainted. Now that we have reviewed the member functions, we will return to the Qt:: WA_StaticContents attribute that we used in the constructor. This attribute tells Qt that the widget’s content doesn’t change when the widget is resized and that the content stays rooted to the widget’s top-left corner. Qt uses this information to avoid needlessly repainting areas that are already shown when resizing the widget. Normally, when a widget is resized, Qt generates a paint event for the widget’s entire visible area. But if the widget is created with the Qt::WA_StaticContents attribute, the paint event’s region is restricted to the pixels that were not previously shown. This implies that if the widget is resized to a smaller size, no paint event is generated at all.
➧
➧
Figure 5.5. Resizing a Qt::WA_StaticContents widget
The IconEditor widget is now complete. Using the information and examples from earlier chapters, we could write code that uses the IconEditor as a window in its own right, as a central widget in a QMainWindow, as a child widget inside a layout, or as a child widget inside a QScrollArea (p. 148). In the next section, we will see how to integrate it with Qt Designer.
Integrating Custom Widgets with Qt Designer
113
Integrating Custom Widgets with Qt Designer Before we can use custom widgets in Qt Designer, we must make Qt Designer aware of them. There are two techniques for doing this: the “promotion” approach and the plugin approach. The promotion approach is the quickest and easiest. It consists of choosing a built-in Qt widget that has a similar API to the one we want our custom widget to have and completing a dialog box in Qt Designer with some information about the custom widget. The widget can then be used in forms developed with Qt Designer, although it will be represented by the associated built-in Qt widget while the form is edited or previewed. Here’s how to insert a HexSpinBox widget into a form using this approach: 1. Create a QSpinBox by dragging it from Qt Designer’s widget box onto the form. 2. Right-click the spin box and choose Promote to Custom Widget from the context menu. 3. Fill in the dialog that pops up with “HexSpinBox” as the class name and “hexspinbox.h” as the header file. Voilà! The code generated by uic will include hexspinbox.h instead of and instantiate a HexSpinBox. In Qt Designer, the HexSpinBox widget will be represented by a QSpinBox, allowing us to set all the properties of a QSpinBox (for example, the range and the current value).
Figure 5.6. Qt Designer’s custom widget dialog
The drawbacks of the promotion approach are that properties that are specific to the custom widget aren’t accessible in Qt Designer and that the widget isn’t rendered as itself. Both these problems can be solved by using the plugin approach. The plugin approach requires the creation of a plugin library that Qt Designer can load at run-time and use to create instances of the widget. The real widget is then used by Qt Designer when editing the form and for previewing, and thanks to Qt’s meta-object system, Qt Designer can dynamically obtain the list of its properties. To show how this works, we will integrate the IconEditor from the previous section as a plugin.
114
5. Creating Custom Widgets
First, we must subclass QDesignerCustomWidgetInterface and reimplement some virtual functions. We will assume that the plugin source code is located in a directory called iconeditorplugin and that the IconEditor source code is located in a parallel directory called iconeditor. Here’s the class definition: #include class IconEditorPlugin : public QObject, public QDesignerCustomWidgetInterface { Q_OBJECT Q_INTERFACES(QDesignerCustomWidgetInterface) public: IconEditorPlugin(QObject *parent = 0); QString name() const; QString includeFile() const; QString group() const; QIcon icon() const; QString toolTip() const; QString whatsThis() const; bool isContainer() const; QWidget *createWidget(QWidget *parent); };
The IconEditorPlugin subclass is a factory class that encapsulates the IconEditor widget. It inherits both QObject and QDesignerCustomWidgetIterface and uses the Q_INTERFACES() macro to tell moc that the second base class is a plugin interface. The functions are used by Qt Designer to create instances of the class and to obtain information about it. IconEditorPlugin::IconEditorPlugin(QObject *parent) : QObject(parent) { }
The constructor is trivial. QString IconEditorPlugin::name() const { return "IconEditor"; }
The name() function returns the name of the widget provided by the plugin. QString IconEditorPlugin::includeFile() const { return "iconeditor.h"; }
The includeFile() function returns the name of the header file for the specified widget encapsulated by the plugin. The header file is included in the code generated by the uic tool.
The group() function returns the name of the widget box group this custom widget should belong to. If the name isn’t already in use, Qt Designer will create a new group for the widget. QIcon IconEditorPlugin::icon() const { return QIcon(":/images/iconeditor.png"); }
The icon() function returns the icon to use to represent the custom widget in Qt Designer’s widget box. Here, we assume that the IconEditorPlugin has an associated Qt resource file with a suitable entry for the icon editor image. QString IconEditorPlugin::toolTip() const { return tr("An icon editor widget"); }
The toolTip() function returns the tooltip to show when the mouse hovers over the custom widget in Qt Designer’s widget box. QString IconEditorPlugin::whatsThis() const { return tr("This widget is presented in Chapter 5 of C++ GUI " "Programming with Qt 4 as an example of a custom Qt " "widget."); }
The whatsThis() function returns the “What’s This?” text for Qt Designer to display. bool IconEditorPlugin::isContainer() const { return false; }
The isContainer() function returns true if the widget can contain other widgets; otherwise, it returns false. For example, QFrame is a widget that can contain other widgets. In general, any Qt widget can contain other widgets, but Qt Designer disallows this when isContainer() returns false. QWidget *IconEditorPlugin::createWidget(QWidget *parent) { return new IconEditor(parent); }
The create() function is called by Qt Designer to create an instance of a widget class with the given parent. Q_EXPORT_PLUGIN2(iconeditorplugin, IconEditorPlugin)
116
5. Creating Custom Widgets
At the end of the source file that implements the plugin class, we must use the Q_EXPORT_PLUGIN2() macro to make the plugin available to Qt Designer. The first argument is the name we want to give the plugin; the second argument is the name of the class that implements it. The .pro file for building the plugin looks like this: TEMPLATE CONFIG HEADERS SOURCES RESOURCES DESTDIR
The .pro file assumes that the QTDIR environment variable is set to the directory where Qt is installed. When you type make or nmake to build the plugin, it will automatically install itself in Qt Designer’s plugins directory. Once the plugin is built, the IconEditor widget can be used in Qt Designer in the same way as any of Qt’s built-in widgets. If you want to integrate several custom widgets with Qt Designer, you can either create one plugin for each one of them or combine them into a single plugin by deriving from QDesignerCustomWidgetCollectionInterface.
Double Buffering Double buffering is a GUI programming technique that consists of rendering a widget to an off-screen pixmap and copying the pixmap onto the display. With earlier versions of Qt, this technique was frequently used to eliminate flicker and to provide a snappier user interface. In Qt 4, QWidget handles this automatically, so we rarely need to worry about widgets flickering. Still, explicit double buffering remains beneficial if the widget’s rendering is complex and needed repeatedly. We can then store a pixmap permanently with the widget, always ready for the next paint event, and copy the pixmap to the widget whenever we receive a paint event. It is especially helpful when we want to do small modifications, such as drawing a rubber band, without recomputing the whole widget’s rendering over and over. We will round off this chapter by reviewing the Plotter custom widget. This widget uses double buffering and also demonstrates some other aspects of Qt programming, including keyboard event handling, manual layout, and coordinate systems. The Plotter widget displays one or more curves specified as vectors of coordinates. The user can draw a rubber band on the image, and the Plotter will zoom in on the area enclosed by the rubber band. The user draws the rubber band by clicking a point on the graph, dragging the mouse to another position with the left mouse button held down, and releasing the mouse button.
117
Double Buffering
➧
Figure 5.7. Zooming in on the Plotter widget
The user can zoom in repeatedly by drawing a rubber band multiple times, zooming out using the Zoom Out button, and then zooming back in using the Zoom In button. The Zoom In and Zoom Out buttons appear the first time they become available, so that they don’t clutter the display if the user doesn’t zoom the graph. The Plotter widget can hold the data for any number of curves. It also maintains a stack of PlotSettings objects, each of which corresponds to a particular zoom level. Let’s review the class, starting with plotter.h: #ifndef PLOTTER_H #define PLOTTER_H #include #include #include #include
class QToolButton; class PlotSettings; class Plotter : public QWidget { Q_OBJECT public: Plotter(QWidget *parent = 0); void setPlotSettings(const PlotSettings &settings); void setCurveData(int id, const QVector &data); void clearCurve(int id); QSize minimumSizeHint() const; QSize sizeHint() const; public slots: void zoomIn(); void zoomOut();
118
5. Creating Custom Widgets
We start by including the header files for the Qt classes that are used in the plotter file’s header, and forward declaring the classes that have pointers or references in the header. In the Plotter class, we provide three public functions for setting up the plot, and two public slots for zooming in and out. We also reimplement minimumSizeHint() and sizeHint() from QWidget. We store a curve’s points as a QVector, where QPointF is a floating-point version of QPoint. protected: void paintEvent(QPaintEvent *event); void resizeEvent(QResizeEvent *event); void mousePressEvent(QMouseEvent *event); void mouseMoveEvent(QMouseEvent *event); void mouseReleaseEvent(QMouseEvent *event); void keyPressEvent(QKeyEvent *event); void wheelEvent(QWheelEvent *event);
In the protected section of the class, we declare all the QWidget event handlers that we want to reimplement. private: void void void void
In the private section of the class, we declare a few functions for painting the widget, a constant, and several member variables. The Margin constant is used to provide some spacing around the graph. Among the member variables is pixmap of type QPixmap. This variable holds a copy of the whole widget’s rendering, identical to what is shown on screen. The plot is always drawn onto this off-screen pixmap first; then the pixmap is copied onto the widget. class PlotSettings { public: PlotSettings(); void scroll(int dx, int dy); void adjust();
The PlotSettings class specifies the range of the x and y axes and the number of ticks for these axes. Figure 5.8 shows the correspondence between a PlotSettings object and a Plotter widget. By convention, numXTicks and numYTicks are off by one; if numXTicks is 5, Plotter will actually draw 6 tick marks on the x axis. This simplifies the calculations later on.
numYTicks
maxY
minY minX
numXTicks maxX
Figure 5.8. PlotSettings’s member variables
Now let’s review the implementation file: #include #include #include "plotter.h"
We include the expected header files and import all the std namespace’s symbols into the global namespace. This allows us to access the functions that are declared in without prefixing them with std:: (for example, floor() instead of std::floor()). Plotter::Plotter(QWidget *parent) : QWidget(parent) { setBackgroundRole(QPalette::Dark);
The setBackgroundRole() call tells QWidget to use the “dark” component of the palette as the color for erasing the widget, instead of the “window” component. This gives Qt a default color that it can use to fill any newly revealed pixels when the widget is resized to a larger size, before paintEvent() even has the chance to paint the new pixels. We also need to call setAutoFillBackground( true) to enable this mechanism. (By default, child widgets inherit the background from their parent widget.) The setSizePolicy() call sets the widget’s size policy to QSizePolicy::Expanding in both directions. This tells any layout manager that is responsible for the widget that the widget is especially willing to grow, but can also shrink. This setting is typical for widgets that can take up a lot of screen space. The default is QSizePolicy::Preferred in both directions, which means that the widget prefers to be the size of its size hint, but it can be shrunk down to its minimum size hint or expanded indefinitely if necessary. The setFocusPolicy(Qt::StrongFocus) call makes the widget accept focus by clicking or by pressing Tab. When the Plotter has focus, it will receive events -- to for key presses. The Plotter widget understands a few keys: + to zoom in; + zoom out; and the arrow keys to scroll up, down, left, and right.
➧
Figure 5.9. Scrolling the Plotter widget
121
Double Buffering
Still in the constructor, we create two QToolButtons, each with an icon. These buttons allow the user to zoom in and out. The button’s icons are stored in a resource file, so any application that uses the Plotter widget will need this entry in its .pro file: RESOURCES
= plotter.qrc
The resource file is similar to the one we have used for the Spreadsheet application: images/zoomin.png images/zoomout.png
The adjustSize() calls on the buttons set their sizes to be that of their size hints. The buttons are not put in a layout; instead, we will position them manually in the Plotter’s resize event. Since we are not using any layouts, we must specify the buttons’ parent explicitly by passing this to the QPushButton constructor. The call to setPlotSettings() at the end completes the initialization. void Plotter::setPlotSettings(const PlotSettings &settings) { zoomStack.clear(); zoomStack.append(settings); curZoom = 0; zoomInButton->hide(); zoomOutButton->hide(); refreshPixmap(); }
The setPlotSettings() function is used to specify the PlotSettings to use for displaying the plot. It is called by the Plotter constructor and can be called by users of the class. The plotter starts out at its default zoom level. Each time the user zooms in, a new PlotSettings instance is created and put onto the zoom stack. The zoom stack is represented by two member variables: • zoomStack holds the different zoom settings as a QVector. • curZoom holds the current PlotSettings’s index in the zoomStack. After the call to setPlotSettings(), the zoom stack contains only one entry, and the Zoom In and Zoom Out buttons are hidden. These buttons will not be shown until we call show() on them in the zoomIn() and zoomOut() slots. (Normally, it is sufficient to call show() on the top-level widget to show all the children. But when we explicitly call hide() on a child widget, it is hidden until we call show() on it.) The call to refreshPixmap() is necessary to update the display. Usually, we would call update(), but here we do things slightly differently because we
122
5. Creating Custom Widgets
want to keep a QPixmap up to date at all times. After regenerating the pixmap, refreshPixmap() calls update() to copy the pixmap onto the widget. void Plotter::zoomOut() { if (curZoom > 0) { --curZoom; zoomOutButton->setEnabled(curZoom > 0); zoomInButton->setEnabled(true); zoomInButton->show(); refreshPixmap(); } }
The zoomOut() slot zooms out if the graph is zoomed in. It decrements the current zoom level and enables the Zoom Out button depending on whether the graph can be zoomed out any more or not. The Zoom In button is enabled and shown, and the display is updated with a call to refreshPixmap(). void Plotter::zoomIn() { if (curZoom < zoomStack.count() - 1) { ++curZoom; zoomInButton->setEnabled(curZoom < zoomStack.count() - 1); zoomOutButton->setEnabled(true); zoomOutButton->show(); refreshPixmap(); } }
If the user has previously zoomed in and then out again, the PlotSettings for the next zoom level will be in the zoom stack, and we can zoom in. (Otherwise, it is still possible to zoom in using a rubber band.) The slot increments curZoom to move one level deeper into the zoom stack, sets the Zoom In button enabled or disabled depending on whether it’s possible to zoom in any further, and enables and shows the Zoom Out button. Again, we call refreshPixmap() to make the plotter use the latest zoom settings. void Plotter::setCurveData(int id, const QVector &data) { curveMap[id] = data; refreshPixmap(); }
The setCurveData() function sets the curve data for a given curve ID. If a curve with the same ID already exists in curveMap, it is replaced with the new curve data; otherwise, the new curve is simply inserted. The curveMap member variable is of type QMap. void Plotter::clearCurve(int id) { curveMap.remove(id);
Double Buffering
123
refreshPixmap(); }
The clearCurve() function removes the specified curve from the curve map. QSize Plotter::minimumSizeHint() const { return QSize(6 * Margin, 4 * Margin); }
The minimumSizeHint() function is similar to sizeHint(); just as sizeHint() specifies a widget’s ideal size, minimumSizeHint() specifies a widget’s ideal minimum size. A layout never resizes a widget below its minimum size hint. The value we return is 300 × 200 (since Margin equals 50) to allow for the margin on all four sides and some space for the plot itself. Below that size, the plot would be too small to be useful. QSize Plotter::sizeHint() const { return QSize(12 * Margin, 8 * Margin); }
In sizeHint(), we return an “ideal” size in proportion to the Margin constant and with the same pleasing 3:2 aspect ratio we used for the minimumSizeHint(). This finishes the review of the Plotter’s public functions and slots. Now let’s review the protected event handlers. void Plotter::paintEvent(QPaintEvent * /* event */) { QStylePainter painter(this); painter.drawPixmap(0, 0, pixmap); if (rubberBandIsShown) { painter.setPen(palette().light().color()); painter.drawRect(rubberBandRect.normalized() .adjusted(0, 0, -1, -1)); } if (hasFocus()) { QStyleOptionFocusRect option; option.initFrom(this); option.backgroundColor = palette().dark().color(); painter.drawPrimitive(QStyle::PE_FrameFocusRect, option); } }
Normally, paintEvent() is the place where we perform all the drawing. But here all the plot drawing is done beforehand in refreshPixmap(), so we can render the entire plot simply by copying the pixmap onto the widget at position (0, 0). If the rubber band is visible, we draw it on top of the plot. We use the “light” component from the widget’s current color group as the pen color to ensure good contrast with the “dark” background. Notice that we draw directly on the widget, leaving the off-screen pixmap untouched. Using QRect::normalized()
124
5. Creating Custom Widgets
ensures that the rubber band rectangle has positive width and height (swapping coordinates if necessary), and adjusted() reduces the size of the rectangle by one pixel to allow for its own 1-pixel-wide outline. If the Plotter has focus, a focus rectangle is drawn using the widget style’s drawPrimitive() function with QStyle::PE_FrameFocusRect as its first argument and a QStyleOptionFocusRect object as its second argument. The focus rectangle’s drawing options are inherited from the Plotter widget (by the initFrom() call). The background color must be specified explicitly. When we want to paint using the current style, we can either call a QStyle function directly, for example, style()->drawPrimitive(QStyle::PE_FrameFocusRect, &option, &painter, this);
or we can use a QStylePainter instead of a normal QPainter, as we have done in Plotter, and paint more conveniently using that. The QWidget::style() function returns the style that should be used to draw the widget. In Qt, a widget style is a subclass of QStyle. The built-in styles include QWindowsStyle, QWindowsXPStyle, QMotifStyle, QCDEStyle, QMacStyle, and QPlastiqueStyle. Each of these styles reimplements the virtual functions in QStyle to perform the drawing in the correct way for the platform the style is emulating. QStylePainter’s drawPrimitive() function calls the QStyle function of the same name, which can be used for drawing “primitive elements” like panels, buttons, and focus rectangles. The widget style is usually the same for all widgets in an application (QApplication::style()), but it can be overridden on a per-widget basis using QWidget::setStyle(). By subclassing QStyle, it is possible to define a custom style. This can be done to give a distinctive look to an application or a suite of applications. While it is generally advisable to use the target platform’s native look and feel, Qt offers a lot of flexibility if you want to be adventurous. Qt’s built-in widgets rely almost exclusively on QStyle to paint themselves. This is why they look like native widgets on all platforms supported by Qt. Custom widgets can be made style-aware either by using QStyle to paint themselves or by using built-in Qt widgets as child widgets. For Plotter, we use a combination of both approaches: The focus rectangle is drawn using QStyle (via a QStylePainter), and the Zoom In and Zoom Out buttons are built-in Qt widgets. void Plotter::resizeEvent(QResizeEvent * /* event */) { int x = width() - (zoomInButton->width() + zoomOutButton->width() + 10); zoomInButton->move(x, 5); zoomOutButton->move(x + zoomInButton->width() + 5, 5); refreshPixmap(); }
Double Buffering
125
Whenever the Plotter widget is resized, Qt generates a “resize” event. Here, we reimplement resizeEvent() to place the Zoom In and Zoom Out buttons at the top right of the Plotter widget. We move the Zoom In button and the Zoom Out button to be side by side, separated by a 5-pixel gap and with a 5-pixel offset from the top and right edges of the parent widget. If we wanted the buttons to stay rooted to the top-left corner, whose coordinates are (0, 0), we would simply have moved them there in the Plotter constructor. But we want to track the top-right corner, whose coordinates depend on the size of the widget. Because of this, it’s necessary to reimplement resizeEvent() and to set the buttons’ position there. We didn’t set any positions for the buttons in the Plotter constructor. This isn’t a problem, since Qt always generates a resize event before a widget is shown for the first time. An alternative to reimplementing resizeEvent() and laying out the child widgets manually would have been to use a layout manager (for example, QGridLayout). Using a layout would have been a little more complicated and would have consumed more resources; on the other hand, it would gracefully handle rightto-left layouts, necessary for languages such as Arabic and Hebrew. At the end, we call refreshPixmap() to redraw the pixmap at the new size. void Plotter::mousePressEvent(QMouseEvent *event) { QRect rect(Margin, Margin, width() - 2 * Margin, height() - 2 * Margin); if (event->button() == Qt::LeftButton) { if (rect.contains(event->pos())) { rubberBandIsShown = true; rubberBandRect.setTopLeft(event->pos()); rubberBandRect.setBottomRight(event->pos()); updateRubberBandRegion(); setCursor(Qt::CrossCursor); } } }
When the user presses the left mouse button, we start displaying a rubber band. This involves setting rubberBandIsShown to true, initializing the rubberBandRect member variable with the current mouse pointer position, scheduling a paint event to paint the rubber band, and changing the mouse cursor to have a crosshair shape. The rubberBandRect variable is of type QRect. A QRect can be defined either as an (x, y, width, height) quadruple—where (x, y) is the position of the top-left corner and width × height is the size of the rectangle—or as a top-left and a bottomright coordinate pair. Here, we have used the coordinate pair representation. We set the point where the user clicked as both the top-left corner and as the
126
5. Creating Custom Widgets
bottom-right corner. Then we call updateRubberBandRegion() to force a repaint of the (tiny) area covered by the rubber band. Qt provides two mechanisms for controlling the mouse cursor’s shape: • QWidget::setCursor() sets the cursor shape to use when the mouse hovers over a particular widget. If no cursor is set for a widget, the parent widget’s cursor is used. The default for top-level widgets is an arrow cursor. • QApplication::setOverrideCursor() sets the cursor shape for the entire application, overriding the cursors set by individual widgets until restoreOverrideCursor() is called. In Chapter 4, we called QApplication::setOverrideCursor() with Qt::WaitCursor to change the application’s cursor to the standard wait cursor. void Plotter::mouseMoveEvent(QMouseEvent *event) { if (rubberBandIsShown) { updateRubberBandRegion(); rubberBandRect.setBottomRight(event->pos()); updateRubberBandRegion(); } }
When the user moves the mouse cursor while holding the left button, we first call updateRubberBandRegion() to schedule a paint event to repaint the area where the rubber band was, then we recompute rubberBandRect to account for the mouse move, and finally we call updateRubberBandRegion() a second time to repaint the area where the rubber band has moved to. This effectively erases the rubber band and redraws it at the new coordinates. If the user moves the mouse upward or leftward, it’s likely that rubberBandRect’s nominal bottom-right corner will end up above or to the left of its top-left corner. If this occurs, the QRect will have a negative width or height. We used QRect::normalized() in paintEvent() to ensure that the top-left and bottom-right coordinates are adjusted to obtain a nonnegative width and height. void Plotter::mouseReleaseEvent(QMouseEvent *event) { if ((event->button() == Qt::LeftButton) && rubberBandIsShown) { rubberBandIsShown = false; updateRubberBandRegion(); unsetCursor(); QRect rect = rubberBandRect.normalized(); if (rect.width() < 4 || rect.height() < 4) return; rect.translate(-Margin, -Margin); PlotSettings prevSettings = zoomStack[curZoom]; PlotSettings settings; double dx = prevSettings.spanX() / (width() - 2 * Margin); double dy = prevSettings.spanY() / (height() - 2 * Margin);
When the user releases the left mouse button, we erase the rubber band and restore the standard arrow cursor. If the rubber band is at least 4 × 4, we perform the zoom. If the rubber band is smaller than that, it’s likely that the user clicked the widget by mistake or to give it focus, so we do nothing. The code to perform the zoom is a bit complicated. This is because we deal with widget coordinates and plotter coordinates at the same time. Most of the work we perform here is to convert the rubberBandRect from widget coordinates to plotter coordinates. Once we have done the conversion, we call PlotSettings:: adjust() to round the numbers and find a sensible number of ticks for each axis. Figures 5.10 and 5.11 depict the situation. (0, 0) 10 8
8
(94, 73)
6
➧
68
4 2
6.8
2.4
10
6.5
6 4
3.2
2
135
0
0 0
2
4
6
8
10
0
2
4
6
8
10
(0, 0)
Figure 5.10. Converting the rubber band from widget to plotter coordinates
2.0
10
7.0
7
8
6
7.0
6
➧
4 3.0
2 0
5 4 3
0
2
4
6
8
10
2
3
4
5
6
7
Figure 5.11. Adjusting plotter coordinates and zooming in on the rubber band
128
5. Creating Custom Widgets
Then we perform the zoom. The zoom is achieved by pushing the new PlotSettings that we have just calculated on top of the zoom stack and calling zoomIn() to do the job. void Plotter::keyPressEvent(QKeyEvent *event) { switch (event->key()) { case Qt::Key_Plus: zoomIn(); break; case Qt::Key_Minus: zoomOut(); break; case Qt::Key_Left: zoomStack[curZoom].scroll(-1, 0); refreshPixmap(); break; case Qt::Key_Right: zoomStack[curZoom].scroll(+1, 0); refreshPixmap(); break; case Qt::Key_Down: zoomStack[curZoom].scroll(0, -1); refreshPixmap(); break; case Qt::Key_Up: zoomStack[curZoom].scroll(0, +1); refreshPixmap(); break; default: QWidget::keyPressEvent(event); } }
When the user presses a key and the Plotter widget has focus, the keyPress-- , Event() function is called. We reimplement it here to respond to six keys: +, + Up, Down, Left, and Right. If the user pressed a key that we are not handling, we call the base class implementation. For simplicity, we ignore the Shift, Ctrl, and Alt modifier keys, which are available through QKeyEvent::modifiers(). void Plotter::wheelEvent(QWheelEvent *event) { int numDegrees = event->delta() / 8; int numTicks = numDegrees / 15; if (event->orientation() == Qt::Horizontal) { zoomStack[curZoom].scroll(numTicks, 0); } else { zoomStack[curZoom].scroll(0, numTicks); } refreshPixmap(); }
Double Buffering
129
Wheel events occur when a mouse wheel is turned. Most mice only provide a vertical wheel, but some also have a horizontal wheel. Qt supports both kinds of wheel. Wheel events go to the widget that has the focus. The delta() function returns the distance the wheel was rotated in eighths of a degree. Mice typically work in steps of 15 degrees. Here, we scroll by the requested number of ticks by modifying the topmost item on the zoom stack and update the display using refreshPixmap(). The most common use of the wheel mouse is to scroll a scroll bar. When we use QScrollArea (covered in Chapter 6) to provide scroll bars, QScrollArea handles the wheel mouse events automatically, so we don’t need to reimplement wheelEvent() ourselves. This finishes the implementation of the event handlers. Now let’s review the private functions. void Plotter::updateRubberBandRegion() { QRect rect = rubberBandRect.normalized(); update(rect.left(), rect.top(), rect.width(), 1); update(rect.left(), rect.top(), 1, rect.height()); update(rect.left(), rect.bottom(), rect.width(), 1); update(rect.right(), rect.top(), 1, rect.height()); }
The updateRubberBand() function is called from mousePressEvent(), mouseMoveEvent(), and mouseReleaseEvent() to erase or redraw the rubber band. It consists of four calls to update() that schedule a paint event for the four small rectangular areas that are covered by the rubber band (two vertical and two horizontal lines). Qt provides the QRubberBand class for drawing rubber bands, but here, hand-coding provided finer control. void Plotter::refreshPixmap() { pixmap = QPixmap(size()); pixmap.fill(this, 0, 0); QPainter painter(&pixmap); painter.initFrom(this); drawGrid(&painter); drawCurves(&painter); update(); }
The refreshPixmap() function redraws the plot onto the off-screen pixmap and updates the display. We resize the pixmap to have the same size as the widget and fill it with the widget’s erase color. This color is the “dark” component of the palette, because of the call to setBackgroundRole() in the Plotter constructor. If the background is a non-solid brush, QPixmap::fill() needs to know the offset in the widget where the pixmap will end up to align the brush pattern correctly. Here, the pixmap corresponds to the entire widget, so we specify position (0, 0).
130
5. Creating Custom Widgets
Then we create a QPainter to draw on the pixmap. The initFrom() call sets the painter’s pen, background, and font to the same ones as the Plotter widget. Next we call drawGrid() and drawCurves() to perform the drawing. At the end, we call update() to schedule a paint event for the whole widget. The pixmap is copied to the widget in the paintEvent() function (p. 123). void Plotter::drawGrid(QPainter *painter) { QRect rect(Margin, Margin, width() - 2 * Margin, height() - 2 * Margin); if (!rect.isValid()) return; PlotSettings settings = zoomStack[curZoom]; QPen quiteDark = palette().dark().color().light(); QPen light = palette().light().color(); for (int i = 0; i setPen(quiteDark); painter->drawLine(x, rect.top(), x, rect.bottom()); painter->setPen(light); painter->drawLine(x, rect.bottom(), x, rect.bottom() + 5); painter->drawText(x - 50, rect.bottom() + 5, 100, 15, Qt::AlignHCenter | Qt::AlignTop, QString::number(label)); } for (int j = 0; j setPen(quiteDark); painter->drawLine(rect.left(), y, rect.right(), y); painter->setPen(light); painter->drawLine(rect.left() - 5, y, rect.left(), y); painter->drawText(rect.left() - Margin, y - 10, Margin - 5, 20, Qt::AlignRight | Qt::AlignVCenter, QString::number(label)); } painter->drawRect(rect.adjusted(0, 0, -1, -1)); }
The drawGrid() function draws the grid behind the curves and the axes. The area on which we draw the grid is specified by rect. If the widget isn’t large enough to accommodate the graph, we return immediately. The first for loop draws the grid’s vertical lines and the ticks along the x axis. The second for loop draws the grid’s horizontal lines and the ticks along the y axis. At the end, we draw a rectangle along the margins. The drawText()
Double Buffering
131
function is used to draw the numbers corresponding to the tick marks on both axes. The calls to drawText() have the following syntax: painter->drawText(x, y, width, height, alignment, text);
where (x, y, width, height) define a rectangle, alignment the position of the text within that rectangle, and text the text to draw. void Plotter::drawCurves(QPainter *painter) { static const QColor colorForIds[6] = { Qt::red, Qt::green, Qt::blue, Qt::cyan, Qt::magenta, Qt::yellow }; PlotSettings settings = zoomStack[curZoom]; QRect rect(Margin, Margin, width() - 2 * Margin, height() - 2 * Margin); if (!rect.isValid()) return; painter->setClipRect(rect.adjusted(+1, +1, -1, -1)); QMapIterator i(curveMap); while (i.hasNext()) { i.next(); int id = i.key(); const QVector &data = i.value(); QPolygonF polyline(data.count()); for (int j double double double
The drawCurves() function draws the curves on top of the grid. We start by calling setClipRect() to set the QPainter’s clip region to the rectangle that contains the curves (excluding the margins and the frame around the graph). QPainter will then ignore drawing operations on pixels outside the area. Next, we iterate over all the curves using a Java-style iterator, and for each curve, we iterate over its constituent QPointFs. The key() function gives the curve’s ID, and the value() function gives the corresponding curve data as a QVector. The inner for loop converts each QPointF from plotter coordinates to widget coordinates and stores them in the polyline variable.
132
5. Creating Custom Widgets
Once we have converted all the points of a curve to widget coordinates, we set the pen color for the curve (using one of a set of predefined colors) and call drawPolyline() to draw a line that goes through all the curve’s points. This is the complete Plotter class. All that remains are a few functions in PlotSettings. PlotSettings::PlotSettings() { minX = 0.0; maxX = 10.0; numXTicks = 5; minY = 0.0; maxY = 10.0; numYTicks = 5; }
The PlotSettings constructor initializes both axes to the range 0 to 10 with 5 tick marks. void PlotSettings::scroll(int dx, int dy) { double stepX = spanX() / numXTicks; minX += dx * stepX; maxX += dx * stepX; double stepY = spanY() / numYTicks; minY += dy * stepY; maxY += dy * stepY; }
The scroll() function increments (or decrements) minX, maxX, minY, and maxY by the interval between two ticks times a given number. This function is used to implement scrolling in Plotter::keyPressEvent(). void PlotSettings::adjust() { adjustAxis(minX, maxX, numXTicks); adjustAxis(minY, maxY, numYTicks); }
The adjust() function is called from mouseReleaseEvent() to round the minX, maxX, minY, and maxY values to “nice” values and to determine the number of ticks appropriate for each axis. The private function adjustAxis() does its work one axis at a time. void PlotSettings::adjustAxis(double &min, double &max, int &numTicks) { const int MinTicks = 4; double grossStep = (max - min) / MinTicks; double step = pow(10.0, floor(log10(grossStep))); if (5 * step < grossStep) { step *= 5;
The adjustAxis() function converts its min and max parameters into “nice” numbers and sets its numTicks parameter to the number of ticks it calculates to be appropriate for the given [min, max] range. Because adjustAxis() needs to modify the actual variables (minX, maxX, numXTicks, etc.) and not just copies, its parameters are non-const references. Most of the code in adjustAxis() simply attempts to determine an appropriate value for the interval between two ticks (the “step”). To obtain nice numbers along the axis, we must select the step with care. For example, a step value of 3.8 would lead to an axis with multiples of 3.8, which is difficult for people to relate to. For axes labeled in decimal notation, “nice” step values are numbers n n n of the form 10 , 2· 10 , or 5· 10 . We start by computing the “gross step”, a kind of maximum for the step value. n Then we find the corresponding number of the form 10 that is smaller than or equal to the gross step. We do this by taking the decimal logarithm of the gross step, rounding that value down to a whole number, then raising 10 to the power of this rounded number. For example, if the gross step is 236, we compute log 236 = 2.37291…; then we round it down to 2 and obtain 102 = 100 n as the candidate step value of the form 10 . Once we have the first candidate step value, we can use it to calculate the n n other two candidates: 2· 10 and 5· 10 . For the example above, the two other candidates are 200 and 500. The 500 candidate is larger than the gross step, so we can’t use it. But 200 is smaller than 236, so we use 200 for the step size in this example. It’s fairly easy to derive numTicks, min, and max from the step value. The new min value is obtained by rounding the original min down to the nearest multiple of the step, and the new max value is obtained by rounding up to the nearest multiple of the step. The new numTicks is the number of intervals between the rounded min and max values. For example, if min is 240 and max is 1184 upon entering the function, the new range becomes [200, 1200], with 5 tick marks. This algorithm will give suboptimal results in some cases. A more sophisticated algorithm is described in Paul S. Heckbert’s article “Nice Numbers for Graph Labels” published in Graphics Gems (ISBN 0-12-286166-3). This chapter has brought us to the end of Part I. It has explained how to customize an existing Qt widget and how to build a widget from the ground up using QWidget as the base class. We have already seen how to compose a widget
134
5. Creating Custom Widgets
from existing widgets in Chapter 2, and we will explore the theme further in Chapter 6. At this point, we know enough to write complete GUI applications using Qt. In Parts II and III, we will explore Qt in greater depth so that we can make full use of Qt’s power.
Part II
Intermediate Qt
◆
Laying Out Widgets on a Form
◆
Stacked Layouts
◆
Splitters
◆
Scrolling Areas
◆
Dock Widgets and Toolbars
◆
Multiple Document Interface
6. Layout Management Every widget that is placed on a form must be given an appropriate size and position. Qt provides several classes that lay out widgets on a form: QHBoxLayout, QVBoxLayout, QGridLayout, and QStackLayout. These classes are so convenient and easy to use that almost every Qt developer uses them, either directly in source code or through Qt Designer. Another reason to use Qt’s layout classes is that they ensure that forms adapt automatically to different fonts, languages, and platforms. If the user changes the system’s font settings, the application’s forms will respond immediately, resizing themselves if necessary. And if you translate the application’s user interface to other languages, the layout classes take into consideration the widgets’ translated contents to avoid text truncation. Other classes that perform layout management include QSplitter, QScrollArea, QMainWindow, and QWorkspace. What these classes have in common is that they provide a flexible layout that the user can manipulate. For example, QSplitter provides a splitter bar that the user can drag to resize widgets, and QWorkspace provides support for MDI (multiple document interface), a means of showing many documents simultaneously within an application’s main window. Because they are often used as alternatives to the layout classes proper, they are covered in this chapter.
Laying Out Widgets on a Form There are three basic ways of managing the layout of child widgets on a form: absolute positioning, manual layout, and layout managers. We will look at each of these approaches in turn, using the Find File dialog shown in Figure 6.1 as our example.
137
138
6. Layout Management
Figure 6.1. The Find File dialog
Absolute positioning is the crudest way of laying out widgets. It is achieved by assigning hard-coded sizes and positions to the form’s child widgets and a fixed size to the form. Here’s what the FindFileDialog constructor looks like using absolute positioning: FindFileDialog::FindFileDialog(QWidget *parent) : QDialog(parent) { ••• namedLabel->setGeometry(9, 9, 50, 25); namedLineEdit->setGeometry(65, 9, 200, 25); lookInLabel->setGeometry(9, 40, 50, 25); lookInLineEdit->setGeometry(65, 40, 200, 25); subfoldersCheckBox->setGeometry(9, 71, 256, 23); tableWidget->setGeometry(9, 100, 256, 100); messageLabel->setGeometry(9, 206, 256, 25); findButton->setGeometry(271, 9, 85, 32); stopButton->setGeometry(271, 47, 85, 32); closeButton->setGeometry(271, 84, 85, 32); helpButton->setGeometry(271, 199, 85, 32); setWindowTitle(tr("Find Files or Folders")); setFixedSize(365, 240); }
Absolute positioning has many disadvantages: • The user cannot resize the window. • Some text may be truncated if the user chooses an unusually large font or if the application is translated into another language. • The widgets might have inappropriate sizes for some styles. • The positions and sizes must be calculated manually. This is tedious and error-prone, and makes maintenance painful.
Laying Out Widgets on a Form
139
An alternative to absolute positioning is manual layout. With manual layout, the widgets are still given absolute positions, but their sizes are made proportional to the size of the window rather than being entirely hard-coded. This can be achieved by reimplementing the form’s resizeEvent() function to set its child widgets’ geometries: FindFileDialog::FindFileDialog(QWidget *parent) : QDialog(parent) { ••• setMinimumSize(265, 190); resize(365, 240); } void FindFileDialog::resizeEvent(QResizeEvent * /* event */) { int extraWidth = width() - minimumWidth(); int extraHeight = height() - minimumHeight(); namedLabel->setGeometry(9, 9, 50, 25); namedLineEdit->setGeometry(65, 9, 100 + extraWidth, 25); lookInLabel->setGeometry(9, 40, 50, 25); lookInLineEdit->setGeometry(65, 40, 100 + extraWidth, 25); subfoldersCheckBox->setGeometry(9, 71, 156 + extraWidth, 23); tableWidget->setGeometry(9, 100, 156 + extraWidth, 50 + extraHeight); messageLabel->setGeometry(9, 156 + extraHeight, 156 + extraWidth, 25); findButton->setGeometry(171 + extraWidth, 9, 85, 32); stopButton->setGeometry(171 + extraWidth, 47, 85, 32); closeButton->setGeometry(171 + extraWidth, 84, 85, 32); helpButton->setGeometry(171 + extraWidth, 149 + extraHeight, 85, 32); }
In the FindFileDialog constructor, we set the form’s minimum size to 265 × 190 and the initial size to 365 × 240. In the resizeEvent() handler, we give any extra space to the widgets that we want to grow. This ensures that the form scales smoothly when the user resizes it.
➧ Figure 6.2. Resizing a resizable dialog
140
6. Layout Management
Just like absolute positioning, manual layout requires a lot of hard-coded constants to be calculated by the programmer. Writing code like this is tiresome, especially if the design changes. And there is still the risk of text truncation. We can avoid this risk by taking account of the child widgets’ size hints, but that would complicate the code even further. The most convenient solution for laying out widgets on a form is to use Qt’s layout managers. The layout managers provide sensible defaults for every type of widget and take into account each widget’s size hint, which in turn typically depends on the widget’s font, style, and contents. Layout managers also respect minimum and maximum sizes, and automatically adjust the layout in response to font changes, content changes, and window resizing. The three most important layout managers are QHBoxLayout, QVBoxLayout, and QGridLayout. These classes inherit QLayout, which provides the basic framework for layouts. All three classes are fully supported by Qt Designer and can also be used directly in code. Here’s the FindFileDialog code using layout managers: FindFileDialog::FindFileDialog(QWidget *parent) : QDialog(parent) { ••• QGridLayout *leftLayout = new QGridLayout; leftLayout->addWidget(namedLabel, 0, 0); leftLayout->addWidget(namedLineEdit, 0, 1); leftLayout->addWidget(lookInLabel, 1, 0); leftLayout->addWidget(lookInLineEdit, 1, 1); leftLayout->addWidget(subfoldersCheckBox, 2, 0, 1, 2); leftLayout->addWidget(tableWidget, 3, 0, 1, 2); leftLayout->addWidget(messageLabel, 4, 0, 1, 2); QVBoxLayout *rightLayout = new QVBoxLayout; rightLayout->addWidget(findButton); rightLayout->addWidget(stopButton); rightLayout->addWidget(closeButton); rightLayout->addStretch(); rightLayout->addWidget(helpButton); QHBoxLayout *mainLayout = new QHBoxLayout; mainLayout->addLayout(leftLayout); mainLayout->addLayout(rightLayout); setLayout(mainLayout); setWindowTitle(tr("Find Files or Folders")); }
The layout is handled by one QHBoxLayout, one QGridLayout, and one QVBoxLayout. The QGridLayout on the left and the QVBoxLayout on the right are placed side by side by the outer QHBoxLayout. The margin around the dialog and the spacing between the child widgets are set to default values based on the current widget style; they can be changed using QLayout::setMargin() and QLayout:: setSpacing().
141
Laying Out Widgets on a Form
The same dialog could be created visually in Qt Designer by placing the child widgets in their approximate positions; selecting those that need to be laid out together; and clicking Form|Lay Out Horizontally, Form|Lay Out Vertically, or Form|Lay Out in a Grid. We used this approach in Chapter 2 for creating the Spreadsheet application’s Go-to-Cell and Sort dialogs. ✕
Window Title
mainLayout
QLabel
QLineEdit
QPushButton
QLabel
QLineEdit
QPushButton
QCheckBox
QPushButton
QTreeWidget
ε ε ε ε ε ε ε ε ε ε ε
QLabel
QPushButton
rightLayout
leftLayout
ightLa mainLa leftLa Figure 6.3. The Find File dialog’s layout
Using QHBoxLayout and QVBoxLayout is fairly straightforward, but using QGridLayout is a bit more involved. QGridLayout works on a two-dimensional grid of cells. The QLabel in the top-left corner of the layout is at position (0, 0), and the corresponding QLineEdit is at position (0, 1). The QCheckBox spans two columns; it occupies the cells in positions (2, 0) and (2, 1). The QTreeWidget and the QLabel beneath it also span two columns. The calls to addWidget() have the following syntax: layout->addWidget(widget, row, column, rowSpan, columnSpan);
Here, widget is the child widget to insert into the layout, (row, column) is the top-left cell occupied by the widget, rowSpan is the number of rows occupied by the widget, and columnSpan is the number of columns occupied by the widget. If omitted, the rowSpan and columnSpan parameters default to 1. The addStretch() call tells the layout manager to consume space at that point in the layout. By adding a stretch item, we have told the layout manager to put any excess space between the Close button and the Help button. In Qt Designer, we can achieve the same effect by inserting a spacer. Spacers appear in Qt Designer as blue “springs”.
142
6. Layout Management
Using layout managers provides additional benefits to those we have discussed so far. If we add a widget to a layout or remove a widget from a layout, the layout will automatically adapt to the new situation. The same applies if we call hide() or show() on a child widget. If a child widget’s size hint changes, the layout will be automatically redone, taking into account the new size hint. Also, layout managers automatically set a minimum size for the form as a whole, based on the form’s child widgets’ minimum sizes and size hints. In the examples presented so far, we have simply put widgets into layouts and used spacer items (stretches) to consume any excess space. In some cases, this isn’t sufficient to make the layout look exactly the way we want. In these situations, we can adjust the layout by changing the size policies and size hints of the widgets being laid out. A widget’s size policy tells the layout system how it should stretch or shrink. Qt provides sensible default size policies for all its built-in widgets, but since no single default can account for every possible layout, it is still common for developers to change the size policies for one or two widgets on a form. A QSizePolicy has both a horizontal and a vertical component. Here are the most useful values: • Fixed means that the widget cannot grow or shrink. The widget always stays at the size of its size hint. • Minimum means that the widget’s size hint is its minimum size. The widget cannot shrink below the size hint, but it can grow to fill available space if necessary. • Maximum means that the widget’s size hint is its maximum size. The widget can be shrunk down to its minimum size hint. • Preferred means that the widget’s size hint is its preferred size, but that the widget can still shrink or grow if necessary. • Expanding means that the widget can shrink or grow and that it is especially willing to grow. Figure 6.4 summarizes the meaning of the different size policies, using a QLabel showing the text “Some Text” as an example. min size hint
size hint
Fixed
Some Text
Minimum
Some Text
Some Text
Maximum
Som
Some Text
Preferred
Som
Some Text
Some Text
Expanding
Som
Some Text
Some Text
siz e
Figure 6.4. The meaning of the different size policies
Laying Out Widgets on a Form
143
In the figure, Preferred and Expanding are depicted the same way. So what is the difference? When a form that contains both Preferred and Expanding widgets is resized, extra space is given to the Expanding widgets, while the Preferred widgets stay at their size hint. There are two other size policies: MinimumExpanding and Ignored. The former was necessary in a few rare cases in older versions of Qt, but it isn’t useful anymore; the preferred approach is to use Expanding and reimplement minimumSizeHint() appropriately. The latter is similar to Expanding, except that it ignores the widget’s size hint and minimum size hint. In addition to the size policy’s horizontal and vertical components, the QSizePolicy class stores a horizontal and a vertical stretch factor. These stretch factors can be used to indicate that different child widgets should grow at different rates when the form expands. For example, if we have a QTreeWidget above a QTextEdit and we want the QTextEdit to be twice as tall as the QTreeWidget, we can set the QTextEdit’s vertical stretch factor to 2 and the QTreeWidget’s vertical stretch factor to 1. Yet another way of influencing a layout is to set a minimum size, a maximum size, or a fixed size on the child widgets. The layout manager will respect these constraints when laying out the widgets. And if this isn’t sufficient, we can always derive from the child widget’s class and reimplement sizeHint() to obtain the size hint we need.
Stacked Layouts The QStackedLayout class lays out a set of child widgets, or “pages”, and shows only one at a time, hiding the others from the user. The QStackedLayout itself is invisible and provides no intrinsic means for the user to change page. The small arrows and the dark gray frame in Figure 6.5 are provided by Qt Designer to make the layout easier to design with. For convenience, Qt also includes QStackedWidget, which provides a QWidget with a built-in QStackedLayout.
Figure 6.5. QStackedLayout
The pages are numbered from 0. To make a specific child widget visible, we can call setCurrentIndex() with a page number. The page number for a child widget is available using indexOf().
144
6. Layout Management
Figure 6.6. Two pages of the Preferences dialog
The Preferences dialog shown in Figure 6.6 is an example that uses QStackedLayout. The dialog consists of a QListWidget on the left and a QStackedLayout on the right. Each item in the QListWidget corresponds to a different page in the QStackedLayout. Here’s the relevant code from the dialog’s constructor: PreferenceDialog::PreferenceDialog(QWidget *parent) : QDialog(parent) { ••• listWidget = new QListWidget; listWidget->addItem(tr("Appearance")); listWidget->addItem(tr("Web Browser")); listWidget->addItem(tr("Mail & News")); listWidget->addItem(tr("Advanced")); stackedLayout = new QStackedLayout; stackedLayout->addWidget(appearancePage); stackedLayout->addWidget(webBrowserPage); stackedLayout->addWidget(mailAndNewsPage); stackedLayout->addWidget(advancedPage); connect(listWidget, SIGNAL(currentRowChanged(int)), stackedLayout, SLOT(setCurrentIndex(int))); ••• listWidget->setCurrentRow(0); }
We create a QListWidget and populate it with the page names. Then we create a QStackedLayout and call addWidget() for each page. We connect the list widget’s currentRowChanged(int) signal to the stacked layout’s setCurrentIndex(int) to implement the page switching and call setCurrentRow() on the list widget at the end of the constructor to start on page 0. Forms like this are also very easy to create using Qt Designer: 1. Create a new form based on the “Dialog” or the “Widget” template. 2. Add a QListWidget and a QStackedWidget to the form. 3. Fill each page with child widgets and layouts.
145
Stacked Layouts
(To create a new page, right-click and choose Insert Page; to switch pages, click the tiny left or right arrow located at the top-right of the QStackedWidget.) 4. Lay the widgets out side by side using a horizontal layout. 5. Connect the list widget’s currentRowChanged(int) signal to the stacked widget’s setCurrentIndex(int) slot. 6. Set the value of the list widget’s currentRow property to 0. Since we have implemented page switching using predefined signals and slots, the dialog will exhibit the correct behavior when previewed in Qt Designer.
Splitters A QSplitter is a widget that contains other widgets. The widgets in a splitter are separated by splitter handles. Users can change the sizes of a splitter’s child widgets by dragging the handles. Splitters can often be used as an alternative to layout managers, to give more control to the user.
Figure 6.7. The Splitter application
The child widgets of a QSplitter are automatically placed side by side (or one below the other) in the order in which they are created, with splitter bars between adjacent widgets. Here’s the code for creating the window depicted in Figure 6.7: int main(int argc, char *argv[]) { QApplication app(argc, argv); QTextEdit *editor1 = new QTextEdit; QTextEdit *editor2 = new QTextEdit; QTextEdit *editor3 = new QTextEdit; QSplitter splitter(Qt::Horizontal); splitter.addWidget(editor1); splitter.addWidget(editor2); splitter.addWidget(editor3); ••• splitter.show(); return app.exec(); }
146
6. Layout Management
The example consists of three QTextEdits laid out horizontally by a QSplitter widget. Unlike layout managers, which simply lay out a form’s child widgets and have no visual representation, QSplitter inherits from QWidget and can be used like any other widget. ✕
Window Title QSplitter QTextEdit
QTextEdit
QTextEdit
Figure 6.8. The Splitter application’s widgets
Complex layouts can be achieved by nesting horizontal and vertical QSplitters. For example, the Mail Client application shown in Figure 6.9 consists of a horizontal QSplitter that contains a vertical QSplitter on its right side.
Figure 6.9. The Mail Client application on Mac OS X
Here’s the code in the constructor of the Mail Client application’s QMainWindow subclass: MailClient::MailClient() { •••
After creating the three widgets that we want to display, we create a vertical splitter, rightSplitter, and add the two widgets we want on the right. Then we create a horizontal splitter, mainSplitter, and add the widget we want it to display on the left and rightSplitter whose widgets we want shown on the right. We make mainSplitter the QMainWindow’s central widget. When the user resizes a window, QSplitter normally distributes the space so that the relative sizes of the child widgets stay the same. In the Mail Client example, we don’t want this behavior; instead, we want the QTreeWidget and the QTableWidget to keep their sizes and we want to give any extra space to the QTextEdit. This is achieved by the two setStretchFactor() calls. The first argument is the 0-based index of the splitter’s child widget, and the second argument is the stretch factor we want to set; the default is 0. mainSplitter foldersTreeWidget
0
1 messagesTableWidget 0 rightSplitter textEdit
1
Splitter Splitter 0 1 Figure 6.10. The Mail Client’s splitter indexing
The first setStretchFactor() call is on rightSplitter, and it sets the widget at position 1 (textEdit) to have a stretch factor of 1. The second setStretchFactor() call is on mainSplitter, and it sets the widget at position 1 (rightSplitter) to have a stretch factor of 1. This ensures that the textEdit will get any additional space that is available. When the application is started, QSplitter gives the child widgets appropriate sizes based on their initial sizes (or based on their size hint if no initial size is specified). We can move the splitter handles programmatically by calling QSplitter::setSizes(). The QSplitter class also provides a means of saving and
148
6. Layout Management
restoring its state the next time the application is run. Here’s the writeSettings() function that saves the Mail Client’s settings: void MailClient::writeSettings() { QSettings settings("Software Inc.", "Mail Client"); settings.beginGroup("mainWindow"); settings.setValue("size", size()); settings.setValue("mainSplitter", mainSplitter->saveState()); settings.setValue("rightSplitter", rightSplitter->saveState()); settings.endGroup(); }
Here’s the corresponding readSettings() function: void MailClient::readSettings() { QSettings settings("Software Inc.", "Mail Client"); settings.beginGroup("mainWindow"); resize(settings.value("size", QSize(480, 360)).toSize()); mainSplitter->restoreState( settings.value("mainSplitter").toByteArray()); rightSplitter->restoreState( settings.value("rightSplitter").toByteArray()); settings.endGroup(); } QSplitter is fully supported by Qt Designer. To put widgets into a splitter, place
the child widgets approximately in their desired positions, select them, and click Form|Lay Out Horizontally in Splitter or Form|Lay Out Vertically in Splitter.
Scrolling Areas
viewport()
verticalScrollBar()
The QScrollArea class provides a scrollable viewport and two scroll bars. If we want to add scroll bars to a widget, it is much simpler to use a QScrollArea than to instantiate our own QScrollBars and implement the scrolling functionality ourselves.
The way to use QScrollArea is to call setWidget() with the widget we want to add scroll bars to. QScrollArea automatically reparents the widget to make it a child of the viewport (accessible through QScrollArea::viewport()) if it isn’t already. For example, if we want scroll bars around the IconEditor widget we developed in Chapter 5, we can write this: int main(int argc, char *argv[]) { QApplication app(argc, argv); IconEditor *iconEditor = new IconEditor; iconEditor->setIconImage(QImage(":/images/mouse.png")); QScrollArea scrollArea; scrollArea.setWidget(iconEditor); scrollArea.viewport()->setBackgroundRole(QPalette::Dark); scrollArea.viewport()->setAutoFillBackground(true); scrollArea.setWindowTitle(QObject::tr("Icon Editor")); scrollArea.show(); return app.exec(); }
The QScrollArea presents the widget at its current size or uses the size hint if the widget hasn’t been resized yet. By calling setWidgetResizable(true), we can tell QScrollArea to automatically resize the widget to take advantage of any extra space beyond its size hint. By default, the scroll bars are only displayed when the viewport is smaller than the child widget. We can force the scroll bars to always be shown by setting scroll bar policies: scrollArea.setHorizontalScrollBarPolicy(Qt::ScrollBarAlwaysOn); scrollArea.setVerticalScrollBarPolicy(Qt::ScrollBarAlwaysOn);
➧
Figure 6.12. Resizing a QScrollArea
150
6. Layout Management
QScrollArea inherits much of its functionality from QAbstractScrollArea. Classes like QTextEdit and QAbstractItemView (the base class of Qt’s item view classes) derive from QAbstractScrollArea, so we don’t need to wrap them in a QScrollArea
to get scroll bars.
Dock Widgets and Toolbars Dock widgets are widgets that can be docked inside a QMainWindow or floated as independent windows. QMainWindow provides four dock widget areas: one above, one below, one to the left, and one to the right of the central widget. Applications like Microsoft Visual Studio and Qt Linguist make extensive use of dock windows to provide a very flexible user interface. In Qt, dock widgets are instances of QDockWidget.
Figure 6.13. A QMainWindow with a dock widget
Every dock widget has its own title bar, even when it is docked. Users can move dock windows from one dock area to another by dragging the title bar. They can also detach a dock window from an area and let the dock window float as an independent window by dragging the dock window outside of any dock area. Free-floating dock windows are always “on top” of their main window. Users can close a QDockWidget by clicking the close button in the widget’s title bar. Any combination of these features can be disabled by calling QDockWidget:: setFeatures(). In earlier versions of Qt, toolbars were treated like dock widgets and shared the same dock areas. Starting with Qt 4, toolbars occupy their own areas
151
Dock Widgets and Toolbars
around the central widget (as shown in Figure 6.14) and can’t be undocked. If a floating toolbar is required, we can simply put it inside a QDockWindow. ✕
Window Title Menu Bar Top Toolbar Area
Right Toolbar Area
Right Dock Area
Left Dock Area
Left Toolbar Area
Top Dock Area
Bottom Dock Area Bottom Toolbar Area Status Bar Figure 6.14. QMainWindow’s dock and toolbar areas
The corners indicated with dotted lines can belong to either of their two adjoining dock areas. For example, we could make the top-left corner belong to the left dock area by calling QMainWindow::setCorner(Qt::TopLeftCorner, Qt:: LeftDockWidgetArea). The following code snippet shows how to wrap an existing widget (in this case, a QTreeWidget) in a QDockWidget and insert it into the right dock area: QDockWidget *shapesDockWidget = new QDockWidget(tr("Shapes")); shapesDockWidget->setWidget(treeWidget); shapesDockWidget->setAllowedAreas(Qt::LeftDockWidgetArea | Qt::RightDockWidgetArea); addDockWidget(Qt::RightDockWidgetArea, shapesDockWidget);
The setAllowedAreas() call specifies constraints on which dock areas can accept the dock window. Here, we only allow the user to drag the dock widget into the left and right dock areas, where there is enough vertical space for it to be displayed sensibly. If no allowed areas are explicitly set, the user can drag the dock widget to any of the four areas. Here’s how to create a toolbar containing a QComboBox, a QSpinBox, and a few QToolButtons from a QMainWindow subclass’s constructor:
If we want to save the position of all the dock widgets and toolbars so that we can restore them the next time the application is run, we can write code that is similar to the code we used to save a QSplitter’s state, using QMainWindow’s saveState() and restoreState() functions: void MainWindow::writeSettings() { QSettings settings("Software Inc.", "Icon Editor"); settings.beginGroup("mainWindow"); settings.setValue("size", size()); settings.setValue("state", saveState()); settings.endGroup(); } void MainWindow::readSettings() { QSettings settings("Software Inc.", "Icon Editor"); settings.beginGroup("mainWindow"); resize(settings.value("size").toSize()); restoreState(settings.value("state").toByteArray()); settings.endGroup(); }
Finally, QMainWindow provides a context menu that lists all the dock windows and toolbars. The user can close and restore dock windows and hide and restore toolbars using this menu.
Figure 6.15. A QMainWindow context menu
Multiple Document Interface Applications that provide multiple documents within the main window’s central area are called multiple document interface applications, or MDI applications. In Qt, an MDI application is created by using the QWorkspace class
Multiple Document Interface
153
as the central widget and by making each document window a child of the QWorkspace. It is conventional for MDI applications to provide a Window menu that includes some commands for managing the windows and the list of windows. The active window is identified with a checkmark. The user can make any window active by clicking its entry in the Window menu. In this section, we will develop the MDI Editor application shown in Figure 6.16 to demonstrate how to create an MDI application and how to implement its Window menu.
Figure 6.16. The MDI Editor application
The application consists of two classes: MainWindow and Editor. The code is on the CD, and since most of it is the same or similar to the Spreadsheet application from Part I, we will only present the new code.
Figure 6.17. The MDI Editor application’s menus
154
6. Layout Management
Let’s start with the MainWindow class. MainWindow::MainWindow() { workspace = new QWorkspace; setCentralWidget(workspace); connect(workspace, SIGNAL(windowActivated(QWidget *)), this, SLOT(updateMenus())); createActions(); createMenus(); createToolBars(); createStatusBar(); setWindowTitle(tr("MDI Editor")); setWindowIcon(QPixmap(":/images/icon.png")); }
In the MainWindow constructor, we create a QWorkspace widget and make it the central widget. We connect the QWorkspace’s windowActivated() signal to the slot we will use to keep the window menu up to date. void MainWindow::newFile() { Editor *editor = createEditor(); editor->newFile(); editor->show(); }
The newFile() slot corresponds to the File|New menu option. It depends on the createEditor() private function to create a child Editor widget. Editor *MainWindow::createEditor() { Editor *editor = new Editor; connect(editor, SIGNAL(copyAvailable(bool)), cutAction, SLOT(setEnabled(bool))); connect(editor, SIGNAL(copyAvailable(bool)), copyAction, SLOT(setEnabled(bool))); workspace->addWindow(editor); windowMenu->addAction(editor->windowMenuAction()); windowActionGroup->addAction(editor->windowMenuAction()); return editor; }
The createEditor() function creates an Editor widget and sets up two signal–slot connections. These connections ensure that Edit|Cut and Edit|Copy are enabled or disabled depending on whether there is any selected text. Because we are using MDI, it is possible that there will be multiple Editor widgets in use. This is a concern since we are only interested in responding to the copyAvailable(bool) signal from the active Editor window, not from the others. But these signals can only ever be emitted by the active window, so this isn’t a problem in practice.
Multiple Document Interface
155
Once we have set up the Editor, we add a QAction representing the window to the Window menu. The action is provided by the Editor class, which we will cover in a moment. We also add the action to a QActionGroup object. The QActionGroup ensures that only one Window menu item is checked at a time. void MainWindow::open() { Editor *editor = createEditor(); if (editor->open()) { editor->show(); } else { editor->close(); } }
The open() function corresponds to File|Open. It creates an Editor for the new document and calls open() on the Editor. It makes more sense to implement the file operations in the Editor class than in the MainWindow class, because each Editor needs to maintain its own independent state. If the open() fails, we simply close the editor since the user will have already been notified of the error. We don’t need to explicitly delete the Editor object ourselves; this is done automatically by Editor through the Qt::WA_DeleteOnClose widget attribute, which is set in the Editor constructor. void MainWindow::save() { if (activeEditor()) activeEditor()->save(); }
The save() slot calls Editor::save() on the active editor, if there is one. Again, the code that performs the real work is located in the Editor class. Editor *MainWindow::activeEditor() { return qobject_cast(workspace->activeWindow()); }
The activeEditor() private function returns the active child window as an Editor pointer, or a null pointer if there isn’t one. void MainWindow::cut() { if (activeEditor()) activeEditor()->cut(); }
The cut() slot calls Editor::cut() on the active editor. We don’t show the copy() and paste() slots because they follow the same pattern. void MainWindow::updateMenus() { bool hasEditor = (activeEditor() != 0);
The updateMenus() slot is called whenever a window is activated (and when the last window is closed) to update the menu system, due to the signal–slot connection we put in the MainWindow constructor. Most menu options only make sense if there is an active window, so we disable them if there isn’t one. At the end, we call setChecked() on the QAction representing the active window. Thanks to the QActionGroup, we don’t need to explicitly uncheck the previously active window. void MainWindow::createMenus() { ••• windowMenu = menuBar()->addMenu(tr("&Window")); windowMenu->addAction(closeAction); windowMenu->addAction(closeAllAction); windowMenu->addSeparator(); windowMenu->addAction(tileAction); windowMenu->addAction(cascadeAction); windowMenu->addSeparator(); windowMenu->addAction(nextAction); windowMenu->addAction(previousAction); windowMenu->addAction(separatorAction); ••• }
The createMenus() private function fills the Window menu with actions. The actions are all typical of such menus and are easily implemented using QWorkspace’s closeActiveWindow(), closeAllWindows(), tile(), and cascade() slots. Every time the user opens a new window, it is added to the Window menu’s list of actions. (This is done in the createEditor() function that we saw on page 154.) When the user closes an editor window, its action in the Window menu is deleted (since the action is owned by the editor window), and so the action is automatically removed from the Window menu.
The closeEvent() function is reimplemented to close all child windows, causing each child to receive a close event. If one of the child widgets “ignores” its close event (because the user canceled an “unsaved changes” message box), we ignore the close event for the MainWindow; otherwise, we accept it, resulting in Qt closing the entire window. If we didn’t reimplement closeEvent() in MainWindow, the user would not be given the opportunity to save unsaved changes. We have now finished our review of MainWindow, so we can move on to the Editor implementation. The Editor class represents one child window. It inherits QTextEdit, which provides the text editing functionality. Just as any Qt widget can be used as a stand-alone window, any Qt widget can be used as a child window in an MDI workspace. Here’s the class definition: class Editor : public QTextEdit { Q_OBJECT public: Editor(QWidget *parent = 0); void newFile(); bool open(); bool openFile(const QString &fileName); bool save(); bool saveAs(); QSize sizeHint() const; QAction *windowMenuAction() const { return action; } protected: void closeEvent(QCloseEvent *event); private slots: void documentWasModified(); private: bool okToContinue(); bool saveFile(const QString &fileName); void setCurrentFile(const QString &fileName); bool readFile(const QString &fileName); bool writeFile(const QString &fileName); QString strippedName(const QString &fullFileName); QString curFile; bool isUntitled;
Four of the private functions that were in the Spreadsheet application’s MainWindow class (p. 57) are also present in the Editor class: okToContinue(), saveFile(), setCurrentFile(), and strippedName(). Editor::Editor(QWidget *parent) : QTextEdit(parent) { action = new QAction(this); action->setCheckable(true); connect(action, SIGNAL(triggered()), this, SLOT(show())); connect(action, SIGNAL(triggered()), this, SLOT(setFocus())); isUntitled = true; fileFilters = tr("Text files (*.txt)\n" "All files (*)"); connect(document(), SIGNAL(contentsChanged()), this, SLOT(documentWasModified())); setWindowIcon(QPixmap(":/images/document.png")); setAttribute(Qt::WA_DeleteOnClose); }
First, we create a QAction representing the editor in the application’s Window menu and connect that action to the show() and setFocus() slots. Since we allow users to create any number of editor windows, we must make some provision for naming them so that they can be distinguished before they have been saved for the first time. One common way of handling this is to allocate names that include a number (for example, document1.txt). We use the isUntitled variable to distinguish between names supplied by the user and names we have created programmatically. We connect the text document’s contentsChanged() signal to the private documentWasModified() slot. This slot simply calls setWindowModified(true). Finally, we set the Qt::WA_DeleteOnClose attribute to prevent memory leaks when the user closes an Editor window. After the constructor, we expect either newFile() or open() to be called. void Editor::newFile() { static int documentNumber = 1; curFile = tr("document%1.txt").arg(documentNumber); setWindowTitle(curFile + "[*]"); action->setText(curFile); isUntitled = true; ++documentNumber; }
Multiple Document Interface
159
The newFile() function generates a name like document1.txt for the new document. The code belongs in newFile(), rather than the constructor, because we don’t want to consume numbers when we call open() to open an existing document in a newly created Editor. Since documentNumber is declared static, it is shared across all Editor instances. The “[*]” marker in the window title is a place marker for where we want the asterisk to appear when the file has unsaved changes on platforms other than Mac OS X. We covered this place marker in Chapter 3 (p. 58). bool Editor::open() { QString fileName = QFileDialog::getOpenFileName(this, tr("Open"), ".", fileFilters); if (fileName.isEmpty()) return false; return openFile(fileName); }
The open() function tries to open an existing file using openFile(). bool Editor::save() { if (isUntitled) { return saveAs(); } else { return saveFile(curFile); } }
The save() function uses the isUntitled variable to determine whether it should call saveFile() or saveAs(). void Editor::closeEvent(QCloseEvent *event) { if (okToContinue()) { event->accept(); } else { event->ignore(); } }
The closeEvent() function is reimplemented to allow the user to save unsaved changes. The logic is coded in the okToContinue() function, which pops up a message box that asks, “Do you want to save your changes?” If okToContinue() returns true, we accept the close event; otherwise, we “ignore” it and leave the window unaffected by it. void Editor::setCurrentFile(const QString &fileName) { curFile = fileName; isUntitled = false; action->setText(strippedName(curFile));
The setCurrentFile() function is called from openFile() and saveFile() to update the curFile and isUntitled variables, to set the window title and action text, and to set the document’s “modified” flag to false. Whenever the user modifies the text in the editor, the underlying QTextDocument emits the contentsChanged() signal and sets its internal “modified” flag to true. QSize Editor::sizeHint() const { return QSize(72 * fontMetrics().width(’x’), 25 * fontMetrics().lineSpacing()); }
The sizeHint() function returns a size based on the width of the letter ‘x’ and the height of a text line. QWorkspace uses the size hint to give an initial size to the window. Here’s the MDI Editor application’s main.cpp file: #include #include "mainwindow.h" int main(int argc, char *argv[]) { QApplication app(argc, argv); QStringList args = app.arguments(); MainWindow mainWin; if (args.count() > 1) { for (int i = 1; i < args.count(); ++i) mainWin.openFile(args[i]); } else { mainWin.newFile(); } mainWin.show(); return app.exec(); }
If the user specifies any files on the command line, we attempt to load them. Otherwise, we start with an empty document. Qt-specific command-line options, such as -style and -font, are automatically removed from the argument list by the QApplication constructor. So if we write mdieditor -style motif readme.txt
on the command line, QApplication::arguments() returns a QStringList containing two items (“mdieditor” and “readme.txt”), and the MDI Editor application starts up with the document readme.txt.
Multiple Document Interface
161
MDI is one way of handling multiple documents simultaneously. On Mac OS X, the preferred approach is to use multiple top-level windows. This approach is covered in the “Multiple Documents” section of Chapter 3.
◆
Reimplementing Event Handlers
◆
Installing Event Filters
◆
Staying Responsive During Intensive Processing
7. Event Processing Events are generated by the window system or by Qt itself in response to various occurrences. When the user presses or releases a key or mouse button, a key or mouse event is generated; when a window is shown for the first time, a paint event is generated to tell the newly visible window that it needs to draw itself. Most events are generated in response to user actions, but some, like timer events, are generated independently by the system. When we program with Qt, we seldom need to think about events, because Qt widgets emit signals when something significant occurs. Events become useful when we write our own custom widgets or when we want to modify the behavior of existing Qt widgets. Events should not be confused with signals. As a rule, signals are useful when using a widget, whereas events are useful when implementing a widget. For example, when we are using QPushButton, we are more interested in its clicked() signal than in the low-level mouse or key events that caused the signal to be emitted. But if we are implementing a class like QPushButton, we need to write code to handle mouse and key events and emit the clicked() signal when necessary.
Reimplementing Event Handlers In Qt, an event is an object that inherits QEvent. Qt handles more than a hundred types of event, each identified by an enum value. For example, QEvent:: type() returns QEvent::MouseButtonPress for mouse press events. Many event types require more information than can be stored in a plain QEvent object; for example, mouse press events need to store which mouse button triggered the event as well as where the mouse pointer was positioned when the event occurred. This additional information is stored in dedicated QEvent subclasses, such as QMouseEvent.
163
164
7. Event Processing
Events are notified to objects through their event() function, inherited from QObject. The event() implementation in QWidget forwards the most common types of event to specific event handlers, such as mousePressEvent(), keyPressEvent(), and paintEvent(). We have already seen many event handlers when implementing MainWindow, IconEditor, and Plotter in earlier chapters. There are many other types of event listed in the QEvent reference documentation, and it is also possible to create custom event types and to dispatch events ourselves. Here, we will review two common event types that deserve more explanation: key events and timer events. Key events are handled by reimplementing keyPressEvent() and keyReleaseEvent(). The Plotter widget reimplements keyPressEvent(). Normally, we only need to reimplement keyPressEvent() since the only keys for which release is important are the modifier keys Ctrl, Shift, and Alt, and these can be checked for in a keyPressEvent() using QKeyEvent::modifiers(). For example, if we were implementing a CodeEditor widget, its stripped-down keyPressEvent() that distinguishes between Home and Ctrl+Home would look like this: void CodeEditor::keyPressEvent(QKeyEvent *event) { switch (event->key()) { case Qt::Key_Home: if (event->modifiers() & Qt::ControlModifier) { goToBeginningOfDocument(); } else { goToBeginningOfLine(); } break; case Qt::Key_End: ••• default: QWidget::keyPressEvent(event); } }
The Tab and Backtab (Shift+Tab) keys are special cases. They are handled by QWidget::event() before it calls keyPressEvent(), with the semantic of passing the focus to the next or previous widget in the focus chain. This behavior is usually what we want, but in a CodeEditor widget, we might prefer to make Tab indent a line. The event() reimplementation would then look like this: bool CodeEditor::event(QEvent *event) { if (event->type() == QEvent::KeyPress) { QKeyEvent *keyEvent = static_cast(event); if (keyEvent->key() == Qt::Key_Tab) { insertAtCurrentPosition(’\t’); return true; } }
Reimplementing Event Handlers
165
return QWidget::event(event); }
If the event is a key press, we cast the QEvent object to a QKeyEvent and check which key was pressed. If the key is Tab, we do some processing and return true to tell Qt that we have handled the event. If we returned false, Qt would propagate the event to the parent widget. A higher-level approach for implementing key bindings is to use a QAction. For example, if goToBeginningOfLine() and goToBeginningOfDocument() are public slots in the CodeEditor widget, and the CodeEditor is used as the central widget in a MainWindow class, we could add the key bindings with the following code: MainWindow::MainWindow() { editor = new CodeEditor; setCentralWidget(editor); goToBeginningOfLineAction = new QAction(tr("Go to Beginning of Line"), this); goToBeginningOfLineAction->setShortcut(tr("Home")); connect(goToBeginningOfLineAction, SIGNAL(activated()), editor, SLOT(goToBeginningOfLine())); goToBeginningOfDocumentAction = new QAction(tr("Go to Beginning of Document"), this); goToBeginningOfDocumentAction->setShortcut(tr("Ctrl+Home")); connect(goToBeginningOfDocumentAction, SIGNAL(activated()), editor, SLOT(goToBeginningOfDocument())); ••• }
This makes it easy to add the commands to a menu or a toolbar, as we saw in Chapter 3. If the commands don’t appear in the user interface, the QAction objects could be replaced with a QShortcut object, the class used by QAction internally to support key bindings. By default, key bindings set using QAction or QShortcut on a widget are enabled whenever the window that contains the widget is active. This can be changed using QAction::setShortcutContext() or QShortcut::setContext(). Another common type of event is the timer event. While most other event types occur as a result of a user action, timer events allow applications to perform processing at regular time intervals. Timer events can be used to implement blinking cursors and other animations, or simply to refresh the display. To demonstrate timer events, we will implement a Ticker widget. This widget shows a text banner that scrolls left by one pixel every 30 milliseconds. If the widget is wider than the text, the text is repeated as often as necessary to fill the entire width of the widget.
166
7. Event Processing
Figure 7.1. The Ticker widget
Here’s the header file: #ifndef TICKER_H #define TICKER_H #include class Ticker : public QWidget { Q_OBJECT Q_PROPERTY(QString text READ text WRITE setText) public: Ticker(QWidget *parent = 0); void setText(const QString &newText); QString text() const { return myText; } QSize sizeHint() const; protected: void paintEvent(QPaintEvent *event); void timerEvent(QTimerEvent *event); void showEvent(QShowEvent *event); void hideEvent(QHideEvent *event); private: QString myText; int offset; int myTimerId; }; #endif
We reimplement four event handlers in Ticker, three of which we have not seen before: timerEvent(), showEvent(), and hideEvent(). Now let’s review the implementation: #include #include "ticker.h" Ticker::Ticker(QWidget *parent) : QWidget(parent) { offset = 0; myTimerId = 0; }
The constructor initializes the offset variable to 0. The x coordinate at which the text is drawn is derived from the offset value. Timer IDs are always non-zero, so we use 0 to indicate that no timer has been started.
The setText() function sets the text to display. It calls update() to request a repaint and updateGeometry() to notify any layout manager responsible for the Ticker widget about a size hint change. QSize Ticker::sizeHint() const { return fontMetrics().size(0, text()); }
The sizeHint() function returns the space needed by the text as the widget’s ideal size. QWidget::fontMetrics() returns a QFontMetrics object that can be queried to obtain information relating to the widget’s font. In this case, we ask for the size required by the given text. (The first argument to QFontMetrics:: size() is a flag that isn’t needed for simple strings, so we just pass 0.) void Ticker::paintEvent(QPaintEvent * /* event */) { QPainter painter(this); int textWidth = fontMetrics().width(text()); if (textWidth < 1) return; int x = -offset; while (x < width()) { painter.drawText(x, 0, textWidth, height(), Qt::AlignLeft | Qt::AlignVCenter, text()); x += textWidth; } }
The paintEvent() function draws the text using QPainter::drawText(). It uses fontMetrics() to ascertain how much horizontal space the text requires, and then draws the text as many times as necessary to fill the entire width of the widget, taking offset into account. void Ticker::showEvent(QShowEvent * /* event */) { myTimerId = startTimer(30); }
The showEvent() function starts a timer. The call to QObject::startTimer() returns an ID number, which we can use later to identify the timer. QObject supports multiple independent timers, each with its own time interval. After the call to startTimer(), Qt will generate a timer event approximately every 30 milliseconds; the accuracy depends on the underlying operating system.
168
7. Event Processing
We could have called startTimer() in the Ticker constructor, but we save some resources by having Qt generate timer events only when the widget is actually visible. void Ticker::timerEvent(QTimerEvent *event) { if (event->timerId() == myTimerId) { ++offset; if (offset >= fontMetrics().width(text())) offset = 0; scroll(-1, 0); } else { QWidget::timerEvent(event); } }
The timerEvent() function is called at intervals by the system. It increments offset by 1 to simulate movement, wrapping at the width of the text. Then it scrolls the contents of the widget one pixel to the left using QWidget::scroll(). It would have been sufficient to call update() instead of scroll(), but scroll() is more efficient because it simply moves the existing pixels on screen and only generates a paint event for the widget’s newly revealed area (a 1-pixel-wide strip in this case). If the timer event isn’t for the timer we are interested in, we pass it on to our base class. void Ticker::hideEvent(QHideEvent * /* event */) { killTimer(myTimerId); }
The hideEvent() function calls QObject::killTimer() to stop the timer. Timer events are low level, and if we need multiple timers, it can become cumbersome to keep track of all the timer IDs. In such situations, it is usually easier to create a QTimer object for each timer. QTimer emits the timeout() signal at each time interval. QTimer also provides a convenient interface for single-shot timers (timers that time out just once).
Installing Event Filters One really powerful feature of Qt’s event model is that a QObject instance can be set to monitor the events of another QObject instance before the latter object even sees them. Let’s suppose that we have a CustomerInfoDialog widget composed of several QLineEdits and that we want to use the Space key to move the focus to the next QLineEdit. This non-standard behavior might be appropriate for an in-house application whose users are trained in its use. A straightforward solution is to subclass QLineEdit and reimplement keyPressEvent() to call focusNextChild(), like this:
This approach has one main disadvantage: If we use several different kinds of widgets in the form (for example, QComboBoxes and QSpinBoxes), we must also subclass them to make them exhibit the same behavior. A better solution is to make CustomerInfoDialog monitor its child widgets’ key press events and implement the required behavior in the monitoring code. This can be achieved using event filters. Setting up an event filter involves two steps: 1. Register the monitoring object with the target object by calling installEventFilter() on the target. 2. Handle the target object’s events in the monitor’s eventFilter() function. A good place to register the monitoring object is in the CustomerInfoDialog constructor: CustomerInfoDialog::CustomerInfoDialog(QWidget *parent) : QDialog(parent) { ••• firstNameEdit->installEventFilter(this); lastNameEdit->installEventFilter(this); cityEdit->installEventFilter(this); phoneNumberEdit->installEventFilter(this); }
Once the event filter is registered, the events that are sent to the firstNameEdit, lastNameEdit, cityEdit, and phoneNumberEdit widgets are first sent to the CustomerInfoDialog’s eventFilter() function before they are sent on to their intended destination. Here’s the eventFilter() function that receives the events: bool CustomerInfoDialog::eventFilter(QObject *target, QEvent *event) { if (target == firstNameEdit || target == lastNameEdit || target == cityEdit || target == phoneNumberEdit) { if (event->type() == QEvent::KeyPress) { QKeyEvent *keyEvent = static_cast(event); if (keyEvent->key() == Qt::Key_Space) { focusNextChild(); return true; } } } return QDialog::eventFilter(target, event); }
170
7. Event Processing
First, we check to see if the target widget is one of the QLineEdits. If the event was a key press, we cast it to QKeyEvent and check which key was pressed. If the pressed key was Space, we call focusNextChild() to pass focus on to the next widget in the focus chain, and we return true to tell Qt that we have handled the event. If we returned false, Qt would send the event to its intended target, resulting in a spurious space being inserted into the QLineEdit. If the target widget isn’t a QLineEdit, or if the event isn’t a Space key press, we pass control to the base class’s implementation of eventFilter(). The target widget could also be some widget that the base class, QDialog, is monitoring. (In Qt 4.1, this is not the case for QDialog. However, other Qt widget classes, such as QScrollArea, do monitor some of their child widgets for various reasons.) Qt offers five levels at which events can be processed and filtered: 1. We can reimplement a specific event handler. Reimplementing event handlers such as mousePressEvent(), keyPressEvent(), and paintEvent() is by far the most common way to process events. We have already seen many examples of this. 2. We can reimplement QObject::event(). By reimplementing the event() function, we can process events before they reach the specific event handlers. This approach is mostly needed to override the default meaning of the Tab key, as shown earlier (p. 164). This is also used to handle rare types of event for which no specific event handler exists (for example, QEvent::HoverEnter). When we reimplement event(), we must call the base class’s event() function for handling the cases we don’t explicitly handle. 3. We can install an event filter on a single QObject. Once an object has been registered using installEventFilter(), all the events for the target object are first sent to the monitoring object’s eventFilter() function. If multiple event filters are installed on the same object, the filters are activated in turn, from the most recently installed back to the first installed. 4. We can install an event filter on the QApplication object. Once an event filter has been registered for qApp (the unique QApplication object), every event for every object in the application is sent to the eventFilter() function before it is sent to any other event filter. This approach is mostly useful for debugging. It can also be used to handle mouse events sent to disabled widgets, which QApplication normally discards. 5. We can subclass QApplication and reimplement notify(). Qt calls QApplication::notify() to send out an event. Reimplementing this function is the only way to get all the events, before any event filters get the opportunity to look at them. Event filters are generally more useful,
171
Installing Event Filters
because there can be any number of concurrent event filters, but only one notify() function. Many event types, including mouse and key events, can be propagated. If the event has not been handled on the way to its target object or by the target object itself, the whole event processing process is repeated, but this time with the target object’s parent as the new target. This continues, going from parent to parent, until either the event is handled or the top-level object is reached. ✕
Window Title QDialog
➌
QGroupBox
➋
QCheckBox
QCheckBox
QCheckBox
QCheckBox ➊
➊ ➋ ➌ Figure 7.2. Event propagation in a dialog
Figure 7.2 shows how a key press event is propagated from child to parent in a dialog. When the user presses a key, the event is first sent to the widget that has focus, in this case the bottom-right QCheckBox. If the QCheckBox doesn’t handle the event, Qt sends it to the QGroupBox, and finally to the QDialog object.
Staying Responsive During Intensive Processing When we call QApplication::exec(), we start Qt’s event loop. Qt issues a few events on startup to show and paint the widgets. After that, the event loop is running, constantly checking to see if any events have occurred and dispatching these events to QObjects in the application. While one event is being processed, additional events may be generated and appended to Qt’s event queue. If we spend too much time processing a particular event, the user interface will become unresponsive. For example, any events generated by the window system while the application is saving a file to disk will not be processed until the file is saved. During the save, the application will not respond to requests from the window system to repaint itself. One solution is to use multiple threads: one thread for the application’s user interface and another thread to perform file saving (or any other time-consuming operation). This way, the application’s user interface will stay responsive while the file is being saved. We will see how to achieve this in Chapter 18. A simpler solution is to make frequent calls to QApplication::processEvents() in the file saving code. This function tells Qt to process any pending events, and
172
7. Event Processing
then returns control to the caller. In fact, QApplication::exec() is little more than a while loop around a processEvents() function call. Here’s an example of how we can keep the user interface responsive using processEvents(), based on the file saving code for Spreadsheet (p. 80): bool Spreadsheet::writeFile(const QString &fileName) { QFile file(fileName); ••• for (int row = 0; row < RowCount; ++row) { for (int column = 0; column < ColumnCount; ++column) { QString str = formula(row, column); if (!str.isEmpty()) out processEvents(QEventLoop::ExcludeUserInputEvents);
telling Qt to ignore mouse and key events. Often, we want to show a QProgressDialog while a long-running operation is taking place. QProgressDialog has a progress bar that keeps the user informed about the progress being made by the application. QProgressDialog also provides a Cancel button that allows the user to abort the operation. Here’s the code for saving a Spreadsheet file using this approach: bool Spreadsheet::writeFile(const QString &fileName) { QFile file(fileName); ••• QProgressDialog progress(this); progress.setLabelText(tr("Saving %1").arg(fileName)); progress.setRange(0, RowCount); progress.setModal(true); for (int row = 0; row < RowCount; ++row) { progress.setValue(row); qApp->processEvents(); if (progress.wasCanceled()) { file.remove(); return false; }
Staying Responsive During Intensive Processing
173
for (int column = 0; column < ColumnCount; ++column) { QString str = formula(row, column); if (!str.isEmpty()) out setSingleShot(true); connect(finishTimer, SIGNAL(timeout()), this, SIGNAL(timeout())); connect(finishTimer, SIGNAL(timeout()), updateTimer, SLOT(stop())); }
In the constructor, we create two QTimer objects: updateTimer is used to refresh the appearance of the widget every second, and finishTimer emits the widget’s timeout() signal when the oven timer reaches 0. The finishTimer only needs to timeout once, so we call setSingleShot(true); by default, timers fire repeatedly until they are stopped or destroyed. The last connect() call is an optimization to stop updating the widget every second when the timer is inactive. void OvenTimer::setDuration(int secs) { if (secs > MaxSeconds) { secs = MaxSeconds; } else if (secs 0) { updateTimer->start(UpdateInterval * 1000); finishTimer->start(secs * 1000); } else { updateTimer->stop(); finishTimer->stop(); } update(); }
The setDuration() function sets the duration of the oven timer to the given number of seconds. We compute the finish time by adding the duration to the
Painter Transformations
185
current time (obtained from QDateTime::currentDateTime()) and store it in the finishTime private variable. At the end, we call update() to redraw the widget with the new duration. The finishTime variable is of type QDateTime. Since the variable holds both a date and a time, we avoid a wrap-around bug when the current time is before midnight and the finish time is after midnight. int OvenTimer::duration() const { int secs = QDateTime::currentDateTime().secsTo(finishTime); if (secs < 0) secs = 0; return secs; }
The duration() function returns the number of seconds left before the timer is due to finish. If the timer is inactive, we return 0. void OvenTimer::mousePressEvent(QMouseEvent *event) { QPointF point = event->pos() - rect().center(); double theta = atan2(-point.x(), -point.y()) * 180 / 3.14159265359; setDuration(duration() + int(theta / DegreesPerSecond)); update(); }
If the user clicks the widget, we find the closest notch using a subtle but effective mathematical formula, and we use the result to set the new duration. Then we schedule a repaint. The notch that the user clicked will now be at the top and will move counterclockwise as time passes until 0 is reached. void OvenTimer::paintEvent(QPaintEvent * /* event */) { QPainter painter(this); painter.setRenderHint(QPainter::Antialiasing, true); int side = qMin(width(), height()); painter.setViewport((width() - side) / 2, (height() - side) / 2, side, side); painter.setWindow(-50, -50, 100, 100); draw(&painter); }
In paintEvent(), we set the viewport to be the largest square area that fits in--50, + --50, 100, 100), side the widget, and we set the window to be the rectangle (+ --50, + --50) to (+50, +50). The that is, the 100 × 100 rectangle extending from (+ qMin() template function returns the lowest of its two arguments. Then we call the draw() function to actually perform the drawing.
186
8. 2D and 3D Graphics
Figure 8.10. The OvenTimer widget at three different sizes
If we had not set the viewport to be a square, the oven timer would be an ellipse when the widget is resized to a non-square rectangle. To avoid such deformations, we must set the viewport and the window to rectangles with the same aspect ratio. Now let’s look at the drawing code: void OvenTimer::draw(QPainter *painter) { static const int triangle[3][2] = { { -2, -49 }, { +2, -49 }, { 0, -47 } }; QPen thickPen(palette().foreground(), 1.5); QPen thinPen(palette().foreground(), 0.5); QColor niceBlue(150, 150, 200); painter->setPen(thinPen); painter->setBrush(palette().foreground()); painter->drawPolygon(QPolygon(3, &triangle[0][0]));
We start by drawing the tiny triangle that marks the 0 position at the top of the widget. The triangle is specified by three hard-coded coordinates, and we use drawPolygon() to render it. What is so convenient about the window–viewport mechanism is that we can hard-code the coordinates we use in the draw commands and still get good resizing behavior. QConicalGradient coneGradient(0, 0, -90.0); coneGradient.setColorAt(0.0, Qt::darkGray); coneGradient.setColorAt(0.2, niceBlue); coneGradient.setColorAt(0.5, Qt::white); coneGradient.setColorAt(1.0, Qt::darkGray); painter->setBrush(coneGradient); painter->drawEllipse(-46, -46, 92, 92);
Painter Transformations
187
We draw the outer circle and fill it using a conical gradient. The gradient’s --90°. center point is located at (0, 0), and the angle is + QRadialGradient haloGradient(0, 0, 20, 0, 0); haloGradient.setColorAt(0.0, Qt::lightGray); haloGradient.setColorAt(0.8, Qt::darkGray); haloGradient.setColorAt(0.9, Qt::white); haloGradient.setColorAt(1.0, Qt::black); painter->setPen(Qt::NoPen); painter->setBrush(haloGradient); painter->drawEllipse(-20, -20, 40, 40);
We fill the inner circle using a radial gradient. The center point and the focal point of the gradient are located at (0, 0). The radius of the gradient is 20. QLinearGradient knobGradient(-7, -25, 7, -25); knobGradient.setColorAt(0.0, Qt::black); knobGradient.setColorAt(0.2, niceBlue); knobGradient.setColorAt(0.3, Qt::lightGray); knobGradient.setColorAt(0.8, Qt::white); knobGradient.setColorAt(1.0, Qt::black); painter->rotate(duration() * DegreesPerSecond); painter->setBrush(knobGradient); painter->setPen(thinPen); painter->drawRoundRect(-7, -25, 14, 50, 150, 50); for (int i = 0; i setPen(thickPen); painter->drawLine(0, -41, 0, -44); painter->drawText(-15, -41, 30, 25, Qt::AlignHCenter | Qt::AlignTop, QString::number(i)); } else { painter->setPen(thinPen); painter->drawLine(0, -42, 0, -44); } painter->rotate(-DegreesPerMinute); } }
We call rotate() to rotate the painter’s coordinate system. In the old coordinate system, the 0-minute mark was on top; now, the 0-minute mark is moved to the place that is appropriate for the time left. We draw the rectangular knob handle after the rotation, since its orientation depends on the rotation angle. In the for loop, we draw the tick marks along the outer circle’s edge and the numbers for each multiple of 5 minutes. The text is drawn in an invisible rectangle underneath the tick mark. At the end of each iteration, we rotate the painter clockwise by 7°, which corresponds to one minute. The next time we draw a tick mark, it will be at a different position around the circle, even
188
8. 2D and 3D Graphics
though the coordinates we pass to the drawLine() and drawText() calls are always the same. The code in the for loop suffers from a minor flaw, which would quickly become apparent if we performed more iterations. Each time we call rotate(), we effectively multiply the current world matrix with a rotation matrix, producing a new world matrix. The rounding errors associated with floating-point arithmetic add up, resulting in an increasingly inaccurate world matrix. Here’s one way to rewrite the code to avoid this issue, using save() and restore() to save and reload the original transformation matrix for each iteration: for (int i = 0; i save(); painter->rotate(-i * DegreesPerMinute); if (i % 5 == 0) { painter->setPen(thickPen); painter->drawLine(0, -41, 0, -44); painter->drawText(-15, -41, 30, 25, Qt::AlignHCenter | Qt::AlignTop, QString::number(i)); } else { painter->setPen(thinPen); painter->drawLine(0, -42, 0, -44); } painter->restore(); }
Another way of implementing an oven timer would have been to compute the (x, y) positions ourselves, using sin() and cos() to find the positions along the circle. But then we would still need to use a translation and a rotation to draw the text at an angle.
High-Quality Rendering with QImage When drawing, we may be faced with a trade-off between speed and accuracy. For example, on X11 and Mac OS X, drawing on a QWidget or QPixmap relies on the platform’s native paint engine. On X11, this ensures that communication with the X server is kept to a minimum; only paint commands are sent rather than actual image data. The main drawback of this approach is that Qt is limited by the platform’s native support: • On X11, features such as antialiasing and support for fractional coordinates are available only if the X Render extension is present on the X server. • On Mac OS X, the native aliased graphics engine uses different algorithms for drawing polygons than X11 and Windows, with slightly different results. When accuracy is more important than efficiency, we can draw to a QImage and copy the result onto the screen. This always uses Qt’s own internal paint
High-Quality Rendering with QImage
189
engine, giving identical results on all platforms. The only restriction is that the QImage on which we paint must be created with an argument of either QImage::Format_RGB32 or QImage::Format_ARGB32_Premultiplied. The premultiplied ARGB32 format is almost identical to the conventional ARGB32 format (0xaarrggbb), the difference being that the red, green, and blue channels are “premultiplied” with the alpha channel. This means that the RGB values, which normally range from 0x00 to 0xFF, are scaled from 0x00 to the alpha value. For example, a 50%-transparent blue color is represented as 0x7F0000FF in ARGB32 format, but 0x7F00007F in premultiplied ARGB32 format, and similarly a 75%-transparent dark green of 0x3F008000 in ARGB32 format would be 0x3F002000 in premultiplied ARGB32 format. Let’s suppose we want to use antialiasing for drawing a widget, and we want to obtain good results even on X11 systems with no X Render extension. The original paintEvent() handler, which relies on X Render for the antialiasing, might look like this: void MyWidget::paintEvent(QPaintEvent *event) { QPainter painter(this); painter.setRenderHint(QPainter::Antialiasing, true); draw(&painter); }
Here’s how to rewrite the widget’s paintEvent() function to use Qt’s platformindependent graphics engine: void MyWidget::paintEvent(QPaintEvent *event) { QImage image(size(), QImage::Format_ARGB32_Premultiplied); QPainter imagePainter(&image); imagePainter.initFrom(this); imagePainter.setRenderHint(QPainter::Antialiasing, true); imagePainter.eraseRect(rect()); draw(&imagePainter); imagePainter.end(); QPainter widgetPainter(this); widgetPainter.drawImage(0, 0, image); }
We create a QImage of the same size as the widget in premultiplied ARGB32 format, and a QPainter to draw on the image. The initFrom() call initializes the painter’s pen, background, and font based on the widget. We perform the drawing using the QPainter as usual, and at the end we reuse the QPainter object to copy the image onto the widget. This approach produces identical high-quality results on all platforms, with the exception of font rendering, which depends on the installed fonts. One particularly powerful feature of Qt’s graphics engine is its support for composition modes. These specify how a source and a destination pixel are merged
190
8. 2D and 3D Graphics
together when drawing. This applies to all painting operations, including pen, brush, gradient, and image drawing. The default composition mode is QImage::CompositionMode_SourceOver, meaning that the source pixel (the pixel we are drawing) is blended on top of the destination pixel (the existing pixel) in such a way that the alpha component of the source defines its translucency. Figure 8.11 shows the result of drawing a semi-transparent butterfly on top of a checker pattern with the different modes.
Source
SourceOver
SourceIn
SourceOut
SourceAtop
Clear
Destination
DestinationOver
DestinationIn
DestinationOut
DestinationAtop
Xor
Figure 8.11. QPainter’s composition modes
Compositions modes are set using QPainter::setCompositionMode(). For example, here’s how to create a QImage containing the XOR of the butterfly and the checker pattern: QImage resultImage = checkerPatternImage; QPainter painter(&resultImage); painter.setCompositionMode(QPainter::CompositionMode_Xor); painter.drawImage(0, 0, butterflyImage);
One issue to be aware of is that the QImage::CompositionMode_Xor operation applies to the alpha channel. This means that if we XOR the color white (0xFFFFFFFF) with itself, we obtain a transparent color (0x00000000), not black (0xFF000000).
Printing Printing in Qt is similar to drawing on a QWidget, QPixmap, or QImage. It consists of the following steps: 1. Create a QPrinter to serve as the paint device. 2. Pop up a QPrintDialog, allowing the user to choose a printer and to set a few options. 3. Create a QPainter to operate on the QPrinter. 4. Draw a page using the QPainter.
191
Printing 5. Call QPrinter::newPage() to advance to the next page. 6. Repeat steps 4 and 5 until all the pages are printed.
On Windows and Mac OS X, QPrinter uses the system’s printer drivers. On Unix, it generates PostScript and sends it to lp or lpr (or to the program set using QPrinter::setPrintProgram()). QPrinter can also be used to generate PDF files by calling setOutputFormat(QPrinter::PdfFormat).
Figure 8.12. Printing a QImage
Let’s start with some simple examples that all print on a single page. The first example prints a QImage: void PrintWindow::printImage(const QImage &image) { QPrintDialog printDialog(&printer, this); if (printDialog.exec()) { QPainter painter(&printer); QRect rect = painter.viewport(); QSize size = image.size(); size.scale(rect.size(), Qt::KeepAspectRatio); painter.setViewport(rect.x(), rect.y(), size.width(), size.height()); painter.setWindow(image.rect()); painter.drawImage(0, 0, image); } }
We assume that the PrintWindow class has a member variable called printer of type QPrinter. We could simply have created the QPrinter on the stack in
192
8. 2D and 3D Graphics
printImage(), but then it would not remember the user’s settings from one print
run to another. We create a QPrintDialog and call exec() to show it. It returns true if the user clicked the OK button; otherwise, it returns false. After the call to exec(), the QPrinter object is ready to use. (It is also possible to print without using a QPrintDialog, by directly calling QPrinter member functions to set things up.) Next, we create a QPainter to draw on the QPrinter. We set the window to the image’s rectangle and the viewport to a rectangle with the same aspect ratio, and we draw the image at position (0, 0). By default, QPainter’s window is initialized so that the printer appears to have a similar resolution as the screen (usually somewhere between 72 and 100 dots per inch), making it easy to reuse widget painting code for printing. Here, it didn’t matter, because we set our own window. Printing items that take up no more than a single page is simple, but many applications need to print multiple pages. For those, we need to paint one page at a time and call newPage() to advance to the next page. This raises the problem of determining how much information we can print on each page. There are two main approaches to handling multi-page documents with Qt: • We can convert our data to HTML and render it using QTextDocument, Qt’s rich text engine. • We can perform the drawing and the page breaking by hand. We will review both approaches in turn. As an example, we will print a flower guide: a list of flower names, each with a textual description. Each entry in the guide is stored as a string of the format “name: description”, for example: Miltonopsis santanae: A most dangerous orchid species.
Since each flower’s data is represented by a single string, we can represent all the flowers in the guide using one QStringList. Here’s the function that prints a flower guide using Qt’s rich text engine: void PrintWindow::printFlowerGuide(const QStringList &entries) { QString html; foreach (QString entry, entries) { QStringList fields = entry.split(": "); QString title = Qt::escape(fields[0]); QString body = Qt::escape(fields[1]); html += "
\n" "
" "" + title + "\n
" + body + "\n
\n \n"; } printHtml(html); }
193
Printing
The first step is to convert the QStringList into HTML. Each flower becomes an HTML table with two cells. We use Qt::escape() to replace the special characters ‘&’, ‘’ with the corresponding HTML entities (“&”, “”). Then we call printHtml() to print the text. void PrintWindow::printHtml(const QString &html) { QPrintDialog printDialog(&printer, this); if (printDialog.exec()) { QPainter painter(&printer); QTextDocument textDocument; textDocument.setHtml(html); textDocument.print(&printer); } }
The printHtml() function pops up a QPrintDialog and takes care of printing an HTML document. It can be reused “as is” in any Qt application to print arbitrary HTML pages.
Aponogeton distachyos
Trapa natans
The Cape pondweed (water hawthorn) is a deciduous perennial that has floating, oblong, dark green leaves which are sometimes splashed purple. The waxy-white flowers have a characteristic 'forked' appearance, sweet scent and black stamens. They appear from early spring until fall. They grow in deep or shallow water and spread to 1.2 m.
The Jesuit's nut (or water chestnut) has mid-green diamond-shaped leaves with deeply toothed edges that grow in neat rosettes. The center of each leaf is often marked with deep purple blotches. White flowers are produced in summer. Each floating plant can spread to 23 cm.
Cabomba caroliniana
Zantedeschia aethiopica
The Fish grass (or fanwort or Washington grass) is a useful oxygenator for ponds. It is a deciduous or semi-evergreen submerged perennial that is used by fish as a source of food and as a place in which to spawn. Plants form spreading hummocks of fan-shaped, coarsly divided leaves which are bright green. Tiny white flowers appear in the summer.
The Arum lily is a South African native that grows well in shallow water. It flowers throughout the summer, with the erect funnel-shaped spathes being held well above the arrow-shaped glossy, deep green leaves. Each spathe surrounds a central yellow spadix. The leaves and flowering stems arise from a tuber. Plants can reach up to 90 cm in height, spreading to 45 cm.
Caltha palustris The Marsh marigold (or kingcup) is a deciduous perennial that grows in shallow water around the edges of ponds. It is equally well suited to a bog garden, moist rock garden or herbaceous border. The rounded dark green leaves set off its large, cup-shaped golden-yellow flowers. Plants can grow to 60 cm in height, with a spread of 45 cm. The double-flowered cultivar 'Flore Plena' only reaches 10 cm.
Ceratophyllum demersum The Hornwort is a deciduous perennial that produces feathery submerged foliage. It sometimes floats and spreads over a large area. It is a good oxygenator and grows best in cool deep water. It has no roots.
Juncus effusus 'Spiralis' The Corkscrew rush is a tufted evergreen perennial with mid-green leafless stems which are twisted and curled like a corkscrew. The stems often lie on the ground. The greenish-brown flowers appear in summer. Plants are best used at the edge of a pond, so that the stems can be seen against the reflective water surface. Strong plants can send up 90 cm-tall twisted shoots which are used in modern flower arranging.
Nuphar lutea The Yellow water lily has small (6 cm diameter) yellow flowers that are bottle-shaped and sickly smelling. They are held above a mat of broad, oval, mid-green leaves which are about 40 cm wide, giving the plant a spread of up to 1.5 m. The seed heads are rounded and warty. This hardy deciduous perennial thrives in deep water, in sun or shade, and is useful for a water-lily effect where Nymphaea will not grow.
Orontium aquaticum The Golden club's flowers lack the spathe typical of other aroids, leaving the central yellow and white spadix to provide color. A deciduous perennial, the golden club grows equally well in shallow or deep water. In spring, the pencil-like flower spikes (spadices) emerge from among the floating mass of waxy leaves which are a bluish or greyish green. Plants grow to 25 cm high spreading up to 60 cm. Large seeds develop later in the summer and are used to propagate plants while they are still fresh.
1
2
Figure 8.13. Printing a flower guide using QTextDocument
Converting a document to HTML and using QTextDocument to print it is by far the most convenient alternative for printing reports and other complex documents. In cases where we need more control, we can do the page layout and the drawing by hand. Let’s now see how we can use this approach to print a flower guide. Here’s the new printFlowerGuide() function: void PrintWindow::printFlowerGuide(const QStringList &entries) { QPrintDialog printDialog(&printer, this); if (printDialog.exec()) {
194
8. 2D and 3D Graphics QPainter painter(&printer); QList pages; paginate(&painter, &pages, entries); printPages(&painter, pages); } }
After setting up the printer and constructing the painter, we call the paginate() helper function to determine which entry should appear on which page. The result of this is a list of QStringLists, with each QStringList holding the entries for one page. We pass on that result to printPages(). For example, let’s suppose that the flower guide contains 6 entries, which we will refer to as A , B , C , D , E , and F . Now let’s suppose that there is room for A and B on the first page; C , D , and E on the second page; and F on the third page. The pages list would then have the list [A , B ] at index position 0, the list [C , D , E ] at index position 1, and the list [F ] at index position 2. void PrintWindow::paginate(QPainter *painter, QList *pages, const QStringList &entries) { QStringList currentPage; int pageHeight = painter->window().height() - 2 * LargeGap; int y = 0; foreach (QString entry, entries) { int height = entryHeight(painter, entry); if (y + height > pageHeight && !currentPage.empty()) { pages->append(currentPage); currentPage.clear(); y = 0; } currentPage.append(entry); y += height + MediumGap; } if (!currentPage.empty()) pages->append(currentPage); }
The paginate() function distributes the flower guide entries into pages. It relies on the entryHeight() function, which computes the height of one entry. It also takes into account the vertical gaps at the top and bottom of the page, of size LargeGap. We iterate through the entries and append them to the current page until we come to an entry that doesn’t fit; then we append the current page to the pages list and start a new page. int PrintWindow::entryHeight(QPainter *painter, const QString &entry) { QStringList fields = entry.split(": "); QString title = fields[0]; QString body = fields[1];
195
Printing int textWidth = painter->window().width() - 2 * SmallGap; int maxHeight = painter->window().height();
The entryHeight() function uses QPainter::boundingRect() to compute the vertical space needed by one entry. Figure 8.14 shows the layout of a flower entry and the meaning of the SmallGap and MediumGap constants. SmallGap
SmallGap SmallGap Title
SmallGap SmallGap Body
SmallGap
MediumGap Small Medium Figure 8.14. A flower entry’s layout
void PrintWindow::printPages(QPainter *painter, const QList &pages) { int firstPage = printer.fromPage() - 1; if (firstPage >= pages.size()) return; if (firstPage == -1) firstPage = 0; int lastPage = printer.toPage() - 1; if (lastPage == -1 || lastPage >= pages.size()) lastPage = pages.size() - 1; int numPages = lastPage - firstPage + 1; for (int i = 0; i < printer.numCopies(); ++i) { for (int j = 0; j < numPages; ++j) { if (i != 0 || j != 0) printer.newPage(); int index; if (printer.pageOrder() == QPrinter::FirstPageFirst) { index = firstPage + j; } else {
196
8. 2D and 3D Graphics index = lastPage - j; } printPage(painter, pages[index], index + 1); } } }
The printPages() function’s role is to print each page using printPage() in the correct order and the correct amount of times. Using the QPrintDialog, the user might request several copies, specify a print range, or request the pages in reverse order. It is our responsibility to honor these options—or to disable them using QPrintDialog::setEnabledOptions(). We start by determining the range to print. QPrinter’s fromPage() and toPage() functions return the page numbers selected by the user, or 0 if no range was chosen. We subtract 1 because our pages list is indexed from 0, and set firstPage and lastPage to cover the full range if the user didn’t set any range. Then we print each page. The outer for loop iterates as many times as necessary to produce the number of copies requested by the user. Most printer drivers support multiple copies, so for those QPrinter::numCopies() always returns 1. If the printer driver can’t handle multiple copies, numCopies() returns the number of copies requested by the user, and the application is responsible for printing that number of copies. (In the QImage example earlier in this section, we ignored numCopies() for the sake of simplicity.)
Aponogeton distachyos
Nuphar lutea
The Cape pondweed (water hawthorn) is a deciduous perennial that has floating, oblong, dark green
The Yellow water lily has small (6 cm diameter) yellow flowers that are bottle-shaped and sickly
leaves which are sometimes splashed purple. The waxy-white flowers have a characteristic 'forked'
smelling. They are held above a mat of broad, oval, mid-green leaves which are about 40 cm wide,
appearance, sweet scent and black stamens. They appear from early spring until fall. They grow in deep
giving the plant a spread of up to 1.5 m. The seed heads are rounded and warty. This hardy deciduous
or shallow water and spread to 1.2 m.
perennial thrives in deep water, in sun or shade, and is useful for a water-lily effect where Nymphaea will not grow.
Cabomba caroliniana The Fish grass (or fanwort or Washington grass) is a useful oxygenator for ponds. It is a deciduous or
Orontium aquaticum
semi-evergreen submerged perennial that is used by fish as a source of food and as a place in which to
The Golden club's flowers lack the spathe typical of other aroids, leaving the central yellow and white
spawn. Plants form spreading hummocks of fan-shaped, coarsly divided leaves which are bright green.
spadix to provide color. A deciduous perennial, the golden club grows equally well in shallow or deep
Tiny white flowers appear in the summer.
water. In spring, the pencil-like flower spikes (spadices) emerge from among the floating mass of waxy leaves which are a bluish or greyish green. Plants grow to 25 cm high spreading up to 60 cm. Large seeds develop later in the summer and are used to propagate plants while they are still fresh.
Caltha palustris The Marsh marigold (or kingcup) is a deciduous perennial that grows in shallow water around the edges of ponds. It is equally well suited to a bog garden, moist rock garden or herbaceous border. The rounded
Trapa natans
dark green leaves set off its large, cup-shaped golden-yellow flowers. Plants can grow to 60 cm in
The Jesuit's nut (or water chestnut) has mid-green diamond-shaped leaves with deeply toothed edges
height, with a spread of 45 cm. The double-flowered cultivar 'Flore Plena' only reaches 10 cm.
that grow in neat rosettes. The center of each leaf is often marked with deep purple blotches. White flowers are produced in summer. Each floating plant can spread to 23 cm.
Ceratophyllum demersum The Hornwort is a deciduous perennial that produces feathery submerged foliage. It sometimes floats
Zantedeschia aethiopica
and spreads over a large area. It is a good oxygenator and grows best in cool deep water. It has no
The Arum lily is a South African native that grows well in shallow water. It flowers throughout the
roots.
summer, with the erect funnel-shaped spathes being held well above the arrow-shaped glossy, deep green leaves. Each spathe surrounds a central yellow spadix. The leaves and flowering stems arise from a tuber. Plants can reach up to 90 cm in height, spreading to 45 cm.
Juncus effusus 'Spiralis' The Corkscrew rush is a tufted evergreen perennial with mid-green leafless stems which are twisted and curled like a corkscrew. The stems often lie on the ground. The greenish-brown flowers appear in summer. Plants are best used at the edge of a pond, so that the stems can be seen against the reflective water surface. Strong plants can send up 90 cm-tall twisted shoots which are used in modern flower arranging.
1
2
Figure 8.15. Printing a flower guide using QPainter
The inner for loop iterates through the pages. If the page isn’t the first page, we call newPage() to flush the old page and start painting on a fresh page. We call printPage() to paint each page.
The printPage() function iterates through all the flower guide entries and prints them using two calls to printBox(): one for the title (the flower’s name) and one for the body (its description). It also draws the page number centered at the bottom of the page.
(0,
LargeGap
(0, 0)
(0,
(0, LargeGap)
pageHeight
window
flower entries print area
LargeGap
[page number] number] entries (0, Large Large Height windo
Figure 8.16. The flower guide’s page layout void PrintWindow::printBox(QPainter *painter, const QString &str, const QFont &font, const QBrush &brush) { painter->setFont(font); int boxWidth = painter->window().width(); int textWidth = boxWidth - 2 * SmallGap; int maxHeight = painter->window().height();
The printBox() function draws the outline of a box, then draws the text inside the box.
Graphics with OpenGL OpenGL is a standard API for rendering 2D and 3D graphics. Qt applications can draw 3D graphics by using the QtOpenGL module, which relies on the system’s OpenGL library. This section assumes that you are familiar with OpenGL. If OpenGL is new to you, a good place to start learning it is http://www.opengl.org/.
Figure 8.17. The Tetrahedron application
Drawing graphics with OpenGL from a Qt application is straightforward: We must subclass QGLWidget, reimplement a few virtual functions, and link the application against the QtOpenGL and OpenGL libraries. Because QGLWidget inherits from QWidget, most of what we already know still applies. The main difference is that we use standard OpenGL functions to perform the drawing instead of QPainter.
Graphics with OpenGL
199
To show how this works, we will review the code of the Tetrahedron application shown in Figure 8.17. The application presents a 3D tetrahedron, or four-sided die, with each face drawn using a different color. The user can rotate the tetrahedron by pressing a mouse button and dragging. The user can set the color of a face by double-clicking it and choosing a color from the QColorDialog that pops up. class Tetrahedron : public QGLWidget { Q_OBJECT public: Tetrahedron(QWidget *parent = 0); protected: void initializeGL(); void resizeGL(int width, int height); void paintGL(); void mousePressEvent(QMouseEvent *event); void mouseMoveEvent(QMouseEvent *event); void mouseDoubleClickEvent(QMouseEvent *event); private: void draw(); int faceAtPosition(const QPoint &pos); GLfloat rotationX; GLfloat rotationY; GLfloat rotationZ; QColor faceColors[4]; QPoint lastPos; };
The Tetrahedron class inherits from QGLWidget. The initializeGL(), resizeGL(), and paintGL() functions are reimplemented from QGLWidget. The mouse event handlers are reimplemented from QWidget as usual. Tetrahedron::Tetrahedron(QWidget *parent) : QGLWidget(parent) { setFormat(QGLFormat(QGL::DoubleBuffer | QGL::DepthBuffer)); rotationX = -21.0; rotationY = -57.0; rotationZ = 0.0; faceColors[0] = Qt::red; faceColors[1] = Qt::green; faceColors[2] = Qt::blue; faceColors[3] = Qt::yellow; }
In the constructor, we call QGLWidget::setFormat() to specify the OpenGL display context, and we initialize the class’s private variables. void Tetrahedron::initializeGL() {
200
8. 2D and 3D Graphics qglClearColor(Qt::black); glShadeModel(GL_FLAT); glEnable(GL_DEPTH_TEST); glEnable(GL_CULL_FACE); }
The initializeGL() function is called just once, before paintGL() is called. This is the place where we can set up the OpenGL rendering context, define display lists, and perform other initializations. All the code is standard OpenGL, except for the call to QGLWidget’s qglClearColor() function. If we wanted to stick to standard OpenGL, we would call glClearColor() in RGBA mode and glClearIndex() in color index mode instead. void Tetrahedron::resizeGL(int width, int height) { glViewport(0, 0, width, height); glMatrixMode(GL_PROJECTION); glLoadIdentity(); GLfloat x = GLfloat(width) / height; glFrustum(-x, x, -1.0, 1.0, 4.0, 15.0); glMatrixMode(GL_MODELVIEW); }
The resizeGL() function is called before paintGL() is called the first time, but after initializeGL() is called. It is also called whenever the widget is resized. This is the place where we can set up the OpenGL viewport, projection, and any other settings that depend on the widget’s size. void Tetrahedron::paintGL() { glClear(GL_COLOR_BUFFER_BIT | GL_DEPTH_BUFFER_BIT); draw(); }
The paintGL() function is called whenever the widget needs to be repainted. This is similar to QWidget::paintEvent(), but instead of QPainter functions we use OpenGL functions. The actual drawing is performed by the private function draw(). void Tetrahedron::draw() { static const GLfloat static const GLfloat static const GLfloat static const GLfloat
glRotatef(rotationY, 0.0, 1.0, 0.0); glRotatef(rotationZ, 0.0, 0.0, 1.0); for (int i = 0; i < 4; ++i) { glLoadName(i); glBegin(GL_TRIANGLES); qglColor(faceColors[i]); for (int j = 0; j < 3; ++j) { glVertex3f(coords[i][j][0], coords[i][j][1], coords[i][j][2]); } glEnd(); } }
In draw(), we draw the tetrahedron, taking into account the x, y, and z rotations and the colors stored in the faceColors array. Everything is standard OpenGL, except for the qglColor() call. We could have used one of the OpenGL functions glColor3d() or glIndex() instead, depending on the mode. void Tetrahedron::mousePressEvent(QMouseEvent *event) { lastPos = event->pos(); } void Tetrahedron::mouseMoveEvent(QMouseEvent *event) { GLfloat dx = GLfloat(event->x() - lastPos.x()) / width(); GLfloat dy = GLfloat(event->y() - lastPos.y()) / height(); if (event->buttons() & Qt::LeftButton) { rotationX += 180 * dy; rotationY += 180 * dx; updateGL(); } else if (event->buttons() & Qt::RightButton) { rotationX += 180 * dy; rotationZ += 180 * dx; updateGL(); } lastPos = event->pos(); }
The mousePressEvent() and mouseMoveEvent() functions are reimplemented from QWidget to allow the user to rotate the view by clicking and dragging. The left mouse button allows the user to rotate around the x and y axes, the right mouse button around the x and z axes. After modifying the rotationX variable, and either the rotationY or the rotationZ variable, we call updateGL() to redraw the scene. void Tetrahedron::mouseDoubleClickEvent(QMouseEvent *event) { int face = faceAtPosition(event->pos()); if (face != -1) { QColor color = QColorDialog::getColor(faceColors[face], this);
202
8. 2D and 3D Graphics if (color.isValid()) { faceColors[face] = color; updateGL(); } } }
The mouseDoubleClickEvent() is reimplemented from QWidget to allow the user to set the color of a tetrahedron face by double-clicking it. We call the private function faceAtPosition() to determine which face, if any, is located under the cursor. If a face was double-clicked, we call QColorDialog::getColor() to obtain a new color for that face. Then we update the faceColors array with the new color, and we call updateGL() to redraw the scene. int Tetrahedron::faceAtPosition(const QPoint &pos) { const int MaxSize = 512; GLuint buffer[MaxSize]; GLint viewport[4]; glGetIntegerv(GL_VIEWPORT, viewport); glSelectBuffer(MaxSize, buffer); glRenderMode(GL_SELECT); glInitNames(); glPushName(0); glMatrixMode(GL_PROJECTION); glPushMatrix(); glLoadIdentity(); gluPickMatrix(GLdouble(pos.x()), GLdouble(viewport[3] - pos.y()), 5.0, 5.0, viewport); GLfloat x = GLfloat(width()) / height(); glFrustum(-x, x, -1.0, 1.0, 4.0, 15.0); draw(); glMatrixMode(GL_PROJECTION); glPopMatrix(); if (!glRenderMode(GL_RENDER)) return -1; return buffer[3]; }
The faceAtPosition() function returns the number of the face at a certain --1 if there is no face at that position. The code for position on the widget, or + determining this in OpenGL is a bit complicated. Essentially, what we do is render the scene in GL_SELECT mode to take advantage of OpenGL’s picking capabilities and then retrieve the face number (its “name”) from the OpenGL hit record. Here’s main.cpp: #include #include
Graphics with OpenGL
203
#include "tetrahedron.h" using namespace std; int main(int argc, char *argv[]) { QApplication app(argc, argv); if (!QGLFormat::hasOpenGL()) { cerr mimeData()->hasFormat("text/uri-list")) event->acceptProposedAction(); }
The dragEnterEvent() is called whenever the user drags an object onto a widget. If we call acceptProposedAction() on the event, we indicate that the user can drop the drag object on this widget. By default, the widget wouldn’t accept the drag. Qt automatically changes the cursor to indicate to the user whether or not the widget is a legitimate drop site. Here we want the user to be allowed to drag files but nothing else. To do so, we check the MIME type of the drag. The MIME type text/uri-list is used to store a list of universal resource identifiers (URIs), which can be file names, URLs (such as HTTP or FTP paths), or other global resource identifiers. Standard MIME types are defined by the Internet Assigned Numbers Authority (IANA). They consist of a type and a subtype separated by a slash. MIME types are used by the clipboard and by the drag and drop system to identify different types of data. The official list of MIME types is available at http://www.iana.org/assignments/media-types/. void MainWindow::dropEvent(QDropEvent *event) { QList urls = event->mimeData()->urls(); if (urls.isEmpty()) return; QString fileName = urls.first().toLocalFile();
Enabling Drag and Drop
207
if (fileName.isEmpty()) return; if (readFile(fileName)) setWindowTitle(tr("%1 - %2").arg(fileName) .arg(tr("Drag File"))); }
The dropEvent() is called when the user drops an object onto the widget. We call QMimeData::urls() to obtain a list of QUrls. Typically, users only drag one file at a time, but it is possible for them to drag multiple files by dragging a selection. If there’s more that one URL, or if the URL is not a local file name, we return immediately. QWidget also provides dragMoveEvent() and dragLeaveEvent(), but for most applications they don’t need to be reimplemented.
The second example illustrates how to initiate a drag and accept a drop. We will create a QListWidget subclass that supports drag and drop, and use it as a component in the Project Chooser application shown in Figure 9.1.
Figure 9.1. The Project Chooser application
The Project Chooser application presents the user with two list widgets, populated with names. Each list widget represents a project. The user can drag and drop the names in the list widgets to move a person from one project to another. The drag and drop code is all located in the QListWidget subclass. Here’s the class definition: class ProjectListWidget : public QListWidget { Q_OBJECT public: ProjectListWidget(QWidget *parent = 0); protected: void mousePressEvent(QMouseEvent *event); void mouseMoveEvent(QMouseEvent *event); void dragEnterEvent(QDragEnterEvent *event);
208
9. Drag and Drop void dragMoveEvent(QDragMoveEvent *event); void dropEvent(QDropEvent *event); private: void startDrag(); QPoint startPos; };
The ProjectListWidget class reimplements five event handlers declared in QWidget. ProjectListWidget::ProjectListWidget(QWidget *parent) : QListWidget(parent) { setAcceptDrops(true); }
In the constructor, we enable drops on the list widget. void ProjectListWidget::mousePressEvent(QMouseEvent *event) { if (event->button() == Qt::LeftButton) startPos = event->pos(); QListWidget::mousePressEvent(event); }
When the user presses the left mouse button, we store the mouse position in the startPos private variable. We call QListWidget’s implementation of mousePressEvent() to ensure that the QListWidget has the opportunity to process mouse press events as usual. void ProjectListWidget::mouseMoveEvent(QMouseEvent *event) { if (event->buttons() & Qt::LeftButton) { int distance = (event->pos() - startPos).manhattanLength(); if (distance >= QApplication::startDragDistance()) startDrag(); } QListWidget::mouseMoveEvent(event); }
When the user moves the mouse cursor while holding the left mouse button, we consider starting a drag. We compute the distance between the current mouse position and the position where the left mouse button was pressed. If the distance is larger than QApplication’s recommended drag start distance (normally 4 pixels), we call the private function startDrag() to start dragging. This avoids initiating a drag just because the user’s hand shakes. void ProjectListWidget::startDrag() { QListWidgetItem *item = currentItem(); if (item) { QMimeData *mimeData = new QMimeData; mimeData->setText(item->text());
Enabling Drag and Drop
209
QDrag *drag = new QDrag(this); drag->setMimeData(mimeData); drag->setPixmap(QPixmap(":/images/person.png")); if (drag->start(Qt::MoveAction) == Qt::MoveAction) delete item; } }
In startDrag(), we create an object of type QDrag with this as its parent. The QDrag object stores the data in a QMimeData object. For this example, we provide the data as a text/plain string using QMimeData::setText(). QMimeData provides several functions for handling the most common types of drags (images, URLs, colors, etc.) and can handle arbitrary MIME types represented as QByteArrays. The call to QDrag::setPixmap() sets the icon that follows the cursor while the drag is taking place. The QDrag::start() call starts the dragging operation and blocks until the user drops or cancels the drag. It takes a combination of supported “drag actions” as argument (Qt::CopyAction, Qt::MoveAction, and Qt::LinkAction) and returns the drag action that was executed (or Qt::IgnoreAction if none was executed). Which action is executed depends on what the source widget allows, what the target supports, and which modifier keys are pressed when the drop occurs. After the start() call, Qt takes ownership of the drag object and will delete it when it is no longer required. void ProjectListWidget::dragEnterEvent(QDragEnterEvent *event) { ProjectListWidget *source = qobject_cast(event->source()); if (source && source != this) { event->setDropAction(Qt::MoveAction); event->accept(); } }
The ProjectListWidget widget not only originates drags, it also accepts such drags if they come from another ProjectListWidget in the same application. QDragEnterEvent::source() returns a pointer to the widget that initiated the drag if that widget is part of the same application; otherwise, it returns a null pointer. We use qobject_cast() to ensure that the drag comes from a ProjectListWidget. If all is correct, we tell Qt that we are ready to accept the action as a move action. void ProjectListWidget::dragMoveEvent(QDragMoveEvent *event) { ProjectListWidget *source = qobject_cast(event->source()); if (source && source != this) { event->setDropAction(Qt::MoveAction); event->accept(); } }
210
9. Drag and Drop
The code in dragMoveEvent() is identical to what we did in dragEnterEvent(). It is necessary because we need to override QListWidget’s (actually, QAbstractItemView’s) implementation of the function. void ProjectListWidget::dropEvent(QDropEvent *event) { ProjectListWidget *source = qobject_cast(event->source()); if (source && source != this) { addItem(event->mimeData()->text()); event->setDropAction(Qt::MoveAction); event->accept(); } }
In dropEvent(), we retrieve the dragged text using QMimeData::text() and create an item with that text. We also need to accept the event as a “move action” to tell the source widget that it can now remove the original version of the dragged item. Drag and drop is a powerful mechanism for transferring data between applications. But in some cases, it’s possible to implement drag and drop without using Qt’s drag and drop facilities. If all we want to do is to move data within one widget in one application, we can often simply reimplement mousePressEvent() and mouseReleaseEvent().
Supporting Custom Drag Types In the examples so far, we have relied on QMimeData’s support for common MIME types. Thus, we called QMimeData::setText() to create a text drag, and we used QMimeData:urls() to retrieve the contents of a text/uri-list drag. If we want to drag plain text, HTML text, images, URLs, or colors, we can use QMimeData without formality. But if we want to drag custom data, we must choose between the following alternatives: 1. We can provide arbitrary data as a QByteArray using QMimeData::setData() and extract it later using QMimeData::data(). 2. We can subclass QMimeData and reimplement formats() and retrieveData() to handle our custom data types. 3. For drag and drop operations within a single application, we can subclass QMimeData and store the data using any data structure we want. The first approach does not involve any subclassing, but does have some drawbacks: We need to convert our data structure to a QByteArray even if the drag is not ultimately accepted, and if we want to provide several MIME types to interact nicely with a wide range of applications, we need to store the data several times (once per MIME type). If the data is large, this can slow down the application needlessly. The second and third approaches can avoid or minimize these problems. They give us complete control and can be used together.
Supporting Custom Drag Types
211
To show how these approaches work, we will show how to add drag and drop capabilities to a QTableWidget. The drag will support the following MIME types: text/plain, text/html, and text/csv. Using the first approach, starting a drag looks like this: void MyTableWidget::mouseMoveEvent(QMouseEvent *event) { if (event->buttons() & Qt::LeftButton) { int distance = (event->pos() - startPos).manhattanLength(); if (distance >= QApplication::startDragDistance()) startDrag(); } QTableWidget::mouseMoveEvent(event); } void MyTableWidget::startDrag() { QString plainText = selectionAsPlainText(); if (plainText.isEmpty()) return; QMimeData *mimeData = new QMimeData; mimeData->setText(plainText); mimeData->setHtml(toHtml(plainText)); mimeData->setData("text/csv", toCsv(plainText).toUtf8()); QDrag *drag = new QDrag(this); drag->setMimeData(mimeData); if (drag->start(Qt::CopyAction | Qt::MoveAction) == Qt::MoveAction) deleteSelection(); }
The startDrag() private function is called from mouseMoveEvent() to start dragging a rectangular selection. We set the text/plain and text/html MIME types using setText() and setHtml(), and we set the text/csv type using setData(), which takes an arbitrary MIME type and a QByteArray. The code for the selectionAsString() is more or less the same as the Spreadsheet::copy() function from Chapter 4 (p. 83). QString MyTableWidget::toCsv(const QString &plainText) { QString result = plainText; result.replace("\\", "\\\\"); result.replace("\"", "\\\""); result.replace("\t", "\", \""); result.replace("\n", "\"\n\""); result.prepend("\""); result.append("\""); return result; } QString MyTableWidget::toHtml(const QString &plainText) { QString result = Qt::escape(plainText); result.replace("\t", "
");
212
9. Drag and Drop result.replace("\n", "\n
"); result.prepend("
\n
"); result.append("\n
"); return result; }
The toCsv() and toHtml() functions convert a “tabs and newlines” string into a CSV (comma-separated values) or an HTML string. For example, the data Red Cyan
Green Yellow
Blue Magenta
is converted to "Red", "Green", "Blue" "Cyan", "Yellow", "Magenta"
or to
Red
Green
Blue
Cyan
Yellow
Magenta
The conversion is performed in the simplest way possible, using QString:: replace(). To escape HTML special characters, we use Qt::escape(). void MyTableWidget::dropEvent(QDropEvent *event) { if (event->mimeData()->hasFormat("text/csv")) { QByteArray csvData = event->mimeData()->data("text/csv"); QString csvText = QString::fromUtf8(csvData); ••• event->acceptProposedAction(); } else if (event->mimeData()->hasFormat("text/plain")) { QString plainText = event->mimeData()->text(); ••• event->acceptProposedAction(); } }
Although we provide the data in three different formats, we only accept two of them in dropEvent(). If the user drags cells from a QTableWidget to an HTML editor, we want the cells to be converted into an HTML table. But if the user drags arbitrary HTML into a QTableWidget, we don’t want to accept it. To make this example work, we also need to call setAcceptDrops(true) and setSelectionMode(ContiguousSelection) in the MyTableWidget constructor. We will now redo the example, but this time we will subclass QMimeData to postpone or avoid the (potentially expensive) conversions between QTableWidgetItems and QByteArray. Here’s the definition of our subclass: class TableMimeData : public QMimeData { Q_OBJECT
Instead of storing actual data, we store a QTableWidgetSelectionRange that specifies which cells are being dragged and keep a pointer to the QTableWidget. The formats() and retrieveData() functions are reimplemented from QMimeData. TableMimeData::TableMimeData(const QTableWidget *tableWidget, const QTableWidgetSelectionRange &range) { myTableWidget = tableWidget; myRange = range; myFormats range(); ••• event->acceptProposedAction(); } else if (event->mimeData()->hasFormat("text/csv")) { QByteArray csvData = event->mimeData()->data("text/csv"); QString csvText = QString::fromUtf8(csvData); ••• event->acceptProposedAction(); } else if (event->mimeData()->hasFormat("text/plain")) { QString plainText = event->mimeData()->text(); ••• event->acceptProposedAction(); } QTableWidget::mouseMoveEvent(event); }
The dropEvent() function is similar to the one we had earlier in this section, but this time we optimize it by checking first if we can safely cast the QMimeData object to a TableMimeData. If the qobject_cast() works, this means the drag was originated by a MyTableWidget in the same application, and we can directly access the table data instead of going through QMimeData’s API. If the cast fails, we extract the data the standard way. In this example, we encoded the CSV text using the UTF-8 encoding. If we want to be certain of using the right encoding, we could use the charset parameter of the text/plain MIME type to specify an explicit encoding. Here are a few examples: text/plain;charset=US-ASCII text/plain;charset=ISO-8859-1
Clipboard Handling Most applications make use of Qt’s built-in clipboard handling in one way or another. For example, the QTextEdit class provides cut(), copy(), and paste() slots as well as keyboard shortcuts, so little or no additional code is required. When writing our own classes, we can access the clipboard through QApplication::clipboard(), which returns a pointer to the application’s QClipboard object. Handling the system clipboard is easy: Call setText(), setImage(), or setPixmap() to put data onto the clipboard, and call text(), image(), or pixmap() to retrieve data from the clipboard. We have already seen examples of clipboard use in the Spreadsheet application from Chapter 4. For some applications, the built-in functionality might not be sufficient. For example, we might want to provide data that isn’t just text or an image, or we might want to provide data in many different formats for maximum interoperability with other applications. The issue is very similar to what we encountered earlier with drag and drop, and the answer is also similar: We can subclass QMimeData and reimplement a few virtual functions. If our application supports drag and drop through a custom QMimeData subclass, we can simply reuse the QMimeData subclass and put it on the clipboard using the setMimeData() function. To retrieve the data, we can call mimeData() on the clipboard. On X11, it is usually possible to paste a selection by clicking the middle button of a three-button mouse. This is done using a separate “selection” clipboard. If you want your widgets to support this kind of clipboard as well as the standard one, you must pass QClipboard::Selection as an additional argument to the various clipboard calls. For example, here’s how we would reimplement mouseReleaseEvent() in a text editor to support pasting using the middle mouse button: void MyTextEditor::mouseReleaseEvent(QMouseEvent *event) { QClipboard *clipboard = QApplication::clipboard(); if (event->button() == Qt::MidButton && clipboard->supportsSelection()) { QString text = clipboard->text(QClipboard::Selection); pasteText(text); } }
On X11, the supportsSelection() function returns true. On other platforms, it returns false. If we want to be notified whenever the clipboard’s contents change, we can connect the QClipboard::dataChanged() signal to a custom slot.
◆ ◆
Using the Item View Convenience Classes Using Predefined Models
◆
Implementing Custom Models
◆
Implementing Custom Delegates
10. Item View Classes Many applications let the user search, view, and edit individual items that belong to a data set. The data might be held in files or accessed from a database or a network server. The standard approach to dealing with data sets like this is to use Qt’s item view classes. In earlier versions of Qt, the item view widgets were populated with the entire contents of a data set; the users would perform all their searches and edits on the data held in the widget, and at some point the changes would be written back to the data source. Although simple to understand and use, this approach doesn’t scale well to very large data sets and doesn’t lend itself to situations where we want to display the same data set in two or more different widgets. The Smalltalk language popularized a flexible approach to visualizing large data sets: model–view–controller (MVC). In the MVC approach, the model represents the data set and is responsible for fetching the data that is needed for viewing and for writing back any changes. Each type of data set has its own model, but the API that the models provide to the views is uniform no matter what the underlying data set. The view presents the data to the user. With any large data set only a limited amount of data will be visible at any one time, so that is the only data that the view asks for. The controller mediates between the user and the view, converting user actions into requests to navigate or edit data, which the view then transmits to the model as necessary. Delegate
Data Source
Model
View
Figure 10.1. Qt’s model/view architecture
Qt provides a model/view architecture inspired by the MVC approach. In Qt, the model behaves the same as it does for classic MVC. But instead of a controller, Qt uses a slightly different abstraction: the delegate. The delegate 217
218
10. Item View Classes
is used to provide fine control over how items are rendered and edited. Qt provides a default delegate for every type of view. This is sufficient for most applications, so we usually don’t need to care about it. Using Qt’s model/view architecture, we can use models that only fetch the data that is actually needed for display in the view. This makes handling very large data sets much faster and less memory hungry than reading all the data. And by registering a model with two or more views, we can give the user the opportunity of viewing and interacting with the data in different ways, with little overhead. Qt automatically keeps multiple views in sync, reflecting changes to one in all the others. An additional benefit of the model/view architecture is that if we decide to change how the underlying data set is stored, we just need to change the model; the views will continue to behave correctly. List View 1
List View 2
List View 3
Table View 1
Table View 2
Model
Data Source Figure 10.2. One model can serve multiple views
In many situations, we only need to present relatively small numbers of items to the user. In these common cases, we can use Qt’s convenience item view classes (QListWidget, QTableWidget, and QTreeWidget) and populate them with items directly. These classes behave in a similar way to the item view classes provided by earlier versions of Qt. They store their data in “items” (for example, a QTableWidget contains QTableWidgetItems). Internally, the convenience classes use custom models that make the items visible to the views. For large data sets, duplicating the data is often not an option. In these cases, we can use Qt’s views (QListView, QTableView, and QTreeView), in conjunction with a data model, which can be a custom model or one of Qt’s predefined models. For example, if the data set is held in a database, we can combine a QTableView with a QSqlTableModel.
Using the Item View Convenience Classes Using Qt’s item view convenience subclasses is usually simpler than defining a custom model and is appropriate when we don’t need the benefits of separating the model and the view. We used this technique in Chapter 4 when we subclassed QTableWidget and QTableWidgetItem to implement spreadsheet functionality.
Using the Item View Convenience Classes
219
In this section, we will show how to use the convenience item view subclasses to display items. The first example shows a read-only QListWidget, the second example shows an editable QTableWidget, and the third example shows a read-only QTreeWidget. We begin with a simple dialog that lets the user pick a flowchart symbol from a list. Each item consists of an icon, a text, and a unique ID.
Figure 10.3. The Flowchart Symbol Picker application
Let’s start with an extract from the dialog’s header file: class FlowChartSymbolPicker : public QDialog { Q_OBJECT public: FlowChartSymbolPicker(const QMap &symbolMap, QWidget *parent = 0); int selectedId() const { return id; } void done(int result); ••• };
When we construct the dialog, we must pass it a QMap, and after it --1 if the user didn’t select any has executed we can retrieve the chosen ID (or + item) by calling selectedId(). FlowChartSymbolPicker::FlowChartSymbolPicker( const QMap &symbolMap, QWidget *parent) : QDialog(parent) { id = -1; listWidget = new QListWidget; listWidget->setIconSize(QSize(60, 60)); QMapIterator i(symbolMap);
220
10. Item View Classes while (i.hasNext()) { i.next(); QListWidgetItem *item = new QListWidgetItem(i.value(), listWidget); item->setIcon(iconForSymbol(i.value())); item->setData(Qt::UserRole, i.key()); } ••• }
--1. Next we construct a QListWidget, a We initialize id (the last selected ID) to + convenience item view widget. We iterate over each item in the flowchart symbol map and create a QListWidgetItem to represent each one. The QListWidgetItem constructor takes a QString that represents the text to display, followed by the parent QListWidget. Then we set the item’s icon and we call setData() to store our arbitrary ID in the QListWidgetItem. The iconForSymbol() private function returns a QIcon for a given symbol name. QListWidgetItem’s have several roles, each of which has an associated QVariant. The most common roles are Qt::DisplayRole, Qt::EditRole, and Qt::IconRole, and for these there are convenience setter and getter functions (setText(), setIcon()), but there are several other roles. We can also define custom roles by specifying a numeric value of Qt::UserRole or higher. In our example, we use Qt::UserRole to store each item’s ID.
The omitted part of the constructor is concerned with creating the buttons, laying out the widgets, and setting the window’s title. void FlowChartSymbolPicker::done(int result) { id = -1; if (result == QDialog::Accepted) { QListWidgetItem *item = listWidget->currentItem(); if (item) id = item->data(Qt::UserRole).toInt(); } QDialog::done(result); }
The done() function is reimplemented from QDialog. It is called when the user presses OK or Cancel. If the user clicked OK, we retrieve the relevant item and extract the ID using the data() function. If we were interested in the item’s text, we could retrieve it by calling item->data(Qt::DisplayRole).toString() or more conveniently, item->text(). By default, QListWidget is read-only. If we wanted the user to edit the items, we could set the view’s edit triggers using QAbstractItemView::setEditTriggers(); for example, a setting of QAbstractItemView::AnyKeyPressed means that the user can begin editing an item just by starting to type. Alternatively, we could provide an Edit button (and perhaps Add and Delete buttons) and connect them to slots so that we could handle the editing operations programmatically.
Using the Item View Convenience Classes
221
Now that we have seen how to use a convenience item view class for viewing and selecting data, we will look at an example where we can edit data. Again we are using a dialog, this time one that presents a set of (x, y) coordinates that the user can edit.
Figure 10.4. The Coordinate Setter application
As with the previous example, we will focus on the item view relevant code, starting with the constructor. CoordinateSetter::CoordinateSetter(QList *coords, QWidget *parent) : QDialog(parent) { coordinates = coords; tableWidget = new QTableWidget(0, 2); tableWidget->setHorizontalHeaderLabels( QStringList() at(row); addRow(); tableWidget->item(row, 0)->setText(QString::number(point.x())); tableWidget->item(row, 1)->setText(QString::number(point.y())); } ••• }
The QTableWidget constructor takes the initial number of table rows and columns to display. Every item in a QTableWidget is represented by a QTableWidgetItem, including horizontal and vertical header items. The setHorizontalHeaderLabels() function sets the text for each horizontal table widget item to the corresponding text in the string list it is passed. By default, QTableWidget provides a vertical header with rows labeled from 1, which is exactly what we want, so we don’t need to set the vertical header labels manually.
222
10. Item View Classes
Once we have created and centered the column labels, we iterate through the coordinate data that was passed in. For every (x, y) pair, we create two QTableWidgetItems corresponding to the x and y coordinates. The items are added to the table using QTableWidget::setItem(), which takes a row and a column in addition to the item. By default, QTableWidget allows editing. The user can edit any cell in the table by navigating to it and then either pressing F2 or simply by typing. All changes made by the user in the view will be automatically reflected into the QTableWidgetItems. To prevent editing, we can call setEditTriggers(QAbstractItemView:: NoEditTriggers). void CoordinateSetter::addRow() { int row = tableWidget->rowCount(); tableWidget->insertRow(row); QTableWidgetItem *item0 = new QTableWidgetItem; item0->setTextAlignment(Qt::AlignRight | Qt::AlignVCenter); tableWidget->setItem(row, 0, item0); QTableWidgetItem *item1 = new QTableWidgetItem; item1->setTextAlignment(Qt::AlignRight | Qt::AlignVCenter); tableWidget->setItem(row, 1, item1); tableWidget->setCurrentItem(item0); }
The addRow() slot is invoked when the user clicks the Add Row button. We append a new row using insertRow(). If the user attempts to edit a cell in the new row, the QTableWidget will automatically create a new QTableWidgetItem. void CoordinateSetter::done(int result) { if (result == QDialog::Accepted) { coordinates->clear(); for (int row = 0; row < tableWidget->rowCount(); ++row) { double x = tableWidget->item(row, 0)->text().toDouble(); double y = tableWidget->item(row, 1)->text().toDouble(); coordinates->append(QPointF(x, y)); } } QDialog::done(result); }
Finally, when the user clicks OK, we clear the coordinates that were passed in to the dialog, and create a new set based on the coordinates in the QTableWidget’s items. For our third and final example of Qt’s convenience item view widgets, we will look at some snippets from an application that shows Qt application settings using a QTreeWidget. Read-only is the default for QTreeWidget.
Using the Item View Convenience Classes
223
Figure 10.5. The Settings Viewer application
Here’s an extract from the constructor: SettingsViewer::SettingsViewer(QWidget *parent) : QDialog(parent) { organization = "Trolltech"; application = "Designer"; treeWidget = new QTreeWidget; treeWidget->setColumnCount(2); treeWidget->setHeaderLabels( QStringList() setResizeMode(0, QHeaderView::Stretch); treeWidget->header()->setResizeMode(1, QHeaderView::Stretch); ••• setWindowTitle(tr("Settings Viewer")); readSettings(); }
To access an application’s settings, a QSettings object must be created with the organization’s name and the application’s name as parameters. We set default names (“Designer” by “Trolltech”) and then construct a new QTreeWidget. At the end, we call the readSettings() function. void SettingsViewer::readSettings() { QSettings settings(organization, application); treeWidget->clear(); addChildSettings(settings, 0, ""); treeWidget->sortByColumn(0); treeWidget->setFocus(); setWindowTitle(tr("Settings Viewer - %1 by %2") .arg(application).arg(organization)); }
224
10. Item View Classes
Application settings are stored in a hierarchy of keys and values. The addChildSettings() private function takes a settings object, a parent QTreeWidgetItem, and the current “group”. A group is the QSettings equivalent of a file system directory. The addChildSettings() function can call itself recursively to traverse an arbitrary tree structure. The initial call from the readSettings() function passes 0 as the parent item to represent the root. void SettingsViewer::addChildSettings(QSettings &settings, QTreeWidgetItem *parent, const QString &group) { QTreeWidgetItem *item; settings.beginGroup(group); foreach (QString key, settings.childKeys()) { if (parent) { item = new QTreeWidgetItem(parent); } else { item = new QTreeWidgetItem(treeWidget); } item->setText(0, key); item->setText(1, settings.value(key).toString()); } foreach (QString group, settings.childGroups()) { if (parent) { item = new QTreeWidgetItem(parent); } else { item = new QTreeWidgetItem(treeWidget); } item->setText(0, group); addChildSettings(settings, item, group); } settings.endGroup(); }
The addChildSettings() function is used to create all the QTreeWidgetItems. It iterates over all the keys at the current level in the settings hierarchy and creates one QTableWidgetItem per key. If 0 was passed as the parent item, we create the item as a child of the QTreeWidget itself (making it a top-level item); otherwise, we create the item as a child of parent. The first column is set to the name of the key and the second column to the corresponding value. Next, the function iterates over every group at the current level. For each group, a new QTreeWidgetItem is created with its first column set to the group’s name. The function then calls itself recursively with the group item as the parent to populate the QTreeWidget with the group’s child items. The item view widgets shown in this section allow us to use a style of programming that is very similar to that used in earlier versions of Qt: reading an entire data set into an item view widget, using item objects to represent data elements, and (if the items are editable) writing back to the data source. In the following sections, we will go beyond this simple approach and take full advantage of Qt’s model/view architecture.
225
Using Predefined Models
Using Predefined Models Qt provides several predefined models for use with the view classes: QStringListModel
Stores a list of strings
QStandardItemModel
Stores arbitrary hierarchical data
QDirModel
Encapsulates the local file system
QSqlQueryModel
Encapsulates an SQL result set
QSqlTableModel
Encapsulates an SQL table
QSqlRelationalTableModel
Encapsulates an SQL table with foreign keys
QSortFilterProxyModel
Sorts and/or filters another model
In this section, we will look at how to use the QStringListModel, the QDirModel, and the QSortFilterProxyModel. The SQL models are covered in Chapter 13. Let’s begin with a simple dialog that users can use to add, delete, and edit a QStringList, where each string represents a team leader.
Figure 10.6. The Team Leaders application
Here’s the relevant extract from the constructor: TeamLeadersDialog::TeamLeadersDialog(const QStringList &leaders, QWidget *parent) : QDialog(parent) { model = new QStringListModel(this); model->setStringList(leaders); listView = new QListView; listView->setModel(model); listView->setEditTriggers(QAbstractItemView::AnyKeyPressed | QAbstractItemView::DoubleClicked); ••• }
226
10. Item View Classes
We begin by creating and populating a QStringListModel. Next we create a QListView and set its model to the one we have just created. We also set some editing triggers to allow the user to edit a string simply by starting to type on it or by double-clicking it. By default, no editing triggers are set on a QListView, making the view effectively read-only. void TeamLeadersDialog::insert() { int row = listView->currentIndex().row(); model->insertRows(row, 1); QModelIndex index = model->index(row); listView->setCurrentIndex(index); listView->edit(index); }
When the user clicks the Insert button, the insert() slot is invoked. The slot begins by retrieving the row number for the list view’s current item. Every data item in a model has a corresponding “model index”, which is represented by a QModelIndex object. We will look at model indexes in detail in the next section, but for now it is sufficient to know that an index has three main components: a row, a column, and a pointer to the model to which it belongs. For a one-dimensional list model, the column is always 0. Once we have the row number, we insert one new row at that position. The insertion is performed on the model, and the model automatically updates the list view. We then set the list view’s current index to the blank row we just inserted. Finally, we set the list view to editing mode on the new row, just as if the user had pressed a key or double-clicked to initiate editing. void TeamLeadersDialog::del() { model->removeRows(listView->currentIndex().row(), 1); }
In the constructor, the Delete button’s clicked() signal is connected to the del() slot. Since we are just deleting the current row, we can call removeRows() with the current index position and a row count of 1. Just like with insertion, we rely on the model to update the view accordingly. QStringList TeamLeadersDialog::leaders() const { return model->stringList(); }
Finally, the leaders() function provides a means of reading back the edited strings when the dialog is closed. TeamLeadersDialog could be made into a generic string list editing dialog sim-
ply by parameterizing its window title. Another generic dialog that is often required is one that presents a list of files or directories to the user. The next example uses the QDirModel class, which encapsulates the computer’s file system and is capable of showing (and hiding) various file attributes. This model
Using Predefined Models
227
can apply a filter to restrict the kinds of file system entries that are shown and can order the entries in various ways.
Figure 10.7. The Directory Viewer application
We will begin by looking at the creation and setting up of the model and the view in the Directory Viewer dialog’s constructor. DirectoryViewer::DirectoryViewer(QWidget *parent) : QDialog(parent) { model = new QDirModel; model->setReadOnly(false); model->setSorting(QDir::DirsFirst | QDir::IgnoreCase | QDir::Name); treeView = new QTreeView; treeView->setModel(model); treeView->header()->setStretchLastSection(true); treeView->header()->setSortIndicator(0, Qt::AscendingOrder); treeView->header()->setSortIndicatorShown(true); treeView->header()->setClickable(true); QModelIndex index = model->index(QDir::currentPath()); treeView->expand(index); treeView->scrollTo(index); treeView->resizeColumnToContents(0); ••• }
Once the model has been constructed, we make it editable and set various initial sort ordering attributes. We then create the QTreeView that will display the model’s data. The QTreeView’s header can be used to provide user-controlled sorting. By making the header clickable, the user can sort by whichever column header they click, with repeated clicks alternating between ascending and descending orders. Once the tree view’s header has been set up, we get the model index of the current directory and make sure that this directory is visible by expanding its parents if necessary using expand(), and scrolling to
228
10. Item View Classes
it using scrollTo(). Then we make sure that the first column is wide enough to show all its entries without using ellipses (…). In the part of the constructor code that isn’t shown here, we connected the Create Directory and Remove buttons to slots to perform these actions. We do not need a Rename button since users can rename in-place by pressing F2 and typing. void DirectoryViewer::createDirectory() { QModelIndex index = treeView->currentIndex(); if (!index.isValid()) return; QString dirName = QInputDialog::getText(this, tr("Create Directory"), tr("Directory name")); if (!dirName.isEmpty()) { if (!model->mkdir(index, dirName).isValid()) QMessageBox::information(this, tr("Create Directory"), tr("Failed to create the directory")); } }
If the user enters a directory name in the input dialog, we attempt to create a directory with this name as a child of the current directory. The QDirModel:: mkdir() function takes the parent directory’s index and the name of the new directory, and returns the model index of the directory it created. If the operation fails, it returns an invalid model index. void DirectoryViewer::remove() { QModelIndex index = treeView->currentIndex(); if (!index.isValid()) return; bool ok; if (model->fileInfo(index).isDir()) { ok = model->rmdir(index); } else { ok = model->remove(index); } if (!ok) QMessageBox::information(this, tr("Remove"), tr("Failed to remove %1").arg(model->fileName(index))); }
If the user clicks Remove, we attempt to remove the file or directory associated with the current item. We could use QDir to accomplish that, but QDirModel offers convenience functions that work on QModelIndexes. The last example in this section shows how to use QSortFilterProxyModel. Unlike the other predefined models, this model encapsulates an existing model and manipulates the data that passes between the underlying model and the
Using Predefined Models
229
view. In our example, the underlying model is a QStringListModel initialized with the list of color names recognized by Qt (obtained through QColor::colorNames()). The user can type a filter string in a QLineEdit and specify how this string is to be interpreted (as a regular expression, a wildcard pattern, or a fixed string) using a combobox.
Figure 10.8. The Color Names application
Here’s an extract from the ColorNamesDialog constructor: ColorNamesDialog::ColorNamesDialog(QWidget *parent) : QDialog(parent) { sourceModel = new QStringListModel(this); sourceModel->setStringList(QColor::colorNames()); proxyModel = new QSortFilterProxyModel(this); proxyModel->setSourceModel(sourceModel); proxyModel->setFilterKeyColumn(0); listView = new QListView; listView->setModel(proxyModel); ••• syntaxComboBox = new QComboBox; syntaxComboBox->addItem(tr("Regular expression"), QRegExp::RegExp); syntaxComboBox->addItem(tr("Wildcard"), QRegExp::Wildcard); syntaxComboBox->addItem(tr("Fixed string"), QRegExp::FixedString); ••• }
The QStringListModel is created and populated in the usual way. This is followed by the construction of the QSortFilterProxyModel. We pass the underlying model using setSourceModel() and tell the proxy to filter based on column 0 of the original model. The QComboBox::addItem() function accepts an optional “data” argument of type QVariant; we use this to store the QRegExp::PatternSyntax value that corresponds to each item’s text.
The reapplyFilter() slot is invoked whenever the user changes the filter string or the pattern syntax combobox. We create a QRegExp using the text in the line edit. Then we set its pattern syntax to the one stored in the syntax combobox’s current item’s data. When we call setFilterRegExp(), the new filter becomes active and the view is automatically updated.
Implementing Custom Models Qt’s predefined models offer a convenient means of handling and viewing data. However, some data sources cannot be used efficiently using the predefined models, and for these situations it is necessary to create custom models optimized for the underlying data source. Before we embark on creating custom models, let’s first review the key concepts used in Qt’s model/view architecture. Every data element in a model has a model index and a set of attributes, called roles, that can take arbitrary values. We saw earlier in the chapter that the most commonly used roles are Qt::DisplayRole and Qt::EditRole. Other roles are used for supplementary data (for example, Qt::ToolTipRole, Qt::StatusTipRole, and Qt::WhatsThisRole), and yet others for controlling basic display attributes (such as Qt::FontRole, Qt:: TextAlignmentRole, Qt::TextColorRole, and Qt::BackgroundColorRole). Table Model
List Model root row 0 1
row 0
Tree Model
root
root row 0
1
0
2
2
1 column
0
1
2
1 2 column
Figure 10.9. Schematic view of Qt’s models
0
1
2
Implementing Custom Models
231
For a list model, the only relevant index component is the row number, accessible from QModelIndex::row(). For a table model, the relevant index components are the row and column numbers, accessible from QModelIndex::row() and QModelIndex::column(). For both list and table models, every item’s parent is the root, which is represented by an invalid QModelIndex. The first two examples in this section show how to implement custom table models. A tree model is similar to a table model, with the following differences. Like a table model, the parent of top-level items is the root (an invalid QModelIndex), but every other item’s parent is some other item in the hierarchy. Parents are accessible from QModelIndex::parent(). Every item has its role data, and zero or more children, each an item in its own right. Since items can have other items as children, it is possible to represent recursive (tree-like) data structures, as the final example in this section will show. The first example in this section is a read-only table model that shows currency values in relation to each other.
Figure 10.10. The Currencies application
The application could be implemented using a simple table, but we want to use a custom model to take advantage of certain properties of the data to minimize storage. If we were to store the 162 currently traded currencies in a table, we would need to store 162 × 162 = 26 244 values; with the custom model presented below, we only need to store 162 values (the value of each currency in relation to the U.S. dollar). The CurrencyModel class will be used with a standard QTableView. The CurrencyModel is populated with a QMap; each key is a currency code and each value is the value of the currency in U.S. dollars. Here’s a code snippet that shows how the map is populated and how the model is used: QMap currencyMap; currencyMap.insert("AUD", 1.3259); currencyMap.insert("CHF", 1.2970); ••• currencyMap.insert("SGD", 1.6901); currencyMap.insert("USD", 1.0000);
Now we can look at the implementation of the model, starting with its header: class CurrencyModel : public QAbstractTableModel { public: CurrencyModel(QObject *parent = 0); void setCurrencyMap(const QMap &map); int rowCount(const QModelIndex &parent) const; int columnCount(const QModelIndex &parent) const; QVariant data(const QModelIndex &index, int role) const; QVariant headerData(int section, Qt::Orientation orientation, int role) const; private: QString currencyAt(int offset) const; QMap currencyMap; };
We have chosen to subclass QAbstractTableModel for our model since that most closely matches our data source. Qt provides several model base classes, including QAbstractListModel, QAbstractTableModel, and QAbstractItemModel. The QAbstractItemModel class is used to support a wide variety of models, including those that are based on recursive data structures, while the QAbstractListModel and QAbstractTableModel classes are provided for convenience when using onedimensional or two-dimensional data sets. QObject QAbstractItemModel QAbstractListModel
QAbstractTableModel
Figure 10.11. Inheritance tree for the abstract model classes
For a read-only table model, we must reimplement three functions: rowCount(), columnCount(), and data(). In this case, we have also reimplemented headerData(), and we provide a function to initialize the data (setCurrencyMap()). CurrencyModel::CurrencyModel(QObject *parent) : QAbstractTableModel(parent) { }
Implementing Custom Models
233
We do not need to do anything in the constructor, except pass the parent parameter to the base class. int CurrencyModel::rowCount(const QModelIndex & /* parent */) const { return currencyMap.count(); } int CurrencyModel::columnCount(const QModelIndex & /* parent */) const { return currencyMap.count(); }
For this table model, the row and column counts are the number of currencies in the currency map. The parent parameter has no meaning for a table model; it is there because rowCount() and columnCount() are inherited from the more generic QAbstractItemModel base class, which supports hierarchies. QVariant CurrencyModel::data(const QModelIndex &index, int role) const { if (!index.isValid()) return QVariant(); if (role == Qt::TextAlignmentRole) { return int(Qt::AlignRight | Qt::AlignVCenter); } else if (role == Qt::DisplayRole) { QString rowCurrency = currencyAt(index.row()); QString columnCurrency = currencyAt(index.column()); if (currencyMap.value(rowCurrency) == 0.0) return "####"; double amount = currencyMap.value(columnCurrency) / currencyMap.value(rowCurrency); return QString("%1").arg(amount, 0, ’f’, 4); } return QVariant(); }
The data() function returns the value of any of an item’s roles. The item is specified as a QModelIndex. For a table model, the interesting components of a QModelIndex are its row and column number, available using row() and column(). If the role is Qt::TextAlignmentRole, we return an alignment suitable for numbers. If the display role is Qt::DisplayRole, we look up the value for each currency and calculate the exchange rate. We could return the calculated value as a double, but then we would have no control over how many decimal places were shown (unless we use a custom delegate). Instead, we return the value as a string, formatted as we want.
The headerData() function is called by the view to populate its horizontal and vertical headers. The section parameter is the row or column number (depending on the orientation). Since the rows and columns have the same currency codes, we do not care about the orientation and simply return the code of the currency for the given section number. void CurrencyModel::setCurrencyMap(const QMap &map) { currencyMap = map; reset(); }
The caller can change the currency map using setCurrencyMap(). The QAbstractItemModel::reset() call tells any views that are using the model that all their data is invalid; this forces them to request fresh data for the items that are visible. QString CurrencyModel::currencyAt(int offset) const { return (currencyMap.begin() + offset).key(); }
The currencyAt() function returns the key (the currency code) at the given offset in the currency map. We use an STL-style iterator to find the item and call key() on it. As we have just seen, it is not difficult to create read-only models, and depending on the nature of the underlying data, there are potential savings in memory and speed with a well-designed model. The next example, the Cities application, is also table-based, but this time all the data is entered by the user. This application is used to store values indicating the distance between any two cities. Like the previous example, we could simply use a QTableWidget and store one item for every city pair. However, a custom model could be more efficient, because the distance from any city A to any different city B is the same whether traveling from A to B or from B to A , so the items are mirrored along the main diagonal. To see how a custom model compares with a simple table, let us assume that we have three cities, A , B , and C . If we store a value for every combination, we would need to store nine values. A carefully designed model would require only the three items (A , B ), (A , C ), and (B , C ).
Implementing Custom Models
235
Figure 10.12. The Cities application
Here’s how we set up and use the model: QStringList cities; cities setTextAlignment(Qt::AlignRight); tableWidget->setItem(row, 1, item1); } ••• }
The constructor creates a table widget, and instead of simply using the default delegate, we set our custom TrackDelegate, passing it the column that holds time data. We begin by setting the column headings, and then iterate through the data, populating the rows with the name and duration of each track. The rest of the constructor and the rest of the TrackEditor dialog holds no surprises, so we will now look at the TrackDelegate that handles the rendering and editing of track data. class TrackDelegate : public QItemDelegate { Q_OBJECT public: TrackDelegate(int durationColumn, QObject *parent = 0);
We use QItemDelegate as our base class, so that we benefit from the default delegate implementation. We could also have used QAbstractItemDelegate if we had wanted to start from scratch. To provide a delegate that can edit data, we must implement createEditor(), setEditorData(), and setModelData(). We also implement paint() to change the rendering of the duration column. TrackDelegate::TrackDelegate(int durationColumn, QObject *parent) : QItemDelegate(parent) { this->durationColumn = durationColumn; }
The durationColumn parameter to the constructor tells the delegate which column holds the track duration. void TrackDelegate::paint(QPainter *painter, const QStyleOptionViewItem &option, const QModelIndex &index) const { if (index.column() == durationColumn) { int secs = index.model()->data(index, Qt::DisplayRole).toInt(); QString text = QString("%1:%2") .arg(secs / 60, 2, 10, QChar(’0’)) .arg(secs % 60, 2, 10, QChar(’0’)); QStyleOptionViewItem myOption = option; myOption.displayAlignment = Qt::AlignRight | Qt::AlignVCenter; drawDisplay(painter, myOption, myOption.rect, text); drawFocus(painter, myOption, myOption.rect); } else{ QItemDelegate::paint(painter, option, index); } }
Since we want to render the duration in the form “minutes : seconds”, we have reimplemented the paint() function. The arg() calls take an integer to render as a string, how many characters the string should have, the base of the integer (10 for decimal), and the padding character.
Implementing Custom Delegates
247
To right-align the text, we copy the current style options and overwrite the default alignment. We then call QItemDelegate::drawDisplay() to draw the text, followed by QItemDelegate::drawFocus(), which will draw a focus rectangle if the item has focus and will do nothing otherwise. Using drawDisplay() is very convenient, especially when used with our own style options. We could also draw using the painter directly. QWidget *TrackDelegate::createEditor(QWidget *parent, const QStyleOptionViewItem &option, const QModelIndex &index) const { if (index.column() == durationColumn) { QTimeEdit *timeEdit = new QTimeEdit(parent); timeEdit->setDisplayFormat("mm:ss"); connect(timeEdit, SIGNAL(editingFinished()), this, SLOT(commitAndCloseEditor())); return timeEdit; } else { return QItemDelegate::createEditor(parent, option, index); } }
We only want to control the editing of track durations, leaving the editing of track names to the default delegate. We achieve this by checking which column the delegate has been asked to provide an editor for. If it’s the duration column, we create a QTimeEdit, set the display format appropriately,and connect its editingFinished() signal to our commitAndCloseEditor() slot. For any other column, we pass on the edit handling to the default delegate. void TrackDelegate::commitAndCloseEditor() { QTimeEdit *editor = qobject_cast(sender()); emit commitData(editor); emit closeEditor(editor); }
If the user presses Enter or moves the focus out of the QTimeEdit (but not if they press Esc), the editingFinished() signal is emitted and the commitAndCloseEditor() slot is called. This slot emits the commitData() signal to inform the view that there is edited data to replace existing data. It also emits the closeEditor() signal to notify the view that this editor is no longer required, at which point the model will delete it. The editor is retrieved using QObject::sender(), which returns the object that emitted the signal that triggered the slot. If the user cancels (by pressing Esc), the view will simply delete the editor. void TrackDelegate::setEditorData(QWidget *editor, const QModelIndex &index) const { if (index.column() == durationColumn) { int secs = index.model()->data(index, Qt::DisplayRole).toInt(); QTimeEdit *timeEdit = qobject_cast(editor); timeEdit->setTime(QTime(0, secs / 60, secs % 60)); } else {
When the user initiates editing, the view calls createEditor() to create an editor, and then setEditorData() to initialize the editor with the item’s current data. If the editor is for the duration column, we extract the track’s duration in seconds and set the QTimeEdit’s time to the corresponding number of minutes and seconds; otherwise, we let the default delegate handle the initialization. void TrackDelegate::setModelData(QWidget *editor, QAbstractItemModel *model, const QModelIndex &index) const { if (index.column() == durationColumn) { QTimeEdit *timeEdit = qobject_cast(editor); QTime time = timeEdit->time(); int secs = (time.minute() * 60) + time.second(); model->setData(index, secs); } else { QItemDelegate::setModelData(editor, model, index); } }
If the user completes the edit (for example, by left-clicking outside the editor widget, or by pressing Enter or Tab) rather than canceling it, the model must be updated with the editor’s data. If the duration was edited, we extract the minutes and seconds from the QTimeEdit, and set the data to the corresponding number of seconds. Although not necessary in this case, it is entirely possible to create a custom delegate that finely controls the editing and rendering of any item in a model. We have chosen to take control of a particular column, but since the QModelIndex is passed to all the QItemDelegate functions that we reimplement, we can take control by column, row, rectangular region, parent, or any combination of these, right down to individual items if required. In this chapter, we have presented a broad overview of Qt’s model/view architecture. We have shown how to use the view convenience subclasses, how to use Qt’s predefined models, and how to create custom models and custom delegates. But the model/view architecture is so rich that we have not had the space to cover all the things it makes possible. For example, we could create a custom view that does not render its items as a list, table, or tree. This is done by the Chart example located in Qt’s examples/itemviews/chart directory, which shows a custom view that renders model data in the form of a pie chart. It is also possible to use multiple views to view the same model without any formality. Any edits made through one view will be automatically and immediately reflected in the other views. This kind of functionality is particularly useful for viewing large data sets where the user may wish to see sections of data that are logically far apart. The architecture also supports selections: Where two
Implementing Custom Delegates
249
or more views are using the same model, each view can be set to have its own independent selections, or the selections can be shared across the views. Qt’s online documentation provides comprehensive coverage of item view programming and the classes that implement it. See http://doc.trolltech. com/4.1/model-view.html for a list of all the relevant classes, and http://doc. trolltech.com/4.1/model-view-programming.html for additional information and links to the relevant examples included with Qt.
◆
Sequential Containers
◆
Associative Containers
◆
Generic Algorithms
◆
Strings, Byte Arrays, and Variants
11. Container Classes Container classes are general-purpose template classes that store items of a given type in memory. C++ already offers many containers as part of the Standard Template Library (STL), which is included in the Standard C++ library. Qt provides its own container classes, so for Qt programs we can use both the Qt and the STL containers. The main advantages of the Qt containers are that they behave the same on all platforms and that they are implicitly shared. Implicit sharing, or “copy on write”, is an optimization that makes it possible to pass entire containers as values without any significant performance cost. The Qt containers also feature easy-to-use iterator classes inspired by Java, they can be streamed using QDataStream, and they usually result in less code in the executable than the corresponding STL containers. Finally, on some hardware platforms supported by Qtopia Core (the Qt version for mobile devices), the Qt containers are the only ones available. Qt offers both sequential containers such as QVector, QLinkedList, and QList, and associative containers such as QMap and QHash. Conceptually, the sequential containers store items one after another, whereas the associative containers store key–value pairs. Qt also provides generic algorithms that perform operations on arbitrary containers. For example, the qSort() algorithm sorts a sequential container, and qBinaryFind() performs a binary search on a sorted sequential container. These algorithms are similar to those offered by the STL. If you are already familiar with the STL containers and have STL available on your target platforms, you might want to use them instead of, or in addition to, the Qt containers. For more information about the STL classes and functions, a good place to start is SGI’s STL web site: http://www.sgi.com/tech/stl/. In this chapter, we will also look at QString, QByteArray, and QVariant, since they have a lot in common with containers. QString is a 16-bit Unicode string used throughout Qt’s API. QByteArray is an array of 8-bit chars useful for storing raw binary data. QVariant is a type that can store most C++ and Qt value types. 251
252
11. Container Classes
Sequential Containers A QVector is an array-like data structure that stores its items at adjacent positions in memory. What distinguishes a vector from a plain C++ array is that a vector knows its own size and can be resized. Appending extra items to the end of a vector is fairly efficient, while inserting items at the front or in the middle of a vector can be expensive. 0
1
2
3
4
937.81
25.984
308.74
310.92
40.9
Figure 11.1. A vector of doubles
If we know in advance how many items we are going to need, we can give the vector an initial size when we define it and use the [] operator to assign a value to the items; otherwise, we must either resize the vector later on or append items. Here’s an example where we specify the initial size: QVector vect(3); vect[0] = 1.0; vect[1] = 0.540302; vect[2] = -0.416147;
Here’s the same example, this time starting with an empty vector and using the append() function to append items at the end: QVector vect; vect.append(1.0); vect.append(0.540302); vect.append(-0.416147);
We can also use the sizes().begin(); while (i != splitter->sizes().end()) { do_something(*i); ++i; }
This is because QSplitter::sizes() returns a new QList by value every time it is called. If we don’t store the return value, C++ automatically destroys it before we have even started iterating, leaving us with a dangling iterator. To make matters worse, each time the loop is run, QSplitter::sizes() must generate a new copy of the list because of the splitter->sizes().end() call. In summary: When using STL-style iterators, always iterate on a copy of a container returned by value. With read-only Java-style iterators, we don’t need to take a copy. The iterator takes a copy for us behind the scenes, ensuring that we always iterate over the data that the function first returned. For example: QListIterator i(splitter->sizes()); while (i.hasNext()) { do_something(i.next()); }
Copying a container like this sounds expensive, but it isn’t, thanks to an optimization called implicit sharing. This means that copying a Qt container is about as fast as copying a single pointer. Only if one of the copies is changed is data actually copied—and this is all handled automatically behind the scenes. For this reason, implicit sharing is sometimes called “copy on write”. The beauty of implicit sharing is that it is an optimization that we don’t need to think about; it simply works, without requiring any programmer intervention. At the same time, implicit sharing encourages a clean programming style where objects are returned by value. Consider the following function: QVector sineTable() { QVector vect(360); for (int i = 0; i < 360; ++i) vect[i] = sin(i / (2 * M_PI)); return vect; }
The call to the function looks like this: QVector table = sineTable();
258
11. Container Classes
STL, in comparison, encourages us to pass the vector as a non-const reference to avoid the copy that takes place when the function’s return value is stored in a variable: using namespace std; void sineTable(vector &vect) { vect.resize(360); for (int i = 0; i < 360; ++i) vect[i] = sin(i / (2 * M_PI)); }
The call then becomes more tedious to write and less clear to read: vector table; sineTable(table);
Qt uses implicit sharing for all of its containers and for many other classes, including QByteArray, QBrush, QFont, QImage, QPixmap, and QString. This makes these classes very efficient to pass by value, both as function parameters and as return values. Implicit sharing is a guarantee from Qt that the data won’t be copied if we don’t modify it. To get the best out of implicit sharing, we can adopt a couple of new programming habits. One habit is to use the at() function rather than the [] operator for read-only access on a (non-const) vector or list. Since Qt’s containers cannot tell whether [] appears on the left side of an assignment or not, it assumes the worst and forces a deep copy to occur—whereas at() isn’t allowed on the left side of an assignment. A similar issue arises when we iterate over a container with STL-style iterators. Whenever we call begin() or end() on a non-const container, Qt forces a deep copy to occur if the data is shared. To prevent this inefficiency, the solution is to use const_iterator, constBegin(), and constEnd() whenever possible. Qt provides one last method for iterating over items in a sequential container: the foreach loop. It looks like this: QLinkedList list; ... foreach (Movie movie, list) { if (movie.title() == "Citizen Kane") { cout setHeaderData(Cd_Year, Qt::Horizontal, tr("Year")); cdModel->select();
The constructor begins by setting up the QSqlRelationalTableModel that handles the cd table. The setRelation() call tells the model that its artistid field (whose field index is held by Cd_ArtistId) holds the id foreign key from the artist table, and that it should display the corresponding name field’s contents instead of IDs. If the user chooses to edit this field (for example, by pressing F2), the model will automatically present a combobox with the names of all the artists, and if the user chooses a different artist, will update the cd table. cdTableView = new QTableView; cdTableView->setModel(cdModel); cdTableView->setItemDelegate(new QSqlRelationalDelegate(this)); cdTableView->setSelectionMode(QAbstractItemView::SingleSelection); cdTableView->setSelectionBehavior(QAbstractItemView::SelectRows); cdTableView->setColumnHidden(Cd_Id, true); cdTableView->resizeColumnsToContents();
Setting up the view for the cd table is again similar to what we have already seen. The only significant difference is that instead of using the view’s default delegate we use QSqlRelationalDelegate. It is this delegate that does the foreign key handling.
306
13. Databases trackModel = new QSqlTableModel(this); trackModel->setTable("track"); trackModel->setHeaderData(Track_Title, Qt::Horizontal, tr("Title")); trackModel->setHeaderData(Track_Duration, Qt::Horizontal, tr("Duration")); trackTableView = new QTableView; trackTableView->setModel(trackModel); trackTableView->setItemDelegate( new TrackDelegate(Track_Duration, this)); trackTableView->setSelectionMode( QAbstractItemView::SingleSelection); trackTableView->setSelectionBehavior(QAbstractItemView::SelectRows);
For tracks, we are only going to show their names and durations, so a QSqlTableModel is sufficient. (The id and cdid field’s are hidden in the currentCdChanged() slot shown later.) The only notable aspect of this part of the code is that we use the TrackDelegate developed in Chapter 10 to show track times as “minutes:seconds” and to allow them to be edited using a suitable QTimeEdit. The creation, connecting, and laying out of the views and buttons holds no surprises, so the only other part of the constructor that we will show are a few non-obvious connections. ••• connect(cdTableView->selectionModel(), SIGNAL(currentRowChanged(const QModelIndex &, const QModelIndex &)), this, SLOT(currentCdChanged(const QModelIndex &))); connect(cdModel, SIGNAL(beforeInsert(QSqlRecord &)), this, SLOT(beforeInsertCd(QSqlRecord &))); connect(trackModel, SIGNAL(beforeInsert(QSqlRecord &)), this, SLOT(beforeInsertTrack(QSqlRecord &))); connect(trackModel, SIGNAL(rowsInserted(const QModelIndex &, int, int)), this, SLOT(refreshTrackViewHeader())); ••• }
The first connection is unusual since instead of connecting a widget, we connect to a selection model. The QItemSelectionModel class is used to keep track of selections in views. By being connected to the table view’s selection model, our currentCdChanged() slot will be called whenever the user navigates from one record to another. void MainForm::currentCdChanged(const QModelIndex &index) { if (index.isValid()) { QSqlRecord record = cdModel->record(index.row()); int id = record.value("id").toInt(); trackModel->setFilter(QString("cdid = %1").arg(id)); } else { trackModel->setFilter("cdid = -1"); }
Implementing Master–Detail Forms
307
trackModel->select(); refreshTrackViewHeader(); }
This slot is called whenever the current CD changes. This occurs when the user navigates to another CD (by clicking or by using the Up and Down keys). If the CD is invalid (for example, if there are no CDs or a new one is being inserted, or the current one has just been deleted), we set the track table’s cdid --1 (an invalid ID that we know will match no records). to + Then, having set the filter, we select the matching track records. The refreshTrackViewHeader() function will be explained in a moment. void MainForm::addCd() { int row = 0; if (cdTableView->currentIndex().isValid()) row = cdTableView->currentIndex().row(); cdModel->insertRow(row); cdModel->setData(cdModel->index(row, Cd_Year), QDate::currentDate().year()); QModelIndex index = cdModel->index(row, Cd_Title); cdTableView->setCurrentIndex(index); cdTableView->edit(index); }
When the user clicks the Add CD button, a new blank row is inserted in the cdTableView and we enter edit mode. We also set a default value for the year field. At this point, the user can edit the record, filling in the blank fields and selecting an artist from the artist combobox that is automatically provided by the QSqlRelationalTableModel because of the setRelation() call, and edit the year if the default was not appropriate. If the user confirms the insertion by pressing Enter, the record is inserted. The user can cancel by pressing Esc. void MainForm::beforeInsertCd(QSqlRecord &record) { record.setValue("id", generateId("cd")); }
This slot is called when the cdModel emits its beforeInsert() signal. We use it to populate the id field just as we did for inserting new artists, and the same caveat applies: It should be done within the scope of a transaction, and ideally the database-specific means of creating IDs (for example, auto-generated IDs) should be used instead. void MainForm::deleteCd() { QModelIndex index = cdTableView->currentIndex(); if (!index.isValid()) return; QSqlDatabase db = QSqlDatabase::database(); db.transaction();
308
13. Databases QSqlRecord record = cdModel->record(index.row()); int id = record.value(Cd_Id).toInt(); int tracks = 0; QSqlQuery query; query.exec(QString("SELECT COUNT(*) FROM track WHERE cdid = %1") .arg(id)); if (query.next()) tracks = query.value(0).toInt(); if (tracks > 0) { int r = QMessageBox::question(this, tr("Delete CD"), tr("Delete \"%1\" and all its tracks?") .arg(record.value(Cd_ArtistId).toString()), QMessageBox::Yes | QMessageBox::Default, QMessageBox::No | QMessageBox::Escape); if (r == QMessageBox::No) { db.rollback(); return; } query.exec(QString("DELETE FROM track WHERE cdid = %1") .arg(id)); } cdModel->removeRow(index.row()); cdModel->submitAll(); db.commit(); currentCdChanged(QModelIndex()); }
If the user clicks the Delete CD button, this slot is called. If there is a current CD we find out how many tracks it has. If there are no tracks we simply delete the CD’s record. If there is at least one track we ask the user to confirm the deletion, and if they click Yes, we delete all the track records, and then the CD’s record. All this is done within the scope of a transaction, so the cascade deletion will either fail as a whole or succeed as a whole—assuming that the underlying database supports transactions. Handling the track data is very similar to handling CD data. Updates can be performed simply by the user editing cells. In the case of track durations, our TrackDelegate ensures that times are shown in a nice format and are easily edited using a QTimeEdit. void MainForm::addTrack() { if (!cdTableView->currentIndex().isValid()) return; int row = 0; if (trackTableView->currentIndex().isValid()) row = trackTableView->currentIndex().row(); trackModel->insertRow(row); QModelIndex index = trackModel->index(row, Track_Title); trackTableView->setCurrentIndex(index); trackTableView->edit(index); }
Implementing Master–Detail Forms
309
This works in the same way as addCd(), with a new blank row being inserted into the view. void MainForm::beforeInsertTrack(QSqlRecord &record) { QSqlRecord cdRecord = cdModel->record(cdTableView->currentIndex() .row()); record.setValue("id", generateId("track")); record.setValue("cdid", cdRecord.value(Cd_Id).toInt()); }
If the user confirms the insertion initiated by addTrack(), this function is called to populate the id and cdid fields. The caveats mentioned earlier still apply of course. void MainForm::deleteTrack() { trackModel->removeRow(trackTableView->currentIndex().row()); if (trackModel->rowCount() == 0) trackTableView->horizontalHeader()->setVisible(false); }
If the user clicks the Delete Track button, we delete the track without formality. It would be easy to use a Yes/No message box if we preferred deletions to be confirmed. void MainForm::refreshTrackViewHeader() { trackTableView->horizontalHeader()->setVisible( trackModel->rowCount() > 0); trackTableView->setColumnHidden(Track_Id, true); trackTableView->setColumnHidden(Track_CdId, true); trackTableView->resizeColumnsToContents(); }
The refreshTrackViewHeader() slot is invoked from various places to ensure that the horizontal header of the track view is shown if and only if there are tracks to show. It also hides the id and cdid fields and resizes the visible table columns based on the current contents of the table. void MainForm::editArtists() { QSqlRecord record = cdModel->record(cdTableView->currentIndex() .row()); ArtistForm artistForm(record.value(Cd_ArtistId).toString(), this); artistForm.exec(); cdModel->select(); }
This slot is called if the user clicks the Edit Artists button. It provides drill-down on the current CD’s artist, invoking the ArtistForm covered in the previous section and selecting the appropriate artist. If there is no current record, a safe empty record is returned by record(), and this will harmlessly not match (and therefore not select) any artist in the artists form. What actually happens is that when we call record.value(Cd_ArtistId), because we are using a QSqlRe-
310
13. Databases
lationalTableModel that maps artist IDs to artist names, the value that is re-
turned is the artist’s name (which will be an empty string if the record is empty). At the end, we get the cdModel to re-select its data, which causes the cdTableView to refresh its visible cells. This is done to ensure that the artist names are shown correctly since some could have been changed by the user in the ArtistForm dialog. For projects that use the SQL classes, we must add the line QT
+= sql
to the .pro files; this will ensure that the application is linked against the QtSql library. This chapter has shown that Qt’s model/view classes make viewing and editing data in SQL databases as easy as possible. In cases where foreign keys refer to tables with lots of records (say, thousands or more), it is probably best to create our own delegate and use it to present a “list of values” form with a search capability rather than relying on QSqlRelationalTableModel’s default comboboxes. And in situations where we want to present records using a form view, we must handle this ourselves: by using a QSqlQuery or QSqlTableModel to handle the database interaction, and mapping the contents of the user interface widgets we want to use for presenting and editing the data to the underlying database in our own code.
◆
Writing FTP Clients
◆
Writing HTTP Clients
◆
Writing TCP Client–Server Applications
◆
Sending and Receiving UDP Datagrams
14. Networking Qt provides the QFtp and QHttp classes for working with FTP and HTTP. These protocols are easy to use for downloading and uploading files and, in the case of HTTP, for sending requests to web servers and retrieving the results. Qt also provides the lower-level QTcpSocket and QUdpSocket classes, which implement the TCP and UDP transport protocols. TCP is a reliable connectionoriented protocol that operates in terms of data streams transmitted between network nodes, while UDP is an unreliable connectionless protocol based on discrete packets sent between network nodes. Both can be used to create network client and server applications. For servers, we also need the QTcpServer class to handle incoming TCP connections.
Writing FTP Clients The QFtp class implements the client side of the FTP protocol in Qt. It offers various functions to perform the most common FTP operations and lets us execute arbitrary FTP commands. The QFtp class works asynchronously. When we call a function like get() or put(), it returns immediately and the data transfer occurs when control passes back to Qt’s event loop. This ensures that the user interface remains responsive while FTP commands are executed. We will start with an example that shows how to retrieve a single file using get(). The example is a console application called ftpget that downloads the remote file specified on the command line. Let’s begin with the main() function: int main(int argc, char *argv[]) { QCoreApplication app(argc, argv); QStringList args = app.arguments(); if (args.count() != 2) { cerr > size; if (size != 40) { enterErrorState(); return false; } in >> width >> height >> numPlanes >> bitsPerPixel >> compression; height /= 2; if (numPlanes != 1 || bitsPerPixel != 1 || compression != 0) { enterErrorState(); return false; } in.skipRawData((size - 20) + 8);
We create a QDataStream to read the device. We must set the byte order to match that specified by the .cur file format specification. There is no need to set a QDataStream version number since the format of integers and floating-point numbers does not vary between data stream versions. Next, we read in various items of cursor header data, and we skip the irrelevant parts of the header and the 8-byte color table using QDataStream::skipRawData(). We must account for all the format’s idiosyncrasies—for example, halving the height because the .cur format gives a height that is twice as high as the actual image’s height. The bitsPerPixel and compression values are always 1 and 0 in a monochrome .cur file. If we have any problems, we call enterErrorState() and return false. QBitArray xorBitmap = readBitmap(width, height, in); QBitArray andBitmap = readBitmap(width, height, in);
405
Extending Qt with Plugins if (in.status() != QDataStream::Ok) { enterErrorState(); return false; }
The next items in the file are two bitmaps, one an XOR mask and the other an AND mask. We read these into QBitArrays rather than into QBitmaps. A QBitmap is a class designed to be drawn on and painted on-screen, but what we need here is a plain array of bits. When we are done with reading the file, we check the QDataStream’s status. This works because if a QDataStream enters an error state, it stays in that state and can only return zeros. For example, if reading fails on the first bit array, the attempt to read the second will result in an empty QBitArray. *image = QImage(width, height, QImage::Format_ARGB32); for (int i = 0; i < int(height); ++i) { for (int j = 0; j < int(width); ++j) { QRgb color; int bit = (i * width) + j; if (andBitmap.testBit(bit)) { if (xorBitmap.testBit(bit)) { color = 0x7F7F7F7F; } else { color = 0x00FFFFFF; } } else { if (xorBitmap.testBit(bit)) { color = 0xFFFFFFFF; } else { color = 0xFF000000; } } image->setPixel(j, i, color); } }
We construct a new QImage of the correct size and set image to point to it. Then we iterate over every pixel in the XOR and AND bit arrays and convert them into 32-bit ARGB color specifications. The AND and XOR bit arrays are used as shown in the following table to obtain the color of each cursor pixel: Result Inverted background pixel
AND 1
XOR 1
1
0
Transparent pixel
0
1
White pixel
0
0
Black pixel
Black, white, and transparent pixels are no problem, but there’s no way of obtaining an inverted background pixel using an ARGB color specification
406
19. Creating Plugins
without knowing the color of the original background pixel. As a substitute, we use a semi-transparent gray color (0x7F7F7F7F). ++currentImageNo; if (currentImageNo == numImages) state = AfterLastImage; return true; }
Once we have finished reading the image, we update the current image number and update the state if we have reached the last image. At the end of the function, the device will be positioned at the next image or at the end of the file.q bool CursorHandler::jumpToNextImage() { QImage image; return read(&image); }
The jumpToNextImage() function is used to skip an image. For simplicity, we simply call read() and ignore the resulting QImage. A more efficient implementation would use the information stored in the .cur file header to skip directly to the appropriate offset in the file.q void CursorHandler::readHeaderIfNecessary() const { if (state != BeforeHeader) return; quint16 reserved; quint16 type; quint16 count; QDataStream in(device()); in.setByteOrder(QDataStream::LittleEndian); in >> reserved >> type >> count; in.skipRawData(16 * count); if (in.status() != QDataStream::Ok || reserved != 0 || type != 2 || count == 0) { enterErrorState(); return; } state = BeforeImage; currentImageNo = 0; numImages = int(count); }
The readHeaderIfNecessary() private function is called from imageCount() and read(). If the file’s header has already been read, the state is not BeforeHeader and we return immediately. Otherwise, we open a data stream on the device, read in some generic data (including the number of cursors in the file), and set
Extending Qt with Plugins
407
the state to BeforeImage. At the end, the device’s file pointer is positioned before the first image. void CursorHandler::enterErrorState() const { state = Error; currentImageNo = 0; numImages = 0; }
If an error occurs, we assume that there are no valid images and set the state to Error. Once in the Error state, the handler’s state cannot change. QBitArray CursorHandler::readBitmap(int width, int height, QDataStream &in) const { QBitArray bitmap(width * height); quint8 byte; quint32 word; for (int i = 0; i < height; ++i) { for (int j = 0; j < width; ++j) { if ((j % 32) == 0) { word = 0; for (int k = 0; k < 4; ++k) { in >> byte; word = (word setIconSize(QSize(260, 80)); ••• loadPlugins(); populateListWidget(text); ••• }
The constructor creates a QListWidget to list the available effects. It calls the private function loadPlugins() to find and load any plugins that implement the TextArtInterface and populates the list widget accordingly by calling another private function, populateListWidget(). void TextArtDialog::loadPlugins() { QDir pluginDir(QApplication::applicationDirPath()); #if defined(Q_OS_WIN) if (pluginDir.dirName().toLower() == "debug" || pluginDir.dirName().toLower() == "release") pluginDir.cdUp(); #elif defined(Q_OS_MAC) if (pluginDir.dirName() == "MacOS") { pluginDir.cdUp(); pluginDir.cdUp(); pluginDir.cdUp(); } #endif if (!pluginDir.cd("plugins")) return; foreach (QString fileName, pluginDir.entryList(QDir::Files)) { QPluginLoader loader(pluginDir.absoluteFilePath(fileName)); if (TextArtInterface *interface = qobject_cast(loader.instance())) interfaces.append(interface); } }
In loadPlugins(), we attempt to load all the files in the application’s plugins directory. (On Windows, the application’s executable usually lives in a debug or release subdirectory, so we move one directory up. On Mac OS X, we take the bundle directory structure into account.) If the file we try to load is a Qt plugin that uses the same version of Qt as the application, QPluginLoader::instance() will return a QObject * that points to a
Making Applications Plugin-Aware
411
Qt plugin. We use qobject_cast() to check whether the plugin implements the TextArtInterface. Each time the cast is successful, we add the interface to the TextArtDialog’s list of interfaces (of type QList). Some applications may want to load two or more different interfaces, in which case the code for obtaining the interfaces would look more like that shown below: QObject *plugin = loader.instance(); if (TextArtInterface *i = qobject_cast(plugin)) textArtInterfaces.append(i); if (BorderArtInterface *i = qobject_cast(plugin)) borderArtInterfaces.append(i); if (TextureInterface *i = qobject_cast(plugin)) textureInterfaces.append(i);
The same plugin may successfully cast to more than one interface pointer, since it is possible for plugins to provide multiple interfaces by using multiple inheritance. void TextArtDialog::populateListWidget(const QString &text) { QSize iconSize = listWidget->iconSize(); QPen pen(QColor("darkseagreen")); QLinearGradient gradient(0, 0, iconSize.width() / 2, iconSize.height() / 2); gradient.setColorAt(0.0, QColor("darkolivegreen")); gradient.setColorAt(0.8, QColor("darkgreen")); gradient.setColorAt(1.0, QColor("lightgreen")); QFont font("Helvetica", iconSize.height(), QFont::Bold); foreach (TextArtInterface *interface, interfaces) { foreach (QString effect, interface->effects()) { QListWidgetItem *item = new QListWidgetItem(effect, listWidget); QPixmap pixmap = interface->applyEffect(effect, text, font, iconSize, pen, gradient); item->setData(Qt::DecorationRole, pixmap); } } listWidget->setCurrentRow(0); }
The populateListWidget() function begins by creating some variables to pass to the applyEffect() function, in particular a pen, a linear gradient, and a font. It then iterates over every TextArtInterface that was found by loadPlugins(). For each effect provided by each interface, a new QListWidgetItem is created with its text set to the name of the effect it represents, and a QPixmap is created using applyEffect().
412
19. Creating Plugins
In this section we have seen how to load plugins by calling loadPlugins() in the constructor, and how to make use of them in populateListWidget(). The code copes gracefully whether there are no plugins providing TextArtInterfaces, just one, or more than one. Furthermore, additional plugins could be added later: Every time the application starts up it loads whatever plugins it finds that provide the interfaces it wants. This makes it easy to extend the application’s functionality without changing the application itself.
Writing Application Plugins An application plugin is a subclass of QObject and of the interfaces it wants to provide. The CD that accompanies this book includes two plugins for the Text Art application presented in the previous section, to show that the application correctly handles multiple plugins. Here, we will only review the code for one of them, the Basic Effects Plugin. We will assume that the plugin’s source code is located in a directory called basiceffectsplugin and that the Text Art application is located in a parallel directory called textart. Here’s the declaration of the plugin class: class BasicEffectsPlugin : public QObject, public TextArtInterface { Q_OBJECT Q_INTERFACES(TextArtInterface) public: QStringList effects() const; QPixmap applyEffect(const QString &effect, const QString &text, const QFont &font, const QSize &size, const QPen &pen, const QBrush &brush); };
The plugin implements only one interface, TextArtInterface. In addition to Q_ OBJECT, we must use the Q_INTERFACES() macro for each of the interfaces that are subclassed to ensure smooth cooperation between moc and qobject_cast(). QStringList BasicEffectsPlugin::effects() const { return QStringList() 9) { myFont.setPointSize(myFont.pointSize() - 1); metrics = QFontMetrics(myFont); }
We want to ensure that the given text will fit in the specified size if possible. For this reason, we use the font’s metrics to see if the text is too large to fit, and if it is we enter a loop where we reduce the point size until we find a size that will fit, or until we reach 9 points, our fixed minimum size. QPixmap pixmap(size); QPainter painter(&pixmap); painter.setFont(myFont); painter.setPen(pen); painter.setBrush(brush); painter.setRenderHint(QPainter::Antialiasing, true); painter.setRenderHint(QPainter::TextAntialiasing, true); painter.setRenderHint(QPainter::SmoothPixmapTransform, true); painter.eraseRect(pixmap.rect());
We create a pixmap of the required size and a painter to paint onto the pixmap. We also set some render hints to ensure the smoothest possible results. The call to eraseRect() clears the pixmap with the background color. if (effect == "Plain") { painter.setPen(Qt::NoPen); } else if (effect == "Outline") { QPen pen(Qt::black); pen.setWidthF(2.5); painter.setPen(pen); } else if (effect == "Shadow") { QPainterPath path; painter.setBrush(Qt::darkGray); path.addText(((size.width() - metrics.width(text)) / 2) + 3, (size.height() - metrics.descent()) + 3, myFont, text); painter.drawPath(path); painter.setBrush(brush); }
For the “Plain” effect, no outline is required. For the “Outline” effect, we ignore the original pen and create our own black pen with a 2.5-pixel width. For the “Shadow” effect, we need to draw the shadow first, so that the text can be painted on top of it. QPainterPath path; path.addText((size.width() - metrics.width(text)) / 2, size.height() - metrics.descent(), myFont, text);
We now have the pen and brushes set appropriately for each text effect, and in the “Shadow” effect case have drawn the shadow. We are now ready to render the text. The text is horizontally centered and drawn far enough above the bottom of the pixmap to allow room for descenders. Q_EXPORT_PLUGIN2(basiceffectsplugin, BasicEffectsPlugin)
At the end of the .cpp file, we use the Q_EXPORT_PLUGIN2() macro to make the plugin available to Qt. The .pro file is similar to the one we used for the Windows cursor plugin earlier in this chapter (p. 408): TEMPLATE CONFIG HEADERS SOURCES DESTDIR
If this chapter has whet your appetite for application plugins, you might like to study the more advanced Plug & Paint example provided with Qt. The application supports three different interfaces and includes a useful Plugin Information dialog that lists the plugins and interfaces that are available to the application.
◆
Interfacing with Native APIs
◆
Using ActiveX on Windows
◆
Handling X11 Session Management
20. Platform-Specific Features In this chapter, we will review some of the platform-specific options available to Qt programmers. We begin by looking at how to access native APIs such as the Win32 API on Windows, Carbon on Mac OS X, and Xlib on X11. We then move on to explore the ActiveQt extension, showing how to use ActiveX controls within Qt/Windows applications and how to create applications that act as ActiveX servers. In the last section, we explain how to make Qt applications cooperate with the session manager under X11. In addition to the features presented here, Trolltech offers several platformspecific Qt Solutions, including the Qt/Motif and Qt/MFC migration frameworks to ease the migration of Motif/Xt and MFC applications to Qt. A similar extension for Tcl/Tk applications is provided by froglogic, and a Microsoft Windows resource converter is available from Klarälvdalens Datakonsult. See the following web pages for details: • http://www.trolltech.com/products/solutions/catalog/ • http://www.froglogic.com/tq/ • http://www.kdab.net/knut/ For embedded development, Trolltech offers the Qtopia application platform. This is covered in Chapter 21.
Interfacing with Native APIs Qt’s comprehensive API caters for most needs on all platforms, but in some circumstances, we may want to use the underlying platform-specific APIs. In this section, we will show how to use the native APIs for the different platforms supported by Qt to accomplish particular tasks. On every platform, QWidget provides a winId() function that returns the window ID or handle. QWidget also provides a static function called find() that returns the QWidget with a particular window ID. We can pass this ID to native API functions to achieve platform-specific effects. For example, the following code 415
416
20. Platform-Specific Features
uses winId() to move the title bar of a tool window to the left using native Mac OS X functions: #ifdef Q_WS_MAC ChangeWindowAttributes(HIViewGetWindow(HIViewRef(toolWin.winId())), kWindowSideTitlebarAttribute, kWindowNoAttributes); #endif
Figure 20.1. A Mac OS X tool window with the title bar on the side
On X11, here’s how we would modify a window property: #ifdef Q_WS_X11 Atom atom = XInternAtom(QX11Info::display(), "MY_PROPERTY", False); long data = 1; XChangeProperty(QX11Info::display(), window->winId(), atom, atom, 32, PropModeReplace, reinterpret_cast(&data), 1); #endif
The #ifdef and #endif directives around the platform-specific code ensure that the application will still compile on other platforms. For a Windows-only application, here’s an example of how we can use GDI calls to draw on a Qt widget: void GdiControl::paintEvent(QPaintEvent * /* event */) { RECT rect; GetClientRect(winId(), &rect); HDC hdc = GetDC(winId()); FillRect(hdc, &rect, HBRUSH(COLOR_WINDOW + 1)); SetTextAlign(hdc, TA_CENTER | TA_BASELINE); TextOutW(hdc, width() / 2, height() / 2, text.utf16(), text.size()); ReleaseDC(winId(), hdc); }
417
Interfacing with Native APIs
For this to work, we must also reimplement QPaintDevice::paintEngine() to return a null pointer and set the Qt::WA_PaintOnScreen attribute in the widget’s constructor. The next example shows how to combine QPainter and GDI calls in a paint event handler using QPaintEngine’s getDC() and releaseDC() functions: void MyWidget::paintEvent(QPaintEvent * /* event */) { QPainter painter(this); painter.fillRect(rect().adjusted(20, 20, -20, -20), Qt::red); #ifdef Q_WS_WIN HDC hdc = painter.paintEngine()->getDC(); Rectangle(hdc, 40, 40, width() - 40, height() - 40); painter.paintEngine()->releaseDC(); #endif }
Mixing QPainter and GDI calls like this can sometimes lead to strange results, especially when QPainter calls occur after GDI calls, because QPainter makes some assumptions about the state of the underlying drawing layer. Qt defines one of the following four window system symbols: Q_WS_WIN, Q_WS_ X11, Q_WS_MAC, and Q_WS_QWS (Qtopia). We must include at least one Qt header before we can use them in applications. Qt also provides preprocessor symbols to identify the operating system: • • • • • • •
We can assume that at most one of these will be defined. For convenience, Qt also defines Q_OS_WIN when either Win32 or Win64 is detected, and Q_OS_UNIX when any Unix-based operating system (including Linux and Mac OS X) is detected. At run-time, we can check QSysInfo::WindowsVersion or QSysInfo:: MacintoshVersion to distinguish between different versions of Windows (2000, ME, etc.) or Mac OS X (10.2, 10.3, etc.). In addition to the operating system and window system macros, there is also a set of compiler macros. For example, Q_CC_MSVC is defined if the compiler is Microsoft Visual C++. These can be useful for working around compiler bugs. Several of Qt’s GUI-related classes provide platform-specific functions that return low-level handles to the underlying object. These are listed in Figure 20.2.
418
20. Platform-Specific Features Mac OS X ATSFontFormatRef
QFont::handle()
CGImageRef
QPixmap::macCGHandle()
GWorldPtr
QPixmap::macQDAlphaHandle()
GWorldPtr
QPixmap::macQDHandle()
RgnHandle
QRegion::handle()
HIViewRef
QWidget::winId()
Windows HCURSOR
QCursor::handle()
HDC
QPaintEngine::getDC()
HDC
QPrintEngine::getPrinterDC()
HFONT
QFont::handle()
HPALETTE
QColormap::hPal()
HRGN
QRegion::handle()
HWND
QWidget::winId()
X11 Cursor
QCursor::handle()
Font
QFont::handle()
Picture
QPixmap::x11PictureHandle()
Picture
QWidget::x11PictureHandle()
Pixmap
QPixmap::handle()
QX11Info
QPixmap::x11Info()
QX11Info
QWidget::x11Info()
Region
QRegion::handle()
Screen
QCursor::x11Screen()
SmcConn
QSessionManager::handle()
Window
QWidget::handle()
Window
QWidget::winId()
Figure 20.2. Platform-specific functions to access low-level handles
On X11, QPixmap::x11Info() and QWidget::x11Info() return a QX11Info object that provides various pointers or handles, such as display(), screen(), colormap(), and visual(). We can use these to set up an X11 graphics context on a QPixmap or QWidget, for example. Qt applications that need to interface with other toolkits or libraries frequently need to access the low-level events (XEvents on X11, MSGs on Windows, EventRef on Mac OS X, QWSEvents on Qtopia) before they are converted into
Interfacing with Native APIs
419
QEvents. We can do this by subclassing QApplication and reimplementing the relevant platform-specific event filter, one of x11EventFilter(), winEventFilter(), macEventFilter(), and qwsEventFilter(). Alternatively, we can access the platform-specific events that are sent to a given QWidget by reimplementing one of x11Event(), winEvent(), macEvent(), and qwsEvent(). This can be useful
for handling certain types of events that Qt normally ignores, such as joystick events. For more information about platform-specific issues, including how to deploy Qt applications on different platforms, see http://doc.trolltech.com/4.1/winsystem.html.
Using ActiveX on Windows Microsoft’s ActiveX technology allows applications to incorporate user interface components provided by other applications or libraries. It is built on Microsoft COM and defines one set of interfaces for applications that use components and another set of interfaces for applications and libraries that provide components. The Qt/Windows Desktop Edition provides the ActiveQt framework to seamlessly combine ActiveX and Qt. ActiveQt consists of two modules: • The QAxContainer module allows us to use COM objects and to embed ActiveX controls in Qt applications. • The QAxServer module allows us to export custom COM objects and ActiveX controls written using Qt. Our first example will embed the Windows Media Player in a Qt application using the QAxContainer module. The Qt application adds an Open button, a Play/Pause button, a Stop button, and a slider to the Windows Media Player ActiveX control.
Figure 20.3. The Media Player application
420
20. Platform-Specific Features
The application’s main window is of type PlayerWindow: class PlayerWindow : public QWidget { Q_OBJECT Q_ENUMS(ReadyStateConstants) public: enum PlayStateConstants { Stopped = 0, Paused = 1, Playing = 2 }; enum ReadyStateConstants { Uninitialized = 0, Loading = 1, Interactive = 3, Complete = 4 }; PlayerWindow(); protected: void timerEvent(QTimerEvent *event); private slots: void onPlayStateChange(int oldState, int newState); void onReadyStateChange(ReadyStateConstants readyState); void onPositionChange(double oldPos, double newPos); void sliderValueChanged(int newValue); void openFile(); private: QAxWidget *wmp; QToolButton *openButton; QToolButton *playPauseButton; QToolButton *stopButton; QSlider *seekSlider; QString fileFilters; int updateTimer; };
The PlayerWindow class inherits from QWidget. The Q_ENUMS() macro (just below Q_OBJECT) is necessary to tell moc that the ReadyStateConstants type used in the onReadyStateChange() slot is an enum type. In the private section, we declare a QAxWidget * data member. PlayerWindow::PlayerWindow() { wmp = new QAxWidget; wmp->setControl("{22D6F312-B0F6-11D0-94AB-0080C74C7E95}");
In the constructor, we start by creating a QAxWidget object to encapsulate the Windows Media Player ActiveX control. The QAxContainer module consists of three classes: QAxObject encapsulates a COM object, QAxWidget encapsulates an ActiveX control, and QAxBase implements the core COM functionality for QAxObject and QAxWidget. We call setControl() on the QAxWidget with the class ID of the Windows Media Player 6.4 control. This will create an instance of the required component. From then on, all the properties, events, and methods of the ActiveX control are available as Qt properties, signals, and slots through the QAxWidget object.
421
Using ActiveX on Windows QObject QAxBase
QWidget
QAxObject
QAxWidget
Figure 20.4. Inheritance tree for the QAxContainer module
The COM data types are automatically converted into the corresponding Qt types, as summarized in Figure 20.5. For example, an in-parameter of type VARIANT_BOOL becomes a bool, and an out-parameter of type VARIANT_BOOL becomes a bool &. If the resulting type is a Qt class (QString, QDateTime, etc.), the in-parameter is a const reference (for example, const QString &). COM types
Qt types
VARIANT_BOOL
bool
char, short, int, long
int
unsigned char, unsigned short, unsigned int, unsigned long
uint
float, double
double
CY
qlonglong, qulonglong
BSTR
QString
DATE
QDateTime, QDate, QTime
OLE_COLOR
QColor
SAFEARRAY(VARIANT)
QList
SAFEARRAY(BSTR)
QStringList
SAFEARRAY(BYTE)
QByteArray
VARIANT
QVariant
IFontDisp *
QFont
IPictureDisp *
QPixmap
User defined type
QRect, QSize, QPoint
Figure 20.5. Relationship between COM types and Qt types
To obtain the list of all the properties, signals, and slots available in a QAxObject or QAxWidget with their Qt data types, call QAxBase::generateDocumentation() or use Qt’s dumpdoc command-line tool, located in Qt’s tools\activeqt\dumpdoc directory. Let’s continue with the PlayerWindow constructor: wmp->setProperty("ShowControls", false); wmp->setSizePolicy(QSizePolicy::Expanding, QSizePolicy::Expanding);
After calling QAxWidget::setControl(), we call QObject::setProperty() to set the ShowControls property of the Windows Media Player to false, since we provide our own buttons to manipulate the component. QObject::setProperty() can be used both for COM properties and for normal Qt properties. Its second parameter is of type QVariant. Next, we call setSizePolicy() to make the ActiveX control take all the available space in the layout, and we connect three ActiveX events from the COM component to three slots. ••• stopButton = new QToolButton; stopButton->setText(tr("&Stop")); stopButton->setEnabled(false); connect(stopButton, SIGNAL(clicked()), wmp, SLOT(Stop())); ••• }
The rest of the PlayerWindow constructor follows the usual pattern, except that we connect some Qt signals to slots provided by the COM object (Play(), Pause(), and Stop()). Since the buttons are similar, we have only shown the Stop button’s implementation here. Let’s leave the constructor and look at the timerEvent() function: void PlayerWindow::timerEvent(QTimerEvent *event) { if (event->timerId() == updateTimer) { double curPos = wmp->property("CurrentPosition").toDouble(); onPositionChange(-1, curPos); } else { QWidget::timerEvent(event); } }
The timerEvent() function is called at regular intervals while a media clip is playing. We use it to advance the slider. This is done by calling property() on the ActiveX control to obtain the value of the CurrentPosition property as a QVariant and calling toDouble() to convert it to a double. We then call onPositionChange() to perform the update. We will not review the rest of the code because most of it isn’t directly relevant to ActiveX and doesn’t show anything that we haven’t covered already. The code is included on the CD. In the .pro file, we need this entry to link with the QAxContainer module:
Using ActiveX on Windows CONFIG
423
+= qaxcontainer
One frequent need when dealing with COM objects is to be able to call a COM method directly (as opposed to connecting it to a Qt signal). The easiest way to do this is to invoke QAxBase::dynamicCall() with the name and signature of the method as first parameter and the arguments to the method as additional parameters. For example: wmp->dynamicCall("TitlePlay(uint)", 6);
The dynamicCall() function takes up to eight parameters of type QVariant and returns a QVariant. If we need to pass an IDispatch * or an IUnknown * this way, we can encapsulate the component in a QAxObject and call asVariant() on it to convert it to a QVariant. If we need to call a COM method that returns an IDispatch * or an IUnknown *, or if we need to access a COM property of one of those types, we can use querySubObject() instead: QAxObject *session = outlook.querySubObject("Session"); QAxObject *defaultContacts = session->querySubObject("GetDefaultFolder(OlDefaultFolders)", "olFolderContacts");
If we want to call methods that have unsupported data types in their parameter list, we can use QAxBase::queryInterface() to retrieve the COM interface and call the method directly. As usual with COM, we must call Release() when we have finished using the interface. If we often need to call such methods, we can subclass QAxObject or QAxWidget and provide member functions that encapsulate the COM interface calls. Be aware that QAxObject and QAxWidget subclasses cannot define their own properties, signals, or slots. We will now review the QAxServer module. This module enables us to turn a standard Qt program into an ActiveX server. The server can either be a shared library or a stand-alone application. Servers built as shared libraries are often called in-process servers; stand-alone applications are called out-ofprocess servers. Our first QAxServer example is an in-process server that provides a widget that shows a ball bouncing left and right. We will also see how to embed the widget in Internet Explorer. Here’s the beginning of the class definition of the AxBouncer widget: class AxBouncer : public QWidget, public QAxBindable { Q_OBJECT Q_ENUMS(SpeedValue) Q_PROPERTY(QColor color READ color WRITE setColor) Q_PROPERTY(SpeedValue speed READ speed WRITE setSpeed) Q_PROPERTY(int radius READ radius WRITE setRadius) Q_PROPERTY(bool running READ isRunning) AxBouncer inherits from both QWidget and QAxBindable. The QAxBindable class provides an interface between the widget and an ActiveX client. Any QWidget
424
20. Platform-Specific Features
can be exported as an ActiveX control, but by subclassing QAxBindable we can notify the client when a property’s value changes, and we can implement COM interfaces to supplement those already implemented by QAxServer.
Figure 20.6. The AxBouncer widget in Internet Explorer
When doing multiple inheritance involving a QObject-derived class, we must always put the QObject-derived class first so that moc can pick it up. We declare three read-write properties and one read-only property. The Q_ ENUMS() macro is necessary to tell moc that the SpeedValue type is an enum type. The enum is declared in the public section of the class: public: enum SpeedValue { Slow, Normal, Fast }; AxBouncer(QWidget *parent = 0); void setSpeed(SpeedValue newSpeed); SpeedValue speed() const { return ballSpeed; } void setRadius(int newRadius); int radius() const { return ballRadius; } void setColor(const QColor &newColor); QColor color() const { return ballColor; } bool isRunning() const { return myTimerId != 0; } QSize sizeHint() const; QAxAggregated *createAggregate();
Using ActiveX on Windows
425
public slots: void start(); void stop(); signals: void bouncing();
The AxBouncer constructor is a standard constructor for a widget, with a parent parameter. The QAXFACTORY_DEFAULT() macro, which we will use to export the component, expects a constructor with this signature. The createAggregate() function is reimplemented from QAxBindable. We will explain it in a moment. protected: void paintEvent(QPaintEvent *event); void timerEvent(QTimerEvent *event); private: int intervalInMilliseconds() const; QColor ballColor; SpeedValue ballSpeed; int ballRadius; int myTimerId; int x; int delta; };
The protected and private sections of the class are the same as those we would have if this was a standard Qt widget. AxBouncer::AxBouncer(QWidget *parent) : QWidget(parent) { ballColor = Qt::blue; ballSpeed = Normal; ballRadius = 15; myTimerId = 0; x = 20; delta = 2; }
The AxBouncer constructor initializes the class’s private variables. void AxBouncer::setColor(const QColor &newColor) { if (newColor != ballColor && requestPropertyChange("color")) { ballColor = newColor; update(); propertyChanged("color"); } }
The setColor() function sets the value of the color property. It calls update() to repaint the widget.
426
20. Platform-Specific Features
The unusual part is the requestPropertyChange() and propertyChanged() calls. These functions are inherited from QAxBindable and should ideally be called whenever we change a property. The requestPropertyChange() asks the client’s permission to change a property, and returns true if the client allows the change. The propertyChanged() function notifies the client that the property has been changed. The setSpeed() and setRadius() property setters also follow this pattern, and so do the start() and stop() slots, since they change the value of the running property. There is one interesting AxBouncer member function left: QAxAggregated *AxBouncer::createAggregate() { return new ObjectSafetyImpl; }
The createAggregate() function is reimplemented from QAxBindable. It allows us to implement COM interfaces that the QAxServer module doesn’t already implement or to bypass QAxServer’s default COM interfaces. Here, we do it to provide the IObjectSafety interface, which is used by Internet Explorer to access a component’s safety options. This is the standard trick to get rid of Internet Explorer’s infamous “Object not safe for scripting” error message. Here’s the definition of the class that implements the IObjectSafety interface: class ObjectSafetyImpl : public QAxAggregated, public IObjectSafety { public: long queryInterface(const QUuid &iid, void **iface); QAXAGG_IUNKNOWN HRESULT WINAPI GetInterfaceSafetyOptions(REFIID riid, DWORD *pdwSupportedOptions, DWORD *pdwEnabledOptions); HRESULT WINAPI SetInterfaceSafetyOptions(REFIID riid, DWORD pdwSupportedOptions, DWORD pdwEnabledOptions); };
The ObjectSafetyImpl class inherits both QAxAggregated and IObjectSafety. The QAxAggregated class is an abstract base class for implementations of additional COM interfaces. The COM object that the QAxAggregated extends is accessible through controllingUnknown(). This COM object is created behind the scenes by the QAxServer module. The QAXAGG_IUNKNOWN macro provides standard implementations of QueryInterface(), AddRef(), and Release(). These implementations simply call the same functions on the controlling COM object. long ObjectSafetyImpl::queryInterface(const QUuid &iid, void **iface) { *iface = 0; if (iid == IID_IObjectSafety) {
The queryInterface() function is a pure virtual function of QAxAggregated. It is called by the controlling COM object to give access to the interfaces provided by the QAxAggregated subclass. We must return E_NOINTERFACE for interfaces that we don’t implement and for IUnknown. HRESULT WINAPI ObjectSafetyImpl::GetInterfaceSafetyOptions( REFIID /* riid */, DWORD *pdwSupportedOptions, DWORD *pdwEnabledOptions) { *pdwSupportedOptions = INTERFACESAFE_FOR_UNTRUSTED_DATA | INTERFACESAFE_FOR_UNTRUSTED_CALLER; *pdwEnabledOptions = *pdwSupportedOptions; return S_OK; } HRESULT WINAPI ObjectSafetyImpl::SetInterfaceSafetyOptions( REFIID /* riid */, DWORD /* pdwSupportedOptions */, DWORD /* pdwEnabledOptions */) { return S_OK; }
The GetInterfaceSafetyOptions() and SetInterfaceSafetyOptions() functions are declared in IObjectSafety. We implement them to tell the world that our object is safe for scripting. Let’s now review main.cpp: #include #include "axbouncer.h" QAXFACTORY_DEFAULT(AxBouncer, "{5e2461aa-a3e8-4f7a-8b04-307459a4c08c}", "{533af11f-4899-43de-8b7f-2ddf588d1015}", "{772c14a5-a840-4023-b79d-19549ece0cd9}", "{dbce1e56-70dd-4f74-85e0-95c65d86254d}", "{3f3db5e0-78ff-4e35-8a5d-3d3b96c83e09}")
The QAXFACTORY_DEFAULT() macro exports an ActiveX control. We can use it for ActiveX servers that export only one control. The next example in this section will show how to export many ActiveX controls. The first argument to QAXFACTORY_DEFAULT() is the name of the Qt class to export. This is also the name under which the control is exported. The other five arguments are the class ID, the interface ID, the event interface ID, the type library ID, and the application ID. We can use standard tools like guidgen
428
20. Platform-Specific Features
or uuidgen to generate these identifiers. Because the server is a library, we don’t need a main() function. Here’s the .pro file for our in-process ActiveX server: TEMPLATE CONFIG HEADERS SOURCES RC_FILE DEF_FILE
The qaxserver.rc and qaxserver.def files referred to in the .pro file are standard files that can be copied from Qt’s src\activeqt\control directory. The makefile or Visual C++ project file generated by qmake contains rules to register the server in the Windows registry. To register the server on end-user machines, we can use the regsvr32 tool available on all Windows systems. We can then include the Bouncer component in an HTML page using the tag: The ActiveX control is not available. Make sure you have built and registered the component server.
We can create buttons that invoke slots:
We can manipulate the widget using JavaScript or VBScript just like any other ActiveX control. See the demo.html file on the CD for a rudimentary page that uses the ActiveX server. Our last example is a scriptable Address Book application. The application can serve as a standard Qt/Windows application or an out-of-process ActiveX server. The latter possibility allows us to script the application using, say, Visual Basic. class AddressBook : public QMainWindow { Q_OBJECT Q_PROPERTY(int count READ count) Q_CLASSINFO("ClassID", "{588141ef-110d-4beb-95ab-ee6a478b576d}") Q_CLASSINFO("InterfaceID", "{718780ec-b30c-4d88-83b3-79b3d9e78502}") Q_CLASSINFO("ToSuperClass", "AddressBook") public: AddressBook(QWidget *parent = 0); ~AddressBook();
The AddressBook widget is the application’s main window. The property and the slots it provides will be available for scripting. The Q_CLASSINFO() macro is used to specify the class and interface IDs associated with the class. These were generated using a tool such as guid or uuid. In the previous example, we specified the class and interface IDs when we exported the QAxBouncer class using the QAXFACTORY_DEFAULT() macro. In this example, we want to export several classes, so we cannot use QAXFACTORY_ DEFAULT(). There are two options available to us: • We can subclass QAxFactory, reimplement its virtual functions to provide information about the types we want to export, and use the QAXFACTORY_ EXPORT() macro to register the factory. • We can use the QAXFACTORY_BEGIN(), QAXFACTORY_END(), QAXCLASS(), and QAXTYPE() macros to declare and register the factory. This approach requires us to specify the class and interface IDs using Q_CLASSINFO(). Back to the AddressBook class definition: The third occurrence of Q_CLASSINFO() may seem a bit mysterious. By default, ActiveX controls expose not only their own properties, signals, and slots to clients, but also those of their superclasses up to QWidget. The ToSuperClass attribute lets us specify the highest superclass (in the inheritance tree) that we want to expose. Here, we specify the class name of the component (AddressBook) as the highest superclass to export, meaning that properties, signals, and slots defined in AddressBook’s superclasses will not be exported.
The ABItem class represents one entry in the address book. It inherits from QTreeWidgetItem so that it can be shown in a QTreeWidget and from QObject so that it can be exported as a COM object. int main(int argc, char *argv[]) { QApplication app(argc, argv); if (!QAxFactory::isServer()) { AddressBook addressBook; addressBook.show(); return app.exec(); } return app.exec(); }
In main(), we check whether the application is being run stand-alone or as a server. The -activex command-line option is recognized by QApplication and makes the application run as a server. If the application isn’t run as a server, we create the main widget and show it as we would normally do in any stand-alone Qt application. In addition to -activex, ActiveX servers understand the following commandline options: • -regserver registers the server in the system registry. • -unregserver unregisters the server from the system registry. • -dumpidl file writes the server’s IDL to the specified file. When the application is run as a server, we must export the AddressBook and ABItem classes as COM components:
The above macros export a factory for creating COM objects. Since we want to export two types of COM objects, we cannot simply use QAXFACTORY_DEFAULT() as we did in the previous example. The first argument to QAXFACTORY_BEGIN() is the type library ID; the second argument is the application ID. Between QAXFACTORY_BEGIN() and QAXFACTORY_ END(), we specify all the classes that can be instantiated and all the data types that we want to make accessible as COM objects. This is the .pro file for our out-of-process ActiveX server: TEMPLATE CONFIG HEADERS SOURCES
The qaxserver.rc file referred to in the .pro file is a standard file that can be copied from Qt’s src\activeqt\control directory. Look in the example’s vb directory for a Visual Basic project that uses the Address Book server. This completes our overview of the ActiveQt framework. The Qt distribution includes additional examples, and the documentation contains information about how to build the QAxContainer and QAxServer modules and how to solve common interoperability issues.
Handling X11 Session Management When we log out on X11, some window managers ask us whether we want to save the session. If we say yes, the applications that were running are automatically restarted the next time we log in, with the same screen positions and, ideally, with the same state as they had when we logged out. The X11-specific component that takes care of saving and restoring the session is called the session manager. To make a Qt/X11 application aware of the session manager, we must reimplement QApplication::saveState() and save the application’s state there.
432
20. Platform-Specific Features
Figure 20.7. Logging out on KDE
Windows 2000 and XP, and some Unix systems, offer a different mechanism called hibernation. When the user puts the computer into hibernation, the operating system simply dumps the computer’s memory onto disk and reloads it when it wakes up. Applications do not need to do anything or even be aware that this happens. When the user initiates a shutdown, we can take control just before the shutdown occurs by reimplementing QApplication::commitData(). This allows us to save any unsaved data and to interact with the user if required. This part of session management is supported on both X11 and Windows. We will explore session management by going through the code of a sessionaware Tic-Tac-Toe application. First, let’s look at the main() function: int main(int argc, char *argv[]) { Application app(argc, argv); TicTacToe toe; toe.setObjectName("toe"); app.setTicTacToe(&toe); toe.show(); return app.exec(); }
We create an Application object. The Application class inherits from QApplication and reimplements both commitData() and saveState() to support session management. Next, we create a TicTacToe widget, make the Application object aware of it, and show it. We have called the TicTacToe widget “toe”. We must give unique object names to top-level widgets if we want the session manager to restore the windows’ sizes and positions.
Handling X11 Session Management
433
Figure 20.8. The Tic-Tac-Toe application
Here’s the definition of the Application class: class Application : public QApplication { Q_OBJECT public: Application(int &argc, char *argv[]); void setTicTacToe(TicTacToe *tic); void saveState(QSessionManager &sessionManager); void commitData(QSessionManager &sessionManager); private: TicTacToe *ticTacToe; };
The Application class keeps a pointer to the TicTacToe widget as a private variable. void Application::saveState(QSessionManager &sessionManager) { QString fileName = ticTacToe->saveState(); QStringList discardCommand; discardCommand isSessionRestored()) restoreState(); setWindowTitle(tr("Tic-Tac-Toe")); }
In the constructor, we clear the board, and if the application was invoked with the -session option, we call the private function restoreState() to reload the old session. void TicTacToe::clearBoard() { for (int row = 0; row < 3; ++row) { for (int column = 0; column < 3; ++column) { board[row][column] = Empty; } } turnNumber = 0; }
In clearBoard(), we clear all the cells and set turnNumber to 0. QString TicTacToe::saveState() const { QFile file(sessionFileName()); if (file.open(QIODevice::WriteOnly)) { QTextStream out(&file); for (int row = 0; row < 3; ++row) { for (int column = 0; column < 3; ++column) out sessionId() + "_" + qApp->sessionKey(); }
The sessionFileName() private function returns the file name for the current session ID and session key. This function is used for both saveState() and restoreState(). The file name is derived from the session ID and session key.
Handling X11 Session Management
437
void TicTacToe::restoreState() { QFile file(sessionFileName()); if (file.open(QIODevice::ReadOnly)) { QTextStream in(&file); for (int row = 0; row < 3; ++row) { for (int column = 0; column < 3; ++column) { in >> board[row][column]; if (board[row][column] != Empty) ++turnNumber; } } } update(); }
In restoreState(), we load the file that corresponds to the restored session and fill the board with that information. We deduce the value of turnNumber from the number of X’s and O’s on the board. In the TicTacToe constructor, we called restoreState() if QApplication::isSessionRestored() returned true. In that case, sessionId() and sessionKey() return the same values as when the application’s state was saved, and so sessionFileName() returns the file name for that session. Testing and debugging session management can be frustrating, because we need to log in and out all the time. One way to avoid this is to use the standard xsm utility provided with X11. The first time we invoke xsm, it pops up a session manager window and a terminal. The applications we start from that terminal will all use xsm as their session manager instead of the usual, system-wide session manager. We can then use xsm’s window to end, restart, or discard a session, and see if our application behaves as it should. For details about how to do this, see http://doc.trolltech.com/4.1/session.html.
◆
Getting Started with Qtopia
◆
Customizing Qtopia Core
21. Embedded Programming Developing software to run on mobile devices such as PDAs and mobile phones can be very challenging because embedded systems generally have slower processors, less permanent storage (flash memory or hard disk), less memory, and smaller displays than desktop computers. Qtopia Core (previously called Qt/Embedded) is a version of Qt optimized for embedded Linux. Qtopia Core provides the same API and tools as the desktop versions of Qt (Qt/Windows, Qt/X11, and Qt/Mac), and adds the classes and tools necessary for embedded programming. Through dual licensing, it is available for both open source and commercial development. Qtopia Core can run on any hardware that runs Linux (including Intel x86, MIPS, ARM, StrongARM, Motorola 68000, and PowerPC architectures). It has a memory-mapped frame buffer and supports a C++ compiler. Unlike Qt/X11, it does not need the X Window System; instead, it implements its own window system (QWS), enabling significant storage and memory savings. To reduce its memory footprint even more, Qtopia Core can be recompiled to exclude unused features. If the applications and components used on a device are known in advance, they can be compiled together into one executable that links statically against the Qtopia Core libraries. Qtopia Core also benefits from various features that are also part of the desktop versions of Qt, including the extensive use of implicit data sharing (“copy on write”) as a memory-saving technique, support for custom widget styles through QStyle, and a layout system that adapts to make the best use of the available screen space. Qtopia Core forms the basis of Trolltech’s embedded offering, which also includes Qtopia Platform, Qtopia PDA, and Qtopia Phone. These provide classes and applications designed specifically for portable devices and can be integrated with several third-party Java virtual machines.
439
440
21. Embedded Programming
Getting Started with Qtopia Qtopia Core applications can be developed on any platform equipped with a multi-platform tool chain. The most common option is to build a GNU C++ cross-compiler on a Unix system. This process is simplified by a script and a set of patches provided by Dan Kegel at http://kegel.com/crosstool/. Since Qtopia Core contains the Qt API, it is usually possible to use a desktop version of Qt, such as Qt/X11 or Qt/Windows, for most of the development. Qtopia Core’s configuration system supports cross-compilers, through the configure script’s -embedded option. For example, to build for the ARM architecture we would type ./configure -embedded arm
We can create custom configurations by adding new files to Qt’s mkspecs/ qws directory. Qtopia Core draws directly to the Linux frame buffer (the memory area associated with the video display). To access the frame buffer, you might need to grant write permissions to the /dev/fb0 device. To run Qtopia Core applications, we must first start one process to act as a server. The server is responsible for allocating screen regions to clients and for generating mouse and keyboard events. Any Qtopia Core application can become a server by specifying -qws on its command line or by passing QApplication:: GuiServer as the third parameter to the QApplication constructor. Client applications communicate with the Qtopia Core server using shared memory. Behind the scenes, the clients draw themselves into shared memory and are responsible for painting their own window decorations. This keeps communication between the clients and the server to a minimum, resulting in a snappy user interface. Qtopia Core applications normally use QPainter to draw themselves, but they can also access the video hardware directly using QDirectPainter. Clients can communicate with each other using the QCOP procotol. A client can listen on a named channel by creating a QCopChannel object and connecting to its received() signal. For example: QCopChannel *channel = new QCopChannel("System", this); connect(channel, SIGNAL(received(const QString &, const QByteArray &)), this, SLOT(received(const QString &, const QByteArray &)));
A QCOP message consists of a name and an optional QByteArray. The static QCopChannel::send() broadcasts a message on a channel. For example: QByteArray data; QDataStream out(&data, QIODevice::WriteOnly); out


![[PDF] Download C++ GUI Programming with Qt 4 - Google Sites](https://m.moam.info/img/260x300/pdf-download-c-gui-programming-with-qt-4-google-si_64788b9f097c474d228d45d6.jpg)


![[PDF Download] C++ GUI Programming with Qt4 ... - Google Sites](https://m.moam.info/img/260x300/pdf-download-c-gui-programming-with-qt4-google-sit_64782e93097c47a9708c8ac2.jpg)


![Fundamentals of Computer Programming with C - Intro Programming ... [PDF]](https://m.moam.info/img/260x300/fundamentals-of-computer-programming-with-c-intro-_647ee14d098a9e791f8b456b.jpg)