For more information on the FirePass controller or the BIG-IP Local and. Global
Traffic ... The FirePass controller should be running version 6.0.1 or later. The.
DEPLOYMENT GUIDE
DEPLOYING THE FIREPASS CONTROLLER WITH THE BIG-IP LOCAL AND GLOBAL TRAFFIC MANAGER
Deploying the FirePass controller with the BIG-IP Local and Global Traffic Manager Welcome to the FirePass and BIG-IP LTM/GTM Deployment Guide. This guide gives you step by step configuration procedures on how to globally and locally monitor and direct traffic to FirePass controllers at globally distributed sites or data centers. For more information on the FirePass controller or the BIG-IP Local and Global Traffic Manager, see http://www.f5.com/products/.
Prerequisites and configuration notes The following are prerequisites for this deployment:
1
◆
The FirePass controller should be running version 6.0.1 or later. The BIG-IP LTM and GTM system must be running at least version 9.4. We strongly recommend using 9.4.3 or later.
◆
You should have familiarity with both the FirePass controller, BIG-IP LTM and BIG-IP GTM. We recommend you read this entire Deployment guide before you start the configuration. This is important because you need know what the names and addresses of configuration objects on the BIG-IP GTM will be while first configuring the FirePass controller (for example, you need to know the name of the Wide IP you will create on the BIG-IP GTM while configuring the FirePass controller).
◆
We assume the FirePass controller, BIG-IP LTM and BIG-IP GTM have been installed, initially configured, and are on the network with the ability to reach one another other.
◆
For this deployment, FirePass controller clustering must not be used for load balancing.
◆
This configuration requires one additional address and host name per FirePass controller, as well as one additional host name for use with the BIG-IP LTM if you are not using wildcard SSL certificate(s).
◆
You must have an SSL server certificate that corresponds to the Wide IP host name that you will create on the GTM created and installed on each FirePass controller. For information on creating and installing certificates on the FirePass controller, see the FirePass Controller Administrator Guide, Chapter 4, Using Server Certificates. You must also have an SSL server certificate for the additional host name required at each cluster site, if you are not using wildcard certificate(s).
◆
You need to provision a publicly accessible name for the Wide IP on the BIG-IP GTM.
◆
If you are running FirePass version 6.0.2, you must have hotfix HF-602-1 installed for the prelogon sequence to run. For FirePass versions 6.0.1 and earlier, this hotfix is not required. For more information on Hot Fixes, see Ask F5.
Deploying the FirePass Controller and BIG-IP Local and Global Traffic Manager
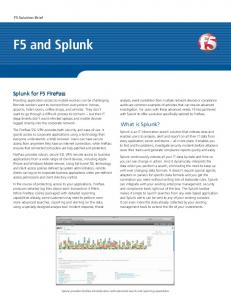
Configuration scenario In our example, the network is composed of two sites (Site A and Site B) each with its own FirePass controller cluster and BIG-IP LTM system. A BIG-IP GTM has been deployed at site B. Clients are able to connect to either FirePass and access network and application services.
Figure 1 Simple configuration example
Note
In our configuration example, the FirePass clusters at Site A and Site B are completely independent, and each cluster must be configured appropriately.
Configuring the FirePass controller In this deployment, we first configure the FirePass controllers. In order to complete this configuration, you must know the address and host name that you will use when configuring the BIG-IP GTM wide IP for use in the FirePass prelogon sequence. The Global Traffic Manager load balances name resolution requests across the services that are defined in the wide IP that is associated with the requested domain name. The virtual servers are serviced by the BIG-IP LTM system, which in turn will distribute traffic amongst the FirePass pool members.
F5 Deployment Guide
2
Configuring the FirePass controllers in a cluster In this configuration, we configure our FirePass controllers in a cluster. This allows for configuration synchronization across the FirePass devices, and simplifies management of the deployment. The BIG-IP LTM device then intelligently directs traffic to the appropriate FirePass device. In our deployment, each site contains a FirePass cluster (all FirePass devices in the cluster reside at the same local site). For this configuration, we recommend that each site has a dedicated FirePass cluster. We strongly recommend the cluster Master be in a redundant configuration. Configuring clustering on the FirePass controllers is outside the scope of this document, but is well documented in the FirePass documentation. See the FirePass Controller Administration Guide, Chapter 12, Using FirePass Controllers in Clusters.
Disabling load balancing on the FirePass cluster The first task is to disable load balancing on the FirePass controller. In this configuration, the load balancing duties are handled by the BIG-IP LTM system, so load balancing on the FirePass devices is not needed. The following procedure must be performed on the Cluster Master.
To disable load balancing on the FirePass controller 1. Log on to the FirePass controller Cluster Master as an administrator. 2. From the lower navigation pane, click Clustering. This option only appears when you have Clustering configured. 3. From the Load Balancing list, select Off (see Figure 2).
Figure 2 Turning off load balancing on the FirePass controller cluster
3
Deploying the FirePass Controller and BIG-IP Local and Global Traffic Manager
Configuring the FirePass controller to allow monitoring The first procedure in this configuration is to configure the FirePass controllers to allow the BIG-IP LTM system to effectively monitor them. This procedure must be repeated for each FirePass controller cluster member.
To configure the FirePass to allow monitoring 1. From the navigation pane, click Device Management, expand Monitoring, and then click Load Status Access Security. 2. Make sure that Do not use password for Load Status query is not checked. If there is a check in the box, click to uncheck it. 3. In the New Password box, type a new password. Retype the password in the Confirm New Password box. This password is separate from any other FirePass authentication, and is only used for basic authentication (HTTP) for accessing the Load Status page. 4. Click the Update button (see Figure 3). 5. Optional: You can limit Load Status page access to a specific set of IP addresses. Type IP addresses/masks separated by commas in the Load Status Access Security box, and then click the Apply button. In our example, we leave this at the default setting. Important: If you do configure Load Status Access Security, make sure you type the IP address/mask of all local BIG-IP LTM self IP addresses that could possibly monitor the Firepass devices.
F5 Deployment Guide
4
6. Repeat this procedure for the other FirePass controllers in the cluster.
Figure 3 Configuring the FirePass to allow BIG-IP LTM monitoring
Note
The IP address mask will initially have a default value of all. Once an IP address / mask is placed in the ACL field, all cannot be re-entered. You can use an address and mask pair of 0.0.0.0/1 and 128.0.0.0/1 as an equivalent configuration to all. Note
If your policy is that the admin console can only be accessed from the management network, be sure to set the IP access restrictions for IP access security (for more information, refer to the Limit IP Access section of the Admin Access Security page in the FirePass online help).
Allowing insecure access Because the BIG-IP LTM system is offloading the SSL traffic, the FirePass controller must be configured to allow insecure access in order to support HTTP interactions with the BIG-IP LTM device. Remember that this is not actually allowing insecure access, as the SSL traffic is terminated at the BIG-IP system. WARNING
Make sure that all connections to the FirePass devices are going through the BIG-IP LTM system. If you allow insecure access as described in the following procedure and there are connections that are not going through the BIG-IP LTM device, you are truly allowing insecure access to the FirePass controller, which should not be allowed.
5
Deploying the FirePass Controller and BIG-IP Local and Global Traffic Manager
To allow insecure access 1. Log into the FirePass controller Cluster Master as an administrator. 2. From the lower navigation pane, click Device Management. From the Device Management options in the upper section, expand Security, and click User Access Security. 3. In the User Access Security section at the top of the page, click the Allow insecure access option button. 4. Restart the service by clicking the Requires services restart link next to User Access Security at the top of the page.
Figure 4 Allowing insecure access so the BIG-IP LTM can offload the SSL traffic
When you see the Restart Screen, the service has been restarted. You do not need to click any of the links to restart the service again.
Setting the Network Configuration options In this section, we configure the IP addresses of the FirePass controller so that the BIG-IP LTM can monitor and direct traffic to FirePass controllers. We recommend two FirePass IP addresses for this configuration, one for management, and one for the BIG-IP LTM to direct traffic to. In order to maintain proper session state, FirePass client connections must remain at the same FirePass controller that the user logged into. To achieve this, the FirePass will redirect the user from the globally load balanced host name to a locally load balanced host name once the global load balancing decision has been made. The user session is then established using the locally balanced name. You must repeat this procedure for all FirePass members in the cluster.
To set the Network Configuration options 1. From the navigation pane, click Device Management, expand Configuration, and then click Network Configuration. 2. From the Add New IP section, in the IP Address /Netmask boxes, type the appropriate IP address and Netmask.
F5 Deployment Guide
6
3. In the Broadcast box, you can optionally type a broadcast IP. 4. From the Interface list, select the appropriate interface for this IP address. 5. Click the Add New button. 6. Repeat this procedure for the other (non-management) address.
Figure 5 Configuring the FirePass IP addresses
7. Repeat this entire procedure for all FirePass members in the cluster.
Configuring the Host options In this section, we configure the Fully Qualified Domain Name (FQDN) of the FirePass controller. In this configuration, the FQDN must match the name of the Wide IP you will configure on the BIG-IP GTM device. You must repeat this procedure for all FirePass members in the cluster.
To configure the Host options 1. From the navigation pane, click Device Management, expand Configuration, and then click Network Configuration. 2. Click the Hosts tab. 3. In the FQDN of the contoller box, type the domain name that you will use for the Wide IP on the BIG-IP GTM. 4. Click the Update button. 7
Deploying the FirePass Controller and BIG-IP Local and Global Traffic Manager
5. Repeat this procedure for all FirePass members in the cluster.
Figure 6 Configuring the GTM Wide IP as the FQDN of the FirePass
Modifying the Web Service options In this section, we modify the Web Service options on the FirePass controller to allow for SSL offloading to the BIG-IP LTM system. Repeat this procedure for each cluster member.
To configure the HTTPS port 443 Web Service options 1. From the navigation pane, click Device Management, expand Configuration, and then click Network Configuration. 2. Click the Web Services tab. 3. From the Web Server Configuration table, click the Configure link for the exisiting externally available host on port 443. 4. Make sure that the Host name is set to the locally load balanced name corresponding to the virtual IP the BIG-IP LTM will use at this site. 5. Click to clear the Use SSL box, if it is checked. 6. Clear the contents of the HTTPS URL to Redirect to box, if applicable. 7. Click the Do not redirect to HTTPS box. 8. Make sure the User Logon and Admin boxes are checked. 9. Uncheck the WebAccess Bypass box. 10. Check the Offloading SSL to a BIG-IP Local Traffic Manager box. 11. Click the Update button.
F5 Deployment Guide
8
12. Repeat this entire procedure for all FirePass members in the cluster.
Finalizing the configuration The final step in this section is to finalize the configuration changes you just made.
To finalize the configuration 1. Click the Finalize Section link (or the Finalize tab). 2. Review the settings. 3. Click the Finalize Changes button. You are prompted to reboot the FirePass controller.
Configuring the PreLogon Sequence The next procedure is to configure a new pre-logon sequence, or prepend new prelogon actions to an existing pre-logon sequence. This is necessary to ensure that all user sessions have been passed to a FirePass controller cluster virtual server by the BIG-IP GTM so that the system is appropriately load balanced. An additional virtual server and HTTP class configured on the BIG-IP LTM system will take care of the case where a user enters http://firepass.example.net rather than https://firepass.example.net. So, you don't need to use prelogon checking or a dedicated web service for this purpose. A check in the prelogon sequence performs redirection when the user enters https://firepass.example.net in a web browser or standalone FirePass client, and directs the user to the locally load balanced virtual IP address on the FirePass controller; for example https://firepass-a.example.net.
To configure a PreLogon Sequence 1. Log on to the FirePass Cluster Master as an administrator. 2. From the navigation pane, click Users, expand Endpoint Security, and click Pre-Logon Sequence. 3. In the New Sequence section at the bottom of the page, type a name for the sequence in the Create New Sequence box. In our example, we type GTM-Sequence. 4. From the Based on list, select template: Empty. 5. Click the Create button. The new sequence appears in the Select Sequence to Use table. 6. In the row of the sequence you just created, click the Edit button. Warning - Do not click the option button in front of the sequence name yet. If you click the option button, the Edit link will be
9
Deploying the FirePass Controller and BIG-IP Local and Global Traffic Manager
replaced with the View link, and you are not able to edit the sequence. The Pre-Logon Sequence Editor opens. 7. In the SubSequences section, click the Open subsequences management link. The Subsequences options appear on the right. 8. In the Add subsequence box, type a name for this subsequence. In our example, we type gtm-logon-check. 9. Move the curser between Subsequence:gtm-logon-check and the Logon Denied box. A small add [+] link appears on the arrow. Click that Add link. The Change Sequence panel appears on the right. 10. In the Change Sequence panel, from the Using list, select New Action, and then click the Apply Changes button. The New Action box appears in the subsequence. 11. On the right, from the Edit Action section, type a name for the action in the Name box where it currently says New Action. In our example, we type CheckLBStatus. In the Description box, you can optionally type a description. Click the Update Details button (see Figure 7).
Figure 7 Adding a new action to the subsequence
12. Move the curser between the new action name you just created (CheckLBStatus in our example) and the fallback link. A small add [+] link appears on the arrow. Click that Add link. The Insert Rule box opens on the right. 13. In the Insert Rule section, type a name for the rule in the Name box. In our example, we type AccessViaWideip. In the rule box, use the following rule syntax: session.network.server.host == ""
In our example, we type: session.network.server.host == "firepass.example.net"
F5 Deployment Guide
10
Click the Insert Rule button.
Figure 8 Inserting the Rule for the PreLogon Sequence
It is important to remember if you are running FirePass version 6.0.2, you must have HF-602-1 installed for this prelogon sequence to run. For FirePass versions 6.0.1 and earlier, this hotfix is not required. For more information on Hot Fixes, see Ask F5. 14. Next, we create another new subsequence. In the Subsequences section, click the Open subsequences management link. The Subsequences options appear on the right. 15. In the Add subsequence box, type a name for this subsequence. In our example, we type prelogon-inspection. 16. Move the curser between Subsequence:prelogon-inspection and the Logon Denied box. A small add [+] link appears on the arrow. Click that Add link. The Change Sequence panel appears on the right. 17. In the Change Sequence panel, from the Predefined Actions list, click Check for Antiviruses, and then click the Apply Changes button. 18. Click the Logon Denied Page link box for the Monitor is Running item. The End Page Properties options open on the right.
11
Deploying the FirePass Controller and BIG-IP Local and Global Traffic Manager
19. From the Type list, select External Logon Page (Client data posted). In the External URL box, type the URL for the locally load balanced URI, and then click the Update button. This completes the prelogon-inspection subsequence in our example.
Figure 9 Configuring the new prelogon subsequence
20. In the first subsequence you created (Subsequence:gtm-logon-check in our example), move the curser between AccessViaWideip and the Logon Denied box. A small add [+] link appears on the arrow. Click that Add link. The End Page Properties options open on the right. 21. From the Change Sequence list, select Replace action (deletes branches after). From the Subsequences table, click the button for the subsequence you created for the Antivirus check. In our example, we click prelogon-inspection. 22. Click the Update button. 23. In the Subsequences:gtm-logon-check section, from the Fallback branch, click the Logon Denied Page link box after the fallback link. The End Page Properties options open on the right.
F5 Deployment Guide
12
24. From the Type list, select Redirect (No client data posted). In the External URL box, type the BIG-IP GTM wide IP host name, and then click the Update button. In our example, we type https://firepass.example.net.
Figure 10 Configuring the Fallback option to be the host name of the BIG-IP GTM wide IP
25. In the Sequence section at the top of the page, move the curser between Sequence Start and the Logon Allowed Page box. A small add [+] link appears on the arrow. Click that Add link. 26. From the Change Sequence list, select Replace action (deletes branches after). 27. In the Subsequences section, click the button for the name of the first subsequence you created, and click the Apply Changes button. 28. In our example, we click Subsequence: gtm-logon-check. The completed sequence should look like the following example:
Figure 11 The completed PreLogon Sequence 29. Click the Back to Console link in the upper right. The PreLogon Sequence page opens.
13
Deploying the FirePass Controller and BIG-IP Local and Global Traffic Manager
30. In the Select Sequence to Use section, click the option button for the Sequence you just created, and then click the Apply button. In our example, we click the button for GTM-Sequence.
Configuring the FirePass Standalone client If you are using the FirePass Standalone client, you need to ensure that the Use Legacy Logon Prompt box is unchecked for this configuration. If you are not using the FirePass Standalone client, you can skip this procedure. For more information on the FirePass Standalone client, see the FirePass Controller Administrator Guide.
To disable the Use Legacy Logon Prompt 1. Launch the FirePass Standalone client. 2. From the View menu, select Settings. The Client Settings dialog box opens. 3. In the navigation pane, click Session Settings. The Session Settings options open. 4. Clear the Use Legacy Logon Prompt check box, if it is checked. 5. Click the OK button.
Figure 12 Disabling the Use Legacy Logon Prompt option
This completes the FirePass controller configuration.
F5 Deployment Guide
14
Configuring the BIG-IP LTM system In this section, we configure the BIG-IP LTM system for monitoring and directing traffic to the FirePass controllers. The following are prerequisites for this section: ◆
The BIG-IP LTM must be running version 9.4 or later.
◆
You need two SSL certificates; one for the globally load balanced name and one for the locally load balanced name (and one IP address for each of these).
Use the following procedures to configure the BIG-IP LTM to load balance and offload SSL from the FirePass controllers: • Connecting to the BIG-IP LTM system • Using SSL certificates and keys • Creating the external health monitor • Creating a pool • Creating profiles • Creating the SSL offload iRule • Creating the virtual servers Tip
We recommend you save your existing BIG-IP configuration before you begin the procedures in this Deployment Guide. To save your BIG-IP configuration, see Appendix B: Backing up and restoring the BIG-IP LTM system configuration, on page 36. The BIG-IP LTM system offers both web-based and command line configuration tools, so that users can work in the environment that they are most comfortable with. This Deployment Guide contains procedures to configure the BIG-IP LTM system using the BIG-IP web-based Configuration utility only. Note
If the BIG-IP LTM device you are using in front of the FirePass controller(s) is not a dedicated device (you are using it in front of additional devices, you can create VLANs on the BIG-IP LTM device to separate FirePass controller traffic from your other application traffic. Configuring VLANs on the BIG-IP LTM and FirePass devices is outside the scope of this document. See the appropriate product’s documentation for information on how to configure VLANs.
Connecting to the BIG-IP LTM system Use the following procedure to access the BIG-IP web-based Configuration utility using a web browser. 15
Deploying the FirePass Controller and BIG-IP Local and Global Traffic Manager
To connect to the BIG-IP system using the Configuration utility 1. In a browser, type the following URL: https:// A Security Alert dialog box appears, click Yes. The authentication dialog box appears. 2. Type your user name and password, and click OK. The Welcome screen opens. Once you are logged onto the BIG-IP system, the Welcome screen of the new Configuration utility opens. From the Configuration utility, you configure and access information on monitoring the BIG-IP system.
Using SSL certificates and keys Before you can enable the BIG-IP LTM system to offload connections from your FirePass devices, you must install a SSL certificate on each virtual server that you wish to use for FirePass connections on the BIG-IP LTM device. For this Deployment Guide, we assume that you already have obtained an SSL certificate, but it is not yet installed on the BIG-IP LTM system. For information on generating certificates, or using the BIG-IP system to generate a request for a new certificate and key from a certificate authority, see the Managing SSL Traffic chapter in the Configuration Guide for Local Traffic Management.
Importing keys and certificates Once you have obtained a certificate, you can import this certificate into the BIG-IP system using the Configuration utility. By importing a certificate or archive into the Configuration utility, you ease the task of managing that certificate or archive. You can use the Import SSL Certificates and Keys screen only when the certificate you are importing is in Privacy Enhanced Mail (PEM) format.
To import a key or certificate 1. On the Main tab, expand Local Traffic. 2. Click SSL Certificates. This displays the list of existing certificates. 3. In the upper right corner of the screen, click Import. 4. From the Import list, select the type of import (Key or Certificate). 5. Select the import method (text or file). 6. Type the name of the key or certificate. 7. Click Import. 8. If you imported the certificate, repeat this procedure for the key.
F5 Deployment Guide
16
Repeat this entire procedure to import additional certificate and key pairs. As noted previously, you need two SSL certificates; one for the globally load balanced name and one for the locally load balanced name.
Creating the external health monitor The first step in the BIG-IP LTM configuration is to create a health monitor for the FirePass devices. For this configuration, we use a EAV health monitor, which uses an external script to check the status of the FirePass devices. You can either download the script from F5, or see Appendix A: EAV script code, on page 35 to create the script yourself. The EAV monitors the FirePass controllers and provides the ability to alter traffic flows based on the FirePass. The BIG-IP LTM is able to make informed load balancing decisions based upon exceeding a configurable threshold for one minute UNIX load average or concurrent session usage. An upcoming release of the BIG-IP LTM will include built-in support for monitoring FirePass devices, which will eliminate the need for this external script. Important
If you are using the BIG-IP LTM in a redundant configuration, you need to copy this script on to both LTM systems. The script is not copied over using the configsync command.
To create the external health monitor 1. Download the script (found at www.f5.com/solution-center/deployment-guides/files/ ltm-firepass-eav.pl) or create your own perl script based on the script in Appendix A: EAV script code, on page 35. 2. Save the script file on the BIG-IP GTM system in the /usr/bin/monitors directory. For example, run the following command from a command line, scp ltm-firepass-eav.pl
[email protected]:/usr/bin/monitors
3. From the command line, run the following command: chmod +x /usr/bin/monitors/ltm-firepass-eav.pl.
This enables BIG-IP GTM to execute the script. 4. On the Main tab, expand Local Traffic, and then click Monitors. The Monitors screen opens. 5. Click the Create button. The New Monitor screen opens. 6. In the Name box, type a name for the Monitor. In our example, we type firepass-eav. 7. From the Type list, select External. The External monitor options display. 17
Deploying the FirePass Controller and BIG-IP Local and Global Traffic Manager
8. In the Interval box, type a time in seconds. In our example, we type 15. This setting determines how frequently the monitor runs. 9. In the Timeout box, type a time in seconds. We recommend this is at least three times the interval, plus one second. In our example, we type 61. This setting determines how long the target has in which to respond to the monitor request. 10. In the Probe Timeout box, type a number of seconds. 11. In the External Program box, type the name of the script you uploaded to the BIG-IP GTM system. In our example, we type firepass-eav.pl. 12. In the Arguments box, you specify values required by the script for load average and concurrency percentage, in that order, separated by a space. These values depend on your configuration. We recommend a max concurrency of 90 to 95%, however you may need to adjust this down according to usage pattern. In our example, we type 12 80 (see Figure 13). 13. Click the Finished button. Important
If you downloaded the script, you must open the file in an editor and set the my $pass parameter to equal the name of your password. This password should be the same across all FirePass devices in this configuration.
F5 Deployment Guide
18
Figure 13 Creating the external health monitor
Creating a pool The next step is to create a BIG-IP LTM pool for the FirePass nodes.
To create a pool 1. On the Main tab, expand Local Traffic, and then click Pools. The Pool screen opens. 2. Click the Create button. The New Pool screen opens. 3. In the Name box, type a name for this pool. In our example, we type firepass-pool. 4. In the Health Monitor section, from the Available list, select the monitor you created in Creating the external health monitor. In our example, we select firepass-eav. 5. From the Load Balancing list, select a load balancing method appropriate for your configuration. For information on the different load balancing methods, see the Online Help or the BIG-IP manual.
19
Deploying the FirePass Controller and BIG-IP Local and Global Traffic Manager
6. In the New Members section, in the Address box, enter the address of one of the Web Services on the FirePass device. 7. In the Service Port box, type 443, or select HTTPS from the list. The port must be 443, so you cannot do port translation on the BIG-IP. 8. Click the Add button. 9. Repeat steps 5-7 for each FirePass node. 10. Click the Finished button.
Figure 14 Creating the pool for the FirePass controllers
Creating profiles BIG-IP version 9.0 and later use profiles. A profile is an object that contains user-configurable settings, with default values, for controlling the behavior of a particular type of network traffic, such as HTTP connections. Using profiles enhances your control over managing network traffic, and makes traffic-management tasks easier and more efficient. Although it is possible to use the default profiles, we strongly recommend you create new profiles based on the default parent profiles. Creating new profiles allows you to easily modify the profile settings specific to this deployment, and ensures you do not accidentally overwrite the default profile. F5 Deployment Guide
20
Creating an HTTP profile We first create an new HTTP profile, based of the default HTTP profile.
To create a new HTTP profile 1. On the Main tab, expand Local Traffic. 2. Click Profiles. The HTTP Profiles screen opens. 3. In the upper right portion of the screen, click the Create button. The New HTTP Profile screen opens. 4. In the Name box, type a name for this profile. In our example, we type firepass-http. 5. From the Parent Profile list, ensure that http is selected. 6. In the Settings section, locate the Request Header Erase row, and click the Custom box on the far right. In the Header Erase box, type the following: BIGIP_HTTPS BIGIP_SSL_PROTOCOL BIGIP_SSL_CIPHER BIGIP_SSL_CIPHER_USEKEYSIZE
7. Click the Custom box in the OneConnect Transformations row. In the Enable box, click to clear the box, which disables OneConnect Transformations (see Figure 15). 8. Leave the rest of the options at their default settings and then click the Finished button.
Figure 15 Creating the HTTP profile
21
Deploying the FirePass Controller and BIG-IP Local and Global Traffic Manager
For more information on creating or modifying profiles, or applying profiles in general, see the BIG-IP documentation.
Creating persistence profiles The next is to create persistence profiles. Using persistence is required when you are using the BIG-IP LTM device to load balance more than one FirePass controller, however the method of persistence depends on your site requirements. In this example, we create two persistence profiles, a cookie persistence profile, and a source address persistence profile that is used as a fallback method.
To create a new cookie persistence profile 1. On the Main tab, expand Local Traffic, and then click Profiles. The HTTP Profiles screen opens. 2. On the Menu bar, click Persistence. The Persistence Profiles screen opens. 3. In the upper right portion of the screen, click the Create button. The New Persistence Profile screen opens. 4. In the Name box, type a name for this profile. In our example, we type firepass-cookie. 5. From the Persistence Type list, select Cookie. The configuration options for cookie persistence appear. 6. Modify any of the settings as applicable for your network. In our example, we leave the options at the default levels. 7. Click the Finished button.
Figure 16 Creating the Cookie Persistence profile
Now we create a new source address affinity persistence profile.
F5 Deployment Guide
22
To create a source address persistence profile 1. On the Main tab, expand Local Traffic, and then click Profiles. The HTTP Profiles screen opens. 2. On the Menu bar, click Persistence. The Persistence Profiles screen opens. 3. In the upper right portion of the screen, click the Create button. The New Persistence Profile screen opens. 4. In the Name box, type a name for this profile. In our example, we type firepass-source. 5. From the Persistence Type list, select Source Address Affinity. The configuration options for Source Address Affinity persistence appear. 6. Modify any of the settings as applicable for your network. In our example, we leave the options at the default levels. 7. Click the Finished button
Creating a Client SSL profile In this procedure, we create two Client SSL profiles, one for the globally load balanced name, and one for the locally load balanced name. In our example, our globally load balanced name (the wide IP name) is firepass.example.net. Each site has a locally load balanced name. We use firepass-a.example.net and firepass-b.example.net. These profile contain the SSL certificate and Key information for offloading the SSL traffic. Note
If you are using a wildcard certificate, you only need to create one Client SSL profile. For more information on wildcard certificates, see Ask F5 solution 6823.
To create a new Client SSL profile based on the default profile 1. On the Main tab, expand Local Traffic, and then click Profiles. The HTTP Profiles screen opens. 2. On the Menu bar, from the SSL menu, select Client. The Client SSL Profiles screen opens. 3. In the upper right portion of the screen, click the Create button. The New Client SSL Profile screen opens. 4. In the Name box, type a name for this profile. In our example, we type firepass-ssl. 5. In the Configuration section, click a check in the Certificate and Key Custom boxes.
23
Deploying the FirePass Controller and BIG-IP Local and Global Traffic Manager
6. From the Certificate list, select the name of the Certificate you imported in the Importing keys and certificates section. 7. From the Key list, select the key you imported in the Importing keys and certificates section. 8. Click the Finished button. Repeat this entire procedure for the locally load balanced name, selecting the appropriate certificate and key pair.
Creating the HTTP Class profile The next step is to create an HTTP Class profile. This profile is used by the HTTP virtual server to seamlessly redirect users to the appropriate logon service if they mistakenly type http://firepass.example.net instead of https://firepass.example.net. This procedure should be performed on the BIG-IP LTM systems at each site.
To create an HTTP Class 1. On the Main tab, expand Local Traffic, and then click Profiles. The HTTP Profiles screen opens. 2. On the Menu bar, from the Protocol menu, select HTTP Class. The HTTP Class Profiles screen opens. 3. In the Name box, type a name for this HTTP class. In our example, we type redirect-class. 4. In the Action section, from the Send to row, click the Custom box. From the Send to list, select Redirect to. The Redirect to Location box appears. 5. In the Redirect to Location box, type the BIG-IP GTM wide IP name preceded by https://. In our example, we type https://firepass.example.net (see Figure 17).
F5 Deployment Guide
24
Figure 17 Creating the HTTP Class
Creating the SSL offload iRule The next step in this configuration is to create an iRule on the BIG-IP LTM device that inserts information about the SSL connection into the request header, which is required for proper FirePass functionality.
To create the Redirect iRule 1. On the Main tab, expand Local Traffic, and then click iRules. The iRules screen opens. 2. In the upper right portion of the screen, click the Create button. The iRule screen opens. 3. In the Name box, type a name for this iRule. In our example, we type firepass-ssloffload.
25
Deploying the FirePass Controller and BIG-IP Local and Global Traffic Manager
4. In the Definition section, type (or copy and paste) the following iRule: when RULE_INIT { set ssl_handshake 0 } when CLIENTSSL_HANDSHAKE { set ssl_handshake 1 } when CLIENTSSL_CLIENTCERT { set ssl_handshake 1 } when HTTP_REQUEST { set http_disable 0 if { $ssl_handshake == 1 } { HTTP::header replace "BIGIP" "on" HTTP::header replace "BIGIP_SSL_CIPHER" "[SSL::cipher name]" HTTP::header replace "BIGIP_SSL_CIPHER_USEKEYSIZE" "[SSL::cipher bits]" HTTP::header replace "BIGIP_SSL_PROTOCOL" "[SSL::cipher version]" set ssl_handshake 0 } if { [HTTP::uri] starts_with "/myvpn" } { set http_disable 1 } if { [HTTP::uri] starts_with "/tunnel" } { set http_disable 1 } } when HTTP_REQUEST_SEND { if { $http_disable != 0 } { HTTP::disable } }
Figure 18 iRule for SSL offload 5. Click the Finished button. This new iRule appears in the list.
Creating the virtual servers The next step in this configuration is to create virtual servers on the BIG-IP LTM device. One virtual server is used for FirePass logons, and the other is to redirect users from HTTP to HTTPS.
F5 Deployment Guide
26
In this step, we create three virtual servers at each site. One virtual server for each of the Client SSL profiles, and the other for the HTTP redirect. This ensures there is a one-to-one mapping between SSL certificates and host names. It is not necessary to create two HTTPS virtual servers if you are using a wildcard certificate.
To create the HTTPS virtual server 1. On the Main tab, expand Local Traffic, and then click Virtual Servers. The Virtual Server screen opens. 2. In the upper right portion of the screen, click the Create button. The New Virtual Server screen opens. 3. In the Name box, type a name for this virtual server. In our example, we type firepass-https. 4. In the Destination section, select the Host option button. 5. In the Address box, type the IP address of this virtual server. This should be on the external VLAN of the BIG-IP device. 6. In the Service Port box, type 443 or select HTTPS from the list.
Figure 19 Adding the FirePass virtual server
7. Leave the Type list at the default setting: Standard. 8. From the HTTP Profile list, select the name of the profile you created in the Creating an HTTP profile section. In our example, we select firepass-http. 9. From the SSL Profile (Client) list, select the name of the profile you created in the Creating a Client SSL profile section. In our example, we type firepass-ssl.
27
Deploying the FirePass Controller and BIG-IP Local and Global Traffic Manager
Figure 20 Selecting the HTTP and SSL profiles for the virtual server 10. In the Resources section, select the iRule you created in the Creating the SSL offload iRule section. In our example, we select firepass-ssloffload. 11. In the Default Pool section, select the pool you created in the Creating a pool section. In our example we select firepass-pool. 12. From the Default Persistence Profile list, select the persistence profile you created in the Creating persistence profiles section. In our example, we select firepass-cookie 13. From the Fallback Persistence Profile list, select firepass-source.
Figure 21 Resources section of the add virtual server page
F5 Deployment Guide
28
14. Click the Repeat button. You could alternatively click the Finished button and repeat the procedure according to step 15. 15. Repeat this procedure to create a virtual server that uses the other Client SSL profile you created in Creating a Client SSL profile, on page 1-23. If you are using a wildcard certificate, it is not necessary to repeat this procedure.
To create the HTTP virtual server The final procedure in the BIG-IP LTM configuration is to create an HTTP virtual server that will redirect users to HTTPS using the HTTP Class profile we created earlier.
To create the HTTP virtual server 1. On the Main tab, expand Local Traffic, and then click Virtual Servers. The Virtual Server screen opens. 2. In the upper right portion of the screen, click the Create button. The New Virtual Server screen opens. 3. In the Name box, type a name for this virtual server. In our example, we type firepass-redirect-vs. 4. In the Destination section, select the Host option button. 5. In the Address box, type the IP address of this virtual server. This should be on the external VLAN of the BIG-IP device. 6. In the Service Port box, type 80 or select HTTP from the list. 7. Leave the Type list at the default setting: Standard. 8. From the HTTP Profile list, select the name of the profile you created in the Creating an HTTP profile section. In our example, we select FP_http. 9. In the Resources section, from the HTTP Class Profiles row, select the HTTP Class profile you created in the Creating the HTTP Class profile section from the Available list. Click the Add (/dev/null)); for (@response) { if ( $_ =~ /(Usage|Percentage|Average|table): \d/ ) { my ($name, $val) = split /:/, $_; chop($sessionUsagePercentage = $val) if (/Percentage/); $MinLoadAverage = $val if (/Load Average/); $largestDatabaseTableSize = $val if (/Database table/); } } # when a device is marked UP it means that session utilization is below the # threshold, and the 1 Minute load average is below the threshold if ( ($sessionUsagePercentage < $sessionUsagePercentageThreshold) && ($MinLoadAverage < $MinLoadAverageThreshold)) { print "UP\n"; } exit(0);
35
Deploying the FirePass Controller and BIG-IP Local and Global Traffic Manager
Appendix B: Backing up and restoring the BIG-IP LTM system configuration We recommend saving your BIG-IP configuration before you begin this configuration. When you save the BIG-IP configuration, it collects the following critical data and compress it into a single User Configuration Set (UCS) file: • BIG-IP configuration files • BIG-IP license and passwords • SSL certificates • SSH keys
Saving up and restoring the BIG-IP configuration The Configuration Management screen allows you to save and restore all configuration files that you may edit to configure a BIG-IP LTM system. These configuration files are called a User Configuration Set (UCS). The Configuration Management screen contains sections for saving and restoring a configuration. The list boxes in these sections display only files in the /usr/local/ucs directory. If you want to save or restore files from another directory, you must type the full path in the box.
To save the BIG-IP configuration using the Configuration utility 1. In the navigation pane, click System Admin. The User Administration screen displays. 2. Click the Configuration Management tab. The Configuration Management screen displays. 3. In the Save Current Configuration section, type the path where you want your configuration file saved or choose a path from the list box. If no path is specified, the BIG-IP saves files to /usr/local/ucs. The BIG-IP appends the extension.ucs to file names without it. In our example, we type f5_backup.ucs. 4. Click the Save button to save the configuration file.
To restore a BIG-IP configuration 1. In the navigation pane, click System Admin. The User Administration screen displays. 2. Click the Configuration Management tab. The Configuration Management screen displays.
F5 Deployment Guide
36
3. In the Restore a Configuration section, choose the configuration file you want to restore from the list box, or type the path where your configuration files were saved. 4. Click the Restore button. To check the status of the restoration, click the View Log button. You should wait a few moments for the log file to start generating before you click View Log. Repeated clicking of this button will update your screen with the most current log file information until the restoration is complete.
37