Laboratory section: The WebCT course pages lead also through the ... own web servers and provide parts of the course module ... There are many issues to solve for building such a course in .... your own automated procedures. Scripts are ...
E-University A Virtual Laboratory for Practical exercises Amine Berqia 1 , Alassane Diop1 , Jürgen Harms 1 Abstract Remote teaching and distant learning take more and more a significant place in the universities. However, much of courses do not propose practical exercises. The goal of our project VITELS (Virtual Internet Telecommunications Laboratory of Switzerland) is to develop a course that provides practical exercises in the area of telecommunications and computer networks to the students. The exercises shall be performed by students remotely. Students do not need to be present in particular laboratory rooms. In addition, supplementary tutorial material and theoretical on-line exercises are under development. In total, seven modules and the authentication/authorization infrastructure will be developed and maintained by the different involved institutes and integrated into a common web environment. The basic course will consist of the following seven modules: Simulation of IP Network Configuration, Configuration and Performance Evaluation of a Real IP Network, Management and Configuration of a Virtual Network, Firewalls, Protocol Analysis, Linux System Installation and Configuration, Client/Server Programming. The development of the course by different partners allows to use the different available equipment resources at the different locations and to use the sophisticated technological knowledge and experience available at the various partner organisations. Given the innovation nature of the project the group in Geneva decided to use the Linux System Installation and Configuration module as an “apprenticeship”. In this paper, we will present a remote laboratory for Linux Installation and configuration.
of the VITELS project - four universities (Bern, Fribourg, Genève, Neuchâtel) and one engineering school (Fribourg) is currently developing modules based on the own competence and equipment. The seven modules focus on Linux System Installation and Configuration, IP Network Simulation, Configuration and Performance Evaluation of a Real IP Network, Client/Server Programming, Protocol Analysis, IP Security and Firewall Management. Each participating university develops and maintains its modules within its own laboratory environment, but allows remote students to access and use the laboratory infrastructure via Internet technology. The entire course must appear to the user as being homogeneous, although it is distributed over several locations in Switzerland. A web-learning environment called WebCT [3] is used to lead through the course modules.
COURSE S ERVER A typical scenario of a remote lab experiment involves the following steps : •
Key-words: Remote teaching, Remote Lab, Practical exercises , VITELS.
•
INTRODUCTION •
Remote laboratories deal with performing real lab experiments remotely via the Internet. The CUI "Centre Universitaire Informatique", at the university of Geneva, has in charge to develop and implement educational lab systems enabling students to access via the Internet, real lab set-ups situated either in a central location or distributed over several remote areas. The work is being performed within the project called Virtual Internet and Telecommunications Laboratory of Switzerland VITELS [1], which is one of several projects within the Swiss Virtual Campus SVC [2] program funded by the Swiss ministry of education and science. Each partner 1
Registration: A student accesses the URL to perform the experiment. If he/she is not a registered student the system should ask the student to first register for the lab before trying to perform the experiment. Once the student registers he/she should be given a user login and password for their future use. It should be noted that self-registration is not allowed for any user. A student’s unique keylogin name is checked against a database of students list. Logging-in: Once the student has a valid login and password he/she can login to the remote real laboratory server. He/she then can choose an experiment from the list of experiments to perform. Performing the experiment: When a student starts performing the experiment, he/she is able to enter input values and submit them to the hardware. The hardware, then, acts upon the input parameter and generates results. The results are finally collected by the local host computer and sent back to the student’s computer. The student can rerun (submit different values to) the experiment as many times as he desires. Once satisfied, he can submit the results for grading.
Our remote course is basically the traditional one with the big difference that it is remotely accessible over the Internet. In order to offer that course in a superior manner than the
CUI, Université de Genève, {berqia, diop, harms}@cui.unige.ch
International Conference on Engineering Education
August 18–21, 2002, Manchester, U.K. 1
E-University traditional one, the differences between both have to be pointed out. Especially the differences concerning the didactical aspects have to be found. It is obvious that in a remote course that is open 24 hours a day. There are no social contacts with other students during the laboratory or students doing homework in the PC pool. But there are many helpful tools that can at least partly replace these negative aspects or even improve and accelerate the learning process. A web-learning environment called (WebCT) is used to lead through the course modules and we try to use all the tools and features of this platform. The module structure is the same as in the traditional course: •
Pre laboratory section: Students get an introduction but not a mandatory list of readings. To select the readings, students use the tool called “Self-Test” (our “intelligent” reference management tool) and get, in case of a wrong answer, a link or source for the best readings. When students feel ready, they can go to the tool called “Quiz” that consists of multiple-choice and essay questions. Essay questions have to be rated by a tutor. Quiz results are logged and can be reviewed by tutors at any time. After successfully passing the quiz, students can access the remote course than in the traditional one as there is at most times no personal assistance available and the laboratory presence time is restricted to 4 hours.
•
Laboratory section: The WebCT course pages lead also through the practical work session. Students get jobs, detailed explanations and hints in carefully selected portions. For the practical work itself they work in additional browser windows: – One window for WebCT with the main course pages, where it is indicated when and where to do what. – One window for the module infrastructure overview, where students see a graphic of the experimental set.
•
Post laboratory section: Students have to prove what they have learned before, sending commented traffic dumps and logs from the practical work. Tutors have to rate the traffic dumps and logs. In a final quiz with multiple choice and essay questions students prove their knowledge. WebCT offers chat rooms, news groups and a White Board where students and tutors can exchange real-time drawings on-line. There is an additional glossary where course specific words are explained.
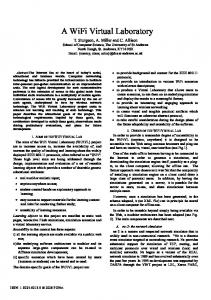
content directly to the student. The result is that the course platform leads through the entire course, like a red thread, but is supplemented with external content from external sources. There are many issues to solve for building such a course in an open and distributed environment. One important issue and at the same time a main obstacle to overcome is the distributed course infrastructure with several modules placed in five geographically distributed locations all over Switzerland. Each partner should be able to create the content of its own course modules rather independently. Other important issues are user administration and security. The courses are open to pre-registered students only. Since users from several administratively independent institutes need to access the entire course, we decided to build a centralised database containing authentication and authorisation data in the first phase of the project. In a later phase we also intend to include accounting. On each site, an entry point called gateway or portal, checks the accessing persons based on the authentication result it receives from the central LDAP directory as shown in FIGURE 1. There are two LDAP servers shown because LDAP and our architecture allow maintaining distributed directories, which can be an advantage if already existing LDAP directories at partner sites should be integrated in the remote course structure.
We propose to use the course platform WebCT that offers many useful functions for student management and especially for creating and automatically rating exercises. Although WebCT offers news boards, chat, student mail, white boards and more it is restricted in terms of designing web pages. As a consequence, the portal servers run their own web servers and provide parts of the course module
FIGURE 1 GLOBAL ARCHITECTURE FOR THE VITELS COURSE
FIGURE 1 shows the possible connections in our architecture. Students and administration personal can access module and scheduling information on the central directory server. Students can connect to the lab modules and portal
International Conference on Engineering Education
August 18–21, 2002, Manchester, U.K. 2
E-University servers to query the directory, to check the student data and the module state. For more details about the architecture see [4] on our web page [1].
sends an IP address. The client takes the first answer and confirms it to the server. In addition to the IP address, the server will give some other network parameters to the client, and information on the boot procedure to follow. Boot server discovery: In the case of PXE remote-boot, the client then proceeds to the discovery of the boot server (in some cases the PXE process is happening at the same time as the DHCP process). The boot server will be responsible for delivering a network boot program to the client. It is not necessarily the same computer as the DHCP server. The client will answer to the first boot server that replies, and download a small network boot program using a simple multicast protocol (MTFTP). NBP connection: If the network boot program is REMBO [5], the client will establish a secure connection to the server, and get an information packet from the NBP service on the server. This packet includes parameters specifying how the computer should be configured, the group to which the computer belongs to, whether I/O devices should be locked, what file server and backup file server it has been attributed to and what is the startup page to load. Pre-OS configuration: REMBO will then perform the tasks as defined in the startup page. To acomplish these tasks, REMBO may use its multicast protocol to download required files. The exact list of tasks is defined in HTML pages and Rembo-C scripts. Many actions can be performed to put the computer in a well-defined state and ensure a failproof startup. OS booting: If the scripts contain a OS boot command, or if the user has interactively selected an OS boot option with the graphical user interface on the client, REMBO will remove itself from the memory, and let the computer start the operating system, as if the computer was booting normally from the hard disk. This ensure a full compatibility with the operating system, and avoid all problems of the traditional diskless remote boot (i.e. REMBO is not present in the memory when the OS has started).
REMOTE LAB: LINUX INSTALLATION AND CONFIGURATION The team at University of Geneva CUI has in charge to develop two modules for VITELS [1] project: • Linux System Installation and Configuration; • Configuration and Performance Evaluation of a Real IP Network. Given the innovation nature of the project, the team in Geneva decided to use the Linux System Installation and Configuration module as an “apprenticeship”. In this paper, we present the remote laboratory with practical exercises for Linux System Installation and Configuration. The development of the remote lab is based on the complete architecture shown in FIGURE 2 and the software tools described below.
REMBO-C SCRIPTING Scripts are useful to automate your management operations, and to handle special operations that are not covered by the standard wizards distributed with REMBO. You can perform a number of tasks by just a few clicks using REMBO wizards. REMBO Professional and REMBO Enterprise even include wizards to setup automatic operating system restauration and boot menus. However, if you cannot use them for your purpose, you will need scripting to design your own automated procedures. Scripts are also very convenient if you often have to build disk images and do not want to have to do it interactively. When a REMBO client computer is started, it starts by loading its startup page (as defined in the server configuration, by default rembo.shtml). The body of the page is displayed on the desktop, and if there is a
FIGURE 2 THE COMPLETE ARCHITECTURE OF THE MODEL
REMBO S ERVER AND CLIENT DEPLOYMENT A typical remote-boot sequence goes through the following phases: Power on: The remote-boot computer is turned on, either by a user or by a wake-up event. IP address discovery: The remote-boot client broadcasts a DHCP request to get an IP address. Any DHCP server that knows the client (i.e., recognizes its hardware address) or that has a pool of freely distributable dynamic addresses
International Conference on Engineering Education
August 18–21, 2002, Manchester, U.K. 3
E-University VIRTUAL N ETWORK COMPUTING
section in the page, it is compiled and executed. This is the place to put your custom automation code.
VNC (Virtual Network Computing) [7] stands for Virtual Network Computing. It is, in essence, a remote display system which allows you to view a computing 'desktop' environment not only on the machine where it is running, but from anywhere on the Internet and from a wide variety of machine architectures. In our module, Linux Systems Installation and Configuration we use Xvnc. Xvnc is the Unix VNC server, which is based on a standard X server. Applications can display themselves on it as if it were a normal X display, but they will actually appear on any connected VNC viewers rather than on a physical screen.
FIGURE 4 VIRTUAL NETWORK COMPUTING
So Xvnc is really two servers in one. For the applications it is an X server, and to the remote VNC users it is a VNC server. By convention we have arranged that the VNC server display number will be the same as the X server display number, which means you can use eg. snoopy:2 to refer to display 2 on machine 'snoopy' in both the X world and the VNC world. Normally you will start Xvnc using the vncserver script, which is designed to simplify the process, and which is written in Perl. You will probably want to edit this to suit your preferences and local conditions. We recommend using vncserver rather than running Xvnc directly, but Xvnc has essentially the same options as a standard X server, with a few extensions. Running Xvnc -h will display a list.
FIGURE 3 EXAMPLE OF A SCRIPT REMBO- C
REMOTE ADMINISTRATION BY WEBMIN Webmin is a web-based interface for system administration for Unix. Using any browser that supports tables and forms (and Java for the File Manager module), you can setup user accounts, Apache, DNS, file sharing and so on. Webmin consists of a simple web server, and a number of CGI programs which directly update system files like /etc/inetd.conf and /etc/passwd. The web server and all CGI programs are written in Perl version 5, and don’t use standard Perl modules.
STUDENT STEPS IN O UR R EMOTE LABORATORY Students with login and password have access to the common VITELS course platform on WebCT [3]. The first stage is to follow the course suggested by one of the 7 modules. Once the student is ready to make the practical part he must book a slot on the scheduling. The Linux module consists in learning to the student how to install and configure a distribution Linux Mandrake.
International Conference on Engineering Education
August 18–21, 2002, Manchester, U.K. 4
E-University The student needs only a web browser to carry out practical work of the Linux module. Once connected to our remote laboratory, the student carries out all the operations on a real machine that is allocated to the student during one slot. The Steps of the installation and configuration are similar to the installation and configuration from a CD. The design of the environment is similar to design of the distribution Linux Mandrake with our contents.
FIGURE 6 INSTALLATION AND CONFIGURATION STEPS
CONCLUSION In this paper the concept of real laboratories over the Internet called remote real lab has been proposed and realised as a part of our project VITELS. Linux Installation and Configuration has been presented as an example of a remote real lab. We can see that our environment provides students the freedom of times and locations to conduct real practical exercises without a physically lab attending.
REFERENCES [1] Virtual Internet Telecommunications Laboratory of Switzerland, http://www.vitels.ch [2] Swiss Virtual Campus, http://www.virtualcampus.ch [3] WebCT, http://www.webct [4] Steinemann, Zimmerli, Jampen, Braun, "Architectural Issues of a Remote Network Laboratory", 2001, NL2002. [5] Rembo, http://www.rembo.com [6] A. BERQIA, A. DIOP, J. HARMS, "A complete Architecture of a Virtual Telecommunications Laboratory", International Conference on Tele-Education in Mechatronics Based on Virtual Laboratories, Weingarten-Germany 17th-21th July 2001. [7]
AT&T Laboratories Cambridge 1986; http://www.uk.research.att.com/vnc
[8] MandrakeSoft SA 1998, 1999, 2000, 2001, 2002; .http://www.mandrakelinux.com/
FIGURE 5 VITELS COURSE P LATFORM
International Conference on Engineering Education
August 18–21, 2002, Manchester, U.K. 5