Implementation and Evaluation of a Wired Data Center Sensor Network Mikko Pervil¨ a1 , Mikko Rantanen1 , and Jussi Kangasharju2 1
University of Helsinki, Department of Computer Science PL 68, 00014 Helsingin yliopisto, Finland
[email protected] [email protected] 2 Helsinki Institute for Information Technology Department of Computer Science PL 68, 00014 Helsingin yliopisto, Finland
[email protected]
Abstract. As an alternative to often costly computational fluid dynamics (CFD) modelling of a data center (DC), we describe an ultra-low cost solution based on a wired sensor network. We describe the sensor hardware, packaging and cabling in detail, as well as the software components. Our prototype has been in production use for twelve months at the time of writing. This article presents detected air flow patterns that would have been difficult to discover using modelling alone, but easy to find with the measurement-based approach. We evaluate the benefits and drawbacks of our solution when compared with CFD models and existing alternatives. Key features of our approach are its accuracy, ease of deployment, and low purchase, construction, and operating costs.
1
Introduction
The benefit of building a CFD model is that proposed air flow modifications can be evaluated without the need of real changes in a DC. Yet CFD models are known to be both extremely computationally intensive and sensitive to any unanticipated air flow changes. The complexity required to calculate the complete air flow model is typically mitigated by simplifying the model, i.e., making generalizations about the conditions in the DC. The derived model is representative for a fixed point in time, but air flow changes can be caused by many day-to-day events in a DC, including hardware failures. We argue that even though CFD can be useful in finding some problematic areas for air flow, without additional verification there can be no certainty that the CFD model remains precise for the whole DC. On the other hand, validating the entire CFD model for a large DC can be a serious burden. It is also difficult to describe the full complexity of a real DC in a model. Overlooked details can produce surprising defects in the resulting model, causing it to differ from the measured reality. The problem is the inherent requirement of true initial knowledge in a simulation-type study. For example, the effects of changes in
the perforated floor tile configuration [13] and obstructions in the underfloor plenum [3] are well known. In CFD modelling, groups of servers are typically modelled as blocks with a homogeneous air flow. However, as new server designs are constantly produced, even units from a single vendor can have extremely varying airflow characteristics [12]. Devices like switches and routers can also eschew the front-to-back cooling pattern [10] completely. Server air flow is not proportional to the amount of power drawn by a server, is difficult to estimate based on reported fan speeds only, and can change considerably by reordering the same servers in the rack [10]. Even though CFD modelling might work well for newly built, homogeneous environments, it can fail in colocation-based data centers. In these DCs, the heterogeneity of the customer base leads to an equally diverse set of installed hardware. A similar type of evolution can be observed in warehouse-scale computing environments [8], after a subset of the initial equipment has been obsoleted or replaced due to failures. In DCs reaching the warehouse-scale, failures become the norm, not an exception [1]. Even though air flow dynamics may change only a little when a single server is taken offline for repairs, failing power-distribution units (PDUs) or computer-room air conditioning (CRACs) units will have much more far-reaching consequences. During the past twelve months of operating our measurement system in our department’s DC (see Sect. 3), we have encountered both a massive power supply failure and a CRAC failure. Knowing exactly where hot spots did and did not start to develop allowed our system administrators to avoid shutting down our computing equipment. Yet the time to react precluded a CFD-based approach, for the temperatures were rising by the hour. The combined weight of these issues points to the fact that instead of CFD, measurement-based approaches have been revisited successfully in the past few years [2,4,5,6,7,11]. The contribution of this article is the complete description of an ultra-low cost wired sensor network which can be implemented in smallto medium-sized DCs within the order of days. As the sensors can be replaced with any equivalent devices, all the software components are open sourced, and the rest of the hardware is COTS equipment, the proposed solution is immediately available for all DC operators. Almost no skills in electronics are required, including soldering, and existing ethernet cabling may be reused. The sensor network can also be used to verify CFD models or act as a baseline for comparisons against more advanced, possibly wireless research experiments. We present our implementation in Sect. 2. Section 3 presents some new discoveries, while Sect. 4 discusses the merits and flaws of our measurement-based solution. Section 5 concludes this article.
2
Design Decisions
By surveying the field of existing approaches it becomes clear that there are a number of vendors willing to sell or lease their measurement solutions, including advanced software applications designed for easy temperature visualization. On
the other hand, a respected estimate [14] divides up to 72% of all DCs into the small- or closet-sized and medium categories. It follows that these smaller DCs have smaller operating budgets, meaning that outsourced solutions can be prohibitively expensive. Even though it is easy to agree that operating any DC in a manner which is ”green” or ”sustainable” is a desirable objective, the driving force behind business decisions still remains the purchase costs vs. benefits. Thus, our primary objectives have been to build a sensor network that is both cheap and very easy to install, yet so reliable it requires almost no manual upkeep. We will examine the latter two requirements first, then present our solution and calculate the actual costs for our implementation. 2.1
Wired Versus Wireless
To our knowledge, the largest published number of operational temperature sensors is by HP [6,4]. According to them, a 70,000 ft2 (ca. 6,503 m2 ) DC which employs 7,500 sensors has been operational since 2007 in Bangalore, India. This number translates to ca. 1.15 sensors/m2 , which we have considered a reasonable requirement. Unfortunately, nearly all of the other implementation details remain unknown. It is unlikely, however, that each sensor was cabled separately. A number of previous solutions have concentrated on wireless or hybrid approaches in communicating with the temperature sensors. Microsoft Research’s Genomotes [5] are implemented with a wireless master node which then daisychains up to seven slave nodes through the venerable RS-232 interface. The entire chain uses a single USB port for a power supply, although the master node also contains a rechargeable battery as a backup. Following Microsoft, chaining multiple sensors into a bus seemed reasonable. Microsoft’s justification for their hybrid approach is the ease of cabling since only the slave nodes need to be physically connected. The master nodes can reside at the top of the server racks and communicate wirelessly. They key problem of reliable wireless data collection is solved by Microsoft’s RACNet solution. While we agree with their analysis of the overabundance of cabling already present in any modern DC, we differ in the conclusion. Since there is already so much cabling present, we consider that modest additions can still be tolerated. Thus, our solutions either adds its own or reuses existing, but unused cabling. 2.2
The Source of Power
Even if all of the data transfer can be performed wirelessly, present wireless technologies still require a separate power source for the sensors. On the other hand, replacing batteries can quickly become a tedious task for the DC operators. Thus, it would be prudent if a single wire can provide both a data signal and a power source. Fortunately, such products have been designed by multiple vendors, e.g., the Inter-Integrated Circuit (I2 C) by Philips and the 1-Wire by Maxim, formerly known as Dallas Semiconductors.
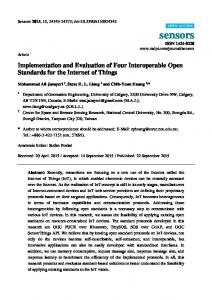
Fig. 1. DS18B20 sensor packaged in a RJ11 female-female adapter
The idea in both product families is simple. By using from two to four conductors cabled together, a single cable can provide a network of devices both power and signals for a data channel. Such setups are particularly suitable for DC environments [7], because an unshielded twisted-pair cable will contain four pairs equalling eight conductors. Moreover, the sensors use very robust signalling techniques allowing reported cable lengths of up to 200 m. In our case, we chose to use the existing ethernet cable rails, but connect our sensors using a separate two-pair RJ11 cable in order to simplify our cabling design. All of our sensors connect to a single bus presently. 2.3
Connecting the Sensors
We chose the 1-Wire products due to our previous experience with them, an open source API, and good support from the Linux community. Auxiliary evidence [4,11] suggests that HP did employ sensors from the same manufacturer [7] in their DCs around 2006. Our design is based on the Maxim DS18B20, which is roughly a pin-sized3 sensor with three conductor legs. It’s accuracy is ±0.5 ◦ C when operating in the range of −10 ◦ C to +85 ◦ C. This sensor has remained in production for a number of years, and is widely used by a large base of electronic hobbyists and professionals alike. In order to connect the DS18B20 to the RJ11 cable, we needed to package each sensor for easy connectivity and eventual replacement when the sensor 3
http://www.maxim-ic.com/datasheet/index.mvp/id/2812
would fail. Due to the cabling, the choice was easy, and we chose the RJ11 female-female adapter jack used for cable extensions. To improve air flow, we used a drill press to perforate the casing with four 4 mm holes. The jack itself can be easily pried open into two halves, and with a little bit of gentle bending, the DS18B20 can be seated inside the plastic casing. Excluding the drill press, a single sensor can be built in three minutes or less with only minor practice. The end result is portrayed in Fig. 1 along a 1 e coin for size comparison. The RJ11 jacks and cable form a sensor bus using 6-position, 4-conductor RJ11 connectors, and the bus itself terminates via a 6-position, 6-conductor RJ12 connector to a DS9490R adapter. The DS9490R is read through a host computer’s USB port. Our current installation uses 15 sensors and over 75 m of cable. The limiting factor was that we simply did not need any more sensors. The sensor positioning is further explained in Sect. 3. 2.4
Results and Cost
Each DS9490R is read by the DigiTemp4 Linux program, which scans for all sensors on the bus and then retrieves their temperature readouts. We wrote a very simple wrapper script to pipeline the data to the well-known RRDtool5 utility. RRDtool is designed to redraw time series graphs in multiple formats and time resolutions (see Sect. 3). We poll all of our sensors every 60 seconds and archive copies of the DigiTemp outputs in addition to the RRDtool databases. RRDtool then graphs its data every five minutes and the graphs are copied to a publicly accessible directory6 . We have published a full step-by-step instruction manual which includes detailed connection diagrams, photographs of each relevant step, and a video of the assembly process7 . The total costs for our current solution amount to just under 160 e for the whole 15 sensor network, or more precisely, 10.51 e per sensor including taxes. These prices could be reduced by ordering the sensors directly from Maxim. While we paid 3.50 e per sensor, the quoted price is about $1.84 per sensor for orders of over 1,000 units. Also, for our modestly sized network, the USB host adapter price is almost half of the total.
3
Data and Knowledge
Our main DC has a floor space of just over 70 m2 (ca. 750 ft2 ). Despite the compact size, the DC draws over 115 kW of power during computationally heavy experiments. Cooling is handled by five CRAC units for the IT load plus one for the battery backup (not shown). The CRAC units are cooled by two separate chilling plants. Cool air from the CRAC units flows to an underfloor plenum and then through perforated tiles into the server inlets. All of the servers are placed 4 5 6 7
http://www.digitemp.com/ by Brian C. Lane http://oss.oetiker.ch/rrdtool/ by Tobias Oetiker http://www.cs.helsinki.fi/group/greenict/ http://blogs.helsinki.fi/pervila/?p=116
(a) Sensor placement, side view
(b) Sensor placement, top view Fig. 2. Sensor placement in the data center, side and top views
into two rows with their fronts opposing each other, forming a cold aisle. The ends and roof of the aisle are sealed to prevent air recirculation, forming a cold aisle containment (CAC) setup. The CAC is reasonably airtight. The CRACs form a third row on the west side of the cold aisle. For further details, see [9]. Figure 2 shows how we placed our 15 sensors. For each of the five CRAC units, we placed one sensor near their supply air vents in the underfloor plenum. Sensors 6–7 were placed just under the perforated floor tiles at 1/5 and 4/5 of the cold aisle length. Sensors 8–9 were placed at the corresponding lengths near the roof of the CAC section. Four sensors were placed at the same lengths on the exhaust or hot aisle side, near the opposite wall of the DC as seen from the CRACs. Sensors 10–11 were placed at 1 m height and 12–13 at 3 m height. Finally, sensors 14–15 were placed over the return vents of the CRAC units.
CRAC supply temps from 01.11.2011 to 01.12.2011 24 23 22 21 20 19
°C
18 17 16 15 14 13 12 11 10
Week 44
Week 45
Physicum CRAC01 supply Physicum CRAC02 supply Exactum CRAC01 supply Exactum CRAC02 supply Exactum CRAC03 supply
Week 46
last last last last last
18.4 17.4 18.3 20.3 20.3
C C C C C
max max max max max
20.6 19.6 21.8 21.1 21.0
Week 47
C C C C C
min min min min min
15.1 15.2 16.4 19.3 19.4
Week 48
C C C C C
Fig. 3. CRAC supply temperatures from November 2011
The placement logic is that we wish to measure the full cycle of the air flow from the CRAC units to the underfloor plenum, then upwards into the CAC section, out from the far side of the racks, over the top of the racks, and back into the CRAC units. First, analyzing the graphs allows us to see whether the CRACs are supplying the DC with enough cooling. Second, we can detect increments in the supply air temperature from the CRAC units to the server inlets, caused by exhaust air recirculation. Third, temperature imbalances caused by different air flow requirements are visible by comparing sensor readouts from the lengthwise pairs. Finally, the exhaust measurements allow us to measure the heat removed by the CRACs, showing if heat is supplied or removed from the DC by other means. 3.1
Machines in Disagreement
Due to historical reasons, the five separate CRAC units are driven separately and not through a centralized system. In Fig. 3 we show the CRAC supply temperatures during November 2011. The two elder units, designated Physicum CRAC01 and CRAC02 in Fig. 3, make their cooling decisions based on a sensor located within the cold aisle. The three other units measure the ambient temperature locally and adjust their cooling power individually based on their measurements. Finally, the unit designated Exactum CRAC03 has been turned off. Thanks to the CAC, we have been able to save over a fifth of the required CRAC power [9]. The fluctuation of supply air temperature is not caused by the differing views of the CRACs alone. Figure 4 and Fig. 5 reveal differences in the return air temperatures, meaning that exhaust heat is divided unevenly across the row of four operating CRAC units. This is caused by the power supply cabling installed above the racks. The cables and connectors would be difficult to model using
Door-side temps from 01.11.2011 to 01.12.2011 38 36 34 32 30
°C
28 26 24 22 20 18 16 14
Week 44
door-side door-side door-side door-side door-side
Week 45
supply floor vent supply CAC roof return air @ 1 m height return air @ 3 m height CRAC return
Week 46
last last last last last
19.0 20.6 32.8 28.3 28.6
C C C C C
max max max max max
21.0 21.2 33.5 29.1 29.0
Week 47
C C C C C
min min min min min
17.6 20.2 31.3 27.5 28.0
Week 48
C C C C C
Fig. 4. Door-side temperatures from November 2011
CFD, but show to be quite effective in restricting air flow. We will discuss other findings from Figures 4 and 5 in more detail below. The end result is that without a centralized management system, the four operational CRACs are continuously readjusting their blower speeds and supply air temperatures. Although all of the units have been manually tuned for a target supply temperature of 22◦ C, the max and min columns of Fig. 3 show that each unit fluctuates with varying variances. This effect has been previously reported by [2], and their centralized management system was able to save up to 58% of the CRAC operating power by minimizing the fluctuation. 3.2
Cold Aisle Imbalances
Figure 4 shows the top half of the DC shown in Fig. 2(b), designated as the doorside, following our IT administrators’ naming convention. This half contains the even-numbered sensors 6–14. The other half is depicted in Fig. 5 and is designated the rear-side. It contains the odd-numbered sensors 7–15. In the figures, the lowest line shows the supply air temperature at the floor of the cold aisle and the second lowest line is the roof of the cold aisle. The top three lines (not clearly visible as three lines in Fig. 5) show the return air temperatures behind the racks (at heights of 1 and 3 m) and the CRAC return air temperature. As the CRACs fluctuate, the two halves of the cold aisle receive different amounts of air flow and at different supply temperatures. The rear-side is supplied more by Physicum CRACs and consequently follows the target temperature of 22◦ C more precisely due to the better CRAC sensor placement. However, these CRACs end up performing the major part of the cooling, for warmer door-side supply air reaches the sensor, meddling with the CRACs decision logic. Since our CAC is custom-built by ourselves, we have tried to ensure that it is relatively airtight near the key areas and blocks off exhaust air recirculation.
Rear-side temps from 01.11.2011 to 01.12.2011 38 36 34 32 30
°C
28 26 24 22 20 18 16 14
Week 44
Week 45
rear-side supply floor vent rear-side supply CAC roof Ukko return air @ 1 m height Ukko return air @ 3 m height rear-side CRAC return
Week 46
last last last last last
18.2 21.9 31.5 31.0 30.3
C C C C C
max max max max max
19.9 22.4 33.4 32.6 31.6
Week 47
C C C C C
min min min min min
16.0 20.9 28.0 27.9 27.9
Week 48
C C C C C
Fig. 5. Rear-side temperatures from November 2011
Thus, Fig. 5 presents a very interesting question about the rise of the supply air temperature from the bottom of the cold aisle to its roof. During normal operations, the delta is around 3◦ C, which can not be explained by heat conducted or radiated from within the cold aisle. We have eliminated the possibility of a sensor failure and also verified that none of the installed servers or network devices are exhausting heat into the inlet side. Neither can the delta be satisfactorily explained by warmer supply air flowing from the other half of the cold aisle, as that half’s supply temperature maximum just barely reaches this half’s minimum. Thus, hot air seams to leak into the CAC from somewhere else than from within, the edges, or roof of the cold aisle. After these options have been exhausted, not many possibilities remain. Our current hypothesis is that either a cold aisle underpressure or hot aisle overpressure is caused by the blade servers installed near the sensor. Either effect is then sufficient to push or draw exhaust air through or around the blade servers and into the cold aisle. We have been able to partially verify this hypothesis using a specially constructed server enclosure. By limiting either the inlet or the exhaust air flow, the inlet air temperatures do rise above the ambient temperature. In the enclosure, this heat must be derived from the exhaust air, since no other sources are nearby. 3.3
Not a Closed System
Although it is standard practice to model a DC as a closed system, this assumption does not seem to hold quite true in practice, although the difference is more difficult to detect. We have long suspected that the building where the DC is housed either contributes or burdens the cooling loads. According to a recent discussion with a local vendor of gas-based extinguishing systems for DCs, a
similar effect has been found in many other environments. Minute changes to the building plans done at the construction site can cause drafts in a DC environment, potentially mitigating the effectiveness of a gas-based extinguisher. Thus, the only possibility for the vendors is to test the correct functionality of the extinguishers in practice. Figure 4 shows that measured at the 1 m height, the exhaust air stays reasonably constant around 32◦ C, while Fig. 5 displays a much lower exhaust temperature around 29◦ C. The spikes in this graph are caused by computing tasks being executed at the blade servers. In both figures, the 1 m temperatures remain consistently above both the 3 m height and the CRAC return temperatures. Therefore, some of the exhaust heat seems to be lost on its way back to the CRACs. It is credible that the servers near the CRACs are simply exhausting colder air, which draws down the temperatures measured at the CRAC returns. But this seems less credible on the other edge of the room, as sensors 11 and 13 measure a homogeneous installation of blade servers. Thus, it seems that Fig. 5 displays some of the heat being drawn by the building walls.
4
Discussion
In the previous section, we have demonstrated some events caught by our sensor network -based approach which would have been difficult to model without comparable initial knowledge about the DC installation. Our aim is not to prove CFD unfeasible, just to show that in some situations, the measurement-based approach can be a better starting point. The information gained from the measurement could then be used to build a much better model. In the case of smallto medium-sized DCs, the wired sensor network alone may suffice to discover the worst hotspots and subsequently optimize the cooling air flow. 4.1
Cost Evaluation
Perhaps the main merit of our implementation is its very affordable price. It is difficult to find comparable prices for a CFD-based approach. A single data point was presented during Google’s European Data Summit 2011. During a retrofit of a network equipment DC the cost of ”a couple of iterations” of CFD modelling was estimated as ”USD$5K–$10K” (Joe Kava during his presentation8 ). As the actual load of the DC was around 85 kW and the maximum load around 250 kW, this gives us a possibility for a comparison. Assuming the midpoint of the price range, the exchange rate of 0.761 e per dollar, and our actual price of 10.51 e per sensor we could purchase 914 sensors plus the required cables and accessories for connectivity. If our implementation generalizes to larger data centers, our density of 0.21 sensors/m2 means that we can instrument a DC with a size of over 2,535 m2 . Even following HP’s much higher sensor density of 1.15 sensors/m2 (see Sect. 2.1), the sensors could cover 8
http://www.youtube.com/watch?v=APynRrGuZJA around 11:17 / 27:52
a DC of 471 m2 . As our price per sensor does not include workmanship costs, this comparison is not entirely fair. On the other hand, the quoted price range of $5,000–$10,000 very likely does not include software licenses. 4.2
Functionality and Reliability
The visualization software is definitely the weak point of the wired sensor-based approach. It is not difficult to discover that as a visualization engine RRDtool is quite old-fashioned in its syntax and hence, can be quite difficult to configure successfully. We are trying to mitigate these problems by releasing a set of helper scripts which make the initial steps much easier. In order to make the temperature information visually connect to the DC installation, some third party software is required to link the graphs near their correct locations on a map of the DC. One alternative for this is to use the NagVis9 toolkit for the well-known Nagios10 infrastructure monitoring daemon. As Nagios is very common in DC environments, this match seems natural and the solution straight-forward. Compared with a wireless solution like Microsoft’s Genomotes (see Sect. 2.1) the difference is that we have not fully solved the infrastructure problem. Each wired sensor bus must connect to a host computer, which must be able to run the DigiTemp application for sensor readouts. In addition, our solution does not come with a built-in battery backup. While these are true disadvantages to our approach, we feel that the prodigious cable lengths permitted by the sensor network mitigate the flaws at least somewhat. For a small- to medium-scale DC, not many sensor buses are really required. Similary, as the sensors themselves are extremely Spartan in their energy consumption, a single backup battery could provide enough power for the operation of both the sensors plus their host laptop.
5
Conclusion
In this article, we have provided the implementation details for a wired sensor network suitable for use in many small- and medium-scale data centers. As the proposed sensor network is both very inexpensive and fast to install, it can replace CFD-modelling in some DC installations, and thus work as a shortcut for system operators wishing to learn more about their DC’s energy efficiency. In other installations, the sensor network could be used to gain initial insight before a full CFD modelling takes place, and verify the CFD model iteratively as it is being built. Finally, the proposed wired sensor network can be used as a baseline for comparing more advanced, possibly wireless sensor networks. Through our own DC installation, we have evaluated some air flow conditions which would have been difficult to model without the measurement-based data. Our temperature graphs are available for interested parties, and we have also published a step-by-step guide describing in detail how to implement a similar sensor network. 9 10
http://www.nagvis.org/screenshots http://www.nagios.org/
References 1. Barroso, L.A., H¨ olzle, U.: The Datacenter as a Computer: An Introduction to the Design of Warehouse-Scale Machines. Synthesis Lectures on Computer Architecture 4(1), 1–108 (Jan 2009) 2. Bash, C.E., Patel, C.D., Sharma, R.K.: Dynamic thermal management of air cooled data centers. In: Thermal and Thermomechanical Phenomena in Electronics Systems, 2006. ITHERM’06. The Tenth Intersociety Conference on. pp. 445–452. IEEE (2006) 3. Bhopte, S., Sammakia, B., Schmidt, R., Iyengar, M., Agonafer, D.: Effect of Under Floor Blockages on Data Center Performance. Thermal and Thermomechanical Proceedings 10th Intersociety Conference on Phenomena in Electronics Systems, 2006. ITHERM 2006. pp. 426–433 (2006) 4. Chen, K., Auslander, D.M., Bash, C.E., Patel, C.D.: Local Temperature Control in Data Center Cooling - Part I: Correlation Matrix. Tech. rep., HP Enterprise Software and Systems Laboratory, Palo Alto (2006), http://www.hpl.hp.com/ techreports/2006/HPL-2006-42.pdf 5. Liu, J., Priyantha, B., Zhao, F., Liang, C., Wang, Q., James, S.: Towards discovering data center genome using sensor nets. In: Proceedings of the 5th Workshop on Embedded Networked Sensors (HotEmNets) (2008) 6. Lowitt, E.M., Grimsley, J.: Hewlett-Packard: Sustainability as a Competitive Advantage (2009), http://www.hp.com/hpinfo/globalcitizenship/environment/ commitment/accenturestudy.pdf 7. Mannas, E., Jones, S.: Add Thermal Monitoring to Reduce Data Center Energy Consumption (2009), http://www.maxim-ic.com/app-notes/index.mvp/id/4334 8. Mars, J., Tang, L., Hundt, R.: Heterogeneity in “Homogeneous” Warehouse-Scale Computers: A Performance Opportunity. IEEE Computer Architecture Letters 10(2), 29–32 (Feb 2011) 9. Pervil¨ a, M., Kangasharju, J.: Cold air containment. In: Proceedings of the 2nd ACM SIGCOMM workshop on Green networking - GreenNets ’11. p. 7. ACM Press, New York, New York, USA (2011), http://dl.acm.org/citation.cfm? doid=2018536.2018539 10. Seymour, M., Aldham, C., Moezzi, H.: The Increasing Challenge of Data Center Design and Management: Is CFD a Must? (2011), http://www. electronics-cooling.com/issue/2011/11/ 11. Vance, A.: HP fires data center robot, hires cooling sensors (2006), http://www. theregister.co.uk/2006/11/29/hp_cool/ 12. VanGilder, J.W.: Real-Time Data Center Cooling Analysis (2011), http://www.electronics-cooling.com/2011/09/ real-time-data-center-cooling-analysis/ 13. VanGilder, J.W., Schmidt, R.R.: Airflow Uniformity Through Perforated Tiles in a Raised-Floor Data Center. In: Proceedings of IPACK2005. pp. 493–501. ASME, San Francisco, CA, USA (2005) 14. Webb, M.: SMART 2020: Enabling the low carbon economy in the information age (2008), http://www.theclimategroup.org/publications/2008/6/19/ smart2020-enabling-the-low-carbon-economy-in-the-information-age/