Poser and WorldBuilder 3.0 integration tutorial - Digi Element
Recommend Documents
POSER TUTORIAL – TATTOO. Welcome to my Tutorial of my Artwork „Tattoo“.
This one is made for Poser but one for DAZ Studio will be made too, if someone ...
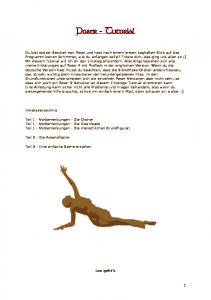
Du bist stolzer Besitzer von Poser und hast nach einem ersten zaghaften Blick
auf das ... dass sich auch ein Poser 5-Benutzer an diesem Einstiegs-Tutorial ...
This tutorial will walk a user through the basic features of Poser 5 and the ... the
walk-through animation are provided for download at the end of the tutorial.
BEGINNER POSER HAIR ROOM TUTORIAL. WOOLLY WORM. USING CP
BOOKWORM. IN POSER 7. IN POSER 7 POSE ROOM, SELECT BOOKWORM.
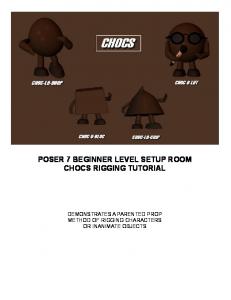
POSER 7 BEGINNER LEVEL SETUP ROOM. CHOCS RIGGING TUTORIAL.
DEMONSTRATES A PARENTED PROP. METHOD OF RIGGING CHARACTERS.
This tutorial has been made available again here for Poser 3 by courtesy of Dan
Nichols, the ... Dan has a new version of this tutorial for Poser 4 on his own site.
We will extend the Xcode application-template called 'Master Detail Application'
and add a print button to generate a PDF containing data from the tutorial app.
Digi ESP is built on the open Eclipse framework and is designed for both the ... of the open Linux environment with its
Shade tutorial: Shoes for Poser www.oscillator.se/3d. Notes. Welcome to the
Shade tutorial: Shoes for Poser. This is my first tutorial for. Shade. I was inspired
by ...
This guide describes NET+OS with GNU Tools and how to use it as part of ....
www.netsilicon.com. 5. The CPU Configuration window opens: 5 Do these steps:
a.
An introduction to remote wireless data networks. ▫ Remote ... with a full TCP/IP
stack and embedded Real Time Operating System (RTOS) which allow remote ...
point-to-multipoint device connectivity. N/A. Through-Hole. Surface Mount. XKA2B-WFT-0. 1 to. 72 Mbps. 309 mA /. 100 mA.
How can tools for ontology-based data access and integration fully take into ... Problem: in the presence of incomplete information, query answering becomes ...
Mar 1, 2011 - Texas Advanced Computing Center. University of Texas .... and basis function derivatives (any member of the jet space). This means that.
Jun 15, 2007 ... This tutorial intends to show you how to apply windforce to dynamic hair and ...
You should be familiar with poser and its hair- and cloth- room.
bees capacity to perceive and learn. Methods based on Harrap et al. [2]. (c) Video Analysis. After experimentation the video footage was reviewed, and the bees'.
Dec 21, 2011 - Banks, 2002; Ghahramani, Wolpert, & Jordan, 1997; ... 528 MArC O. ErNST .... ramani, Wolpert, & Jordan, 1997; van Beers, Sittig, &. Denier van ...
Jan 25, 2006 ... axisymmetric problems in electrostatics and in low frequency magnetics. The
program runs ... After you hit "OK", a blank electrostatics problem.
Jul 30, 2009 ... 1 Introduction. ABAQUS is a finite-element analysis software. Abaqus/CAE
provides a pre- processing and postprocessing environment for the ...
Hans Janssen, Jan Carmeliet. 2. 0. 50. 100. 150. 200. 3. 5. 7. 9 log(-pc) (log(Pa)) w (kg/m. ³). -20. -17. -14. -11. -8. 3. 5. 7. 9 log(-pc) (log(Pa)) log. (K. A/v. ) (log(s)).
Mario López. Guillermo Catalán. José María Catalán. Las coreografías presentadas eran: “Sacramonte”, “Dos Canciones de C
Sep 7, 2017 - latest tools and software available have made it accessible for anyone with a ... Launch. Q1. 2018. Develo
There was a problem previewing this document. Retrying... Download. Connect more apps... Try one of the apps below to op
Retrying... Download. Connect more apps... Try one of the apps below to open or edit this item. Vector Integration Tutor
Poser and WorldBuilder 3.0 integration tutorial - Digi Element
In these tutorials we do not describe basic World Builder operations like creating
... Also we suggest that you refer to Poser manual for more details on Poser.
Poser and World Builder integration In these tutorials we do not describe basic World Builder operations like creating skeletons, or animating objects. For introductory tutorials please refer to your getting started guide. Also we suggest that you refer to Poser manual for more details on Poser related issues.
Basics Stage 1. Export of animated Poser models into World Builder We will use animated horse trot, which is coming with Poser 4 disk. Step 1. Load the file “Poser/extras/sample files/Heather Dunnigan/horse trot.pz3”. Step 2. Set loop interpolation to on. Step 3. Select command File | Export | Wavefront OBJ… Step 4. Select Multi-frame export in the appeared dialog. Leave the frame range as is. Step 5. In the Hierarchy selection dialog you have to uncheck GROUND object. Note. If you leave GROUND object checked, it will be exported together with the horse model. In WB, if model is imported with certain options, you might have no means to remove GROUND or detach it from the horse model. So we suggest excluding it from the very beginning. Step 6. Next a file dialog will appear. Select location and a name for the exported model. Let’s assume we export it into d:\awb30\PoserMeshes\horse.obj. Poser will automatically add numbers to the file name. Make sure that you have enough room on your disk for export operation – for a long sequence you might need considerable disk space. After you press Ok in the file dialog you will have to wait a little bit while Poser goes through the entire sequence and saves obj files.
Stage 2. Import of animated Poser model into World Builder We suggest that you start WB with the pre-built template scene that already contains flat terrain surface, camera, light and the ambient light is set to some reasonable value. Step 1. Select command File | Import | Poser Object… Step 2. In the file dialog select the first one of the created obj files. In our case it will be horse_0.obj.
Step 3. A new dialog with import options will appear.
Figure 1
Complete description of import options will appear in the manual; here we will discuss only few of them. - Import entire object. If unchecked you will have an option to select what parts of the object to import from the list to the right. - Rotate model. Poser axis Z is oriented horizontally while in World Builder it faces up. Check this option on to rotate Z of Poser model up on import. Other options should be left as suggested by default. Sometimes in quite rare situations you might need “Unify normals” checked to eliminate artifacts on the imported model. In most cases however default options work perfectly, so we will leave the OBJ import settings as is. Step 4. Usually on the first import of Poser object your redirection is not set to include Poser textures into the search paths. When World Builder can’t find textures it prompts you to select the path to the textures that it can’t find. Make sure that you select right texture in the right folder otherwise the model will import incorrectly. Also keep “Include path into redirection” checked on so that next time you will have less manual work to do to complete the import. When you select all options and textures, World Builder will read entire sequence of the obj files. Step 5. After the import will be completed you will have a Poser object in WB scene with one area attached to it. Here are properties of the object and area.
Figure 2
On the Poser Animation property page you can turn on and off loop option. In our case we want the trot looped so we could set arbitrary long animation range in World Builder. Use temporary files is an option existing mainly for compatibility with earlier builds and should be used with caution – instead of using virtual memory World Builder will swap animation data into temp folder defined on your system. Make sure that you have enough space on the disk where temp folder is located when you use this option. To replace texture maps you can use material properties. Material can be found in the area attached to the Poser object. Formally you can define new areas on Poser object but in the current version results could be unpredictable.
Note. When you change texture map outside World Builder while the project referencing the map is loaded, you can use Reload button on the Map property page – see right screen shot.
Stage 3. Animating translation for Poser object in World Builder Imported object is animated but it is not moving according to the animation. You have to animate translation of the horse model manually. Follow the standard procedure that we describe here in brief only. Please refer to quick start guide for more details. Step 1. Select horse_0 object Step 2. Switch to the move mode - use icon
on the top toolbar for that
Step 3. Turn on Auto key mode – click on the icon in the right lower corner. When you are in Auto key mode the icon changes color to red. Step 4. Move object to the desired initial location while World Builder remains in frame 0. Step 5. Move time slider into the last frame of animation. Step 6. Move the model into the final location while remaining in the last frame. Replay animation to make sure that the model is aligned with the terrain surface and that hooves do not slide along it. If you have this sliding effect, adjust final or initial position of the model. Remember that you need to be in Auto key mode so that changes apply to the key frames. Now with the horse animated an properly placed into the scene you can build the rest of the scene.
Some tips We suggest that you always start with animating object in Poser and bringing it into the default scene into World Builder. If you start with World Builder scene you might end up having hard time to fit animated object into the ready scene. It is easier to build scene around the object rather that tweak animation to fit the scene. To keep flat region along the object trajectory you can use closed skeleton on the zero level. The skeleton should enclose the path. To make this technique work you should avoid intersection of this enclosing skeleton with other skeletons (this is also true in case of general skeletons) and also you should not place other non-flat skeletons into the enclosed region.
Another way keep area flat is to use flat 3ds mesh as a footprint. With 3ds mesh you can also profile terrain to fit the shape of the 3ds object. So if the 3ds mesh is a prop from Poser, say a staircase, or mesh strip representing a trail, then you can import this object too, use it as a footprint and, provided WB terrain has high enough resolution, it will snap to the prop. We will discuss this more advanced technique in the upcoming tutorials. Right after importing the model you should tweak lighting so that models looks right. You can change ambient light intensity and color as well as directional light intensity and color. Also if you plan to use File Response emulation filter then you have to add it at this stage since it changes the appearance of the objects considerably. The same applies to RGB levels filter. Tweaking lighting is easier than going through the numerous material properties of the imported object. Also it ensures that you will have the same appearance for the re-imported object.