E GSM GPS Power ... drive for 15-20 minutes so the device can register on the
GPS network and begin ... To track your HCT Micro, open a browser window and
go to www. ... Login tab on the top right of the website and click on GPS Tracking.
Tracking Your Device. Start driving for 20-30 minutes to establish a connection to
the. BrickHouse GPS server. Viewing. You should have received an email from ...
Guida Veloce del VideoMic GO™. VideoMic ... Il VideoMic GO™ RØDE dispone
di un supporto elastico .... di gioco nella lunghezza tra il connettore di uscita del ...
Chapter 2: Selecting Elements the jQuery Way 27. Selector ..... ished,
professional look, and jQuery provides ... Some Ajax examples make use of PHP
on the.
De handzame Qware tablet is een mini pc met een aanraakscherm die, eenmaal
verbonden met internet, legio mogelijkheden biedt d.m.v 'apps' (kleine ...
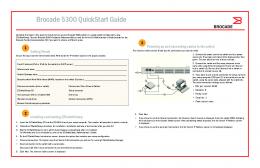
Complete the steps in this guide to install and set up your Brocade 5300 switch in
a ... See the Brocade 5300 Hardware Reference Manual and the Fabric OS ...
Three different layouts available to view your Listings; basic List view, detailed Card view, .... Bulk & Single Tag
Double USM is a Photoshop Panel that splits the. Unsharp Mask Filter into its basic components: Dark and Light halos â
On your first visit to the dashboard, you will be prompted to add three Streams. The types of Stream that you will be ab
Three different layouts available to view your Listings; basic List view, detailed Card view, .... Bulk & Single Tag
IG5A familien kommer justert fra fabrikken for motorer med samme effekt som
omformeren og med. 4 poler. Dersom en annen type motor brukes må dette
legges ...
Jul 18, 2005 ... Combine this with an FPGA implementation platform – the NanoBoard – and you
have a complete. FPGA design environment. This QuickStart ...
iCade CORE, 2 pilas AA, Guía de inicio rápido, Folleto de instrucciones de
seguridad e información sobre la garantía. DESCARGA. 1. Abra la tienda App
Store ...
”SETUP CAR” TAB. Car and Upright data is measured and entered here. See
measurement instructions later in this document. Data entered here limits the car
...
Windows. The Babyface comes with drivers for Windows 7 / XP SP2+ / Vista (32.
Bit & 64 Bit, ASIO 2.0 and WDM). After the baby has been recognized, the ...
Double USM is a Photoshop Panel that splits the. Unsharp Mask Filter into its basic components: Dark and Light halos â
Double USM is a Photoshop Panel that splits the. Unsharp Mask Filter into its basic components: Dark and Light halos â
Dreamweaver CS6. Tom Negrino and Dori Smith. Peachpit Press. 1249 Eighth
Street. Berkeley, CA 94710. 510/524-2178. 510/524-2221 (fax). Find us on the ...
Nov 26, 2011 ... Using Roomie, tap Edit on the room and then Add Device. Wait up to 60 seconds
and Roomie will display the unit and its IP address in the list.
vocabularies see the manual. Tap buttons to speak messages and navigate to
folders. Tap the message window to speak a message. Delete letters or words…
way out, and Dreamweaver CS6 removes several features found in prior versions
that supported frames. You'll no longer find Frameset options in the. Page from ...
Visual QuickStart Guide 9th Edition and upgrading Mac OS X Dori Smith is the author of Java 2 Visual QuickStart JavaScri
Connect each computer or other device to a switch port on the back of the ... Connect the Gateway to the wall jack that
Mar 17, 2004 ... QuickStart Guide. Title: OpenOffice.org 1.1 Impress QuickStart Guide ...... text
boxes, charts, lists,. Gallery themes, transitions, and animations.
Understanding the importance of the sensitivity settings on your transmitter and the AF (or âAudio Frequencyâ) outpu
Quickstart Guide Setting Levels on the Sennheiser G3 Camera Mount Wireless System
Understanding the importance of the sensitivity settings on your transmitter and the AF (or “Audio Frequency”) output on your receiver is essential for achieving professional sounding audio. This guide is intended to help you understand the gain staging possibilities of the Sennheiser G3 wireless system.
Setting Levels on Your
Transmitter
Setting Levels on Your
Transmitter
1
With both your transmitter and receiver powered OFF, plug a compatible microphone into the input of your transmitter. Then, connect your output cable to the output of your receiver.
Setting Levels on Your
Transmitter
2
Turn both your transmitter and receiver on by pressing and holding the ON/OFF button for 2 seconds.
Setting Levels on Your
Transmitter
3
Take your transmitter, which will read “Mic/Line” on the top, and press the Set button to bring up the Menu. Navigate through the menu until you reach the Sensitivity setting. Press the Set button to select. This will allow you to adjust the input sensitivity with the buttons located above the Set button.
Setting Levels on Your
Transmitter
4
The unit’s default sensitivity setting is set at -30dB. Try changing the setting to -21dB (note: the sensitivity is adjusted in 3dB increments).
Setting Levels on Your
Transmitter
5 [
Press the Set button to store the new setting of -21dB. The transmitter will read “stored” when you have successfully saved your setting. Press the ON/OFF button to return to the main menu.
]
Note: This sensitivity setting will work for normal speaking levels. It is recommended to adjust sensitivity for loud or quiet speakers.
Setting Levels on Your
receiver
Setting Levels on Your
Receiver
1
Plug the output of your receiver into your recording device. Set the input gain on your recording device to approximately mid-way (note: setting the input gain on your recording device to midway is only a starting point, you may want to experiment with this setting to get the best sound).
Setting Levels on Your
Receiver
2
Press the Set button on your receiver, and using the Scroll buttons located above the Set button, scroll until you find AF Out (AF stands for Audio Frequency, and acts as a volume control). Press the Set button to select AF Out.
Setting Levels on Your
Receiver
3 [
The receiver’s default AF Out setting is at 0dB. Scroll down to -30dB. Now, using the Up arrow, you can raise the volume to your desired level, typically when your peaks are hitting around -6dB on your recorder. Hit the Set button to store your setting. (Note: The receiver’s AF Out is adjusted in 6dB increments).
]
Note: For best results, you should always use headphones on your recorder/camera to monitor your audio.