Open MS Paint and draw or select your background image. (TIP 1: Make certain
you scroll down (and across) to the edge of the Paint page, and pull the arrow.
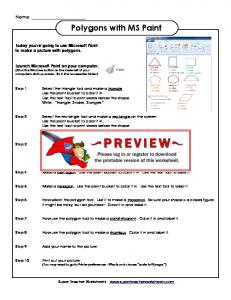
Polygons with MS Paint. Today you're going to use Microsoft Paint to make a
picture with polygons. Launch Microsoft Paint on your computer. (Click the ...
Image Concepts. Using Microsoft Paint lab. 12. 247. Objectives: Upon successful
completion of Lab 12, you will be able to. ○. Create a simple image using the ...
Microsoft Paint is a free computer-graphics program that comes free with ... you
do not already have Paint, do a web search for “Microsoft Paint download”.
Page 1 of 1. File: Pdf to ms paint converter free. download. Download now. Click here if your download doesn't start aut
Creating Complex Lines with MS Paint. MS Paint is a free graphics program
included in all versions of Microsoft Windows. This handout will explain how to ...
dari pengajar, peserta juga diminta untuk menjelaskan hasil gambar yang
diciptakan (15 menit). 3. Materi Belajar : 1. Buka aplikasi Ms. Paint, sehingga
muncul ...
Jul 6, 2012 - deviation (RSD) of the peak area for all isotopically labeled amino acids ... and 15 labeled internal standards was achieved by operating the ...
βNpO2NO3 = â(0.55±0.09) at 2 M NaClO4 (20 â¦C) [9] and log10 βNpO2NO3 = â0.52 at 8.5 M NaClO4 (20 â¦C) [10]. These binding constants are extremely weak ...
Jul 6, 2012 - deviation (RSD) of the peak area for all isotopically labeled amino acids ... and 15 labeled internal standards was achieved by operating the ...
Products 1 - 10 ... Archaeologists found pigments and paint grinding ... being used as coverings on
a variety of buildings, artwork and furnishings in China, Japan ..... A general
review of earlier work regarding all aspects of the polymerisation o
Using Microsoft Paint to optimize images. 1. Save all your images to a folder on
your computer. Call the folder Web Images Originals. You may want to retain the
...
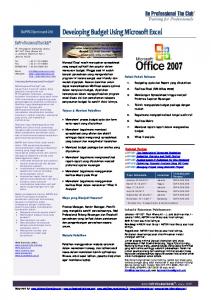
Developing Budget Using Microsoft Excel ... Pelatihan yang diselenggarakan
oleh BePRO dan CareerTrack ... Microsof Excel masih merupakan spreadsheet.
MS access vs. MS excel. ○ Introduce MS excel. ○ Introduce MS access. ○ End
up with activity ... (e,g) Excel functions best with calculations like calculating the ...
nordiazepam, triazolam, temazepam, nitrazepam, and chlordiazepoxide in oral fluid is described, using liquid chromatography coupled to a triple quadrupole ...
Nov 24, 2004 - Larry L. David,â¡ and Srinivasa R. Nagalla*,â . Department of Pediatrics and School of Dentistry, Oregon Health & Sciences University,. 3181 SW ...
Imaging Iron in MS using Susceptibility .... P. Zamboni, The Big Idea: Iron-dependent inflammation in venous ... Discuss
Aug 10, 2016 - L-valine-2,3,4,4,4,4â²,4â²,4â²-d8 (Val-d8), were purchased from CDN. Isotopes Inc. (Quebec, Canada). LC-MS/MS conditions. LC-MS/MS ...
Best Sign Systems, Inc. can accurately match any PMS or custom color using
Matthews PaintTM which is widely recognized as the highest quality painting ...
How to Resize your Agent Photo using. Paint comes installed on practically every
Wind lacks in features, it makes up for in ease of us able to do much ...
Clean All Surfaces That Will Contact Psycho Paint® - All surfaces to be painted,
need to be free of any contaminants. (especially mold release). If necessary ...
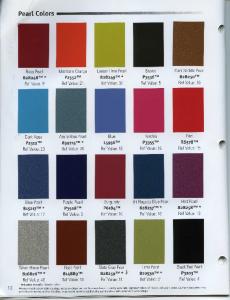
Silver Hlnde Pearl Rust Pearl Slate Gray Pearl : Lil Black Red Pearl. 816826TM *
814889“VI 828259TM * ll" 820530TM * P3203TM. Ref Value: 49 Ref Value: 10 ...
All colours in the world can be mixed within minutes in our store at ... Wide variety
of colours can be tinted in store. Colors ... Jotun Fenomastic; an exceptional.
Open MS Paint and draw or select your background image. (TIP 1: Make certain you scroll down (and across) to the edge of
Using MS Paint
1
How to ... insert parts of photos (heads/bodies) into MS Paint images. This can be used for forming new images or adapting photos for photostories, powerpoints, movies in movie maker, scanning in parts of picture books & putting images of students into books and multi-media. 1. Open MS Paint and draw or select your background image. (TIP 1: Make certain you scroll down (and across) to the edge of the Paint page, and pull the arrow up to the edge of the picture so you’re not saving empty white paper as well as the image.) Save the background image- in your work folder.
File > Save as >. >Name the File > “Save as type” > jpeg.
2. Open MS Paint again - and bring in the photo you wish to cut up and use a part of. (File> Open> browse your folders for it). 1. Select the “free form” cutting tool. Cut around the shape you want to save – until the line meets itself. Either save OR move the cut-out part and add to the image as you wish.
After “Selecting” the whole image > Select the “Draw Opaque” button on the tool bar or the “Draw Opaque” option under “Image” – to remove the background from the cut out image before saving.
(TIP 2: You can save the cut out image if you “select” it and move it to the top left corner of the page – then drag the edges of the white page area close (as in TIP 1 above)..
Page 1 - Made 4 U @ the Coalface
Using MS Paint Page 2
2
3. Use the “Select” tool to Select the cut-out image and save it to the clipboard (Control C) 4. Open your background in another Paint Programme (so you have two MS Paint programmes open). 5. Switch to the background Paint image and paste the cut-out image onto it (“Control V”).
Click the “Make Opaque” button on the Tool Bar to remove any unwanted background. While the image is selected - move the image wherever you want it on the page.
Click the “Magnifier” button on the Tool Bar to see an increased size of the image’s pixels. Use the Paintbrush to paint out - or fill in - any untidy edges.
Save the completed image, as usual. Insert into a Word doc, Photostory 3, Powerpoint, Moviemaker etc. TIP 3: Add text to image in Word, Powerpoint etc
Made 4 U @ the Coalface
Some Ideas: Place students in ‘real’ situations eg. Newspaper photos. Retell stories - with students as main characters. Insert scanned images from picture books into photos. Use student drawn backgrounds. Put completed stories on computer desktops or online sites for reading access.