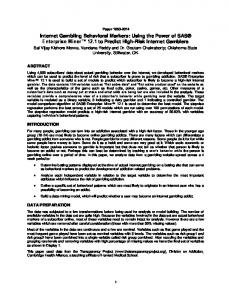
SAS configuration is handled by SAS Management Console and stored in the ... Scheduling servers are third-party software
Paper 229-30 ®
SAS Scheduling: Getting the Most Out of Your Time and Resources Allen Tran, Platform Computing Corporation, Markham, Ontario Randy Williams, SAS Institute Inc., Cary, NC Alan Wong, Platform Computing Corporation, Markham, Ontario ABSTRACT This paper illustrates how organizations can better leverage the scheduling capabilities in SAS software. If you are new to SAS Scheduling, you will learn how to take advantage of the integrated SAS Scheduling capabilities for your SAS applications. For those already implementing SAS Scheduling solutions, information will be given on how to extend your scheduling capabilities within your environment. Some of the topics covered include various configurations of operating systems and machines, methods for implementing site policies, and ways to extend the capabilities through the integration with Platform JobScheduler for SAS.
INTRODUCTION Platform JobScheduler for SAS is an integrated, enterprise job scheduler that is specifically designed to manage your complex flows of SAS jobs more efficiently. Platform JobScheduler for SAS includes Platform LSF (an execution agent) and is available for use at no extra cost to customers who have purchased a SAS Enterprise ETL Server technology package. SAS Scheduling is directly integrated with SAS ETL Studio, SAS Marketing Automation, and SAS Web Report Studio. Platform JobScheduler for SAS is unlike other job schedulers because it offers resource virtualization, optimal resource sharing, enterprise scalability, and seamless manageability through resource clustering. Platform Computing and SAS are continuing to extend the integration to include other SAS applications. Some of the benefits of Platform JobScheduler for SAS include: •
Automation: It uses sophisticated event-driven scheduling to reliably automate SAS workload processing. SAS flows are captured, graphically created, and stored for easy reuse in the future.
•
Reliability: It ensures that SAS flows are automatically distributed for processing on available hosts.
•
Scalability: Built on highly scalable grid technology, it is ideal for any complex IT environment that requires the capacity to support the mission-critical execution of jobs across your compute grids.
•
Effective Prioritization of Workload: It offers a rich set of configuration options for building queues based on job priority, departmental policies, or project requirements.
•
Upgradeability: You can extend the functionality of Platform JobScheduler for non-SAS jobs by upgrading to the full version.
THE SAS SCHEDULING SOLUTION ARCHITECTURE
The architecture of the SAS Scheduling solution consists of three areas that enable your enterprise to configure and set up your environment, create jobs and schedule flows, and then execute the flows. These areas are described in the following three sections. Meta LSB_SUB_EXCLUSIVE=Y LSB_SUB_PROJECT_NAME="my_project" LSB_SUB_NUM_PROCESSORS=2 LSB_SUB_MAX_NUM_PROCESSORS=2 LSB_SUB_COMMAND_LINE="sleep 10" The list of all possible job parameters that are written to the LSB_SUB_PARM_FILE can be found in the SAS white paper, Implementing Site Policies for SAS Scheduling with Platform JobScheduler. LSB_SUB_ABORT_VALUE specifies the exit value that esub should return if Platform LSF is to reject the job submission. LSB_SUB_MODIFY_ENVFILE specifies the file that esub should write any job environment variables changes to. The variables modified should be written to this file in the same format that is used in LSB_SUB_PARM_FILE. The order of the variables does not matter. After esub runs, Platform LSF checks LSB_SUB_MODIFY_ENVFILE for changes. If changes are found, Platform LSF applies them to the job’s environment variables.
2
LSF_SERVERDIR is the machine-dependent directory that contains all the server daemon binaries, scripts, and other utilities that are shared by all hosts of the same type. Typically, this directory is located in ///etc, where is the location of your Platform LSF installation, is the Platform LSF version number, and is the host's architecture. You will have an LSF_SERVERDIR for every different machine architecture that you install, although some machine architectures are similar enough to share the same binaries and, therefore, the same LSF_SERVERDIR directory.
7
LSB_SUB_MODIFY_FILE specifies the file that esub should write any submission parameter changes to. The job options modified should be written to this file in the same format that is used in LSB_SUB_PARM_FILE. The order of the options does not matter. After esub runs, Platform LSF checks LSB_SUB_MODIFY_FILE for changes. If changes are found, Platform LSF applies them to the job. Understanding General esub Logic After esub is issued, Platform LSF checks if the script exited with LSB_SUB_ABORT_VALUE. If it did, the job is rejected. Otherwise, Platform LSF applies the changes found in the LSB_SUB_MODIFY_ENVFILE and LSB_SUB_MODIFY_FILE files, if they exist. Rejecting, Validating, and Modifying Job Submissions Depending on your site policies, you can reject a job. To reject a job, your esub command should return with LSB_SUB_ABORT_VALUE. If a job is rejected, the esub command should not write to either LSB_SUB_MODIFY_FILE or LSB_SUB_MODIFY_ENVFILE. Your esub command can make use of the LSB_SUB_ABORT_VALUE to validate a job submission by defining conditions to reject jobs. An esub command can modify the job-submission parameters and the job environment variables before the job is actually submitted by writing the appropriate values to LSB_SUB_MODIFY_FILE and LSB_SUB_MODIFY_ENVFILE. The following example illustrates a basic esub command that rejects, validates, and modifies the job submission based on certain criteria. In this example, userA can submit jobs only to the queue queueA; userB must use Bourne shell (/bin/sh); and userC has no authority to submit a job: #!/bin/sh . $LSB_SUB_PARM_FILE # redirect stderr to stdout so echo can be used # for error messages exec 1>&2 #Note: In this example, queueA must exist or be added to the lsb.queue file. # ensure userA is using the correct queue, that is, queueA if [ “$USER” = "userA" -a “$LSB_SUB_QUEUE” != "queueA" ]; then echo "UserA has submitted a job to an incorrect queue." echo "...submitting to queueA" echo 'LSB_SUB_QUEUE = "queueA"' > $LSB_SUB_MODIFY_FILE fi # ensure userB is using the correct shell (/bin/sh) if [ “$USER” = "userB" -a “$SHELL” != "/bin/sh" ]; then
echo "UserB has submitted a job using $SHELL." echo "...using /bin/sh instead" echo 'SHELL = "/bin/sh"' > $LSB_SUB_MODIFY_ENVFILE fi # deny userC the ability to submit a job if [ “$USER” = "userC" ]; then echo "You are not permitted to submit a job." exit $LSB_SUB_ABORT_VALUE fi
8
Setting the Priority of Jobs Based on the User Assume that a job in a work environment is given a priority based on the user who initiated it. User1 and user2 have the same priority. User3 and user4 have the same priority, and their priority is higher than user1 and user2. User5 has the highest priority, and user5 jobs should execute before any other jobs. No other users should be allowed to execute jobs in the work environment’s cluster. To set job priorities, perform the following steps: Step 1: Define three queues that have different priorities. In your cluster's lsb.queues file (as defined in $LSB_CONFDIR//configdir), set up three distinct queues. Define a different priority for each queue. For example: Begin Queue QUEUE_NAME PRIORITY DESCRIPTION End Queue
= highpriority = 40 = for high priority users
Begin Queue QUEUE_NAME PRIORITY DESCRIPTION End Queue
= medpriority = 30 = for medium priority users
Begin Queue QUEUE_NAME PRIORITY DESCRIPTION End Queue
= lowpriority = 20 = for low priority users
Remember to reconfigure your cluster after making these changes (badmin reconfig). Step 2: Define an esub command to change to the appropriate queue based on the user. Place the esub command in your $LSF_SERVERDIR directory. #!/bin/sh # source in the parameter file so that they can be treated as environment variables. $LSB_SUB_PARM_FILE # redirect stdout to stderr so echo can be used for error messages exec 1>&2
if [ “$USER” = "user1" -o “$USER” = "user2" ]; then # "user1" and "user2" jobs run on the low priority queue if [ "$LSB_SUB_QUEUE" != "lowpriority" ]; then # let the user know the queue has been changed echo "Changing from queue to ." echo 'LSB_SUB_QUEUE = "lowpriority"' > $LSB_SUB_MODIFY_FILE fi elif [ “$USER” = "user3" -o “$USER” = "user4" ]; then # "user3" and "user4" jobs run on the medium priority queue if [ "$LSB_SUB_QUEUE" != "medpriority" ]; then # let the user know the queue has been changed
9
echo "Changing from queue to ." echo 'LSB_SUB_QUEUE = "medpriority"' > $LSB_SUB_MODIFY_FILE fi elif [ “$USER” = "user5" ]; then # "user5" jobs run on the high priority queue if [ "$LSB_SUB_QUEUE" != "highpriority" ]; then # let the user know the queue has been changed echo "Changing from queue to ." echo 'LSB_SUB_QUEUE = "highpriority"' > $LSB_SUB_MODIFY_FILE fi else # unknown user. reject job for this reason echo "Unknown user $USER." exit $LSB_SUB_ABORT_VALUE fi Implementing a dev/test/prod Environment Typically, users develop, test, and then run their flows in production. Therefore, three different environments must be supported: development, testing, and production. For example, at the development stage, only host1 should be used. For the testing and production stages, host2, host3, and host4 can be used, but jobs that run in the production stage should always have higher priority. Because users progress at their own pace, it is up to the user to specify what stage they are at. To set up different environments, perform the following steps: Step 1: Define three different queues to support the different stages. In your cluster's lsb.queues file (as defined in $LSB_CONFDIR//configdir), set up three queues: dev, test, prod; the hosts for each queue as described above; and the prod queue to have a higher priority than the test queue. For example: Begin Queue QUEUE_NAME PRIORITY HOSTS DESCRIPTION End Queue
= = = =
prod 35 host2 host3 host4 for production jobs
Begin Queue QUEUE_NAME PRIORITY HOSTS DESCRIPTION End Queue
= = = =
test 20 host2 host3 host4 for testing jobs
Begin Queue QUEUE_NAME PRIORITY HOSTS DESCRIPTION End Queue
= = = =
dev 20 host1 for development jobs
Remember to reconfigure your cluster after making these changes (badmin reconfig).
10
Step 2: Define an esub command to detect which stage the user is at and to submit the jobs to the appropriate queue. Use a specific environment variable (for example, USER_STAGE) with specific stage keywords that map back to the queue names dev, test, and prod. #!/bin/sh # source in the parameter file so that they can be treated as environment variables. $LSB_SUB_PARM_FILE # redirect stdout to stderr so echo can be used for error messages exec 1>&2 if [ "$USER_STAGE" = "dev" -o "$USER_STAGE" = "test" -o "$USER_STAGE" = "prod" ]; then # submit the job to the appropriate queue as specified by the user echo "Executing job in the $USER_STAGE environment." echo "LSB_SUB_QUEUE = \"$USER_STAGE\" " > $LSB_SUB_MODIFY_FILE else # stage is not specified or unknown; assume production job echo "Executing job in the prod environment." echo 'LSB_SUB_QUEUE = "prod"' > $LSB_SUB_MODIFY_FILE fi
Place the esub command in your $LSF_SERVERDIR directory. Step 3: Tell users to change their login scripts to set the USER_STAGE environment variable to the appropriate stage. For example, if a user's login shell is C shell and the user is in the development stage, this user should add the line setenv USER_STAGE dev to the .cshrc file. Note:
When Platform JobScheduler submits the batch job to Platform LSF on behalf of a user, Platform JobScheduler effectively logs on as that user (which picks up the user's environment), and then submits the job. By doing this, the job submission behaves as if the user logged on to the Platform JobScheduler server host and submitted the job to Platform LSF.
IMPLEMENTING FLEXIBILITY IN YOUR FLOWS AND JOBS
Platform JobScheduler provides substitution capabilities within your job through the use of variables. When Platform JobScheduler encounters a variable, it substitutes the variable with its current value. For example, you can use variables as part of or as all of a filename to make filenames flexible, or you can use variables to pass arguments to and from scripts. You can export the value of a variable to one or more jobs in a flow (making the variable local to the flow), or to other flows that are currently running on the same Platform JobScheduler server (making the variable global to all flows). Using User Variables within a Flow Definition There are two types of variables that you can set: local variables, which are available to the jobs or events within the current flow; and global variables, which are available to all the flows within the Platform JobScheduler server. You can set the value of one or more variables in the following ways:
3
•
Set the variable value within your job. This approach allows you to dynamically define and modify variable values during the execution of your flow.
•
Trigger a flow to run with user variables through the Platform JobScheduler Flow Manager . This approach allows you to statically define your variable values when the flow is initially triggered for execution.
3
The Flow Manager application is provided with Platform JobScheduler. Flow Manager enables you to monitor the progress and manage the execution of your flows.
11
To set variable values within your job, see the “Defining Flows to Process Today’s Data” section. To trigger a flow with user variables through the Flow Manager, perform the following steps: 1. 2. 3. 4.
In the tree view of the Flow Manager, expand the tree until you see the flow definition you want to trigger. Right-click the flow definition, select Trigger, and then select With Variables. The Pass Variables to Flow dialog box appears. Specify the parameters to pass in the following format: variable=value;variable=value... Click OK. A flow is created and run.
Once a local or global variable has been defined, you can use the variable in the following job fields (available in Schedule Manager from the job's properties using the Advanced... button on the Scheduling Details tab): • • •
Job Definition, General tab: Name, Command to run, Input file, Output file, Error file Job Definition, File Transfer tab: Local path including name, File on execution host File Event Definition dialog: File name
To use a variable, perform the following steps: 1. 2.
Ensure that a value for the variable is set, either within the current flow, or as a global variable within the Flow Manager server, prior to the point in the flow where the value is required. In the appropriate input field, specify the variable in the format #{variable}.
More information about user variables (including built-in variables) can be found in Using Platform JobScheduler. Defining Flows to Process Today’s Data Suppose you want to define a flow that processes data based on the current day’s data files. You might want to process data based on previous data files. The data files are in the format .dat. To use variables to define a flow, perform the following steps: Important: Before you can use variables in your flow, you or your administrator must configure one or more queues in Platform LSF to support setting user variables. You can either choose an existing queue or create a new queue. In your cluster's lsb.queues file (as defined in $LSB_CONFDIR//configdir), add the following JOB_STARTER line to the queue(s) you want to support setting user variables: JOB_STARTER
= //bin/jsstarter
For example: Begin Queue QUEUE_NAME = uservars DESCRIPTION = for jobs that need to set user variables # Note: is where you installed Platform JobScheduler # is your JobScheduler version JOB_STARTER = //bin/jsstarter End Queue
12
Step 1: Write a script that sets the DATE variable for the flow. In the Bourne shell, the script would look like the following: getdate.sh ---------#!/bin/sh # if DATE has already been defined, don’t set the DATE variable if [ “$1” = “#{DATE}” ] # the date has not been set; set it to today’s date todays_datevar=`date +%Y%m%d’ JS_FLOW_VARIABLE_LIST="DATE=$todays_datevar” export JS_FLOW_VARIABLE_LIST elif # do nothing, the date has already been set fi Note that the script communicates the DATE variable with Platform JobScheduler through the JS_FLOW_VARIABLE_LIST environment variable. If you want to make DATE a global variable, replace JS_FLOW_VARIABLE_LIST with JS_GLOBAL_VARIABLE_LIST. Step 2: Create a job at the beginning of the flow that executes the script. The job would have the command line getdate.sh #{DATE} and must be submitted to a queue that supports setting user variables. When Platform JobScheduler encounters an undefined variable, no substitution is made. Thus, if DATE is not defined, then getdate.sh #{DATE} is the command that gets executed. Step 3: Define other jobs that require the DATE variable to be dependent on this job. For example, the command line of a dependent job might be processdata.sh #{DATE}.dat. This job can be submitted to any queue. As a result, in Flow Manager, if you trigger the flow with no variables, the first job sets the DATE variable to today’s date. If you trigger the flow that sets the DATE variable (as described in the “Using User Variables within a Flow Definition” section), the first job leaves the DATE variable alone. In either case, the subsequent jobs use the value that is specified by DATE.
CONCLUSION SAS and Platform Computing have partnered to provide an integrated, enterprise job scheduler that is specifically designed to manage your complex job flows more efficiently. An overview of the architecture and a description of the supported operating systems and configuration were described that can be leveraged to maximize your existing IT infrastructure. Three broad scheduling topics were introduced to resolve common user scenarios: • • •
tuning your cluster to maximize the utilization of n-way machines automating the implementation of site policies to automatically set job priorities based on the user and implement a dev/test/prod environment implementing flexibility in your flows to create a flow that processes today's data files
The topics and examples provided in the paper are a small representation of the features available and how they can be applied. A few commonly encountered use cases and customer scenarios are a fraction of all use cases and customer scenarios. More information is available from the SAS Customer Support Web site (http://support.sas.com) and the Platform JobScheduler for SAS Web site (http://www.platform.com/products/JSSAS), and you are encouraged to visit them.
13
REFERENCES Tran, Allen, and Williams, Randy. 2004. “Implementing Site Policies for SAS Scheduling with Platform JobScheduler”. Available http://support.sas.com/documentation/whitepaper/technical/JobScheduler.pdf. Platform Computing Corporation. 2003. Administering Platform LSF. Markham, Ontario: Platform Computing Corporation. Platform Computing Corporation. 2003. Using Platform JobScheduler. Markham, Ontario: Platform Computing Corporation.
ACKNOWLEDGEMENTS The authors would like to thank Cheryl Doninger, Amy Wolfe, Diane Hatcher, Qingda Wang, and Kathy Walch for reviewing contents of this paper and making suggestions to improve it.
CONTACT INFORMATION Your comments and questions are valued and encouraged. Contact the authors at: Allen Tran Platform Computing Corporation Markham, Ontario Work Phone: 905-948-4169
[email protected] Randy Williams SAS Institute Inc. SAS Campus Drive Cary, NC 27513 Work Phone: 919-531-6865
[email protected] Alan Wong Platform Computing Corporation Markham, Ontario Work Phone: 905-948-4308
[email protected]
SAS and all other SAS Institute Inc. product or service names are registered trademarks or trademarks of SAS Institute Inc. in the USA and other countries. ® indicates USA registration. Other brand and product names are trademarks of their respective companies. Copyright © 2005 Platform Computing Corporation. ®™ Trademarks of Platform Computing Corporation. All other logo and product names are the trademarks of their respective owners, errors and omissions excepted.
14