Page 1 of 3. Intro to Waves Lab. Name: Date: Group Members: Start-Up: Stretch
your spring out to a length of 6.1 meters (20 floor tiles, each floor tile is 0.305 ...
Intro to Waves Lab
Name: Group Members:
Date:
Please be gentle with the springs. They are easily tangled and mangled. DO NOT overstretch the springs; they will become permanently deformed. Return them to their plastic bag when you are finished with the lab.
Start-Up: Stretch your spring out to a length of 6.1 meters (20 floor tiles, each floor tile is 0.305 meter), with one person at each end.
Part 1: Longitudinal (compressional) Waves With your free hand, grasp the spring about 50 cm from the end. Pull the spring straight back towards the end of the spring, compressing the spring. Then release the spring, being careful not to let go of the end of the spring. 1.
Describe in words and drawings what you see after releasing the spring.
2.
What happens to the wave when it reaches the other end of the spring?
Part 2: Transverse Waves Move your hand very quickly and sharply to the right (about 30 cm out) and back to its original position. (Practice until you can produce a single large pulse that travels down only one side of the spring.) 3.
Describe in words and drawings what you see after releasing the spring.
4.
Describe in words and drawings what happens to the wave when it reaches the other end of the spring.
5.
Does the size of the wave change as it travels along the spring? Describe both its amplitude and its wavelength.
Page 1 of 3
Repeat the procedure, only this time use a stopwatch to measure how long it takes for the wave pulse to travel from one end to the other and back. Record the data below, then calculate the speed of the wave. Next, stretch the spring out to 7.9 m (26 floor tiles), repeat the procedure, and calculate the velocity of the wave. Finally, shorten the spring to 4.9 m (16 floor tiles) and repeat. 6.
Show your data and calculations below. Include error with each measurement and calculate experimental error (show as both a percentage and an actual value).
Trial
Length
Time
Velocity
16 tiles 20 tiles 26 tiles 7.
Does the speed of the wave change if you stretch the spring farther? If so, does the wave travel faster or slower when the spring is stretched farther? If there is a difference, is it within experimental error or does it appear the speed truly changes.
Part 3: Interference of Transverse Waves In this section, you will be observing what happens when two transverse wave pulses meet each other. Move back to 20 tiles apart. The two people holding the ends of the spring will both send a single wave pulse at the same time, and you should observe what happens when the two waves meet in the middle. 8.
If the two wave pulses are on the same side of the spring, what happens when the two waves meet in the middle of the spring? Describe in words and drawings. (It may be easier to see what is happening if you make the amplitude of one of the waves bigger than the other.)
9.
If the two wave pulses are on opposite sides of the spring, describe in words and drawings what happens when they meet in the middle of the spring?
Page 2 of 3
Part 4: Periodic Transverse Waves So far, you’ve just been sending single wave pulses down the spring. By vibrating your hand steadily back and forth, you can produce a stream of wave pulses, called a periodic wave. Try producing a periodic wave by vibrating your hand back and forth six or eight times (if you do it more you may get interference from waves reflecting off the stationary end of the spring). 10. Vary the rate at which you vibrate your hand; in other words, try shaking your hand back and forth slowly and then more quickly. How does the length of the waves that you produce depend on how fast you are vibrating your hand? Describe using words and pictures.
11. Does the speed at which the wave travels down the spring depend on how fast you are vibrating your hand? (Try using the stopwatch to time them.)
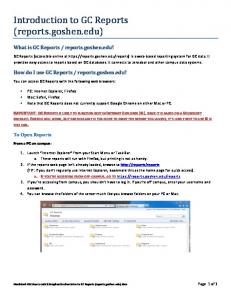
Part 5: Standing Waves A standing wave is a wave that appears to move sideways, but doesn’t appear to be traveling along the spring. Standing waves are actually multiple waves that are interfering with each other. Anyone who has played a stringed instrument has probably seen standing waves on the strings. For this procedure, stand up (and stay the 20 tiles apart). Only one person will move the spring; the other person should try to hold it as stationary as possible (slip a pencil through the spring’s looped end, and hold the pencil on each side). Vibrate the spring until you can see only one “hump” moving up and down in the middle of the spring: You may need to practice to get this.
Using a pencil to hold the stationary end of the spring.
12. Record the time it takes for the wave to complete ten cycles. Calculate the frequency, period, wavelength, and speed of the wave. (Hint: how much of a wave do you see from end to end?)
Change the rate of your vibrations until you can see two “humps in the wave: 13. Record the time it takes for the wave to complete ten cycles. Calculate the frequency, period, wavelength, and speed of the wave.
Change the rate of your vibrations until you can see three “humps in the wave. 14. Record the time it takes for the wave to complete ten cycles. Calculate the frequency, period, wavelength, and speed of the wave.
Page 3 of 3